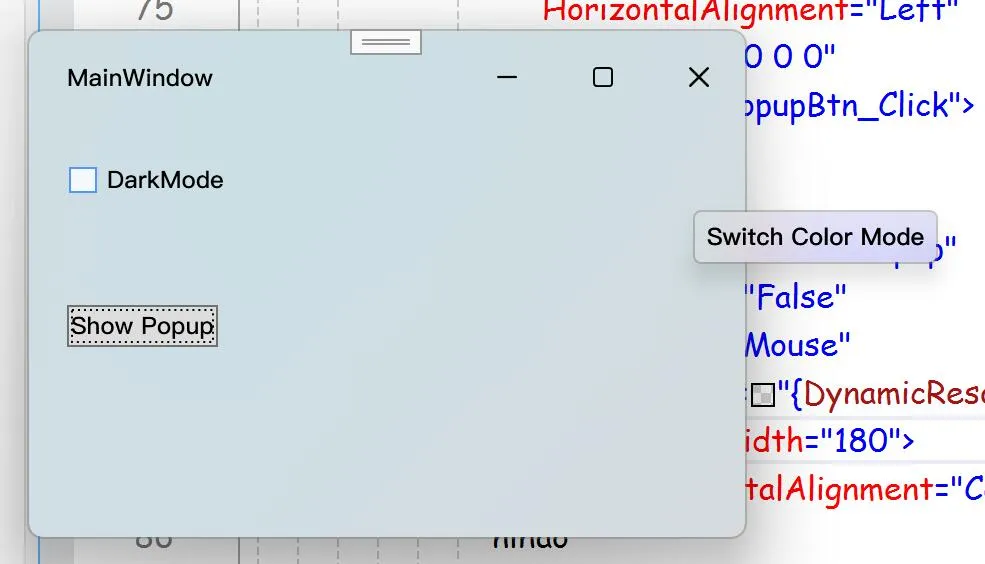
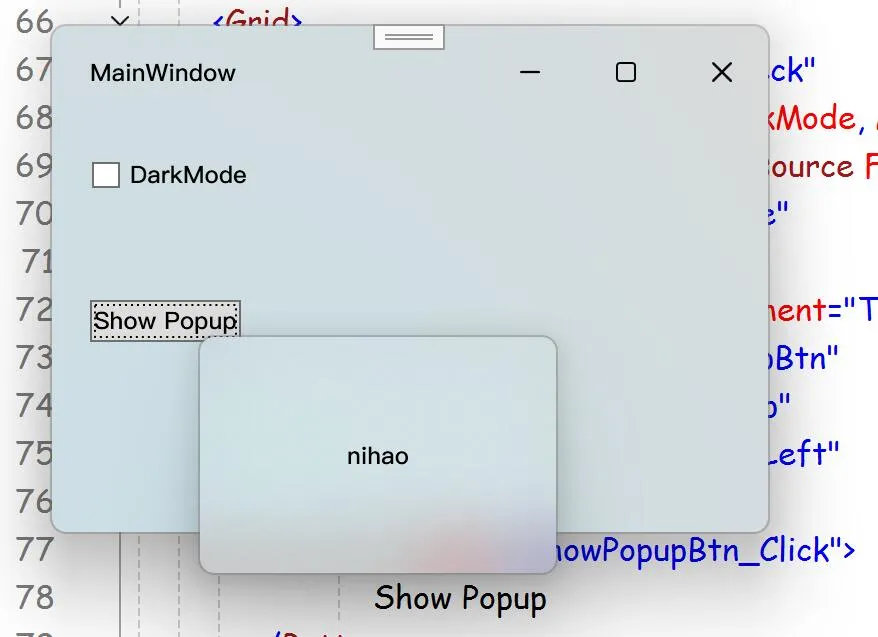
先看效果图:


大致思路是:通过反射获取Popup内部的原生窗口句柄,然后通过前文已经实现的WindowMaterial类来应用窗口特效;对于ToolTip,为了保持其易用性,我使用了附加属性+全局样式的方式来实现,ToolTip也是一个特殊的Popup.
前文链接:WPF 模拟UWP原生窗口样式------亚克力|云母材质、自定义标题栏样式、原生DWM动画 (附我封装好的类)
本文的Demo:
TwilightLemon/WindowEffectTest: 测试win10/11的模糊效果 (github.com)
一、获取原生窗口句柄
通过查阅.NET源码得知,Popup内部通过一个类型为PopupSecurityHelper的私有字段_secHelper来管理窗口hWnd,并且在创建完成之时会触发Popup.Opened事件。
通过反射来获取窗口句柄:
const BindingFlags privateInstanceFlag = BindingFlags.NonPublic | BindingFlags.Instance;
public static IntPtr GetNativeWindowHwnd(this Popup popup)
{
    //获取Popup内部的_secHelper字段Info
    var field = typeof(Popup).GetField("_secHelper", privateInstanceFlag);
    if (field != null)
    {
        //获取popup的_secHelper字段值
        if (field.GetValue(popup) is { } _secHelper)
        {
            //获取_secHelper的Handle属性Info
            if (_secHelper.GetType().GetProperty("Handle", privateInstanceFlag) is { } prop)
            {
                if (prop.GetValue(_secHelper) is IntPtr handle)
                {
                    //返回句柄
                    return handle;
                }
            }
        }
    }
    //未找到
    return IntPtr.Zero;
}同样地,能在ToolTip内部找到私有字段_parentPopup
public static IntPtr GetNativeWindowHwnd(this ToolTip tip)
{
    var field=tip.GetType().GetField("_parentPopup", privateInstanceFlag);
    if (field != null)
    {
        if(field.GetValue(tip) is Popup{ } popup)
        {
            return popup.GetNativeWindowHwnd();
        }
    }
    return IntPtr.Zero;
}
二、应用WindowMaterial特效
有了窗口句柄那么一切都好办了,直接调用我封装好的WindowMaterial类,如果你想了解更多请查看前文。
public static void SetPopupWindowMaterial(IntPtr hwnd,Color compositionColor,
     MaterialApis.WindowCorner corner= MaterialApis.WindowCorner.Round)
{
    if (hwnd != IntPtr.Zero)
    {
        int hexColor = compositionColor.ToHexColor();
        var hwndSource = HwndSource.FromHwnd(hwnd);
        //----
        MaterialApis.SetWindowProperties(hwndSource, 0);
        MaterialApis.SetWindowComposition(hwnd, true, hexColor);
        //----
        MaterialApis.SetWindowCorner(hwnd, corner);
    }
}
根据微软的设计规范,这里默认对普通Popup使用圆角,对ToolTip使用小圆角,使用亚克力材质并附加compositionColor。
在github中获取完整的WindowMaterial.cs,我可能会不定期地更新它:WindowEffectTest/WindowMaterial.cs at master · TwilightLemon/WindowEffectTest (github.com)
如果你想使用Mica或MicaAlt等材质则将上面框起来的代码替换为:
MaterialApis.SetWindowProperties(hwndSource, -1);
MaterialApis.SetBackDropType(hwnd, MaterialType.Mica);
MaterialApis.SetDarkMode(hwnd, isDarkMode: true);
三、没错我又封装了一个即开即用的类
在Demo中查看封装好的类:WindowEffectTest/FluentPopup.cs at master · TwilightLemon/WindowEffectTest (github.com)
使用FluentPopup
<local:FluentPopup x:Name="testPopup"
                   StaysOpen="False"
                   Placement="Mouse"
                   Background="{DynamicResource PopupWindowBackground}">
    <Grid Height="120" Width="180">
        <TextBlock HorizontalAlignment="Center" VerticalAlignment="Center">
            nihao
        </TextBlock>
    </Grid>
</local:FluentPopup>其中,Background属性是我自定义的一个依赖属性,只允许使用SolidColorBrush,用于设置亚克力特效的CompositionColor。
如果你希望像Demo中那样让Popup失焦自动关闭,可以设置StaysOpen为False,在后台打开Popup时使用:
private async void ShowPopupBtn_Click(object sender, RoutedEventArgs e)
{
    await Task.Yield();
    testPopup.IsOpen = true;
}关于为什么要加上await Task.Tield(),可以看看吕毅大佬的文章:一点点从坑里爬出来:如何正确打开 WPF 里的 Popup? - Walterlv
在全局内使用FluentToolTip
我自定义了一个附加属性FluentTooltip.UseFluentStyle,你只需要在App.xaml中设置即可全局生效: 这里的PopupWindowBackground和ForeColor是我自定义的颜色资源,你可以根据自己的需要来设置。
同样地Background仅支持SolidColorBrush。
<Style TargetType="{x:Type ToolTip}">
    <Setter Property="local:FluentTooltip.UseFluentStyle"
            Value="True" />
    <Setter Property="Background"
            Value="{DynamicResource PopupWindowBackground}" />
    <Setter Property="Foreground"
            Value="{DynamicResource ForeColor}" />
</Style>
这样你就可以方便地创建一个Fluent风格的ToolTip了:
<Button
    ToolTip="xxxxx"
    />
参考链接
Popup.cs at Dotnet Source
ToolTip.cs at Dotnet Source
一点点从坑里爬出来:如何正确打开 WPF 里的 Popup? - Walterlv
WPF 模拟UWP原生窗口样式------亚克力|云母材质、自定义标题栏样式、原生DWM动画 (附我封装好的类) - TwilightLemon

本作品采用 知识共享署名-非商业性使用-相同方式共享 4.0 国际许可协议 进行许可。欢迎转载、使用、重新发布,但务必保留文章署名TwilightLemon(https://blog.twlmgatito.cn),不得用于商业目的,基于本文修改后的作品务必以相同的许可发布。
文章及其代码仓库可能不时更新,查看原文:WPF中为Popup和ToolTip使用WindowMaterial特效 win10/win11 - Twlm's Blog (twlmgatito.cn)