Tomcat
【1】、Tomcat基本介绍
环境准备
JVM介绍
Java业务都是运行在java虚拟机上,java虚拟机简称JVM( java virtual machine)
虚拟机是通过软件模拟出具有完整硬件系统的功能
为什么Java需要JVM虚拟机
早期C语言不支持跨平台,如果C语言想要在Windows Linux Mac上运行,需要进行分别编译,那么在Linux上有很多优秀的软件,如果需要在Windows上使用需要重新编译,移植性差而Java则不同,Java是可以跨平台,只需要将源码进行一次编译,能够在不同的操作系统运行
JAVA是如何做到的?
它只需要在Windwos Linux系统上运行一个jvm,这样我们能将Java编译好的war包在Windows和 Linux平台运行起来,无需我们重复编译。而JVM是由jre提供
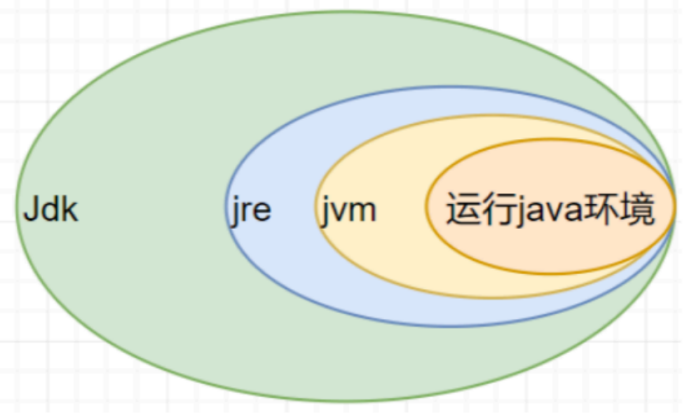
- JAVA环境JRE和JDK的区别
jre是java的运行环境,包含jvm
jdk是java的开发环境,会包含java的运行环境jre
如果说单纯的运行java代码,只需要jre足够,但如果需要提供开发环境以及运行环境则需要JDK
Tomcat
- Tomcat和Nginx类似,都是WEB服务器软件 只不过Tomcat是基于JAVA开发的WEB服务,主要解析JAVA代码
- Nginx仅支持静态资源解析,而Tomcat支持解析Java开发的WEB应用,还支持解析静态资源(效率不高)
- Nginx适合做前端负载均衡,Tomcat适合做后端应用服务处理
- 通常情况企业会使用Nginx+Tomcat结合,Nginx处理静态资源,Tomcat处理动态资源
【2】、安装tomcat
Tomcat官网: https://tomcat.apache.org/
1、安装jdk
不同版本的tomcat对java版本的依赖不同
sh
yum install java -y
或者上传rpm包
rpm -ivh jdk....rpm
查看是否安装成功
[root@web01 ~]# rpm -qa|grep jdk jdk1.8-1.8.0_181-fcs.x86_64

# 查看系统提供的jdk版本
[root@web01 ~]# yum list | grep jdk
2、下载tomcat
sh
[root@web01 ~]# wget https://dlcdn.apache.org/tomcat/tomcat-10/v10.1.34/bin/apache-tomcat-10.1.34.tar.gz
[root@web01 ~]# mkdir /soft
[root@web01 ~]# tar xf apache-tomcat-10.1.34.tar.gz  -C /soft
[root@web01 ~]# ln -s /soft/apache-tomcat-10.1.34/ /soft/tomcat
[root@web01 ~]# ll /soft/
total 0
drwxr-xr-x 9 root root 234 Dec 20 15:37 apache-tomcat-10.1.34
lrwxrwxrwx 1 root root  28 Dec 20 15:38 tomcat -> /soft/apache-tomcat-10.1.34/
3、启动tomcat
tomcat的启动和停止方式是通过shell脚本实现的
sh
[root@web01 ~]# /soft/tomcat/bin/startup.sh
Using CATALINA_BASE:   /soft/tomcat
Using CATALINA_HOME:   /soft/tomcat
Using CATALINA_TMPDIR: /soft/tomcat/temp
Using JRE_HOME:        /usr
Using CLASSPATH:       /soft/tomcat/bin/bootstrap.jar:/soft/tomcat/bin/tomcat-juli.jar
Using CATALINA_OPTS:
Tomcat started.
[root@web01 ~]# ss -tunlp | grep 8080
tcp     LISTEN   0        100                    *:8080                *:*       users:(("java",pid=10534,fd=45))
sh
# 查看日志信息
[root@web01 ~]# ll /soft/tomcat/logs/
total 20
-rw-r----- 1 root root 6477 Dec 20 15:41 catalina.2024-12-20.log
-rw-r----- 1 root root 6477 Dec 20 15:41 catalina.out
-rw-r----- 1 root root  408 Dec 20 15:41 localhost.2024-12-20.log
-rw-r----- 1 root root    0 Dec 20 15:40 localhost_access_log.2024-12-20.txt
4、配置tomcat使用systemctl方式启动
sh
[root@web01 ~]# cat /usr/lib/systemd/system/tomcat.service
[Unit]
Description=Apache Tomcat Server
After=network.target remote-fs.target nss-lookup.target

[Service]
Type=forking
ExecStart=/soft/tomcat/bin/startup.sh
ExecStop=/soft/tomcat/bin/shutdown.sh
ExecRetart=/soft/tomcat/bin/shutdown.sh && sleep2 && /soft/tomcat/bin/startup.sh

[Install]
WantedBy=multi-user.target

# 如果tomcat处于启动状态,现使用命令停止

[root@web01 ~]# systemctl daemon-reload
[root@web01 ~]# systemctl start tomcat.service
[root@web01 ~]# ss -tunlp | grep 8080
tcp     LISTEN   0        100                    *:8080                *:*       users:(("java",pid=14127,fd=45))
【3】、tomcat配置文件
sh
tomcat软件目录结构:
bin ---主要包含启动和关闭tomcat的脚本(启停java脚本依赖jar包文件)
conf ---tomcat配置文件的目录(站点配置:server.xml)
lib ---tomcat运行时需要加载的jar包
logs ---tomcat日志存放位置
temp ---tomcat临时存放文件路径
webapps ---tomcat默认站点目录
work ---tomcat运行时产生的缓存文件
sh
[root@web01 tomcat]# cat conf/server.xml
<?xml version="1.0" encoding="UTF-8"?>
<Server port="8005" shutdown="SHUTDOWN">
<Listener className="org.apache.catalina.startup.VersionLoggerListener" />
<Listener className="org.apache.catalina.core.AprLifecycleListener" />
<Listener className="org.apache.catalina.core.JreMemoryLeakPreventionListener" />
<Listener className="org.apache.catalina.mbeans.GlobalResourcesLifecycleListener" />
<Listener className="org.apache.catalina.core.ThreadLocalLeakPreventionListener" />
<GlobalNamingResources>
<Resource name="UserDatabase" auth="Container"
type="org.apache.catalina.UserDatabase"
description="User database that can be updated and saved"
factory="org.apache.catalina.users.MemoryUserDatabaseFactory"
pathname="conf/tomcat-users.xml" />
</GlobalNamingResources>
<Service name="Catalina">
<Connector port="8080" protocol="HTTP/1.1"
connectionTimeout="20000"
redirectPort="8443"
maxParameterCount="1000"
/>
<Engine name="Catalina" defaultHost="localhost">
<Realm className="org.apache.catalina.realm.LockOutRealm">
<Realm className="org.apache.catalina.realm.UserDatabaseRealm"
resourceName="UserDatabase"/>
</Realm>
<Host name="localhost" appBase="webapps" # 指定网站根目录
unpackWARs="true" autoDeploy="true"> # 是否自动部署
prefix="localhost_access_log" suffix=".txt" # 日志文件格式
pattern="%h %l %u %t "%r" %s %b" />
</Host>
</Engine>
</Service>
</Server>【4】、自定义server
sh
# 类似于nginx中的server
# 我们需要自己在网站的根目录下创建一个ROOT目录
<Host name="diy.tomcat.com" appBase="/code/tomcat" # 如果目录不存在会自动创建
unpackWARs="true" autoDeploy="true">
<Valve className="org.apache.catalina.valves.AccessLogValve" directory="logs"
prefix="diy_tomcat_log" suffix=".log"
pattern="%h %l %u %t "%r" %s %b" />
</Host>
[root@web01 tomcat]# mkdir /code/tomcat/ROOT
[root@web01 tomcat]# cd /code/tomcat/ROOT
[root@web01 ROOT]# echo tomcat > index.html
[root@web01 ROOT]# ll
total 4
-rw-r--r-- 1 root root 7 Dec 20 16:37 index.html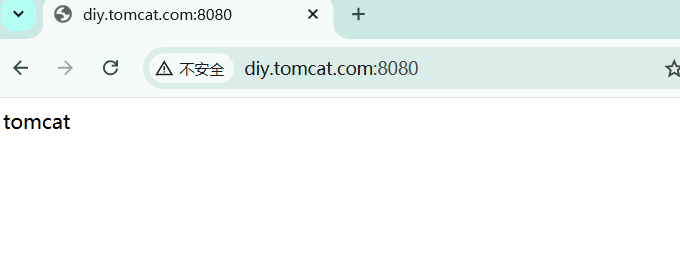
定义context,类似于nginx中的location
sh
<Host name="diy.tomcat.com" appBase="/code/tomcat"
unpackWARs="true" autoDeploy="true">
<Context docBase="/code/tt" path="/tt" reloadable="true" />
<Valve className="org.apache.catalina.valves.AccessLogValve" directory="logs"
prefix="diy_tomcat_log" suffix=".log"
pattern="%h %l %u %t "%r" %s %b" />
</Host>
[root@web01 ROOT]# systemctl restart tomcat.service
[root@web01 ROOT]# mkdir /code/tt
[root@web01 ROOT]# echo tt > /code/tt/index.html
【5】、tomcat页面管理
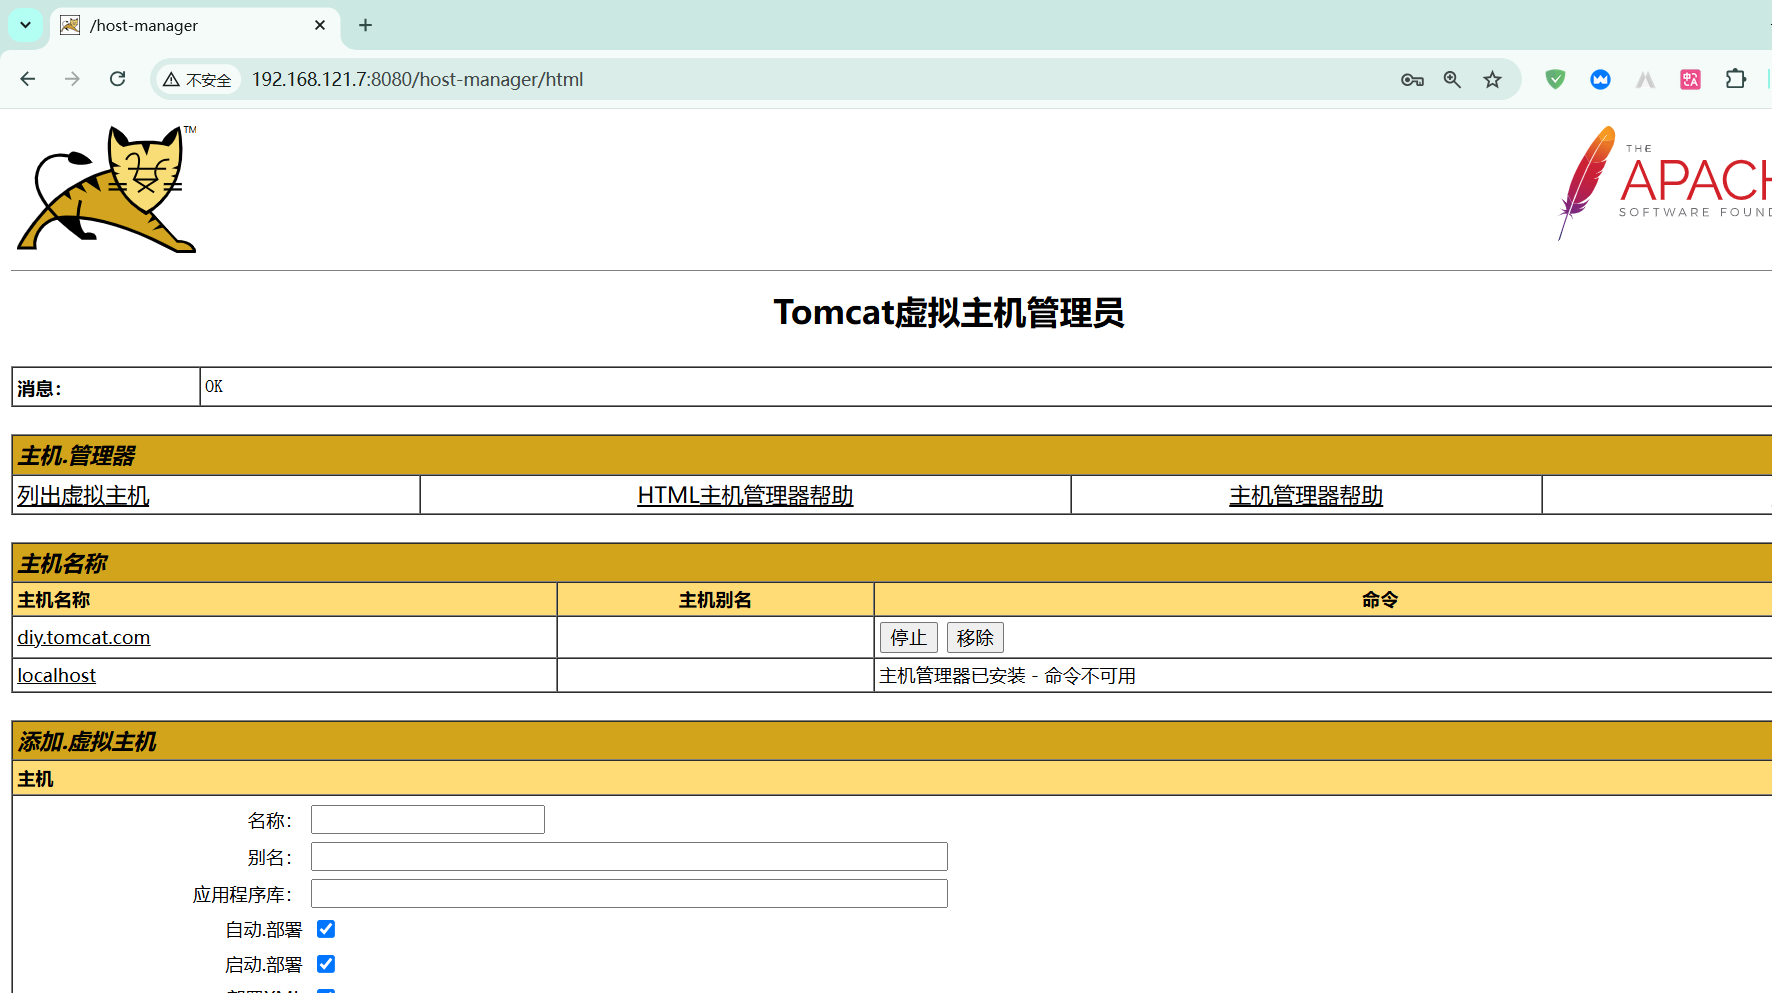
Tomcat自带的管理页面
管理功能
监控功能
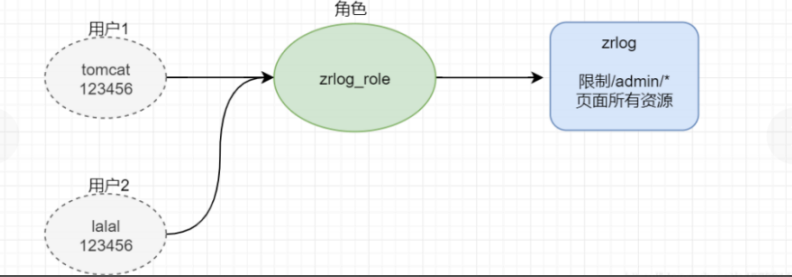
1.所有的管理页面,都将权限赋予给了角色,而角色的名称是固定的: manager-gui admin-gui
2.需要添加一个用户,将用户捆绑至对应的角色,这样用户就可以访问到对应的页面
3.由于项目默认允许127.0.0.1访问,所以配置好了角色和用户也无法正常访问
sh
[root@web01 tomcat]# vim /soft/tomcat/conf/tomcat-users.xml
		  <role rolename="manager-gui"/>
          <role rolename="admin-gui"/>
          <user username="tomcat" password="123456" roles="manager-gui,admin-gui"/>
</tomcat-users>


[root@web01 tomcat]# tail /soft/tomcat/webapps/host-manager/META-INF/context.xml
  See the License for the specific language governing permissions and
  limitations under the License.
-->
<Context antiResourceLocking="false" privileged="true" >
  <CookieProcessor className="org.apache.tomcat.util.http.Rfc6265CookieProcessor"
                   sameSiteCookies="strict" />
  <Valve className="org.apache.catalina.valves.RemoteAddrValve"
         allow="\d+\.\d+\.\d+\.\d+|::1|0:0:0:0:0:0:0:1" />
  <Manager sessionAttributeValueClassNameFilter="java\.lang\.(?:Boolean|Integer|Long|Number|String)|org\.apache\.catalina\.filters\.CsrfPreventionFilter\$LruCache(?:\$1)?|java\.util\.(?:Linked)?HashMap"/>
</Context>


[root@web01 tomcat]# tail /soft/tomcat/webapps/manager/META-INF/context.xml
  See the License for the specific language governing permissions and
  limitations under the License.
-->
<Context antiResourceLocking="false" privileged="true" >
  <CookieProcessor className="org.apache.tomcat.util.http.Rfc6265CookieProcessor"
                   sameSiteCookies="strict" />
  <Valve className="org.apache.catalina.valves.RemoteAddrValve"
         allow="\d+\.\d+\.\d+\.\d+|::1|0:0:0:0:0:0:0:1" />
  <Manager sessionAttributeValueClassNameFilter="java\.lang\.(?:Boolean|Integer|Long|Number|String)|org\.apache\.catalina\.filters\.CsrfPreventionFilter\$LruCache(?:\$1)?|java\.util\.(?:Linked)?HashMap"/>
</Context>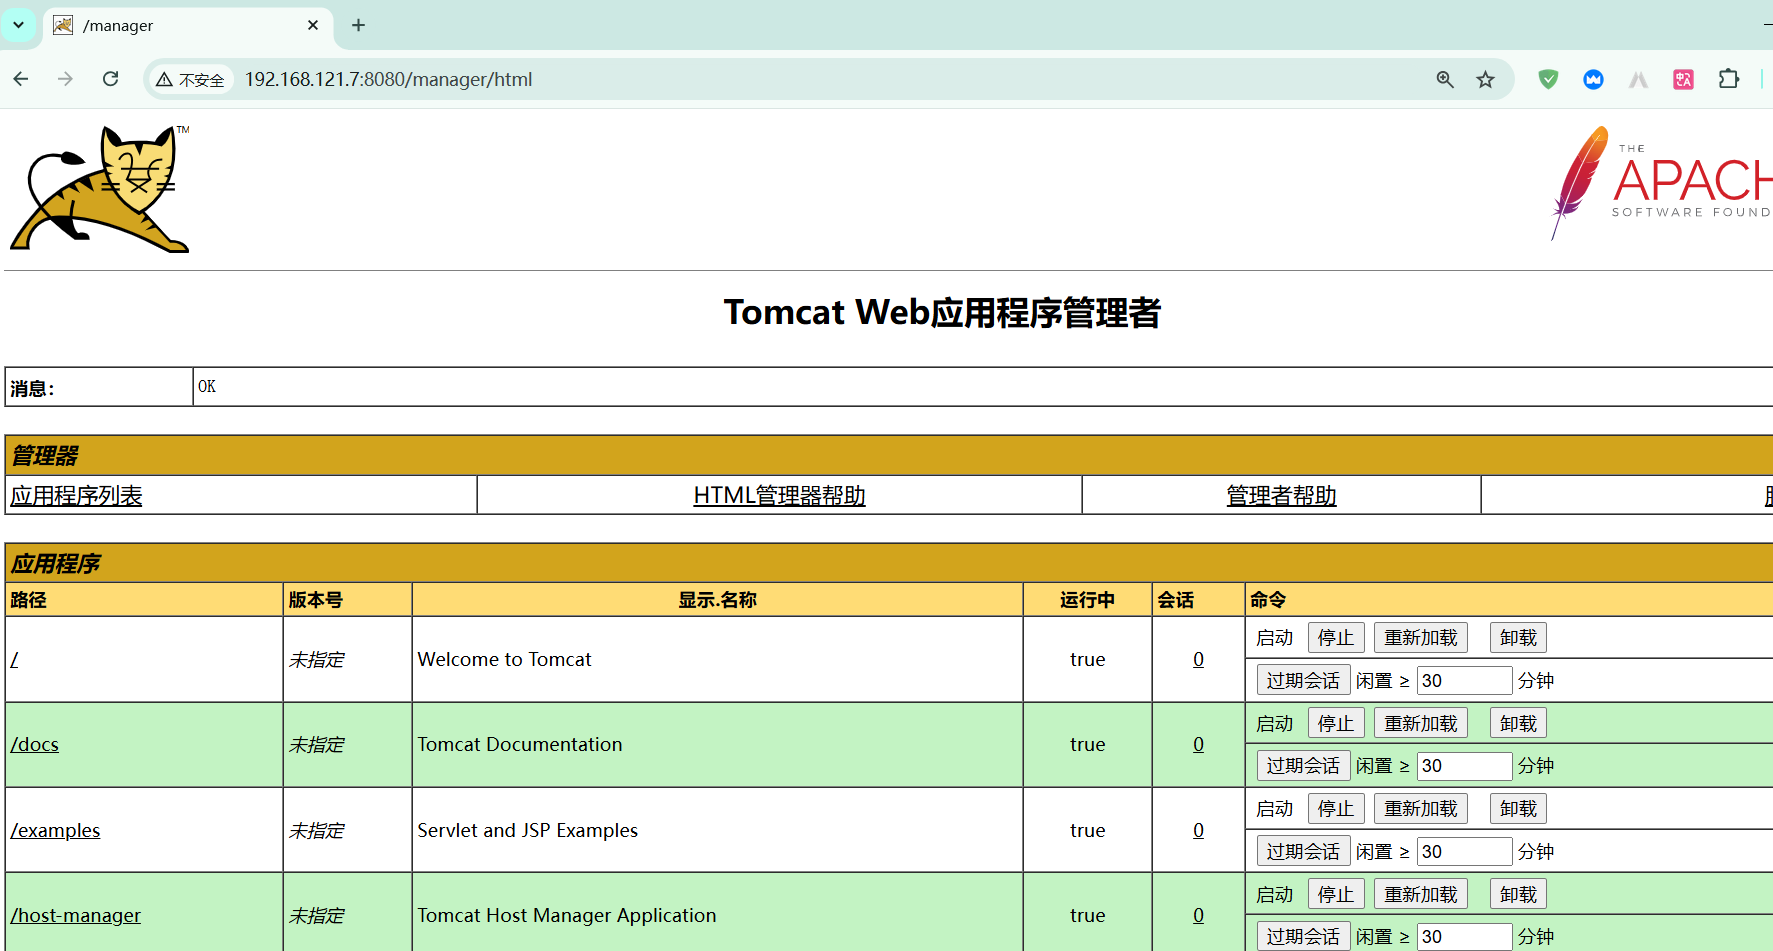
【6】、tomcat部署zrlog
1、web01部署zrlog
由于zrlog对tomcat和java的版本要求较严格
所以我们需要重新部署tomcat
sh
1.下载tomcat9
[root@web01 ~]# wget https://dlcdn.apache.org/tomcat/tomcat-9/v9.0.98/bin/apache-tomcat-9.0.98.tar.gz
--2024-12-23 15:04:39--  https://dlcdn.apache.org/tomcat/tomcat-9/v9.0.98/bin/apache-tomcat-9.0.98.tar.gz
Resolving dlcdn.apache.org (dlcdn.apache.org)... 151.101.2.132, 2a04:4e42::644
Connecting to dlcdn.apache.org (dlcdn.apache.org)|151.101.2.132|:443... connected.
HTTP request sent, awaiting response... 200 OK
Length: 12760610 (12M) [application/x-gzip]
Saving to: 'apache-tomcat-9.0.98.tar.gz'

apache-tomcat-9.0.98.tar.gz                    100%[===================================================================================================>]  12.17M  5.67MB/s    in 2.1s

2024-12-23 15:04:42 (5.67 MB/s) - 'apache-tomcat-9.0.98.tar.gz' saved [12760610/12760610]

[root@web01 ~]# mkdir /soft
[root@web01 ~]# ls
apache-tomcat-9.0.98.tar.gz
[root@web01 ~]# tar -xf apache-tomcat-9.0.98.tar.gz -C /soft/
[root@web01 ~]# ln -s /soft/apache-tomcat-9.0.98 /soft/tomcat
[root@web01 ~]# ll /soft
total 0
drwxr-xr-x 9 root root 220 Dec 23 15:27 apache-tomcat-9.0.98
lrwxrwxrwx 1 root root  26 Dec 23 15:27 tomcat -> /soft/apache-tomcat-9.0.98

2.下载jdk,通过rpm安装
[root@web01 ~]# ls
jdk-8u181-linux-x64.rpm
[root@web01 ~]# rpm -ivh jdk-8u181-linux-x64.rpm
warning: jdk-8u181-linux-x64.rpm: Header V3 RSA/SHA256 Signature, key ID ec551f03: NOKEY
Verifying...                          ################################# [100%]
Preparing...                          ################################# [100%]
Updating / installing...
   1:jdk1.8-2000:1.8.0_181-fcs        ################################# [100%]
Unpacking JAR files...
        tools.jar...
        plugin.jar...
        javaws.jar...
        deploy.jar...
        rt.jar...
        jsse.jar...
        charsets.jar...
        localedata.jar...
[root@web01 ~]# rpm -qa | grep jdk
jdk1.8-1.8.0_181-fcs.x86_64


3.编写tomcat配置文件,并启动tomcat
[root@web01 ~]# vim /soft/tomcat/conf/server.xml
[root@web01 ~]# /soft/tomcat/bin/startup.sh
Using CATALINA_BASE:   /soft/tomcat
Using CATALINA_HOME:   /soft/tomcat
Using CATALINA_TMPDIR: /soft/tomcat/temp
Using JRE_HOME:        /usr
Using CLASSPATH:       /soft/tomcat/bin/bootstrap.jar:/soft/tomcat/bin/tomcat-juli.jar
Using CATALINA_OPTS:
Tomcat started.
[root@web01 ~]# ss -tunlp | grep 8080
tcp     LISTEN   0        100                    *:8080                *:*       users:(("java",pid=23008,fd=58))

4.部署网站代码
[root@web01 ~]# mkdir -p /code/zrlog
[root@web01 ~]# cd /code/zrlog
[root@web01 zrlog]# rz
rz waiting to receive.**[root@web01 zrlog]#
[root@web01 zrlog]# ls
zrlog-2.2.1-efbe9f9-release  zrlog-2.2.1-efbe9f9-release.war
[root@web01 zrlog]# mv zrlog-2.2.1-efbe9f9-release ROOT
[root@web01 zrlog]# ls
ROOT  zrlog-2.2.1-efbe9f9-release.war
[root@web01 zrlog]# ls
ROOT  zrlog-2.2.1-efbe9f9-release  zrlog-2.2.1-efbe9f9-release.war
[root@web01 zrlog]# rm -f zrlog-2.2.1-efbe9f9-release* -r
[root@web01 zrlog]# ls
ROOT

5.重启tomcat
[root@web01 ~]# /soft/tomcat/bin/shutdown.sh
Using CATALINA_BASE:   /soft/tomcat
Using CATALINA_HOME:   /soft/tomcat
Using CATALINA_TMPDIR: /soft/tomcat/temp
Using JRE_HOME:        /usr
Using CLASSPATH:       /soft/tomcat/bin/bootstrap.jar:/soft/tomcat/bin/tomcat-juli.jar
Using CATALINA_OPTS:
[root@web01 ~]# /soft/tomcat/bin/startup.sh
Using CATALINA_BASE:   /soft/tomcat
Using CATALINA_HOME:   /soft/tomcat
Using CATALINA_TMPDIR: /soft/tomcat/temp
Using JRE_HOME:        /usr
Using CLASSPATH:       /soft/tomcat/bin/bootstrap.jar:/soft/tomcat/bin/tomcat-juli.jar
Using CATALINA_OPTS:
Tomcat started.

6.配置数据库
[root@db01 ~]# mysql -uroot -pxu
Welcome to the MariaDB monitor.  Commands end with ; or \g.
Your MariaDB connection id is 71
Server version: 10.3.39-MariaDB MariaDB Server

Copyright (c) 2000, 2018, Oracle, MariaDB Corporation Ab and others.

Type 'help;' or '\h' for help. Type '\c' to clear the current input statement.

MariaDB [(none)]> create database zrlog;
Query OK, 1 row affected (0.001 sec)

MariaDB [(none)]> show databases;
+--------------------+
| Database           |
+--------------------+
| information_schema |
| mysql              |
| performance_schema |
| wp                 |
| zrlog              |
+--------------------+
5 rows in set (0.003 sec)

7. Windows访问
配置hosts
192.168.121.7 www.zr.com
www.zr.com:8080/install/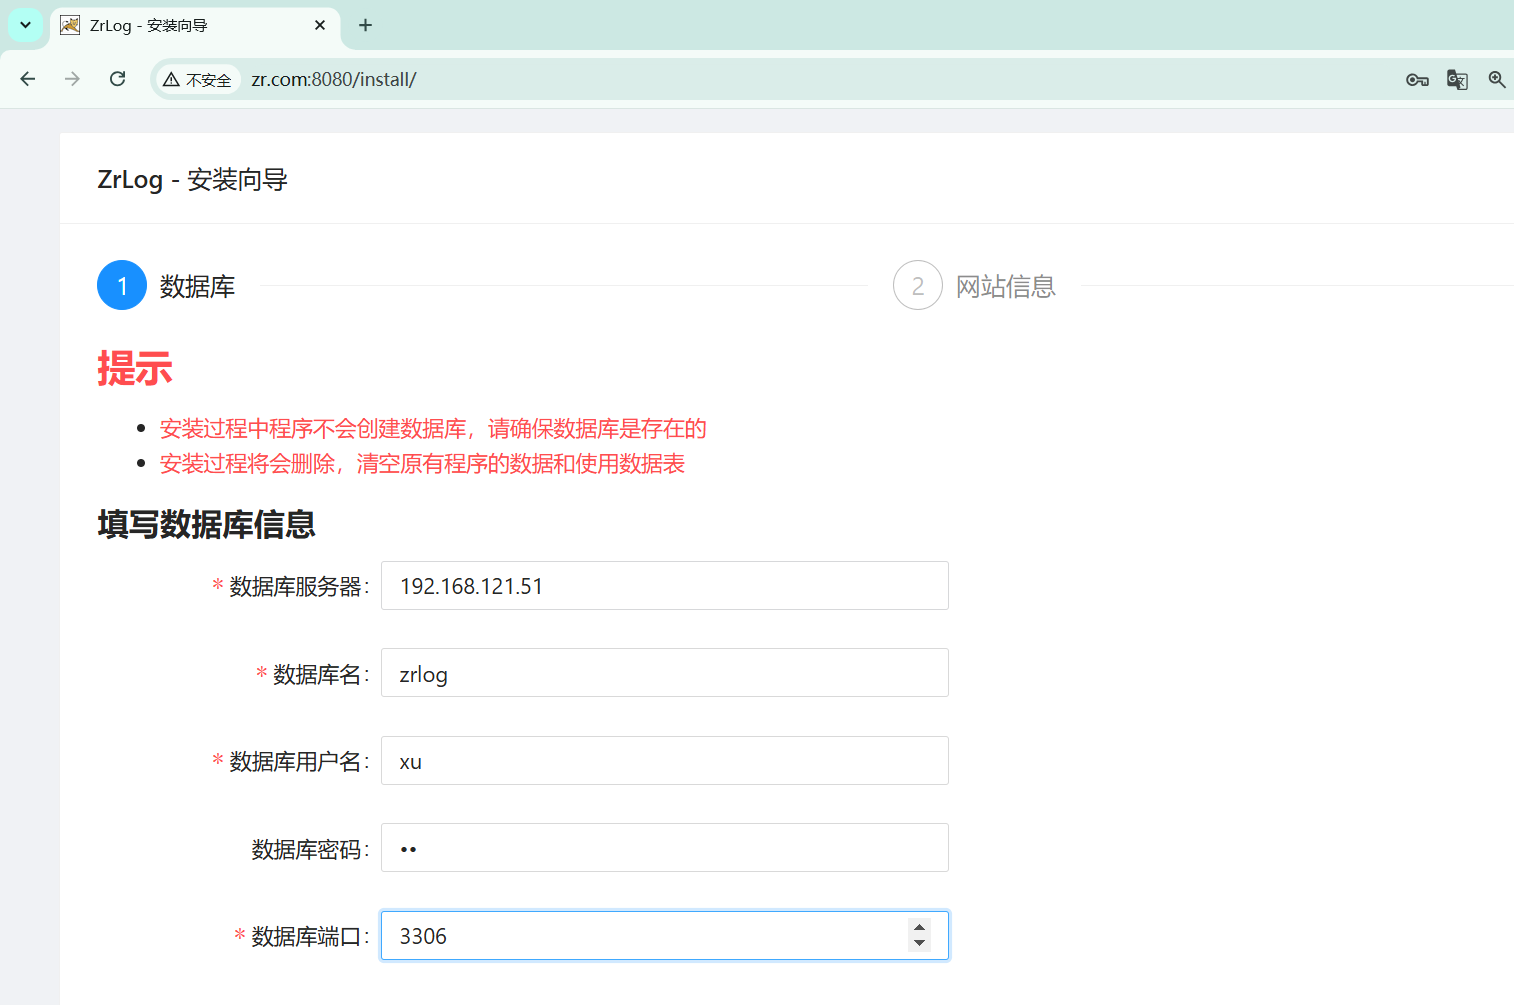
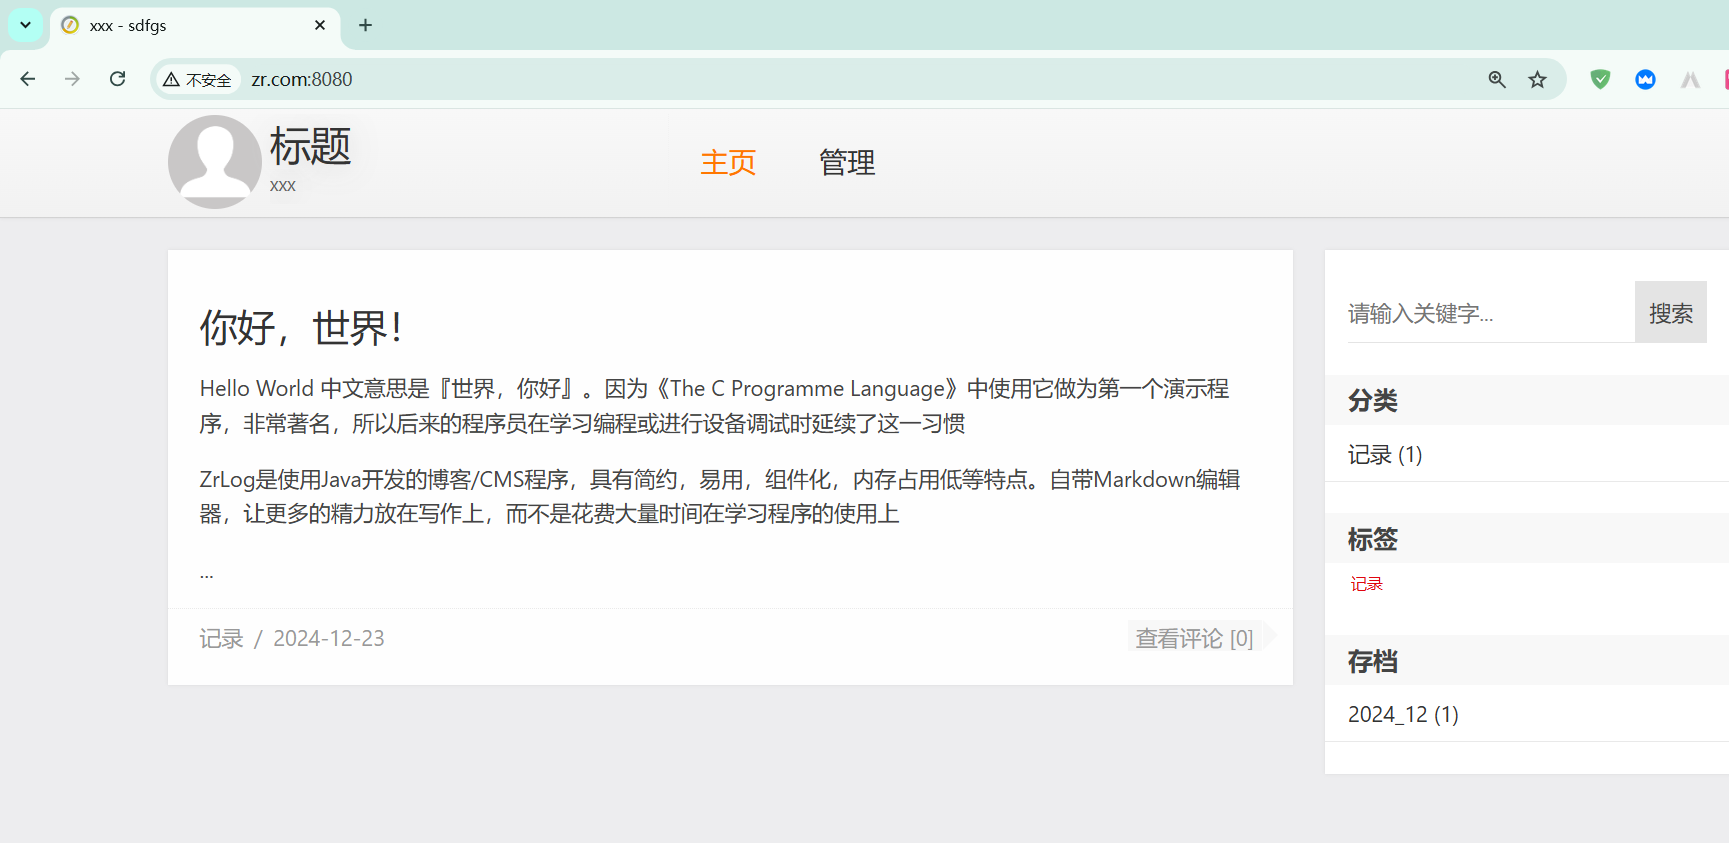
2、web02部署zrlog
sh
1.安装jdk
[root@web02 ~]# ll jdk-8u181-linux-x64.rpm
-rw-r--r-- 1 root root 170023183 Aug 20 09:31 jdk-8u181-linux-x64.rpm
[root@web02 ~]# rpm -ivh jdk-8u181-linux-x64.rpm
2.安装tomcat、配置server
[root@web02 ~]# scp -r 10.0.0.7:/soft /
3.配置systemctl启动方式
cat >/usr/lib/systemd/system/tomcat.service<<'EOF'
[Unit]
Description=Apache Tomcat Server
After=network.target remote-fs.target nss-lookup.target
[Service]
Type=forking
ExecStart=/soft/tomcat/bin/startup.sh
ExecStop=/soft/tomcat/bin/shutdown.sh
ExecRetart=/soft/tomcat/bin/shutdown.sh && sleep2 && /soft/tomcat/bin/startup.sh
[Install]
WantedBy=multi-user.target
EOF
# 重新加载systemctl
[root@web02 ~]# systemctl daemon-reload
4.下载zrlog 同步web01的代码
[root@web02 ~]# scp -r 10.0.0.7:/code/zrlog /code/
5.启动tomcat
[root@web02 logs]# systemctl restart tomcat
6.windows访问测试
10.0.0.8 www.zr.com3、部署负载均衡
sh
[root@lb01 conf.d]# cat zr.conf
upstream zr {
     server 172.16.1.7:8080;
     server 172.16.1.8:8080;
     keepalive 16;
}
server {
	listen 443 ssl;
	server_name www.zr.com;
	ssl_certificate   ssl_key/server.crt;
        ssl_certificate_key  ssl_key/server.key;

     ssl_session_cache shared:SSL:1m;
     ssl_session_timeout 5m;

     #自定义设置使用的TLS协议的类型以及加密套件(以下为配置示例,请您自行评估是否需要配置)
     #TLS协议版本越高,HTTPS通信的安全性越高,但是相较于低版本TLS协议,高版本TLS协议对浏览器的兼容性较差。
     ssl_ciphers ECDHE-RSA-AES128-GCM-SHA256:ECDHE:ECDH:AES:HIGH:!NULL:!aNULL:!MD5:!ADH:!RC4;
     ssl_protocols TLSv1.1 TLSv1.2 TLSv1.3;

	location / {
	proxy_pass http://zr;
	include proxy_params;
	proxy_next_upstream error timeout http_500 http_502 http_503 http_504;
	}
}
server {
        listen 80;
        server_name www.zr.com;
        return 302 https://$server_name$request_uri;
}
[root@lb01 conf.d]# nginx -t
nginx: the configuration file /etc/nginx/nginx.conf syntax is ok
nginx: configuration file /etc/nginx/nginx.conf test is successful
[root@lb01 conf.d]# systemctl restart nginx


hosts解析
10.0.0.5 www.zr.com
4、静态资源共享
在web01服务器上上传一个静态资源
sh
1.web01上传图片
#图片的位置
[root@web01 zrlog]# ll ROOT/attached/image/20241223/20241223094001_428.jpeg
-rw-r----- 1 root root 52606 Dec 23 09:40 ROOT/attached/image/20241223/20241223094001_428.jpeg

2.web02访问测试
裂图

3.NFS配置共享zrlog的静态文件目录
[root@nfs ~]# cat /etc/exports
/data/wp 172.16.1.0/24(rw,sync,all_squash,anonuid=666,anongid=666)
/data/zrlog 172.16.1.0/24(rw,sync,all_squash,anonuid=666,anongid=666)

[root@nfs ~]# mkdir /data/zrlog
[root@nfs ~]# grep 666 /etc/passwd
www:x:666:666::/home/www:/sbin/nologin
[root@nfs ~]# chown www.www /data/zrlog/
[root@nfs ~]# ll -d /data/zrlog/
drwxr-xr-x 2 www www 6 Dec 23 09:48 /data/zrlog/

#重启生效
[root@nfs ~]# systemctl restart nfs


4.将图片推送至NFS共享目录 推送image目录到31
[root@web01 zrlog]# scp -r ROOT/attached/image 10.0.0.31:/data/zrlog/

#在NFS服务端递归授权目录权限
[root@nfs ~]# chown -R www.www /data/zrlog/


5.挂载31的/data/zrlog 到 attached
[root@web01 ~]# mount -t nfs 172.16.1.31:/data/zrlog /code/zrlog/ROOT/attached
[root@web01 ~]# df -h
Filesystem               Size  Used Avail Use% Mounted on
devtmpfs                 459M     0  459M   0% /dev
tmpfs                    475M     0  475M   0% /dev/shm
tmpfs                    475M   49M  426M  11% /run
tmpfs                    475M     0  475M   0% /sys/fs/cgroup
/dev/sda3                 48G  5.0G   43G  11% /
/dev/sda1                195M  122M   74M  63% /boot
tmpfs                     95M     0   95M   0% /run/user/0
172.16.1.31:/data/zrlog   48G  3.9G   44G   9% /code/zrlog/ROOT/attached


web02挂载NFS
[root@web02 ROOT]# mkdir /code/zrlog/ROOT/attached

[root@web02 ~]# mount -t nfs 172.16.1.31:/data/zrlog /code/zrlog/ROOT/attached
[root@web02 ~]# df -h
Filesystem               Size  Used Avail Use% Mounted on
devtmpfs                 459M     0  459M   0% /dev
tmpfs                    475M     0  475M   0% /dev/shm
tmpfs                    475M   49M  426M  11% /run
tmpfs                    475M     0  475M   0% /sys/fs/cgroup
/dev/sda3                 48G  4.7G   44G  10% /
tmpfs                    475M   32K  475M   1% /tmp
/dev/sda1                195M  122M   74M  63% /boot
tmpfs                     95M     0   95M   0% /run/user/0
172.16.1.31:/data/zrlog   48G  3.9G   44G   9% /code/zrlog/ROOT/attached
5、实现共享存储
1.官网的推荐的不使用,如果使用则不能超过4个节点
2.使用第三方插件实现tomcat将会话写入到redis
我们先查看下tomcat提供的session管理
(1)、配置web01
sh
1.配置虚拟主机
[root@web01 conf]# vim server.xml
..
</Host>
<Host name="www.session.com" appBase="/code/session"
unpackWARs="true" autoDeploy="true">
<Valve className="org.apache.catalina.valves.AccessLogValve" directory="logs"
prefix="session_tomcat" suffix=".log"
pattern="%h %l %u %t "%r" %s %b" />
</Host>
<Host name="www.zr.com" appBase="/code/zrlog"
...
2.准备代码或者当前web01的session
[root@web01 conf]# systemctl restart tomcat
[root@web01 conf]# mkdir /code/session/ROOT
[root@web01 conf]# vim /code/session/ROOT/index.jsp
<body>
<%
//HttpSession session = request.getSession(true);
System.out.println(session.getCreationTime());
out.println("<br> web01 SESSION ID:" + session.getId() + "<br>");
out.println("Session created time is :" + session.getCreationTime()
+ "<br>");
%>
</body>
3.访问session
192.168.121.7 www.session.com
(2)、配置web02
sh
# 同步WEB01的配置
[root@web02 ROOT]# scp 192.168.121.7:/soft/tomcat/conf/server.xml /soft/tomcat/conf/

# 重启Tomcat
[root@web02 ROOT]# systemctl restart tomcat

# 创建Index.jsp
[root@web02 ROOT]# mkdir /code/session/ROOT
[root@web02 ROOT]# vim /code/session/ROOT/index.jsp
<body>
        <%
        //HttpSession session = request.getSession(true);
        System.out.println(session.getCreationTime());
        out.println("<br> web02 SESSION ID:" + session.getId() + "<br>");
        out.println("Session created time is :" + session.getCreationTime()
        + "<br>");
        %>
</body>

# hosts解析
192.168.121.8 session.oldboy.com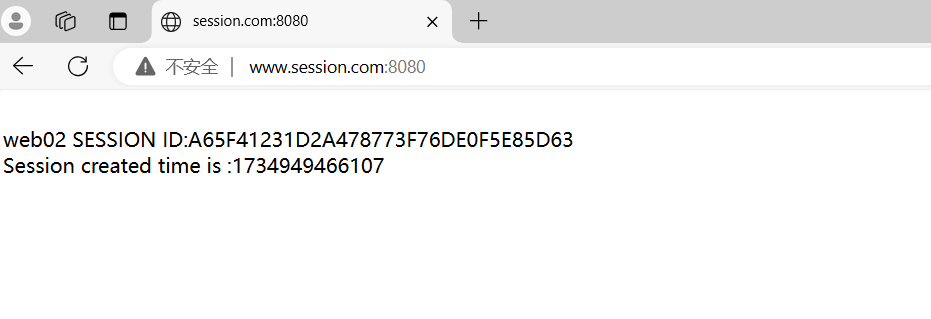
(3)、接入负载均衡
sh
[root@lb01 conf.d]# cat session.conf
upstream se {
     server 172.16.1.7:8080;
     server 172.16.1.8:8080;
     keepalive 16;
}
server {
	listen 443 ssl;
	server_name www.session.com;
	ssl_certificate   ssl_key/server.crt;
        ssl_certificate_key  ssl_key/server.key;

     ssl_session_cache shared:SSL:1m;
     ssl_session_timeout 5m;

     #自定义设置使用的TLS协议的类型以及加密套件(以下为配置示例,请您自行评估是否需要配置)
     #TLS协议版本越高,HTTPS通信的安全性越高,但是相较于低版本TLS协议,高版本TLS协议对浏览器的兼容性较差。
     ssl_ciphers ECDHE-RSA-AES128-GCM-SHA256:ECDHE:ECDH:AES:HIGH:!NULL:!aNULL:!MD5:!ADH:!RC4;
     ssl_protocols TLSv1.1 TLSv1.2 TLSv1.3;

	location / {
	proxy_pass http://se;
	include proxy_params;
	proxy_next_upstream error timeout http_500 http_502 http_503 http_504;
	}
}
server {
        listen 80;
        server_name www.session.com;
        return 302 https://$server_name$request_uri;
}
[root@lb01 conf.d]# nginx -t
nginx: the configuration file /etc/nginx/nginx.conf syntax is ok
nginx: configuration file /etc/nginx/nginx.conf test is successful
[root@lb01 conf.d]# systemctl restart nginx


hosts解析
192.168.121.5 session.oldboy.com

访问结果session一直是变化的。
(4)、接入redis
sh
# 10.0.0.51服务器运行
# 启动redis服务 保证远程可以访问到redis

1.上传redis插件
[root@web01 ~]# ll
total 900
-rw-r--r-- 1 root root 921429 Dec 23 11:13 tomcat-cluster-redis-session-manager.zip

2.解压插件
[root@web01 ~]# unzip tomcat-cluster-redis-session-manager.zip

3.拷贝jars到tomcat的/lib目录中
[root@web01 ~]# cp tomcat-cluster-redis-session-manager/lib/* /soft/tomcat/lib/

4.拷贝conf下的redis.properties文件,到tomcat的conf文件
[root@web01 ~]# cp tomcat-cluster-redis-session-manager/conf/redis-data-cache.properties /soft/tomcat/conf/

5.将配置文件中连接redis地址修改为如下地址即可
[root@web01 ~]# vim /soft/tomcat/conf/redis-data-cache.properties
redis.hosts=172.16.1.51:6379

6.添加如下两行至tomcat/conf/context.xml  (添加在</Context> 上一行 )
[root@web01 ~]# vim /soft/tomcat/conf/context.xml
<Valve className="tomcat.request.session.redis.SessionHandlerValve" />
<Manager className="tomcat.request.session.redis.SessionManager" />

注意: 修改完一台直接和另外一台进行无差异同步rsync --delete
[root@web01 ~]# rsync -avz --delete /soft/tomcat/ 10.0.0.8:/soft/tomcat
修改完成后重启Tomcat