系统版本:CentOS 7
事情起因:
生产环境因为外网开放,密码强度为初始密码,造成挖矿病毒攻击,删除过程中发现,删除文件的同时,病毒会同时从外网下载,怎么也删除不干净,故决定重装系统。
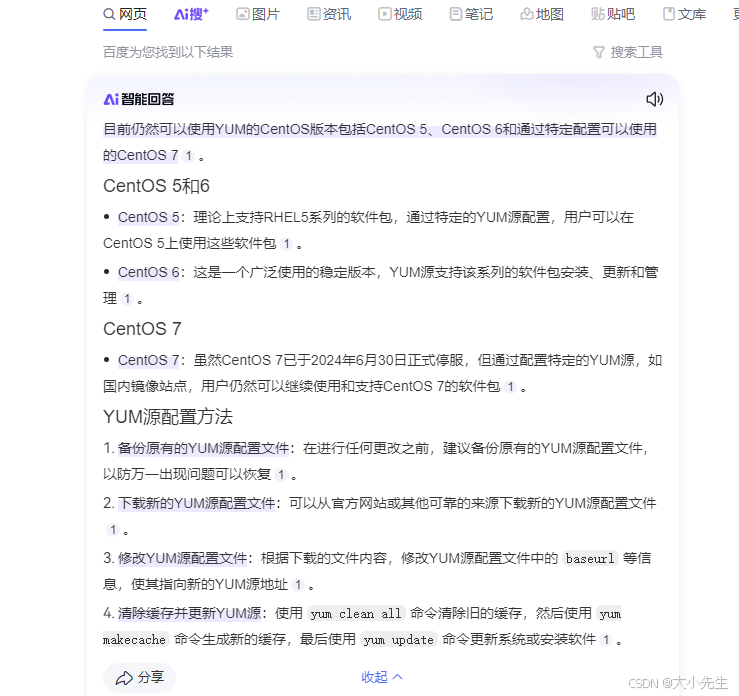
同事是在2024年6月19日部署的生产环境,不巧的是CentOS 7在2024年6月30日停止维护了,造成无法通过yum命令直接从http://mirrorlist.centos.org下载相应的插件,换成阿里云、网易云、腾讯云之后相应的nasm、yasm、libx264都无法下载下来,所以只能通过下载安装包的形式操作,除此之外,还需要考虑安装版本的问题,最初始的时候没考虑到,造成安装成功,执行的过程中有错误出现。
一、查看nasm、yasm、libx264是否已经安装
bash
-bash-4.2# nasm -version
NASM version 2.13.03 compiled on Jan  7 2025
-bash-4.2# yasm --version
yasm 1.3.0
Compiled on Jan  7 2025.
Copyright (c) 2001-2014 Peter Johnson and other Yasm developers.
Run yasm --license for licensing overview and summary.
-bash-4.2# x264 --version
x264 0.164.3204 373697b
built on Jan  7 2025, gcc: 4.8.5 20150623 (Red Hat 4.8.5-44)
x264 configuration: --chroma-format=all
libx264 configuration: --chroma-format=all
x264 license: GPL version 2 or later
已安装的情况下,可自动忽略下方的安装过程
二、安装nasm
wget https://www.nasm.us/pub/nasm/releasebuilds/2.13.03/nasm-2.13.03.tar.gz
tar -xvf nasm-2.13.03.tar.gz
cd nasm-2.13.03/
./configure
make && sudo make install
验证是否安装成功
nasm -version
三、安装yasm
wget http://www.tortall.net/projects/yasm/releases/yasm-1.3.0.tar.gz
tar zxvf yasm-1.3.0.tar.gz
cd yasm-1.3.0/
./configure
make && sudo make install
验证是否安装成功
yasm --version
四、安装x264
git clone https://code.videolan.org/videolan/x264.git
cd x264/
./configure --enable-shared --enable-static
make && sudo make install
验证是否安装成功
x264 --version
x264配置过程
bash
# 先找到缺失文件的位置,例如执行
find / -name 'libx264.so.164'
# 得到
/home/soft/x264/libx264.so.164
/usr/local/lib/libx264.so.164
如果查询的时候没有找到的话,直接去/usr/local/lib 查看是否有libx264.so.164

# 修改ld.so.conf
vim /etc/ld.so.conf
最后一行添加:/usr/local/lib/


#执行 cat /etc/ld.so.conf 命令 展示下方说明修改成功

include ld.so.conf.d/*.conf
/usr/local/lib/


# 加载改动
ldconfig
五、安装FFmpeg
wget http://ffmpeg.org/releases/ffmpeg-5.0.1.tar.xz
tar -xvJf ffmpeg-5.0.1.tar.xz
mv ffmpeg-5.0.1/ /usr/local/ffmpeg/
cd /usr/local/ffmpeg
./configure --prefix=/home/newdisk/project/video-flv/ffmpeg-5.0 --enable-gpl --enable-libx264 --enable-static --disable-shared --enable-encoder=libx264 --extra-libs=-ldl
【我这里指定了安装位置,你也可以不指定{/home/newdisk/project/video-flv/ffmpeg-5.0}】
make && sudo make install
检查是否安装成功
bash
-bash-4.2# ffmpeg
ffmpeg version 5.0.1 Copyright (c) 2000-2022 the FFmpeg developers
  built with gcc 4.8.5 (GCC) 20150623 (Red Hat 4.8.5-44)
  configuration: --enable-gpl --enable-libx264 --enable-static --disable-shared --enable-encoder=libx264 --extra-libs=-ldl
  libavutil      57. 17.100 / 57. 17.100
  libavcodec     59. 18.100 / 59. 18.100
  libavformat    59. 16.100 / 59. 16.100
  libavdevice    59.  4.100 / 59.  4.100
  libavfilter     8. 24.100 /  8. 24.100
  libswscale      6.  4.100 /  6.  4.100
  libswresample   4.  3.100 /  4.  3.100
  libpostproc    56.  3.100 / 56.  3.100
Hyper fast Audio and Video encoder
usage: ffmpeg [options] [[infile options] -i infile]... {[outfile options] outfile}...

Use -h to get full help or, even better, run 'man ffmpeg'

上方的提示说明安装成功了,如果有红色或者error说明安装失败了
[root@x ffmpeg]# ffmpeg
ffmpeg: error while loading shared libraries: libx264.so.164: cannot open shared object file: No such file or directory
如果出现这种就是x264没有配置成功,找不到,重新配置一下,按照x264的配置过程
vim /etc/profile
新增
export PATH=$PATH:/usr/local/ffmpeg/bin
加载配置 ----必须加载配置,否则不生效
source /etc/profile
六、测试是否成功
ffprobe rtsp地址
bash
-bash-4.2# ffprobe rtsp://admin:xxxx@xxxxxx:554/Streaming/Channels/101
ffprobe version 5.0.1 Copyright (c) 2007-2022 the FFmpeg developers
  built with gcc 4.8.5 (GCC) 20150623 (Red Hat 4.8.5-44)
  configuration: --enable-gpl --enable-libx264 --enable-static --disable-shared --enable-encoder=libx264 --extra-libs=-ldl
  libavutil      57. 17.100 / 57. 17.100
  libavcodec     59. 18.100 / 59. 18.100
  libavformat    59. 16.100 / 59. 16.100
  libavdevice    59.  4.100 / 59.  4.100
  libavfilter     8. 24.100 /  8. 24.100
  libswscale      6.  4.100 /  6.  4.100
  libswresample   4.  3.100 /  4.  3.100
  libpostproc    56.  3.100 / 56.  3.100
Input #0, rtsp, from 'rtsp://admin:xxx@xxxx:554/Streaming/Channels/101':
  Metadata:
    title           : HIK Media Server V4.32.110
    comment         : HIK Media Server Session Description : standard
  Duration: N/A, start: 0.040000, bitrate: N/A
  Stream #0:0: Video: h264 (Main), yuvj420p(pc, bt709, progressive), 2560x1440, 25 fps, 25 tbr, 90k tbn
至此整个过程就结束了,如果还有问题,留言一起解决