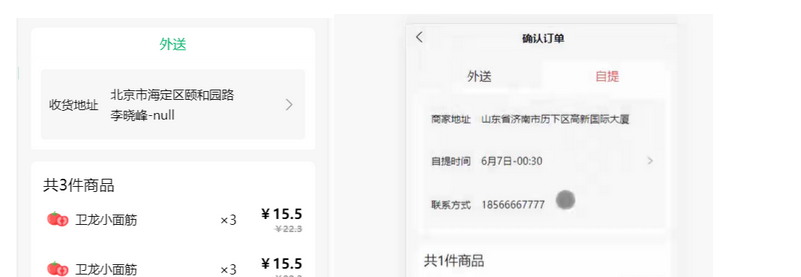
配送方式在订单确认页面最上方,可以进行选中配送还是自提,这里先看看配送。
代码样式:
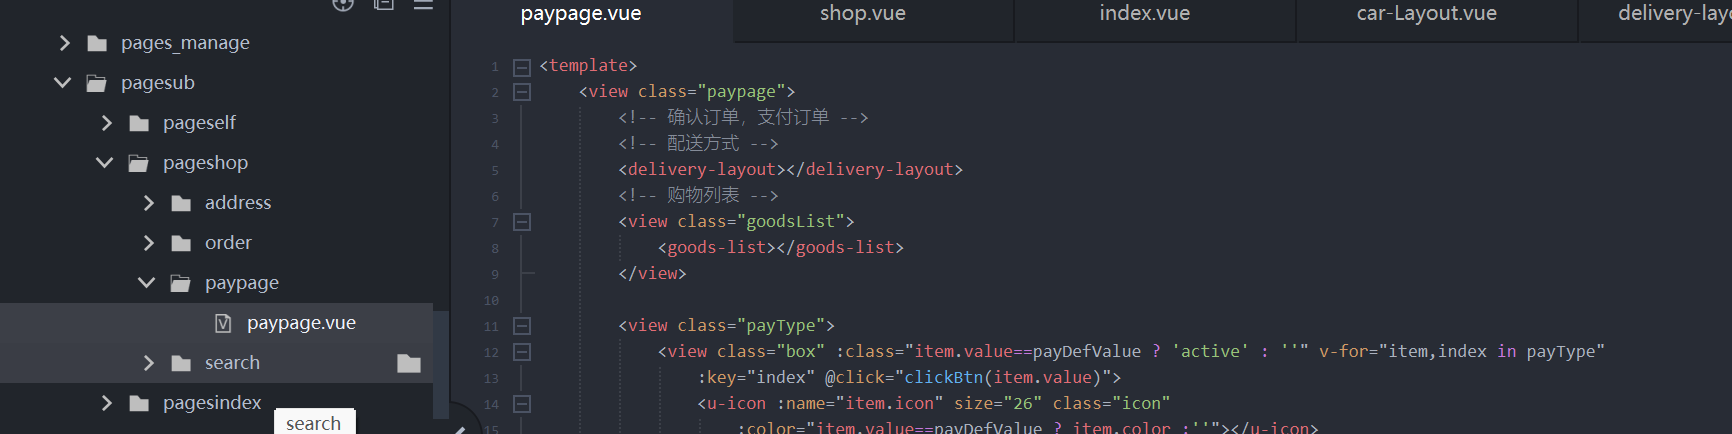
可以看出来是通过组件来实现的。组件名字是:delivery-layout
1、建立组件文件夹和页面,delivery-layout这里就只有配送
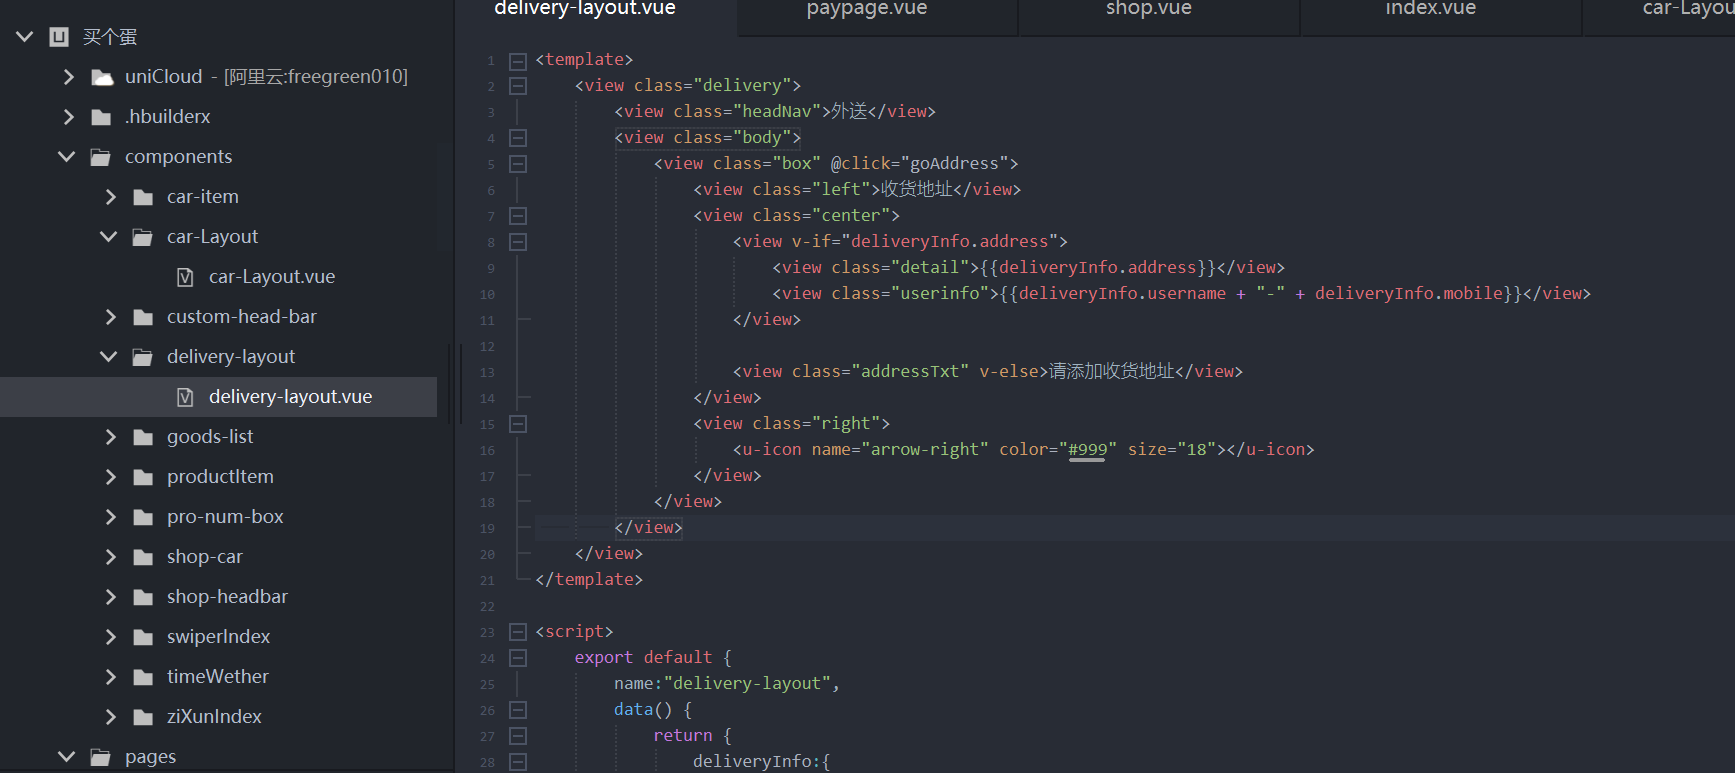
2、具体代码
html
<template>
	<view class="delivery">
		<view class="headNav">外送</view>
		<view class="body">
			<view class="box" @click="goAddress">
				<view class="left">收货地址</view>
				<view class="center">
					<view v-if="deliveryInfo.address">
						<view class="detail">{{deliveryInfo.address}}</view>
						<view class="userinfo">{{deliveryInfo.username + "-" + deliveryInfo.mobile}}</view>
					</view>

					<view class="addressTxt" v-else>请添加收货地址</view>
				</view>
				<view class="right">
					<u-icon name="arrow-right" color="#999" size="18"></u-icon>
				</view>
			</view>
		</view>
	</view>
</template>

<script>
	export default {
		name:"delivery-layout",
		data() {
			return {
				deliveryInfo:{
					address:"北京市海定区颐和园路",
					username:"李晓峰",
					mobile:null
				}
			}
		},
		methods:{
			goAddress(){
				uni.navigateTo({
					url:"/pagesub/pageshop/address/addrlist"
				})
			}
		}
	}
</script>

<style lang="scss">
.delivery{
	.headNav{
		width: 100%;
		height: 78rpx;
		background: #fff;
		@include flex-box-set();
		color:$brand-theme-color;
		border-radius: 15rpx 15rpx 0 0;
	}
	.body{
		background: #fff;
		padding:25rpx;
		.box{
			padding:40rpx 20rpx;
			background: $page-bg-color;
			border-radius: 10rpx;
			font-size: 30rpx;
			@include flex-box();
			.center{
				flex:1;
				padding:0 30rpx;
				font-size: 30rpx;
				.userinfo{
					padding-top:10rpx;
				}
			}
		}
	}
}
</style>
3、解析样式
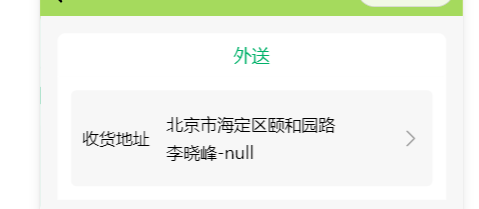
一共就两部分
头部表示送货方式 要不自提 要不配送
下面就是地址信息(收货地址 地址姓名电话 后面有一个箭头)
具体代码:
3.1 点击切换配送方式 后面做
3.2 点击地址或者箭头,选地址
<view class="box" @click="goAddress">
方法:
javascript
methods:{
goAddress(){
uni.navigateTo({
url:"/pagesub/pageshop/address/addrlist"
})
}
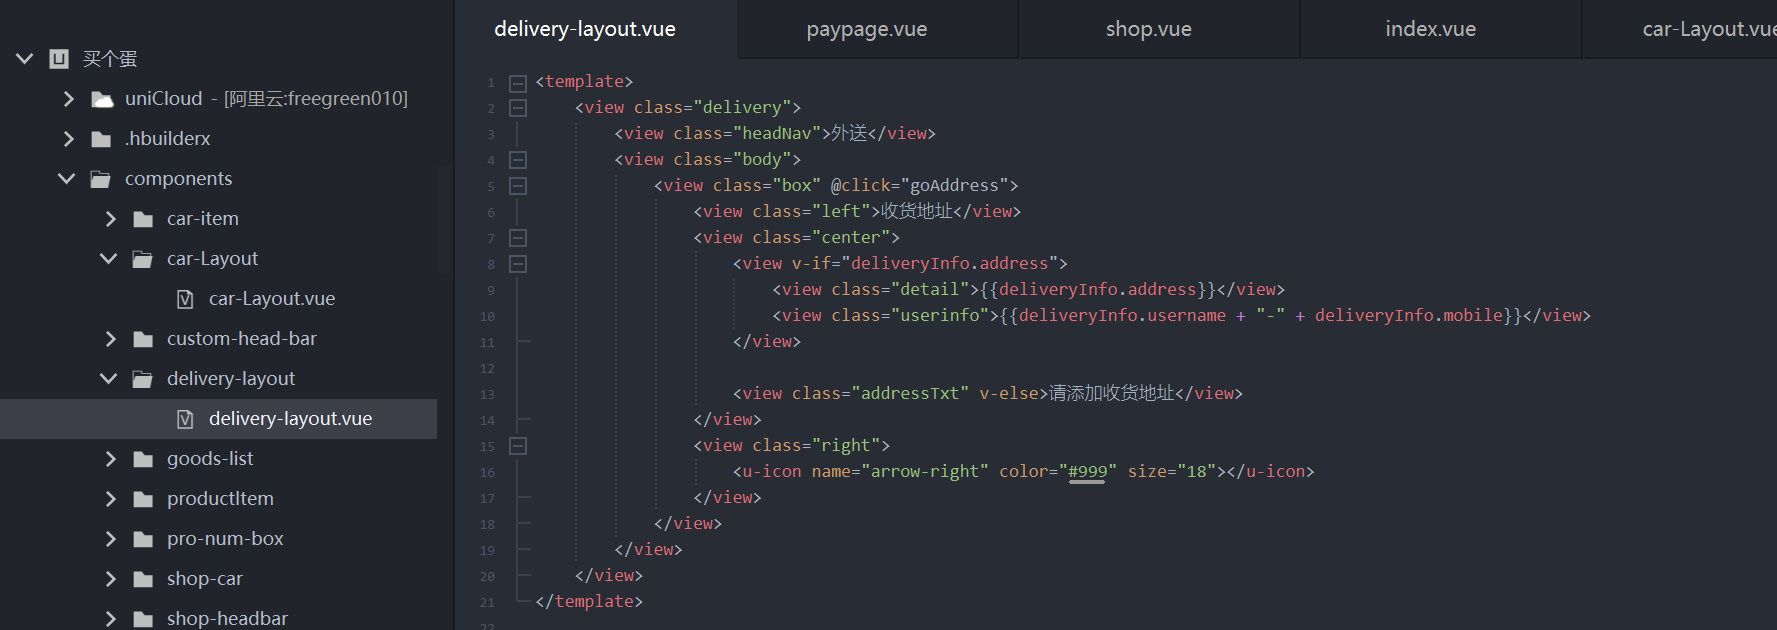
}3.3 如果没有地址,呈现的是添加地址:
html
<view class="box" @click="goAddress">
				<view class="left">收货地址</view>
				<view class="center">
					<view v-if="deliveryInfo.address">
						<view class="detail">{{deliveryInfo.address}}</view>
						<view class="userinfo">{{deliveryInfo.username + "-" + deliveryInfo.mobile}}</view>
					</view>

					<view class="addressTxt" v-else>请添加收货地址</view>
				</view>
				<view class="right">
					<u-icon name="arrow-right" color="#999" size="18"></u-icon>
				</view>
			</view>