目录
[1. 数据加载时指定了两类标签](#1. 数据加载时指定了两类标签)
[2. 损失函数用了二分类专用的](#2. 损失函数用了二分类专用的)
[3. 输出层只有 1 个神经元,用了sigmoid激活函数](#3. 输出层只有 1 个神经元,用了sigmoid激活函数)
[4. 预测时用 0.5 作为分类阈值](#4. 预测时用 0.5 作为分类阈值)
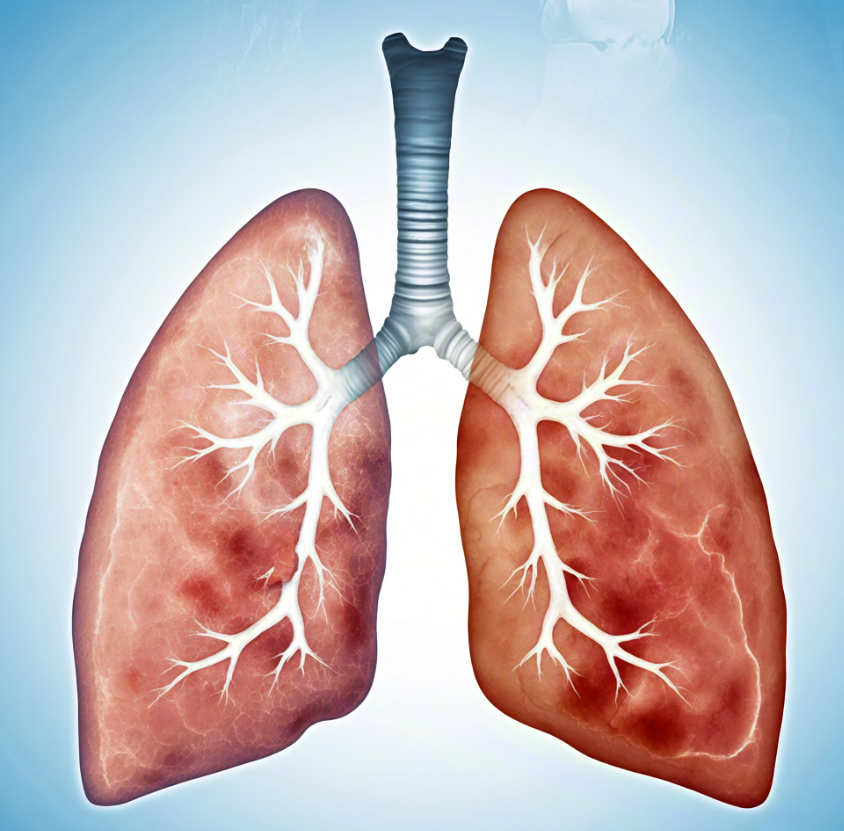
二分类胸片判断:
python
import numpy as np
import matplotlib.pyplot as plt
from sklearn.model_selection import train_test_split
from sklearn.metrics import f1_score, roc_auc_score, roc_curve, confusion_matrix, classification_report
from imblearn.over_sampling import RandomOverSampler
import tensorflow as tf
from keras import layers
from keras import models
# 或者更常用的是直接导入Sequential类
from keras.models import Sequential
from keras.preprocessing.image import ImageDataGenerator
import os
import zipfile
import requests
from tensorflow.python.keras.callbacks import EarlyStopping
#  这个代码执行 请切换环境到tf_env
plt.rcParams['font.sans-serif'] = ['SimHei']  # 使用 SimHei 字体
plt.rcParams['axes.unicode_minus'] = False    # 解决负号显示问题
plt.rcParams['font.size'] = 10  # 设置全局字体大小

# 数据加载和预处理
def load_data(train_dir, test_dir, val_dir, img_size=(150, 150), batch_size=32):
    # 数据增强器 - 仅用于训练集
    train_datagen = ImageDataGenerator(
        rescale=1. / 255,
        rotation_range=10,
        width_shift_range=0.1,
        height_shift_range=0.1,
        shear_range=0.1,
        zoom_range=0.1,
        horizontal_flip=True
    )

    # 验证集和测试集只需要重新缩放
    val_test_datagen = ImageDataGenerator(rescale=1. / 255)

    # 加载训练数据
    train_generator = train_datagen.flow_from_directory(
        train_dir,
        target_size=img_size,
        batch_size=batch_size,
        class_mode='binary',
        classes=['NORMAL', 'PNEUMONIA'],
        shuffle=True
    )

    # 加载验证数据
    val_generator = val_test_datagen.flow_from_directory(
        val_dir,
        target_size=img_size,
        batch_size=batch_size,
        class_mode='binary',
        classes=['NORMAL', 'PNEUMONIA'],
        shuffle=False
    )

    # 加载测试数据
    test_generator = val_test_datagen.flow_from_directory(
        test_dir,
        target_size=img_size,
        batch_size=batch_size,
        class_mode='binary',
        classes=['NORMAL', 'PNEUMONIA'],
        shuffle=False
    )

    return train_generator, val_generator, test_generator

# 处理样本不均衡(过采样)
def handle_imbalance(generator):
    # 提取特征和标签
    X, y = [], []
    num_batches = len(generator)

    # 重置生成器以确保从开始获取数据
    generator.reset()

    for i in range(num_batches):
        batch_x, batch_y = generator.next()
        X.append(batch_x)
        y.append(batch_y)

    X = np.concatenate(X)
    y = np.concatenate(y)

    # 打印原始分布
    print(f"原始样本分布: 正常={np.sum(y == 0)}, 肺炎={np.sum(y == 1)}")

    # 展平特征用于过采样
    X_flat = X.reshape(X.shape[0], -1)

    # 过采样少数类
    ros = RandomOverSampler(random_state=42)
    X_resampled, y_resampled = ros.fit_resample(X_flat, y)

    # 恢复图像形状
    X_resampled = X_resampled.reshape(-1, *X.shape[1:])

    print(f"过采样后分布: 正常={np.sum(y_resampled == 0)}, 肺炎={np.sum(y_resampled == 1)}")

    return X_resampled, y_resampled, y

# 构建改进的CNN模型
def build_model(input_shape):
    model = models.Sequential([
        # 第一个卷积块
        layers.Conv2D(32, (3, 3), activation='relu', input_shape=input_shape),
        layers.BatchNormalization(),
        layers.MaxPooling2D((2, 2)),
        layers.Dropout(0.2),

        # 第二个卷积块
        layers.Conv2D(64, (3, 3), activation='relu'),
        layers.BatchNormalization(),
        layers.MaxPooling2D((2, 2)),
        layers.Dropout(0.3),

        # 第三个卷积块
        layers.Conv2D(128, (3, 3), activation='relu'),
        layers.BatchNormalization(),
        layers.MaxPooling2D((2, 2)),
        layers.Dropout(0.4),

        # 第四个卷积块
        layers.Conv2D(256, (3, 3), activation='relu'),
        layers.BatchNormalization(),
        layers.MaxPooling2D((2, 2)),
        layers.Dropout(0.5),

        # 分类器
        layers.Flatten(),
        layers.Dense(512, activation='relu'),
        layers.BatchNormalization(),
        layers.Dropout(0.5),
        layers.Dense(1, activation='sigmoid')
    ])

    # 使用更稳定的优化器
    optimizer = tf.keras.optimizers.Adam(learning_rate=0.0001)

    model.compile(
        optimizer=optimizer,
        loss='binary_crossentropy',
        metrics=[
            'accuracy',
            tf.keras.metrics.Precision(name='precision'),
            tf.keras.metrics.Recall(name='recall'),
            tf.keras.metrics.AUC(name='auc')
        ]
    )

    return model

# 主函数
def main():
    # 假设数据集已经手动下载并解压
    train_dir = "chest_xray/train"
    test_dir = "chest_xray/test"
    val_dir = "chest_xray/val"

    # 加载数据
    img_size = (150, 150)
    batch_size = 32
    train_generator, val_generator, test_generator = load_data(train_dir, test_dir, val_dir, img_size, batch_size)

    # 处理样本不均衡
    X_train, y_train_resampled, y_train_original = handle_imbalance(train_generator)

    # 计算类别权重(基于原始分布)
    n_normal = np.sum(y_train_original == 0)
    n_pneumonia = np.sum(y_train_original == 1)
    total = n_normal + n_pneumonia
    weight_for_normal = (1 / n_normal) * (total / 2.0)
    weight_for_pneumonia = (1 / n_pneumonia) * (total / 2.0)
    class_weights = {0: weight_for_normal, 1: weight_for_pneumonia}
    print(f"类别权重: 正常={weight_for_normal:.2f}, 肺炎={weight_for_pneumonia:.2f}")

    # 构建模型
    model = build_model((*img_size, 3))
    model.summary()

    # 提前停止回调
    early_stopping = EarlyStopping(
        monitor='val_loss',
        patience=5,
        restore_best_weights=True,
        verbose=1
    )

    # 训练模型
    history = model.fit(
        X_train, y_train_resampled,
        epochs=30,
        batch_size=32,
        validation_data=val_generator,
        class_weight=class_weights,
        callbacks=[early_stopping],
        verbose=1
    )

    # 评估模型 - 使用完整测试集
    test_generator.reset()
    test_steps = len(test_generator)
    test_results = model.evaluate(test_generator, steps=test_steps, verbose=1)

    print("\n测试集评估结果:")
    print(f"准确率: {test_results[1]:.4f}")
    print(f"精确率: {test_results[2]:.4f}")
    print(f"召回率: {test_results[3]:.4f}")
    print(f"AUC: {test_results[4]:.4f}")

    # 获取测试集所有预测结果
    test_generator.reset()
    y_true = []
    y_pred_prob = []

    for i in range(test_steps):
        batch_x, batch_y = test_generator.next()
        y_true.extend(batch_y)
        batch_pred = model.predict(batch_x, verbose=0).ravel()
        y_pred_prob.extend(batch_pred)

    y_true = np.array(y_true)
    y_pred_prob = np.array(y_pred_prob)
    y_pred = (y_pred_prob > 0.5).astype(int)

    # 计算额外指标
    f1 = f1_score(y_true, y_pred)
    auc = roc_auc_score(y_true, y_pred_prob)

    print(f"\nF1-score: {f1:.4f}")
    print(f"AUC-ROC: {auc:.4f}")

    # 分类报告
    print("\n分类报告:")
    print(classification_report(y_true, y_pred, target_names=['NORMAL', 'PNEUMONIA']))

    # 混淆矩阵
    cm = confusion_matrix(y_true, y_pred)
    print("混淆矩阵:")
    print(cm)

    # 绘制ROC曲线
    fpr, tpr, _ = roc_curve(y_true, y_pred_prob)
    plt.figure(figsize=(10, 6))
    plt.plot(fpr, tpr, color='darkorange', lw=2, label=f'ROC曲线 (AUC = {auc:.4f})')
    plt.plot([0, 1], [0, 1], color='navy', lw=2, linestyle='--')
    plt.xlim([0.0, 1.0])
    plt.ylim([0.0, 1.05])
    plt.xlabel('False Positive Rate')
    plt.ylabel('True Positive Rate')
    plt.title('接收者操作特征曲线(ROC)')
    plt.legend(loc="lower right")
    plt.savefig('roc_curve.png', dpi=300)
    plt.show()

    # 绘制训练历史
    plt.figure(figsize=(12, 8))

    plt.subplot(2, 2, 1)
    plt.plot(history.history['accuracy'], label='训练准确率')
    plt.plot(history.history['val_accuracy'], label='验证准确率')
    plt.title('准确率')
    plt.legend()

    plt.subplot(2, 2, 2)
    plt.plot(history.history['loss'], label='训练损失')
    plt.plot(history.history['val_loss'], label='验证损失')
    plt.title('损失')
    plt.legend()

    plt.subplot(2, 2, 3)
    plt.plot(history.history['precision'], label='训练精确率')
    plt.plot(history.history['val_precision'], label='验证精确率')
    plt.title('精确率')
    plt.legend()

    plt.subplot(2, 2, 4)
    plt.plot(history.history['recall'], label='训练召回率')
    plt.plot(history.history['val_recall'], label='验证召回率')
    plt.title('召回率')
    plt.legend()

    plt.tight_layout()
    plt.savefig('training_history.png', dpi=300)
    plt.show()

if __name__ == "__main__":
main()这段代码里有很多地方明确体现了这是一个二分类任务(判断 "正常胸片" 和 "肺炎胸片" 两类),最关键的有这几个地方:
1. 数据加载时指定了两类标签
在 load_data 函数中,加载数据时明确指定了类别为两类:
|----------------------------------------------------------------------------------------------------------------------------------------------------------------------------------|
| train_generator = train_datagen.flow_from_directory( train_dir, ... class_mode='binary', # 这里指定是"二分类"模式 classes='NORMAL', 'PNEUMONIA', # 明确两类:正常(NORMAL)和肺炎(PNEUMONIA) ... ) |
- class_mode='binary':直接告诉程序 "这是二分类任务",标签会被处理成 0 和 1(0 代表正常,1 代表肺炎)。
- classes='NORMAL', 'PNEUMONIA':手动指定只有这两个类别,没有第三种情况。
2. 损失函数用了二分类专用的
在模型编译时,损失函数用的是 binary_crossentropy(二分类交叉熵):
|---------------------------------------------------------------------|
| model.compile( ... loss='binary_crossentropy', # 专门用于二分类的损失函数 ... ) |
这个损失函数的作用是:计算 "模型判断为 0 或 1 的概率" 与 "实际标签(0 或 1)" 之间的差距,指导模型优化。如果是多分类任务,会用其他损失函数(比如 categorical_crossentropy)。
3. 输出层只有 1 个神经元,用了sigmoid激活函数
模型的最后一层是:
|---------------------------------------------|
| layers.Dense(1, activation='sigmoid') # 输出层 |
- Dense(1):只输出 1 个数值,这个数值经过 sigmoid 激活后,会被压缩到 0~1 之间。
- 实际含义:
- 数值越接近 0 → 模型认为 "更可能是正常胸片(0 类)";
- 数值越接近 1 → 模型认为 "更可能是肺炎胸片(1 类)"。
这是二分类任务的典型输出方式(多分类会有多个神经元,对应多个类别)。
4. 预测时用 0.5 作为分类阈值
在生成最终判断结果时:
|--------------------------------------------------------------------|
| y_pred = (y_pred_prob > 0.5).astype(int) # 大于0.5算1类(肺炎),否则算0类(正常) |
直接用 0.5 作为 "两类的分界线",把输出概率分成 "0" 和 "1" 两类,进一步说明这是二分类。
从 "数据标签定义""损失函数选择""输出层设计" 到 "最终预测规则",全流程都围绕 "只能分成两类" 展开,没有任何支持多类别的设计。所以这段代码是典型的二分类任务,目标就是区分 "正常胸片" 和 "肺炎胸片"。