如果你是一位以太坊开发者,那么你一定对 Geth 控制台中的 personal.unlockAccount 命令再熟悉不过了。多年来,它一直是我们发送交易、与合约交互时不可或缺的第一步。然而,时代变了。随着以太坊生态的成熟和安全标准的提升,这个曾经的"好朋友"正在被官方弃用,取而代之的是一个更强大、更安全的解决方案------Clef。
这篇文章将深入探讨为什么我们需要告别 personal API,Clef 是什么,以及如何配置和使用它来管理我们的账户,从而将我们的以太坊开发安全实践提升到一个新的水平。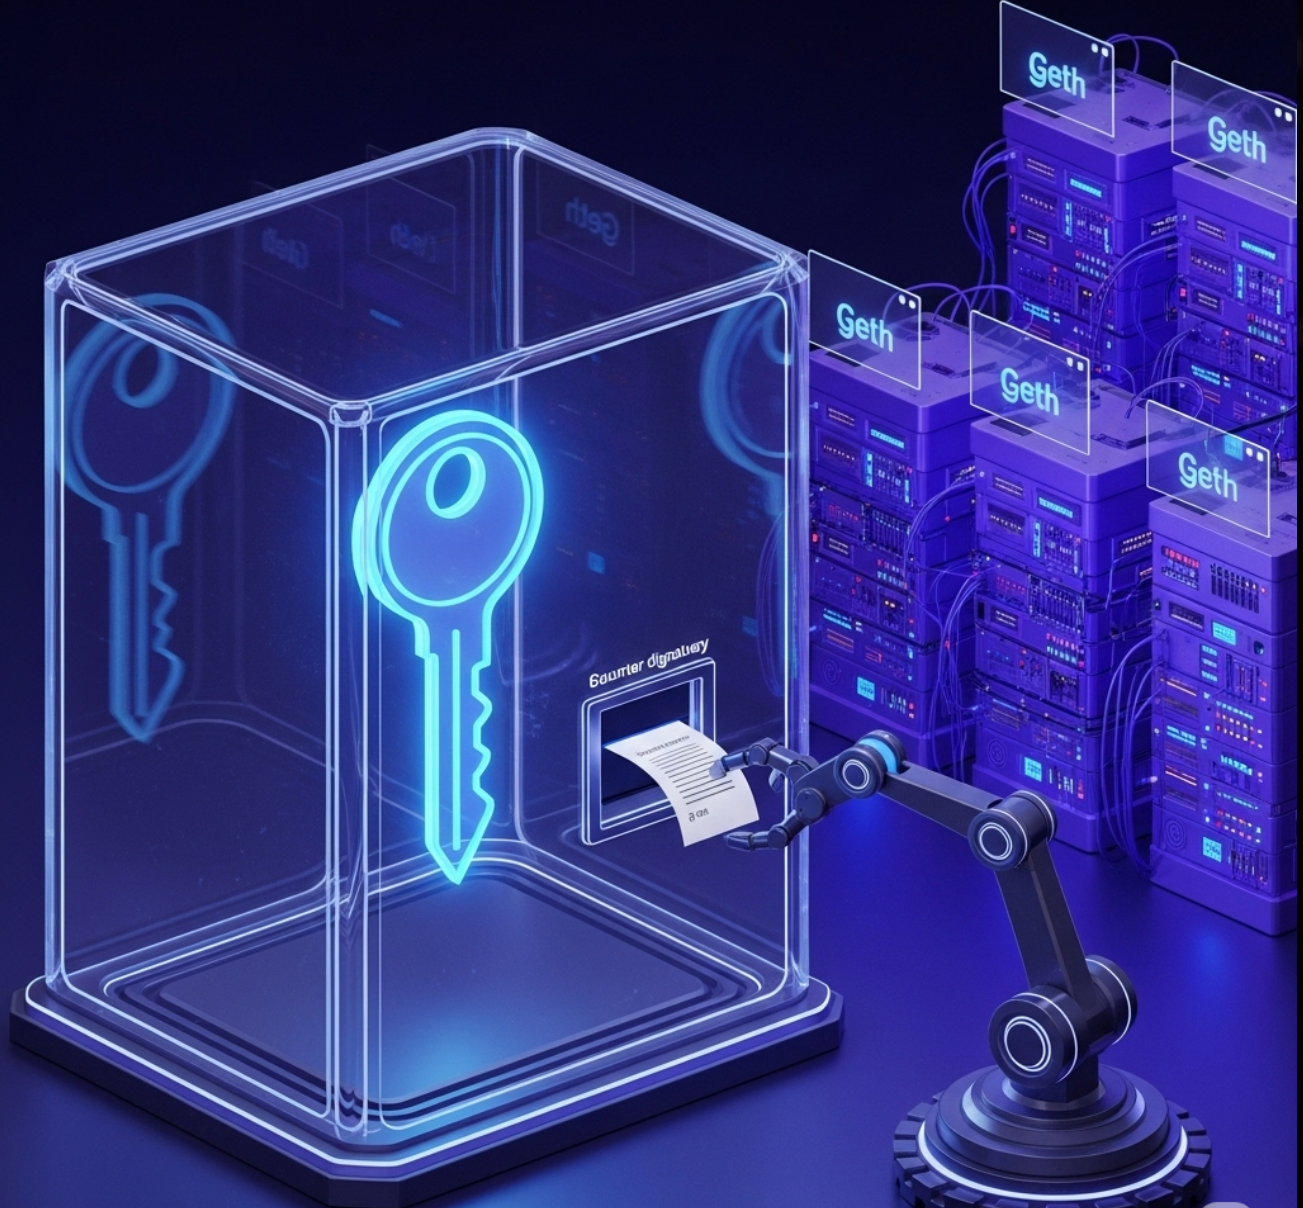
为什么 personal API 必须被淘汰?
personal API 的核心问题在于它的工作模式:它要求我们在 Geth 节点进程中直接解锁我们的账户。这意味着我们的私钥被加载到内存中,并且在解锁期间,任何能够访问 Geth RPC 端口的应用程序(例如,一个恶意的 DApp 页面)都有可能发起交易请求,并用我们已解锁的账户进行签名。
这相当于把我们的保险箱钥匙直接交给了银行大堂经理。虽然经理大多数时候会按我们的指示操作,但如果大堂里混进了骗子,或者经理本身被挟持,我们的资产就岌岌可危了。这种将密钥管理和节点功能耦合在一起的"热钱包"模式,是重大安全隐患的根源。
Clef:我们的专属数字资产保险库
为了解决这个问题,以太坊团队推出了 Clef。我们可以将 Clef 理解为一个独立的、专门用于签名操作的进程。它的唯一职责就是保管我们的私钥,并根据外部请求(例如来自 Geth 的请求)来签名交易或数据。
Clef 的核心设计理念是**"关注点分离"**(Separation of Concerns):
- Geth 节点:负责处理区块链数据同步、P2P 网络、执行交易等"公共"事务。它不再需要接触任何私钥。
- Clef 签名器:负责管理私钥、提供用户交互界面以审批交易等"私人"事务。它是一个与世隔绝的保险库。
当 Geth 需要签名一笔交易时,它不会自己动手,而是会将这笔交易的摘要信息发送给 Clef,请求签名。Clef 收到请求后,会通过一个安全通道(通常是终端提示)向我们------真正的账户主人------请求授权。只有在我们明确输入密码并同意后,Clef 才会用对应的私钥完成签名,并将签名后的交易返回给 Geth。Geth 拿到签名后,再将其广播到网络中。
Clef 的核心工作流程
下面的流程图直观地展示了使用 Clef 后,一笔交易从发起到广播的全过程。
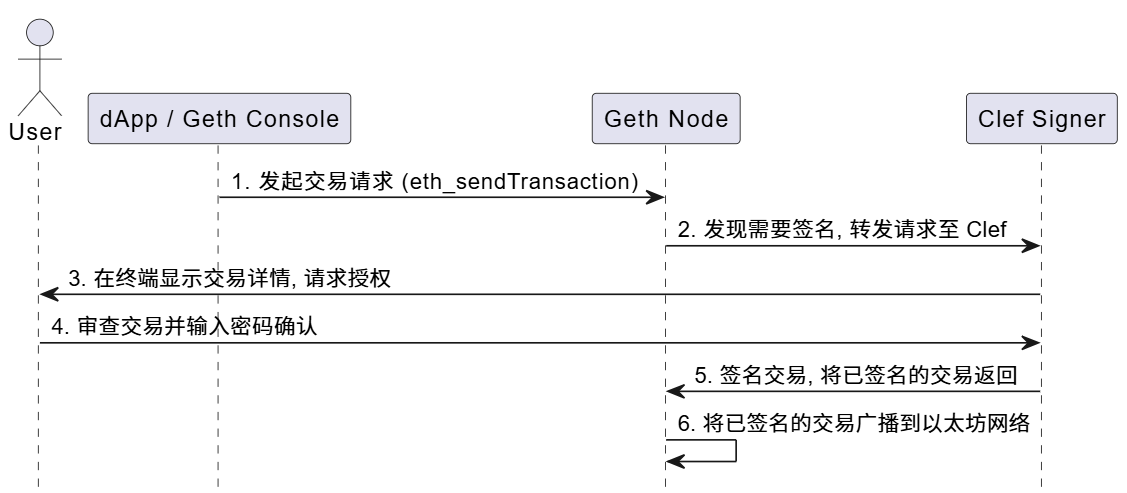
从图中可以看到,私钥始终被隔离在 Clef 进程中,Geth 从头到尾都没有机会触碰到它。更重要的是,每一次签名都需要用户的明确授权,这极大地降低了资产被盗用的风险。
实践入门:如何配置和使用 Clef
让我们通过一个简单的例子,看看如何用 Clef 来取代旧的 personal API。
第一步:初始化 Clef 并创建新账户
首先,我们需要像初始化 Geth 一样初始化 Clef 的数据目录,并创建一个新账户。
bash
# 1. 初始化 Clef 的配置和密钥库
clef init
clef init

WARNING!

Clef is an account management tool. It may, like any software, contain bugs.

Please take care to
- backup your keystore files,
- verify that the keystore(s) can be opened with your password.

Clef is distributed in the hope that it will be useful, but WITHOUT ANY WARRANTY;
without even the implied warranty of MERCHANTABILITY or FITNESS FOR A PARTICULAR
PURPOSE. See the GNU General Public License for more details.

Enter 'ok' to proceed:
> ok

The master seed of clef will be locked with a password.
Please specify a password. Do not forget this password!
Password:
Repeat password:

A master seed has been generated into C:\Users\heish\AppData\Roaming\Signer\masterseed.json

This is required to be able to store credentials, such as:
* Passwords for keystores (used by rule engine)
* Storage for JavaScript auto-signing rules
* Hash of JavaScript rule-file

You should treat 'masterseed.json' with utmost secrecy and make a backup of it!
* The password is necessary but not enough, you need to back up the master seed too!
* The master seed does not contain your accounts, those need to be backed up separately!

# 2. 创建一个新账户 (会提示我们设置密码)
clef newaccount
clef newaccount

WARNING!

Clef is an account management tool. It may, like any software, contain bugs.

Please take care to
- backup your keystore files,
- verify that the keystore(s) can be opened with your password.

Clef is distributed in the hope that it will be useful, but WITHOUT ANY WARRANTY;
without even the implied warranty of MERCHANTABILITY or FITNESS FOR A PARTICULAR
PURPOSE. See the GNU General Public License for more details.

Enter 'ok' to proceed:
> ok

## New account password

Please enter a password for the new account to be created (attempt 0 of 3)
>
-----------------------
INFO [07-25|08:52:48.891] Your new key was generated               address=0xC4C5C88Bed94F97D22e68dD02BA91D31C06c10CB
WARN [07-25|08:52:48.913] Please backup your key file!             path=C:\Users\heish\AppData\Local\Ethereum\keystore\UTC--2025-07-25T00-52-47.982077100Z--c4c5c88bed94f97d22e68dd02ba91d31c06c10cb
WARN [07-25|08:52:48.913] Please remember your password!
Generated account 0xC4C5C88Bed94F97D22e68dD02BA91D31C06c10CB
我们会发现,这个过程和 geth account new 非常相似。生成的密钥文件同样存储在 keystore 目录中。
第二步:启动 Clef 服务
接下来,启动 Clef 进程。为了安全,启动时必须指定链 ID,以防止交易在不同链上被重放(Replay Attack)。
bash
# 假设我们在 本地测试环节进行操作 (Chain ID: 1337)
# --keystore 指定密钥库位置, 通常是 ~/.clef/keystore
clef --chainid 1337
WARNING!

Clef is an account management tool. It may, like any software, contain bugs.

Please take care to
- backup your keystore files,
- verify that the keystore(s) can be opened with your password.

Clef is distributed in the hope that it will be useful, but WITHOUT ANY WARRANTY;
without even the implied warranty of MERCHANTABILITY or FITNESS FOR A PARTICULAR
PURPOSE. See the GNU General Public License for more details.

Enter 'ok' to proceed:
> ok

INFO [07-25|10:52:42.263] Using CLI as UI-channel
INFO [07-25|10:52:42.413] Loaded 4byte database                    embeds=268,621 locals=0 local=./4byte-custom.json
## Master Password

Please enter the password to decrypt the master seed
>
-----------------------
INFO [07-25|10:53:04.067] Starting signer                          chainid=1337 keystore=C:\Users\heish\AppData\Local\Ethereum\keystore light-kdf=false advanced=false
INFO [07-25|10:53:04.072] Audit logs configured                    file=audit.log
INFO [07-25|10:53:04.072] IPC endpoint opened                      url=\\.\pipe\clef.ipc

------- Signer info -------
* intapi_version : 7.0.1
* extapi_version : 6.1.0
* extapi_http : n/a
* extapi_ipc : \\.\pipe\clef.ipc

------- Available accounts -------
0. 0xC4C5C88Bed94F97D22e68dD02BA91D31C06c10CB at keystore://C:\Users\heish\AppData\Local\Ethereum\keystore\UTC--2025-07-25T00-52-47.982077100Z--c4c5c88bed94f97d22e68dd02ba91d31c06c10cb
成功启动后,Clef 会监听一个 IPC 文件(默认为 clef.ipc),等待来自 Geth 等客户端的连接。
第三步:启动 Geth 并连接到 Clef
现在,以一种新的方式启动 Geth,通过 --signer 标志告诉它将所有签名任务都委托给 Clef。
bash
# 启动 Geth 并连接到 Sepolia 测试网
# --signer 指向 Clef 正在监听的 IPC 文件路径
 geth --datadir . --networkid 1337 --rpc.enabledeprecatedpersonal --rpc.allow-unprotected-txs --http --http.addr "0.0.0.0" --http.api "eth,net,web3,admin,miner,txpool,debug" --signer \\.\pipe\clef.ipc
此时,我们的 Geth 节点已经不再管理任何私钥了。
第四步:发起一笔交易并体验审批流程
最后,让我们来发起一笔交易,感受一下 Clef 的安全审批流程。
-
打开一个新的终端,附加到 Geth 节点:
bashgeth attach ipc:\\.\pipe\geth.ipc -
在 Geth 控制台中,执行一笔交易,就像我们以前做的那样:
javascripteth.sendTransaction({ from: "0x...", to: "0x...", value: web3.toWei(0.01, "ether") })
此时,我们会发现 Geth 控制台"卡住"了。不要慌,切换到我们正在运行 Clef 的那个终端,我们会看到类似下面的提示:
Account: 0x...
Approve sending 0.01 ether to 0x...
Transaction data: 0x
[y/N] >
这就是 Clef 在向我们请求授权!它清楚地列出了交易的发送方、接收方和金额。只有当我们输入 y 并按下回车,Clef 才会签名这笔交易。签名完成后,Geth 控制台会立刻返回交易哈希,交易被成功广播。
实用建议与进阶思考
- 自动化规则集 :对于需要自动化的脚本,每次都手动确认显然不现实。Clef 提供了强大的规则引擎(
clef.rules),我们可以预先定义规则,让 Clef 自动批准符合条件的交易,例如"允许向我自己的另一个地址发送任意金额"或"允许与某个特定合约交互,但 gas 上限不能超过 200000"。 - 远程签名:由于 Clef 是一个独立的进程,它完全可以运行在一台独立的、高度安全的物理机或硬件安全模块(HSM)上,通过安全的网络连接为远端的 Geth 节点提供签名服务。这是企业级应用保障资产安全的最佳实践。
结论
从 personal API 迁移到 Clef,不仅仅是一次工具的更迭,更是一次安全理念的升级。它强制我们采用"最小权限"原则,将密钥管理与节点操作彻底分离,从根本上杜绝了一大类安全风险。虽然初次配置会比以往多几个步骤,但这种为了资产安全而付出的"麻烦"是完全值得的。拥抱 Clef,就是为我们和我们的用户在去中心化的世界里,构建一道更坚固的安全防线。