3D开发,自定义几何体,添加纹理。
1. 基本场景设置
首先,我们需要设置Three.js的基本环境:
javascript
// 导入Three.js核心库
import * as THREE from "three";
// 导入OrbitControls(轨道控制器),用于用鼠标交互控制相机视角
import { OrbitControls } from "three/examples/jsm/controls/OrbitControls.js";
// 导入GUI(图形用户界面库),用于创建调试控制面板
import { GUI } from "three/examples/jsm/libs/lil-gui.module.min.js";

// 1. 创建场景(Scene) - 所有3D对象的容器
const scene = new THREE.Scene();

// 2. 创建透视相机(PerspectiveCamera)
// 参数说明:
// - 45: 视野角度(FOV)
// - window.innerWidth / window.innerHeight: 宽高比(根据窗口尺寸自动适应)
// - 0.1: 近裁剪面(Near Clipping Plane)
// - 1000: 远裁剪面(Far Clipping Plane)
const camera = new THREE.PerspectiveCamera(
  45,
  window.innerWidth / window.innerHeight,
  0.1,
  1000
);

// 3. 创建WebGL渲染器
const renderer = new THREE.WebGLRenderer();
// 设置渲染器尺寸为窗口尺寸
renderer.setSize(window.innerWidth, window.innerHeight);
// 将渲染器的canvas元素添加到HTML文档中
document.body.appendChild(renderer.domElement);
这段代码初始化了Three.js的核心组件:场景是3D对象的容器,相机决定了我们如何查看场景,而渲染器则将场景渲染到网页上。
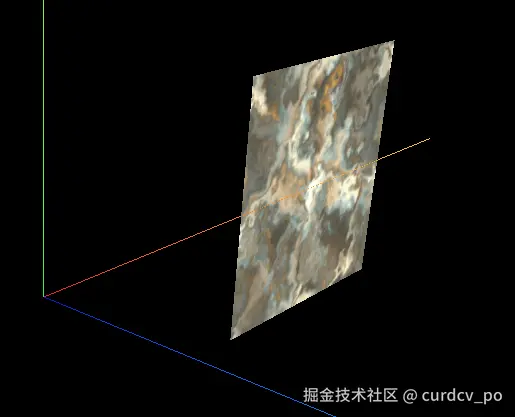
2. 创建标准平面几何体
Three.js提供了许多内置几何体,如PlaneGeometry:
javascript
// 创建2x2的平面几何体
const planeGeometry = new THREE.PlaneGeometry(2, 2);

// 加载纹理
let uvTexture = new THREE.TextureLoader().load("./texture/uv_grid_opengl.jpg");

// 创建材质并应用纹理
const planeMaterial = new THREE.MeshBasicMaterial({
  map: uvTexture,
});

// 创建网格对象并添加到场景
const planeMesh = new THREE.Mesh(planeGeometry, planeMaterial);
scene.add(planeMesh);
planeMesh.position.x = -3;PlaneGeometry会自动生成顶点和UV坐标,使纹理能够正确映射到平面上。
3. 创建自定义几何体
有时我们需要创建自定义几何体,这时可以使用BufferGeometry:
javascript
// 创建自定义几何体
const geometry = new THREE.BufferGeometry();

// 定义顶点坐标
const vertices = new Float32Array([
  -1.0, -1.0, 0.0,
  1.0, -1.0, 0.0,
  1.0, 1.0, 0.0,
  -1.0, 1.0, 0
]);

// 设置顶点属性
geometry.setAttribute("position", new THREE.BufferAttribute(vertices, 3));

// 使用索引绘制
const indices = new Uint16Array([0, 1, 2, 2, 3, 0]);
geometry.setIndex(new THREE.BufferAttribute(indices, 1));

// 设置UV坐标
const uv = new Float32Array([
  0, 0, // 左下角
  1, 0, // 右下角
  1, 1, // 右上角
  0, 1  // 左上角
]);
geometry.setAttribute("uv", new THREE.BufferAttribute(uv, 2));

// 创建材质和网格
const material = new THREE.MeshBasicMaterial({ map: uvTexture });
const plane = new THREE.Mesh(geometry, material);
scene.add(plane);
plane.position.x = 3;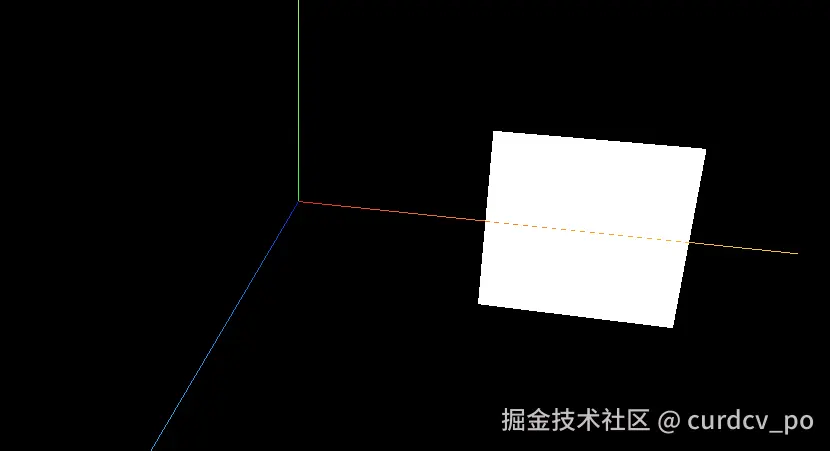
自定义几何体的关键点:
- 定义顶点坐标(每3个值表示一个顶点的x,y,z坐标)
- 设置索引来定义三角形(每3个索引表示一个三角形)
- 定义UV坐标(每2个值表示一个顶点在纹理上的位置)
4. 辅助功能和交互控制
为了便于调试和交互,我们添加了一些辅助功能:
javascript
// 添加坐标轴辅助器
const axesHelper = new THREE.AxesHelper(5);
scene.add(axesHelper);

// 添加轨道控制器
const controls = new OrbitControls(camera, renderer.domElement);
controls.enableDamping = true;
controls.dampingFactor = 0.05;

// 添加GUI控制
let eventObj = {
  Fullscreen: function() { document.body.requestFullscreen(); },
  ExitFullscreen: function() { document.exitFullscreen(); }
};

const gui = new GUI();
gui.add(eventObj, "Fullscreen").name("全屏");
gui.add(eventObj, "ExitFullscreen").name("退出全屏");
5. 渲染循环和响应式设计
最后,我们设置渲染循环和窗口大小变化的响应:
javascript
function animate() {
  controls.update();
  requestAnimationFrame(animate);
  renderer.render(scene, camera);
}
animate();

window.addEventListener("resize", () => {
  renderer.setSize(window.innerWidth, window.innerHeight);
  camera.aspect = window.innerWidth / window.innerHeight;
  camera.updateProjectionMatrix();
});
总结
Three.js中两种创建几何体的方法:
- 使用内置的
PlaneGeometry快速创建平面 - 使用
BufferGeometry自定义几何体,包括顶点、索引和UV坐标的设置
自定义几何体虽说要更多代码,但提供了更大的灵活性,可以创建任何形状的3D对象。
UV坐标对于纹理映射,它决定了2D纹理如何包裹在3D表面上。
添加轨道控制器、坐标轴辅助器和GUI界面,便于开发和调试。