🎯 在 Unity 项目中,有时需要直接调用电脑上的打印机打印图片,比如要开发一款自助拍照打卡机软件,Windows下的话基本只需要下载安装对应厂商的打印机驱动即可完成环境部署,配合我所用到的打印脚本即可测试,但是国产麒麟系统底层多基于 Linux 内核,会有系统权限及具体机型 版本适配的问题, 本文用到的打印机型号为惠普 HP 116w 激光多功能一体机,其他型号或其他品牌机器需要具体再去做测试,目前文章内容仅提供借鉴参考。
🌐首先去打印机官网下载对应设备的驱动,只要电脑能够成功连接,并且成功打印测试纸张或者测试图片那么就可以转去Unity去编写脚本啦。
✨ 一、Unity Windows 环境打印图片(支持自定义尺寸与偏移)
C#脚本使用 System.Drawing.Printing 实现打印图片功能
✅ 从配置文件读取打印参数(宽高、偏移)
✅ 自动缩放图片至打印纸大小
✅ 居中打印
✅ 支持任意本地图片文件
1.Windows下Unity工程相关设置
cs
System.Drawing
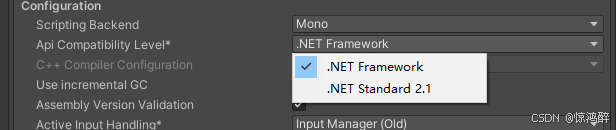
System.Drawing.Printing首先打印命名空间依赖了System.Drawing ,切换API兼容以解决报错

2.Windows环境 完整测试代码如下:
cs
using System.Collections;
using System.Collections.Generic;
using UnityEngine;
using LitJson;
using System.IO;
using System.Drawing;
using System;

public class Prints : MonoBehaviour
{
    public static Prints instance;

    private int coordinateX, coordinateY;  // 打印偏移
    private int width, height;              // 打印尺寸
    private Bitmap bitmap;                  // 位图对象
    private System.Drawing.Printing.PrintDocument printDocument1;

    private void Awake()
    {
        if (instance == null) instance = this;
    }

    void Start()
    {
        GetTxt(); // 读取配置
        printDocument1 = new System.Drawing.Printing.PrintDocument();
    }

    /// <summary>
    /// 从配置文件读取打印参数
    /// </summary>
    public void GetTxt()
    {
        var configPath = Path.Combine(Application.streamingAssetsPath + "/配置参数/", "photo.txt");
        if (File.Exists(configPath))
        {
            var json = File.ReadAllText(configPath);
            JsonData data = JsonMapper.ToObject(json);
            width = int.Parse(data["width"].ToString());
            height = int.Parse(data["height"].ToString());
            coordinateX = int.Parse(data["X"].ToString());
            coordinateY = int.Parse(data["Y"].ToString());
        }
    }

    /// <summary>
    /// 设置打印事件
    /// </summary>
    private void SetPrintInfo()
    {
        printDocument1.PrintPage += new System.Drawing.Printing.PrintPageEventHandler(printDocument1_PrintPage);
    }

    /// <summary>
    /// 打印绘制逻辑
    /// </summary>
    private void printDocument1_PrintPage(object sender, System.Drawing.Printing.PrintPageEventArgs e)
    {
        if (bitmap == null) return;

        // 获取可打印区域
        var destRect = e.MarginBounds;

        // 等比例缩放
        float ratio = Math.Min(
            (float)destRect.Width / bitmap.Width,
            (float)destRect.Height / bitmap.Height
        );

        int newWidth = width > 0 ? width : (int)(bitmap.Width * ratio);
        int newHeight = height > 0 ? height : (int)(bitmap.Height * ratio);

        // 居中位置
        int posX = destRect.X + (destRect.Width - newWidth) / 2 + coordinateX;
        int posY = destRect.Y + (destRect.Height - newHeight) / 2 + coordinateY;

        e.Graphics.DrawImage(bitmap, posX, posY, newWidth, newHeight);
    }

    /// <summary>
    /// 启动打印
    /// </summary>
    public void StartPrintList(string fileName)
    {
        string path = Path.Combine(Application.streamingAssetsPath, fileName);

        if (!File.Exists(path))
        {
            Debug.LogError("图片文件不存在:" + path);
            return;
        }

        bitmap = new Bitmap(path);
        Debug.Log($"图片加载成功: {bitmap.Width}x{bitmap.Height}");

        SetPrintInfo();
        printDocument1.Print(); // 发送到打印机
    }

    private void Update()
    {
        if (Input.GetKeyDown("y"))
        {
            StartPrintList("4.png");
        }
    }
}
3.代码细节及原理
-
核心类
-
System.Drawing.Printing.PrintDocument:.NET 提供的打印文档类,用于发送打印任务到系统默认打印机。 -
PrintPageEventHandler:用于处理每一页的绘制逻辑,比如如何绘制图片、缩放、居中等。 -
Bitmap:加载需要打印的图片。
-
-
流程
-
从
photo.txt读取配置(宽、高、X 偏移、Y 偏移) -
加载需要打印的图片
-
绑定
PrintPage事件,绘制图片到纸张可打印区域 -
调用
PrintDocument.Print()发送打印任务
-
-
可打印区域
通过
e.MarginBounds获取打印机的可用区域,并进行等比例缩放,防止图片拉伸变形。
4.配置文件(photo.txt)
配置文件存放在 StreamingAssets/配置参数/photo.txt
cs
{
    "width": 600,
    "height": 800,
    "X": 10,
    "Y": 20
}
说明
-
width/height:指定打印图片的目标尺寸(像素) -
X/Y:指定图片在纸张上的偏移量(单位:像素)
以上代码功能均在Windows环境下出包测试成功,下一步就是国产麒麟主机的探索了
✨ 二、麒麟系统打印机环境准备
1.添加打印机 以银河麒麟V10系统为例
操作方法:
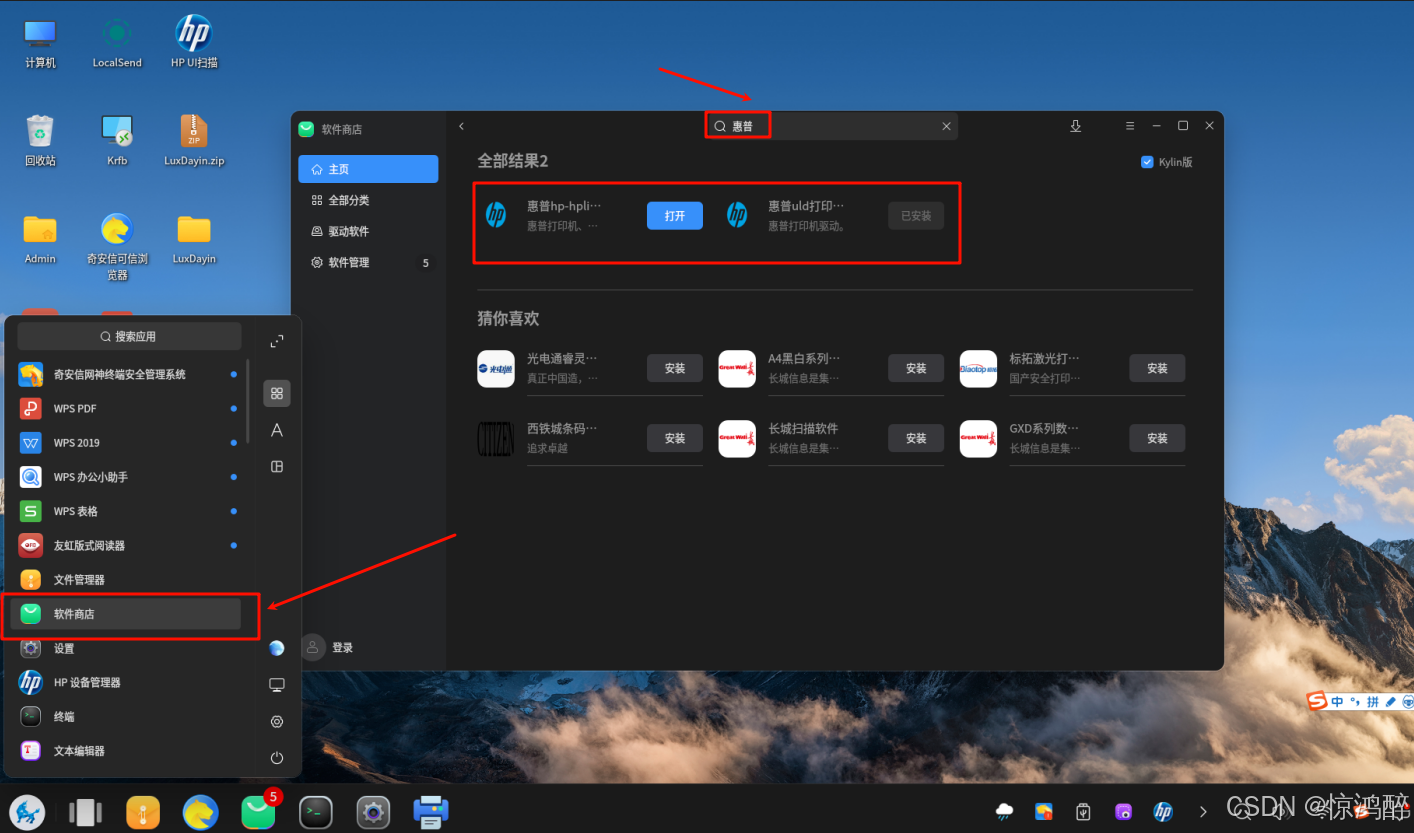
左下角点击开始,在所有程序中找到打开"软件商店" ,在商店中搜索框输入"惠普"进行搜索,搜索结果中的"hplip 打印驱动" "惠普 uld 打印驱动" "uld 打印驱动依赖"下载并安装。(新增加更新,搜索不到驱动更换关键词"全库搜索"然后安装图片所示结果)
2.连接添加打印机
安装在软件商店中下载的惠普驱动之后,可以先尝试插入 usb 线,系统自动识别安装打印机。识别安装完成即可进 行正常打印,若未识别安装或网络连接查看后续步骤
左下角点击开始,选择设置进入,在设置中点击"设备"进入,点击打印机选项,再点击添加打印机。
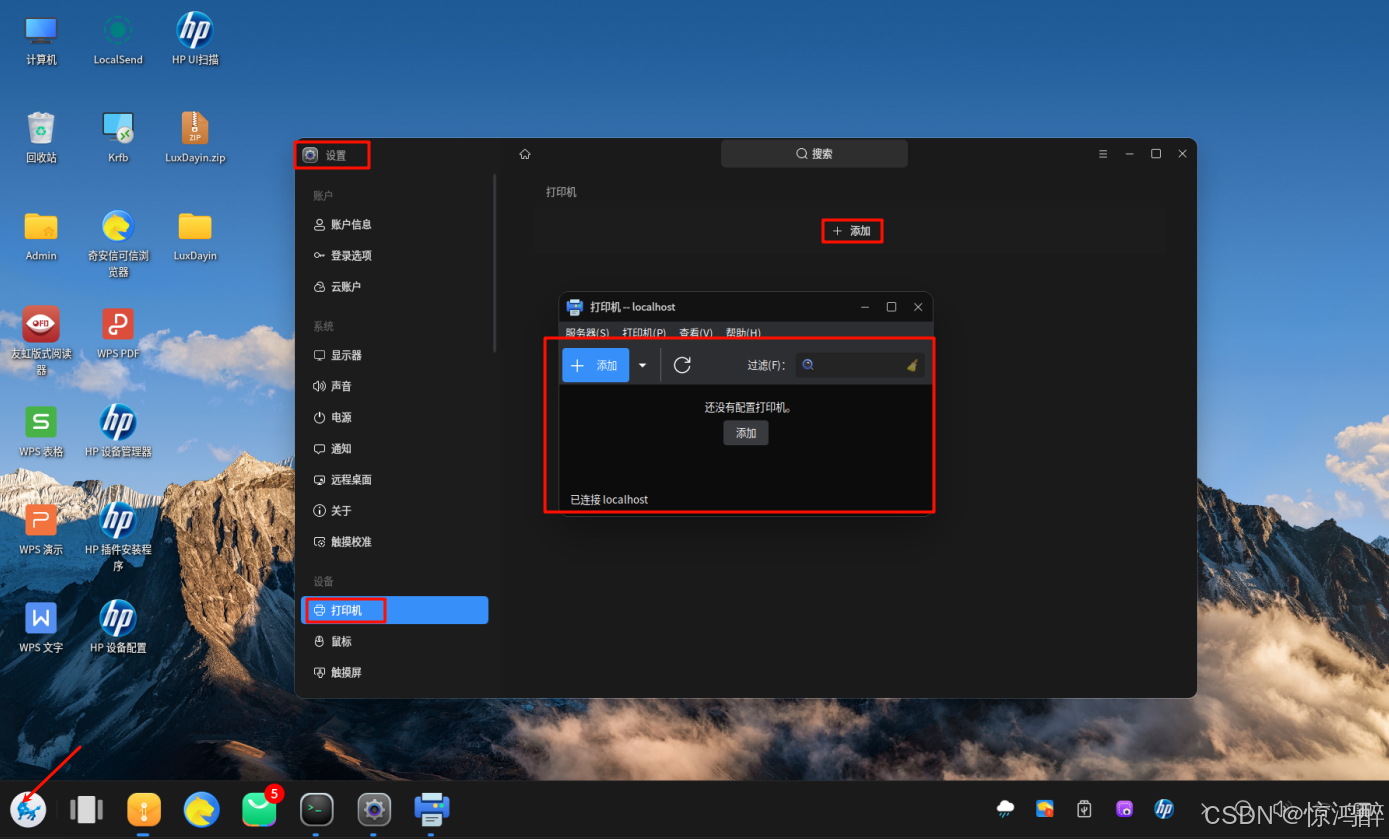
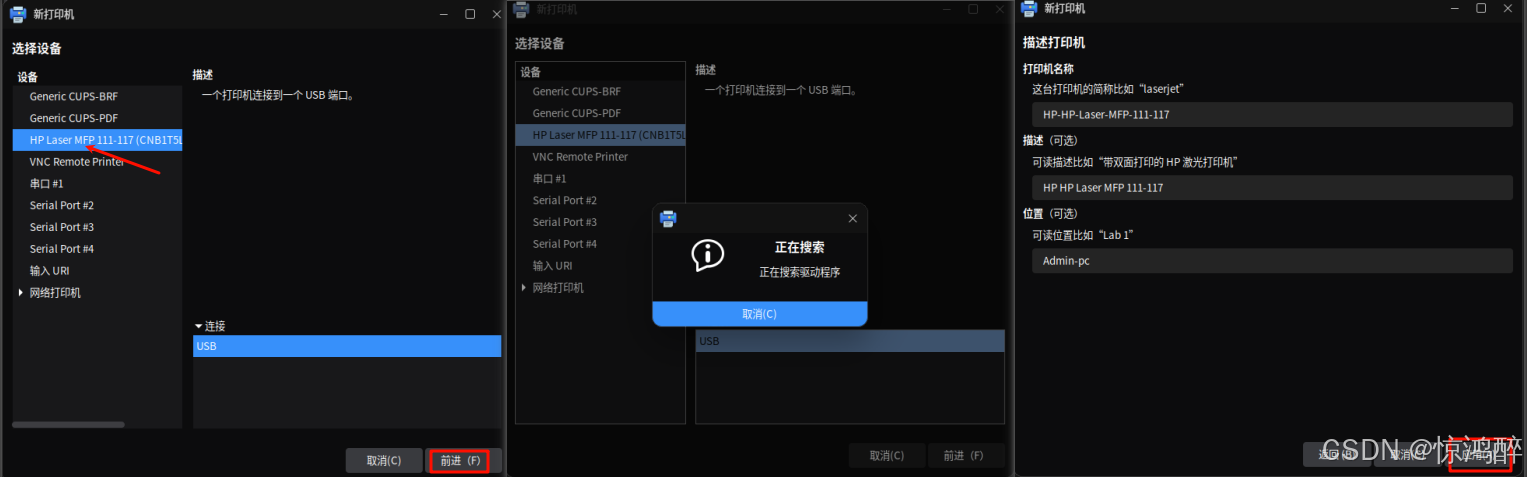
在添加界面选择搜索到的打印机选项,选择带有 HP 识别到的设备,再点击前进,自动搜索安装的驱动,添加成功提示界面,点击应用。
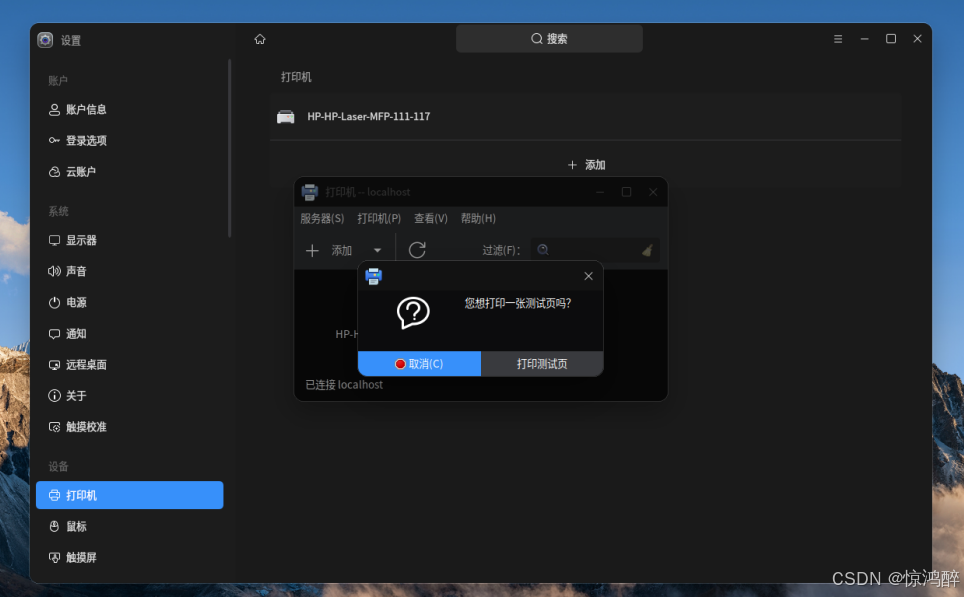
3.打印纸张测试
弹出打印测试页窗口,点击打印测试页,测试页成功打印,成功出纸后及完成了对打印机环境的配置,现在可以去着手开发的事项了。
✨ 三、Unity 打印工程移植适配 Linux(麒麟)逐步推进
展示容错,虽然知道用之前Windows编写的脚本指定不能复用,但是还是直接出了一个包运行了一下,报错信息这不就来了嘛。

1. OK,现在得捋清楚 遇到的问题是什么 为什么报错。
在 国产 Linux 上运行 Unity 打包后的程序,而咱们目前的打印功能依赖了以下命名空间。
cs
System.Drawing
System.Drawing.Printing
这些东西底层是 GDI+ ,在 Windows 里是自带的,但在 Linux(尤其是国产 Linux,比如麒麟、统信、银河麒麟等)是没有的,所以 Mono 会去找 libgdiplus.so 这个库------找不到就直接 DllNotFoundException。
2. 问题核心
-
libgdiplus是 System.Drawing 在 Linux 上的实现依赖(Mono 提供)。 -
Linux 默认不装它。
-
你用
Bitmap、PrintDocument时就会调用它。 -
打印功能 在 Unity + Linux 环境中几乎不可能直接用 GDI+,因为它本身是 Windows API 的封装。
3.怎么办?实现思路分析一波
思路1:缺啥补啥呗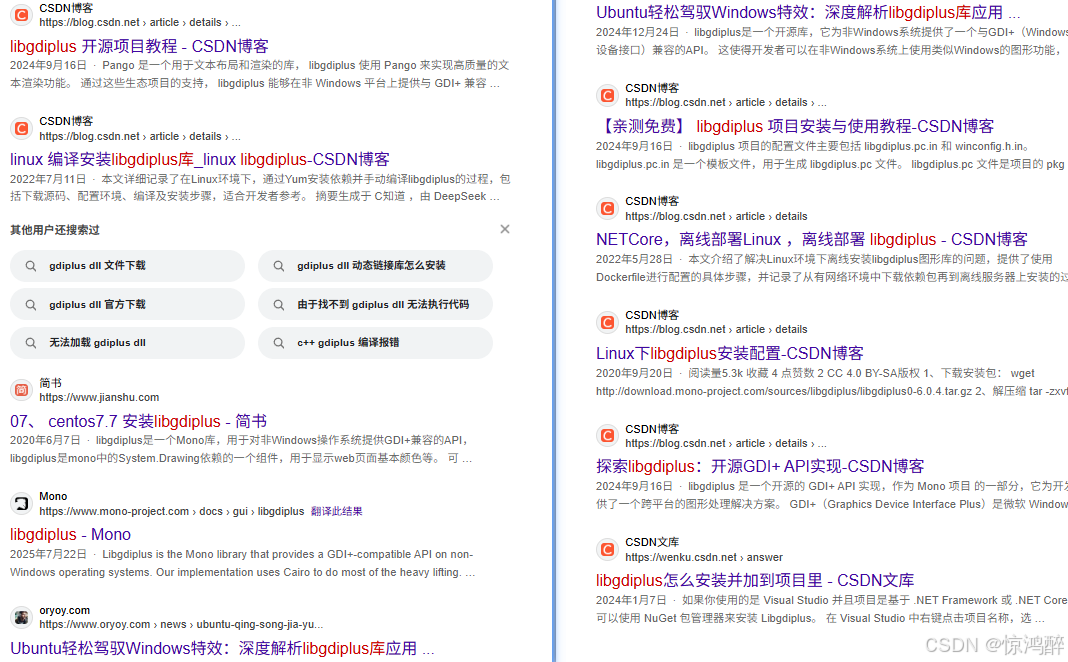
经过我的光罗搜索,发现这个库想运行在Linux中是有一些解决方向,安装 libgdiplus(只解决 Bitmap 相关,不一定能直接打印),本质是另一个坑。
对于我这种纯Unity开发来说,功能模块编写都ok,安装库这类活真是力不从心...
思路2:终端命令?
在前几天的开发中,包括配置可执行文件,自启动之类的时候,都用到了系统中的终端,查找学习后CUPS(Common UNIX Printing System)是 Linux 系统中广泛使用的打印管理系统,支持本地和网络打印机的管理。
1. 打开终端
在 KylinOS 桌面上你可以这样做:
-
方式 1 :按
Ctrl + Alt + T -
方式 2:点击左下角应用菜单 → 搜索 "终端" / "Terminal" → 打开
-
方式 3:右键桌面 → 打开终端(如果有这个选项)
2. 在终端确认打印机是否可用 尝试运行
cs
//查看打印机是否可用
lpstat -p

//打印桌面的一张图片  具体的路径可在图片属性中查看
lp /home/user/Desktop/4.png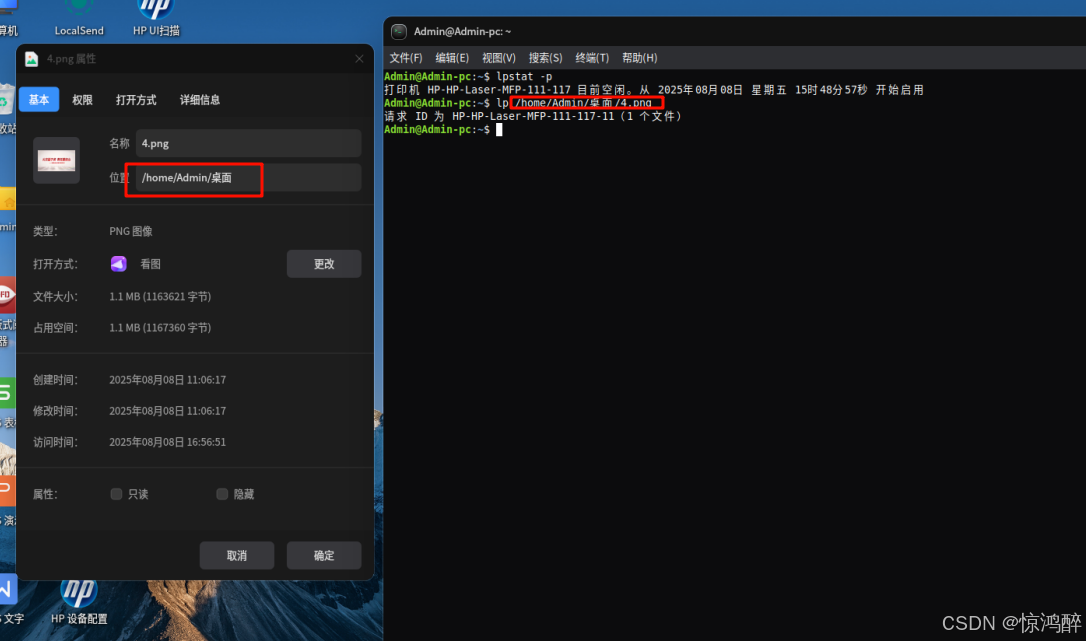
OK啊 ,现在打印机嘟嘟嘟的有反应了,用命令行成功打印了一张,现在就是在Unity 模拟一下终端 将思路付诸实践。
✨ 四、Unity中通过脚本调用打印机打印
上个阶段,我们已经用命令行的形式打印出了一张图了。
在 Unity 里,我们可以用 .NET 的 System.Diagnostics.Process 类来执行 lp 命令。
1. Process 是什么?
System.Diagnostics.Process 是 .NET 提供的一个类,用于在程序中启动另一个进程(运行外部程序或命令)。
在 Linux 下,它等效于我们在终端手动输入命令。
2. 核心配置项
-
FileName要执行的命令路径(这里是
/usr/bin/lp,绝对路径更稳妥)。可以用
which lp在终端查到。 -
Arguments命令参数,例如:
-
lp "图片路径"→ 使用默认打印机 -
lp -d 打印机名 "图片路径"→ 指定打印机
-
-
UseShellExecute = false让命令不依赖 Shell,才能重定向输出流。
-
RedirectStandardOutput / RedirectStandardError获取命令执行的标准输出(stdout)和错误输出(stderr)。
3. Linux CUPS + Process 流程图
cs
┌────────────────────────────┐
│  Unity 脚本调用 PrintOnLinux │
└──────────────┬─────────────┘
               │
               ▼
   ┌─────────────────────┐
   │ 创建 Process 实例    │
   └─────────┬───────────┘
             │
             ▼
 ┌─────────────────────────────┐
 │ 配置 ProcessStartInfo        │
 │  - FileName = "/usr/bin/lp"  │
 │  - Arguments = "文件路径"     │
 │  - UseShellExecute = false   │
 │  - Redirect 标准输出/错误    │
 └───────────┬─────────────────┘
             │
             ▼
     ┌─────────────────┐
     │ 绑定输出监听事件 │
     └─────────┬───────┘
               │
               ▼
  ┌─────────────────────────┐
  │ 调用 process.Start()     │
  │ 调用 BeginOutputReadLine │
  │ 调用 BeginErrorReadLine  │
  └────────────┬────────────┘
               │
               ▼
     ┌───────────────────┐
     │ CUPS 执行 lp 命令   │
     └─────────┬─────────┘
               │
               ▼
  ┌─────────────────────────┐
  │ 打印机接收数据并打印     │
  └─────────────────────────┘
4. 完整测试代码如下
跟之前Windows下的脚本做了 合并 能够同时支持两端的打印。
cs
using System.Collections;
using System.Collections.Generic;
using UnityEngine;
using LitJson;
using System.IO;
using System;

#if UNITY_STANDALONE_WIN
using System.Drawing;
using System.Drawing.Printing;
#endif

using System.Diagnostics; // Linux 打印命令调用

public class Prints : MonoBehaviour
{
    public static Prints instance;

    private int coordinateX, coordinateY;
    private int width, height;

#if UNITY_STANDALONE_WIN
    private Bitmap bitmap;
    private PrintDocument printDocument1;
#endif

    private void Awake()
    {
        if (instance == null) instance = this;
    }

    void Start()
    {
        GetTxt();

#if UNITY_STANDALONE_WIN
        printDocument1 = new PrintDocument();
#endif
    }

    public void GetTxt()
    {
        var path = Path.Combine(Application.streamingAssetsPath + "/配置参数/", "photo.txt");
        if (File.Exists(path))
        {
            var r = new StreamReader(path);
            JsonData data = JsonMapper.ToObject(r.ReadToEnd());
            width = int.Parse(data["width"].ToString());
            height = int.Parse(data["height"].ToString());
            coordinateX = int.Parse(data["X"].ToString());
            coordinateY = int.Parse(data["Y"].ToString());
            r.Close();
        }
    }

#if UNITY_STANDALONE_WIN
    private void SetPrintInfo()
    {
        printDocument1.PrintPage += new PrintPageEventHandler(PrintDocument_PrintPage);
    }

    private void PrintDocument_PrintPage(object sender, PrintPageEventArgs e)
    {
        if (bitmap == null) return;

        var destRect = e.MarginBounds;
        float ratio = Math.Min(
            (float)destRect.Width / bitmap.Width,
            (float)destRect.Height / bitmap.Height
        );

        int newWidth = width > 0 ? width : (int)(bitmap.Width * ratio);
        int newHeight = height > 0 ? height : (int)(bitmap.Height * ratio);

        int posX = destRect.X + (destRect.Width - newWidth) / 2 + coordinateX;
        int posY = destRect.Y + (destRect.Height - newHeight) / 2 + coordinateY;

        e.Graphics.DrawImage(bitmap, posX, posY, newWidth, newHeight);
    }
#endif

#if UNITY_STANDALONE_LINUX
    private void PrintOnLinux(string filePath, string printerName = "")
    {
        try
        {
            Process process = new Process();
            process.StartInfo.FileName = "/usr/bin/lp"; // 绝对路径,避免 PATH 问题
            if (!string.IsNullOrEmpty(printerName))
            {
                process.StartInfo.Arguments = $"-d \"{printerName}\" \"{filePath}\"";
            }
            else
            {
                process.StartInfo.Arguments = $"\"{filePath}\""; // 使用默认打印机
            }
            process.StartInfo.UseShellExecute = false;
            process.StartInfo.RedirectStandardOutput = true;
            process.StartInfo.RedirectStandardError = true;

            process.OutputDataReceived += (sender, e) =>
            {
                if (!string.IsNullOrEmpty(e.Data))
                    UnityEngine.Debug.Log("[lp 输出] " + e.Data);
            };
            process.ErrorDataReceived += (sender, e) =>
            {
                if (!string.IsNullOrEmpty(e.Data))
                    UnityEngine.Debug.LogError("[lp 错误] " + e.Data);
            };

            process.Start();
            process.BeginOutputReadLine();
            process.BeginErrorReadLine();

            UnityEngine.Debug.Log("Linux 打印命令已执行: " + process.StartInfo.FileName + " " + process.StartInfo.Arguments);
        }
        catch (Exception ex)
        {
            UnityEngine.Debug.LogError("Linux 打印失败: " + ex.Message);
        }
    }
#endif

    public void StartPrintList(string path)
    {
        path = Path.Combine(Application.streamingAssetsPath, "4.png");

        if (!File.Exists(path))
        {
            UnityEngine.Debug.LogError("图片文件不存在:" + path);
            return;
        }

#if UNITY_STANDALONE_WIN
        bitmap = new Bitmap(path);
        SetPrintInfo();
        printDocument1.Print();
#elif UNITY_STANDALONE_LINUX
        // 改成你的打印机名,如果有默认打印机可以留空
        PrintOnLinux(path, "");
#else
        Debug.LogWarning("当前平台未实现打印功能");
#endif
    }

    private void Update()
    {
        if (Input.GetKeyDown("y"))
        {
            StartPrintList("sss");
        }
    }
}
打包,设置权限,点击运行,结果如下:

✔️ 现在Unity已经成功在麒麟v10系统打印出了图片 功能跑通可以完善整体程序啦,目前基于自己的"野路子"完成,可能诸多方面还不够完善。希望这篇文章能为你后续的项目开发提供思路,也欢迎大家在评论区交流更多技巧 💬。