1、torch.nn中的Sequential介绍
结构:
torch.nn-->Containers-->Sequential
python
class torch.nn.Sequential(*args: Module)
class torch.nn.Sequential(arg: OrderedDict[str, Module])
一种顺序容器。模块将按照它们在构造函数中传递的顺序添加到其中。或者,可以传入模块的 OrderedDict。Sequential 的 forward() 方法接受任何输入并将其转发到它包含的第一个模块。然后,它将输出按顺序"链接"到每个后续模块的输入,最后返回最后一个模块的输出。
Sequential 提供的值相对于手动调用序列 的模块是它允许将整个容器视为 单个模块,以便在 Sequential 适用于它存储的每个模块(每个模块都是 Sequential 的注册子模块)。
Sequential 和 torch.nn.ModuleList的区别?ModuleList 顾名思义------一个用于存储模块的列表。另一方面, Sequential 中的层以级联方式连接。
python
# Using Sequential to create a small model. When `model` is run,
# input will first be passed to `Conv2d(1,20,5)`. The output of
# `Conv2d(1,20,5)` will be used as the input to the first
# `ReLU`; the output of the first `ReLU` will become the input
# for `Conv2d(20,64,5)`. Finally, the output of
# `Conv2d(20,64,5)` will be used as input to the second `ReLU`
model = nn.Sequential(
    nn.Conv2d(1, 20, 5), nn.ReLU(), nn.Conv2d(20, 64, 5), nn.ReLU()
)

# Using Sequential with OrderedDict. This is functionally the
# same as the above code
model = nn.Sequential(
    OrderedDict(
        [
            ("conv1", nn.Conv2d(1, 20, 5)),
            ("relu1", nn.ReLU()),
            ("conv2", nn.Conv2d(20, 64, 5)),
            ("relu2", nn.ReLU()),
        ]
    )
)
1.1 Sequential的方法
- append(module)------将给定模块附加到末尾。
参数:module (nn.Module) -- 要附加的模块
返回值:Self
python
import torch.nn as nn
n = nn.Sequential(nn.Linear(1, 2), nn.Linear(2, 3))
n.append(nn.Linear(3, 4))
Sequential(
    (0): Linear(in_features=1, out_features=2, bias=True)
    (1): Linear(in_features=2, out_features=3, bias=True)
    (2): Linear(in_features=3, out_features=4, bias=True)
)- extend(sequential)------使用另一个顺序容器中的层扩展当前顺序容器。
参数:sequential (Sequential) -- 一个顺序容器,其层将添加到当前容器中。
返回值:Self
python
import torch.nn as nn
n = nn.Sequential(nn.Linear(1, 2), nn.Linear(2, 3))
other = nn.Sequential(nn.Linear(3, 4), nn.Linear(4, 5))
n.extend(other) # or `n + other`
Sequential(
    (0): Linear(in_features=1, out_features=2, bias=True)
    (1): Linear(in_features=2, out_features=3, bias=True)
    (2): Linear(in_features=3, out_features=4, bias=True)
    (3): Linear(in_features=4, out_features=5, bias=True)
)- insert(index, module)------将模块插入指定索引处的顺序容器中。
参数: - index (int) -- 要插入模块的索引。 - module (Module) -- 要插入的模块。
返回值:Self
python
import torch.nn as nn
n = nn.Sequential(nn.Linear(1, 2), nn.Linear(2, 3))
n.insert(0, nn.Linear(3, 4))
Sequential(
    (0): Linear(in_features=3, out_features=4, bias=True)
    (1): Linear(in_features=1, out_features=2, bias=True)
    (2): Linear(in_features=2, out_features=3, bias=True)
)
2、Pytorch实战
2.1 参数设置
这里以CIFAR10数据集为例,使用如下网络模型:
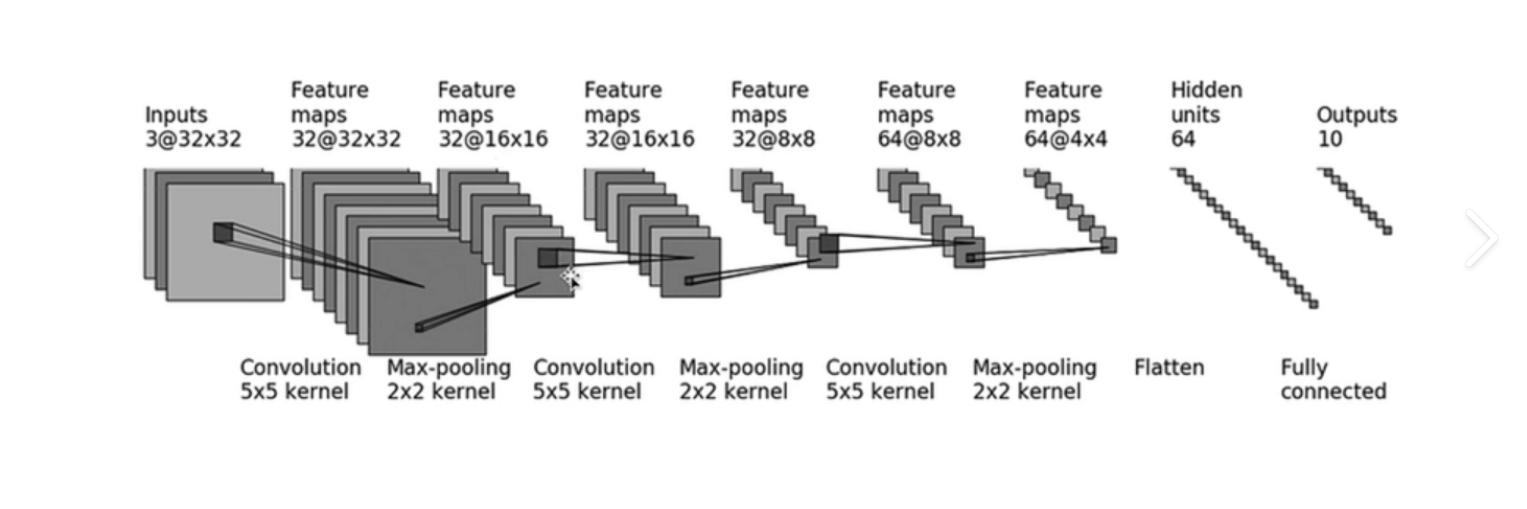
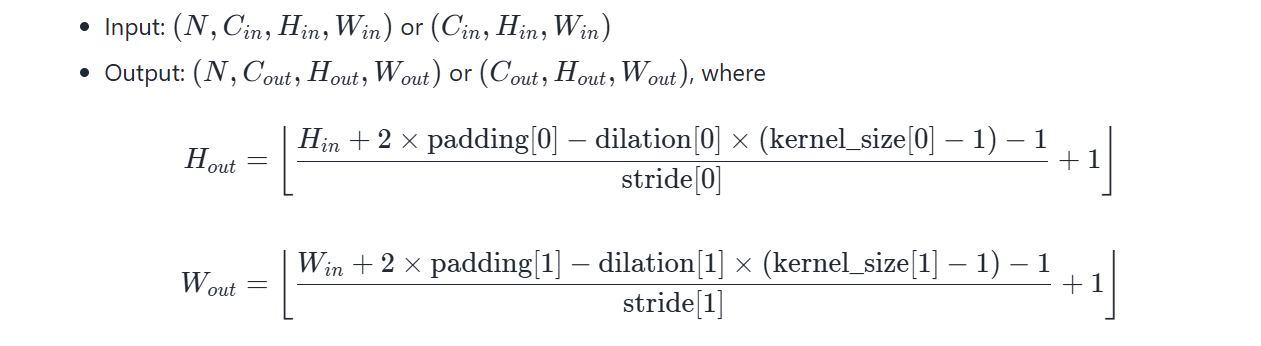
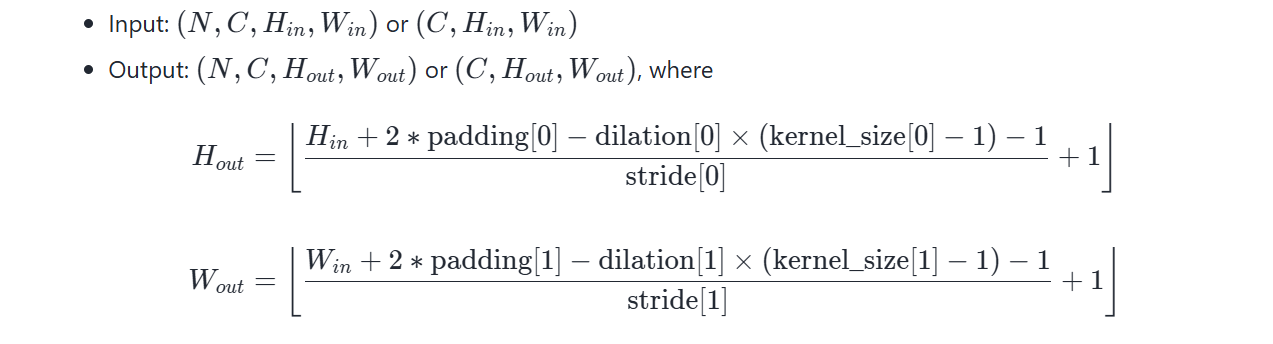
卷积层的参数可以由torch.nn.Conv2d的介绍计算得到:
最大池化层的参数可以由torch.nn.MaxPool2d的介绍计算得到:
2.2 建立网络模型并验证结构
python
# pytorch实战------sequential practice

from torch import nn
from torch.nn import Sequential, Conv2d, MaxPool2d, Flatten, Linear


class Seq(nn.Module):
    def __init__(self):
        super(Seq,self).__init__()
        self.conv1=Conv2d(3,32,5,1,2)
        self.maxpool1=MaxPool2d(2)
        self.conv2=Conv2d(32,32,5,1,2)
        self.maxpool2=MaxPool2d(2)
        self.conv3=Conv2d(32,64,5,1,2)
        self.maxpool3=MaxPool2d(2)
        self.flatten=Flatten
        self.linear1=Linear(1024,64)
        self.linear2=Linear(64,10)

    def forward(self,x):
        x=self.conv1(x)
        x=self.maxpool1(x)
        x=self.conv2(x)
        x=self.maxpool2(x)
        x=self.conv3(x)
        x=self.maxpool3(x)
        x=self.flatten(x)
        x=self.linear1(x)
        x=self.linear2(x)

        return x

seq=Seq()
print(seq)
input=torch.ones((64,3,32,32))
output=seq(input)
print(output.shape)
结果:
python
Seq(
  (conv1): Conv2d(3, 32, kernel_size=(5, 5), stride=(1, 1), padding=(2, 2))
  (maxpool1): MaxPool2d(kernel_size=2, stride=2, padding=0, dilation=1, ceil_mode=False)
  (conv2): Conv2d(32, 32, kernel_size=(5, 5), stride=(1, 1), padding=(2, 2))
  (maxpool2): MaxPool2d(kernel_size=2, stride=2, padding=0, dilation=1, ceil_mode=False)
  (conv3): Conv2d(32, 64, kernel_size=(5, 5), stride=(1, 1), padding=(2, 2))
  (maxpool3): MaxPool2d(kernel_size=2, stride=2, padding=0, dilation=1, ceil_mode=False)
  (linear1): Linear(in_features=1024, out_features=64, bias=True)
  (linear2): Linear(in_features=64, out_features=10, bias=True)
)
torch.Size([64, 10])
2.3 使用Sequential重新建立网络模型
python
# pytorch实战------sequential practice
import torch
from torch import nn
from torch.nn import Sequential, Conv2d, MaxPool2d, Flatten, Linear
class Seq(nn.Module):
def __init__(self):
super(Seq,self).__init__()
self.module=Sequential(
Conv2d(3, 32, 5, 1, 2),
MaxPool2d(2),
Conv2d(32, 32, 5, 1, 2),
MaxPool2d(2),
Conv2d(32, 64, 5, 1, 2),
MaxPool2d(2),
Flatten(),
Linear(1024, 64),
Linear(64, 10)
)
def forward(self,x):
x=self.module(x)
return x
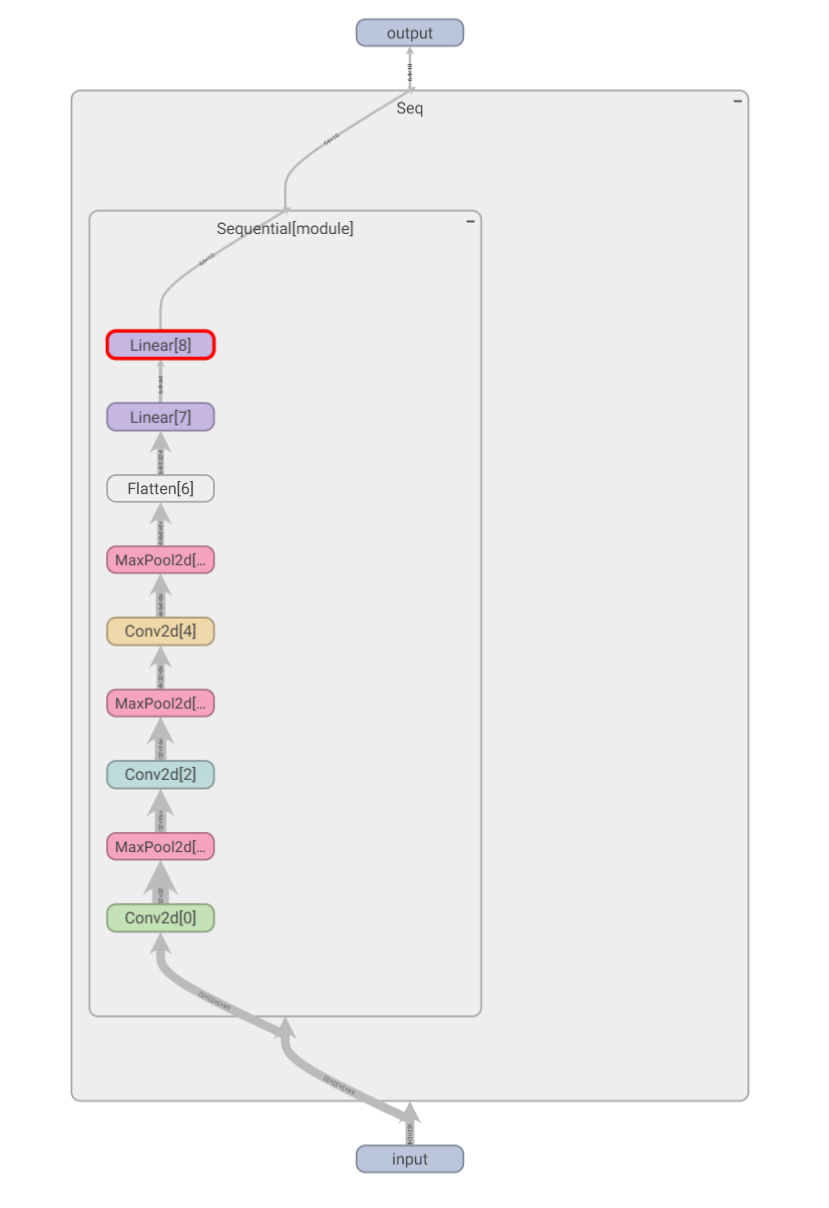
seq=Seq()2.4 使用Tensorboard可视化网络结构
Tensorboard学习笔记:Pytorch中Tensorboard的学习
python
# pytorch实战------sequential practice
import torch
from torch import nn
from torch.nn import Sequential, Conv2d, MaxPool2d, Flatten, Linear
from torch.utils.tensorboard import SummaryWriter


class Seq(nn.Module):
    def __init__(self):
        super(Seq,self).__init__()

        self.module=Sequential(
            Conv2d(3, 32, 5, 1, 2),
            MaxPool2d(2),
            Conv2d(32, 32, 5, 1, 2),
            MaxPool2d(2),
            Conv2d(32, 64, 5, 1, 2),
            MaxPool2d(2),
            Flatten(),
            Linear(1024, 64),
            Linear(64, 10)
        )

    def forward(self,x):
        x=self.module(x)
        return x

seq=Seq()
print(seq)
input=torch.ones((64,3,32,32))
output=seq(input)
print(output.shape)

writer=SummaryWriter(".\logs_seq")
writer.add_graph(seq,input)
writer.close()
在终端进入当前环境,输入命令:
python
(mypytorch) PS E:\my_pycharm_projects\project1> tensorboard --logdir=logs_seq
#结果:
TensorFlow installation not found - running with reduced feature set.
W0811 23:16:22.249774 31868 plugin_event_accumulator.py:369] Found more than one graph event p
er run, or there was a metagraph containing a graph_def, as well as one or more graph events.  Overwriting the graph with the newest event.
Serving TensorBoard on localhost; to expose to the network, use a proxy or pass --bind_all
TensorBoard 2.19.0 at http://localhost:6006/ (Press CTRL+C to quit)
打开网址:
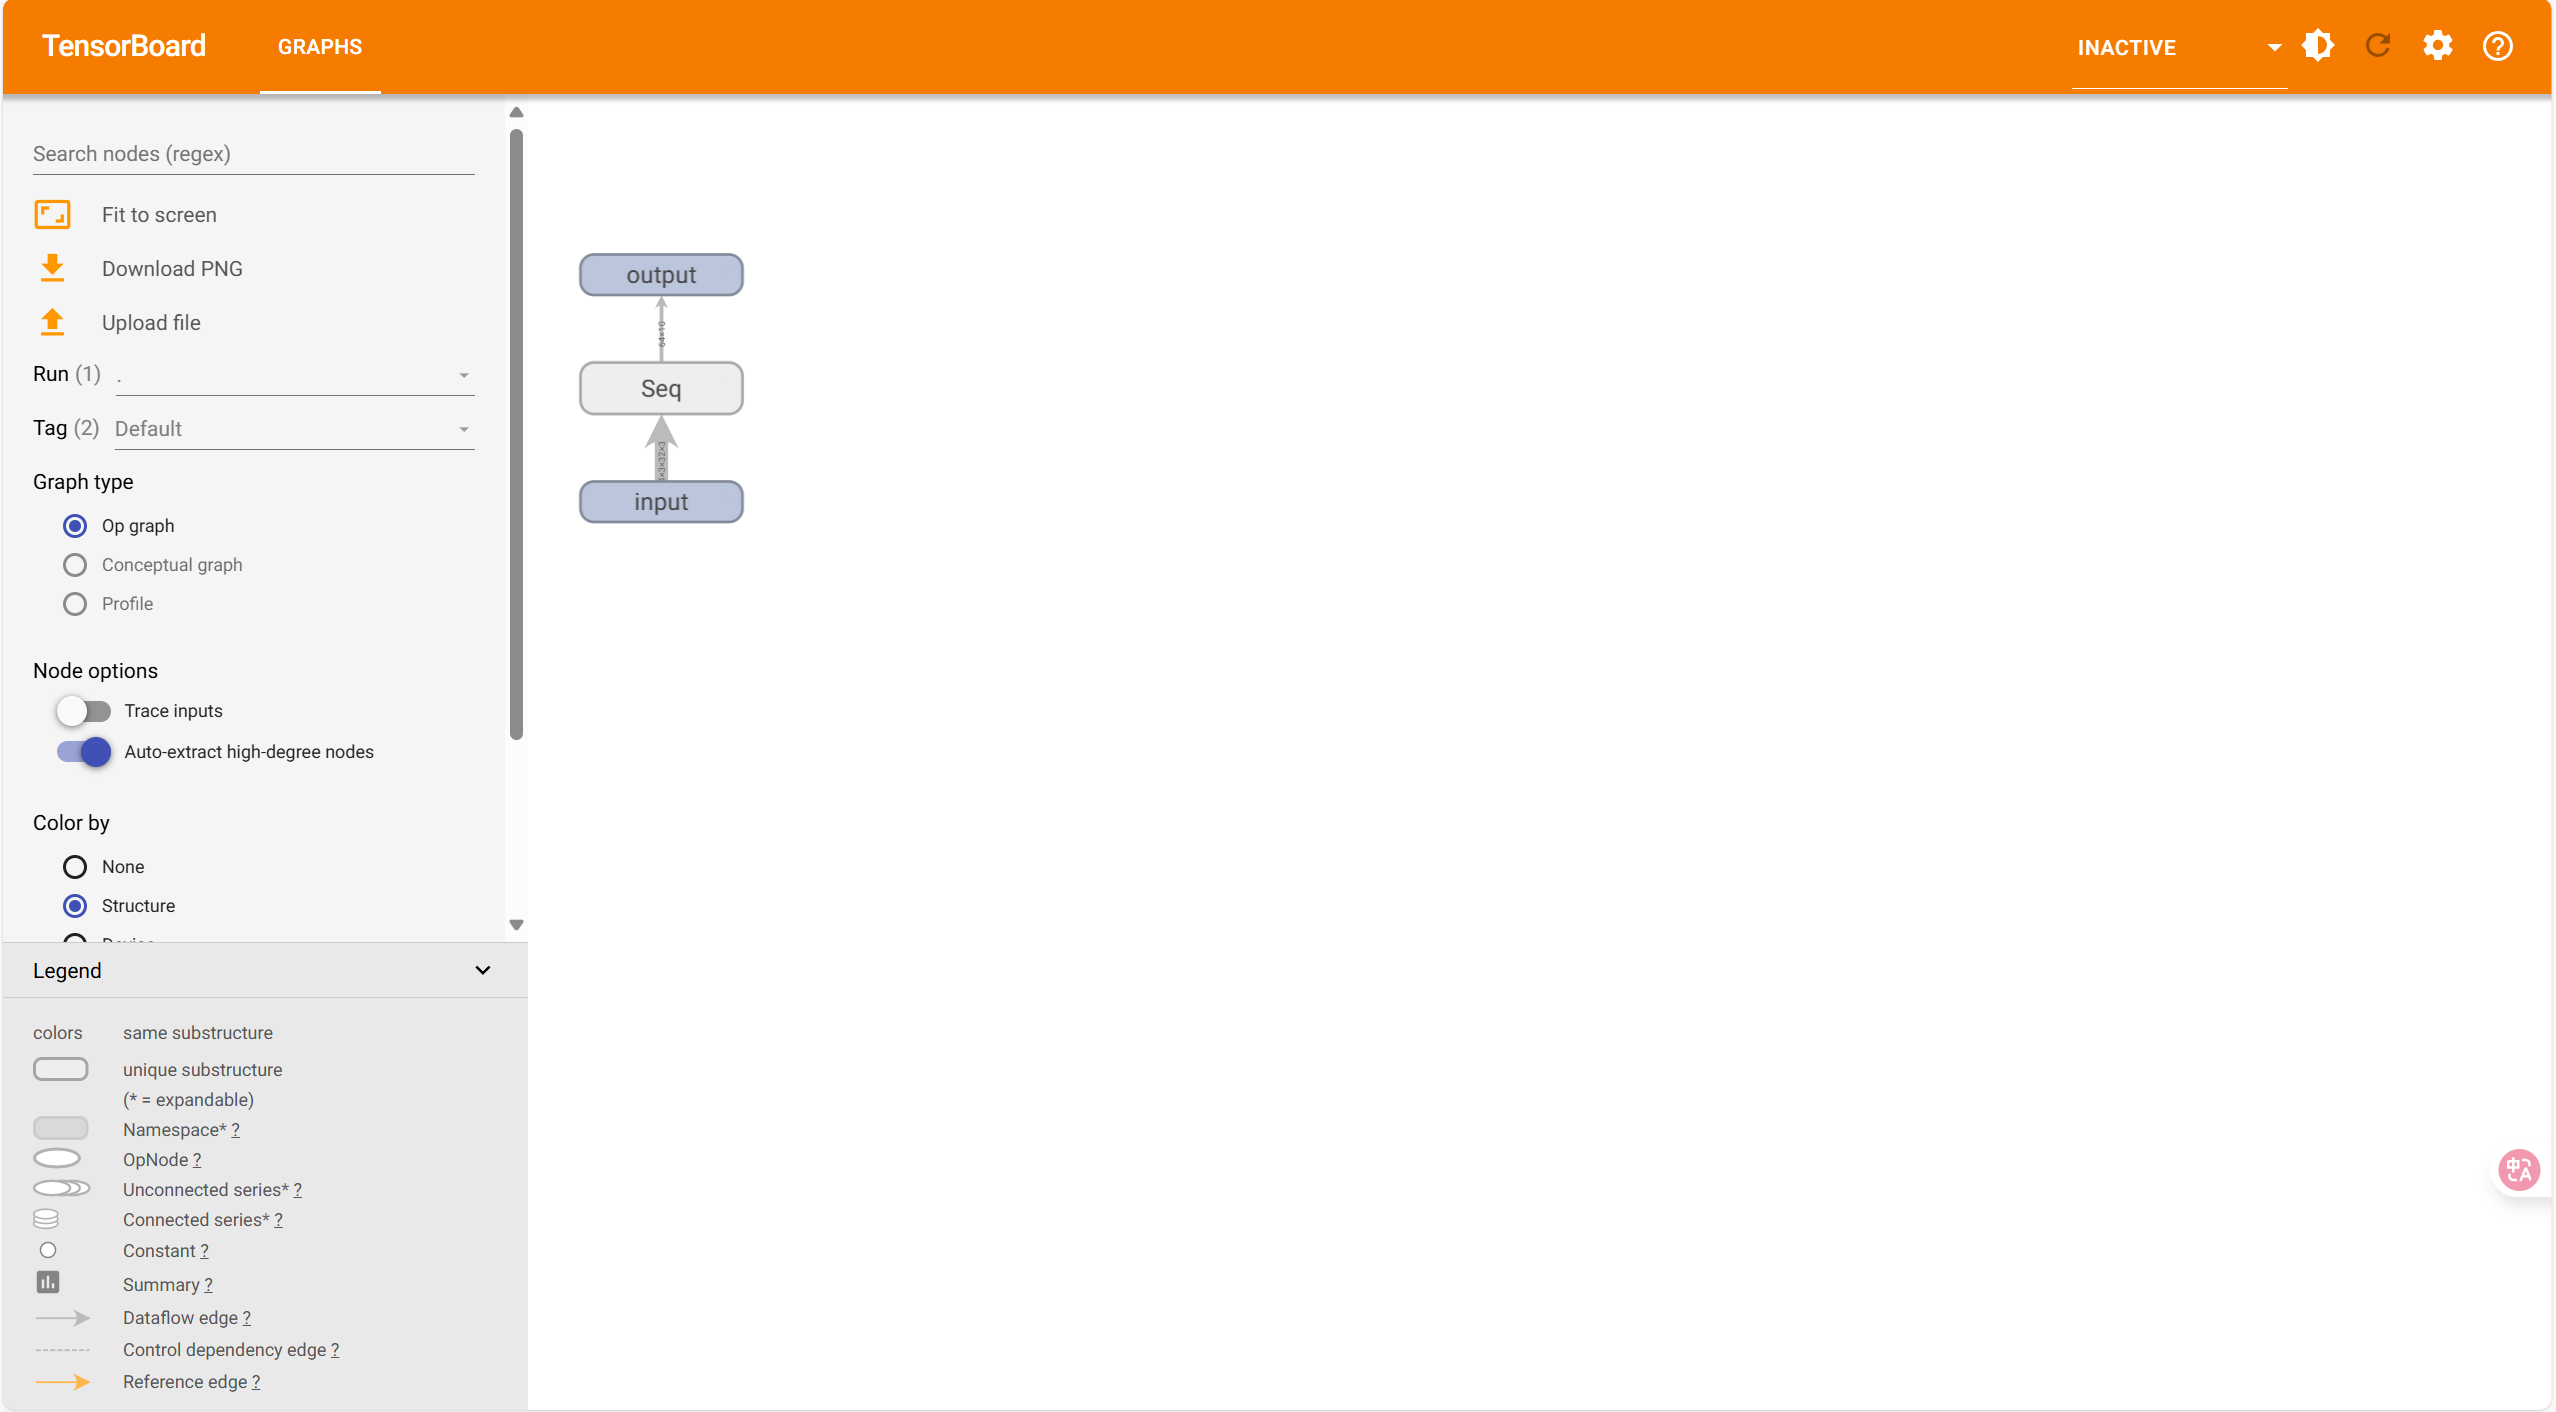
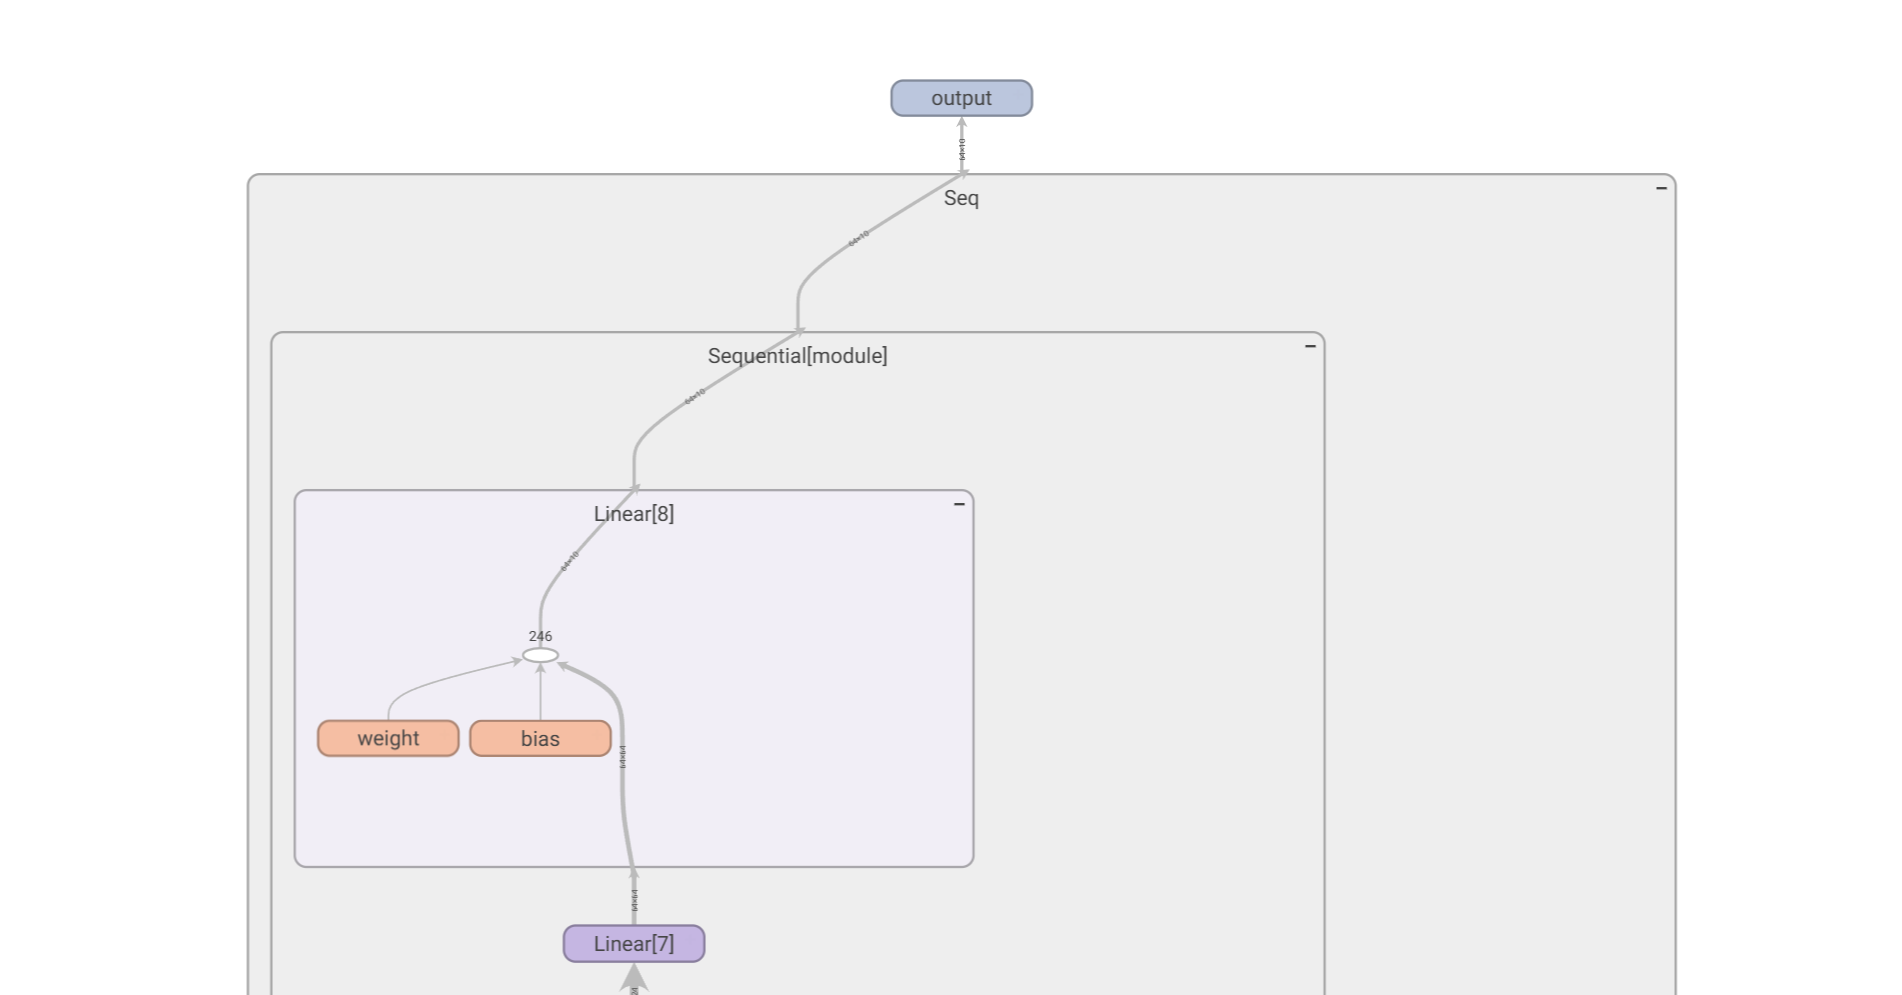
双击放大查看模型结构细节: