一、功能概述与实现步骤
1.1 功能需求
-
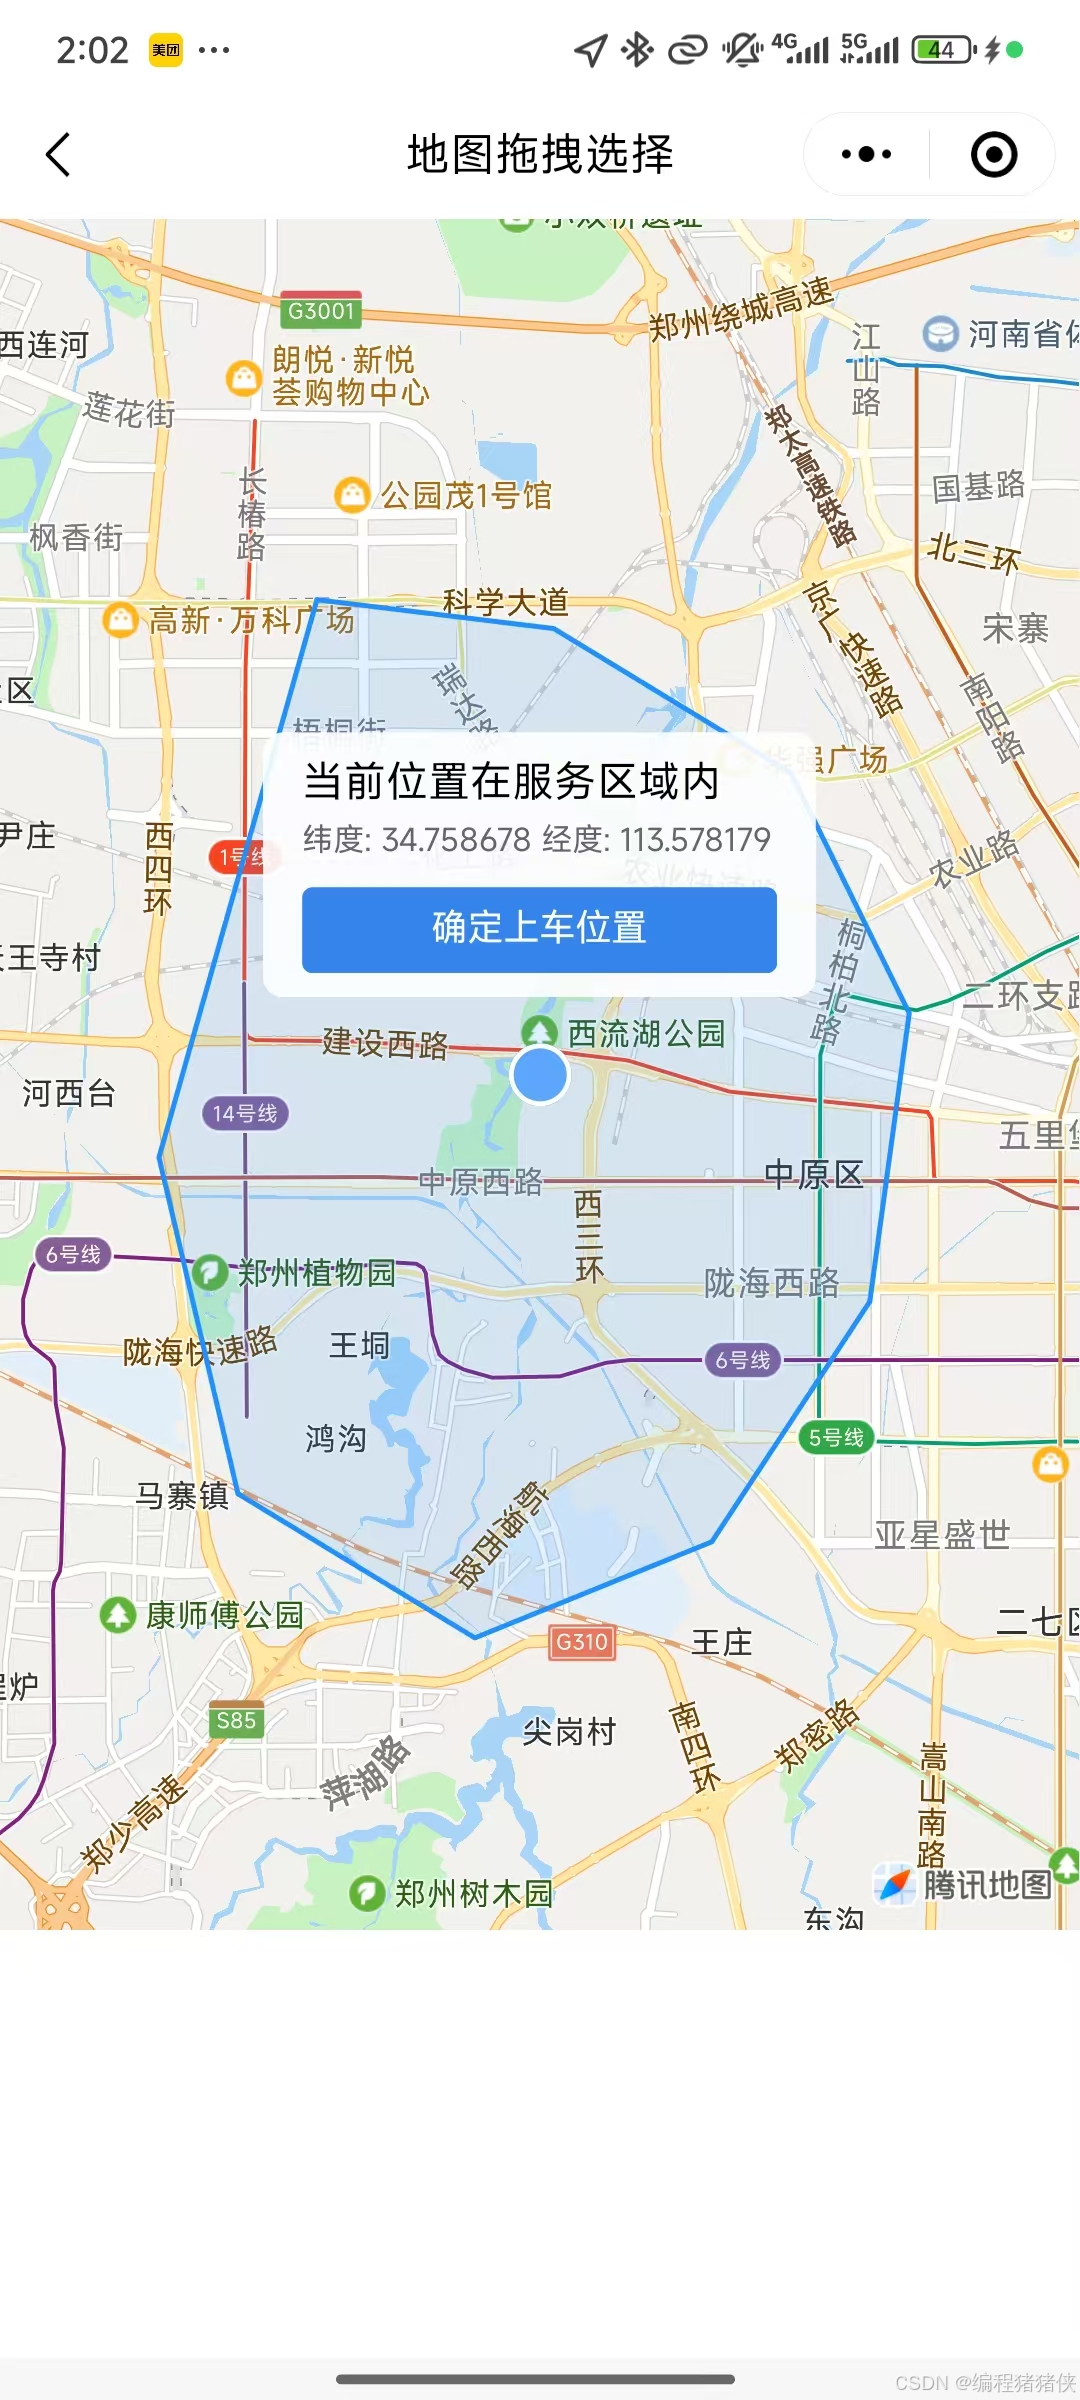
显示地图并固定中心点标记
-
绘制服务区域多边形边界
-
实时检测拖拽后位置是否在服务区内
-
提供位置确认和超出范围提示功能
1.2 实现步骤分解
第一步:初始化地图基础配置
-
创建Map组件并设置基本属性
-
定义服务区域多边形坐标
-
设置地图初始中心点
第二步:实现地图交互逻辑
-
监听地图拖拽事件
-
获取拖拽后中心点坐标
-
判断坐标是否在服务区内
第三步:实现覆盖层UI
-
固定中心点标记
-
位置信息显示面板
-
操作按钮(确认/返回服务区)
二、分步骤代码实现
2.1 第一步:地图基础配置
javascript<template> <view class="map-container"> <map id="map" style="width: 100%; height: 80vh" :latitude="center.latitude" :longitude="center.longitude" :polygons="polygons" @regionchange="handleMapDrag" :show-location="true" > <!-- 覆盖层将在第三步添加 --> </map> </view> </template> <script setup> import { ref, onMounted } from "vue"; // 服务区域边界坐标 const serviceAreaPolygon = [ { latitude: 34.808, longitude: 113.55 }, { latitude: 34.805, longitude: 113.58 }, // ...其他坐标点 { latitude: 34.808, longitude: 113.55 } // 闭合多边形 ]; // 中心点位置 const center = ref({ latitude: 34.747, longitude: 113.625 }); // 多边形配置 const polygons = ref([{ points: serviceAreaPolygon, strokeWidth: 2, strokeColor: "#1E90FF", fillColor: "#1E90FF22" }]); // 初始化地图上下文 const mapContext = ref(null); onMounted(() => { mapContext.value = uni.createMapContext("map"); }); </script>2.2 第二步:地图交互逻辑实现
javascript// 当前坐标点 const currentPos = ref({ ...center.value }); // 是否在服务区内 const isInServiceArea = ref(true); // 地图拖拽事件处理 const handleMapDrag = (e) => { if (e.type === "end") { mapContext.value.getCenterLocation({ success: (res) => { currentPos.value = { latitude: res.latitude, longitude: res.longitude }; // 判断是否在服务区内 isInServiceArea.value = isPointInPolygon( currentPos.value, serviceAreaPolygon ); } }); } }; // 射线法判断点是否在多边形内 function isPointInPolygon(point, polygon) { const { latitude, longitude } = point; let inside = false; for (let i = 0, j = polygon.length - 1; i < polygon.length; j = i++) { const xi = polygon[i].longitude, yi = polygon[i].latitude; const xj = polygon[j].longitude, yj = polygon[j].latitude; const intersect = ((yi > latitude) !== (yj > latitude)) && (longitude < (xj - xi) * (latitude - yi) / (yj - yi) + xi); if (intersect) inside = !inside; } return inside; }2.3 第三步:覆盖层UI实现
javascript<!-- 在map标签内添加 --> <cover-view class="center-marker"></cover-view> <cover-view class="info-box" :class="{ 'out-of-range': !isInServiceArea }"> <cover-view v-if="isInServiceArea"> 当前位置在服务区域内 </cover-view> <cover-view v-else class="error"> 当前选择位置超出服务区域 </cover-view> <cover-view class="coords"> 纬度: {{ currentPos.latitude.toFixed(6) }} 经度: {{ currentPos.longitude.toFixed(6) }} </cover-view> <cover-view v-if="!isInServiceArea" class="recenter-btn" @tap="centerToServiceArea" > 查看最近的服务区域 </cover-view> <cover-view v-else class="confirm-btn" @tap="confirmLocation" > 确定上车位置 </cover-view> </cover-view>2.4 第四步:业务功能完善
javascript// 返回服务区中心 const centerToServiceArea = () => { const center = getPolygonCenter(serviceAreaPolygon); currentPos.value = { ...center }; isInServiceArea.value = true; mapContext.value.moveToLocation({ latitude: center.latitude, longitude: center.longitude }); }; // 计算多边形中心点 function getPolygonCenter(polygon) { let latSum = 0, lngSum = 0; polygon.forEach(point => { latSum += point.latitude; lngSum += point.longitude; }); return { latitude: latSum / polygon.length, longitude: lngSum / polygon.length }; } // 确认位置 const confirmLocation = () => { uni.showToast({ title: `位置已确认: ${currentPos.value.latitude.toFixed(6)}, ${currentPos.value.longitude.toFixed(6)}`, icon: "none" }); // 实际业务中可以触发回调或跳转 };三、完整实现代码
javascript<template> <view class="map-container"> <map id="map" style="width: 100%; height: 80vh" :latitude="center.latitude" :longitude="center.longitude" :polygons="polygons" @regionchange="handleMapDrag" :show-location="true" > <cover-view class="center-marker"></cover-view> <cover-view class="info-box" :class="{ 'out-of-range': !isInServiceArea }"> <cover-view v-if="isInServiceArea">当前位置在服务区域内</cover-view> <cover-view v-else class="error">当前选择位置超出服务区域</cover-view> <cover-view class="coords"> 纬度: {{ currentPos.latitude.toFixed(6) }} 经度: {{ currentPos.longitude.toFixed(6) }} </cover-view> <cover-view v-if="!isInServiceArea" class="recenter-btn" @tap="centerToServiceArea" > 查看最近的服务区域 </cover-view> <cover-view v-else class="confirm-btn" @tap="confirmLocation" > 确定上车位置 </cover-view> </cover-view> </map> </view> </template> <script setup> import { ref, onMounted } from "vue"; // 服务区域边界 const serviceAreaPolygon = [ { latitude: 34.808, longitude: 113.55 }, { latitude: 34.805, longitude: 113.58 }, { latitude: 34.79, longitude: 113.61 }, { latitude: 34.765, longitude: 113.625 }, { latitude: 34.735, longitude: 113.62 }, { latitude: 34.71, longitude: 113.6 }, { latitude: 34.7, longitude: 113.57 }, { latitude: 34.715, longitude: 113.54 }, { latitude: 34.75, longitude: 113.53 }, { latitude: 34.808, longitude: 113.55 } ]; const center = ref(getPolygonCenter(serviceAreaPolygon)); const currentPos = ref({ ...center.value }); const isInServiceArea = ref(true); const mapContext = ref(null); const polygons = ref([{ points: serviceAreaPolygon, strokeWidth: 2, strokeColor: "#1E90FF", fillColor: "#1E90FF22" }]); onMounted(() => { mapContext.value = uni.createMapContext("map"); }); const handleMapDrag = (e) => { if (e.type === "end") { mapContext.value.getCenterLocation({ success: (res) => { currentPos.value = { latitude: res.latitude, longitude: res.longitude }; isInServiceArea.value = isPointInPolygon( currentPos.value, serviceAreaPolygon ); } }); } }; function isPointInPolygon(point, polygon) { const { latitude, longitude } = point; let inside = false; for (let i = 0, j = polygon.length - 1; i < polygon.length; j = i++) { const xi = polygon[i].longitude, yi = polygon[i].latitude; const xj = polygon[j].longitude, yj = polygon[j].latitude; const intersect = ((yi > latitude) !== (yj > latitude)) && (longitude < (xj - xi) * (latitude - yi) / (yj - yi) + xi); if (intersect) inside = !inside; } return inside; } function getPolygonCenter(polygon) { let latSum = 0, lngSum = 0; polygon.forEach(point => { latSum += point.latitude; lngSum += point.longitude; }); return { latitude: latSum / polygon.length, longitude: lngSum / polygon.length }; } const centerToServiceArea = () => { const center = getPolygonCenter(serviceAreaPolygon); currentPos.value = { ...center }; isInServiceArea.value = true; mapContext.value.moveToLocation({ latitude: center.latitude, longitude: center.longitude }); }; const confirmLocation = () => { uni.showToast({ title: `位置已确认: ${currentPos.value.latitude.toFixed(6)}, ${currentPos.value.longitude.toFixed(6)}`, icon: "none" }); }; </script> <style scoped> .map-container { width: 100%; height: 100vh; position: relative; } .center-marker { position: absolute; top: 50%; left: 50%; transform: translate(-50%, -50%); width: 20px; height: 20px; background-color: #5ca7fc; border-radius: 50%; border: 2px solid white; z-index: 999; } .info-box { position: absolute; top: 20%; left: 50%; transform: translateX(-50%); background: rgba(255, 255, 255, 0.9); padding: 12px 16px; border-radius: 8px; width: 80%; box-shadow: 0 2px 8px rgba(0,0,0,0.1); } .info-box.out-of-range { background: rgba(255, 240, 240, 0.9); } .coords { font-size: 12px; color: #666; margin: 8px 0; } .error { color: #f56c6c; font-weight: bold; } .recenter-btn, .confirm-btn { margin-top: 10px; padding: 8px 12px; border-radius: 4px; text-align: center; font-size: 14px; } .recenter-btn { background: #606266; color: white; } .confirm-btn { background: #409eff; color: white; } </style>四、总结
本文分步骤详细讲解了如何使用Uni-app实现地图位置选择功能,从基础配置到完整实现,重点介绍了:
-
地图基础配置方法
-
多边形区域绘制与判断
-
交互逻辑的实现
-
覆盖层UI的开发技巧
-
.moveToLocation移动api 只有在真机才能实现,微信开发者工具不支持
-
可直接复制完整代码到单页测试运行,欢迎补充问题