一、项目创建阶段的配置初始化
1. Vue CLI 中的 ESLint 集成
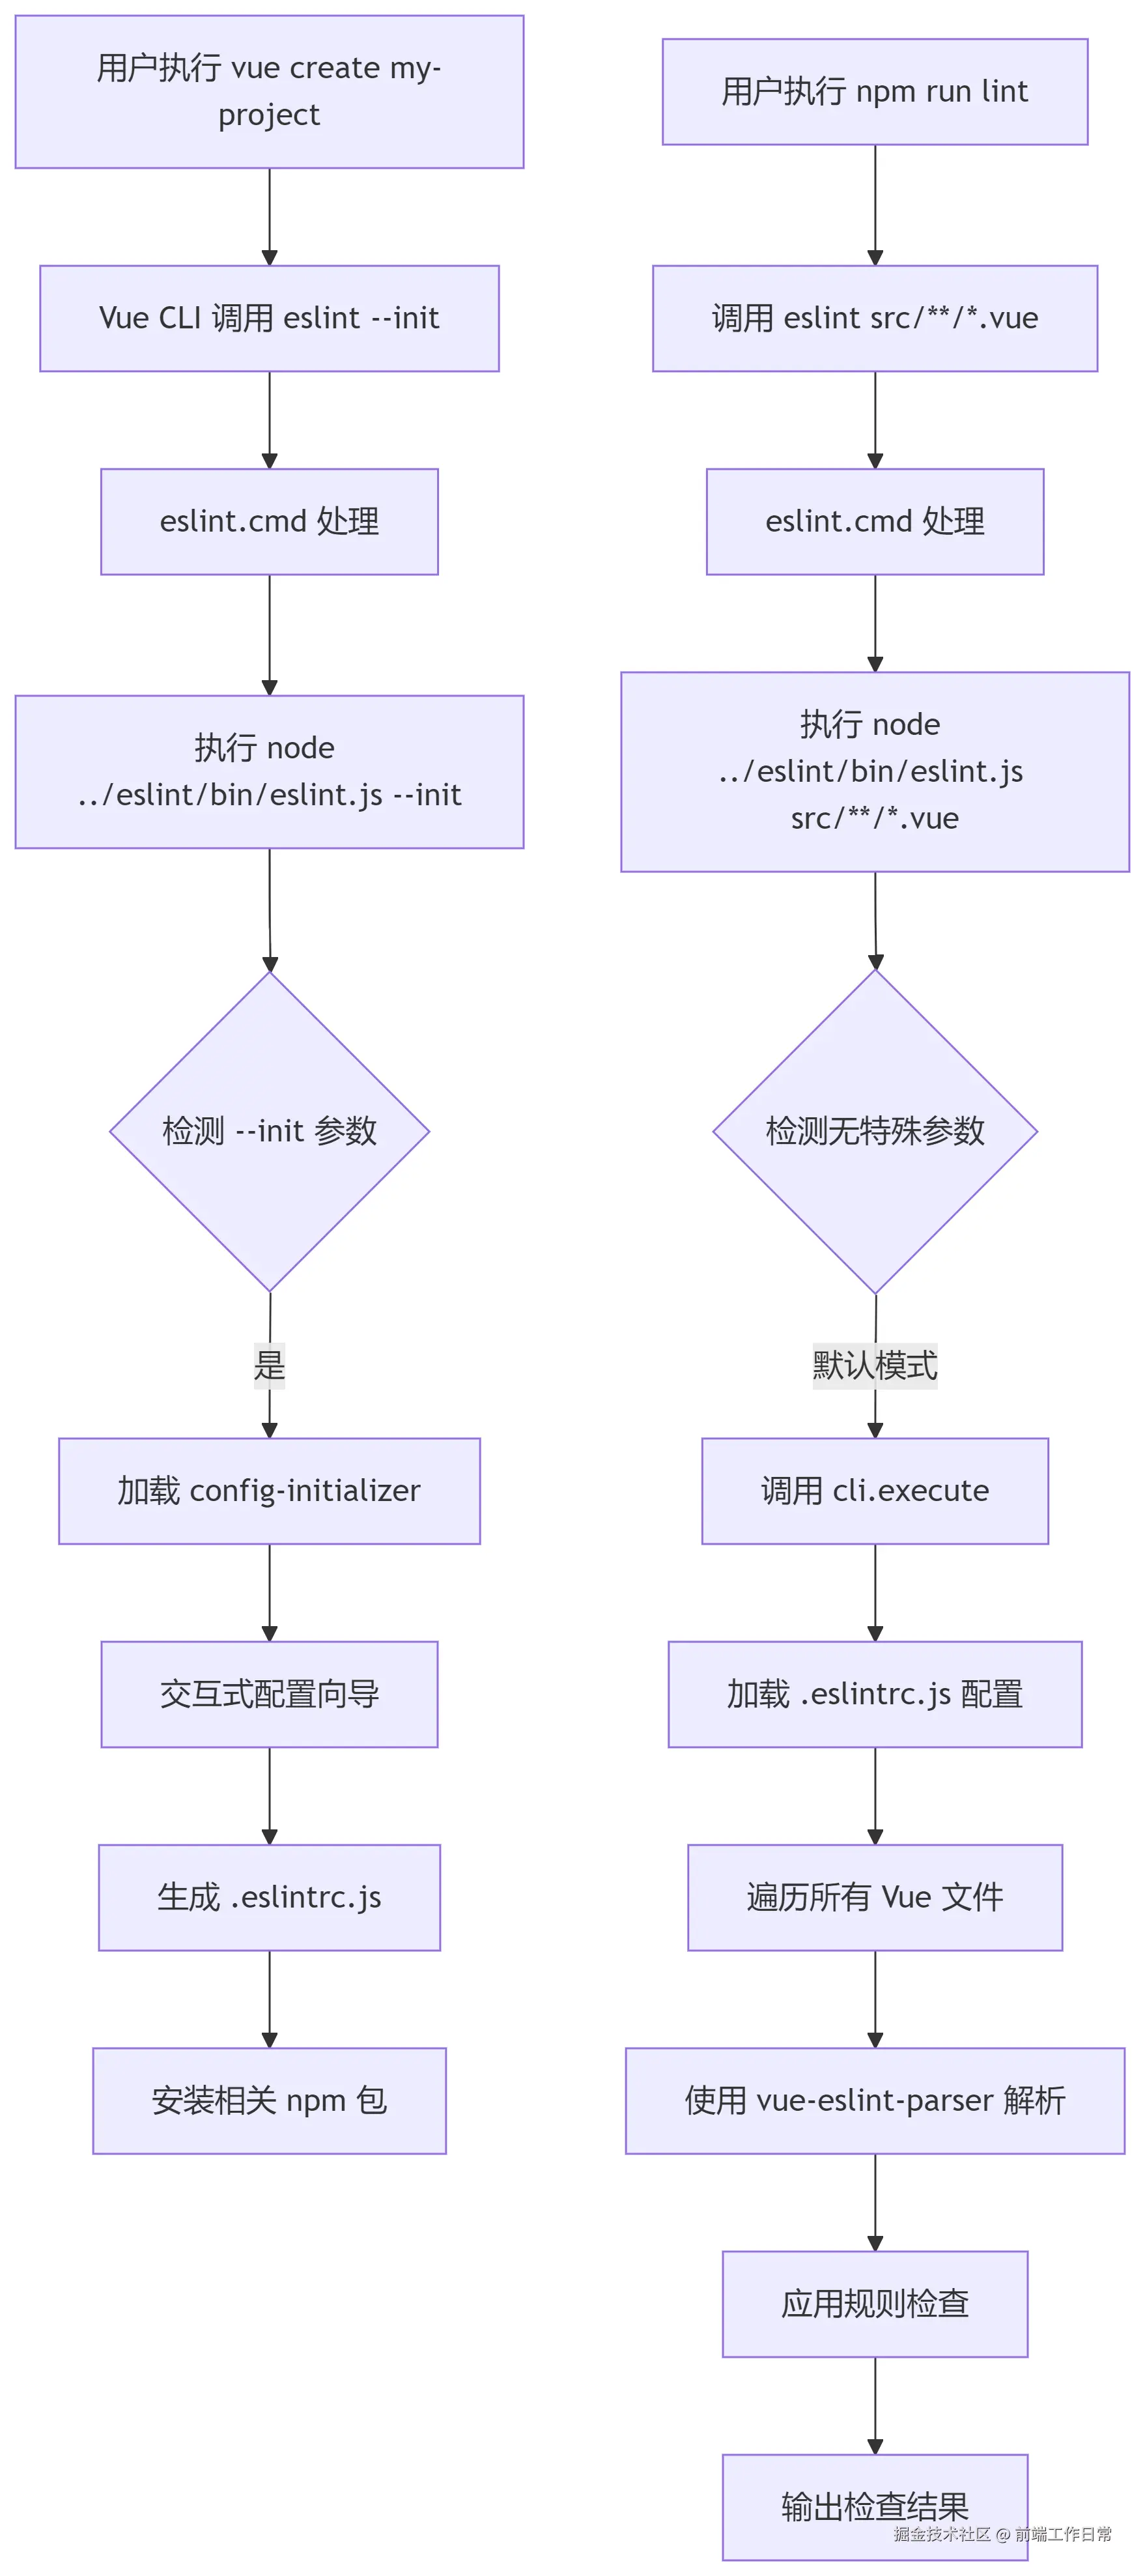
当运行 vue create my-project 并选择 ESLint 时:
csharp
# 内部执行流程
vue create → 调用 eslint --init → 生成 Vue 专用配置
2. 自动生成的 Vue 配置
java
// .eslintrc.js
module.exports = {
  env: { browser: true, es2021: true },
  extends: [
    'plugin:vue/essential', // Vue 特有规则
    'eslint:recommended'    // ESLint 推荐规则
  ],
  parserOptions: {
    ecmaVersion: 12,
    sourceType: 'module',
    parser: 'babel-eslint'  // 支持 ES 新特性
  },
  plugins: ['vue'],         // Vue 插件
  rules: {
    'vue/multi-word-component-names': 'off' // 关闭单名单词组件警告
  }
};
3. 依赖自动安装
Vue CLI 会自动安装所需依赖:
json
{
  "devDependencies": {
    "eslint": "^8.0.0",
    "eslint-plugin-vue": "^9.0.0",
    "babel-eslint": "^10.1.0"
  }
}
二、开发阶段的实时检查
1. 编辑器集成原理
VSCode ESLint 插件的工作机制:
markdown
// 编辑保存时触发
1. 获取当前文件内容
2. 执行: eslint --stdin --stdin-filename App.vue
3. 传输内容到标准输入
4. 获取并显示检查结果
2. Vue 单文件组件的特殊处理
对于 .vue 文件,ESLint 需要:
markdown
1. 使用 vue-eslint-parser 解析器
2. 分离 template/script/style 三部分
3. 对每部分应用相应规则
4. 合并结果显示
三、构建前的质量检查
1. package.json 中的检查脚本
json
{
  "scripts": {
    "lint": "eslint --ext .js,.vue src",  // 实际调用 node_modules/.bin/eslint
    "lint:fix": "npm run lint -- --fix"
  }
}
2. 完整的检查流程
当运行 npm run lint 时:
npm run lint触发命令- npm 会在
node_modules/.bin中查找eslint(Windows 执行.cmd,Unix 执行无后缀脚本) - 通过符号链接定位到
node_modules/eslint/bin/eslint.js - 执行该文件(首行
#!/usr/bin/env node告诉系统用 Node.js 运行) - 检查无特殊参数,走默认模式,调用cli.execute
- 加载配置,遍历vue文件,解析并检查规则,输出结果
3. 自动修复机制
xml
// --fix 的工作流程
1. 检测可自动修复的问题
2. 应用修复规则生成新代码
3. 写回原文件(需磁盘权限)
4. 输出修复统计信息

// Vue 模板修复示例
<template>
  <!-- 修复前 -->
  <div v-if="show" v-if="error"/>
  <!-- 修复后 -->
  <div v-if="show"/>
</template>
四、提交前的强制验证
1. Git Hooks 集成
通过 husky + lint-staged 实现提交前检查:
json
{
  "husky": {
    "hooks": {
      "pre-commit": "lint-staged"
    }
  },
  "lint-staged": {
    "*.{js,vue}": ["eslint --fix", "git add"]
  }
}
2. CI/CD 流水线检查
在 GitHub Actions 中的配置示例:
yaml
name: ESLint Check
on: [push, pull_request]
jobs:
  lint:
    runs-on: ubuntu-latest
    steps:
    - uses: actions/checkout@v2
    - run: npm ci
    - run: npm run lint