本篇文章主要讲解如果使用k8s构建高可用,高性能的Redis集群,并且使用到redis-cluster-proxy进行集群代理。
环境准备
k8s集群:(均为红帽9)
|-----------|-----------------|
| k8sMaster | 192.168.118.200 |
| k8sNode1 | 192.168.118.201 |
| k8sNode2 | 192.168.118.202 |
使用搭建nfs服务作为后端的存储,nfs持久化存储storageclass,nfs主机:192.168.118.100
私有harbor作为镜像仓库,对应的名称为:OpenLabTest,这个本篇不做讲解,只要能正常推送和拉取即可
使用statefulset控制器创建redis集群,deployment控制器创建redis-cluster-proxy,loadbalancer对代理暴露,headless提供redis-cluster-proxy的对redis集群的配置dns解析
搭建nfs服务器
nfs主机上
bash
dnf install nfs-utils -y
systemctl enable --now nfs-server.service
vim /etc/exports
/nfsdata        *(rw,sync,no_root_squash)
exportfs -rv

[root@devops nfsdata]# showmount -e
Export list for devops:
/nfsdata *
所有的k8s主机:
bash
for i in {200..202};do ssh root@192.168.118.${i} dnf install nfs-utils -y; done
for i in {200..202};do ssh root@192.168.118.${i} showmount -e 192.168.118.100; done
创建存储类
对于存储类的provisioner需要集群权限和命名空间的权限,前者用来监控集群检测时候又pvc的创建调用了这个存储类,后者用来leader-election保证只有一个provisioner进行pv的创建。
权限:
vim provisionerPrivilege.yml
bash
apiVersion: v1
kind: Namespace
metadata:
  name: nfs-provisioner
---
apiVersion: v1
kind: ServiceAccount
metadata:
  name: nfs-provisioner-svc
  namespace: nfs-provisioner
---
apiVersion: rbac.authorization.k8s.io/v1
kind: ClusterRole
metadata:
  name: nfs-clusterrole
  namespace: nfs-provisioner
rules:
- apiGroups:
  - ""
  resources:
  - nodes
  verbs:
  - get
  - list
  - watch
- apiGroups:
  - ""
  resources:
  - persistentvolumes
  verbs:
  - get
  - list
  - watch
  - create
  - delete
- apiGroups:
  - ""
  resources:
  - persistentvolumeclaims
  verbs:
  - get
  - list
  - watch
  - update
- apiGroups:
  - "storage.k8s.io"
  resources:
  - storageclasses
  verbs:
  - get
  - list
  - watch
- apiGroups:
  - ""
  resources:
  - events
  verbs:
  - create
  - update
  - patch
---
kind: ClusterRoleBinding
apiVersion: rbac.authorization.k8s.io/v1
metadata:
  name: nfs-clusterrolebinding
subjects:
  - kind: ServiceAccount
    name: nfs-provisioner-svc
    namespace: nfs-provisioner
roleRef:
  kind: ClusterRole
  name: nfs-clusterrole
  apiGroup: rbac.authorization.k8s.io
---
kind: Role
apiVersion: rbac.authorization.k8s.io/v1
metadata:
  name: leader-elector
  namespace: nfs-provisioner
rules:
  - apiGroups: [""]
    resources: ["endpoints"]
    verbs: ["get", "list", "watch", "create", "update", "patch"]
---
kind: RoleBinding
apiVersion: rbac.authorization.k8s.io/v1
metadata:
  name: leader-electorbinding
  namespace: nfs-provisioner
subjects:
  - kind: ServiceAccount
    name: nfs-provisioner-svc
    namespace: nfs-provisioner
roleRef:
  kind: Role
  name: leader-elector
  apiGroup: rbac.authorization.k8s.io
创建provisioner ,vim nfs-provioner.yml
bash
apiVersion: apps/v1
kind: Deployment
metadata:
  labels:
    app: nfs-provisioner
  name: nfs-provisioner
  namespace: nfs-provisioner
spec:
  replicas: 2
  selector:
    matchLabels:
      app: nfs-provisioner
  template:
    metadata:
      labels:
        app: nfs-provisioner
    spec:
      serviceAccountName: nfs-provisioner-svc
      containers:
      - image: OpenLabTest/nfsprovisioner/nfs-subdir-external-provisioner:v4.0.2
        name: nfs-subdir-external-provisioner
        volumeMounts:
          - name: nfs-root
            mountPath: /persistentvolumes
        env:
          - name: PROVISIONER_NAME
            value: k8s-sigs.io/nfs-subdir-external-provisioner
          - name: NFS_SERVER
            value: 192.168.118.100
          - name: NFS_PATH
            value: /nfsdata
      volumes:
        - name: nfs-root
          nfs:
            server: 192.168.118.100
            path: /nfsdata
创建存储类,vim storageclass.yml
bash
apiVersion: storage.k8s.io/v1
kind: StorageClass
metadata:
  name: nfs-storageclass
provisioner: k8s-sigs.io/nfs-subdir-external-provisioner
parameters:
  archiveOnDelete: "false"
创建redis集群(statefulset)
创建一个namespace提供集群环境
bash
apiVersion: v1
kind: Namespace
metadata:
  name: redis-cluster
先写一份redis的配置文件,然后生成一份configmap,为了将其挂载到集群的每一台pod上
vim redis.conf
bash
protected-mode no
appendonly yes
dir /data
port 6379
cluster-enabled yes
cluster-config-file /data/nodes.conf
clueter-node-timeout 5000
masterauth openlab
requirepass openlab
使用yaml的方式便于管理:
bash
kubectl create configmap redis-config --from-file=redis.conf -n redis-cluster --dry-run=client -o yaml > sts-redis.yml然后写一份statefulset追加到sts-redis.conf这个文件中:
bash
apiVersion: v1
data:
  redis.conf: |
    protected-mode no
    appendonly yes
    dir /data
    port 6379
    cluster-enabled yes
    cluster-config-file /data/nodes.conf
    cluster-node-timeout 5000
    masterauth openlab
    requirepass openlab
kind: ConfigMap
metadata:
  name: redis-config
  namespace: redis-cluster
---
apiVersion: apps/v1
kind: StatefulSet
metadata:
  labels:
    app: redis-cluster
  name: redis-cluster
  namespace: redis-cluster
spec:
  serviceName: headless-redis
  replicas: 6
  selector:
    matchLabels:
      app.kubernetes.io/name: redis-cluster
  updateStrategy:
    type: RollingUpdate
    rollingUpdate:
      partition: 1
  template:
    metadata:
      labels:
        app.kubernetes.io/name: redis-cluster
    spec:
      affinity:
        podAntiAffinity:
          preferredDuringSchedulingIgnoredDuringExecution:
            - weight: 100
              podAffinityTerm:
                labelSelector:
                  matchLabels:
                    app.kubernetes.io/name: redis-cluster
                topologyKey: kubernetes.io/hostname
      containers:
      - image: OpenLabTest/redis/redis:7.2.6
        name: redis
        command:
          - "redis-server"
        args:
          - "/etc/redis/redis.conf"
          - "--protected-mode"
          - "no"
          - "--cluster-announce-ip"
          - "$(POD_IP)"
        env:
          - name: POD_IP
            valueFrom:
              fieldRef:
                fieldPath: status.podIP
        ports:
          - name: redis
            containerPort: 6379
            protocol: TCP
        volumeMounts:
          - name: config
            mountPath: /etc/redis
          - name: redis-cluster-data
            mountPath: /data
        resources:
          limits:
            cpu: '2'
            memory: 4Gi
          requests:
            cpu: 50m
            memory: 500Mi
      volumes:
        - name: config
          configMap:
            name: redis-config
            items:
              - key: redis.conf
                path: redis.conf
  volumeClaimTemplates:
    - metadata:
        name: redis-cluster-data
      spec:
        accessModes: ["ReadWriteOnce"]
        storageClassName: "nfs-storageclass"
        resources:
          requests:
            storage: 5Gi
然后写一份无头服务用于暴露这些pod
vim sts-redis.conf
bash
---
apiVersion: v1
kind: Service
metadata:
  labels:
    app: headless-redis
  name: headless-redis
  namespace: redis-cluster
spec:
  clusterIP: None
  selector:
    app.kubernetes.io/name: redis-cluster
  type: ClusterIP
  ports:
    - port: 6379
      targetPort: 6379
部署集群
bash
kubectl apply -f  provisionerPrivilege.yml
kubectl apply -f  nfs-provisioner.yml
kubectl apply -f  storageclass.yml
[root@k8sMaster redis-lab]# kubectl apply -f sts-redis.yml
configmap/redis-config created
statefulset.apps/redis-cluster created
service/headless-redis created
bash
[root@k8sMaster redis-lab]# kubectl get pod -n redis-cluster
NAME                           READY   STATUS    RESTARTS        AGE
redis-cluster-0                1/1     Running   0               24m
redis-cluster-1                1/1     Running   0               24m
redis-cluster-2                1/1     Running   0               24m
redis-cluster-3                1/1     Running   0               24m
redis-cluster-4                1/1     Running   0               24m
redis-cluster-5                1/1     Running   0               24m

[root@k8sMaster redis-lab]# kubectl describe svc/headless-redis -n redis-cluster
Name:              headless-redis
Namespace:         redis-cluster
Labels:            app=headless-redis
Annotations:       <none>
Selector:          app.kubernetes.io/name=redis-cluster
Type:              ClusterIP
IP Family Policy:  SingleStack
IP Families:       IPv4
IP:                None
IPs:               None
Port:              <unset>  6379/TCP
TargetPort:        6379/TCP
Endpoints:         10.244.185.194:6379,10.244.185.195:6379,10.244.185.196:6379 + 3 more...
Session Affinity:  None
Events:            <none>
创建cluster:
bash
[root@k8sMaster redis-lab]# kubectl exec -it pod/redis-cluster-0 -n redis-cluster -- redis-cli -a openlab --cluster create --cluster-replicas 1 $(kubectl get pod -n redis-cluster -o jsonpath='{range.items[*]}{.status.podIP}:6379 {end}')
Warning: Using a password with '-a' or '-u' option on the command line interface may not be safe.
>>> Performing hash slots allocation on 6 nodes...
Master[0] -> Slots 0 - 5460
Master[1] -> Slots 5461 - 10922
Master[2] -> Slots 10923 - 16383
Adding replica 10.244.249.20:6379 to 10.244.249.18:6379
Adding replica 10.244.185.227:6379 to 10.244.185.225:6379
Adding replica 10.244.185.226:6379 to 10.244.249.19:6379
M: d5c88a398fdbd72c71b32d19cea06e6970266e73 10.244.249.18:6379
   slots:[0-5460] (5461 slots) master
M: 16310814a65a2056351f0b5f3ab50df0e769b6bd 10.244.185.225:6379
   slots:[5461-10922] (5462 slots) master
M: eaedc92e9d8e66bf511429084ca59af25af97aef 10.244.249.19:6379
   slots:[10923-16383] (5461 slots) master
S: d1f1c28af479d951fbf7d199b9b868b0672e0a37 10.244.185.226:6379
   replicates eaedc92e9d8e66bf511429084ca59af25af97aef
S: 8949e4cd9f1b515d4ef6c8677732435accd324a2 10.244.249.20:6379
   replicates d5c88a398fdbd72c71b32d19cea06e6970266e73
S: cae29a03bb6820051e808e9a04f03dda71e3087b 10.244.185.227:6379
   replicates 16310814a65a2056351f0b5f3ab50df0e769b6bd
Can I set the above configuration? (type 'yes' to accept): yes
>>> Nodes configuration updated
>>> Assign a different config epoch to each node
>>> Sending CLUSTER MEET messages to join the cluster
Waiting for the cluster to join
.
>>> Performing Cluster Check (using node 10.244.249.18:6379)
M: d5c88a398fdbd72c71b32d19cea06e6970266e73 10.244.249.18:6379
   slots:[0-5460] (5461 slots) master
   1 additional replica(s)
S: d1f1c28af479d951fbf7d199b9b868b0672e0a37 10.244.185.226:6379
   slots: (0 slots) slave
   replicates eaedc92e9d8e66bf511429084ca59af25af97aef
M: eaedc92e9d8e66bf511429084ca59af25af97aef 10.244.249.19:6379
   slots:[10923-16383] (5461 slots) master
   1 additional replica(s)
S: cae29a03bb6820051e808e9a04f03dda71e3087b 10.244.185.227:6379
   slots: (0 slots) slave
   replicates 16310814a65a2056351f0b5f3ab50df0e769b6bd
S: 8949e4cd9f1b515d4ef6c8677732435accd324a2 10.244.249.20:6379
   slots: (0 slots) slave
   replicates d5c88a398fdbd72c71b32d19cea06e6970266e73
M: 16310814a65a2056351f0b5f3ab50df0e769b6bd 10.244.185.225:6379
   slots:[5461-10922] (5462 slots) master
   1 additional replica(s)
[OK] All nodes agree about slots configuration.
>>> Check for open slots...
>>> Check slots coverage...
[OK] All 16384 slots covered.
集群信息:
root@k8sMaster redis-lab# kubectl exec -it pod/redis-cluster-0 -n redis-cluster -- redis-cli -p 6379 -a openlab cluster info
Warning: Using a password with '-a' or '-u' option on the command line interface may not be safe.
cluster_state:ok #这里得是ok
cluster_slots_assigned:16384
cluster_slots_ok:16384
cluster_slots_pfail:0
cluster_slots_fail:0
cluster_known_nodes:6
cluster_size:3
cluster_current_epoch:13
cluster_my_epoch:1
cluster_stats_messages_ping_sent:10433
cluster_stats_messages_pong_sent:10635
cluster_stats_messages_fail_sent:24
cluster_stats_messages_auth-ack_sent:3
cluster_stats_messages_sent:21095
cluster_stats_messages_ping_received:10630
cluster_stats_messages_pong_received:10410
cluster_stats_messages_meet_received:5
cluster_stats_messages_fail_received:9
cluster_stats_messages_auth-req_received:7
cluster_stats_messages_received:21061
total_cluster_links_buffer_limit_exceeded:0
构建redis-cluter-proxy
redis cluster是redis的官方集群方案,但是他要求客户端自己做重定向,所以连接单机redis和集群redis的客户端会有些不同,连接集群版redis的时候要客户端连接6个redis实例。
官方为了屏蔽这种差异,做了一个redis-cluster-proxy,经过这个proxy的代理后,连接redis集群就和连接单机redis一样了。目的是让任何只支持单机协议的客户端,也能无痛、透明地访问整个 Redis Cluster。
这里使用dockerfile进行对于redis-cluster-proxy的构建:redis-cluster-proxy: A proxy for Redis clusters.
bash
mkdir foo
cd foo
[root@devops foo]# git config --global user.name 'jjdjr01'
[root@devops foo]# git config --global user.email '13303836+jjdjr01@user.noreply.gitee.com'
[root@devops redis-cluster-proxy]# git clone https://gitee.com/mirrors_RedisLabs/redis-cluster-proxy.git
然后改几行代码:
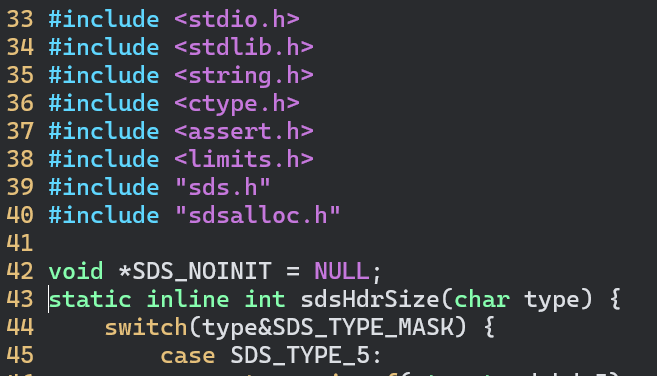
vim src/sds.h ----38行
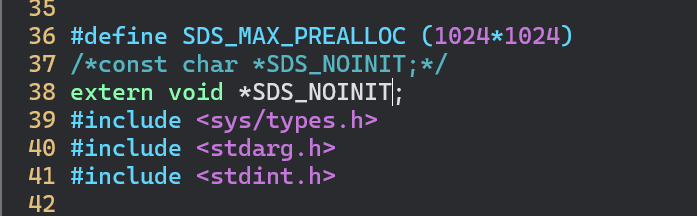
vim src/sds.c ----42
然后使用多阶构建:基础镜像为:centos:stream9
bash
vim dockerfile

FROM OpenLabTest/lib/centos:stream9 AS builder
ADD redis-cluster-proxy.tar.gz /mnt
WORKDIR /mnt/redis-cluster-proxy

RUN  yum clean all && yum makecache && \
    yum install -y gcc make git && \
    make PREFIX=/opt/proxy install

FROM OpenLabTest/lib/centos:stream9
COPY --from=builder /opt/proxy/bin/redis-cluster-proxy /usr/local/bin/
EXPOSE 7777
ENTRYPOINT ["/usr/local/bin/redis-cluster-proxy", "-c", "/etc/proxy/proxy.conf"]
我们将构建好的镜像打包上传到自己的私有harbor:
bash
[root@devops redis-cluster-proxy]# docker build -t redis-cluster-proxy:v1.0 .
[root@devops redis-cluster-proxy]# docker tag redis-cluster-proxy:v1.0 OpenLabTest/lib/redis-cluster-proxy:v1.0
[root@devops redis-cluster-proxy]# docker push OpenLabTest/lib/redis-cluster-proxy:v1.0
The push refers to repository [OpenLabTest/lib/redis-cluster-proxy]
8318aa05ceb5: Pushed
5c81f697ce5f: Mounted from lib/centos
v1.0: digest: sha256:3d12ee0d608690bf8fd9593062e43a0e143b4a8098e17441c719d8cbaa492036 size: 739
部署redis-cluster-proxy
写一份配置文件同理上:vim redis-cluster-proxy.yml
bash
apiVersion: v1
data:
  proxy.conf: |
    cluster redis-cluster-0.headless-redis.redis-cluster.svc.cluster.local:6379
    cluster redis-cluster-1.headless-redis.redis-cluster.svc.cluster.local:6379
    cluster redis-cluster-2.headless-redis.redis-cluster.svc.cluster.local:6379
    cluster redis-cluster-3.headless-redis.redis-cluster.svc.cluster.local:6379
    cluster redis-cluster-4.headless-redis.redis-cluster.svc.cluster.local:6379
    cluster redis-cluster-5.headless-redis.redis-cluster.svc.cluster.local:6379
    bind 0.0.0.0
    port 7777
    threads 3
    daemonize no
    enable-cross-slot yes
    auth openlab
    log-level error
kind: ConfigMap
metadata:
  name: cluster-proxy
  namespace: redis-cluster
这里cluster字段后面就是用到的无头服务,对集群的解析
deployment内容 vim redis-cluster-proxy.yml
bash
---
apiVersion: apps/v1
kind: Deployment
metadata:
  name: redis-proxy
  namespace: redis-cluster
spec:
  replicas: 2
  selector:
    matchLabels:
      app: redis-proxy
  template:
    metadata:
      labels:
        app: redis-proxy
    spec:
      containers:
        - name: redis-proxy
          image: OpenLabTest/lib/redis-cluster-proxy:v1.0
          imagePullPolicy: IfNotPresent
          command: ["/usr/local/bin/redis-cluster-proxy"]
          args:
            - -c
            - /etc/proxy/proxy.conf
          ports:
            - name: redis-7777
              containerPort: 7777
              protocol: TCP
          volumeMounts:
            - name: cluster-proxy-v
              mountPath: /etc/proxy
      volumes:
        - name: cluster-proxy-v
          configMap:
            name: cluster-proxy
            items:
              - key: proxy.conf
path: proxy.conf然后使用loadbalancer服务对其进行暴露,loadbalancer的部署这里不做说明,将yaml也是写在同一份yaml文件中,提供loadbalancer的metallb部署看这篇文章:K8S的Service的LoadBanlance之Metallb解决方案-阿里云开发者社区
这里直接使用loadbalancer
bash
---
apiVersion: v1
kind: Service
metadata:
  labels:
    app: redis-cluster-proxy
  name: cluster-proxy
  namespace: redis-cluster
spec:
  ports:
  - port: 6379
    protocol: TCP
    targetPort: 7777
  selector:
    app: redis-proxy
  type: LoadBalancer
然后部署:
bash
[root@k8sMaster redis-lab]# kubectl apply -f redis-cluster-proxy.yml
configmap/cluster-proxy created
deployment.apps/redis-proxy created
service/cluster-proxy created

[root@k8sMaster redis-lab]# kubectl get pod -n redis-cluster
NAME                           READY   STATUS    RESTARTS   AGE
redis-cluster-0                1/1     Running   0          57s
redis-cluster-1                1/1     Running   0          55s
redis-cluster-2                1/1     Running   0          52s
redis-cluster-3                1/1     Running   0          50s
redis-cluster-4                1/1     Running   0          47s
redis-cluster-5                1/1     Running   0          45s
redis-proxy-5ff7944bbb-nqq9z   1/1     Running   0          8s
redis-proxy-5ff7944bbb-r9psr   1/1     Running   0          8s
查看暴露服务:
bash
[root@k8sMaster redis-lab]# kubectl get svc -n redis-cluster
NAME             TYPE           CLUSTER-IP      EXTERNAL-IP       PORT(S)          AGE
cluster-proxy    LoadBalancer   10.103.126.23   192.168.118.120   6379:32518/TCP   105m
headless-redis   ClusterIP      None            <none>            6379/TCP         106m
测试
随便找一台主机,跑一个redis镜像进行测试
bash
[root@devops ~]# redis-cli -h 192.168.118.120 -p 6379 -a openlab ping
Warning: Using a password with '-a' or '-u' option on the command line interface may not be safe.
PONG
[root@devops nfsdata]# docker run -it --name test OpenLabTest/redis/redis:7.2.6 /bin/bash
root@b07107ef88e5:/data# redis-cli -h 192.168.118.120 -p 6379 -a openlab
Warning: Using a password with '-a' or '-u' option on the command line interface may not be safe.
192.168.118.120:6379> set foo bar
192.168.118.120:6379> get foo
"bar"
root@b07107ef88e5:/data# redis-benchmark -h 192.168.118.120 -p 6379 -n 100 -c 20
WARNING: Could not fetch server CONFIG
====== PING_INLINE ======
100 requests completed in 0.01 seconds
20 parallel clients
3 bytes payload
keep alive: 1
multi-thread: no
Latency by percentile distribution:
0.000% <= 0.151 milliseconds (cumulative count 1)
50.000% <= 0.607 milliseconds (cumulative count 52)
75.000% <= 0.935 milliseconds (cumulative count 75)
87.500% <= 3.255 milliseconds (cumulative count 88)
93.750% <= 4.159 milliseconds (cumulative count 94)
96.875% <= 6.415 milliseconds (cumulative count 97)
98.438% <= 7.207 milliseconds (cumulative count 99)
99.219% <= 7.895 milliseconds (cumulative count 100)
100.000% <= 7.895 milliseconds (cumulative count 100)
Cumulative distribution of latencies:
0.000% <= 0.103 milliseconds (cumulative count 0)
3.000% <= 0.207 milliseconds (cumulative count 3)
12.000% <= 0.303 milliseconds (cumulative count 12)
27.000% <= 0.407 milliseconds (cumulative count 27)
41.000% <= 0.503 milliseconds (cumulative count 41)
52.000% <= 0.607 milliseconds (cumulative count 52)
60.000% <= 0.703 milliseconds (cumulative count 60)
68.000% <= 0.807 milliseconds (cumulative count 68)
73.000% <= 0.903 milliseconds (cumulative count 73)
75.000% <= 1.007 milliseconds (cumulative count 75)
76.000% <= 1.103 milliseconds (cumulative count 76)
77.000% <= 1.303 milliseconds (cumulative count 77)
78.000% <= 1.407 milliseconds (cumulative count 78)
80.000% <= 1.503 milliseconds (cumulative count 80)
84.000% <= 3.103 milliseconds (cumulative count 84)
93.000% <= 4.103 milliseconds (cumulative count 93)
95.000% <= 5.103 milliseconds (cumulative count 95)
98.000% <= 7.103 milliseconds (cumulative count 98)
100.000% <= 8.103 milliseconds (cumulative count 100)
Summary:
throughput summary: 11111.11 requests per second
latency summary (msec):
avg min p50 p95 p99 max
1.318 0.144 0.607 5.063 7.207 7.895
====== PING_MBULK ======
100 requests completed in 0.01 seconds
20 parallel clients
3 bytes payload
keep alive: 1
multi-thread: no
--------存储测试------------
root@3dbb343d2601:/data# redis-benchmark -h 192.168.118.120 -t set -n 1000 -r 100
WARNING: Could not fetch server CONFIG
====== SET ======
1000 requests completed in 0.06 seconds
50 parallel clients
3 bytes payload
keep alive: 1
multi-thread: no
Latency by percentile distribution:
0.000% <= 0.191 milliseconds (cumulative count 1)
50.000% <= 2.119 milliseconds (cumulative count 501)
75.000% <= 2.999 milliseconds (cumulative count 752)
87.500% <= 4.015 milliseconds (cumulative count 875)
93.750% <= 5.327 milliseconds (cumulative count 938)
96.875% <= 8.135 milliseconds (cumulative count 969)
98.438% <= 9.143 milliseconds (cumulative count 985)
99.219% <= 9.271 milliseconds (cumulative count 993)
99.609% <= 9.415 milliseconds (cumulative count 997)
99.805% <= 9.527 milliseconds (cumulative count 999)
99.902% <= 9.575 milliseconds (cumulative count 1000)
100.000% <= 9.575 milliseconds (cumulative count 1000)
Cumulative distribution of latencies:
0.000% <= 0.103 milliseconds (cumulative count 0)
0.100% <= 0.207 milliseconds (cumulative count 1)
0.400% <= 0.407 milliseconds (cumulative count 4)
1.200% <= 0.503 milliseconds (cumulative count 12)
2.400% <= 0.607 milliseconds (cumulative count 24)
3.100% <= 0.703 milliseconds (cumulative count 31)
6.200% <= 0.807 milliseconds (cumulative count 62)
9.500% <= 0.903 milliseconds (cumulative count 95)
11.800% <= 1.007 milliseconds (cumulative count 118)
14.900% <= 1.103 milliseconds (cumulative count 149)
19.200% <= 1.207 milliseconds (cumulative count 192)
22.900% <= 1.303 milliseconds (cumulative count 229)
27.500% <= 1.407 milliseconds (cumulative count 275)
30.800% <= 1.503 milliseconds (cumulative count 308)
34.200% <= 1.607 milliseconds (cumulative count 342)
36.500% <= 1.703 milliseconds (cumulative count 365)
40.300% <= 1.807 milliseconds (cumulative count 403)
43.400% <= 1.903 milliseconds (cumulative count 434)
46.500% <= 2.007 milliseconds (cumulative count 465)
49.600% <= 2.103 milliseconds (cumulative count 496)
77.700% <= 3.103 milliseconds (cumulative count 777)
88.200% <= 4.103 milliseconds (cumulative count 882)
93.200% <= 5.103 milliseconds (cumulative count 932)
95.700% <= 6.103 milliseconds (cumulative count 957)
95.900% <= 7.103 milliseconds (cumulative count 959)
96.800% <= 8.103 milliseconds (cumulative count 968)
98.400% <= 9.103 milliseconds (cumulative count 984)
100.000% <= 10.103 milliseconds (cumulative count 1000)
Summary:
throughput summary: 15384.62 requests per second
latency summary (msec):
avg min p50 p95 p99 max
2.493 0.184 2.119 5.895 9.215 9.575
故障切换测试
先获取集群的信息:
bash
[root@k8sMaster redis-lab]# kubectl exec -it pod/redis-cluster-0 -n redis-cluster -- \
  redis-cli -a openlab --cluster check \
  $(kubectl get pod -l app.kubernetes.io/name=redis-cluster -n redis-cluster \
    -o jsonpath='{.items[0].status.podIP}:6379')
Warning: Using a password with '-a' or '-u' option on the command line interface may not be safe.
10.244.185.204:6379 (1a625719...) -> 0 keys | 5461 slots | 1 slaves.
10.244.249.9:6379 (e806f51f...) -> 0 keys | 5462 slots | 1 slaves.
10.244.185.206:6379 (9e8e783b...) -> 0 keys | 5461 slots | 1 slaves.
[OK] 0 keys in 3 masters.
0.00 keys per slot on average.
>>> Performing Cluster Check (using node 10.244.185.204:6379)
M: 1a6257194ef74a241b6c260d3c20915de2a20f3f 10.244.185.204:6379
   slots:[0-5460] (5461 slots) master
   1 additional replica(s)
S: 2f3238bd7f1ec19effb65b335fcdc9c6f8b967aa 10.244.249.14:6379
   slots: (0 slots) slave
   replicates e806f51fa1fb67c16c87bf6d98e5c4fdadae0758
S: 5c12cbb6f6627439de3819f6b5828ce68cc2d43c 10.244.249.13:6379
   slots: (0 slots) slave
   replicates 9e8e783b21b428f04d312566536453357e4f08cd
M: e806f51fa1fb67c16c87bf6d98e5c4fdadae0758 10.244.249.9:6379
   slots:[5461-10922] (5462 slots) master
   1 additional replica(s)
M: 9e8e783b21b428f04d312566536453357e4f08cd 10.244.185.206:6379
   slots:[10923-16383] (5461 slots) master
   1 additional replica(s)
S: e77e7ce8c99ef7636e5cbdd9f9c382b599afc921 10.244.185.208:6379
   slots: (0 slots) slave
   replicates 1a6257194ef74a241b6c260d3c20915de2a20f3f
[OK] All nodes agree about slots configuration.
>>> Check for open slots...
>>> Check slots coverage...
[OK] All 16384 slots covered.
随便嘎掉一个slave,比如这里的10.244.185.208是10.244.185.204的slave,找到名称
bash
[root@k8sMaster redis-lab]# kubectl get pod -n redis-cluster -o wide
NAME                           READY   STATUS    RESTARTS   AGE     IP               NODE       NOMINATED NODE   READINESS GATES
redis-cluster-0                1/1     Running   0          10m     10.244.185.204   k8snode2   <none>           <none>
redis-cluster-1                1/1     Running   0          10m     10.244.249.9     k8snode1   <none>           <none>
redis-cluster-2                1/1     Running   0          10m     10.244.185.206   k8snode2   <none>           <none>
redis-cluster-3                1/1     Running   0          9m58s   10.244.249.13    k8snode1   <none>           <none>
redis-cluster-4                1/1     Running   0          9m55s   10.244.185.208   k8snode2   <none>           <none>
redis-cluster-5                1/1     Running   0          9m52s   10.244.249.14    k8snode1   <none>           <none>
也就是redis-cluster-4为redis-cluster-0的slave,这里删掉slave:
bash
[root@k8sMaster redis-lab]# kubectl delete pod/redis-cluster-4 -n redis-cluster
pod "redis-cluster-4" deleted
查看集群是否依旧:
bash
[root@k8sMaster redis-lab]# kubectl exec -it pod/redis-cluster-0 -n redis-cluster --   redis-cli -a openlab --cluster check   $(kubectl get pod -l app.kubernetes.io/name=redis-cluster -n redis-cluster \
    -o jsonpath='{.items[0].status.podIP}:6379')
Warning: Using a password with '-a' or '-u' option on the command line interface may not be safe.
10.244.185.204:6379 (1a625719...) -> 0 keys | 5461 slots | 1 slaves.
10.244.249.9:6379 (e806f51f...) -> 0 keys | 5462 slots | 1 slaves.
10.244.185.206:6379 (9e8e783b...) -> 0 keys | 5461 slots | 1 slaves.
[OK] 0 keys in 3 masters.
0.00 keys per slot on average.
>>> Performing Cluster Check (using node 10.244.185.204:6379)
M: 1a6257194ef74a241b6c260d3c20915de2a20f3f 10.244.185.204:6379
   slots:[0-5460] (5461 slots) master
   1 additional replica(s)
S: 2f3238bd7f1ec19effb65b335fcdc9c6f8b967aa 10.244.249.14:6379
   slots: (0 slots) slave
   replicates e806f51fa1fb67c16c87bf6d98e5c4fdadae0758
S: 5c12cbb6f6627439de3819f6b5828ce68cc2d43c 10.244.249.13:6379
   slots: (0 slots) slave
   replicates 9e8e783b21b428f04d312566536453357e4f08cd
M: e806f51fa1fb67c16c87bf6d98e5c4fdadae0758 10.244.249.9:6379
   slots:[5461-10922] (5462 slots) master
   1 additional replica(s)
M: 9e8e783b21b428f04d312566536453357e4f08cd 10.244.185.206:6379
   slots:[10923-16383] (5461 slots) master
   1 additional replica(s)
S: e77e7ce8c99ef7636e5cbdd9f9c382b599afc921 10.244.185.211:6379
   slots: (0 slots) slave
   replicates 1a6257194ef74a241b6c260d3c20915de2a20f3f
[OK] All nodes agree about slots configuration.
>>> Check for open slots...
>>> Check slots coverage...
[OK] All 16384 slots covered.
bash
[root@k8sMaster redis-lab]# kubectl get pod/redis-cluster-4 -n redis-cluster -o wide
NAME              READY   STATUS    RESTARTS   AGE   IP               NODE       NOMINATED NODE   READINESS GATES
redis-cluster-4   1/1     Running   0          77s   10.244.185.211   k8snode2   <none>           <none>
可以看到这个IP发生了改变变为了10.244.185.211,但是对应的replicates依旧是10.244.185.204,不变。
同理删掉master,也就是redis-cluster-0
bash
[root@k8sMaster redis-lab]# kubectl delete pod/redis-cluster-0 -n redis-cluster
pod "redis-cluster-0" deleted
[root@k8sMaster redis-lab]# kubectl get pod/redis-cluster-0 -n redis-cluster -o wide
NAME              READY   STATUS    RESTARTS   AGE   IP               NODE       NOMINATED NODE   READINESS GATES
redis-cluster-0   1/1     Running   0          11s   10.244.185.212   k8snode2   <none>           <none>
bash
[root@k8sMaster redis-lab]# kubectl exec -it pod/redis-cluster-0 -n redis-cluster --   redis-cli -a openlab --cluster check   $(kubectl get pod -l app.kubernetes.io/name=redis-cluster -n redis-cluster \
    -o jsonpath='{.items[0].status.podIP}:6379')
Warning: Using a password with '-a' or '-u' option on the command line interface may not be safe.
10.244.185.212:6379 (1a625719...) -> 0 keys | 5461 slots | 1 slaves.
10.244.185.206:6379 (9e8e783b...) -> 0 keys | 5461 slots | 1 slaves.
10.244.249.9:6379 (e806f51f...) -> 0 keys | 5462 slots | 1 slaves.
[OK] 0 keys in 3 masters.
0.00 keys per slot on average.
>>> Performing Cluster Check (using node 10.244.185.212:6379)
M: 1a6257194ef74a241b6c260d3c20915de2a20f3f 10.244.185.212:6379
   slots:[0-5460] (5461 slots) master
   1 additional replica(s)
S: 5c12cbb6f6627439de3819f6b5828ce68cc2d43c 10.244.249.13:6379
   slots: (0 slots) slave
   replicates 9e8e783b21b428f04d312566536453357e4f08cd
S: 2f3238bd7f1ec19effb65b335fcdc9c6f8b967aa 10.244.249.14:6379
   slots: (0 slots) slave
   replicates e806f51fa1fb67c16c87bf6d98e5c4fdadae0758
M: 9e8e783b21b428f04d312566536453357e4f08cd 10.244.185.206:6379
   slots:[10923-16383] (5461 slots) master
   1 additional replica(s)
M: e806f51fa1fb67c16c87bf6d98e5c4fdadae0758 10.244.249.9:6379
   slots:[5461-10922] (5462 slots) master
   1 additional replica(s)
S: e77e7ce8c99ef7636e5cbdd9f9c382b599afc921 10.244.185.211:6379
   slots: (0 slots) slave
   replicates 1a6257194ef74a241b6c260d3c20915de2a20f3f
[OK] All nodes agree about slots configuration.
>>> Check for open slots...
>>> Check slots coverage...
[OK] All 16384 slots covered.
可以看到即使删掉它还是master
监控与管理
大部分开发、运维人员还是喜欢图形化的 Redis 管理工具,所以介绍一下 Redis 官方提供的图形化工具 RedisInsight。
由于 RedisInsight 默认并不提供登录验证功能,因此,在系统安全要求比较高的环境会有安全风险,请慎用!个人建议生产环境使用命令行工具。
这里使用到镜像:docker.io/redislabs/redisinsight:2.56 - 镜像下载 | docker.io
bash
apiVersion: apps/v1
kind: Deployment
metadata:
  labels:
    app.kubernetes.io/name: redisinsight
  name: redisinsight
  namespace: redis-cluster
spec:
  replicas: 1
  selector:
    matchLabels:
      app.kubernetes.io/name: redisinsight
  template:
    metadata:
      labels:
        app.kubernetes.io/name: redisinsight
    spec:
      containers:
      - image: OpenLabTest/redis/redisinsight:2.56
        name: redisinsight
        ports:
        - name: redisinsight
          containerPort: 5540
          protocol: TCP
        resources:
          limits:
            cpu: "2"
            memory: 2Gi
          requests:
            cpu: 100m
            memory: 500Mi
---
apiVersion: v1
kind: Service
metadata:
  name: redisinsight-svc
  namespace: redis-cluster
  labels:
    app.kubernetes.io/name: redisinsight
spec:
  type: LoadBalancer
  ports:
  - name: redisinsight
    protocol: TCP
    port: 8080
    targetPort: 5540
  selector:
    app.kubernetes.io/name: redisinsight
注意:redisinsight监听端口就是5540,其他的都可以改
控制台初始化
bash
[root@k8sMaster redis-lab]# kubectl get svc -n redis-cluster
NAME               TYPE           CLUSTER-IP      EXTERNAL-IP       PORT(S)          AGE
cluster-proxy      LoadBalancer   10.105.98.112   192.168.118.120   6379:30256/TCP   53m
headless-redis     ClusterIP      None            <none>            6379/TCP         76m
redisinsight-svc LoadBalancer 10.100.63.211 192.168.118.121 8080:31041/TCP 112s进入http://192.168.118.121:8080,只勾选最后一个按钮,然后点击submit
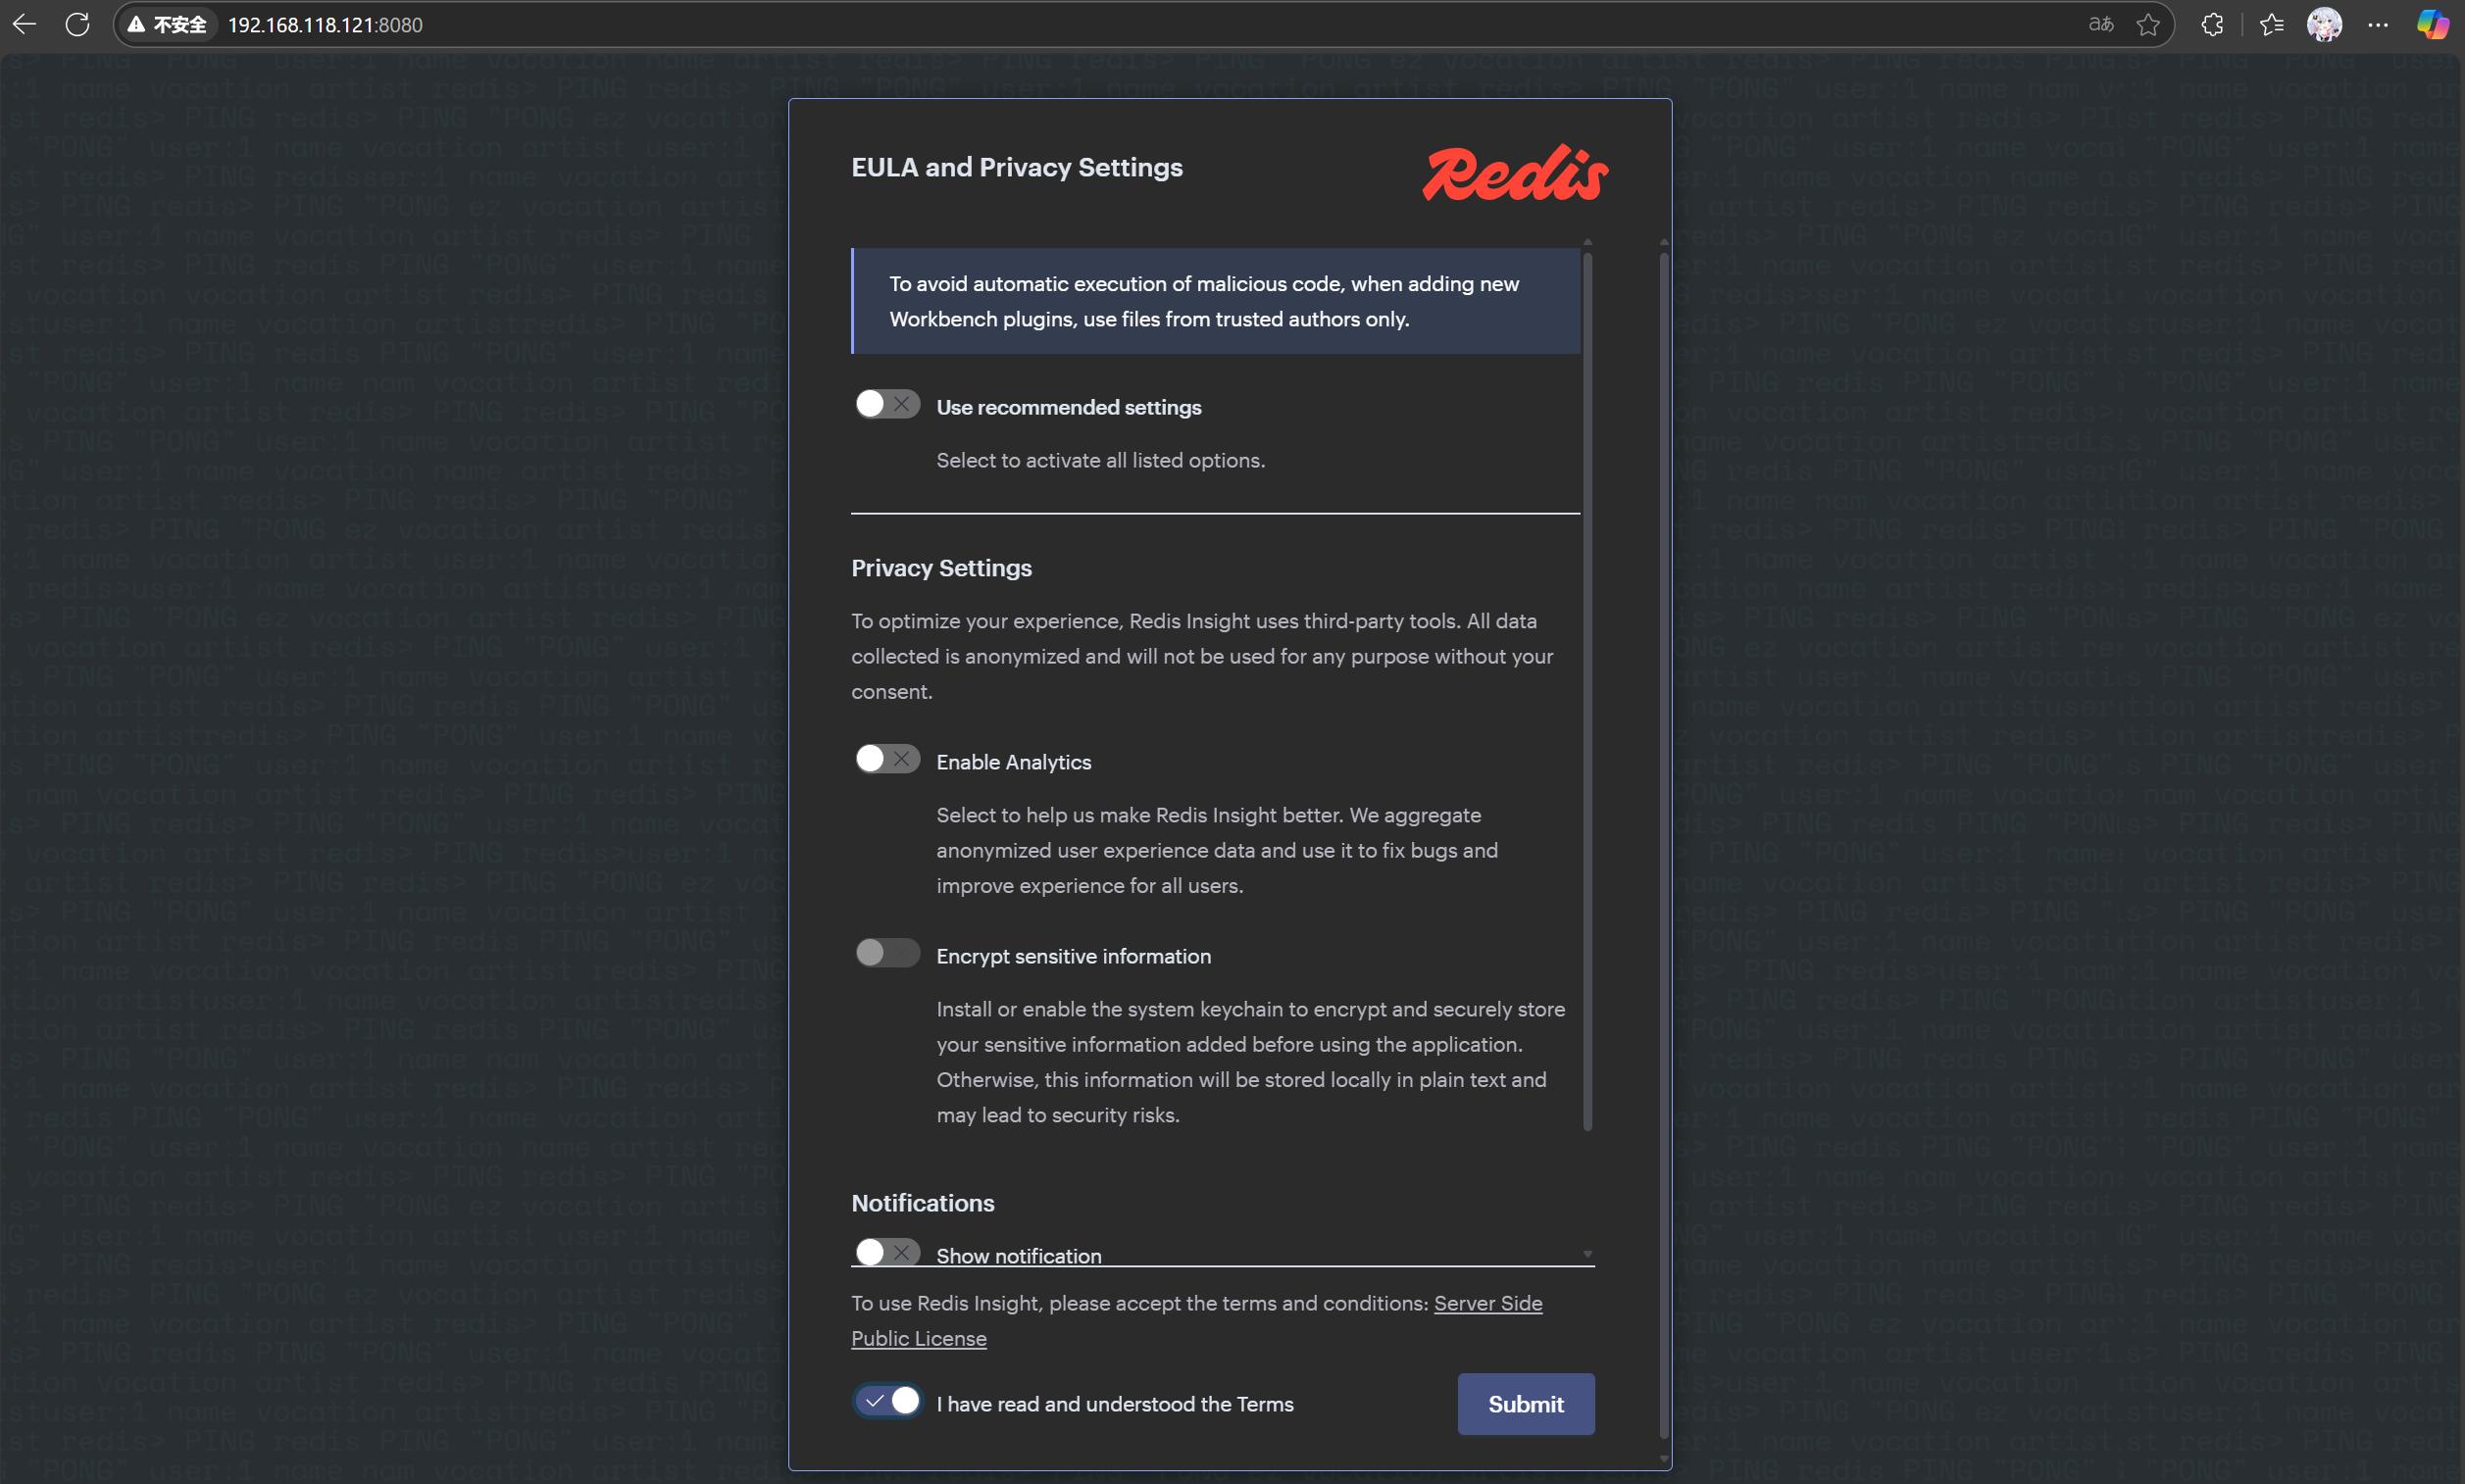
点击"Add Database manually",然后输入提示信息:
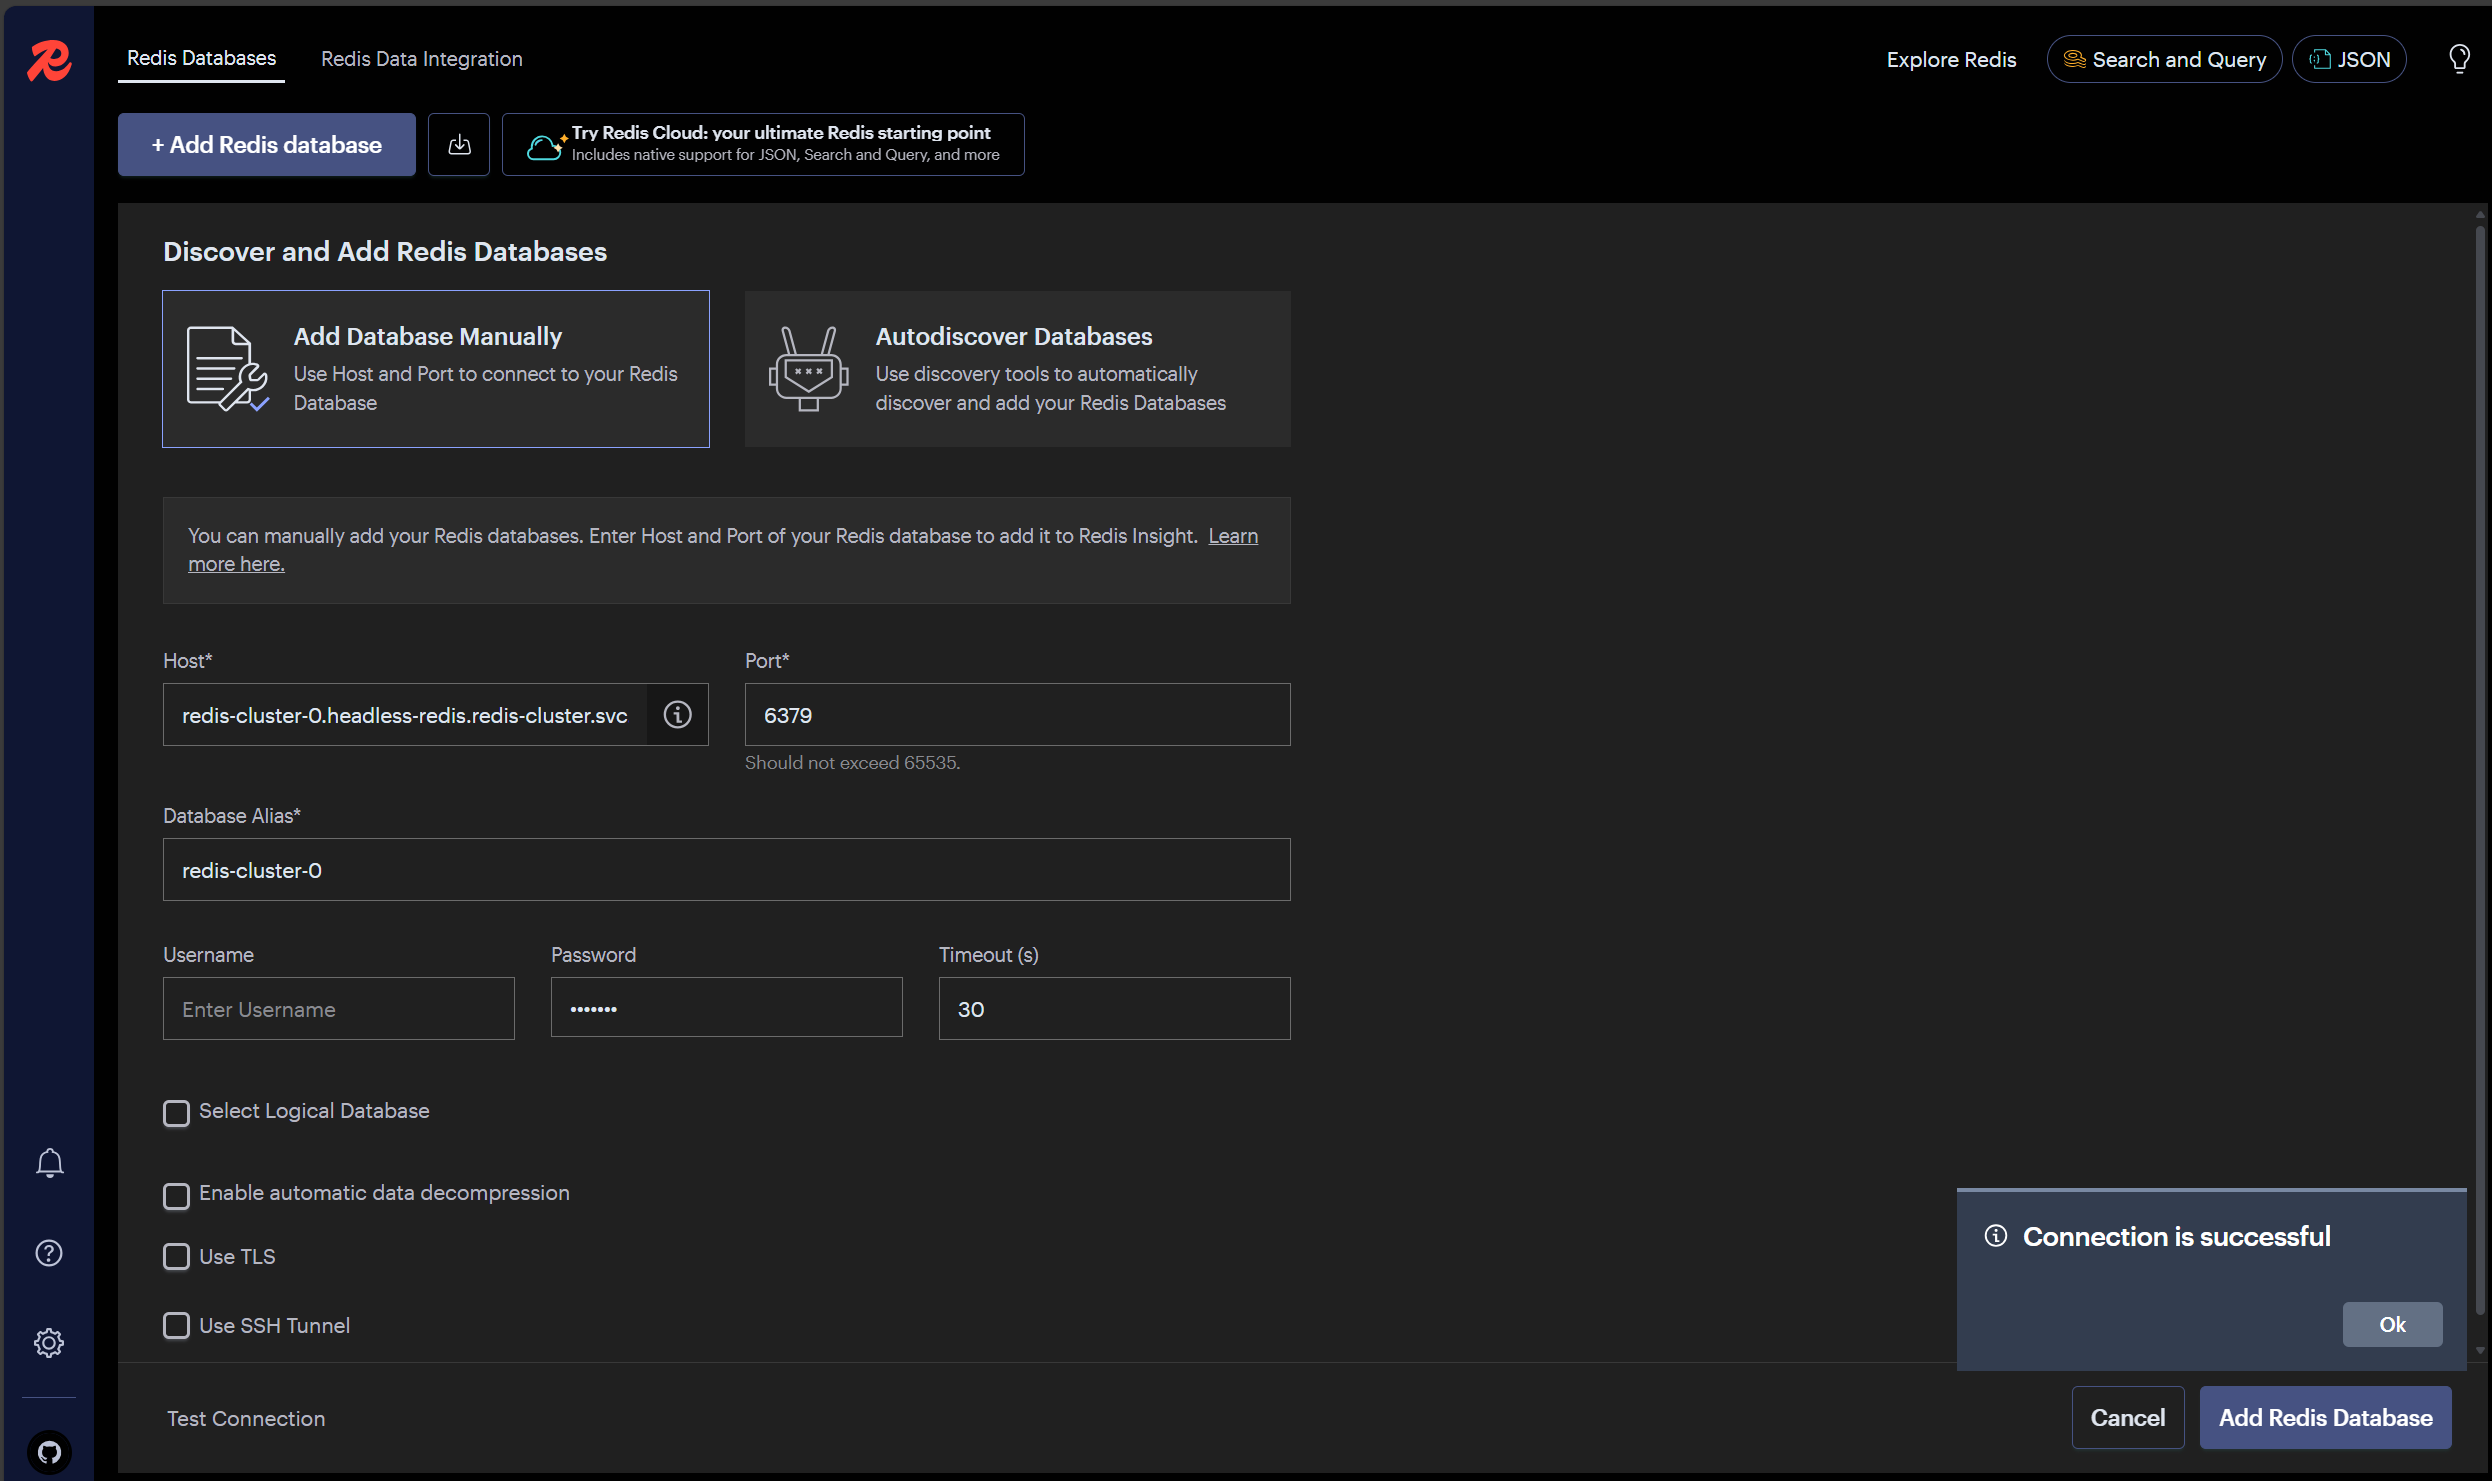
host写我们的无头服务代理的pod域名即可(这里可不敢写redis-cluster-proxy的暴露的loadbalancer IP),Database Alias随便,password写我们sts-redis.yml指定的用户和密码,我这里都是openlab
然后点击左下角的Test Connection测试连接,ok即可,然后点击右下角的Add redis Database
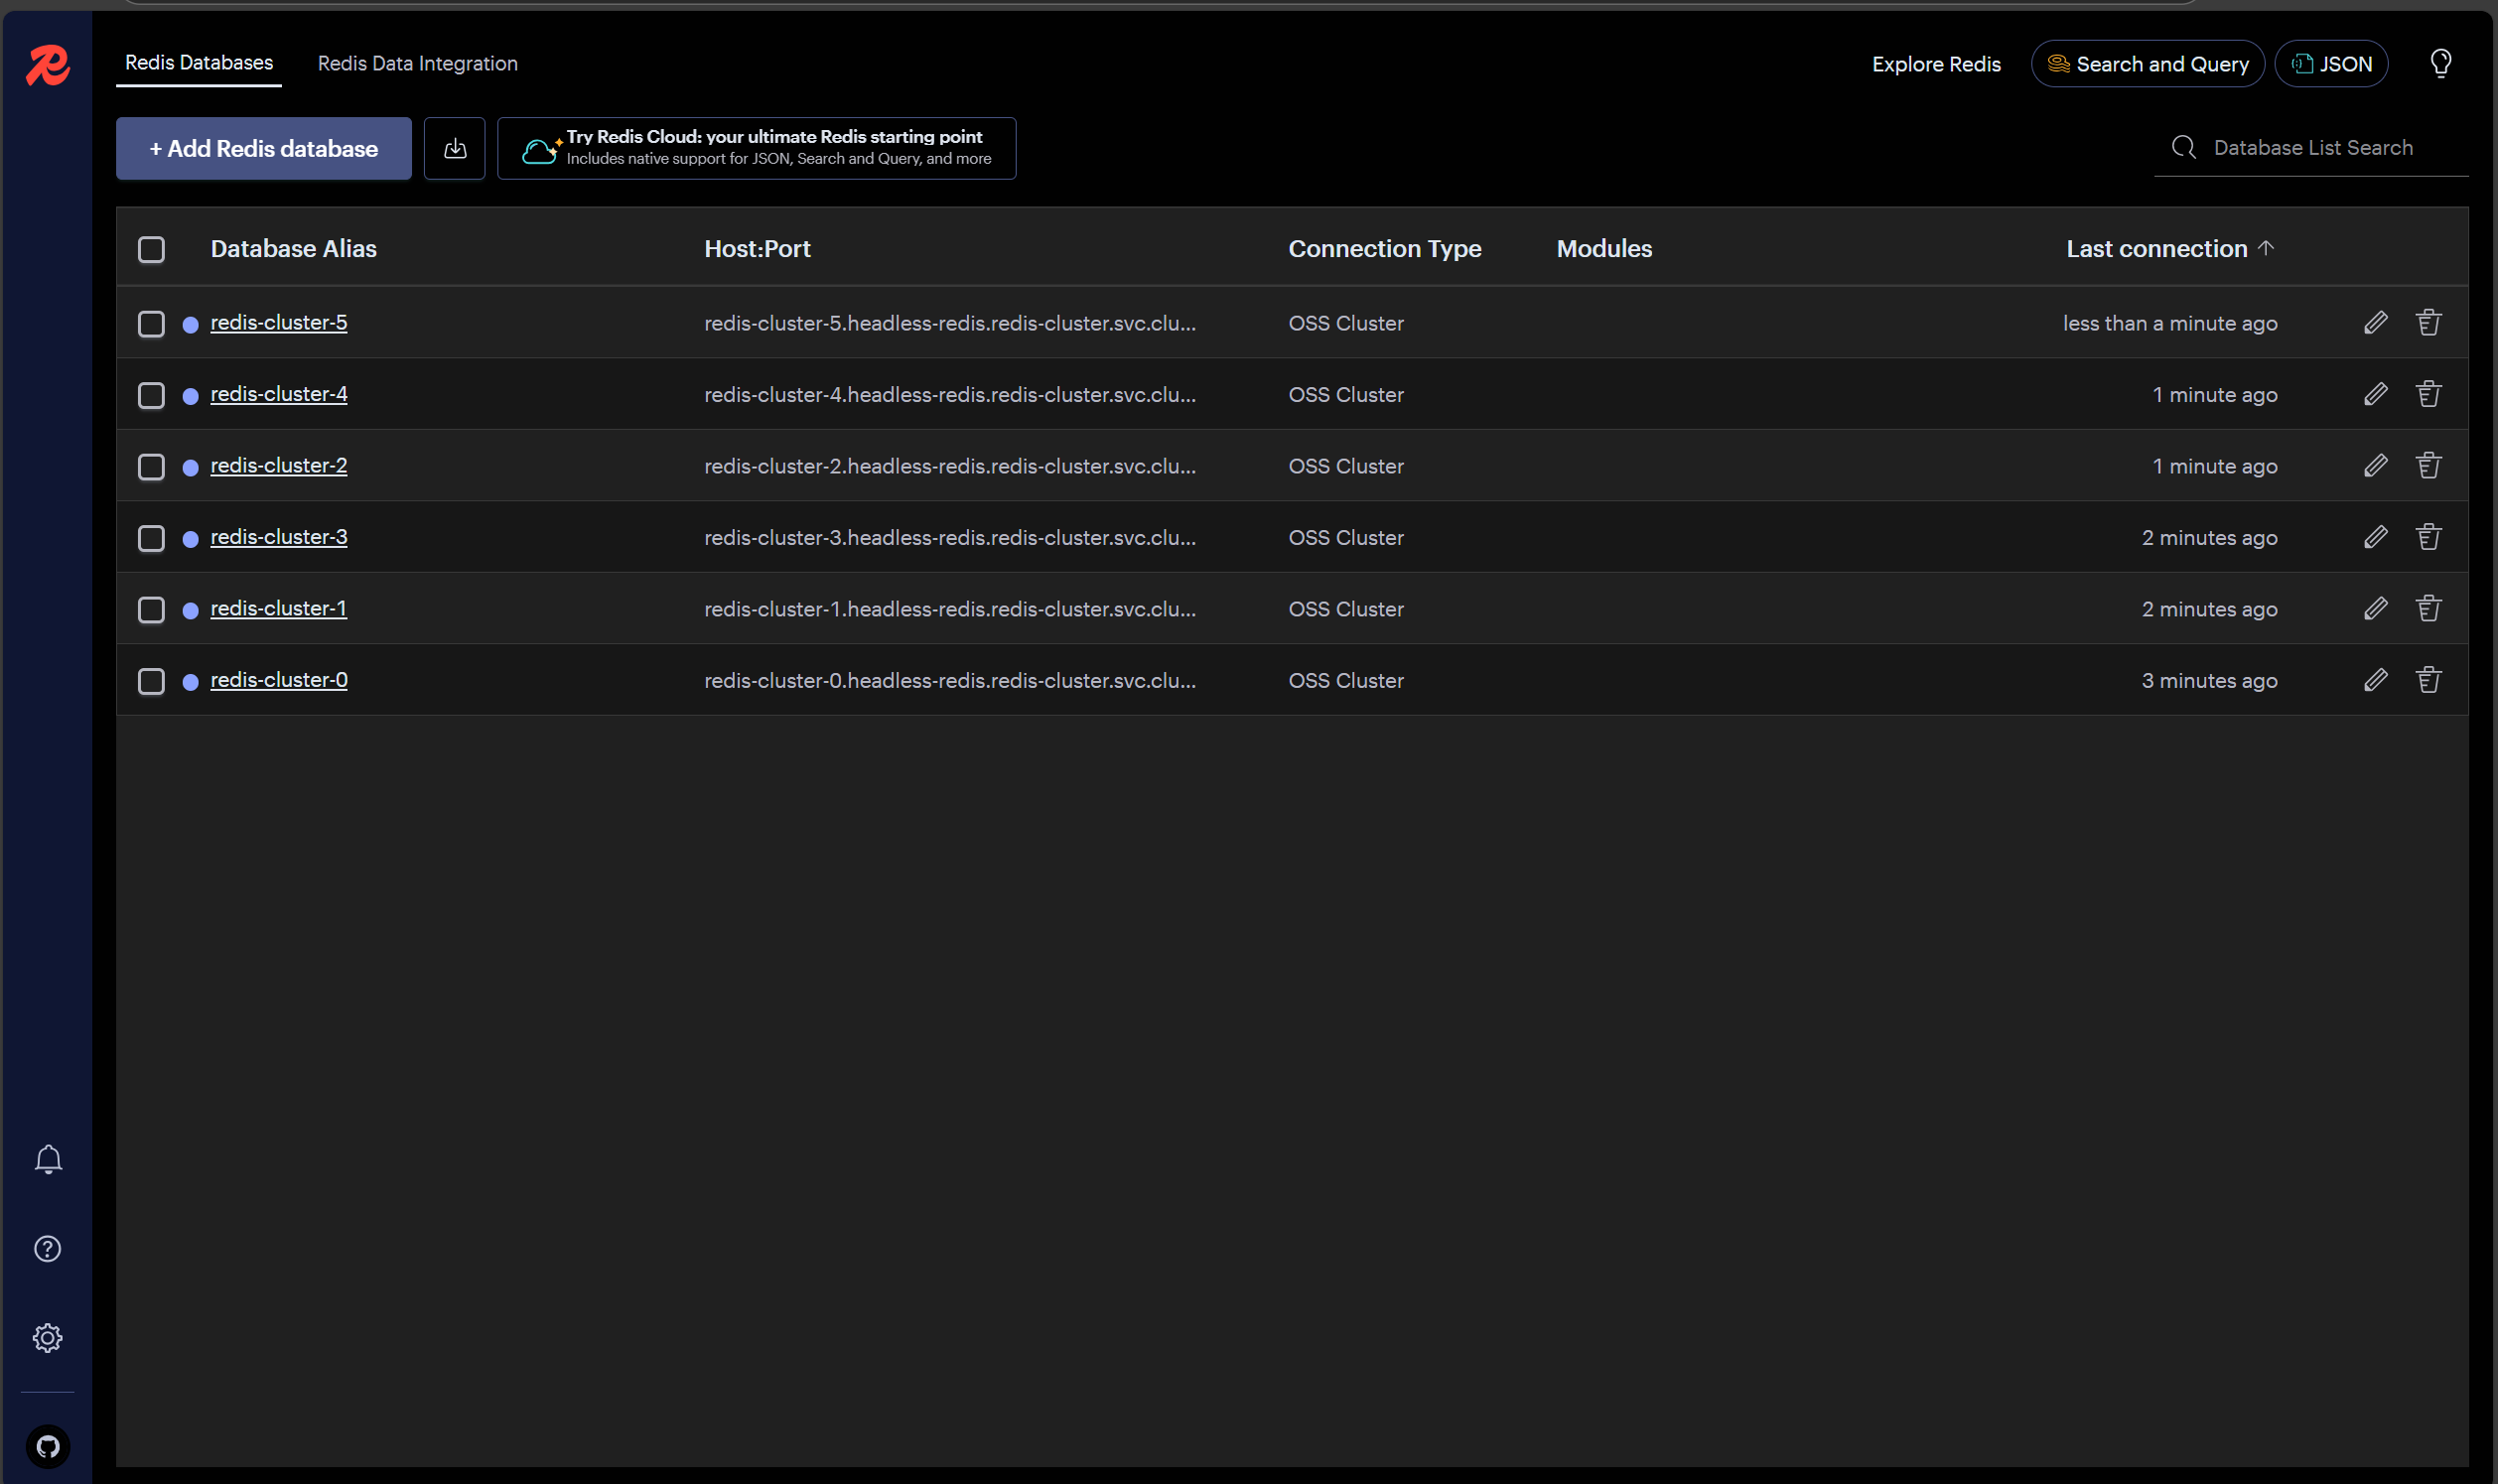
然后统统加入
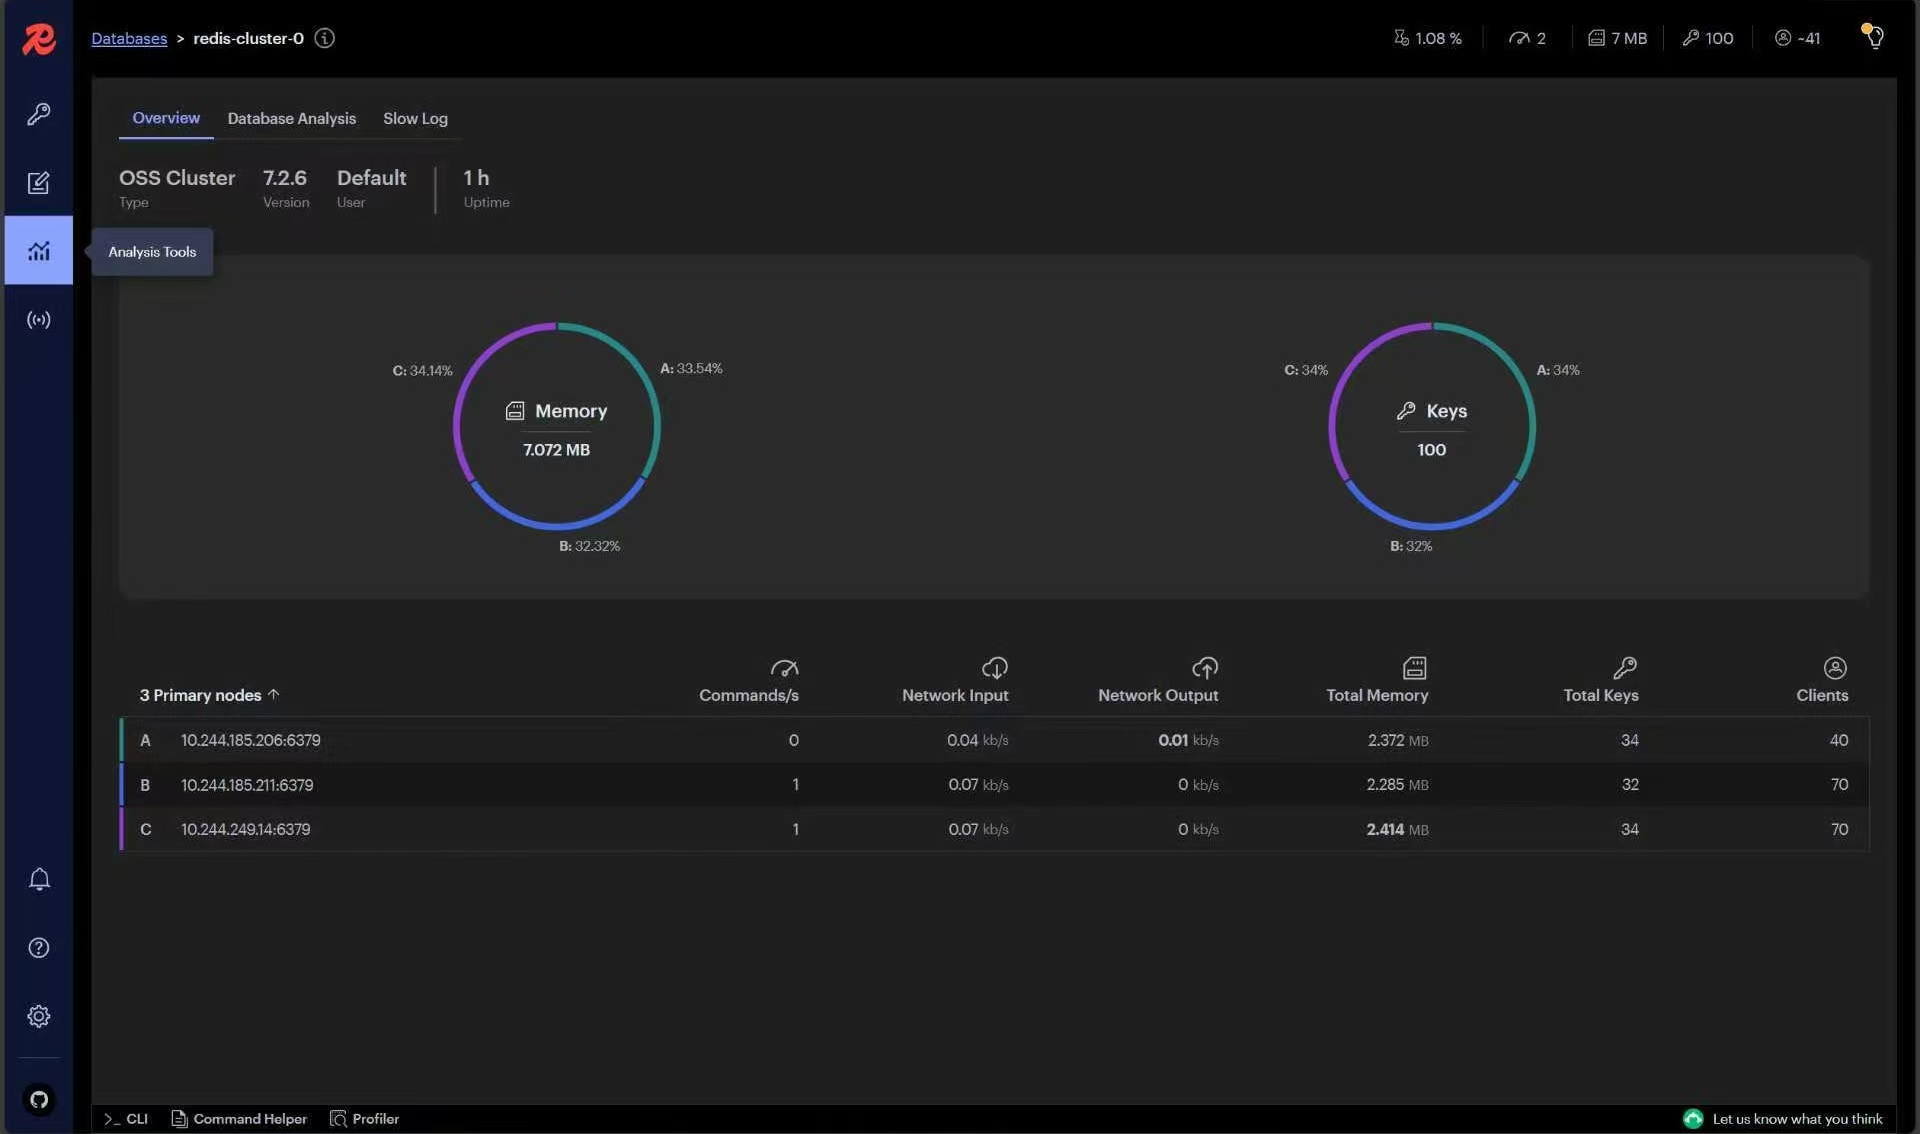
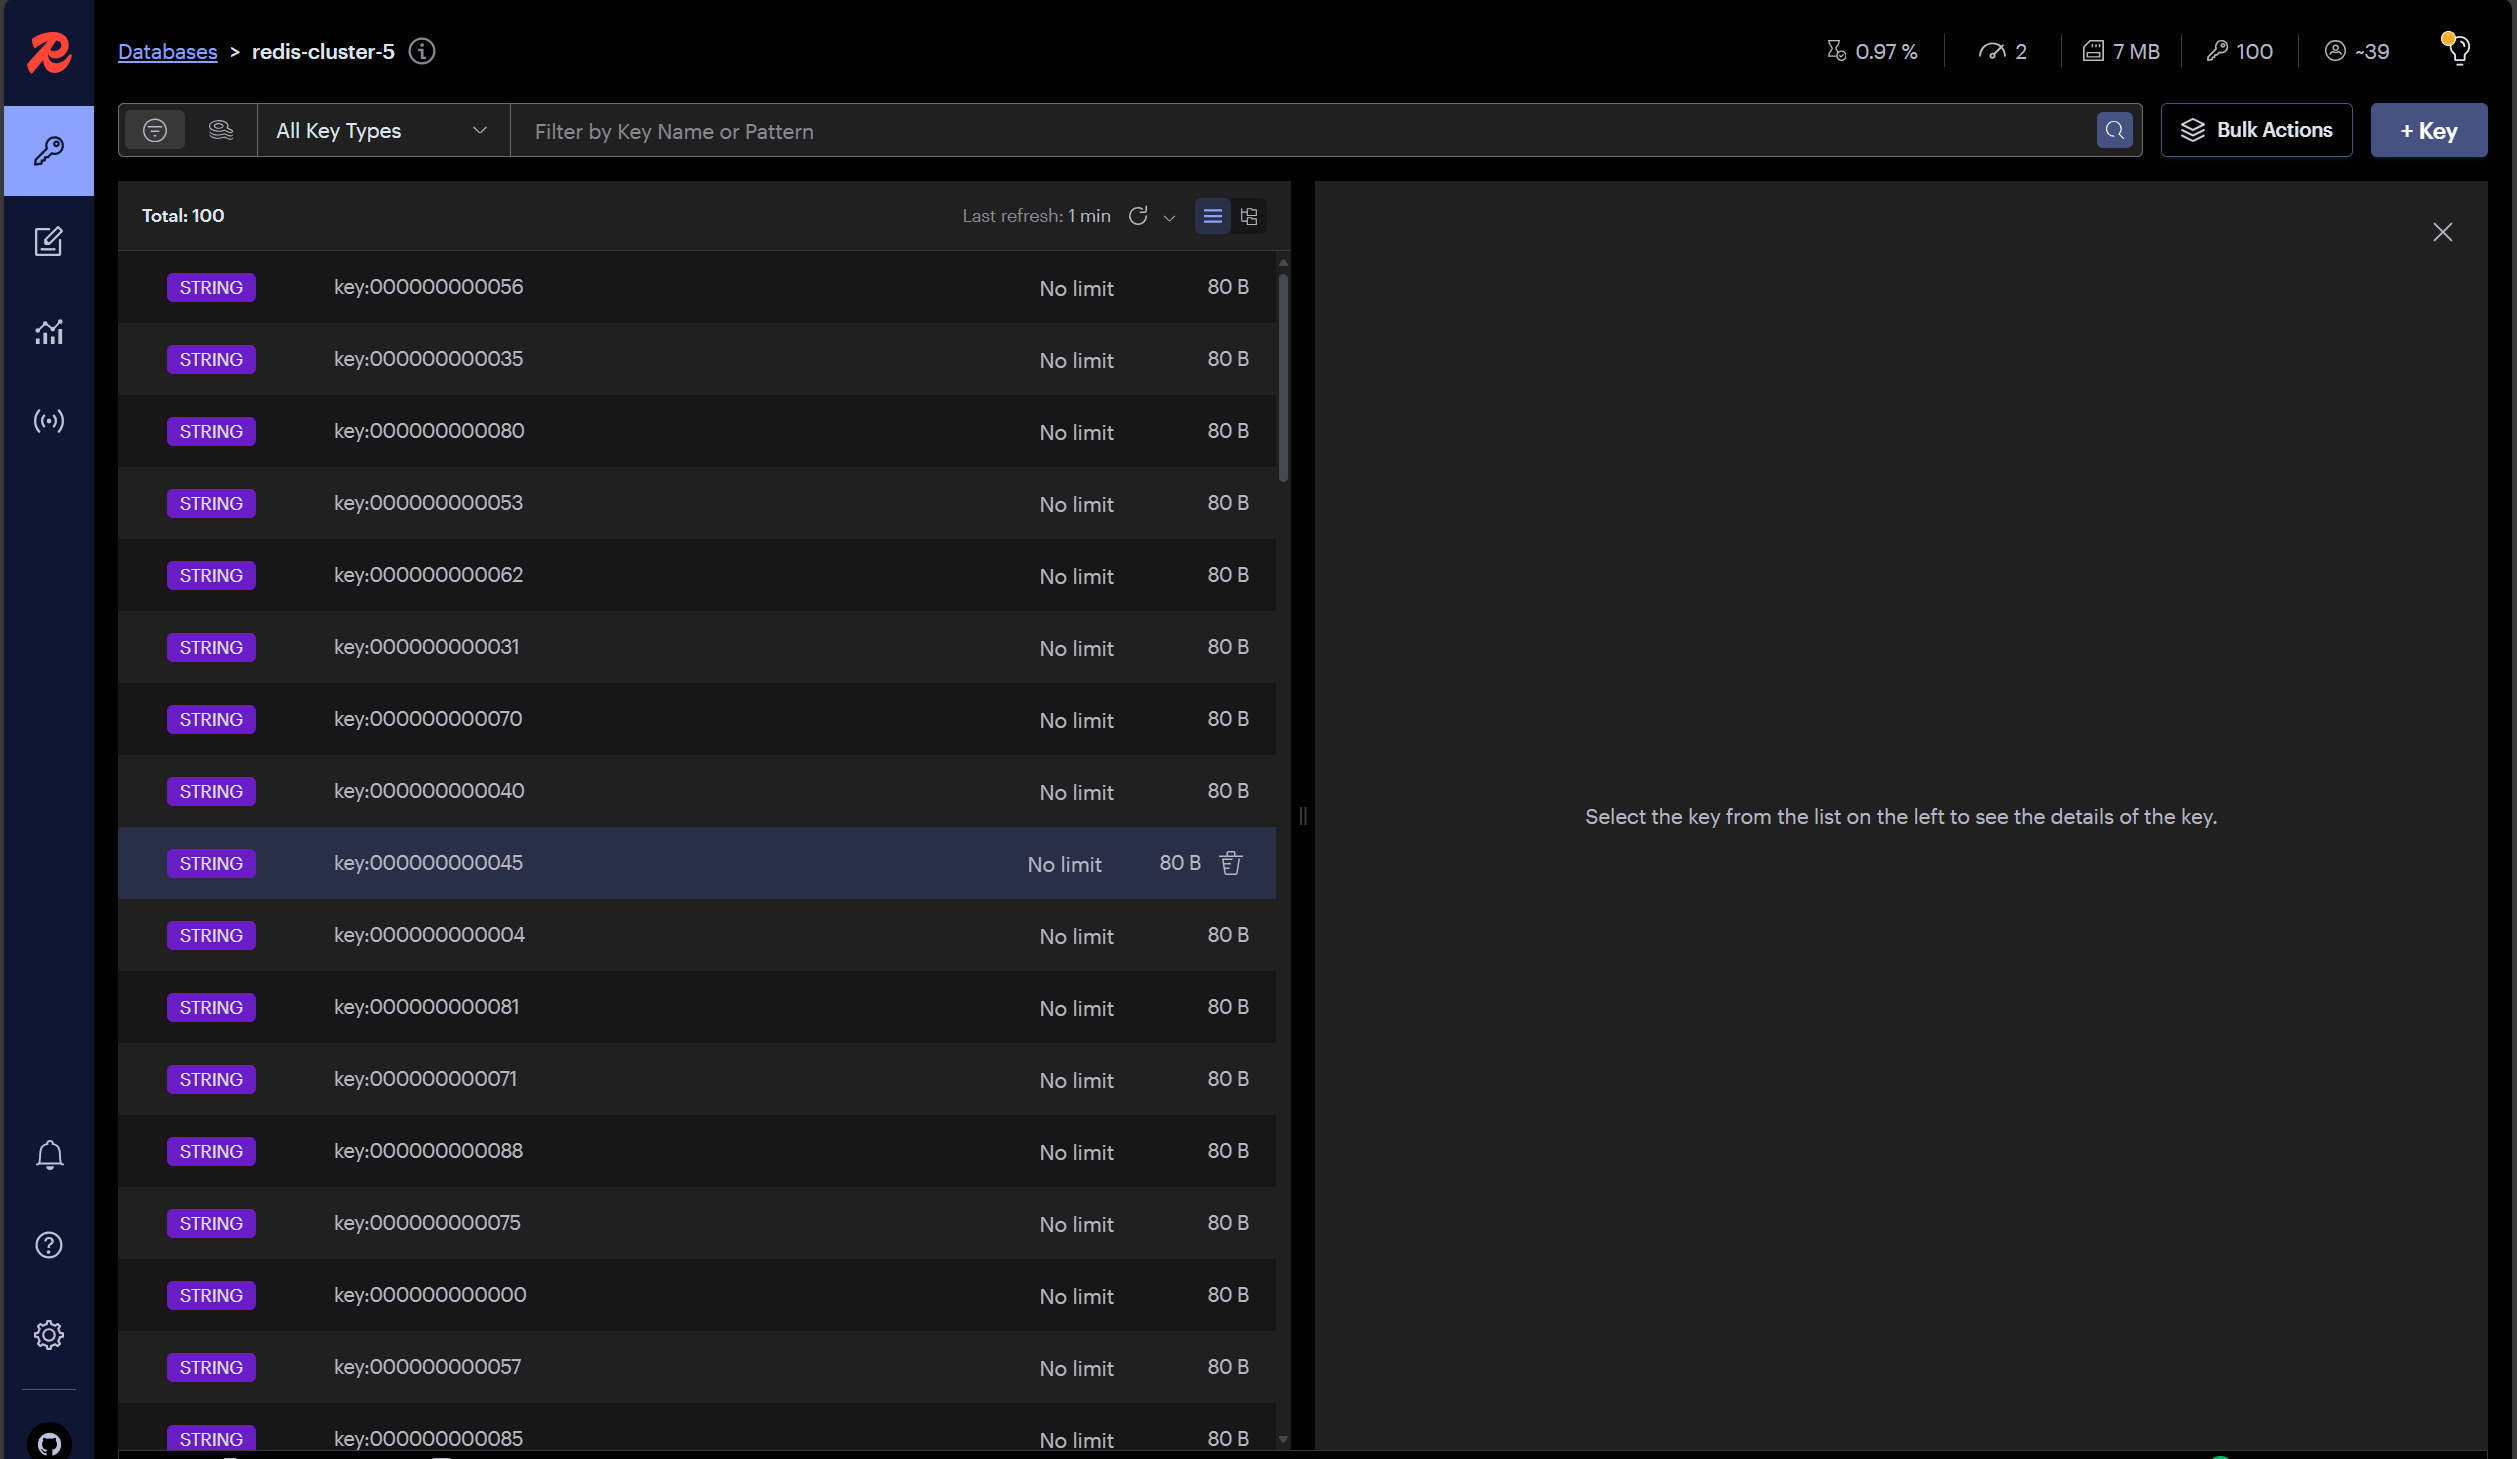
然后直接点击我们的数据库名称,就可以查看里面所有的数据,右上角可以添加数据
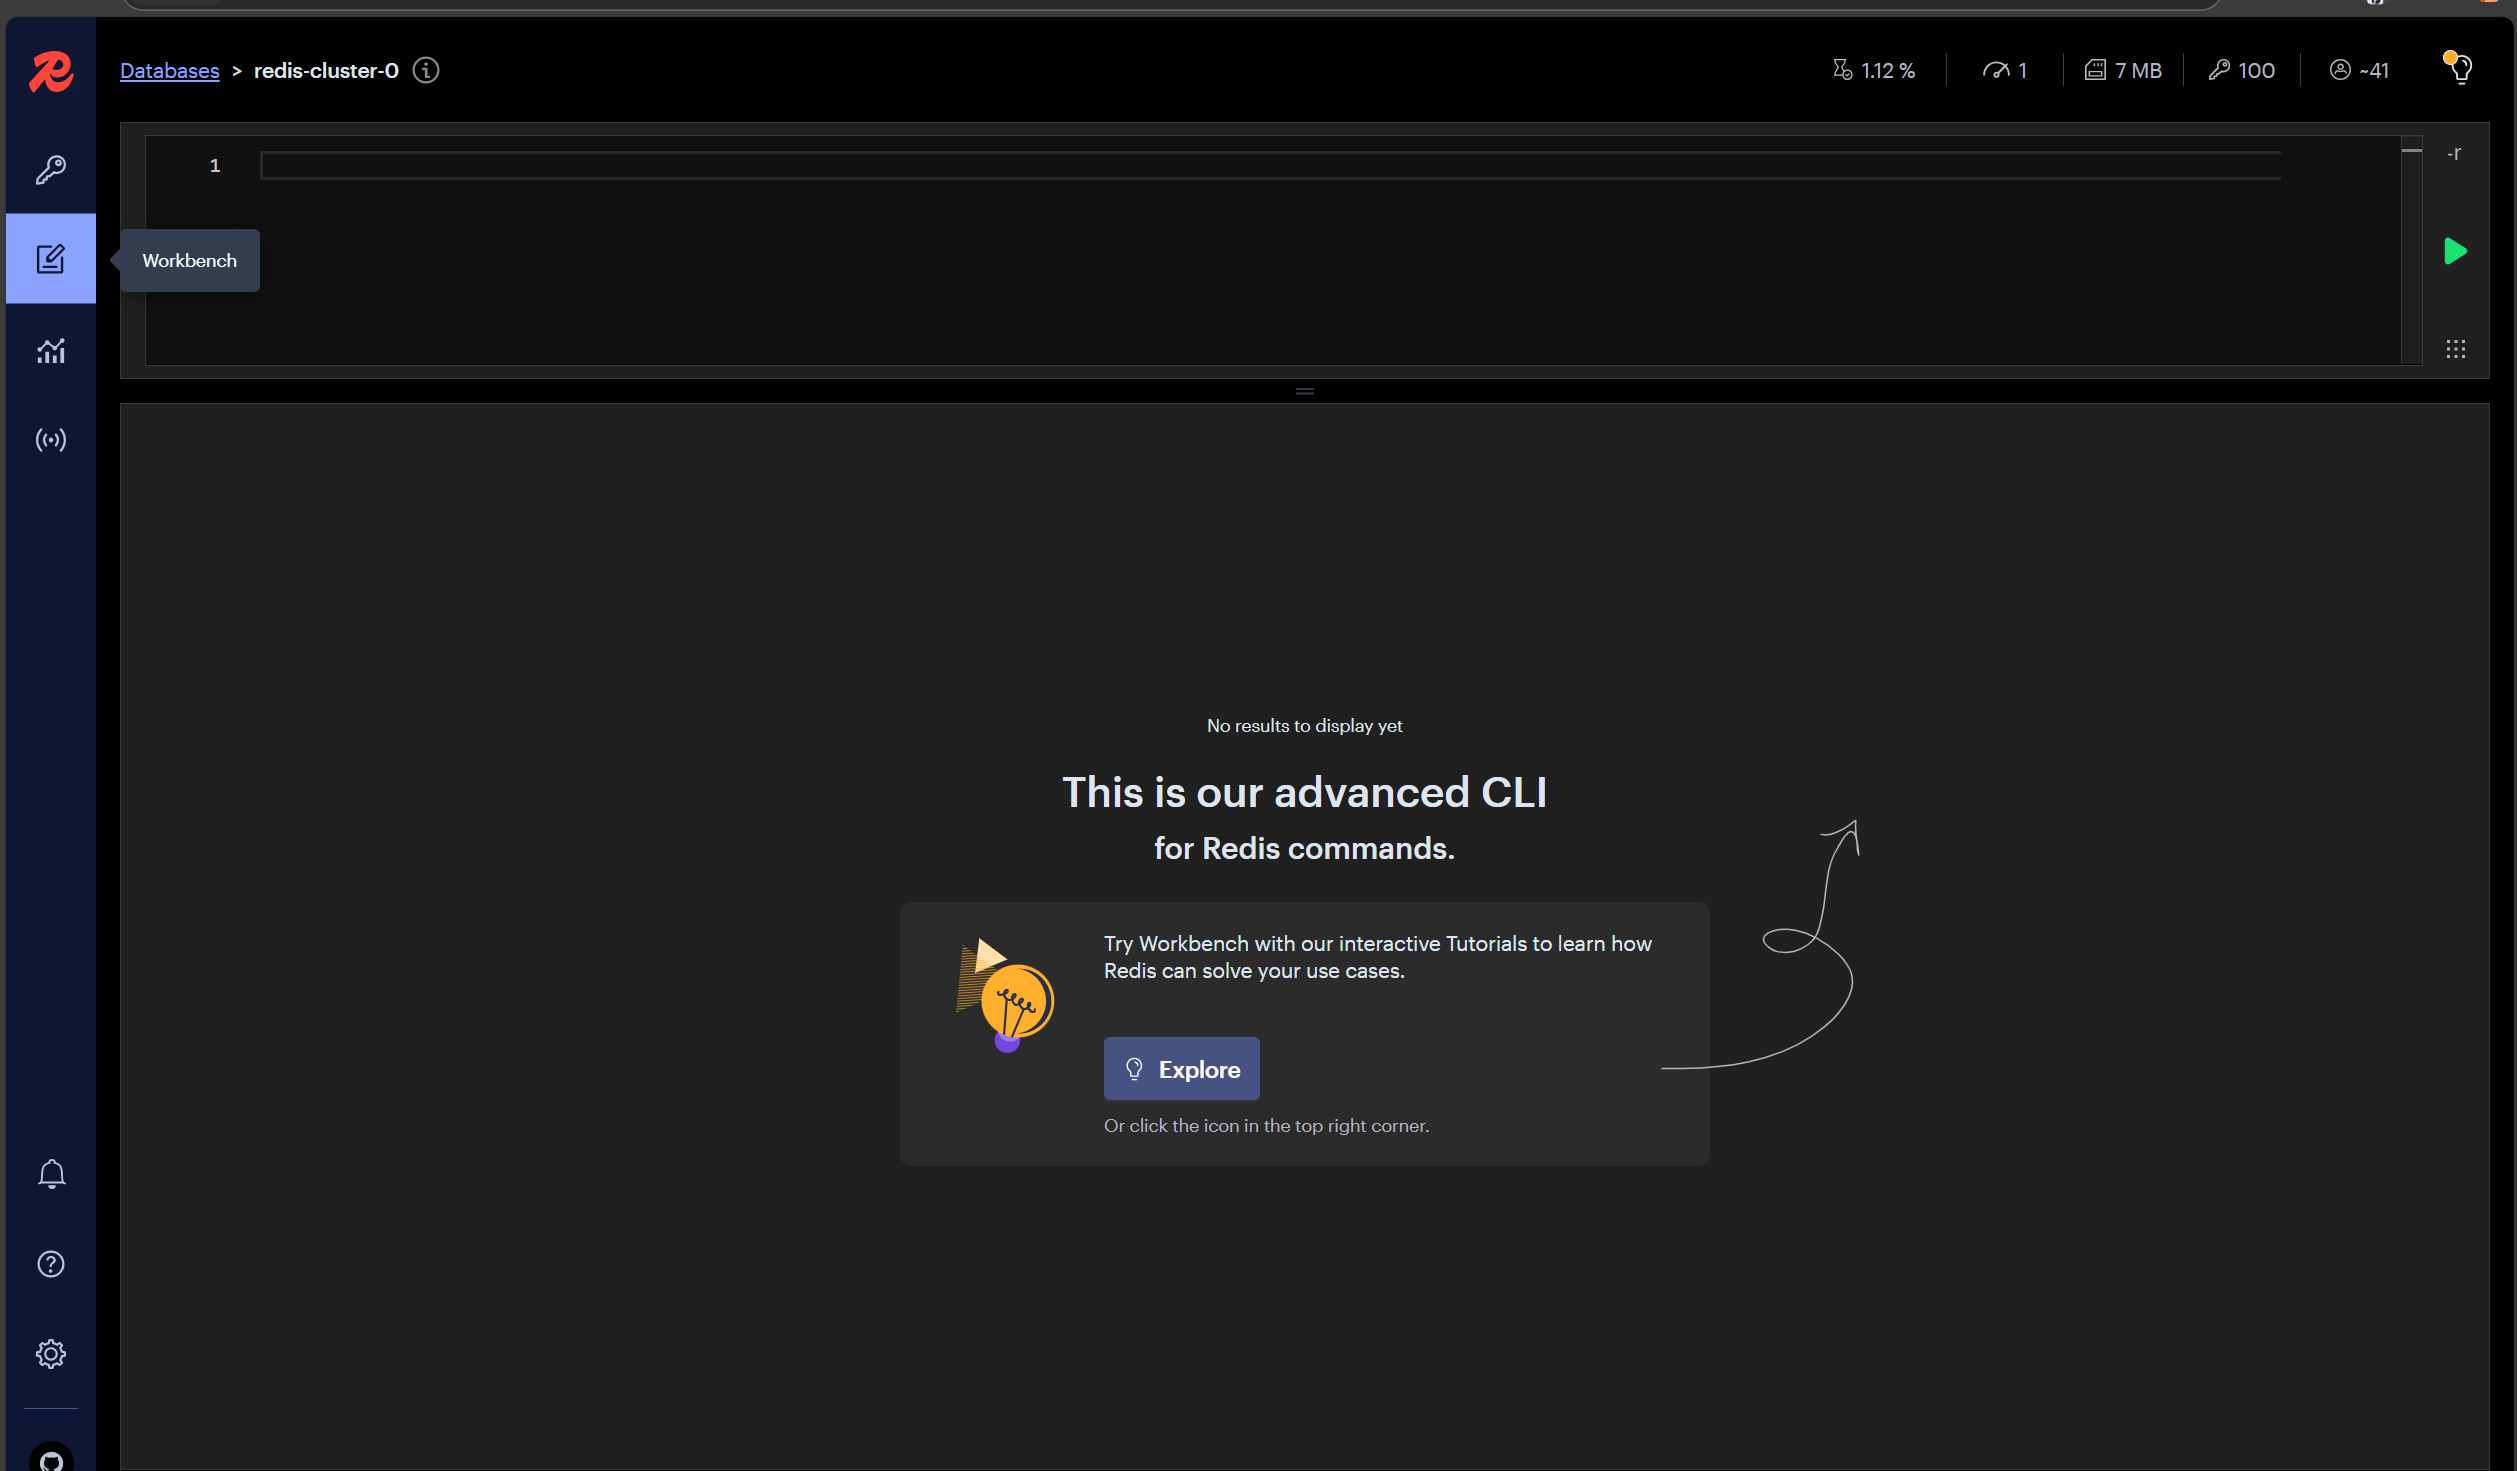
Workbench(可以执行 Redis 管理命令)
Analytics (里面存有的key是我们之前做的测试)