1.前言
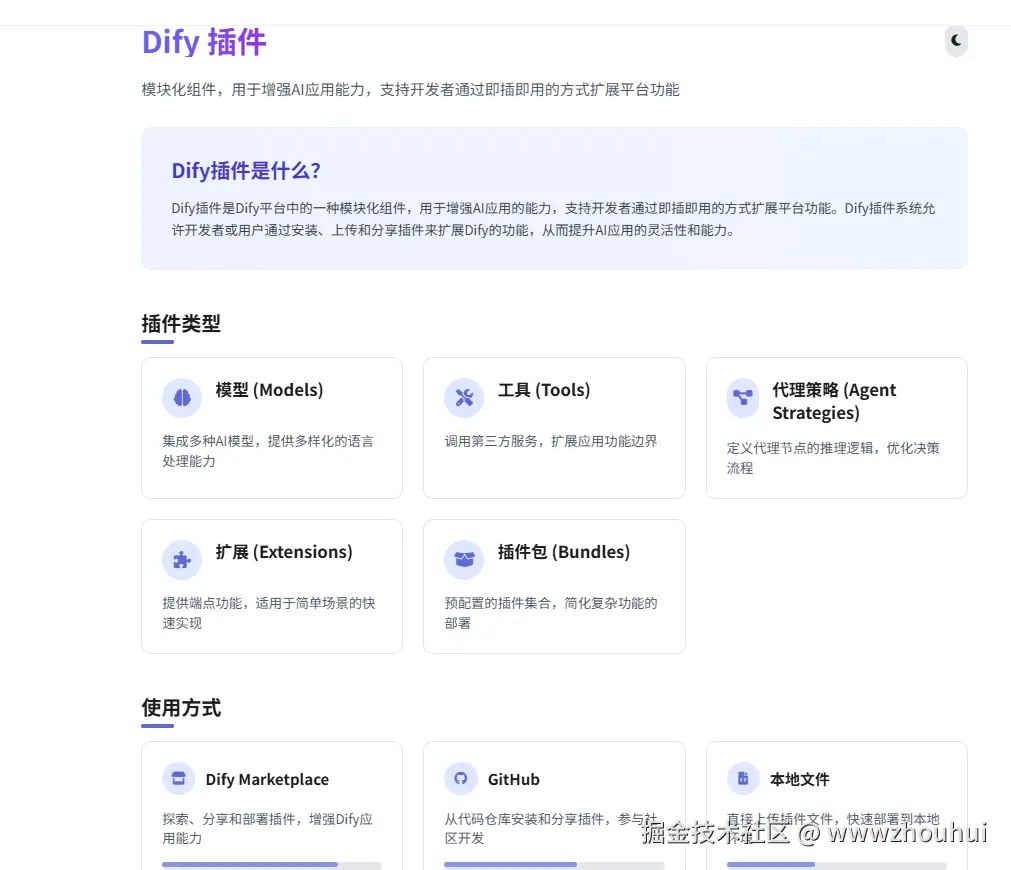
Dify 插件是 Dify 平台中的一种模块化组件,用于增强 AI 应用的能力,支持开发者通过即插即用的方式扩展平台功能。Dify 插件系统允许开发者或用户通过安装、上传和分享插件来扩展 Dify 的功能,从而提升 AI 应用的灵活性和能力。
Dify 插件的类型包括模型(Models)、工具(Tools)、代理策略(Agent Strategies)、扩展(Extensions)和插件包(Bundles)等。这些插件类型支持开发者根据具体需求选择和使用,以满足不同场景下的功能需求。例如,模型插件可以集成多种 AI 模型,工具插件可以调用第三方服务,代理策略插件可以定义代理节点的推理逻辑,扩展插件则提供端点功能,适用于简单场景。
之前有给大家做过关于dify插件开发的文章。《dify案例分享-零代码搞定 DIFY 插件开发:小白也能上手的文生图插件实战》
和《dify案例分享-零基础上手 Dify TTS 插件!从开发到部署免费文本转语音,测试 + 打包教程全有》,上周由于google nano_banana
非常火爆我又基于dify插件做了一个nano_banana 插件,然后基于nano_banana的插件做了一个dify的工作流。
《dify案例分享-国内首发!手把手教你用Dify调用Nano BananaAI画图》当时为了图方便就使用本地安装,后面安装过程中会有点小麻烦,然后我在群里面协助大家解决。
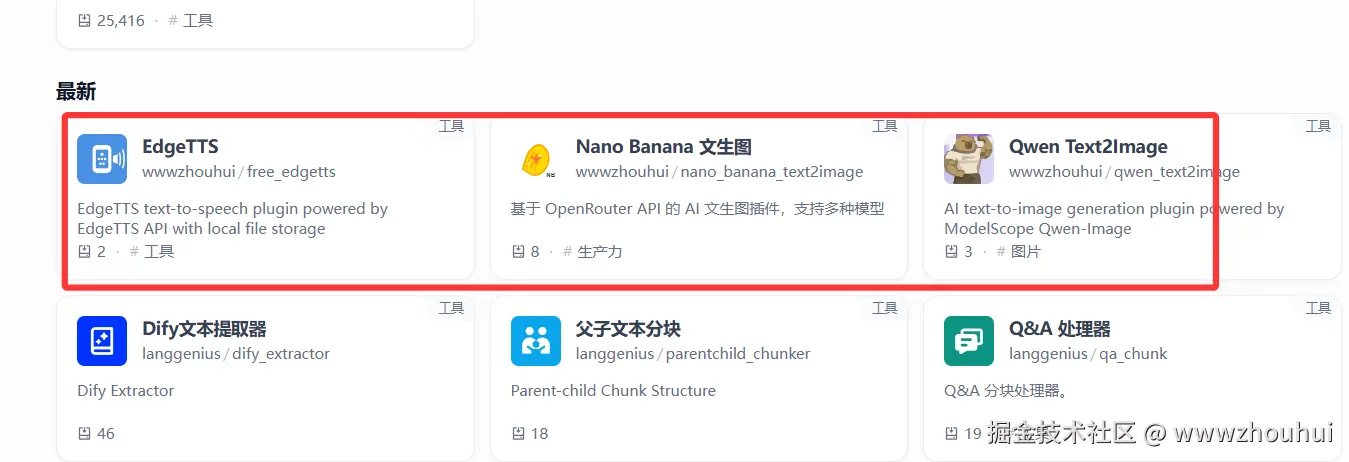
由于之前对dify 插件的上传应用市场不熟悉,导致不能及时上架dify应用市场,走了一些弯路。今天就带大家手把手教大家如何把制作好的dify 插件上传到应用市场上。 我们看一下我已经上架的三个插件
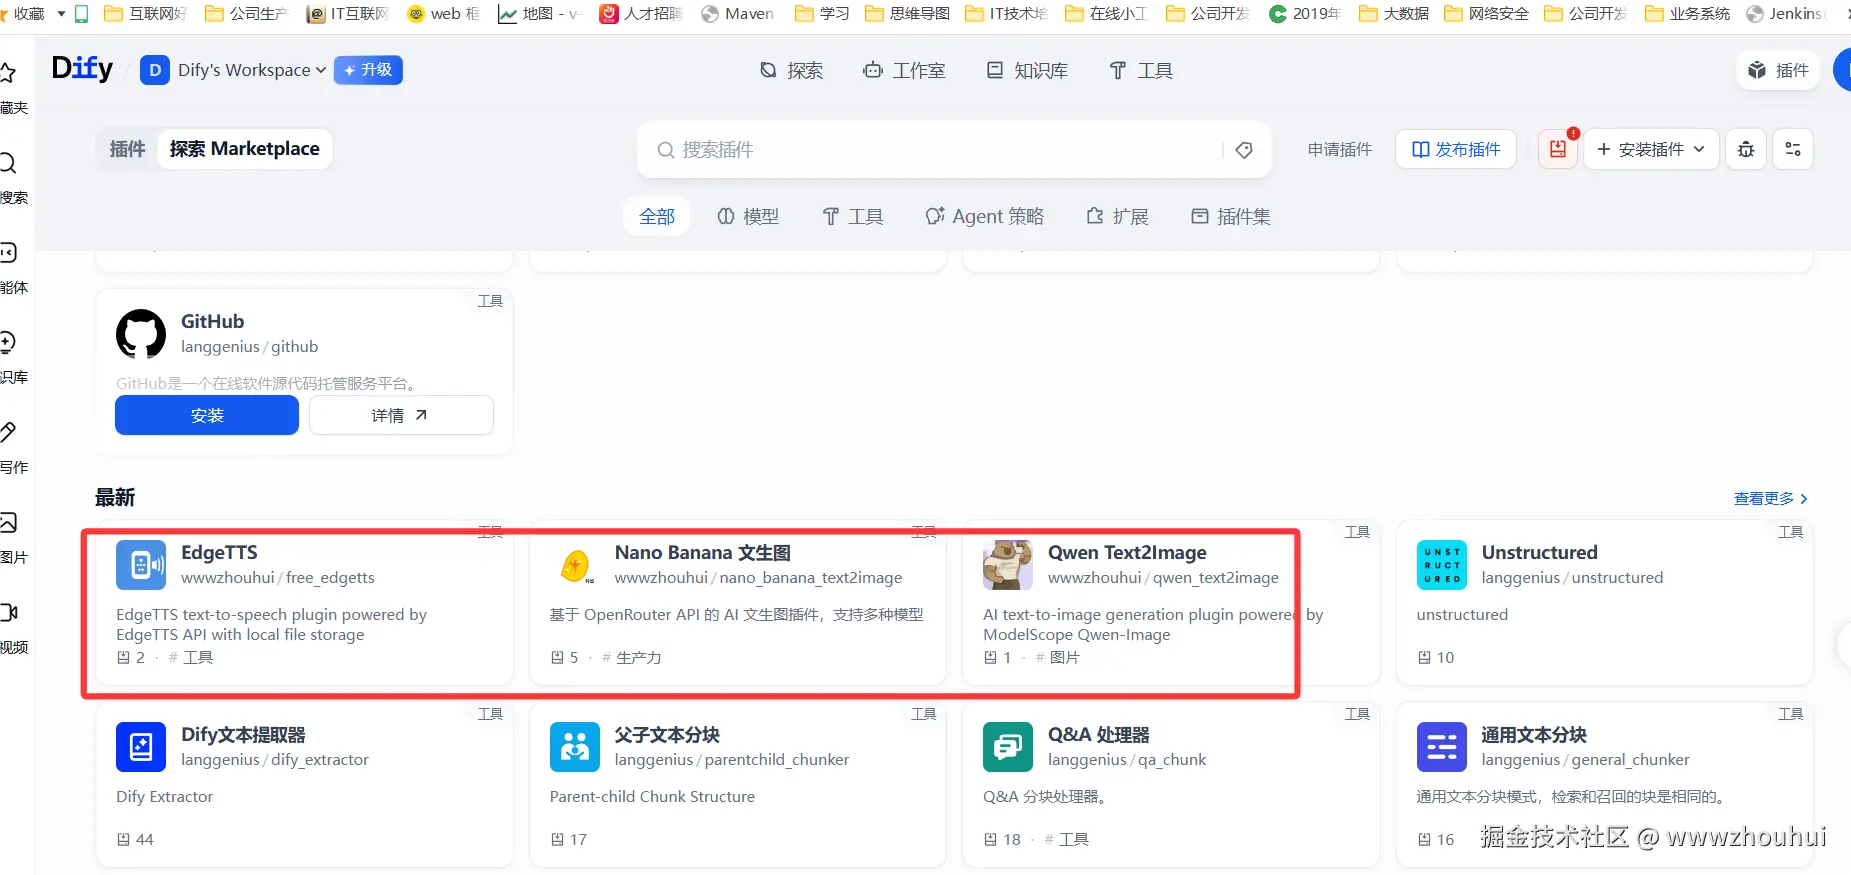
感兴趣的小伙伴可以在应用市场来体验三个插件。话不多说下面带大家制作如何上传这个插件。
2.插件文档要求
在上传插件市场之前文档有相关要求。
需要有一个PRIVACY.md 文档
大概内容如下
md
# Privacy Policy

This plugin processes your text prompts to generate images using the OpenRouter API. Here's how your data is handled:

## Data Processing

- **Text Prompts**: Your text content is sent to the OpenRouter API service to generate corresponding images
- **API Communication**: The plugin communicates with OpenRouter servers (https://openrouter.ai) to process text-to-image requests
- **Generated Images**: Image files are temporarily downloaded and processed by the plugin, then returned to your workflow
- **Model Selection**: You can choose from multiple AI models including Gemini, DALL-E, and Claude for image generation

## Data Storage

- **No Local Storage**: The plugin does not permanently store your text prompts or generated images locally
- **Temporary Processing**: All data processing is temporary and happens only during the image generation process
- **API Key Security**: Your OpenRouter API key is stored securely within your environment and is not logged or transmitted elsewhere

## Third-Party Services

- **OpenRouter API**: Your text prompts are sent to the OpenRouter image generation service to create images
- **Network Communication**: The plugin requires internet connectivity to communicate with OpenRouter servers
- **Service Provider**: OpenRouter API service (https://openrouter.ai) processes your requests according to their privacy policy
- **AI Model Providers**: Depending on your model selection, requests may be processed by Google (Gemini), OpenAI (DALL-E), or Anthropic (Claude)

## Optional Features

- **Image-to-Image Generation**: If you provide an input image URL, it will be downloaded, processed, and sent to OpenRouter for transformation
- **Image Processing**: Input images are temporarily downloaded, resized if necessary, and converted to appropriate formats before transmission

## Data Retention

- The plugin does not retain any user data after task completion
- Generated images are temporarily processed and immediately returned to your workflow
- No persistent storage of prompts, images, or user information within the plugin

## Data Transmission

- Text prompts and input images are transmitted securely over HTTPS to OpenRouter API
- Generated images are returned securely over HTTPS
- No data is shared with any other third parties beyond the OpenRouter service
有的小伙伴会问这个文档怎么写的? 不会写可以问AI 我的思路是把之前别人写的好的复制到当前项目下面。输入下面的提示词
请认真阅读我这个项目nano_banana,基于这个项目的内容修改下PRIVACY.md 关于插件项目隐私相关说明。原来的PRIVACY.md是基于别的项目参考拿过来的,需要修改的修改使用的内容用英文我使用的是claude code . 或则ccr 模型可以用国内模型,阿里的魔搭社区每天送2000次积分,这个国内模型都可以实现。 关于ccr 安装不会? 可以看我之前的文章《免费玩转 AI 编程!Claude Code Router + Qwen3-Code 实战教程》
通过上面的操作模型理解了你的项目功能并结合Privacy Policy 生成相关文档。
需要编写英文版本的README.md
这个就很好理解,你需要有一个项目介绍。因为考虑到dify走海外市场路线,所以需要英文README.md文档,我之前的文档是中文的,我让大模型给我生成
请基于README_CN.md 编写一个README.md 文档,内容都是英文的。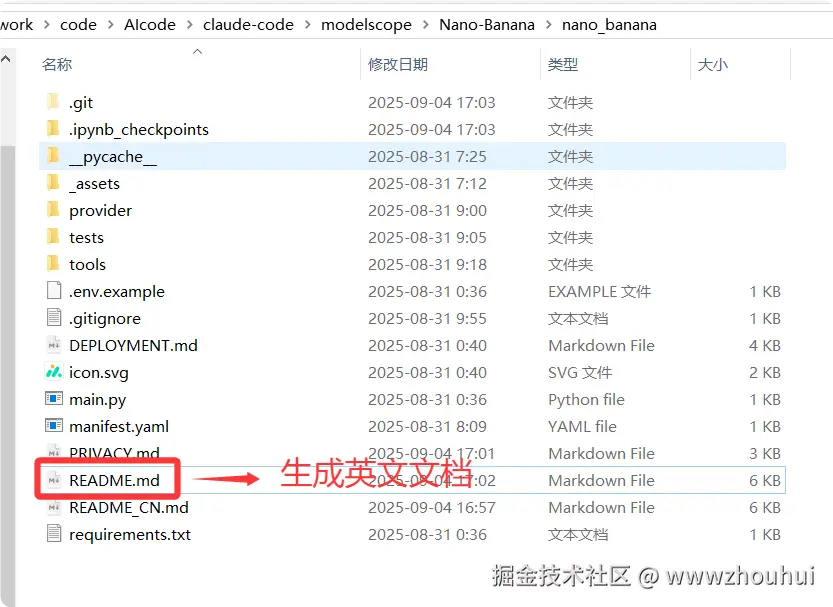
3.插件上传
首选我们需要把插件代码写好,并打包成difypkg 文件

关于如何打包可以看我之前的教程。这里就不做相信展开了。
fork项目
首选我们需要去 dify-plugins 项目中fork 这个项目到本地
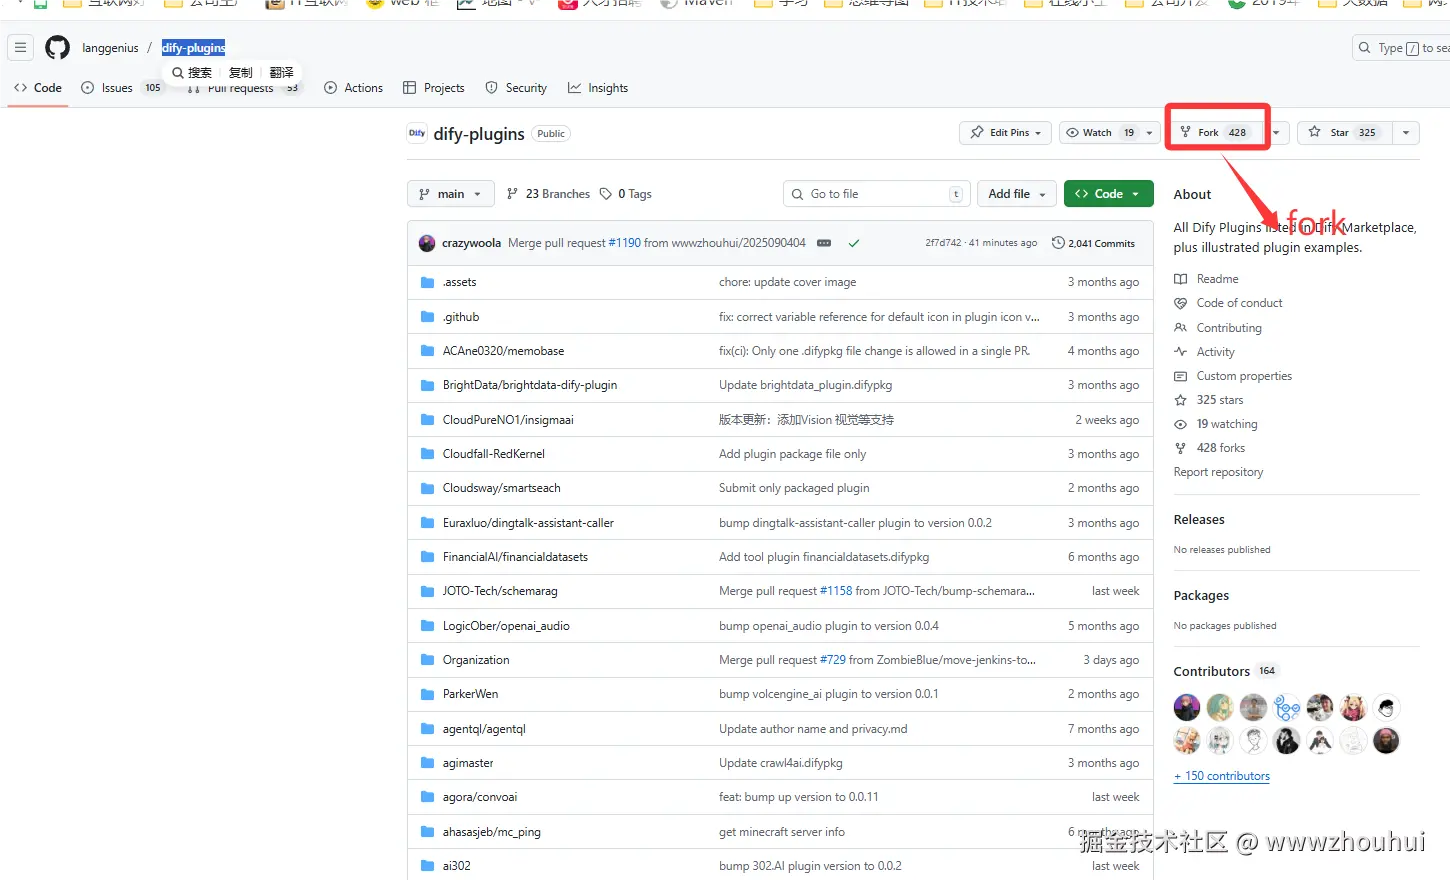
我已经fork过了,所以显示我fork 后的项目
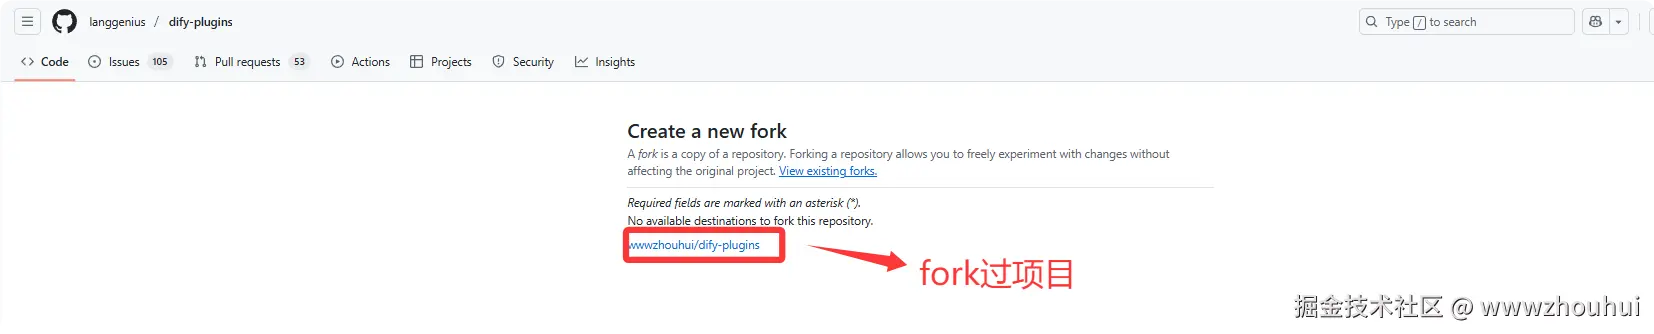
我们点击这个项目进入到我们fork插件项目
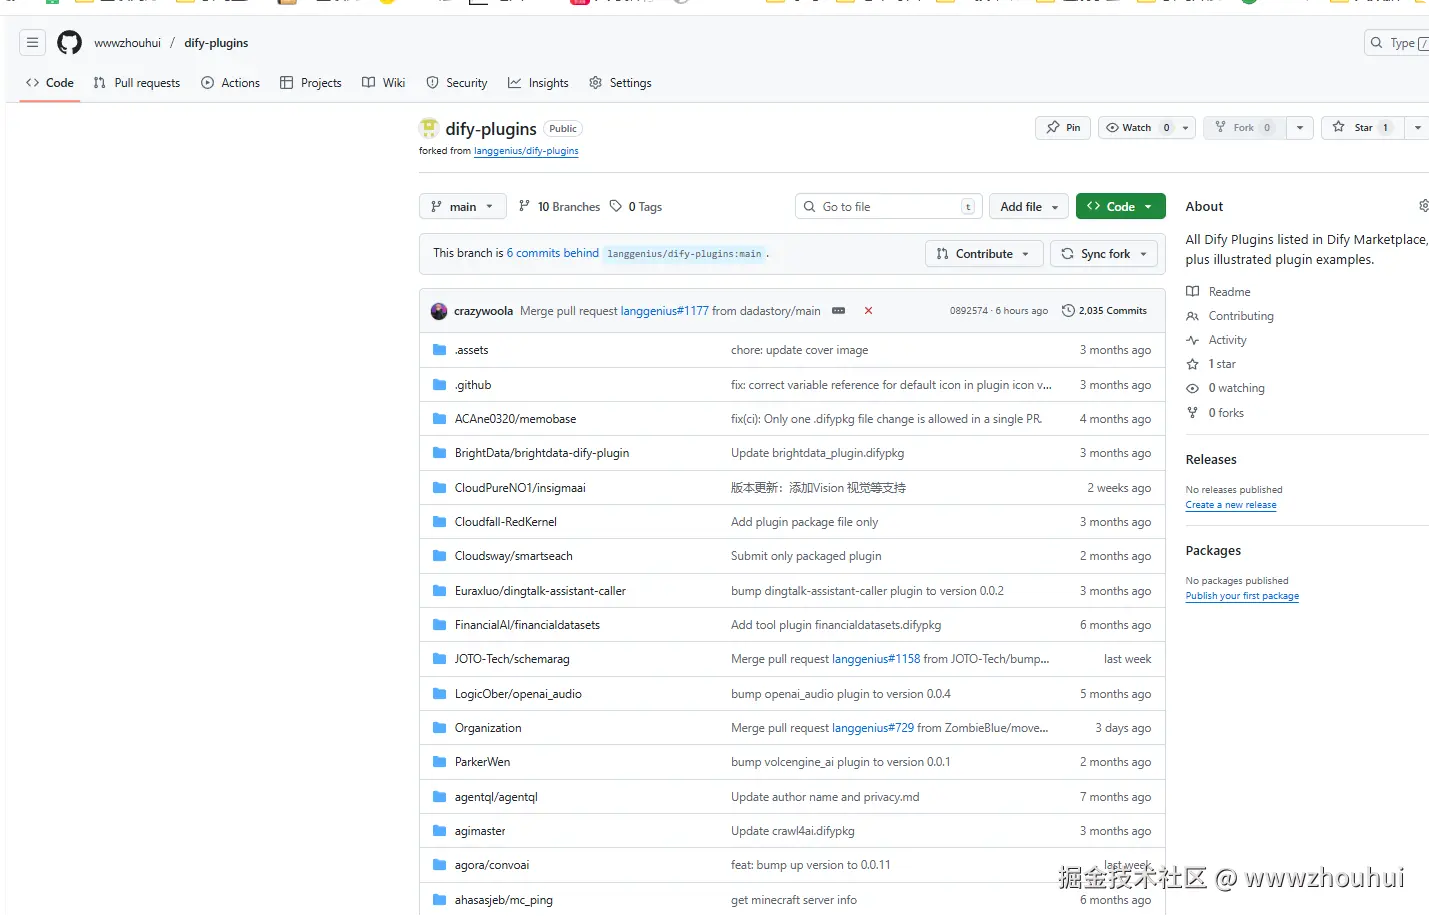
将仓库clone到本地
这里我们使用git 来clone 我这个fork的项目到本地
git clone github.com/wwwzhouhui/...

这个时候我们在本地就可以看到这个项目。
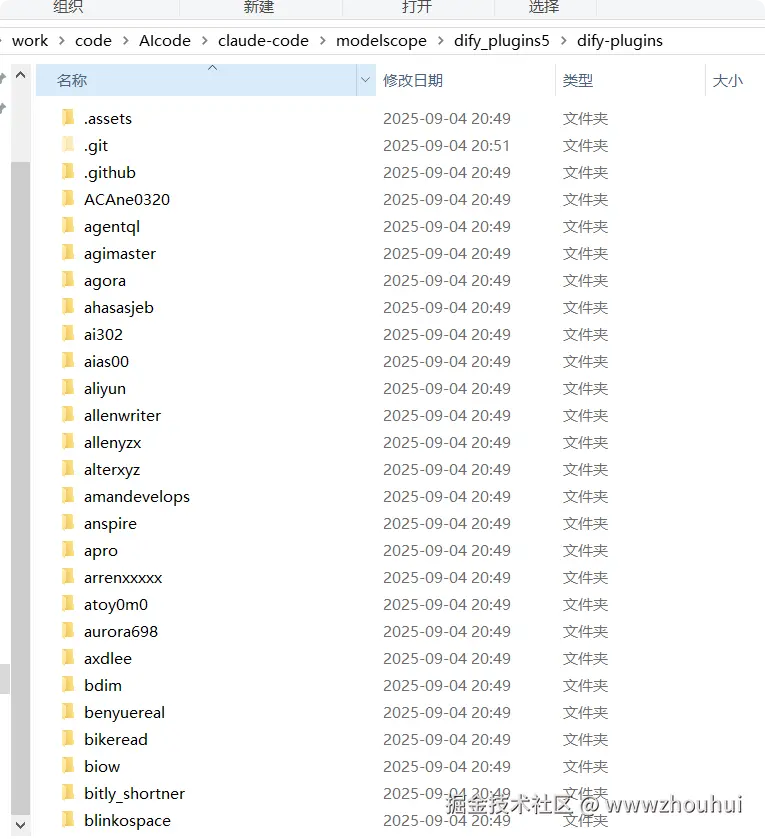
新建一个文件夹
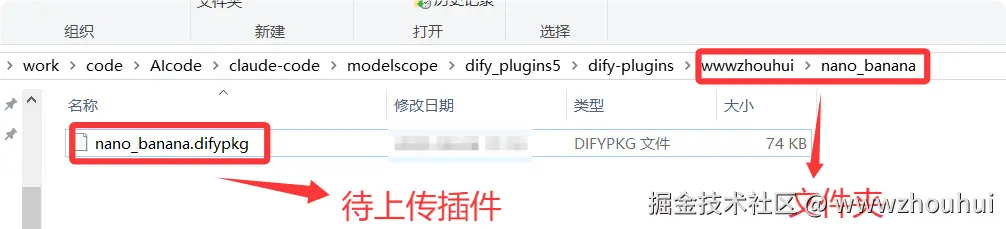
由于我们是第一次上传,所以需要新建一个我们自己项目的文件。比如我的是wwwzhouhui,然后就是具体插件名称nano_banana
文件夹里面就是我要上传的这个插件。nano_banana.difypkg
创建新分支,将修改后的本地仓库搬运到分支中
接下来我们使用git 命令把这个插件提交到分支仓库中。
sql
cd dify-plugins/
git checkout -b  2025090405
git add .
git commit -m "插件nano_banana"
git push origin 2025090405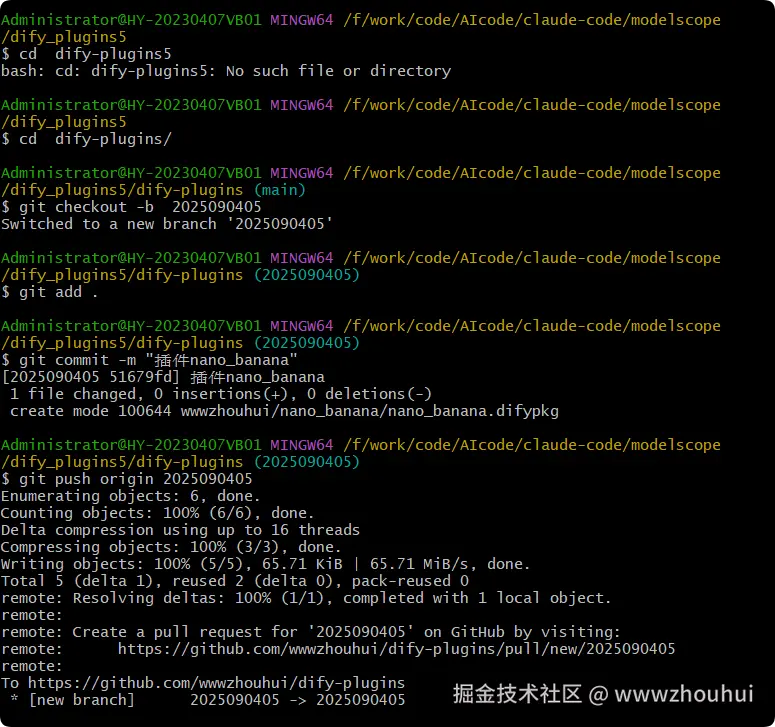
pull request
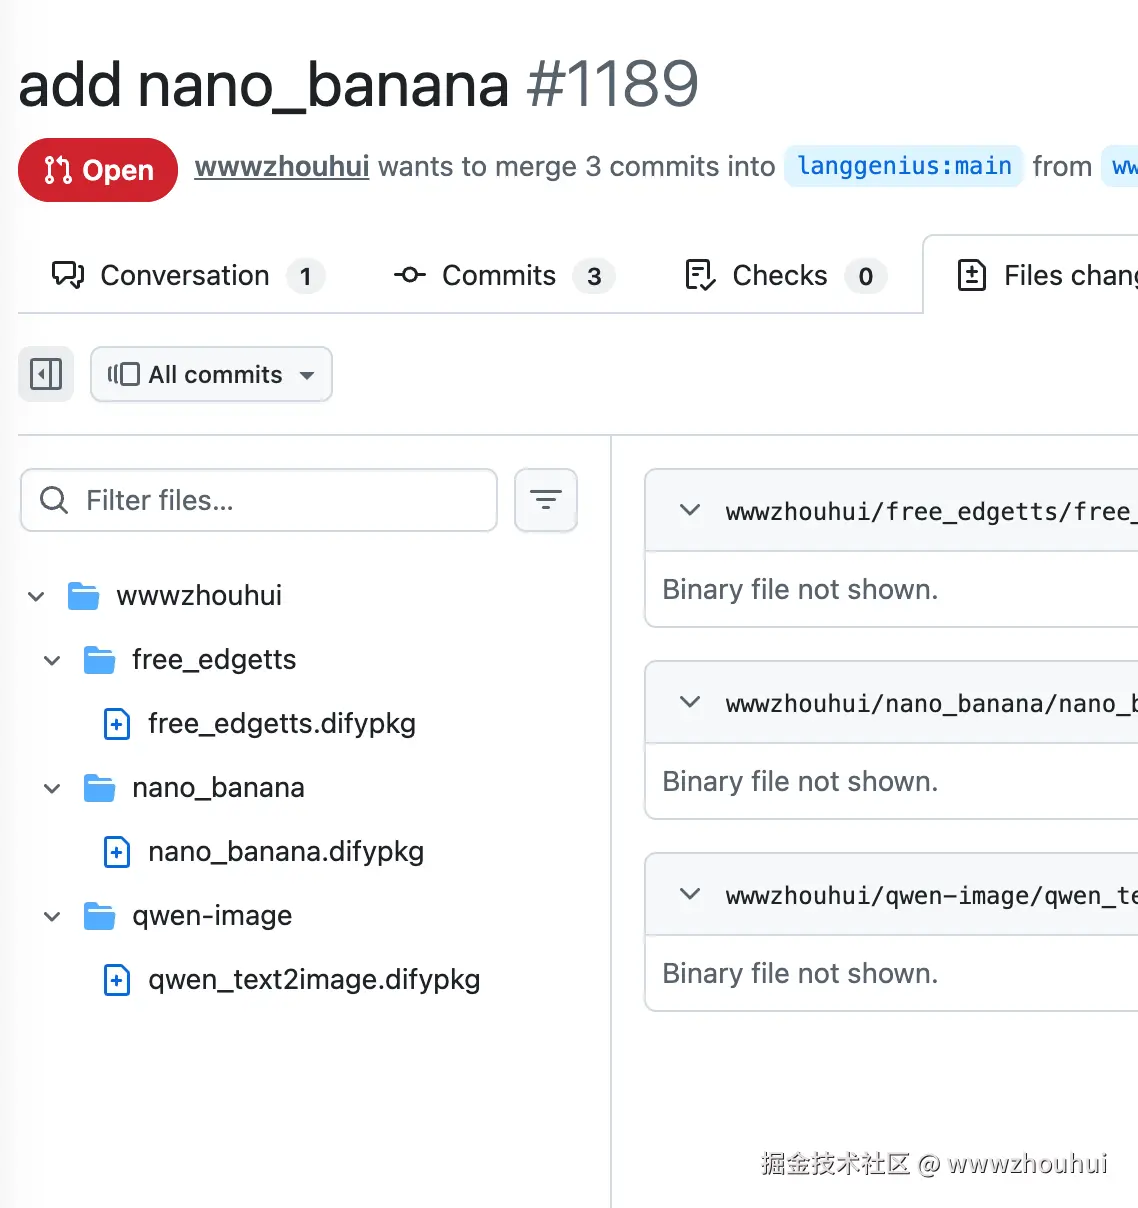
这个时候我们在插件提交需要提交一个PR 实行代码的合并操作。
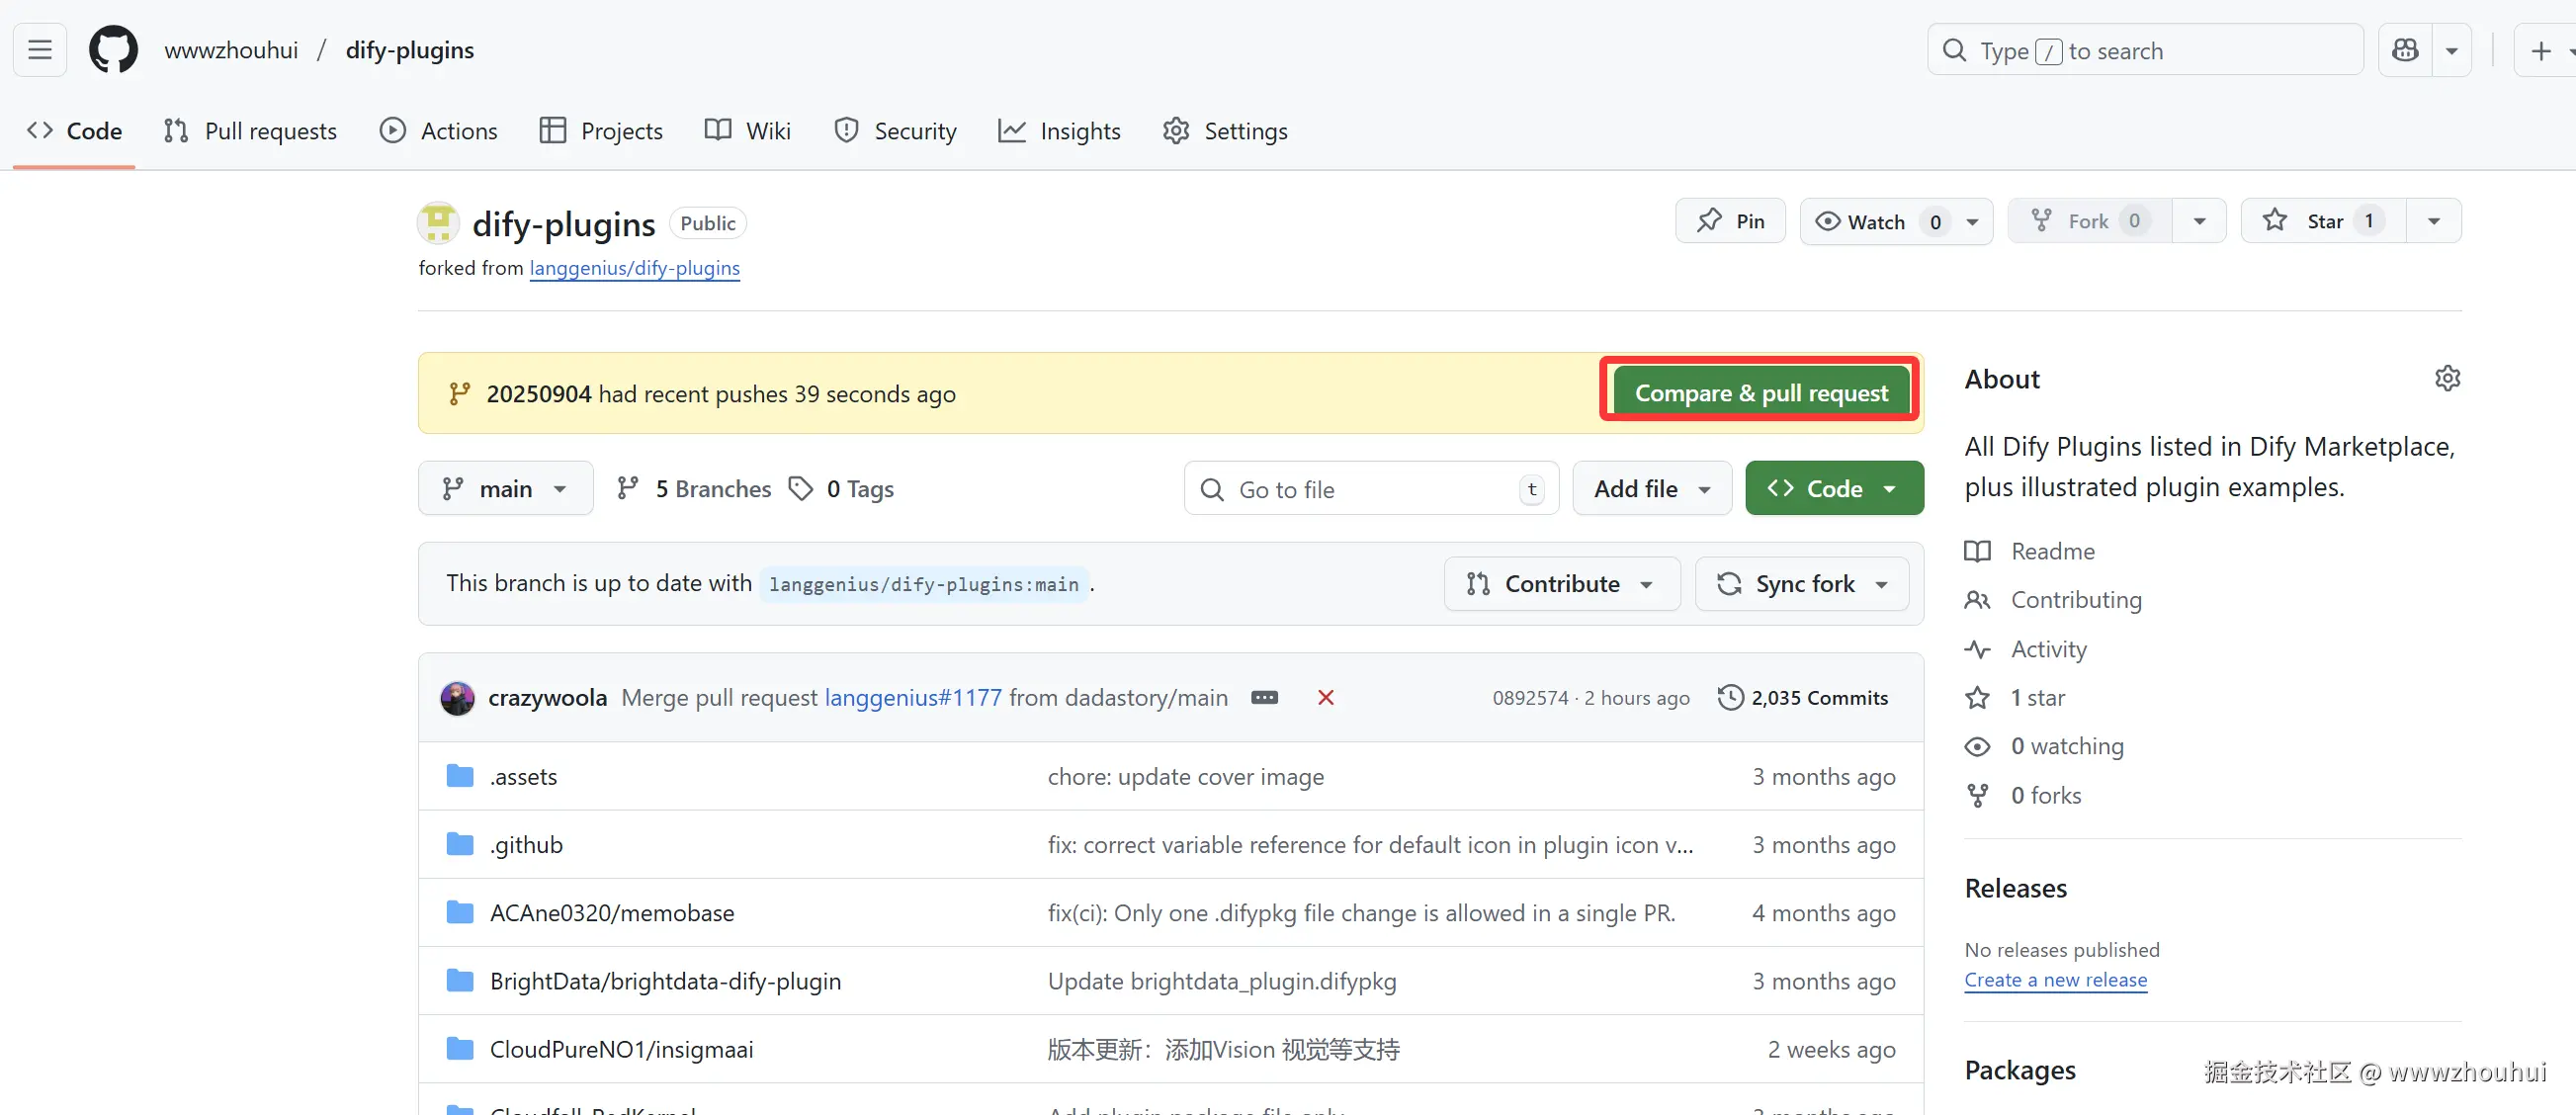
完成后,进入你fork的仓库,找到该分支
点击
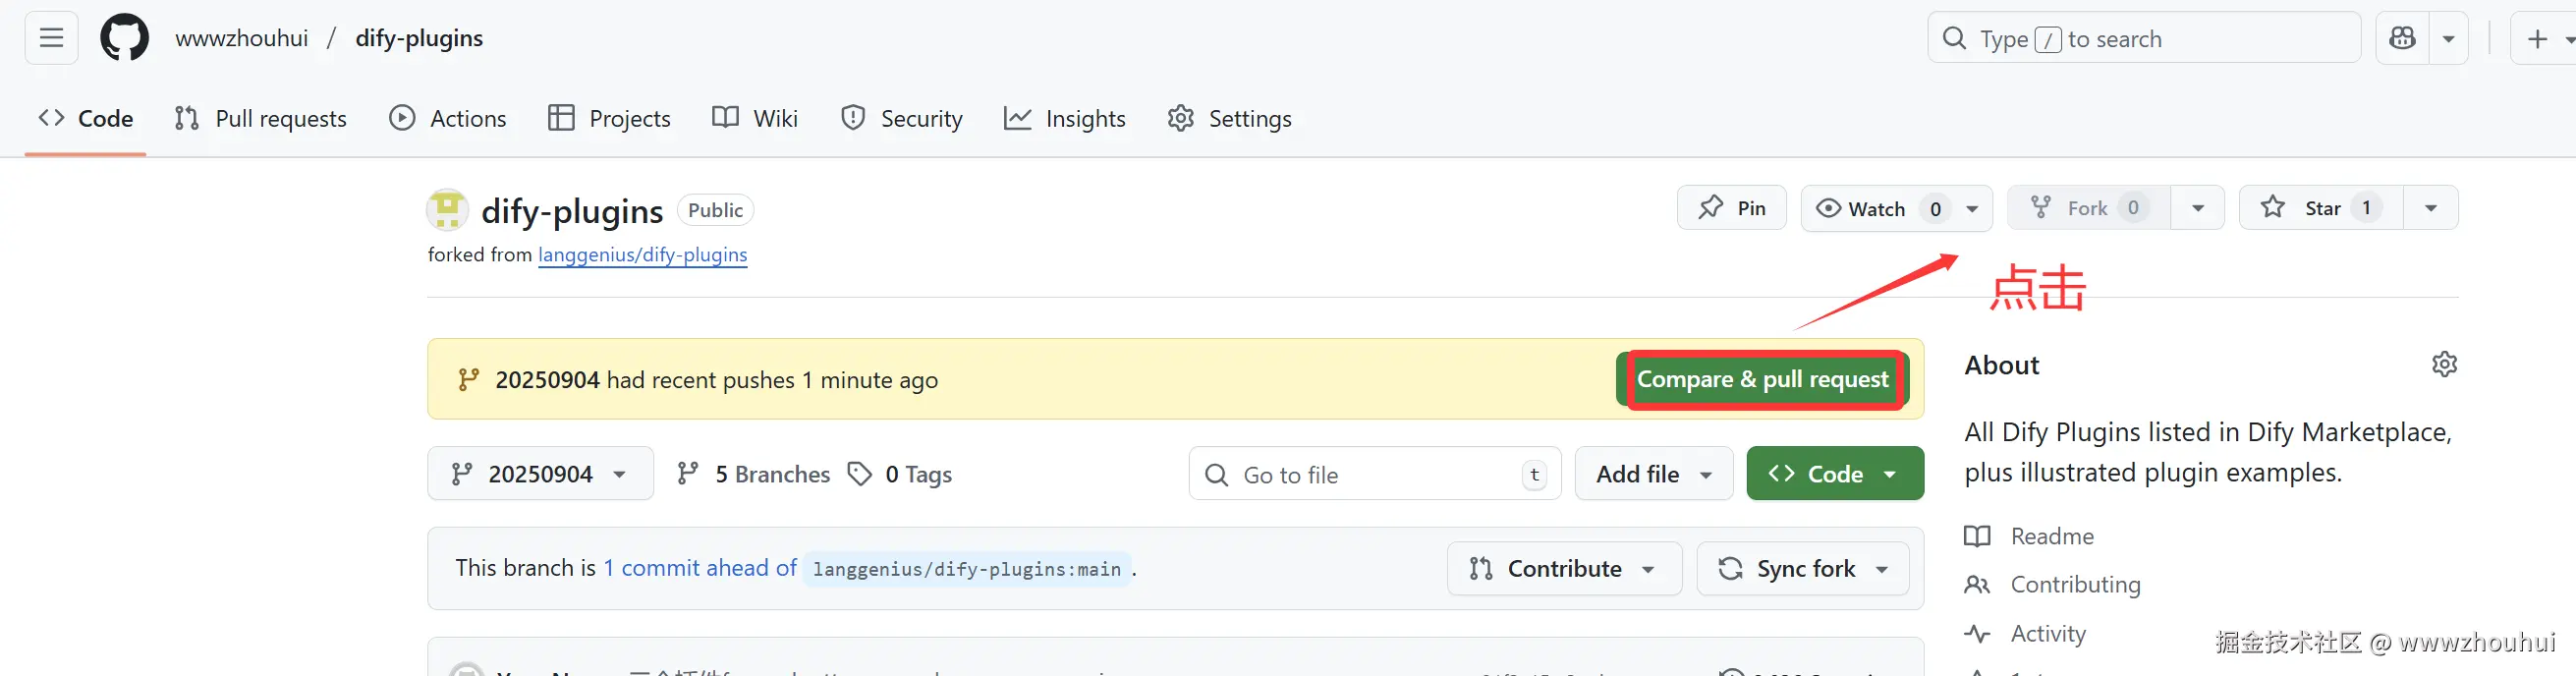
填写信息提交, Plugin Author 填写我的名字、Plugin Name 填写我们上面插件名字 如:nano_banana,Repository URL 填写我们开源项目地址例如:github.com/wwwzhouhui/...
less
1. Metadata
Plugin Author: wwwzhouhui
Plugin Name: nano_banana
Repository URL: https://github.com/wwwzhouhui/nano_banana
2. Submission Type
 New plugin submission

 Version update for existing plugin

3. Description
4. Checklist
[x] I have read and followed the Publish to Dify Marketplace guidelines
[x] I have read and comply with the Plugin Developer Agreement
[x] I confirm my plugin works properly on both Dify Community Edition and Cloud Version
[x] I confirm my plugin has been thoroughly tested for completeness and functionality
[x] My plugin brings new value to Dify
5. Documentation Checklist
Please confirm that your plugin README includes all necessary information:

 Step-by-step setup instructions
 Detailed usage instructions
 All required APIs and credentials are clearly listed
 Connection requirements and configuration details
 Link to the repository for the plugin source code
6. Privacy Protection Information
Based on Dify Plugin Privacy Protection Guidelines:

Data Collection
Privacy Policy
 I confirm that I have prepared and included a privacy policy in my plugin package based on the Plugin Privacy Protection Guidelines
这里需要注意的是这个插件仓库对提交文件有一定的要求。必须要只能上传一个文件,并且文件是.difypkg 文件。超过多个文件是不能触发自动检查的,这里会导致自动执行action失败。
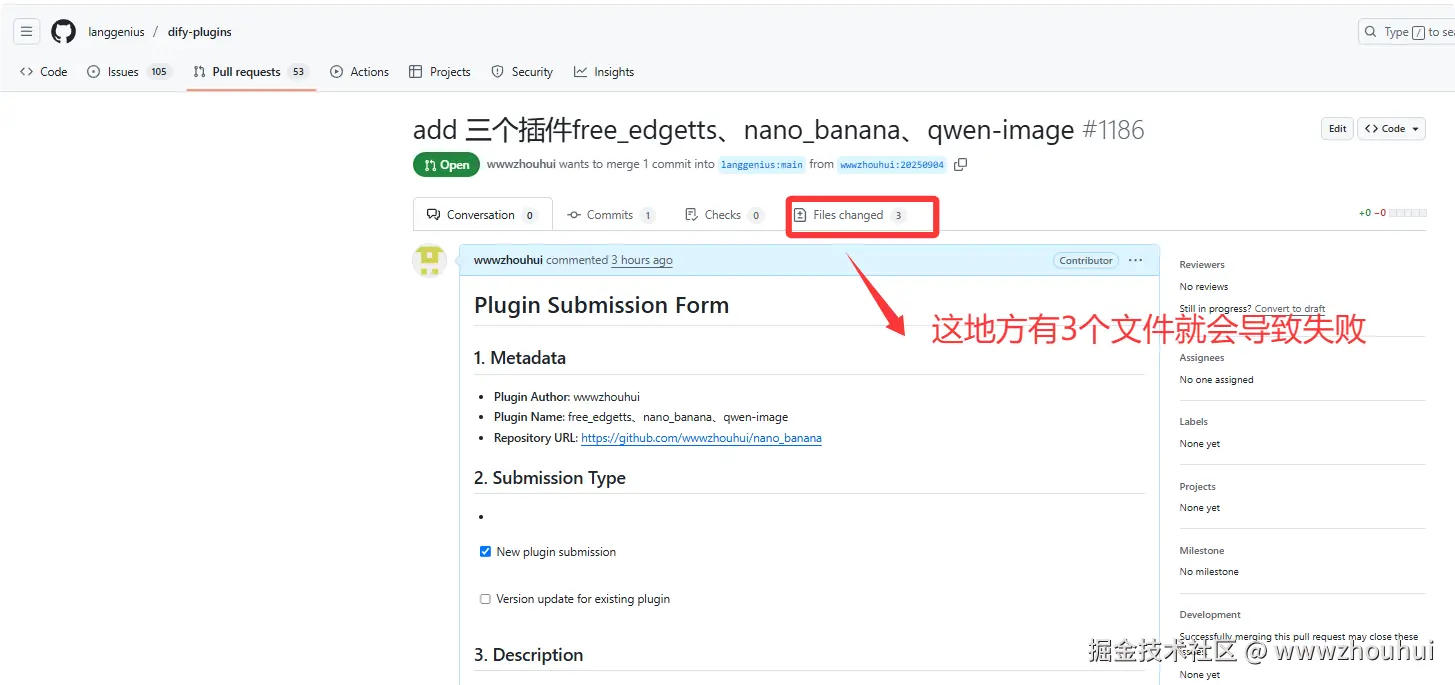
下面的是错误的3个文件
按照上面要求提交后,系统自动触发action
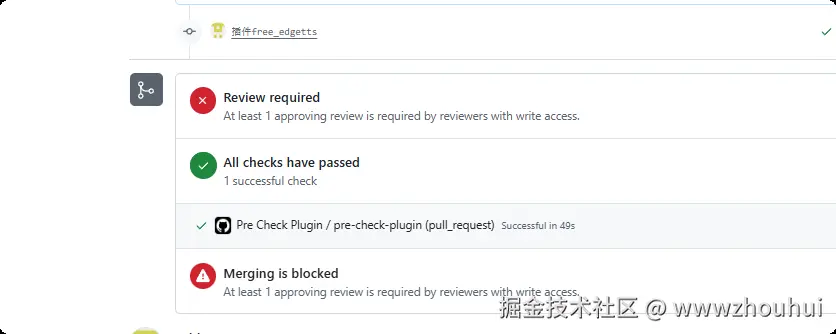
上面出现后等待代码合并,合并完成后就可以了。
这里非常感谢彻夜之歌 🍌布拿拿 和非法操作 两位大佬的指导

后面插件代码合并后我们就可以在应用市场看到了
4.常见问题
插件签名验证问题
之前没有使用插件市场上下载插件,通过本地上传插件会出现下面这个错误
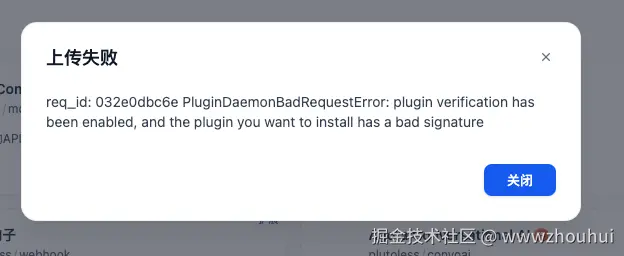
这个问题主要是因为插件本地安装没有通过dify 安全验证 ,所以我们需要在.env文件中修改配置
shell
FORCE VERIFYING SIGNATURE=false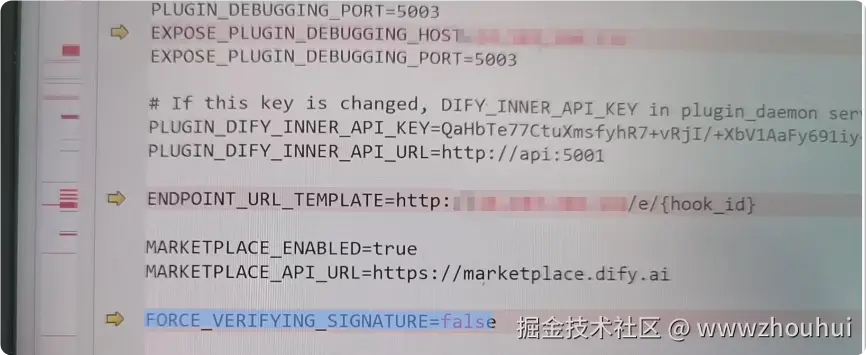
默认的这个FORCE VERIFYING SIGNATURE=true,
如果从插件市场下载,这里就不需要设置.
安装nano_banana生成图片显示不了
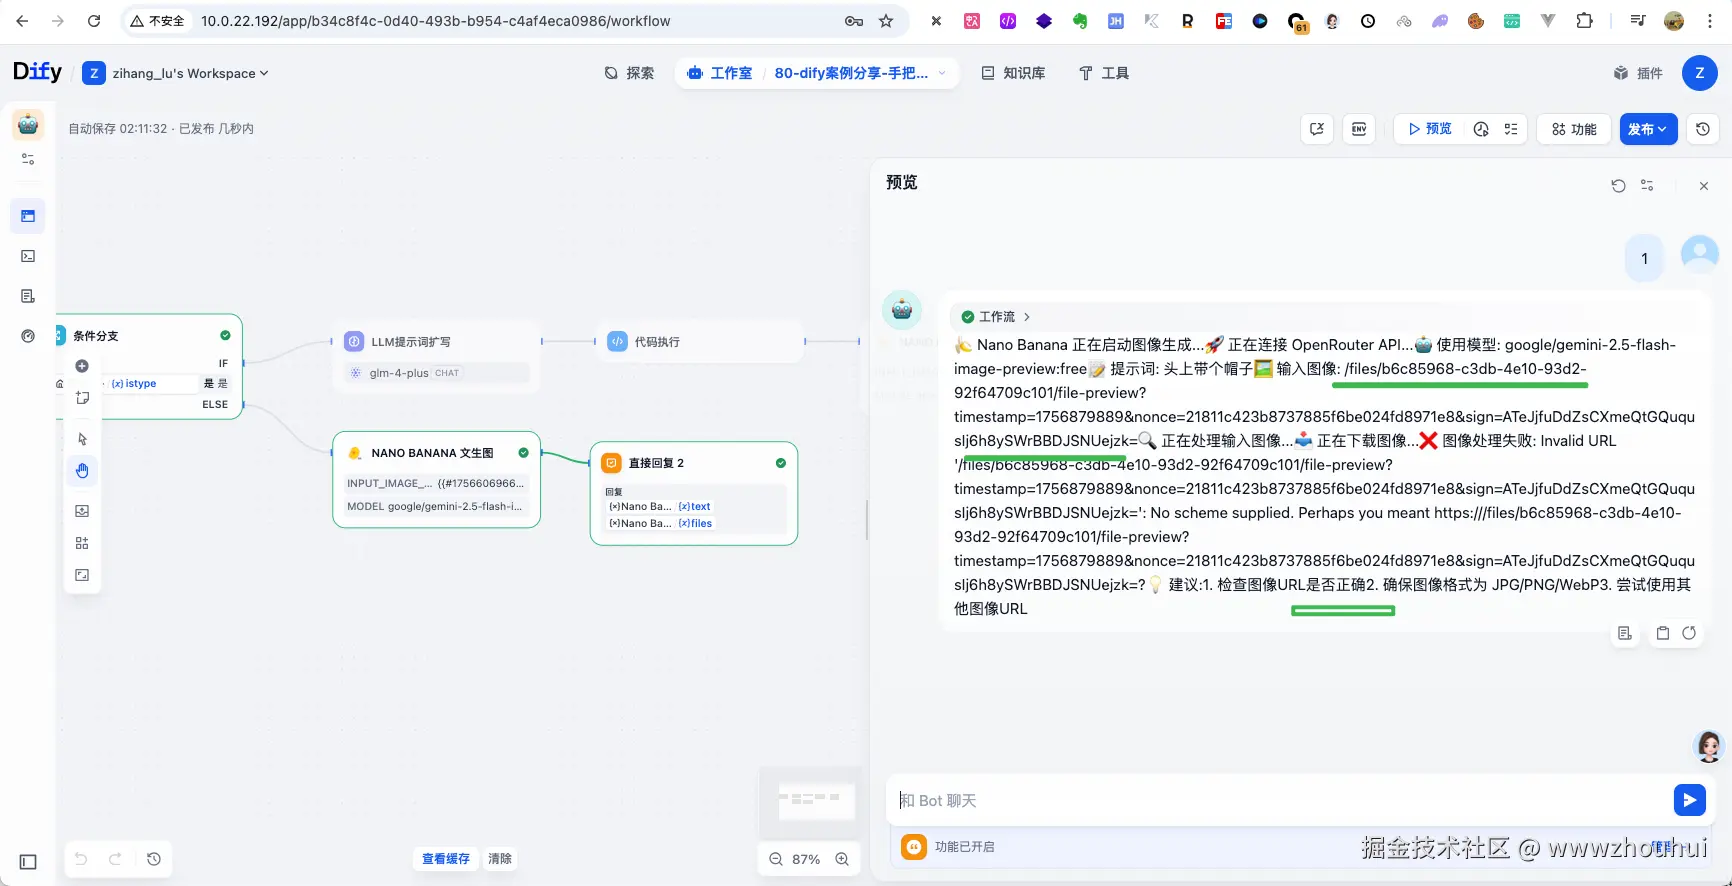
这个问题主要是因为生成的图片链接需要通过公网访问,我们需要把下面配置修改
1.env 文件中查找FILES_URL
默认的FILES_URL是空的,我们需要修改使用 http://:5001 或 http://api:5001,在此情况下,确保外部可以访问端口 5001

2.docker-compose.yaml 对应的FILES_URL修改
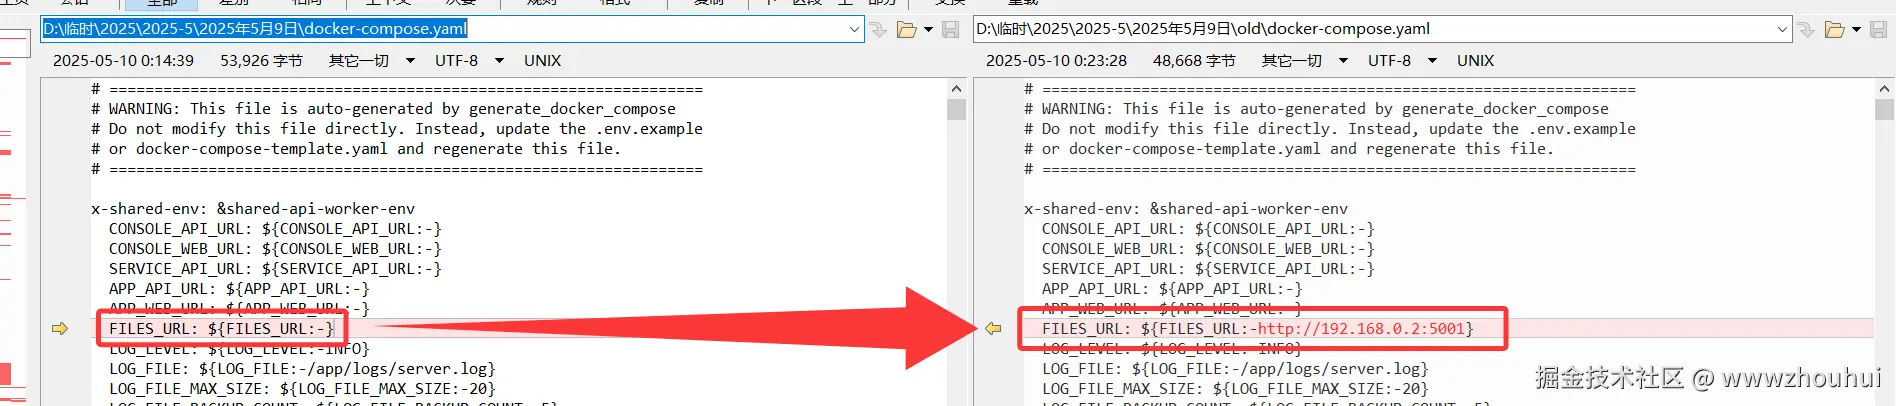
此外dify-api容器镜像端口开放出来(默认情况是不开放的),增加如下代码
yaml
  ports:

   - '5001:5001'
我们也可以从docker容器看到端口开放情况(默认是不开启的)

5.总结
今天主要带大家了解并实现了将 Dify 插件上传至应用市场的完整流程,从插件文档的规范准备(包括 PRIVACY.md 隐私政策的编写、英文 README.md 的生成),到通过 fork 仓库、本地克隆、创建分支、提交 PR 等步骤完成插件上传,再到常见问题的针对性解决,形成了一套覆盖插件上架全流程的实操指南。
通过这套实践方案,开发者能够更高效地将自己开发的 Dify 插件推向应用市场 ------ 无需再为文档格式、上传步骤走弯路,借助规范的流程确保插件顺利通过审核,让更多用户能够便捷地获取和使用插件,极大降低了插件分享和推广的技术门槛。在实际操作中,该流程能够稳定支持各类 Dify 插件(如模型、工具、代理策略等)的上传需求,无论是新插件首发还是版本更新,都能通过清晰的步骤完成操作,有效解决了开发者对插件上架流程不熟悉、审核易受阻的问题。同时,该流程具备良好的扩展性 ------ 开发者可以基于此持续迭代插件功能,通过多次 PR 提交实现版本更新,进一步丰富 Dify 应用市场的生态,为平台带来更多样化的功能扩展,满足不同场景下的用户需求。
感兴趣的小伙伴可以按照这份指南尝试将自己开发的 Dify 插件上传至应用市场,让优质插件发挥更大价值。今天的分享就到这里结束了,我们下一篇文章见。