需要实现的效果
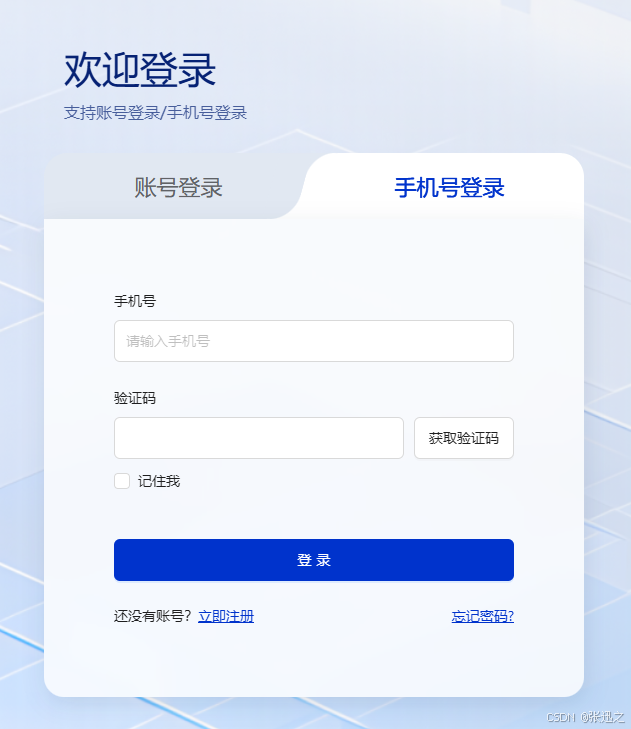
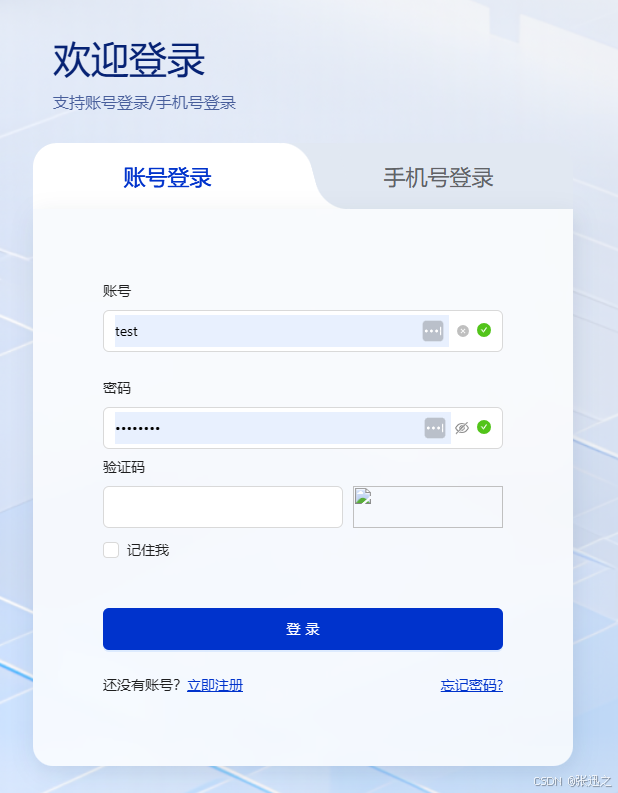
实现思路
利用tab页的before和after属性,添加tab页前后的圆弧属性,同时使用tab页的shadow阴影填充右下角的圆弧空缺部分。
            <Tabs
                onChange={onChange}
                type="card"
                items={getTabItems()}
            />

.ant-tabs-nav{
        margin: 0;

        .ant-tabs-nav-list{
            display: flex;
            position: relative;
            z-index: 2;
            width: 100%;
            background: #E1E8F2;
            border-radius: 24px 24px 0 0;
            overflow: hidden; // 重点
            user-select: none;
        }

        .ant-tabs-tab{
            flex: 1;
            position: relative;
            display: flex;
            justify-content: center;
            align-items: center;
            height: 66px;
            padding: 18px 0;
            margin: 0;
            border: none;
            font-weight: 500;
            font-size: 22px;
            color: #606266;
            line-height: 30px;
            text-align: left;
            font-style: normal;
            border-radius: 24px 24px 0 0 !important;
            background: #E1E8F2;
            transition: none;
            user-select: none;

            &::before{
                content: '';
                position: absolute;
                left: 10px;
                bottom: 0;
                width: 32px;
                height: 66px;
                background: #E1E8F2;
                border-bottom-left-radius: 24px;
                transform: skewX(15deg); // 重点
                z-index: 4;
            }
            &::after{
                z-index: 4;
                content: '';
                position: absolute;
                right: 10px;
                bottom: 0;
                width: 32px;
                height: 66px;
                background: #E1E8F2;
                border-bottom-right-radius: 24px;
                transform: skewX(-15deg); // 重点
            }
        }
        .ant-tabs-tab-active{
            opacity: 1;
            z-index: 3;
            background: #ffffff;
            border-radius: 24px 24px 0 0 !important;
            box-shadow: 48px 42px 0 #ffffff, -48px 42px 0 #ffffff; // 重点
            user-select: none;

            &::before{
                content: '';
                position: absolute;
                left: -12px;
                bottom: 0;
                width: 24px;
                height: 66px;
                border-top-left-radius: 24px;
                background-color: #ffffff;
                transform: skewX(-15deg); // 重点
            }
            &::after{
                content: '';
                position: absolute;
                right: -12px;
                bottom: 0;
                width: 24px;
                height: 66px;
                border-top-right-radius: 24px;
                background-color: #ffffff;
                transform: skewX(15deg); // 重点
            }
        }
    }