我本来想用渐变色 做屏幕背景,结果它给我报了个"shader 编译时间太长"的错误 (或警告?)。主要是我的安卓设备 GPU 性能太弱了。
所以我就开始琢磨:"干脆直接用图片来做背景,不是更好吗?"
关于性能(Performance)
很明显,我们不能用那种又大、分辨率又高 的图片来做背景。下面我给的两个例子,用的都是 10KB 大小的 WebP 格式图片。
从 assets 里加载一个 10KB 的 WebP 图,对性能的影响可以忽略不计 ,尤其如果我们在应用启动时就把它预加载好的话。
不过,第一次加载时可能还是会有一点感觉 ,所以我们最好把 ColorScheme 里的 surface color (表面颜色)设置成跟背景图的主色调接近。
看看例子(Examples)
这里有两个注册页面的例子,分别展示了在浅色和深色的图片背景下的效果。

ColorScheme (配色方案)是由 ChatGPT 生成 的。一个是为了 surface color (表面颜色)是 pink.shade100 ,第二个是为了 surface color 是 grey.shade800。
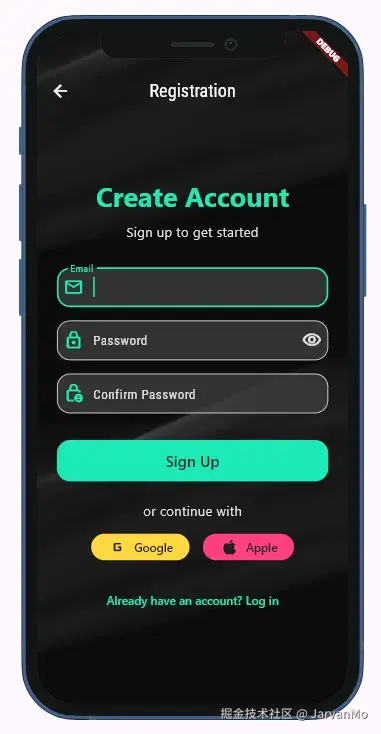
有点太花哨了 (或者说太活泼了 )不合我的口味,但就像我说的,这得怪 ChatGPT 。而且,这里的重点不是按钮的颜色 ,背景 才是重点。背景看起来效果不错。
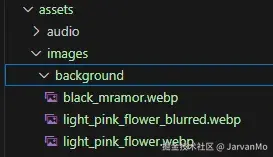
显然,我们应该把图片放到 assets 文件夹里:
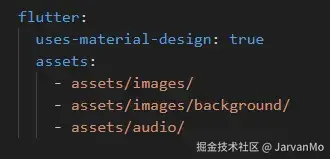
并且在 pubspec.yaml 文件中提及路径:
我是从 Canva 获取我的图片的,但其实你可以随便找一张照片 ,给它做个模糊效果 ,加一个半透明图层 ,然后以中等质量 保存成 WebP 格式就行了。
以下就是本文的主要核心代码 ,BgScaffold:
dart
import 'package:flutter/material.dart';
import 'package:getx_miscellanous/app/data/memory_settings_service.dart';

class BgScaffold  extends StatelessWidget {
  final Widget? body;
  final PreferredSizeWidget? appBar;
  final Widget? floatingActionButton;
  final FloatingActionButtonLocation? floatingActionButtonLocation;
  final Widget? bottomNavigationBar;
  final Widget? drawer;
  final Widget? endDrawer;
  final String? lightBackgroundImagePath;
  final String? darkBackgroundImagePath;

  const BgScaffold({
    super.key,
    this.body,
    this.appBar,
    this.floatingActionButton,
    this.floatingActionButtonLocation,
    this.bottomNavigationBar,
    this.drawer,
    this.endDrawer,
    this.lightBackgroundImagePath,
    this.darkBackgroundImagePath,
  }) : assert(
          lightBackgroundImagePath != null || darkBackgroundImagePath != null,
          'At least one background image path must be provided',
        );

  @override
  Widget build(BuildContext context) {
    cacheImages(context, darkBackgroundImagePath, lightBackgroundImagePath);
    ThemeData theme = Theme.of(context);

    final isDark = theme.brightness == Brightness.dark;
    final imagePath = isDark
        ? (darkBackgroundImagePath ?? lightBackgroundImagePath!)
        : (lightBackgroundImagePath ?? darkBackgroundImagePath!);
    final loadingColor = Theme.of(context).colorScheme.surface;

    return Scaffold(
      backgroundColor: Colors.transparent,
      extendBodyBehindAppBar: true,
      appBar: appBar,
      drawer: drawer,
      endDrawer: endDrawer,
      floatingActionButton: floatingActionButton,
      floatingActionButtonLocation: floatingActionButtonLocation,
      bottomNavigationBar: bottomNavigationBar,
      body: Stack(
        children: [
          // Background image container with loading color
          Container(
            width: double.infinity,
            height: double.infinity,
            color: loadingColor,
            child: Image.asset(
              imagePath,
              fit: BoxFit.cover,
              cacheWidth: null,
              cacheHeight: null,
              frameBuilder: (context, child, frame, wasSynchronouslyLoaded) {
                if (wasSynchronouslyLoaded || frame != null) {
                  return child;
                }
                return Container(color: loadingColor);
              },
              errorBuilder: (context, error, stackTrace) {
                return Container(color: loadingColor);
              },
            ),
          ),
          // Actual body content
          if (body != null) body!,
        ],
      ),
    );
  }

  void cacheImages(
    BuildContext context,
    String? darkBackgroundImagePath,
    String? lightBackgroundImagePath,
  ) {
    if (MemorySettingsService().bgImagesCached){
      return;
    }
    if (darkBackgroundImagePath != null){
      precacheImage(AssetImage(darkBackgroundImagePath), context);
    }
    if (lightBackgroundImagePath != null){
      precacheImage(AssetImage(lightBackgroundImagePath), context);
    }
    MemorySettingsService().bgImagesCached = true;
  }
}
请注意 extendBodyBehindAppBar 这个属性。我以前不知道它有这个功能。
下面是我们如何使用 BgScaffold 的方法:
dart
   return BgScaffold(
      darkBackgroundImagePath: 'assets/images/background/black_mramor.webp',
      lightBackgroundImagePath: 'assets/images/background/light_pink_flower.webp',
      appBar: AppBar(
        title: const Text('Registration'),
        centerTitle: true,
        backgroundColor: Colors.transparent,
      ),
      body: RegistrationPage(),
    );
与普通的 Scaffold 唯一的区别是,我们提供了背景图片的路径。
frameBuilder 是一个回调函数 ,每当 Flutter 解码图像的一帧 时,它就会被调用。它主要用于两个目的:显示加载状态 和处理动画。
以下是每个参数的含义:
dart
frameBuilder: (context, child, frame, wasSynchronouslyLoaded) {
// context - 标准的 BuildContext
// child - 正在被解码的实际的 Image 组件
// frame - 我们正在处理的是第几帧(0, 1, 2...),如果尚未加载,则为 null
// wasSynchronouslyLoaded - 如果图像是从缓存加载的,则为 true;如果正在从磁盘/网络加载,则为 false
}
在我们的代码中:
dart
if (wasSynchronouslyLoaded || frame != null) {
  return child;
}
return Container(color: loadingColor);这段代码的意思是:"如果图片已经在缓存中 (即 wasSynchronouslyLoaded 为真),或者 我们至少解码了一帧 (即 frame != null ),就显示图片 。否则,就显示加载颜色。"
关键在于,对于已经预缓存 的 asset 图片 来说,wasSynchronouslyLoaded 几乎总是 true ,所以加载颜色很少会显示 。这其实就是我们想要的效果------瞬间显示。
我们在每一次构建时 都调用 cacheImages 方法,这效率上有点低 ,但(除了第一次之外)我们所做的只是检查 MemorySettingsService().bgImagesCached 这个变量 。我选择这种方式是为了让 BgScaffold 保持自包含(self-contained)。
或者 ,我们可以在应用启动时就缓存图片:
dart
return MaterialApp(
      home: Builder(
        builder: (context) {
          cacheImages(context, darkBackgroundImagePath,
                               lightBackgroundImagePath);

          return RegistrationScreen();
        },
),并且,这样可能 就能摆脱 使用 MemorySettingsService().bgImagesCached 这个变量了。因为 MaterialApp 组件很少会被重建。
无论是采用哪种方法,实际的图片加载和缓存都只会发生一次 ,所以两者之间并没有太大的区别。
这就是我今天想分享的所有内容了。
感谢您的阅读!