效果图
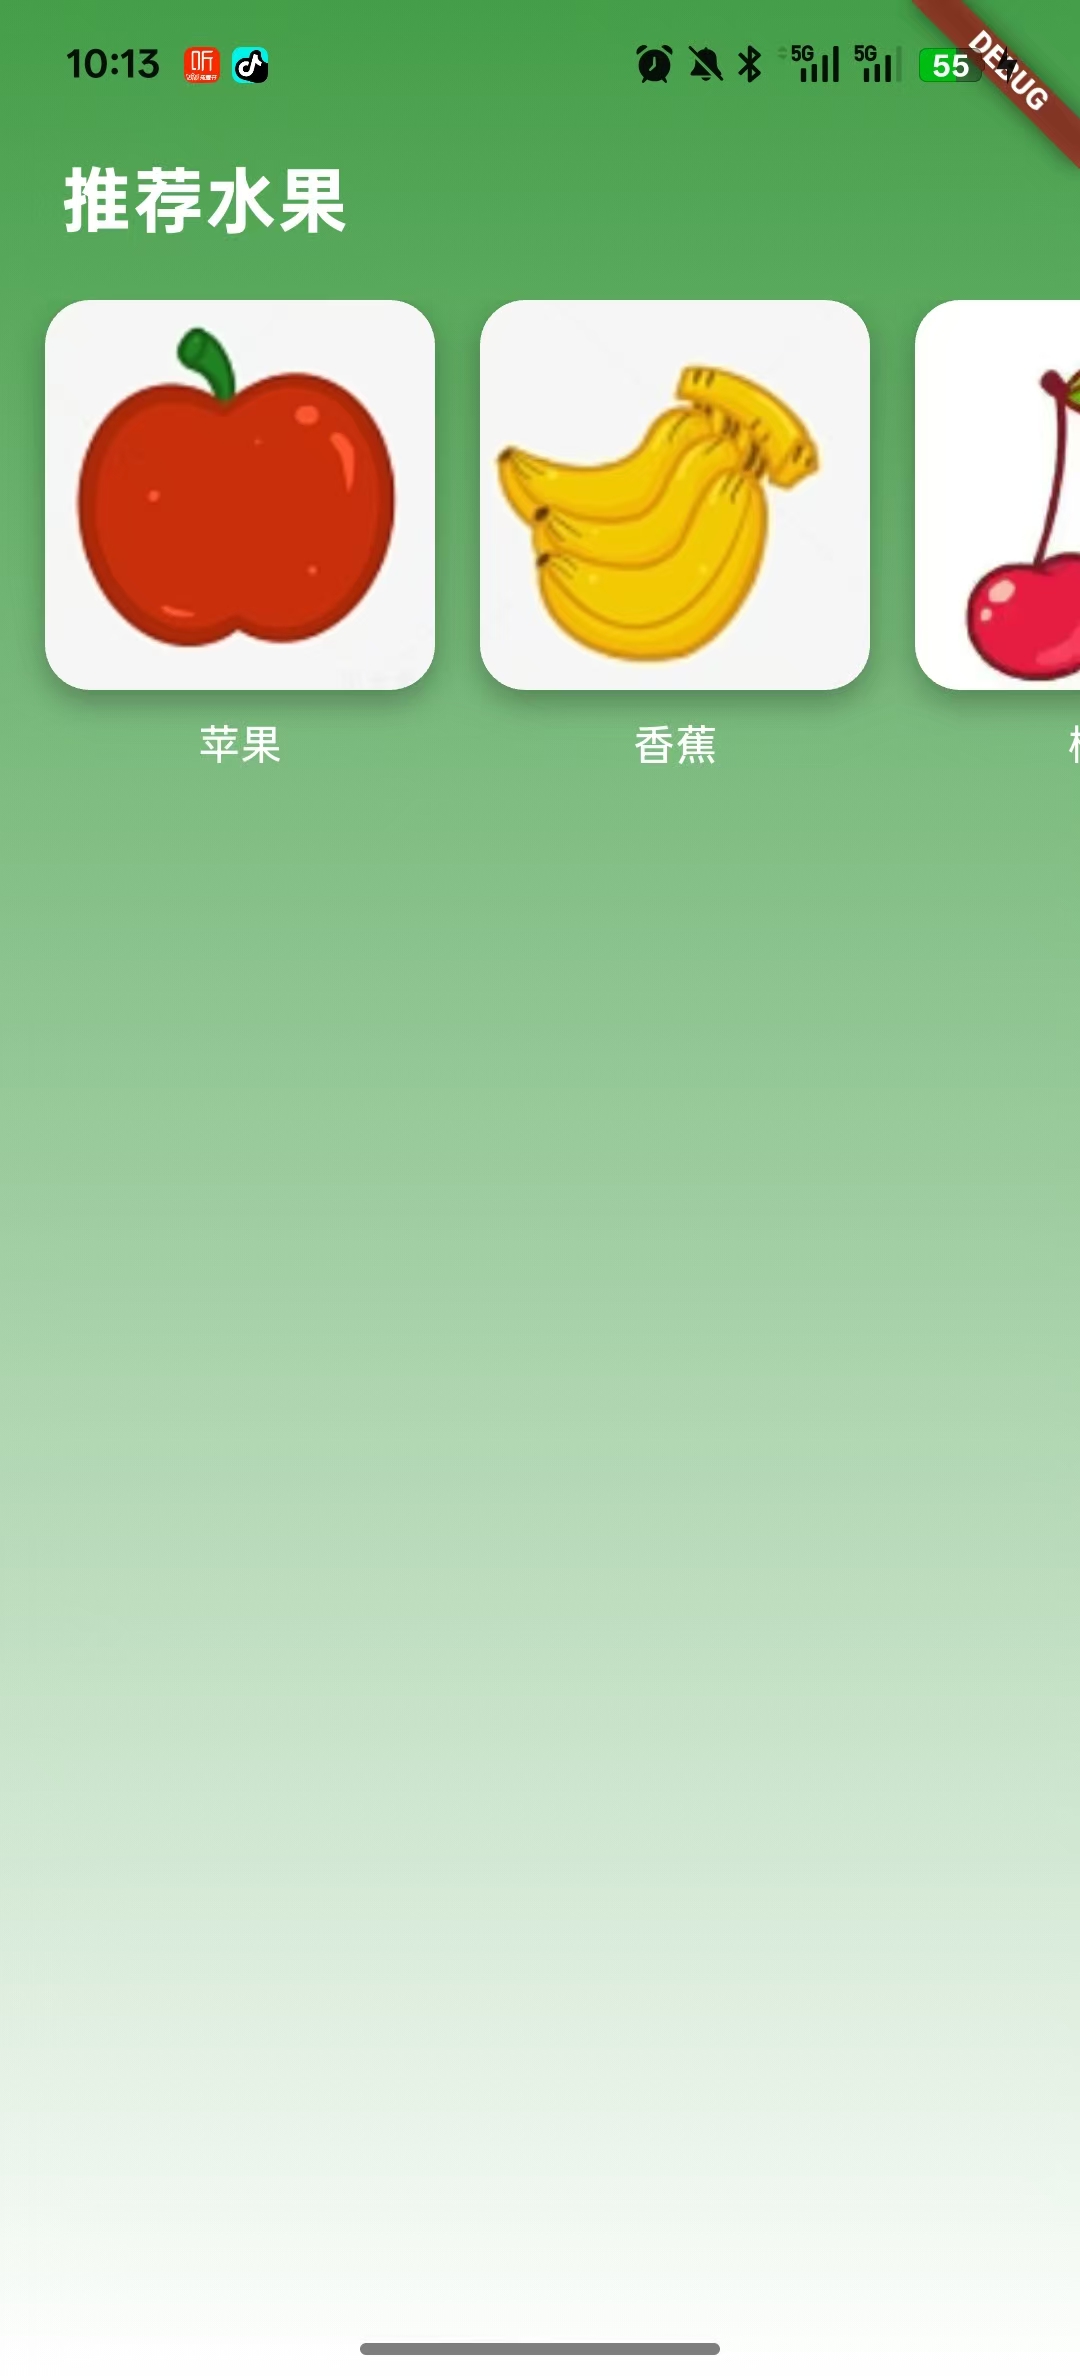
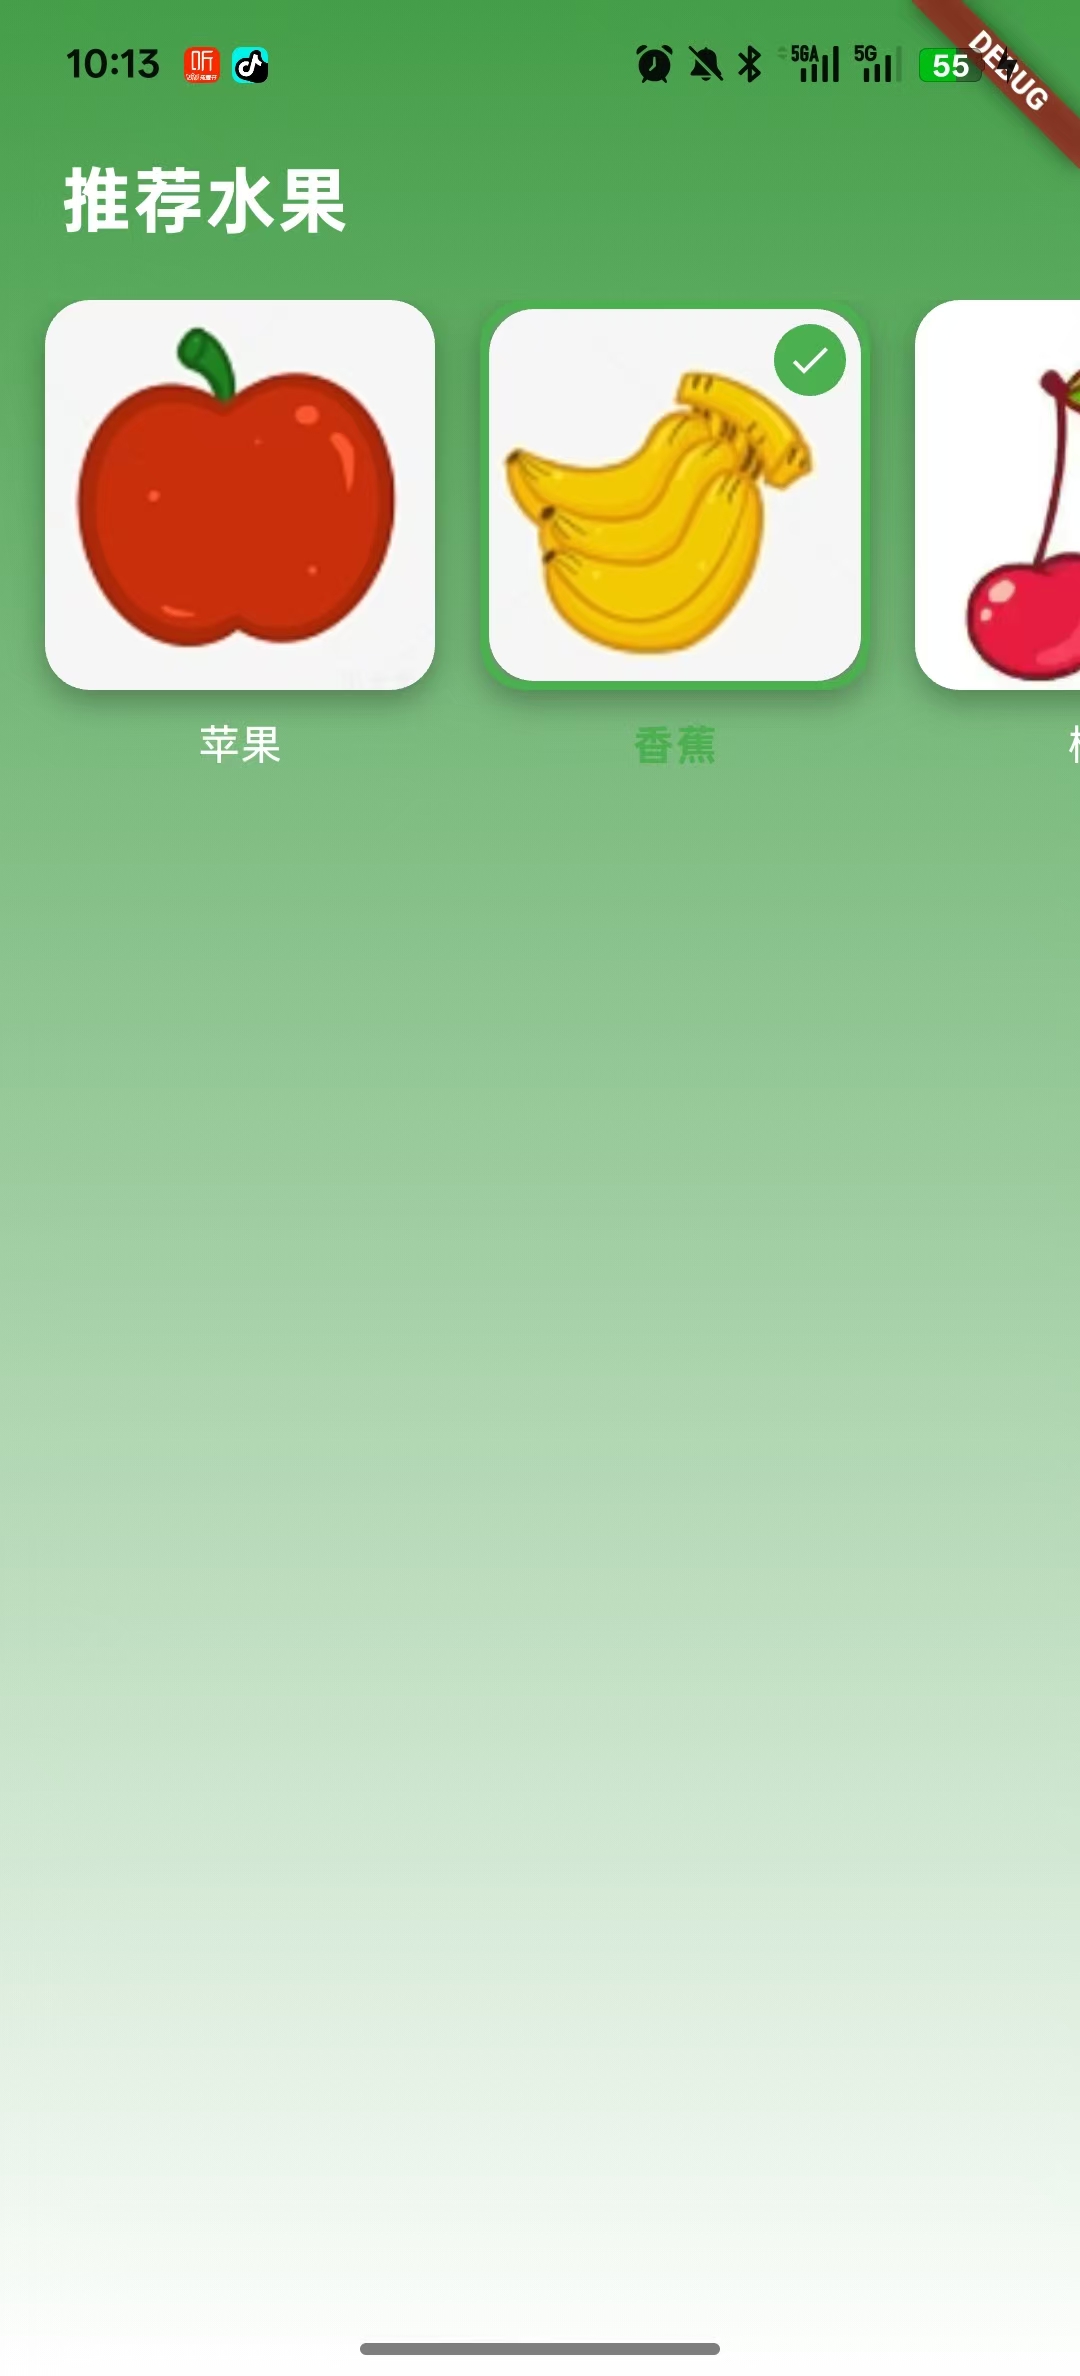
详细介绍:这是一个使用ListView.builder来建造的横向滚动水果数据列表,当点击的时候会有一个选中图标和选中边框,并且文字的颜色也会发生更改。
实现步骤:
1.准备数据,并且定义一个值为当前选中索引
Dart
  final List<Map<String, dynamic>> _items = [
    {'title': '苹果', 'image': 'assets/images/apple.png', 'isSelected': false},
    {'title': '香蕉', 'image': 'assets/images/banana.png', 'isSelected': false},
    {'title': '樱桃', 'image': 'assets/images/cherry.png', 'isSelected': false},
    {'title': '芒果', 'image': 'assets/images/mango.png', 'isSelected': false},
  ];

// 当前选中的索引
  int? _selectedIndex;
或者可以自定义数据类来使用
Dart
//定义水果数据类
class FruitItem{
  final String title;
  final String image;
  bool isSelected;

  FruitItem({
    required this.title,
    required this.image,
    this.isSelected = false,
  });
}


  // 使用自定义类
  final List<FruitItem> _items = [
    FruitItem(title: '苹果', image: 'assets/images/apple.png'),
    FruitItem(title: '香蕉', image: 'assets/images/banana.png'),
    FruitItem(title: '樱桃', image: 'assets/images/cherry.png'),
    FruitItem(title: '芒果', image: 'assets/images/mango.png'),
  ];


// 当前选中的索引
  int? _selectedIndex;
2.定义UI,设置最底层的渐变背景
Dart
        Container(
            width: double.infinity,
            height: double.infinity,
            decoration: BoxDecoration(
              gradient: LinearGradient(
                begin: Alignment.topCenter,
                end: Alignment.bottomCenter,
                colors: [
                  Colors.green.withOpacity(0.9),
                  Colors.white,
                ],
              ),
            ),
          ),
3.设置标题
Dart
        Positioned(
            top: 50,
            left: 20,
            child: Text(
              '推荐水果',
              style: TextStyle(
                color: Colors.white,
                fontSize: 24,
                fontWeight: FontWeight.bold,
              ),
            ),
          ),
4.设置横向滚动列表
Dart
        Positioned(
            top: 100,
            left: 0,
            right: 0,
            height: 180, // 列表高度
            child: _buildHorizontalList(),
          ),


Widget _buildHorizontalList() {
    return ListView.builder( //ListView.builder按需构建子项
      scrollDirection: Axis.horizontal, // 横向滚动
      padding: const EdgeInsets.symmetric(horizontal: 15), //内边距
      itemCount: _items.length, //子项的数量
      itemBuilder: (context, index) { //框架自动传递index:为每个索引位置构建对应的Widget

        final item = _items[index]; //用index取_items的对象数据
        final isSelected = _selectedIndex == index; // 计算选中状态

        return buildItem(
          title: item['title']!,
          image: item['image']!,
          // title: item.title,
          // image: item.image,
          isSelected: isSelected, // 传递选中状态
          callback: () {
            _onItemTap(index);
          },
        );
      },
    );
  }
5.处理选中逻辑
Dart
  // 选中状态管理逻辑
  void _onItemTap(int index) {
    print('点击了: ${_items[index]['title']}');
    // print('点击了: ${_items[index].title}');

    setState(() {
      // 互斥逻辑:如果点击的是已选中的项目,则取消选中
      if (_selectedIndex == index) {
        _selectedIndex = null;
      } else {
        _selectedIndex = index;
      }
    });

    // 传回点击事件给父组件
    _handleItemSelection(index, _selectedIndex == index);
  }

 // 处理项目选择事件
  void _handleItemSelection(int index, bool isSelected) {
    print('项目 $index ${isSelected ? '被选中' : '取消选中'}');
  }
6.设置通用的功能小卡片
Dart
  Widget buildItem({
    required String title, //名字
    required String image, //图片
    required bool isSelected, //是否选中
    VoidCallback? callback //传回点击事件
  }) {
    return Container(
      margin: const EdgeInsets.only(right: 15),//外边距
      child: Column(
        children: [
          // 使用 Stack 包装图片和选中图标
          Stack(
            children: [
              // 图片容器
              Container(
                width: 130,
                height: 130,
                decoration: BoxDecoration(
                  color: Colors.white.withOpacity(0.1),
                  borderRadius: BorderRadius.circular(15),
                  boxShadow: [ //阴影效果
                    BoxShadow(
                      color: Colors.black.withOpacity(0.3),
                      blurRadius: 8,
                      offset: const Offset(0, 4),
                    ),
                  ],
                  // 添加选中状态边框
                  border: isSelected ? Border.all(color: Colors.green, width: 3,) : null,
                ),
                child: Material(
                  color: Colors.transparent,
                  child: InkWell(
                    onTap: callback, //点击事件
                    borderRadius: BorderRadius.circular(15),
                    child: ClipRRect( //给图片做裁剪
                      borderRadius: BorderRadius.circular(15),
                      child: Image.asset(
                        image,
                        fit: BoxFit.cover,
                        width: double.infinity,
                        height: double.infinity,
                      ),
                    ),
                  ),
                ),
              ),

              // 选中图标 - 显示在右上角
              if (isSelected)
                Positioned(
                  top: 8,
                  right: 8,
                  child: Container(
                    width: 24,
                    height: 24,
                    decoration: BoxDecoration(
                      color: Colors.green,
                      borderRadius: BorderRadius.circular(12),
                    ),
                    child: const Icon(
                      Icons.check,
                      color: Colors.white,
                      size: 16,
                    ),
                  ),
                ),
            ],
          ),

          // 文字
          const SizedBox(height: 8),
          Text(
            title,
            style: TextStyle(
              color: isSelected ? Colors.green : Colors.white,
              fontSize: 14,
              fontWeight: isSelected ? FontWeight.bold : FontWeight.w500,
            ),
          ),
        ],
      ),
    );
  }
分层架构
Dart
┌─────────────────────────────────────────┐
│   UI层 (Presentation Layer)             │
│  ┌─────────────────────────────────────┐ │
│  │  Widget树 (Widget Tree)             │ │
│  │  • Scaffold                         │ │
│  │  • Stack                            │ │
│  │  • Positioned                        │ │
│  │  • ListView.builder                 │ │
│  └─────────────────────────────────────┘ │
├─────────────────────────────────────────┤
│  状态管理层 (State Management Layer)     │
│  ┌─────────────────────────────────────┐ │
│  │  StatefulWidget + setState()        │ │
│  │  • _items (数据状态)                 │ │
│  │  • _selectedIndex (选中状态)         │ │
│  └─────────────────────────────────────┘ │
├─────────────────────────────────────────┤
│  数据层 (Data Layer)                    │
│  ┌─────────────────────────────────────┐ │
│  │  List<Map<String, dynamic>> _items   │ │
│  │  • 静态数据                          │ │
│  │  • 内存存储                          │ │
│  └─────────────────────────────────────┘ │
└─────────────────────────────────────────┘
组件架构
Dart
SleepPage (StatefulWidget)
├── _SleepPage (State)
    ├── _items (数据源)
    ├── _selectedIndex (状态)
    ├── build() (UI构建)
    ├── _buildHorizontalList() (列表构建)
    ├── _onItemTap() (交互处理)
    └── buildItem() (组件复用)
布局
Dart
// Stack布局计算
Stack(
  children: [
    Container(...), // 背景层 - 最底层
    Positioned(...), // 标题层 - 中间层
    Positioned(...), // 列表层 - 最上层
  ],
)

// ListView动态构建
ListView.builder(
  itemCount: _items.length, // 数据驱动
  itemBuilder: (context, index) {
    return buildItem(...); // 按需构建
  },
)
条件渲染
Dart
// 边框条件渲染
border: isSelected ? Border.all(...) : null

// 图标条件渲染
if (isSelected) Positioned(...)

// 文字样式条件渲染
color: isSelected ? Colors.green : Colors.white
fontWeight: isSelected ? FontWeight.bold : FontWeight.w500
数据流
Dart
用户点击
    ↓
InkWell.onTap
    ↓
callback() → _onItemTap(index)
    ↓
setState() → 状态变更
    ↓
Widget.rebuild() → UI更新
    ↓
_handleItemSelection() → 事件回调
为什么callback能够直到当前用户点击的是哪个子项?因为闭包捕获机制。
Dart
==================================================================
callback 是如何传递 index 的?

itemBuilder: (context, index) {
  final item = _items[index];
  final isSelected = _selectedIndex == index;

  return buildItem(
    title: item['title']!,
    image: item['image']!,
    isSelected: isSelected,
    callback: () {  // ⭐️ 关键:这里创建了一个闭包
      _onItemTap(index);  // 闭包捕获了当前的 index
    },
  );
}
===============================================================

什么是闭包?

// 每次调用 itemBuilder 时,都会创建一个新的函数
callback: () {
  _onItemTap(index);  // 这个函数"记住"了创建时的 index 值
}

===============================================================

执行过程

// 第1次构建 (index = 0)
callback = () { _onItemTap(0); }  // 闭包捕获 index=0

// 第2次构建 (index = 1)
callback = () { _onItemTap(1); }  // 闭包捕获 index=1

// 第3次构建 (index = 2)
callback = () { _onItemTap(2); }  // 闭包捕获 index=2

===============================================================
具体的数据流路径
Dart
// ========== 点击苹果的执行路径 ==========

// 用户手指触摸屏幕苹果卡片区域
↓
// Flutter 检测到触摸事件,触发 InkWell 的 onTap
InkWell(
  onTap: callback,  // ⭐️ 起点:这里被触发
)
↓
// 执行 callback(),实际执行的是闭包函数
callback()  // 实际是:() { _onItemTap(0); }
↓
// 调用 _onItemTap 方法,传入 index=0
_onItemTap(0)  // ⭐️ 进入点击处理方法
↓
// 第1步:打印日志
print('点击了: ${_items[0]['title']}')  // 输出:点击了: 苹果
↓
// 第2步:更新状态
setState(() {
  // 互斥逻辑:如果点击的是已选中的项目,则取消选中
  if (_selectedIndex == index) {  // _selectedIndex == 0 ?
    _selectedIndex = null;
  } else {
    _selectedIndex = index;       // _selectedIndex = 0
  }
})
↓
// Flutter 收到 setState() 信号,标记需要重建
↓
// 第3步:调用 build() 方法重新构建UI
@override
Widget build(BuildContext context) {
  return Scaffold(...);  // ⭐️ 重新构建整个页面
}
↓
// 第4步:重新构建 _buildHorizontalList()
Positioned(
  child: _buildHorizontalList(),  // ⭐️ 重新构建列表
)
↓
// 第5步:ListView.builder 重新构建所有项目
ListView.builder(
  itemBuilder: (context, index) {
    // 为每个索引重新构建项目
    // index=0: 苹果(重新计算 isSelected)
    // index=1: 香蕉(重新计算 isSelected)
    // index=2: 樱桃(重新计算 isSelected)
    // index=3: 芒果(重新计算 isSelected)
  }
)
↓
// 第6步:为苹果项目重新计算选中状态
final isSelected = _selectedIndex == index;  // 0 == 0 → true
↓
// 第7步:重新构建苹果卡片(使用新的 isSelected=true)
return buildItem(
  title: '苹果',
  image: 'assets/images/apple.png',
  isSelected: true,  // ⭐️ 现在为选中状态
  callback: () { _onItemTap(0); }
)
↓
// 第8步:buildItem 使用新的选中状态渲染
// - 显示绿色边框
// - 显示对勾图标
// - 文字变为绿色
↓
// 第9步:处理回调事件
_handleItemSelection(0, true)  // ⭐️ 传递选中事件
↓
// 第10步:打印最终状态
print('项目 0 被选中')  // 输出:项目 0 被选中

视觉更新
- 苹果: 显示绿色边框 + 对勾图标 + 绿色文字
- 其他: 无边框 + 无图标 + 白色文字
代码实例
Dart
import 'package:flutter/cupertino.dart';
import 'package:flutter/material.dart';


//定义水果数据类
// class FruitItem{
//   final String title;
//   final String image;
//   bool isSelected;
//
//   FruitItem({
//     required this.title,
//     required this.image,
//     this.isSelected = false,
//   });
// }


class SleepPage extends StatefulWidget {
  const SleepPage({super.key});

  @override
  State<StatefulWidget> createState() => _SleepPage();
}

class _SleepPage extends State<SleepPage> {

  //1.准备数据
  final List<Map<String, dynamic>> _items = [
    {'title': '苹果', 'image': 'assets/images/apple.png', 'isSelected': false},
    {'title': '香蕉', 'image': 'assets/images/banana.png', 'isSelected': false},
    {'title': '樱桃', 'image': 'assets/images/cherry.png', 'isSelected': false},
    {'title': '芒果', 'image': 'assets/images/mango.png', 'isSelected': false},
  ];

  // 使用自定义类
  // final List<FruitItem> _items = [
  //   FruitItem(title: '苹果', image: 'assets/images/apple.png'),
  //   FruitItem(title: '香蕉', image: 'assets/images/banana.png'),
  //   FruitItem(title: '樱桃', image: 'assets/images/cherry.png'),
  //   FruitItem(title: '芒果', image: 'assets/images/mango.png'),
  // ];


  // 当前选中的索引
  int? _selectedIndex;

  @override
  Widget build(BuildContext context) {
    return Scaffold(
      backgroundColor: Colors.transparent,
      body: Stack(
        children: [
          // 2. 背景渐变
          Container(
            width: double.infinity,
            height: double.infinity,
            decoration: BoxDecoration(
              gradient: LinearGradient(
                begin: Alignment.topCenter,
                end: Alignment.bottomCenter,
                colors: [
                  Colors.green.withOpacity(0.9),
                  Colors.white,
                ],
              ),
            ),
          ),

          // 3. 标题
          Positioned(
            top: 50,
            left: 20,
            child: Text(
              '推荐水果',
              style: TextStyle(
                color: Colors.white,
                fontSize: 24,
                fontWeight: FontWeight.bold,
              ),
            ),
          ),

          // 4. 横向滚动列表(占位置)
          Positioned(
            top: 100,
            left: 0,
            right: 0,
            height: 180, // 列表高度
            child: _buildHorizontalList(),
          ),


        ],
      ),
    );
  }

  // 4.构建横向滚动列表
  Widget _buildHorizontalList() {
    return ListView.builder( //ListView.builder按需构建子项
      scrollDirection: Axis.horizontal, // 横向滚动
      padding: const EdgeInsets.symmetric(horizontal: 15), //内边距
      itemCount: _items.length, //子项的数量
      itemBuilder: (context, index) { //框架自动传递index:为每个索引位置构建对应的Widget

        final item = _items[index]; //用index取_items的对象数据
        final isSelected = _selectedIndex == index; // 计算选中状态  计算_selectedIndex是否等于 index?

        return buildItem(
          title: item['title']!,
          image: item['image']!,
          // title: item.title,
          // image: item.image,
          isSelected: isSelected, // 传递选中状态
          callback: () {
            _onItemTap(index);
          },
        );
      },
    );
  }

  // 选中状态管理逻辑
  void _onItemTap(int index) {
    print('点击了: ${_items[index]['title']}');
    // print('点击了: ${_items[index].title}');

    setState(() {
      // 互斥逻辑:如果点击的是已选中的项目,则取消选中
      if (_selectedIndex == index) {
        _selectedIndex = null;
      } else {
        _selectedIndex = index;  //下标传递
      }
    });

    // 传回点击事件给父组件
    _handleItemSelection(index, _selectedIndex == index);
  }

  // 处理项目选择事件
  void _handleItemSelection(int index, bool isSelected) {
    print('项目 $index ${isSelected ? '被选中' : '取消选中'}');
  }

  // 功能小卡片
  Widget buildItem({
    required String title, //名字
    required String image, //图片
    required bool isSelected, //是否选中
    VoidCallback? callback //传回点击事件
  }) {
    return Container(
      margin: const EdgeInsets.only(right: 15),//外边距
      child: Column(
        children: [
          // 使用 Stack 包装图片和选中图标
          Stack(
            children: [
              // 图片容器
              Container(
                width: 130,
                height: 130,
                decoration: BoxDecoration(
                  color: Colors.white.withOpacity(0.1),
                  borderRadius: BorderRadius.circular(15),
                  boxShadow: [ //阴影效果
                    BoxShadow(
                      color: Colors.black.withOpacity(0.3),
                      blurRadius: 8,
                      offset: const Offset(0, 4),
                    ),
                  ],
                  // 添加选中状态边框
                  border: isSelected ? Border.all(color: Colors.green, width: 3,) : null,
                ),
                child: Material(
                  color: Colors.transparent,
                  child: InkWell(
                    onTap: callback, //点击事件
                    borderRadius: BorderRadius.circular(15),
                    child: ClipRRect( //给图片做裁剪
                      borderRadius: BorderRadius.circular(15),
                      child: Image.asset(
                        image,
                        fit: BoxFit.cover,
                        width: double.infinity,
                        height: double.infinity,
                      ),
                    ),
                  ),
                ),
              ),

              // 选中图标 - 显示在右上角
              if (isSelected)
                Positioned(
                  top: 8,
                  right: 8,
                  child: Container(
                    width: 24,
                    height: 24,
                    decoration: BoxDecoration(
                      color: Colors.green,
                      borderRadius: BorderRadius.circular(12),
                    ),
                    child: const Icon(
                      Icons.check,
                      color: Colors.white,
                      size: 16,
                    ),
                  ),
                ),
            ],
          ),

          // 文字
          const SizedBox(height: 8),
          Text(
            title,
            style: TextStyle(
              color: isSelected ? Colors.green : Colors.white,
              fontSize: 14,
              fontWeight: isSelected ? FontWeight.bold : FontWeight.w500,
            ),
          ),
        ],
      ),
    );
  }
}