uni-app 自适应透明导航栏组件实现
一个支持滚动渐变透明的 uni-app 导航栏组件,让你的小程序拥有更现代的交互体验
📖 前言
在开发小程序时,我们经常会看到这样的效果:页面顶部有张大图,导航栏初始是透明的,随着页面向下滚动,导航栏逐渐变得不透明。这种设计既美观又实用,今天就来分享如何实现这个效果。
✨ 核心特性
- 🎨 自动透明渐变:滚动时导航栏背景从透明到不透明平滑过渡
- 🎯 精准控制:基于 IntersectionObserver 实现,性能优异
- 🔧 灵活配置:支持自定义背景色、标题、返回按钮等
- 📱 完美适配:自动适配不同机型的状态栏高度
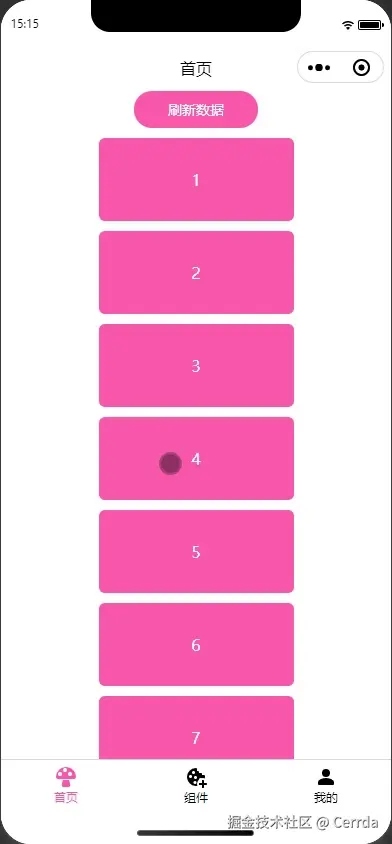
🎬 效果演示
当用户向下滚动页面时,导航栏会从完全透明逐渐变为设定的背景色,整个过渡非常丝滑自然。
🔍 实现原理
核心思路
- 占位元素:在页面顶部放置一个与导航栏等高的透明占位元素
- 交叉观察 :使用
IntersectionObserver监听占位元素与视口的交叉情况 - 透明度计算:根据交叉比例动态计算导航栏背景的透明度
- 实时更新:通过响应式数据驱动样式更新
关键技术点
- IntersectionObserver:性能优于传统的 scroll 事件监听
- RGBA 动态计算:保持颜色不变,只改变透明度通道
- 临界值优化:处理真机环境下交叉比例不精确的问题
💻 代码实现
1. 组件主体 (kl-navbar/index.vue)
vue
<script lang="ts" setup>
const {
  title = '',
  placeholder = false,
  leftArrow = false,
  backgroundColor = '#fff',
  autoTransparent = false
} = defineProps<{
  title?: string
  placeholder?: boolean
  leftArrow?: boolean
  backgroundColor?: string
  /** 滚动时标题栏透明渐变 ( tip : placeholder = true时无效 ) */
  autoTransparent?: boolean
}>()

// 只有在不使用 placeholder 模式时才启用自动透明
const canIUseAutoTransparent = computed(() => autoTransparent && !placeholder)

const { statusBarHeight, headerHeight, navbarHeight } = useGlobalStore()

// 按需启用透明度计算
const { r, g, b, a } = (!canIUseAutoTransparent.value)
  ? {}
  : useAutoTransparent(backgroundColor)
</script>

<script lang="ts">
export default {
  options: {
    addGlobalClass: true,
    virtualHost: true,
    styleIsolation: 'shared',
  },
}
</script>

<template>
  <view>
    <!-- 导航栏主体 -->
    <view
      class="fixed left-0 top-0 z-996 grid grid-cols-3 w-100vw items-center"
      :class="[canIUseAutoTransparent && 'transition-background-color duration-100 ease-out']"
      :style="{
        height: `${navbarHeight}px`,
        paddingTop: `${statusBarHeight}px`,
        lineHeight: `${navbarHeight}px`,
        backgroundColor: canIUseAutoTransparent
          ? `rgba(${r},${g},${b},${a})`
          : `${backgroundColor}`,
      }"
    >
      <!-- 返回按钮 -->
      <view
        v-if="leftArrow"
        class="i-line-md:chevron-small-left p-x-12Px text-24Px"
        @tap="navigateBack"
      />
      <!-- 标题 -->
      <text class="col-start-2 text-center">
        {{ title }}
      </text>
    </view>

    <!-- 占位模式:推开后续内容 -->
    <view v-if="placeholder" :style="{ height: `${headerHeight}px` }" />

    <!-- 自动透明模式:用于观察的目标元素 -->
    <view
      v-else-if="autoTransparent"
      class="_auto-transparent__observer-target pointer-events-none absolute w-full"
      :style="{ height: `${headerHeight}px` }"
    />
  </view>
</template>
设计要点:
- 导航栏使用
fixed定位,始终固定在顶部 - 动态计算状态栏高度,适配不同机型
- 根据模式渲染不同的占位/观察元素
2. 透明度逻辑 (use-auto-transparent.ts)
typescript
import { convertToRGBA } from '@/utils'

export function useAutoTransparent(backgroundColor: string) {
  // 将背景色转换为 RGB 值
  const { r, g, b } = convertToRGBA(backgroundColor)
  const a = ref(0)  // 透明度通道,0 表示完全透明

  let observer: UniNamespace.IntersectionObserver

  onMounted(() => {
    const instance = getCurrentInstance()

    // 创建交叉观察器,设置 51 个观察阈值(0%, 2%, 4%...100%)
    observer = uni.createIntersectionObserver(
      instance?.proxy,
      { thresholds: Array.from({ length: 51 }, (_, i) => (i / 50)) }
    )

    // 相对于视口顶部进行观察
    observer
      .relativeToViewport({ top: 0 })
      .observe('._auto-transparent__observer-target', ({ intersectionRatio }) => {
        // 处理临界值:真机环境下可能不会精确等于 0 或 1
        // >= 0.95 视为完全可见(透明)
        // <= 0.05 视为完全不可见(不透明)
        a.value = intersectionRatio >= 0.95
          ? 0
          : intersectionRatio <= 0.05
          ? 1
          : 1 - intersectionRatio
      })
  })

  onUnmounted(() => observer.disconnect())

  return { r, g, b, a }
}
核心逻辑:
- 观察阈值:设置 51 个阈值点,确保过渡足够平滑
- 交叉比例 :
intersectionRatio表示目标元素有多少比例与视口交叉- 1 表示完全在视口内 → 导航栏透明
- 0 表示完全不在视口内 → 导航栏不透明
- 临界值处理:处理精度问题,避免无法完全透明/不透明
3. 颜色转换工具 (utils/index.ts)
typescript
/** 返回合法颜色值的 r, g, b 值 */
export function convertToRGBA(color: string) {
  // 处理 HEX 格式:#fff 或 #ffffff
  if (color.startsWith('#')) {
    const hex = color.slice(1).replace(/^([0-9A-F]{3})$/i, '$1$1')
    const r = Number.parseInt(hex.substring(0, 2), 16)
    const g = Number.parseInt(hex.substring(2, 4), 16)
    const b = Number.parseInt(hex.substring(4, 6), 16)
    return { r, g, b }
  }
  // 处理 RGB 格式:rgb(255, 255, 255)
  else if (color.startsWith('rgb')) {
    const parts = color.match(/(\d+),\s*(\d+),\s*(\d+)/)
    if (parts) {
      const [_, r, g, b] = parts
      return { r, g, b }
    }
  }
  throw new Error('Invalid color format')
}
支持格式:
- HEX:
#fff、#ffffff - RGB:
rgb(255, 255, 255)
4. 全局状态管理 (store/global.ts)
typescript
export const useGlobalStore = defineStore('global', () => {
  const systemInfo = uni.getSystemInfoSync()

  // 高度相关常量(单位:px)
  const navbarHeight = 44  // 导航栏高度
  const statusBarHeight = systemInfo.statusBarHeight || 0  // 状态栏高度
  const headerHeight = statusBarHeight + navbarHeight  // 总头部高度

  const tabbarHeight = 50
  const whiteBarHeight = systemInfo.safeAreaInsets?.bottom || 0
  const footerHeight = tabbarHeight + whiteBarHeight

  return {
    systemInfo,
    statusBarHeight,
    navbarHeight,
    headerHeight,
    tabbarHeight,
    whiteBarHeight,
    footerHeight,
  }
})
全局常量:
- 统一管理各种高度值
- 自动适配不同设备的状态栏高度
📝 使用示例
vue
<template>
  <view>
    <!-- 基础用法:固定背景色 -->
    <kl-navbar
      title="页面标题"
      :left-arrow="true"
      background-color="#ffffff"
    />

    <!-- 占位模式:推开页面内容 -->
    <kl-navbar
      title="页面标题"
      :placeholder="true"
      background-color="#ffffff"
    />

    <!-- 自动透明模式:滚动渐变 -->
    <kl-navbar
      title="页面标题"
      :left-arrow="true"
      :auto-transparent="true"
      background-color="#ffffff"
    />

    <!-- 页面内容 -->
    <view class="content">
      <!-- 这里通常会放一张大图或其他内容 -->
    </view>
  </view>
</template>
Props 说明
| 参数 | 类型 | 默认值 | 说明 |
|---|---|---|---|
| title | string | '' | 导航栏标题 |
| placeholder | boolean | false | 是否占位模式(推开内容) |
| leftArrow | boolean | false | 是否显示返回箭头 |
| backgroundColor | string | '#fff' | 背景颜色 |
| autoTransparent | boolean | false | 是否启用自动透明渐变 |
⚠️ 注意: autoTransparent 和 placeholder 不能同时使用,当 placeholder=true 时,autoTransparent 会被忽略。
🎯 技术亮点
1. 性能优化
使用 IntersectionObserver 而非 scroll 事件监听,优势:
- 浏览器原生 API,性能更好
- 自动节流,避免频繁计算
- 更精确的元素可见性判断
2. 边界处理
typescript
a.value = intersectionRatio >= 0.95
  ? 0
  : intersectionRatio <= 0.05
  ? 1
: 1 - intersectionRatio在真机测试中发现,intersectionRatio 在接近 0 或 1 时可能出现微小误差(如 0.9999 或 0.0001),导致导航栏永远无法完全透明或不透明。通过设置 5% 的容差范围,确保视觉效果完美。
3. 灵活的颜色支持
通过 convertToRGBA 工具函数,支持多种颜色格式输入,最终转换为 RGBA 格式,只改变透明度通道,保持颜色不变。
4. 响应式设计
利用 Vue 3 的响应式系统,透明度 a 的变化会自动触发样式更新,无需手动操作 DOM。
🤔 常见问题
Q1: 为什么要设置 51 个观察阈值?
A: 阈值越多,过渡越平滑。51 个阈值意味着每 2% 的变化就会触发一次回调,在性能和流畅度之间取得平衡。
Q2: 占位模式和透明模式有什么区别?
A:
- 占位模式:导航栏下方有一个等高的空白占位,页面内容被推到导航栏下方
- 透明模式 :导航栏使用
fixed定位悬浮在页面上方,页面内容从屏幕顶部开始
Q3: 能否自定义渐变速度?
A: 当前实现中渐变速度与滚动速度成正比。如需自定义,可以在计算透明度时添加缓动函数。
🚀 扩展思路
- 支持渐变色背景:当前只支持纯色,可以扩展支持渐变背景
- 标题颜色联动:背景变化时,标题颜色也跟随变化(黑 ↔ 白)
- 自定义阈值:将阈值数量作为 prop 暴露,让用户自定义平滑度
- 支持其他样式:除了透明度,还可以支持模糊效果(backdrop-filter)
📚 总结
这个导航栏组件的实现虽然代码量不大,但涉及了多个技术点:
- ✅ IntersectionObserver API 的使用
- ✅ Vue 3 Composition API 的实践
- ✅ 跨平台适配(状态栏高度)
- ✅ 性能优化(避免频繁计算)
- ✅ 边界情况处理
希望这篇文章能帮助你理解并实现类似的效果。如果你有更好的实现思路,欢迎交流讨论!