Flutter在鸿蒙平台实现相机预览的技术实践
大家好,今天我们一起来看一下使用相机调用这个案例,一起来看一下flutter代码运行到鸿蒙平台的效果
首先大家需要下载这个仓库
1.下载代码
git clone git@gitcode.com:openharmony-tpc/flutter_samples.git2.适配ohos的案例都在ohos目录下
AUTHORSadd_to_appdeeplink_store_examplegoogle_mapsplace_trackersimplistic_editor
COMMITTERS.mdanalysis_defaultsdesktop_photo_searchinfinite_listplatform_channelstesting_app
CONTRIBUTING.mdandroid_splash_screendocsios_app_clipplatform_component_demotool
LICENSEanimationsexperimentalisolate_exampleplatform_designveggieseasons
OAT.xmlasset_transformationflutter_maps_firestorejsonexampleplatform_view_swiftweb
PATENTSbackground_isolate_channelsflutter_music_playermaterial_3_demoprovider_counterweb_embedding
README.OpenSourcecode_sharingflutter_smart_agriculturenavigation_and_routingprovider_shopper
README.en.mdcompass_appform_appnext_gen_ui_demosimple_shader
README.mdcontext_menusgame_templateohossimplistic_calculator
cd到ohos目录下
现在这里面就是我们的这些适配了ohos的目录
README.mdevent_bus_testhttp_testpath_parsing_testsqflite_test
animation_demofloor_testjs_dart_demoperformancestring_scanner_test
async_testflutter-pagload_native_resource_demopetitparser_testtest_uni_links
asynchronousflutter_huawei_loginlocaltion_demopictures_provider_demotestcamera
automated_testing_demoflutter_ohos_theme_fontsizescalelogging_testplatform_demotestchat
cached_network_image_sampleflutter_page_sample1multi_productsplatform_testtestpicture
channel_demoflutter_page_sample2node_test_serverplatformchannel_demotuple_test
clock_testflutter_svg_testohos_flutter_photoviewpickerprovider_partrefreshuuid_test
component_demoflutter_webview_demoohos_sqlite3_demorxdart_testvector_math_test
dio_testgesture_intercept_demoohos_themeAdaptationscrollview_demovideo_full_screen
docshttp_parser_testpath_drawing_testsqflite_helperxml_test
我今天想学习的是testcamera
3.进入testcamera目录
cd testcamera4.现在就可以直接使用flutter run来测试了。
这个时候会报错
+ flutter_lints 2.0.3 (6.0.0 available)
+ flutter_test 0.0.0 from sdk flutter
+ leak_tracker 10.0.9 (11.0.2 available)
+ leak_tracker_flutter_testing 3.0.9 (3.0.10 available)
+ leak_tracker_testing 3.0.1 (3.0.2 available)
+ lints 2.1.1 (6.0.0 available)
+ matcher 0.12.17 (0.12.18 available)
+ material_color_utilities 0.11.1 (0.13.0 available)
+ meta 1.16.0 (1.17.0 available)
+ path 1.9.1
+ sky_engine 0.0.0 from sdk flutter
+ source_span 1.10.1
+ stack_trace 1.12.1
+ stream_channel 2.1.4
+ string_scanner 1.4.1
+ term_glyph 1.2.2
+ test_api 0.7.4 (0.7.8 available)
+ vector_math 2.1.4 (2.2.0 available)
+ vm_service 15.0.0 (15.0.2 available)
Changed 27 dependencies!
12 packages have newer versions incompatible with dependency constraints.
Try `flutter pub outdated` for more information.
Launching lib/main.dart on 2LQ0224129000383 in debug mode...
start hap build...
Running Hvigor task assembleHap... 15.1s
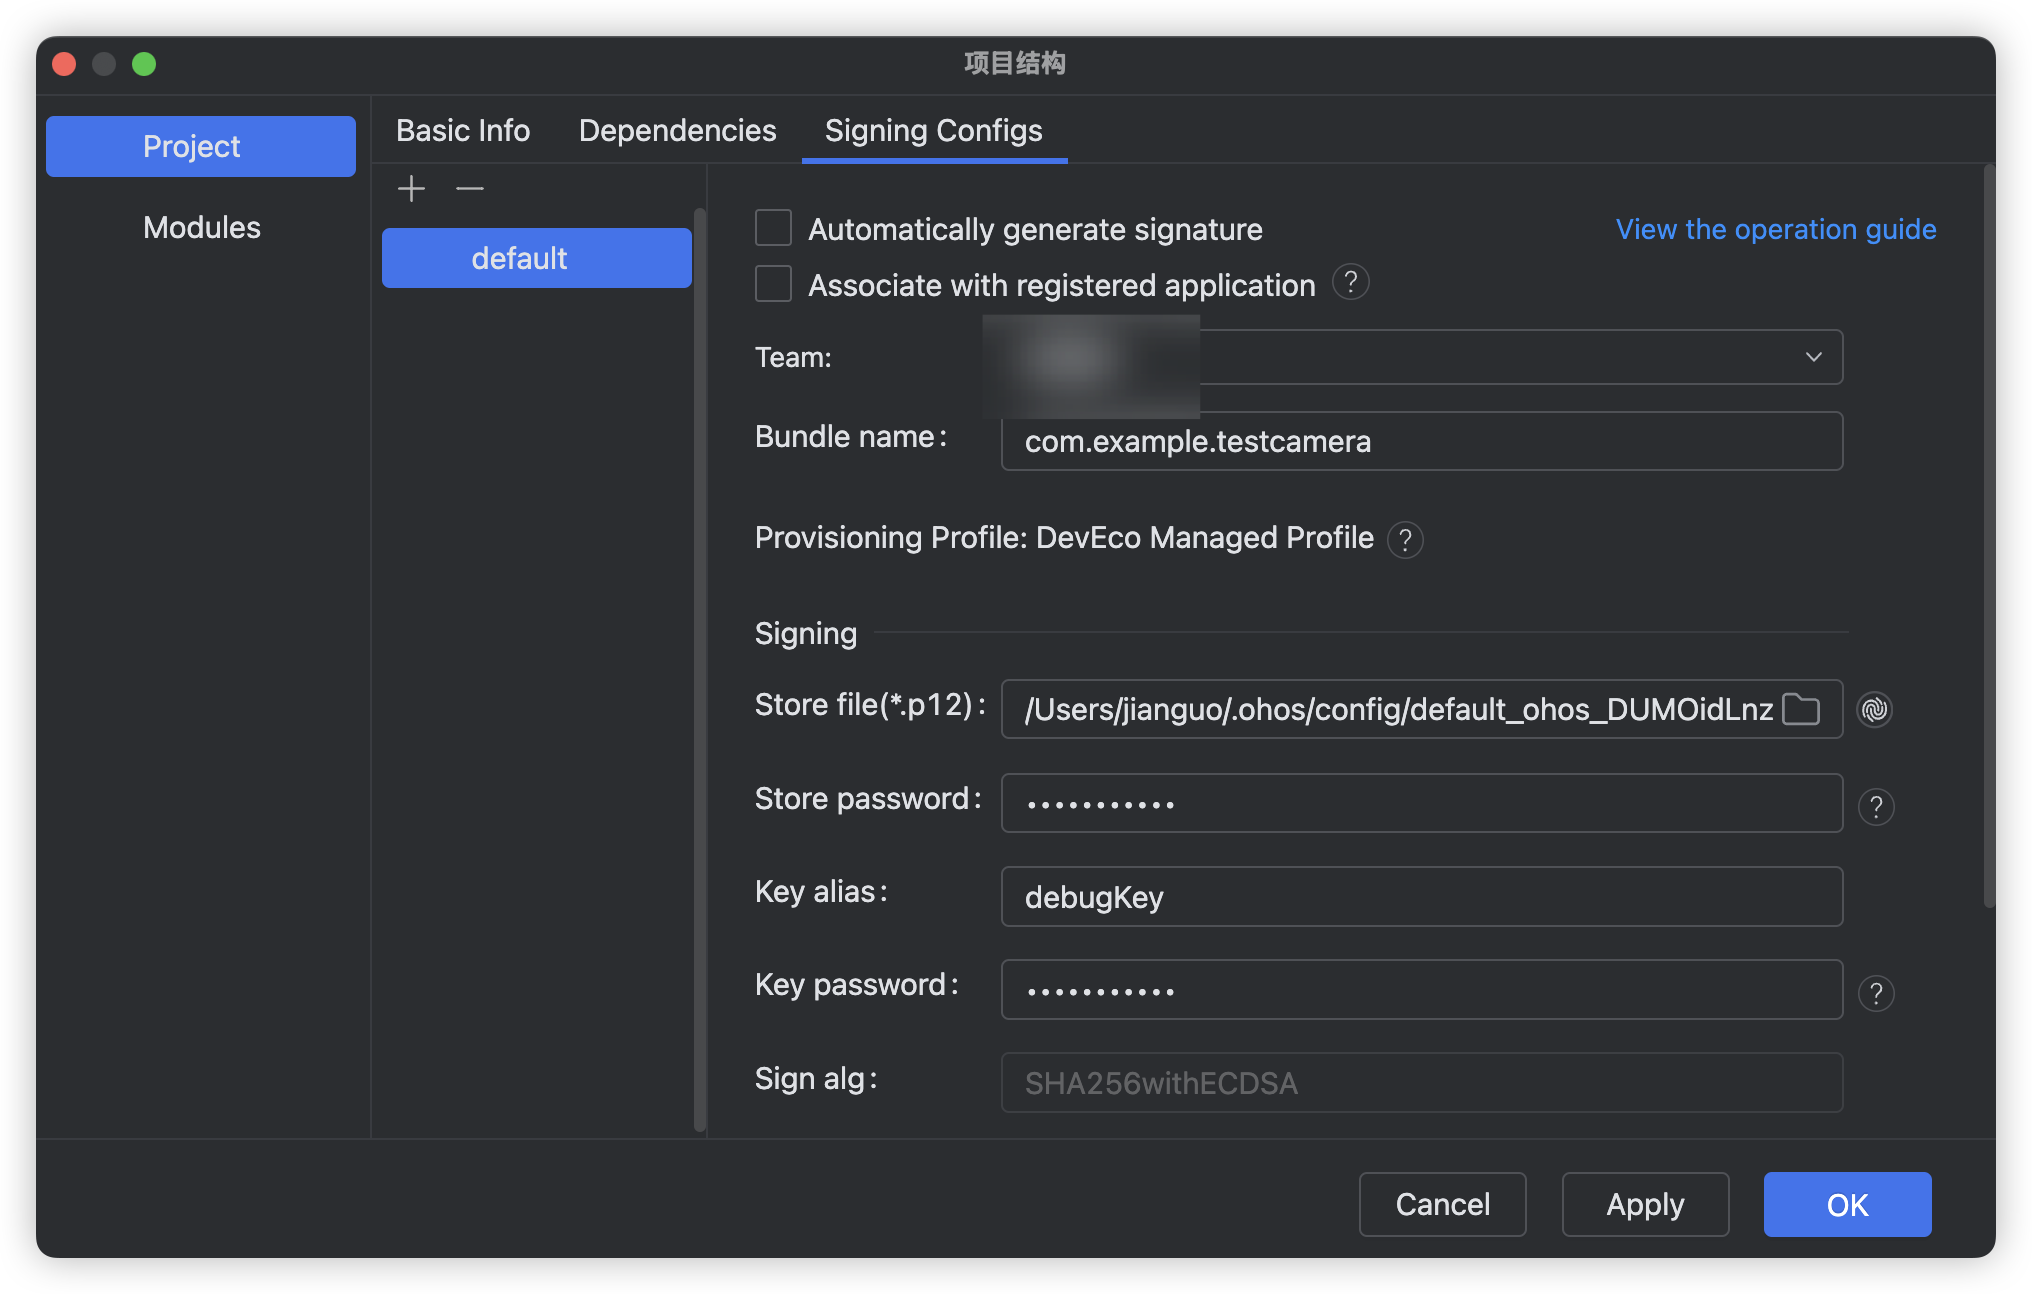
Error: 请通过DevEco Studio打开ohos工程后配置调试签名(File -> Project Structure -> Signing Configs 勾选Automatically generate signature)
所以需要大家在这里面ohos模块签名
找到对应的文件
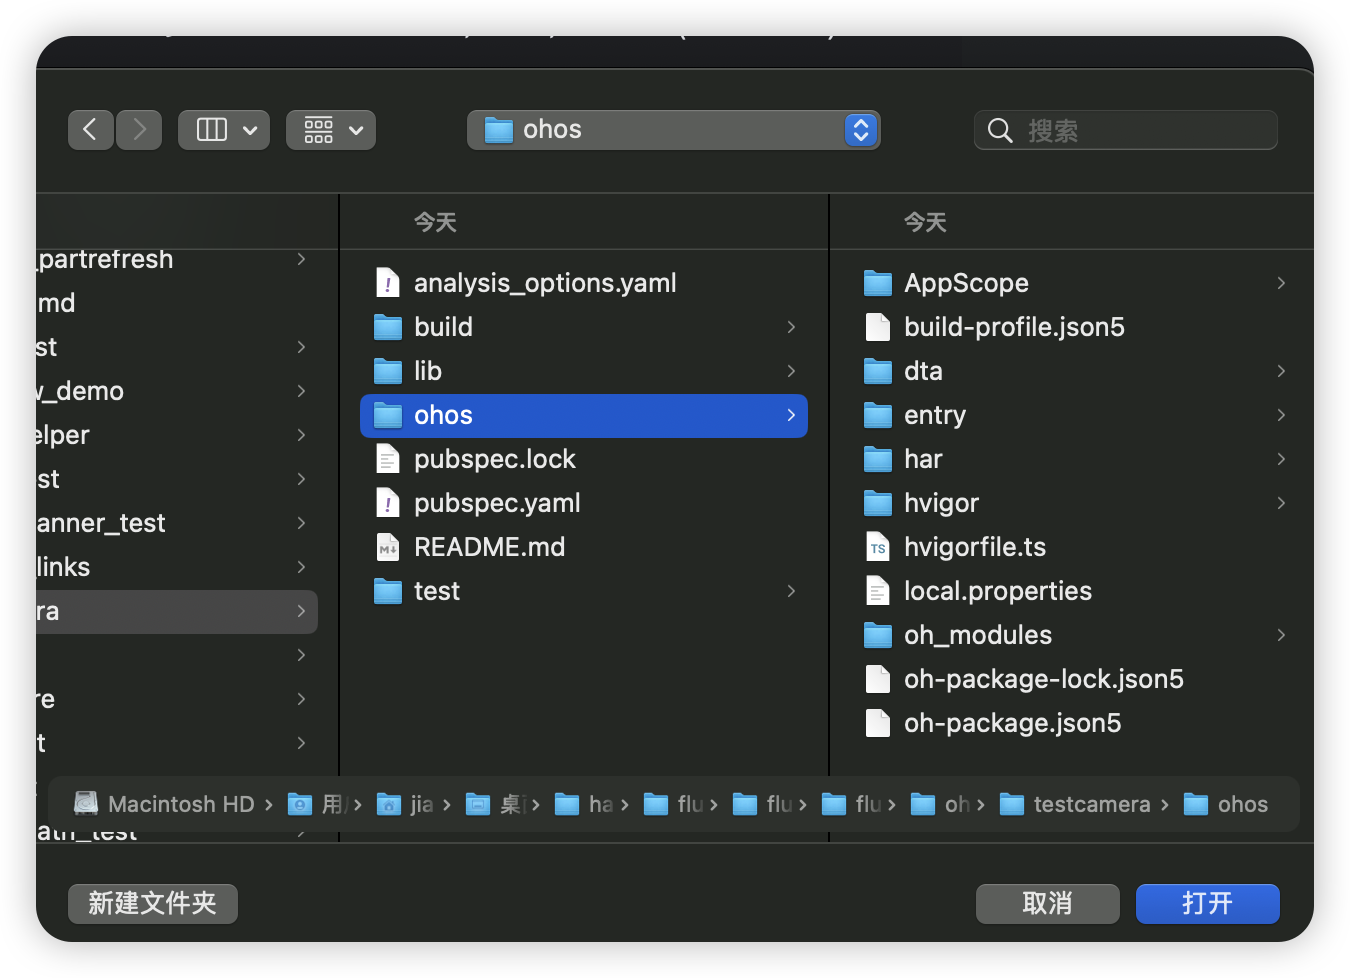
5.打开deveco。签名
6.现在就可以尝试了
flutter run
Launching lib/main.dart on 2LQ0224129000383 in debug mode...
start hap build...
Running Hvigor task assembleHap... 10.7s
✓ Built ohos/entry/build/default/outputs/default/entry-default-signed.hap.
installing hap. bundleName: com.example.testcamera
12-18 08:07:00.014 24792 24792 W A00000/com.example.testcamera/XComFlutterOHOS_Native: flutter settings log message: build textureId :-1
12-18 08:07:00.281 24792 24792 W A00000/com.example.testcamera/XComFlutterOHOS_Native: flutter settings log message: build textureId :1
waiting for a debug connection: http://127.0.0.1:55220/qL6lfbc1GRE=/
Syncing files to device 2LQ0224129000383... 72ms
Flutter run key commands.
r Hot reload. 🔥🔥🔥

已经运行成功。
现在我们就可以对现在的源码继续分享了。
一、项目概述
本项目展示了如何在鸿蒙(OpenHarmony)平台上使用Flutter框架实现相机预览功能。这是一个典型的跨平台开发场景,通过Flutter的插件机制,将鸿蒙原生的相机能力桥接到Flutter应用中,实现了高性能的相机预览体验。
技术栈
-
Flutter框架:用于UI层和业务逻辑
-
ArkTS:鸿蒙原生开发语言,用于实现相机插件
-
MethodChannel:Flutter与原生平台通信的桥梁
-
Texture:Flutter的纹理渲染机制,用于显示相机预览流
二、技术架构
2.1 整体架构
┌─────────────────────────────────────────┐
│         Flutter UI Layer               │
│ (CameraPage.dart - Material Design)   │
└──────────────┬──────────────────────────┘
              │ MethodChannel
              │ (CameraControlChannel)
┌──────────────▼──────────────────────────┐
│     Flutter Plugin Bridge             │
│ (CameraPlugin.ets - FlutterPlugin)     │
└──────────────┬──────────────────────────┘
              │ TextureRegistry
              │ (Surface ID)
┌──────────────▼──────────────────────────┐
│     HarmonyOS Camera API               │
│ (@ohos.multimedia.camera)             │
└─────────────────────────────────────────┘
2.2 数据流向
-
Flutter端 :通过
MethodChannel发送指令(注册纹理、启动相机) -
插件层:接收指令,调用鸿蒙相机API,创建纹理Surface
-
相机层:将预览流输出到Surface
-
渲染层:通过Texture将Surface内容渲染到Flutter Widget
三、Flutter端实现
3.1 主入口(main.dart)
import 'package:flutter/material.dart';
import 'CameraPage.dart';
void main() {
runApp(const MyApp());
}
class MyApp extends StatelessWidget {
const MyApp({super.key});
// This widget is the root of your application.
@override
Widget build(BuildContext context) {
return MaterialApp(
title: 'Flutter Demo',
theme: ThemeData(
// This is the theme of your application.
//
// Try running your application with "flutter run". You'll see the
// application has a blue toolbar. Then, without quitting the app, try
// changing the primarySwatch below to Colors.green and then invoke
// "hot reload" (press "r" in the console where you ran "flutter run",
// or simply save your changes to "hot reload" in a Flutter IDE).
// Notice that the counter didn't reset back to zero; the application
// is not restarted.
primarySwatch: Colors.blue,
),
home: const CameraPage(),
);
}
}主入口非常简洁,直接启动CameraPage作为首页。
3.2 相机页面(CameraPage.dart)
这是Flutter端的核心实现,展示了如何使用MethodChannel和Texture:
import 'package:flutter/material.dart';
import 'package:flutter/services.dart';
import 'dart:math' as math;
class CameraPage extends StatefulWidget {
const CameraPage({super.key});
@override
_CameraPageState createState() => _CameraPageState();
}
class _CameraPageState extends State<CameraPage> {
final MethodChannel _channel = MethodChannel('CameraControlChannel');
int textureId = -1;
@override
void initState() {
super.initState();
newTexture();
startCamera();
}
@override
void dispose() {
super.dispose();
if (textureId >= 0) {
_channel.invokeMethod('unregisterTexture', {'textureId': textureId});
}
}
void startCamera() async {
await _channel.invokeMethod('startCamera');
}
void newTexture() async {
int id = await _channel.invokeMethod('registerTexture');
setState(() {
this.textureId = id;
});
}
Widget getTextureBody(BuildContext context) {
return Container(
width: 500,
height: 500,
child: Texture(
textureId: textureId,
),
);
}
@override
Widget build(BuildContext context) {
Widget body = textureId >= 0 ? getTextureBody(context) : Text('loading...');
print('build textureId :$textureId');
return Scaffold(
appBar: AppBar(
title: Text("daex_texture"),
),
body: Container(
color: Colors.white,
height: 500,
child: Center(
child: body,
),
),
);
}
}关键技术点:
-
MethodChannel通信
-
通道名称:
CameraControlChannel(必须与原生端保持一致) -
三个核心方法:
-
registerTexture:注册纹理,获取textureId -
startCamera:启动相机预览 -
unregisterTexture:释放纹理资源
-
-
-
Texture Widget
-
Flutter提供的原生纹理渲染组件
-
通过
textureId与原生平台的Surface绑定 -
实现零拷贝的高性能渲染
-
-
生命周期管理
-
initState:初始化时注册纹理并启动相机 -
dispose:页面销毁时释放纹理资源,防止内存泄漏
-
四、鸿蒙端实现(ArkTS)
4.1 插件注册(EntryAbility.ets)
import { FlutterAbility } from '@ohos/flutter_ohos'
import { GeneratedPluginRegistrant } from '../plugins/GeneratedPluginRegistrant';
import FlutterEngine from '@ohos/flutter_ohos/src/main/ets/embedding/engine/FlutterEngine';
import { CameraPlugin } from '../cameraplugin/CameraPlugin';
export default class EntryAbility extends FlutterAbility {
configureFlutterEngine(flutterEngine: FlutterEngine) {
super.configureFlutterEngine(flutterEngine)
GeneratedPluginRegistrant.registerWith(flutterEngine)
this.addPlugin(new CameraPlugin());
}
}插件在Flutter引擎初始化时注册,确保在应用启动时即可使用。
4.2 相机插件(CameraPlugin.ets)
这是整个插件的核心,实现了FlutterPlugin和MethodCallHandler接口:
export class CameraPlugin implements FlutterPlugin, MethodCallHandler {
private binding: FlutterPluginBinding | null = null;
private mMethodChannel: MethodChannel | null = null;
private textureRegistry: TextureRegistry | null = null;
private textureId: number = -1;
private surfaceId: number = -1;
getUniqueClassName(): string {
return TAG;
}
onAttachedToEngine(binding: FlutterPluginBinding): void {
Log.e(TAG, "CameraPlugin onAttachedToEngine");
this.binding = binding;
this.mMethodChannel = new MethodChannel(binding.getBinaryMessenger(), "CameraControlChannel");
this.mMethodChannel.setMethodCallHandler(this);
this.textureRegistry = binding.getTextureRegistry();
}
onDetachedFromEngine(binding: FlutterPluginBinding): void {
this.binding = null;
this.mMethodChannel = null;
}
onMethodCall(call: MethodCall, result: MethodResult): void {
let method: string = call.method;
Log.e(TAG, "Received '" + method + "' message.");
switch (method) {
case "registerTexture":
this.registerCameraTexture();
result.success(this.textureId);
break;
case "startCamera":
this.startCamera();
result.success(null);
break;
case "unregisterTexture":
this.unregisterTexture(call.argument("textureId"));
result.success(null);
break;
}
}
getTextureId(): number {
return this.textureId
}
registerCameraTexture(): void {
Log.i(TAG, "start register Camera texture in flutter engine");
this.textureId = this.textureRegistry!.getTextureId();
this.surfaceId = this.textureRegistry!.registerTexture(this.textureId)!.getSurfaceId();
}
unregisterTexture(textureId: number): void {
this.textureRegistry!.unregisterTexture(textureId);
}
startCamera() {
checkPermissions(permissions).then((value: boolean) => {
if (value) {
this.startSession();
} else {
// 获取权限
reqPermissionsFromUser(permissions, getContext(this) as Context).then((value: boolean) => {
if (value) {
this.startSession();
} else {
console.log(`[camera test] 授权失败`);
}
});
}
});
}
startSession() {
console.log(`[camera test] 已经授权,相机开始拍摄`);
let cameraManager = getCameraManager(getContext(this) as common.BaseContext);
let cameraDevices = getCameraDevices(cameraManager);
let cameraInput = getCameraInput(cameraDevices[0], cameraManager);
if (cameraInput != null) {
getSupportedOutputCapability(cameraDevices[0], cameraManager, cameraInput)
.then((supportedOutputCapability) => {
if (supportedOutputCapability != undefined) {
let previewOutput = getPreviewOutput(cameraManager, supportedOutputCapability, this.surfaceId.toString());
let captureSession = getCaptureSession(cameraManager);
if (captureSession != undefined && previewOutput != undefined && cameraInput != null) {
beginConfig(captureSession);
setSessionCameraInput(captureSession, cameraInput);
setSessionPreviewOutput(captureSession, previewOutput);
startSession(captureSession);
}
}
});
}
}
}核心流程:
-
插件生命周期
-
onAttachedToEngine:创建MethodChannel,获取TextureRegistry -
onDetachedFromEngine:清理资源
-
-
纹理注册
-
从TextureRegistry获取唯一的textureId
-
注册纹理并获取对应的Surface ID
-
Surface ID将用于相机预览输出
-
-
相机启动流程
- 权限检查 → 获取相机管理器 → 创建输入流 → 获取输出能力 → 创建预览输出 → 配置会话 → 启动会话
4.3 相机工具类(CameraUtil.ets)
封装了鸿蒙相机API的调用逻辑:
export function getCameraManager(context: common.BaseContext): camera.CameraManager {
let cameraManager: camera.CameraManager = camera.getCameraManager(context);
return cameraManager;
}
/**
* 通过cameraManager类中的getSupportedCameras()方法,获取当前设备支持的相机列表,列表中存储了设备支持的所有相机ID。
* 若列表不为空,则说明列表中的每个ID都支持独立创建相机对象;否则,说明当前设备无可用相机,不可继续后续操作。
* @param cameraManager
* @returns
*/
export function getCameraDevices(cameraManager: camera.CameraManager): Array<camera.CameraDevice> {
let cameraArray: Array<camera.CameraDevice> = cameraManager.getSupportedCameras();
if (cameraArray != undefined && cameraArray.length <= 0) {
console.error("[camera test] cameraManager.getSupportedCameras error");
return [];
}
for (let index = 0; index < cameraArray.length; index++) {
console.info('[camera test] cameraId : ' + cameraArray[index].cameraId); // 获取相机ID
console.info('[camera test] cameraPosition : ' + cameraArray[index].cameraPosition); // 获取相机位置
console.info('[camera test] cameraType : ' + cameraArray[index].cameraType); // 获取相机类型
console.info('[camera test] connectionType : ' + cameraArray[index].connectionType); // 获取相机连接类型
}
return cameraArray;
}
/**
* 调用cameraManager类中的createCaptureSession()方法创建一个会话
* @param cameraManager
* @returns
*/
export function getCaptureSession(cameraManager: camera.CameraManager): camera.CaptureSession | undefined {
let captureSession: camera.CaptureSession | undefined = undefined;
try {
captureSession = cameraManager.createCaptureSession();
} catch (error) {
let err = error as BusinessError;
console.error(`[camera test] Failed to create the CaptureSession instance. error: ${JSON.stringify(err)}`);
}
return captureSession;
}
/**
* 调用captureSession类中的beginConfig()方法配置会话
* @param captureSession
*/
export function beginConfig(captureSession: camera.CaptureSession): void {
try {
captureSession.beginConfig();
} catch (error) {
let err = error as BusinessError;
console.error(`[camera test] Failed to beginConfig. error: ${JSON.stringify(err)}`);
}
}
/**
* 调用captureSession类中的commitConfig()和start()方法提交相关配置,并启动会话
* @param captureSession
* @returns
*/
export async function startSession(captureSession: camera.CaptureSession): Promise<void> {
try {
await captureSession.commitConfig();
} catch (error) {
let err = error as BusinessError;
console.error(`[camera test] Failed to commitConfig. error: ${JSON.stringify(err)}`);
}
try {
await captureSession.start()
} catch (error) {
let err = error as BusinessError;
console.error(`[camera test] Failed to start. error: ${JSON.stringify(err)}`);
}
}
export function getCameraInput(cameraDevice: camera.CameraDevice, cameraManager: camera.CameraManager): camera.CameraInput | null{
// 创建相机输入流
let cameraInput: camera.CameraInput | null = null;
try {
cameraInput = cameraManager.createCameraInput(cameraDevice);
// 监听cameraInput错误信息
cameraInput.on('error', cameraDevice, (error: BusinessError) => {
console.info(`[camera test] Camera input error code: ${error.code}`);
});
} catch (error) {
let err = error as BusinessError;
console.error('[camera test] Failed to createCameraInput errorCode = ' + err.code);
}
return cameraInput;
}
/**
* 通过getSupportedOutputCapability()方法,获取当前设备支持的所有输出流
* 输出流在CameraOutputCapability中的各个profile字段中
* @param cameraDevice
* @param cameraManager
* @returns
*/
export async function getSupportedOutputCapability(cameraDevice: camera.CameraDevice, cameraManager: camera.CameraManager,
cameraInput: camera.CameraInput): Promise<camera.CameraOutputCapability | undefined> {
// 打开相机
await cameraInput.open();
// 获取相机设备支持的输出流能力
let cameraOutputCapability = cameraManager.getSupportedOutputCapability(cameraDevice);
if (!cameraOutputCapability) {
console.error("[camera test] cameraManager.getSupportedOutputCapability error");
return undefined;
}
console.info("[camera test] outputCapability: " + JSON.stringify(cameraOutputCapability));
return cameraOutputCapability;
}
/**
* 获取预览流
* @param cameraManager
* @param cameraOutputCapability
* @param surfaceId
* @returns
*/
export function getPreviewOutput(cameraManager: camera.CameraManager, cameraOutputCapability: camera.CameraOutputCapability,
surfaceId: string): camera.PreviewOutput | undefined {
let previewProfilesArray: Array<camera.Profile> = cameraOutputCapability.previewProfiles;
let previewOutput: camera.PreviewOutput | undefined = undefined;
try {
previewOutput = cameraManager.createPreviewOutput(previewProfilesArray[0], surfaceId);
} catch (error) {
let err = error as BusinessError;
console.error("[camera test] Failed to create the PreviewOutput instance. error code: " + err.code);
}
return previewOutput;
}
export function setSessionCameraInput(captureSession: camera.CaptureSession, cameraInput: camera.CameraInput): void{
try {
captureSession.addInput(cameraInput);
} catch (error) {
let err = error as BusinessError;
console.error(`[camera test] Failed to addInput. error: ${JSON.stringify(err)}`);
}
}
export function setSessionPreviewOutput(captureSession: camera.CaptureSession, previewOutput: camera.PreviewOutput): void{
try {
captureSession.addOutput(previewOutput);
} catch (error) {
let err = error as BusinessError;
console.error(`[camera test] Failed to add previewOutput. error: ${JSON.stringify(err)}`);
}
}关键函数说明:
-
getCameraManager:获取相机管理器实例
-
getCameraDevices:枚举设备支持的相机(前置/后置)
-
getCameraInput:创建相机输入流,并监听错误事件
-
getSupportedOutputCapability:获取相机支持的输出能力(需要先打开相机)
-
getPreviewOutput:创建预览输出,关键是将Surface ID传入
-
会话管理:beginConfig → addInput/addOutput → commitConfig → start
欢迎大家加入**开源鸿蒙跨平台开发者社区**:汇聚全球开发者,提供清晰的贡献路径与激励体系,你的每一行代码都可能成为产业升级的基石;