在 Jetpack Compose 中,虽然 Row、Column 和 Box 能满足 90% 的布局需求,但当你需要实现瀑布流、标签云、或者复杂的重叠效果时,就需要用到自定义布局 (Custom Layout)。
Compose 的布局系统相比传统 View 系统更加简洁高效(摒弃了多次测量机制)。
1. 布局原理
在 Compose 中,每个 UI 节点的布局过程分为三个阶段:
- 测量 (Measure): 父组件问子组件:"你需要多大地方?"(传入 Constraints)
- 决定尺寸 (Decide Size): 子组件根据约束和自身内容,告诉父组件:"我这么大。"(返回 Placeable)
- 放置 (Place) : 父组件拿到子组件的尺寸后,决定把它放在哪里(调用
placeRelative)。
核心原则:单次测量
Compose 禁止对同一个子组件进行多次测量(Intrinsic Size 除外),这极大提高了性能,避免了 View 体系中嵌套布局导致的指数级性能衰退。
2. 核心 API:Layout Composable
自定义布局的核心是 Layout 函数。
Kotlin
@Composable
fun MyCustomLayout(
    modifier: Modifier = Modifier,
    content: @Composable () -> Unit
) {
    Layout(
        modifier = modifier,
        content = content
    ) { measurables, constraints ->
        // 1. 测量所有子组件
        // 2. 计算自身尺寸
        // 3. 放置子组件
        layout(width, height) { ... }
    }
}measurables: 待测量的子组件列表。constraints: 父组件传来的约束(最大/最小宽高)。placeables: 测量后得到的子组件对象(包含宽高信息)。
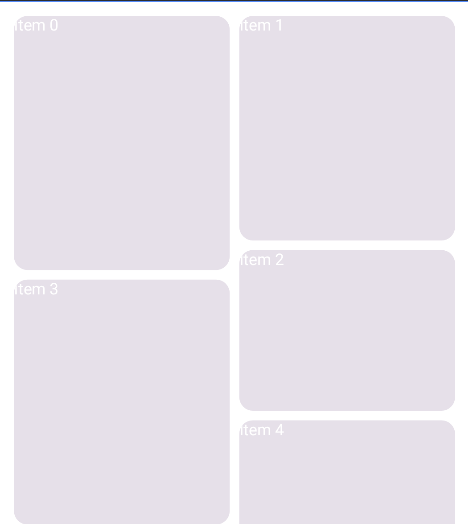
3. 实战:实现一个简易的"瀑布流" (StaggeredGrid)
我们将实现一个垂直滚动的瀑布流布局,支持指定列数。
3.1 代码实现
Kotlin
@Composable
fun VerticalStaggeredGrid(
    columns: Int, // 列数
    modifier: Modifier = Modifier,
    content: @Composable () -> Unit
) {
    Layout(
        content = content,
        modifier = modifier
    ) { measurables, constraints ->

        // --- 步骤 1:测量子组件 ---

        // 计算每一列的宽度(总宽 / 列数)
        val itemWidth = constraints.maxWidth / columns
        // 创建约束:强制每个子项宽度固定,高度不限
        val itemConstraints = constraints.copy(
            minWidth = itemWidth,
            maxWidth = itemWidth
        )

        // 测量所有子项
        val placeables = measurables.map { measurable ->
            measurable.measure(itemConstraints)
        }

        // --- 步骤 2:计算位置 ---

        // 记录每一列当前的高度,初始都为 0
        val columnHeights = IntArray(columns)

        // 记录每个子项的 (x, y) 坐标
        val placeableXY = placeables.map { placeable ->
            // 算法:找到当前高度最小的那一列
            val minHeightColumnIndex = columnHeights.indexOf(columnHeights.minOrNull() ?: 0)

            val x = minHeightColumnIndex * itemWidth
            val y = columnHeights[minHeightColumnIndex]

            // 更新该列的高度
            columnHeights[minHeightColumnIndex] += placeable.height

            Pair(x, y) // 返回坐标
        }

        // --- 步骤 3:布局自身与放置子项 ---

        // 自身高度 = 最高那一列的高度
        val layoutHeight = columnHeights.maxOrNull() ?: constraints.minHeight

        layout(
            width = constraints.maxWidth,
            height = layoutHeight
        ) {
            // 放置每一个子项
            placeables.forEachIndexed { index, placeable ->
                val (x, y) = placeableXY[index]
                placeable.placeRelative(x = x, y = y)
            }
        }
    }
}
3.2 使用示例
为了让瀑布流可以滚动,我们需要在外部添加 verticalScroll 修饰符。同时,为了让它从顶部开始显示,我们通常将其放在一个填充父容器的 Column 或 Box 中。
Kotlin
@Composable
fun StaggeredGridDemo() {
    // 1. 准备数据
    val items = remember {
        List(20) { index ->
            // 随机高度模拟不同大小的图片/卡片
            Random.nextInt(100, 300).dp
        }
    }

    // 2. 外层容器
    Box(
        modifier = Modifier
            .fillMaxSize() // 占满全屏
            .background(Color.White)
    ) {
        // 3. 使用自定义布局
        VerticalStaggeredGrid(
            columns = 2,
            modifier = Modifier
                .fillMaxWidth()
                .verticalScroll(rememberScrollState()) // 【关键】添加滚动能力
                .padding(8.dp) // 外边距
        ) {
            items.forEachIndexed { index, height ->
                Card(
                    modifier = Modifier
                        .padding(4.dp) // item 间距
                        .height(height) // 应用随机高度
                        .fillMaxWidth(), // 宽度填满列宽
                ) {
                    Box(contentAlignment = Alignment.Center) {
                        Text(
                            text = "Item $index",
                            color = Color.White,
                            style = MaterialTheme.typography.h6
                        )
                    }
                }
            }
        }
    }
}
4. 进阶:使用 LayoutModifier
有时候我们不需要写一个新的容器,只是想修改某个组件的尺寸或位置,这时可以使用 Modifier.layout。
例如,实现一个忽略父组件 Padding 的全宽组件:
Kotlin
fun Modifier.ignoreParentPadding(horizontalPadding: Dp) = this.layout { measurable, constraints ->
    // 1. 测量:让子组件宽度增加 2倍 padding(抵消父组件的 padding)
    val placeable = measurable.measure(
        constraints.copy(
            maxWidth = constraints.maxWidth + (horizontalPadding.roundToPx() * 2)
        )
    )

    // 2. 布局
    layout(placeable.width, placeable.height) {
        // 3. 放置:向左偏移 padding 距离
        placeable.placeRelative(-horizontalPadding.roundToPx(), 0)
    }
}
5. 进阶:SubcomposeLayout (子组合布局)
如果你需要根据第一个子组件的尺寸来决定第二个子组件的内容 (例如:根据文本高度决定是否显示"展开/收起"按钮),普通的 Layout 做不到,因为测量和组合是分开的。
这时需要 SubcomposeLayout,它允许你在测量过程中动态组合新的 UI。BoxWithConstraints 和 LazyColumn 底层都用了它。但请注意,它的性能开销比普通 Layout 大,非必要不使用。
总结
- Layout Lambda : 核心是
measure(测量子项) -> 计算坐标 ->layout(指定自身尺寸) ->place(放置子项)。 - Constraints: 约束自上而下传递,尺寸自下而上上报。
- 单次测量: 保证了 Compose 布局的高效性。
掌握自定义布局,你就不再受限于官方提供的基础容器,能够自由绘制任何设计稿要求的 UI 结构。