一、Spring AI Alibaba
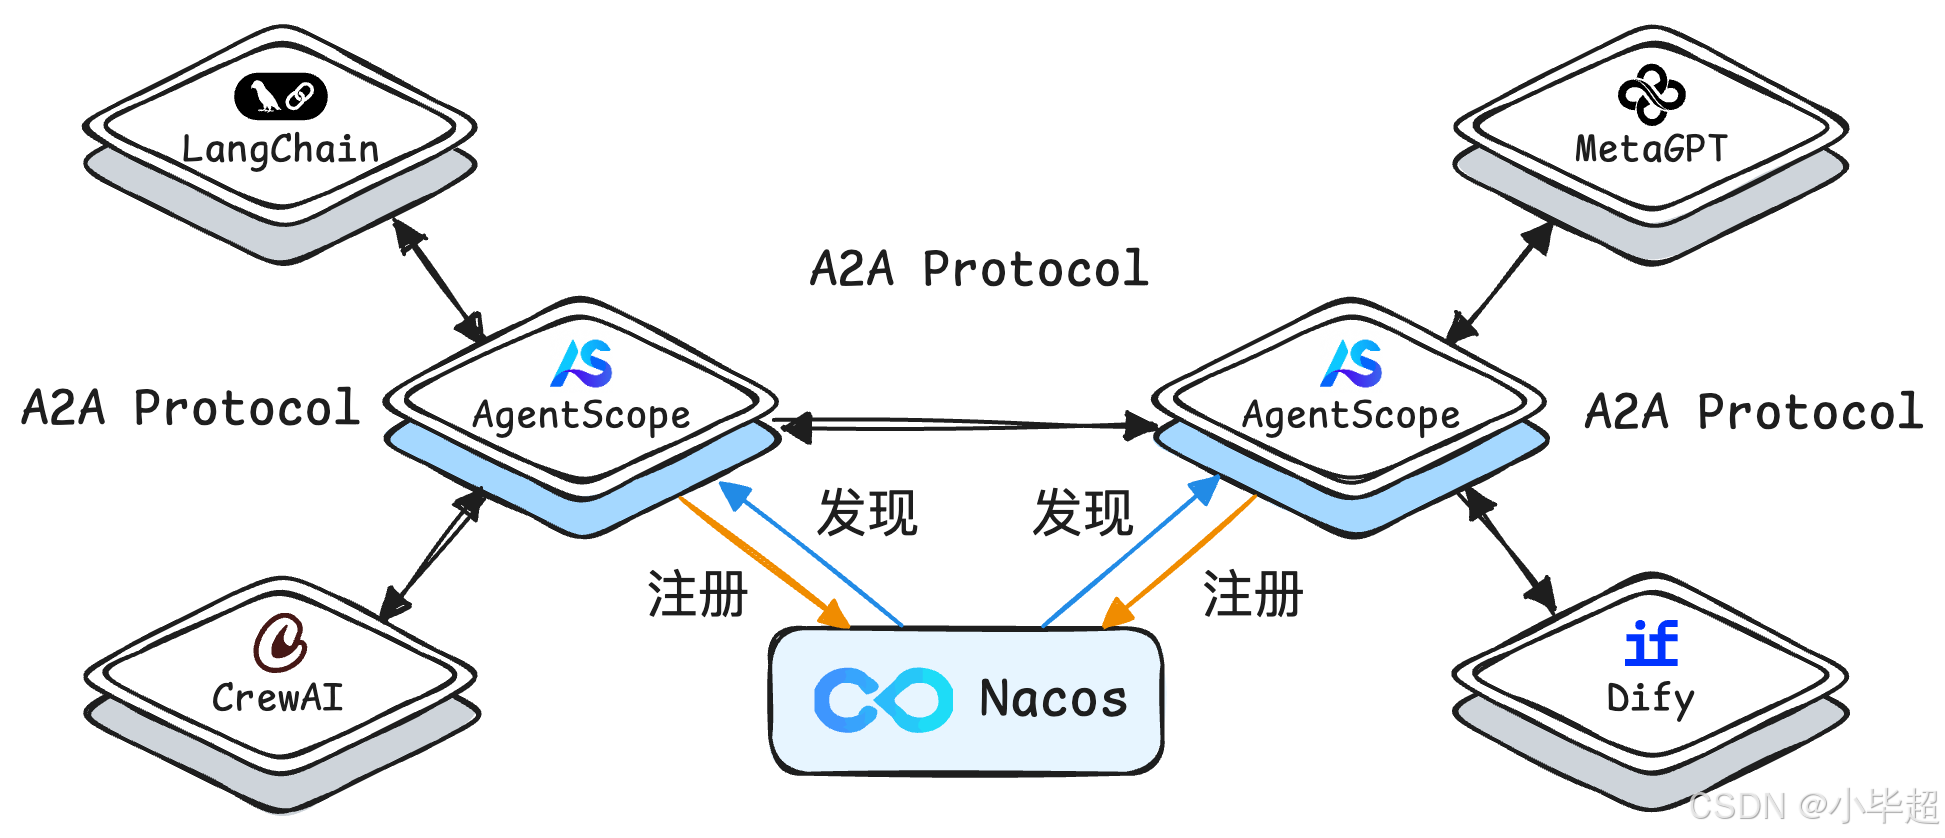
在本专栏上一篇文章中,介绍了 Python + AgentScope 完整实现 A2A 智能体服务的注册、集群部署、Nacos 服务发现与客户端负载调用能力,解决了多智能体框架不统一、智能体无法高效协同的问题。
过程如下图所示:
文章地址:
但在企业真实落地场景中,绝大多数核心业务系统、微服务架构均基于 Java 技术栈构建。如果 AI 智能体仅能在 Python 侧独立运行,无法与 Java 业务体系打通,会形成新的技术孤岛,无法真正融入企业微服务生态。
因此本篇内容将聚焦Java生态上,基于 Spring AI Alibaba 快速搭建 Java 版 A2A 服务端与客户端,实现Java 智能体注册至 Nacos、并实现客户端远程调用。
Spring AI Alibaba 是阿里开源的 Spring AI 生态扩展,旨在帮助 Java 开发者更便捷地构建 AI 应用。在最新的版本中,Spring AI Alibaba 已经全面拥抱 A2A 协议,提供了开箱即用的 Starter 组件:
spring-ai-alibaba-starter-a2a-server:用于快速将Agent包装为标准的A2A服务端。spring-ai-alibaba-starter-a2a-client:用于在Spring环境中作为客户端,发起A2A协议调用。spring-ai-alibaba-starter-a2a-registry:深度集成Nacos,实现A2A AgentCard的自动注册与发现。
这意味着,Java 开发者无需手动处理 A2A 协议底层的 JSON-RPC 转换和 HTTP 路由,只需通过简单的配置和注解,就能让 Spring Boot 微服务具备 Agent 互联能力。
核心技术栈版本延续上篇规范,保证前后实验兼容性:
- Nacos:
3.2.0(最低3.0+支持AI注册中心能力) - Spring Boot:
3.4.0 - Spring AI Alibaba:
1.0.0.4+ - 模型服务:
ModelScopeQwen3.5系列开源模型
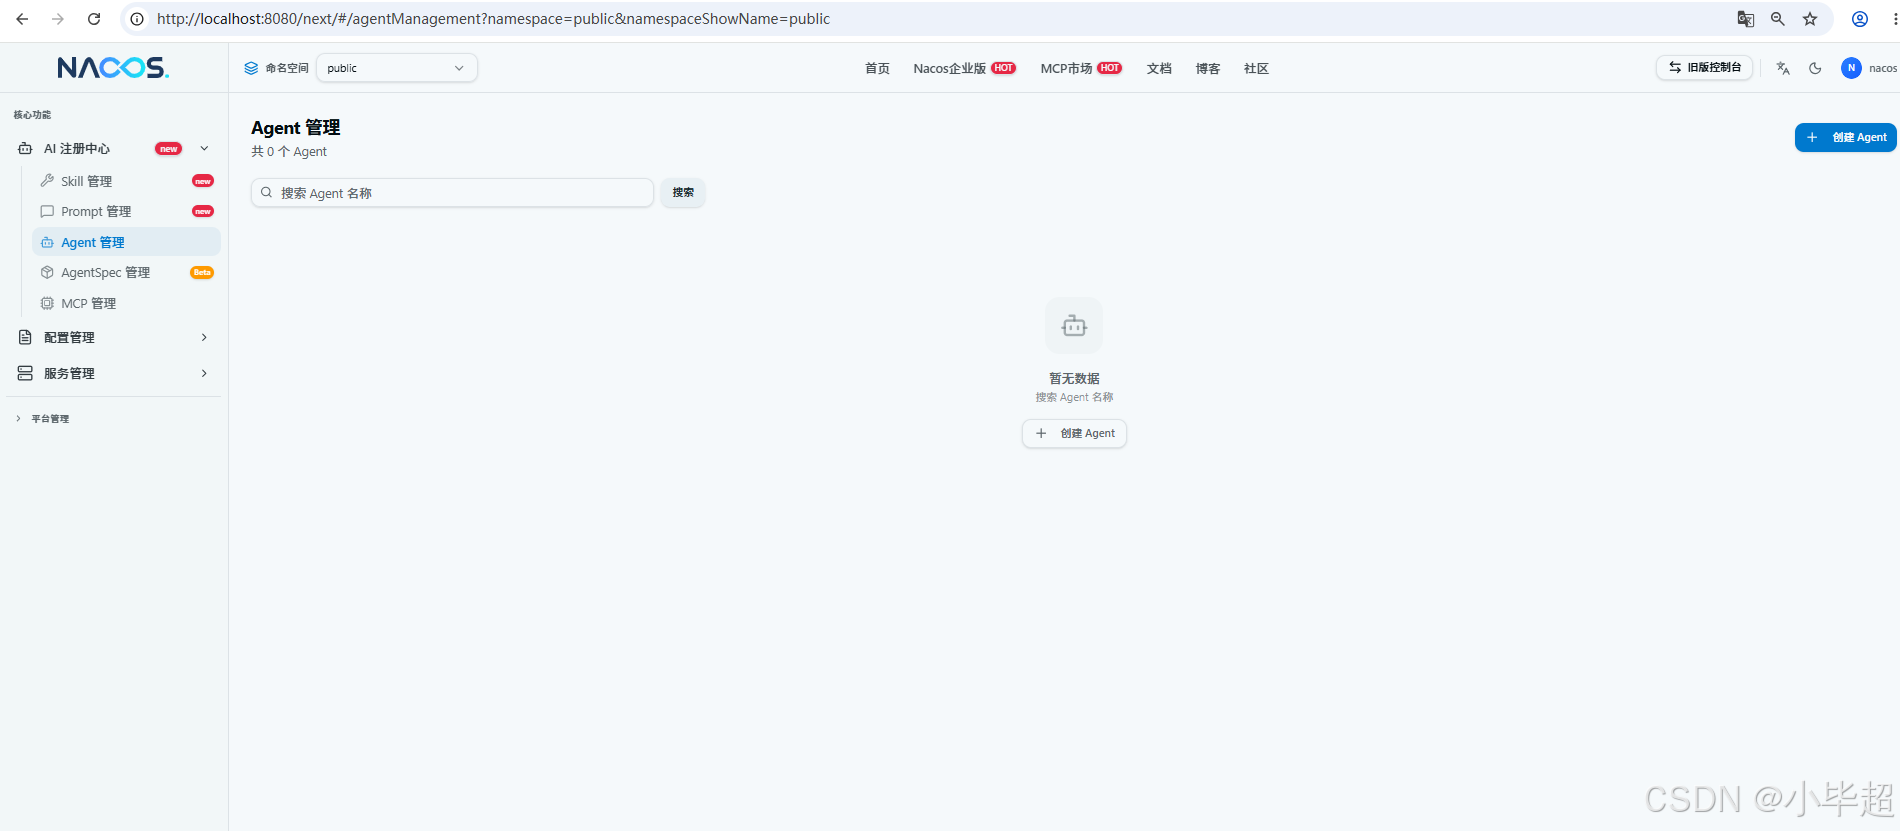
开始前请提前安装好 Nacos 服务, 安装过程可参考官方文档:
二、A2A 服务端实现
首先,我们新建一个 Spring Boot 项目,将 Java 端的天气助手 Agent 封装为 A2A 服务并注册到 Nacos。
2.1 项目依赖
pom 引入 WebFlux、Spring AI Alibaba A2A Server、Registry 以及 OpenAI 模型依赖:
xml
<?xml version="1.0" encoding="UTF-8"?>
<project xmlns="http://maven.apache.org/POM/4.0.0" xmlns:xsi="http://www.w3.org/2001/XMLSchema-instance"
         xsi:schemaLocation="http://maven.apache.org/POM/4.0.0 https://maven.apache.org/xsd/maven-4.0.0.xsd">
    <modelVersion>4.0.0</modelVersion>
    <parent>
        <groupId>org.springframework.boot</groupId>
        <artifactId>spring-boot-starter-parent</artifactId>
        <version>3.4.0</version>
        <relativePath/>
    </parent>

    <groupId>com.example</groupId>
    <artifactId>a2a-demo</artifactId>
    <version>0.0.1-SNAPSHOT</version>
    <name>a2a-demo</name>
    <description>a2a-demo</description>
    <properties>
        <java.version>17</java.version>
        <project.build.sourceEncoding>UTF-8</project.build.sourceEncoding>
        <project.reporting.outputEncoding>UTF-8</project.reporting.outputEncoding>
        <!-- Spring AI Alibaba版本1.0.0.4及以上 -->
        <spring.ai.alibaba.version>1.0.0.4</spring.ai.alibaba.version>
    </properties>
    <dependencies>
        <dependency>
            <groupId>org.springframework.boot</groupId>
            <artifactId>spring-boot-starter-webflux</artifactId>
        </dependency>

        <dependency>
            <groupId>org.springframework.boot</groupId>
            <artifactId>spring-boot-starter-test</artifactId>
            <scope>test</scope>
        </dependency>

        <!-- 引入A2A Server starter -->
        <dependency>
            <groupId>com.alibaba.cloud.ai</groupId>
            <artifactId>spring-ai-alibaba-starter-a2a-server</artifactId>
            <version>${spring.ai.alibaba.version}</version>
        </dependency>

        <!-- 引入A2A Nacos 注册中心 -->
        <dependency>
            <groupId>com.alibaba.cloud.ai</groupId>
            <artifactId>spring-ai-alibaba-starter-a2a-registry</artifactId>
            <version>${spring.ai.alibaba.version}</version>
        </dependency>

        <!-- 引入OpenAI -->
        <dependency>
            <groupId>org.springframework.ai</groupId>
            <artifactId>spring-ai-starter-model-openai</artifactId>
            <version>1.0.1</version>
        </dependency>

    </dependencies>

    <build>
        <plugins>
            <plugin>
                <groupId>org.apache.maven.plugins</groupId>
                <artifactId>maven-compiler-plugin</artifactId>
                <version>3.8.1</version>
                <configuration>
                    <source>17</source>
                    <target>17</target>
                    <encoding>UTF-8</encoding>
                </configuration>
            </plugin>
            <plugin>
                <groupId>org.springframework.boot</groupId>
                <artifactId>spring-boot-maven-plugin</artifactId>
                <configuration>
                    <mainClass>com.example.a2ademo.A2aDemoApplication</mainClass>
                    <skip>true</skip>
                </configuration>
                <executions>
                    <execution>
                        <id>repackage</id>
                        <goals>
                            <goal>repackage</goal>
                        </goals>
                    </execution>
                </executions>
            </plugin>
        </plugins>
    </build>

</project>
2.2 配置文件
指定模型连接信息、Nacos 注册中心以及 Agent 元数据:
yml
server:
  port: 8085

spring:
  application:
    name: a2a-server-example
  ai:
    openai:
      base-url: https://api-inference.modelscope.cn
      api-key: ms-xxx ## 替换为你的key
      chat:
        options:
          model: Qwen/Qwen3.5-35B-A3B

    alibaba:
      a2a:
        # 配置Nacos信息
        nacos:
          server-addr: ${NACOS_ADDRESS:localhost:8848}
          username: ${NACOS_USERNAME:nacos}
          password: ${NACOS_PASSWORD:123456}
        server:
          version: 1.0.1
          card:
            # 配置Agent URL
            url: http://localhost:8085/a2a
这里 a2a.server.card.url 非常关键,它定义了该 Agent 在 A2A 协议下暴露的地址。启动时,框架会自动构建 AgentCard 并注册至 Nacos 中。
2.3 构建测试工具
使用 @Tool 注解定义一个简单的天气伪工具,供智能体调用,以测试工具调用能力:
java
@Component
public class WeatherTools {

    @Tool(description = "查看某个地区的最新天气情况")
    public String weather(String local) {
        if (StringUtils.isBlank(local)){
            return "参数:local 不可为空!";
        }
        return local + ",地区的最新天气为多云转晴,30-35摄氏度。";
    }

}
2.4 构建 ReactAgent 智能体
通过 ReactAgent 将大模型与工具整合构造智能体:
java
@Configuration
public class RootAgentConfiguration {

    @Bean
    public List<ToolCallback> tools(WeatherTools tools) {
        return new ArrayList<ToolCallback>(List.of(ToolCallbacks.from(tools)));
    }

    @Bean
    @Primary
    public BaseAgent rootAgent(OpenAiChatModel chatModel, List<ToolCallback> tools) throws GraphStateException {
        return ReactAgent.builder()
                .name("xiaobichao")
                .description("小毕超天气助手")
                .model(chatModel)
                .instruction("你叫小毕超,是一个天气智能助手!")
                .inputKey("input")
                .tools(tools)
                .build();
    }
}
2.5 启动服务端
启动 Spring Boot 项目:
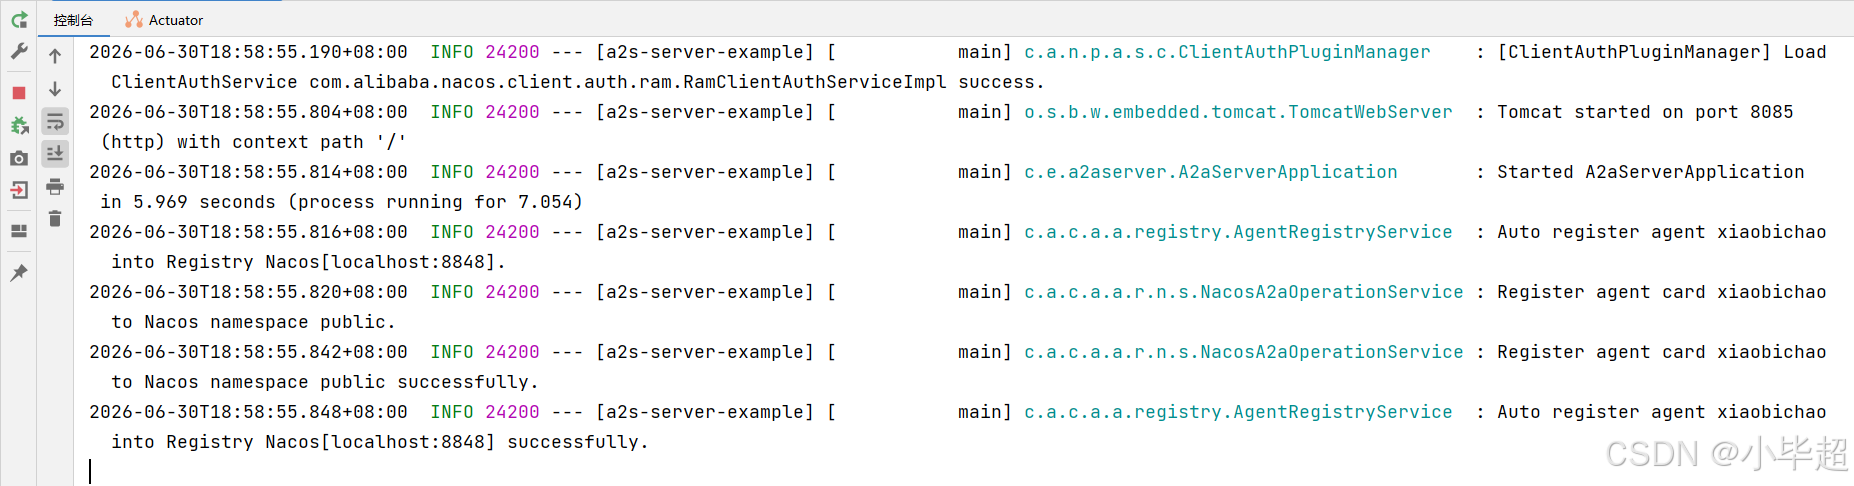
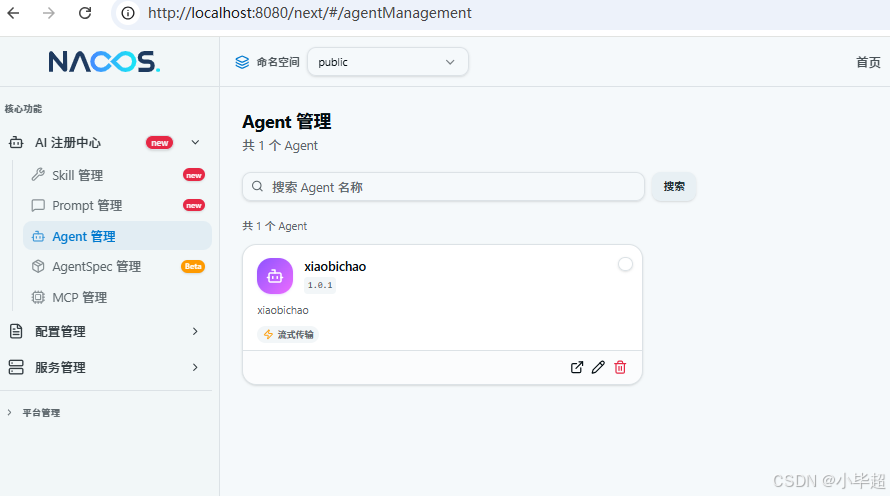
观察 Nacos 注册情况,可以看到名为 xiaobichao 的智能体已自动注册:
点进详情,可以看到注册的 URL 等信息,与配置一致:
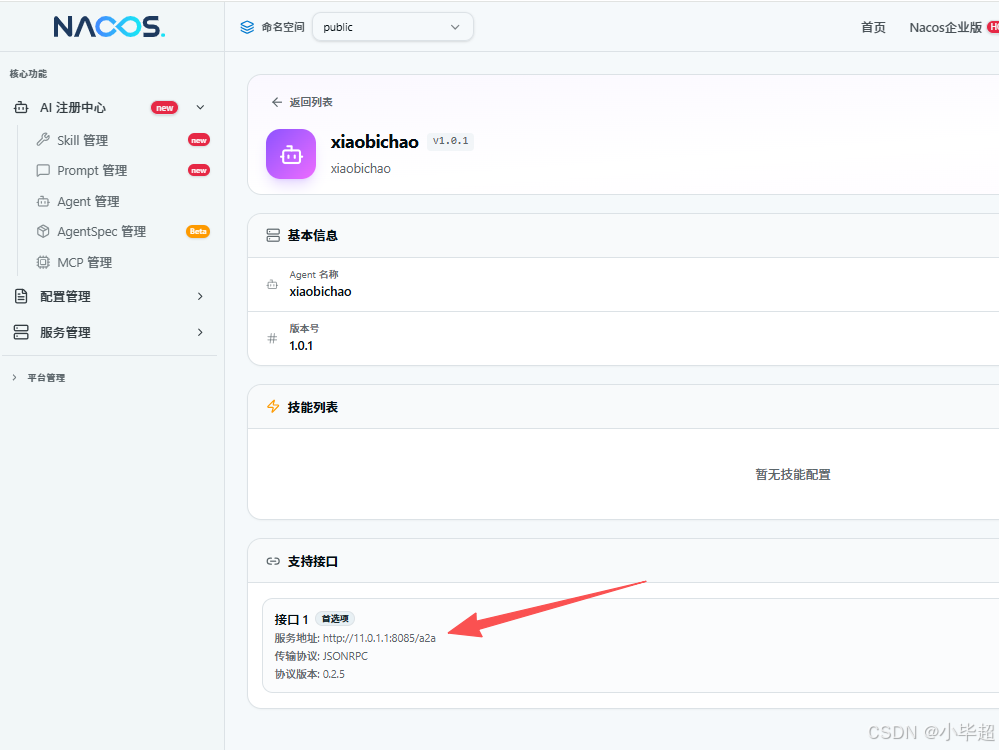
至此,A2A 服务端已经就绪。它与上一篇用 AgentScope 编写的 Python 服务端在协议层面完全互通,可以被任意支持 A2A 的客户端调用。
三、A2A 客户端实现并调用测试
接下来我们创建一个新的 Spring Boot 客户端项目,通过 Nacos 发现刚才的 xiaobichao 服务,并进行流式调用。
3.1 项目依赖
客户端 pom 需要引入 spring-ai-alibaba-starter-a2a-client 和 spring-ai-alibaba-starter-a2a-registry:
xml
<?xml version="1.0" encoding="UTF-8"?>
<project xmlns="http://maven.apache.org/POM/4.0.0" xmlns:xsi="http://www.w3.org/2001/XMLSchema-instance"
         xsi:schemaLocation="http://maven.apache.org/POM/4.0.0 https://maven.apache.org/xsd/maven-4.0.0.xsd">
    <modelVersion>4.0.0</modelVersion>
    <parent>
        <groupId>org.springframework.boot</groupId>
        <artifactId>spring-boot-starter-parent</artifactId>
        <version>3.4.0</version>
        <relativePath/>
    </parent>

    <groupId>com.example</groupId>
    <artifactId>a2a-demo</artifactId>
    <version>0.0.1-SNAPSHOT</version>
    <name>a2a-demo</name>
    <description>a2a-demo</description>
    <properties>
        <java.version>17</java.version>
        <project.build.sourceEncoding>UTF-8</project.build.sourceEncoding>
        <project.reporting.outputEncoding>UTF-8</project.reporting.outputEncoding>
        <!-- Spring AI Alibaba版本1.0.0.4及以上 -->
        <spring.ai.alibaba.version>1.0.0.4</spring.ai.alibaba.version>
    </properties>
    <dependencies>
        <dependency>
            <groupId>org.springframework.boot</groupId>
            <artifactId>spring-boot-starter-webflux</artifactId>
        </dependency>

        <dependency>
            <groupId>org.springframework.boot</groupId>
            <artifactId>spring-boot-starter-test</artifactId>
            <scope>test</scope>
        </dependency>

        <!-- 引入A2A Client starter -->
        <dependency>
            <groupId>com.alibaba.cloud.ai</groupId>
            <artifactId>spring-ai-alibaba-starter-a2a-client</artifactId>
            <version>${spring.ai.alibaba.version}</version>
        </dependency>

        <!-- 引入A2A Nacos 注册中心 -->
        <dependency>
            <groupId>com.alibaba.cloud.ai</groupId>
            <artifactId>spring-ai-alibaba-starter-a2a-registry</artifactId>
            <version>${spring.ai.alibaba.version}</version>
        </dependency>

    </dependencies>

    <build>
        <plugins>
            <plugin>
                <groupId>org.apache.maven.plugins</groupId>
                <artifactId>maven-compiler-plugin</artifactId>
                <version>3.8.1</version>
                <configuration>
                    <source>17</source>
                    <target>17</target>
                    <encoding>UTF-8</encoding>
                </configuration>
            </plugin>
            <plugin>
                <groupId>org.springframework.boot</groupId>
                <artifactId>spring-boot-maven-plugin</artifactId>
                <configuration>
                    <mainClass>com.example.a2ademo.A2aDemoApplication</mainClass>
                    <skip>true</skip>
                </configuration>
                <executions>
                    <execution>
                        <id>repackage</id>
                        <goals>
                            <goal>repackage</goal>
                        </goals>
                    </execution>
                </executions>
            </plugin>
        </plugins>
    </build>

</project>
3.2 配置文件
application.yml 只要指定 Nacos 地址:
yml
server:
  port: 8086

spring:
  application:
    name: a2a-client-example
  ai:
    alibaba:
      a2a:
        nacos:
          # 开启从Nacos中自动发现Agent
          discovery:
            enabled: true
          server-addr: ${NACOS_ADDRESS:localhost:8848}
          username: ${NACOS_USERNAME:nacos}
          password: ${NACOS_PASSWORD:123456}
3.3 构建远程智能体代理
创建一个 A2aRemoteAgent,用于代理远程智能体。
java
@Configuration
public class RootAgentConfiguration {

    @Bean
    public BaseAgent rootAgent(AgentCardProvider agentCardProvider) throws GraphStateException {
        return A2aRemoteAgent.builder()
                .agentCardProvider(agentCardProvider)
                .name("xiaobichao").description("小毕超天气智能助手").build();
    }
}
AgentCardProvider 会自动根据 name 从 Nacos 中查找对应的 AgentCard,并建立通信通道。整个过程开发者无需关心远程服务地址和协议细节。
3.4 构建测试接口
java
@RestController
@RequestMapping("/")
public class TestController {

    private final BaseAgent rootAgent;

    public TestController(BaseAgent rootAgent) {
        this.rootAgent = rootAgent;
    }

    @GetMapping(value = "stream", produces = MediaType.TEXT_EVENT_STREAM_VALUE)
    public Flux<ServerSentEvent<String>> stream(@RequestParam("question") String question)
            throws GraphStateException, GraphRunnerException {
        return rootAgent.stream(Map.of("input", List.of(new UserMessage(question))))
                .mapNotNull(output -> {
                    System.out.println("stream agent invoke : " + output.toString());
                    if (output.isSTART() || output.isEND()) {
                        return null;
                    }
                    if (output instanceof StreamingOutput) {
                        String chunk = ((StreamingOutput) output).chunk();
                        return ServerSentEvent.<String>builder()
                                .data(chunk)
                                .build();
                    }
                    return null;
                });
    }

}
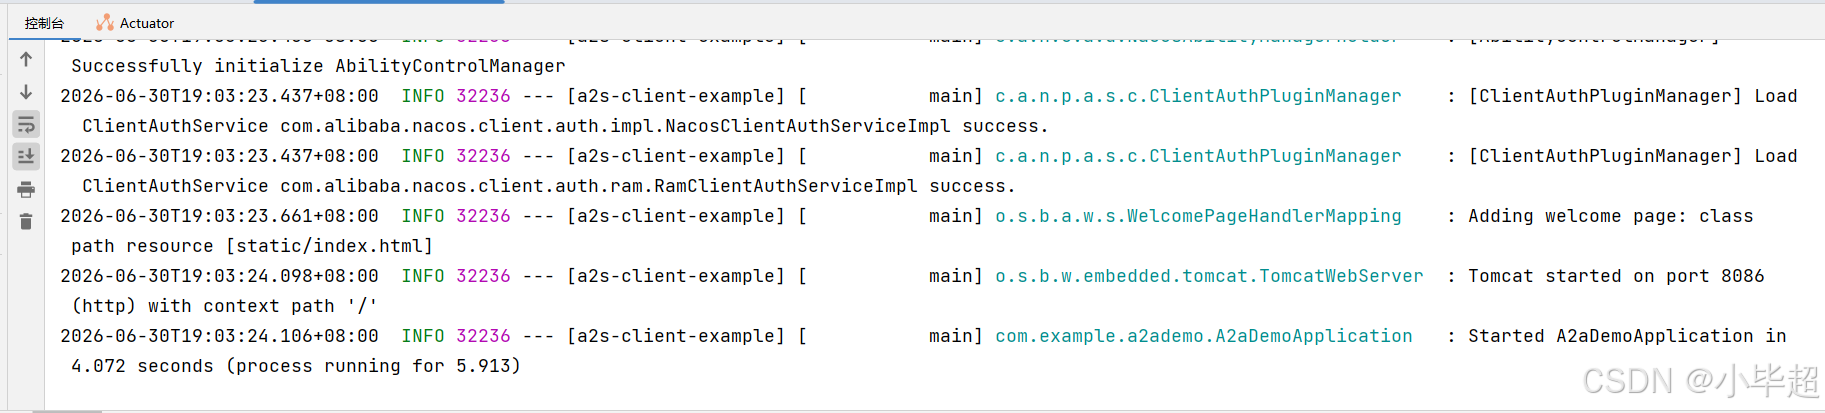
启动服务:
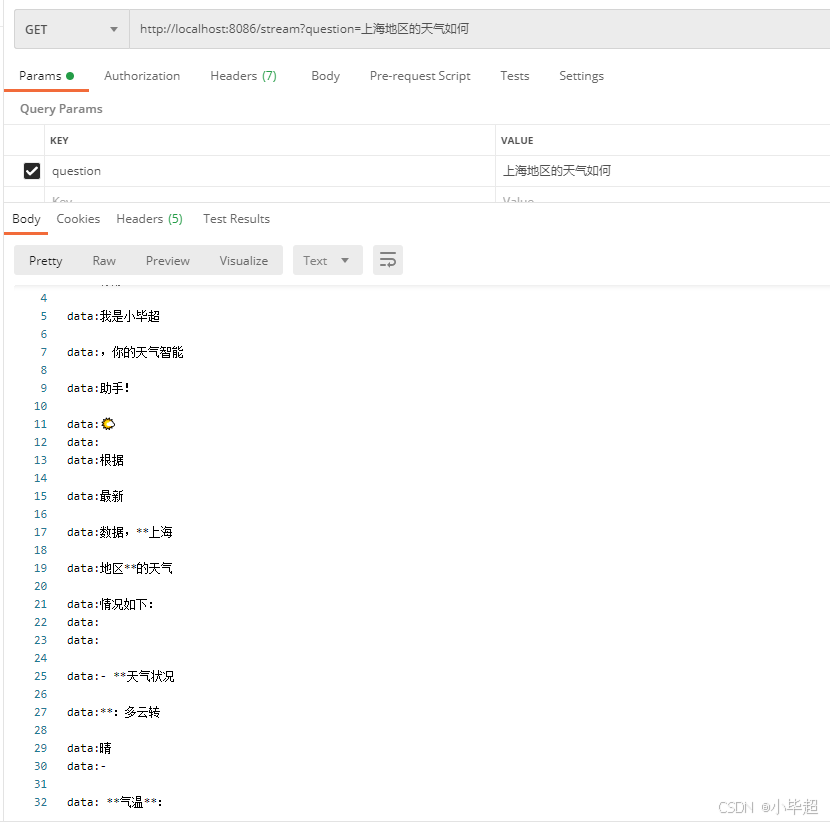
3.5 远程调用测试