(298 - a)
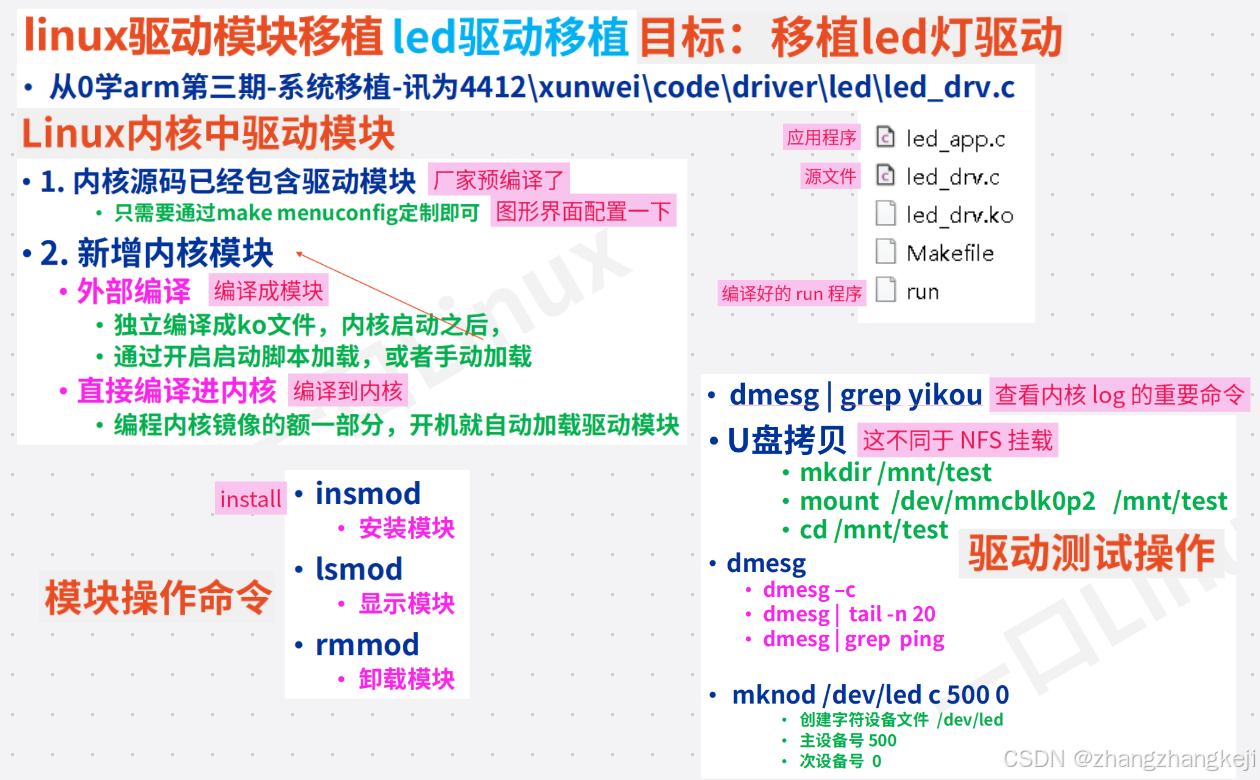
++
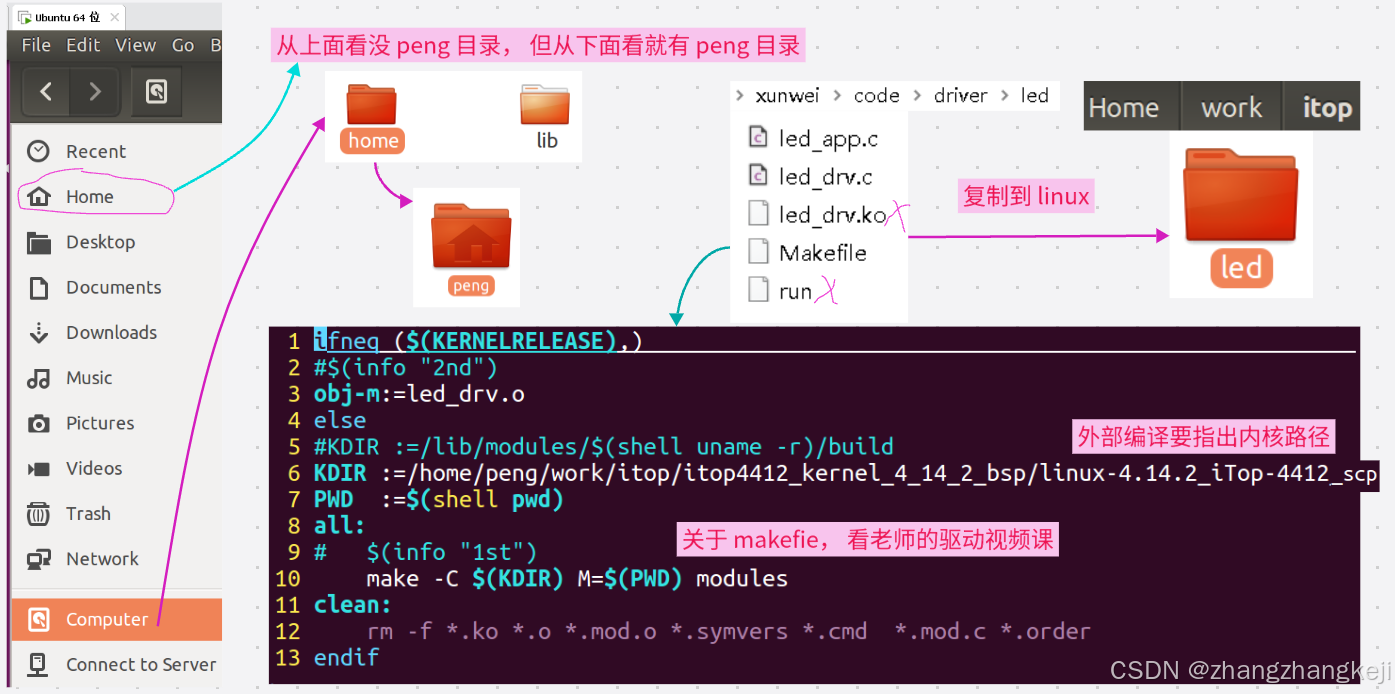
++ 接着解释下这个 makefile 文件 :
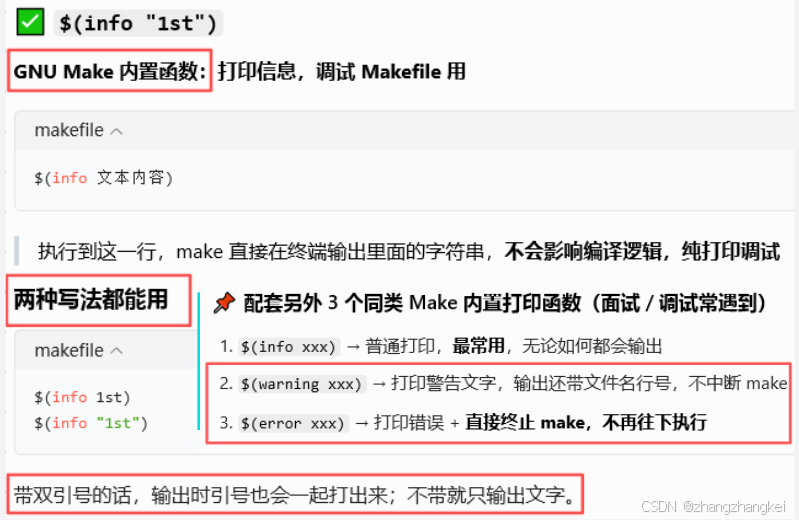
++
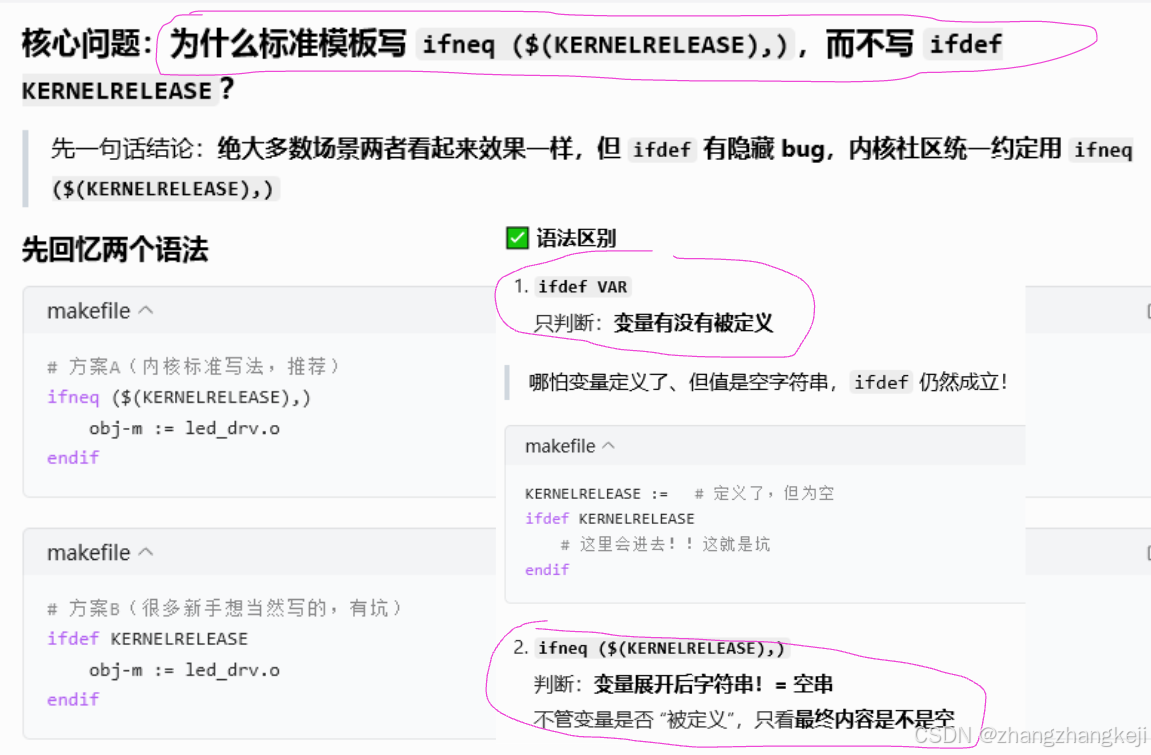
(298 - b)解释 makefile 的二次编译:
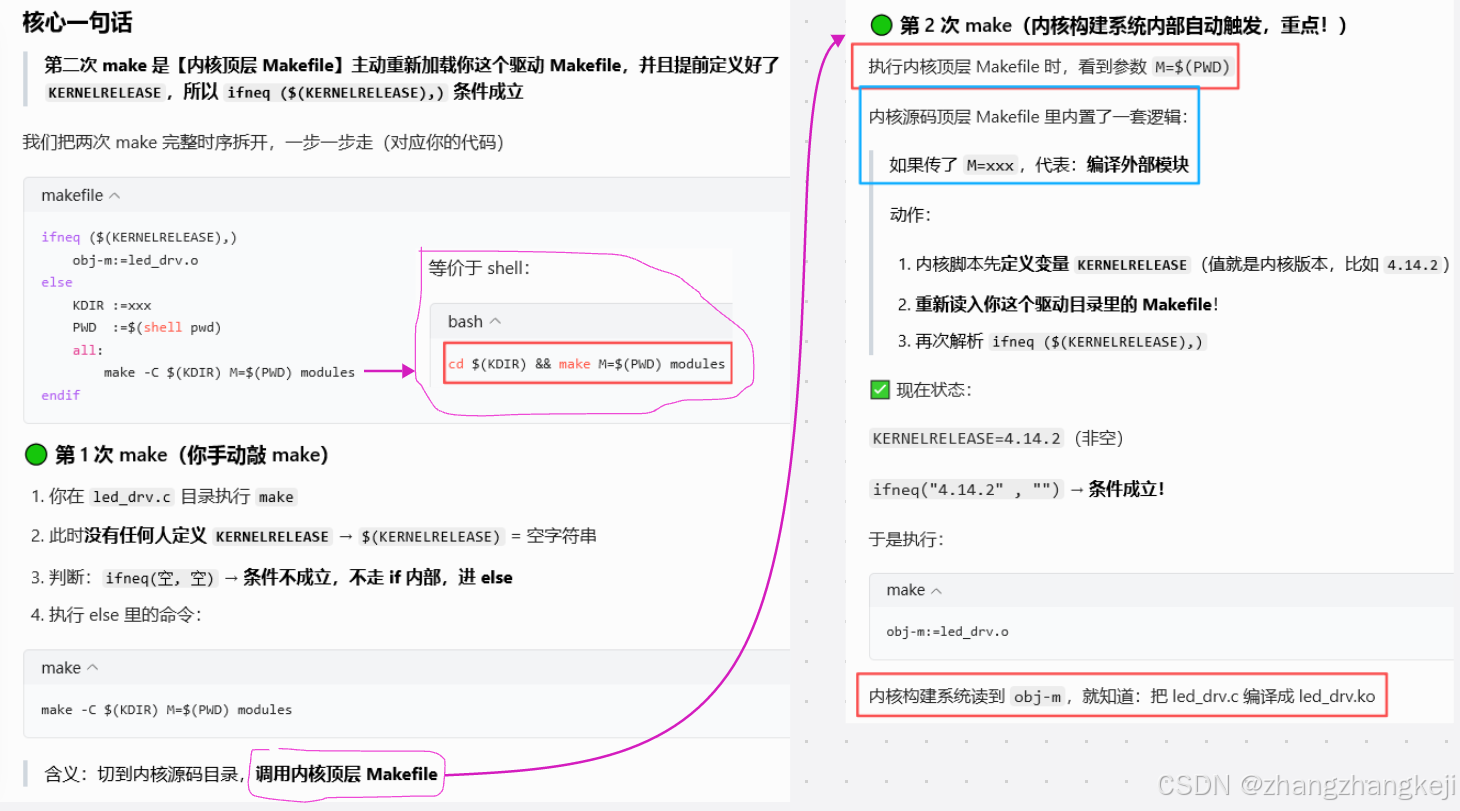
++
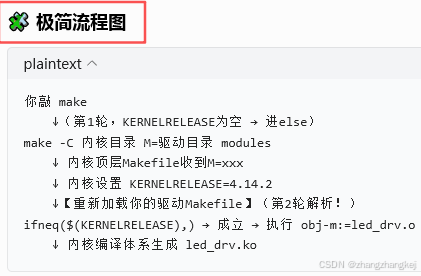
(298 - c) 开始执行 make ,编译,以及运行 :
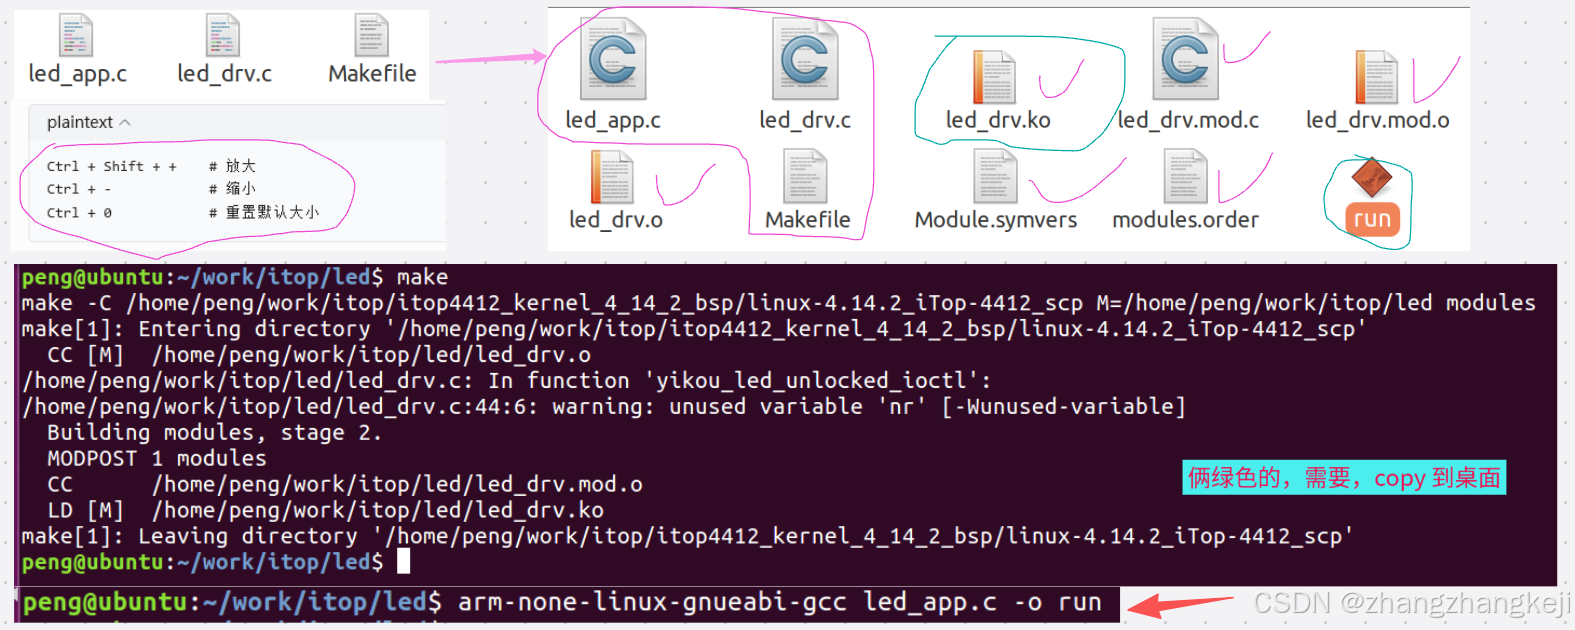
++
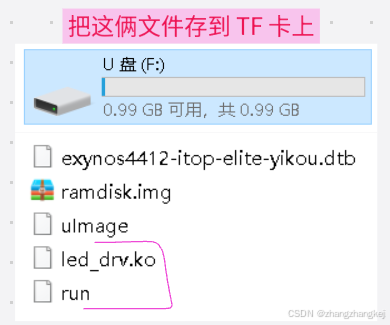
++ USB 挂载,跟 NFS 一样,老师教了又一种方式 :
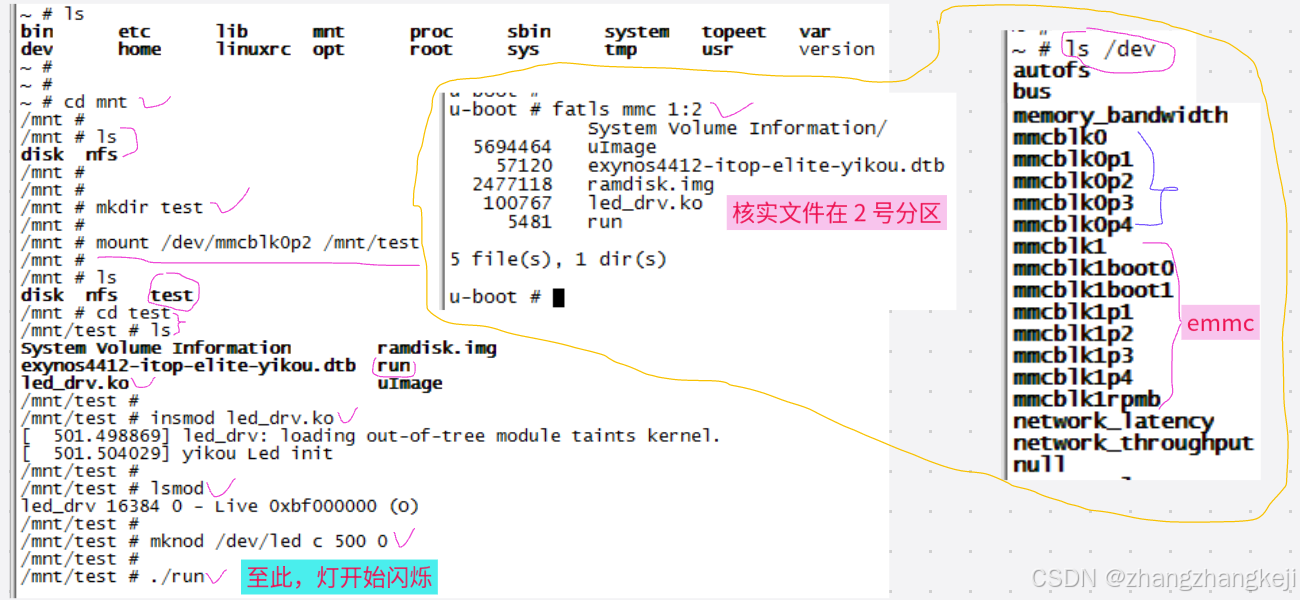
++
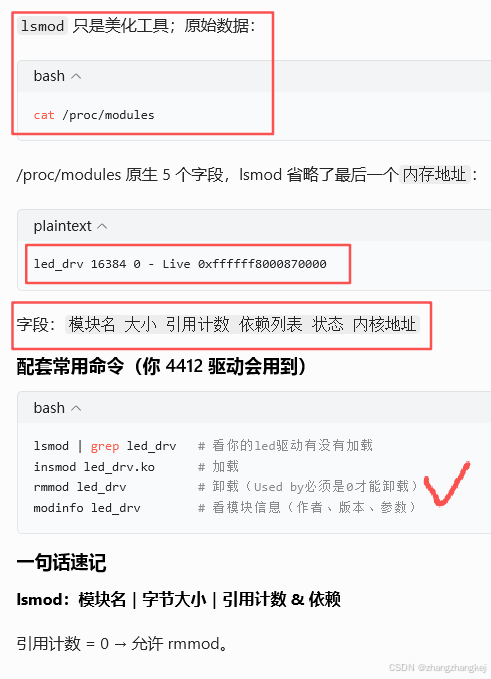
(299)以下是一些注释 :
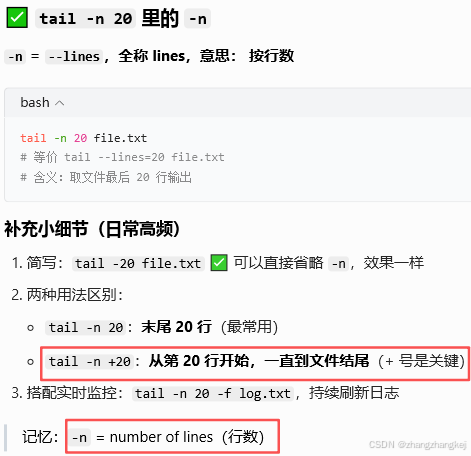
(230)
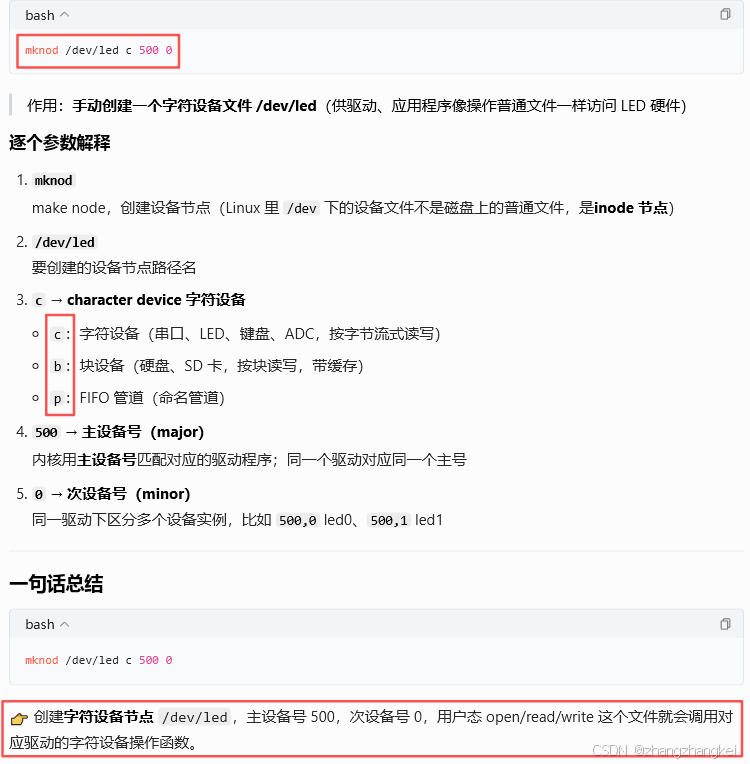
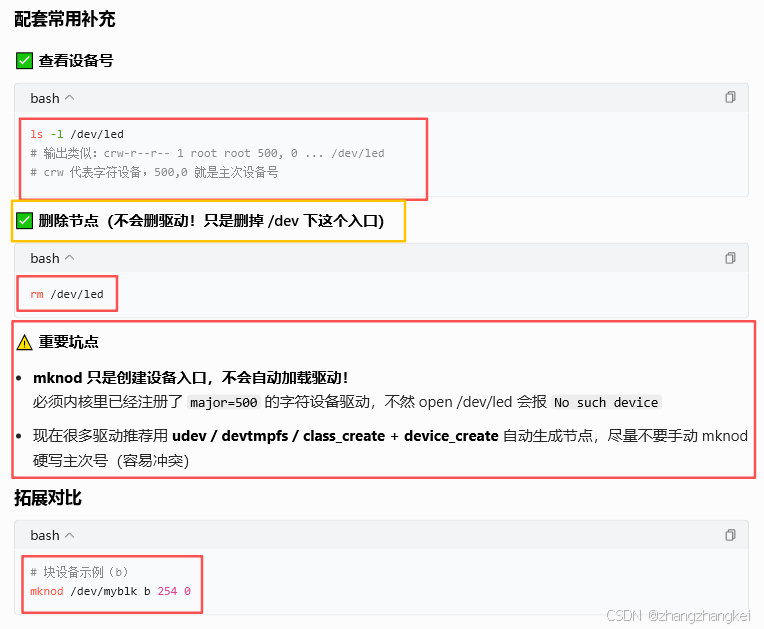
(231)

c
// 头文件
#include <linux/fs.h>
#include <linux/cdev.h>

#define LED_MAJOR 500   // 和 mknod 的 500 一致
#define LED_MINOR 0

// 设备操作集:open/read/write/release
static struct file_operations led_fops = {
    .owner = THIS_MODULE,
    .open  = led_open,
    .write = led_write,
};

static int __init led_drv_init(void)
{
    // 注册字符设备,主号500,名字"led",绑定fops
    int ret = register_chrdev(LED_MAJOR, "led", &led_fops);
    if(ret < 0){
        pr_err("register_chrdev fail\n");
        return ret;
    }
    pr_info("led drv register ok, major=%d\n", LED_MAJOR);
    return 0;
}

static void __exit led_drv_exit(void)
{
    unregister_chrdev(LED_MAJOR, "led");
}

module_init(led_drv_init);
module_exit(led_drv_exit);
MODULE_LICENSE("GPL");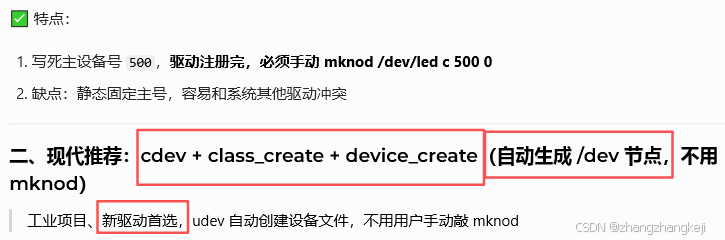
c
#include <linux/fs.h>
#include <linux/cdev.h>
#include <linux/device.h>
#include <linux/module.h>

static int major;
static struct cdev led_cdev;
static struct class *led_class;
static struct device *led_dev;

static struct file_operations led_fops = {
    .owner = THIS_MODULE,
    .open  = led_open,
    .write = led_write,
};

static int __init led_drv_init(void)
{
    dev_t devno;
    // 1. 动态申请主次设备号(不用自己硬写500)
    int ret = alloc_chrdev_region(&devno, 0, 1, "led_auto");
    if(ret) return ret;

    major = MAJOR(devno);
    // 2. 初始化cdev,绑定操作函数集
    cdev_init(&led_cdev, &led_fops);
    led_cdev.owner = THIS_MODULE;
    cdev_add(&led_cdev, devno, 1);

    // 3. 创建设备类 /sys/class/led
    led_class = class_create(THIS_MODULE, "led");
    if(IS_ERR(led_class)){
        ret = PTR_ERR(led_class);
        goto err_cdev;
    }
    // 4. 自动生成 /dev/led 节点!【重点】
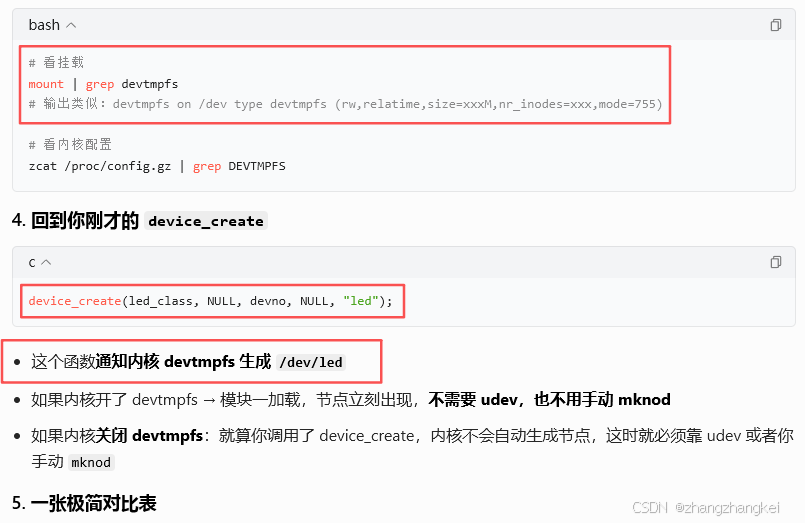
    led_dev = device_create(led_class, NULL, devno, NULL, "led");
    if(IS_ERR(led_dev)){
        ret = PTR_ERR(led_dev);
        goto err_class;
    }
    pr_info("auto create /dev/led, major=%d minor=%d\n", major, MINOR(devno));
    return 0;

err_class:
    class_destroy(led_class);
err_cdev:
    cdev_del(&led_cdev);
    unregister_chrdev_region(devno,1);
    return ret;
}

static void __exit led_drv_exit(void)
{
    dev_t devno = MKDEV(major, 0);
    device_destroy(led_class, devno);
    class_destroy(led_class);
    cdev_del(&led_cdev);
    unregister_chrdev_region(devno,1);
}

module_init(led_drv_init);
module_exit(led_drv_exit);
MODULE_LICENSE("GPL");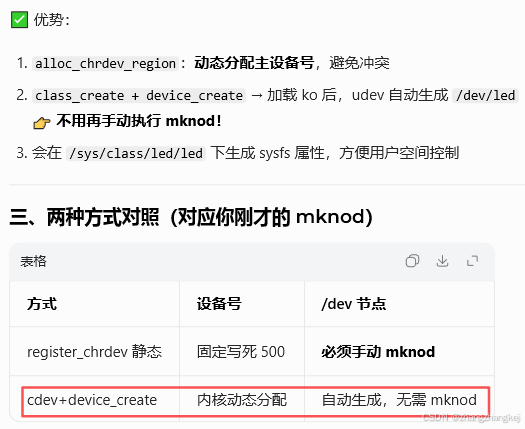
++ 四、用户态测试代码极简示例(配套上面驱动) :
c
// test_led.c
#include <stdio.h>
#include <fcntl.h>
#include <unistd.h>
int main(void)
{
    int fd = open("/dev/led", O_WRONLY);
    if(fd < 0){
        perror("open /dev/led");
        return -1;
    }
    write(fd, "1", 1); // 传给驱动write,点亮LED
    close(fd);
    return 0;
}
五、实操命令汇总 :
bash
# 加载驱动
insmod led.ko
# 查看字符设备
cat /proc/devices
# 看/dev/led信息
ls -l /dev/led
# 卸载
rmmod led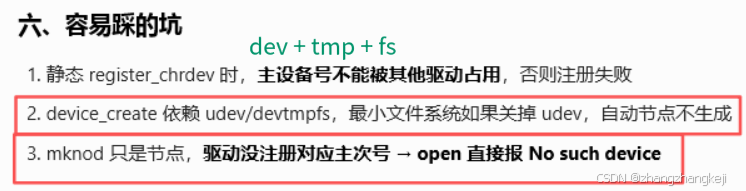
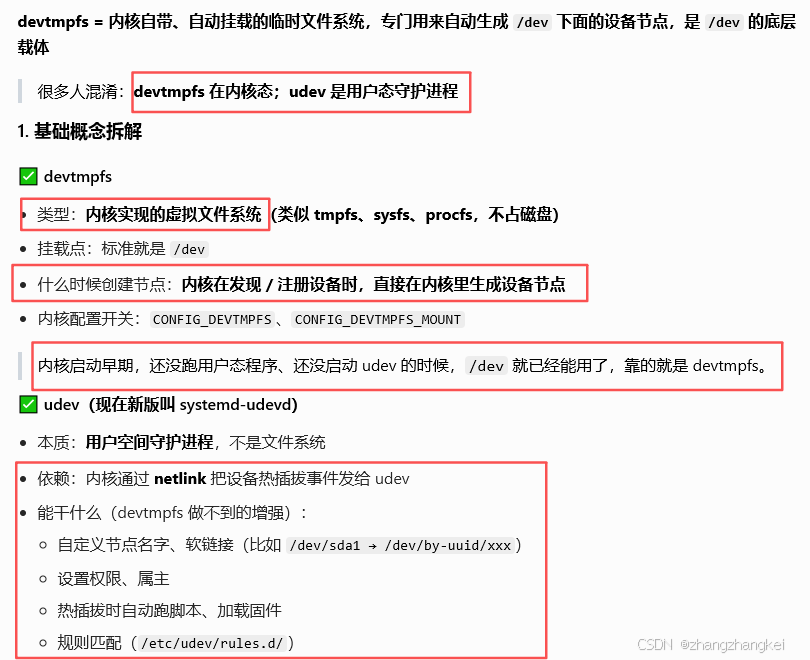
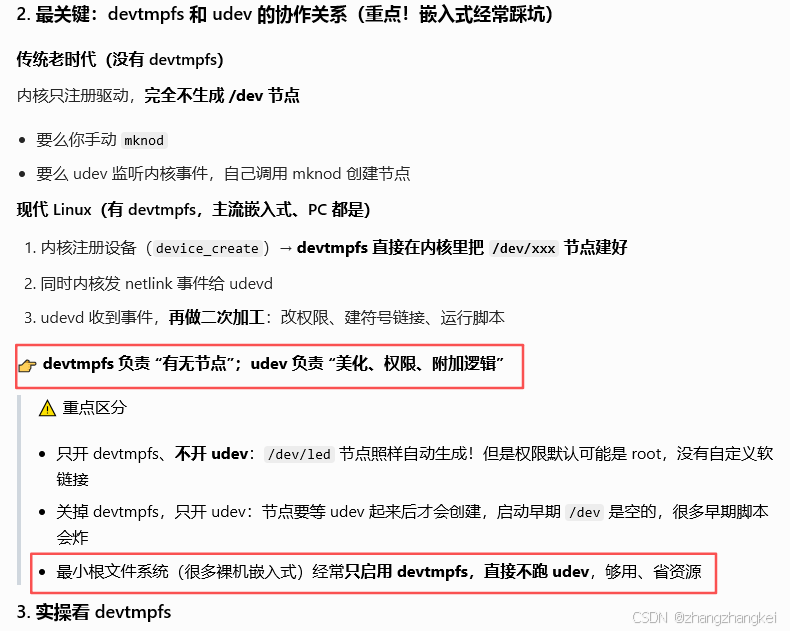
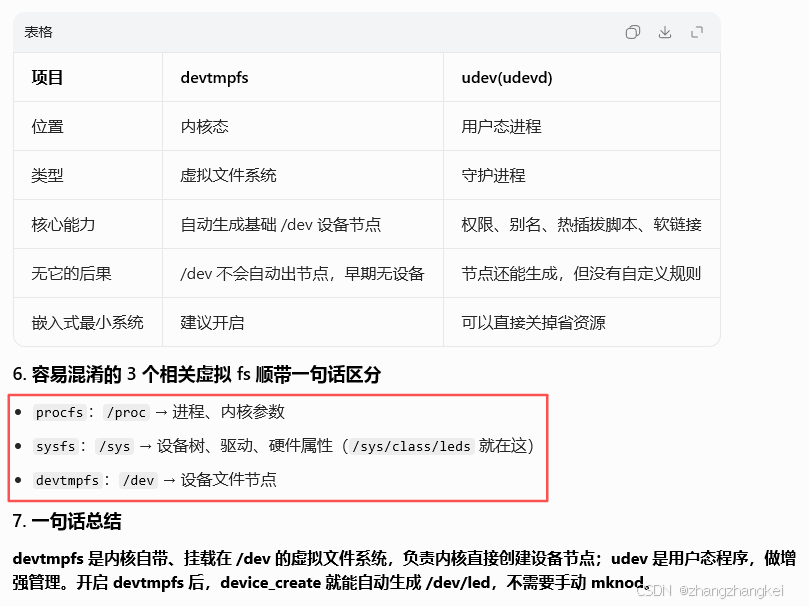
(232)devtmpfs 在内核态;udev 是用户态守护进程 :
(233)
(234)
(235)
谢谢