注:本文为" Ansible Windows 主机管理 "相关合辑。
略作重排,如有内容异常,请看原文。
示例环境有点旧,仅供参考。
Ansible 管理 Windows 主机指南
概述
Ansible 是一个开源的基于 SSH 的自动化配置管理工具,可用于系统配置、软件部署和高级 IT 任务编排(如持续部署或零停机更新)。其设计目标为简单、易用、安全、可靠,适用于从少量实例到大规模企业环境的各种场景。
Ansible 采用 Agentless 架构,被管理节点无需安装客户端代理。对于 Linux 系统,通过 SSH 连接进行管理;对于 Windows 系统,可通过 WinRM(Windows Remote Management)协议进行管理。
Ansible 主控机可使用以下三种方式管理 Windows 主机(注:Ansible 2.10 及以上版本要求主控机运行 Python 3.x,Python 2.7 已停止支持):
- 在 Windows 10 或 Windows Server 2016 及更高版本上安装 WSL(Windows Subsystem for Linux),启动 sshd 服务后通过 SSH 连接管理。该方式功能受限,仅支持文件类等基本操作,无法使用域、活动目录等 Windows 特有功能。
- 在 Windows 上开启 WinRM 连接方式(默认禁用),Ansible 指定 WinRM 连接类型进行管理。该方式可管理的对象和功能丰富,为推荐方案。
- Ansible 自 2.8 版本起可通过 ssh 连接插件管理 Windows 主机,但该方式在 2.18 版本之前未获得官方正式支持。自 Ansible 2.18 起,基于 Windows 自带 OpenSSH 的 SSH 连接方式已获得官方支持。官方仅支持 Windows 自带的 OpenSSH 实现,不支持上游 Win32-OpenSSH 包;OpenSSH 版本需不低于 7.9.0.0,因此实际官方支持范围从 Windows Server 2022 开始。
本文基于 WinRM 连接方式介绍 Ansible 管理 Windows 主机的完整配置与操作流程。
一、环境准备
1.1 系统要求
Ansible 管理 Windows 主机需满足以下最低要求:
- PowerShell 版本:3.0 及以上
- .NET Framework 版本:4.0 及以上
默认支持的 Windows 系统包括:
- Windows 7 SP1、8.1、10、11
- Windows Server 2008 SP2、2008 R2 SP1、2012、2012 R2、2016、2019、2022、2025
注:Ansible 对 Windows 版本的支持与微软操作系统支持生命周期保持一致。一般而言,Ansible 可管理处于微软当前支持(Current Support)或扩展支持(Extended Support)期内的 Windows 版本。Windows Server 2016 及更高版本默认搭载 PowerShell 5.1,无需额外安装即可引导(bootstrap)。桌面版系统(如 Windows 10、11)虽未在官方测试矩阵中逐一列出,但经验证可与 Server 版保持同等兼容性。
对于更古老的系统,需额外安装 PowerShell 3.0+ 和 .NET 4.0+。
注意:.NET Framework 4.0 存在已知漏洞,建议安装更高版本或及时应用安全补丁。PowerShell 3.0 下的 WinRM 同样存在已知安全漏洞,建议升级 PowerShell 版本或应用微软发布的安全补丁。
1.2 检查 PowerShell 版本
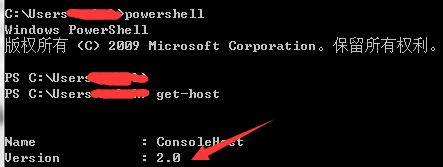
在 Windows 主机上输入 PowerShell 命令进入 PowerShell 模式,执行以下命令查看版本:
get-host或
$PSVersionTable各系统默认 PowerShell 版本如下:
| 操作系统 | 默认 PowerShell 版本 |
|---|---|
| Windows 7 / Server 2008 | PowerShell 4 |
| Windows Server 2012 | PowerShell 4 |
| Windows 10 | PowerShell 5.1 |
| Windows 11 | PowerShell 5.1 |
| Windows Server 2022 | PowerShell 5.1 |
| Windows Server 2025 | PowerShell 5.1 |
注:Windows Server 2022 和 2025 默认预装 Windows PowerShell 5.1。PowerShell 7.x 为可选安装版本,需通过手动下载安装包或 WinGet(桌面体验版通常预装 WinGet)进行安装。Ansible 的 WinRM/PSRP 连接插件默认使用 Windows PowerShell 5.1,兼容性已经验证。若需使用 PowerShell 7.x,需额外配置 WinRM 服务以监听 PowerShell 7.x 的引擎。
1.3 升级 PowerShell
PowerShell 3 存在已知问题,对 Ansible 的支持不够完善,建议升级至 PowerShell 4 或更高版本。
- .NET Framework 4.5 下载地址:
https://download.microsoft.com/download/B/A/4/BA4A7E71-2906-4B2D-A0E1-80CF16844F5F/dotNetFx45_Full_setup.exe - Windows Management Framework (WMF) 5.1(含 PowerShell 5.1)下载地址:
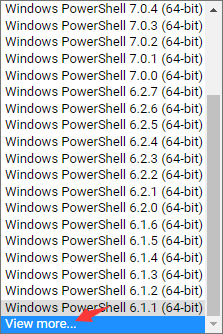
https://www.microsoft.com/en-us/download/details.aspx?id=54616 - PowerShell - old-versions
https://www.filehorse.com/download-windows-powershell-64/old-versions/
注:PowerShell 最新版本为 7.x 系列,PowerShell 7.x 为跨平台版本(兼容 Windows、Linux、macOS),PowerShell 5.1 为基于 .NET Framework 的版本,仅支持 Windows 平台。
Windows Server 2022 和 2025 默认预装 Windows PowerShell 5.1,可直接使用。若需要使用 PowerShell 7.x,可通过手动下载安装包或使用 WinGet(桌面体验版通常预装 WinGet)进行安装;安装后需验证 Ansible 模块兼容性。若环境中存在依赖 Windows PowerShell 5.1 的旧模块,应继续使用默认的 Windows PowerShell 5.1,无需额外安装 Windows Management Framework 5.1(该系统已内置)。
- Windows Management Framework (WMF) - PowerShell | Microsoft Learn
https://learn.microsoft.com/zh-cn/powershell/scripting/windows-powershell/wmf-overview
升级完成后需重启操作系统。
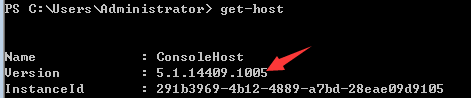
升级完成后再次检查版本:
1.4 配置 PowerShell 执行策略
使用以下命令查看当前执行策略:
get-executionpolicy
使用以下命令将执行策略修改为 Remotesigned:
set-executionpolicy remotesigned
二、Windows 主机配置
2.1 配置 WinRM 服务
WinRM 服务默认处于未启用状态。首先检查监听器状态:
winrm enumerate winrm/config/listener如无返回信息,则表示 WinRM 未启动。
执行以下命令进行基础配置:
winrm quickconfig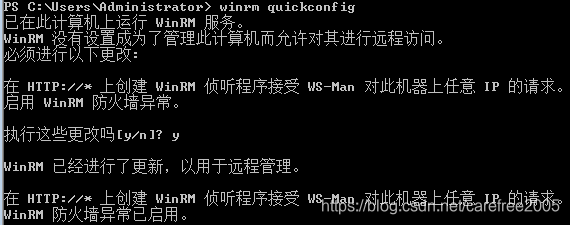
查看监听器状态:
winrm e winrm/config/listener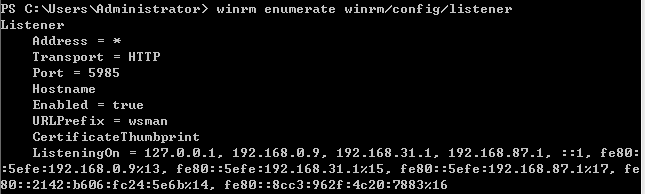
配置认证方式:
winrm set winrm/config/service/auth @{Basic="true"}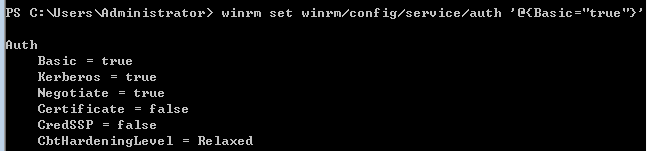
配置允许非加密连接:
winrm set winrm/config/service @{AllowUnencrypted="true"}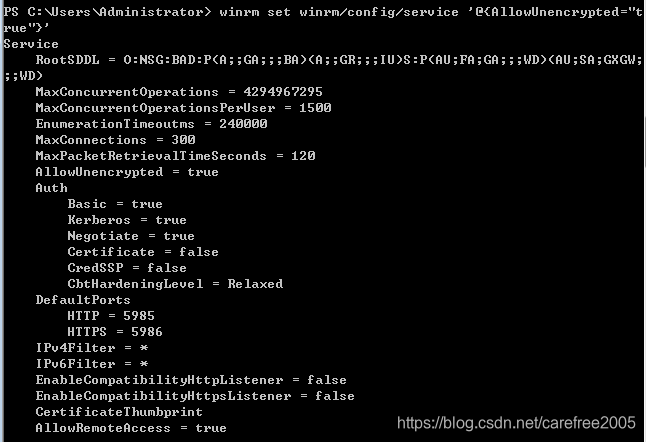
2.2 配置防火墙规则
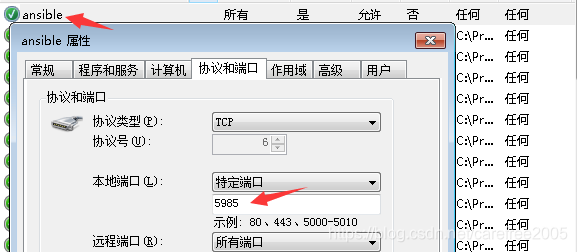
添加防火墙入站规则,允许 WinRM 端口通过:
- HTTP 模式:端口 5985
- HTTPS 模式:端口 5986
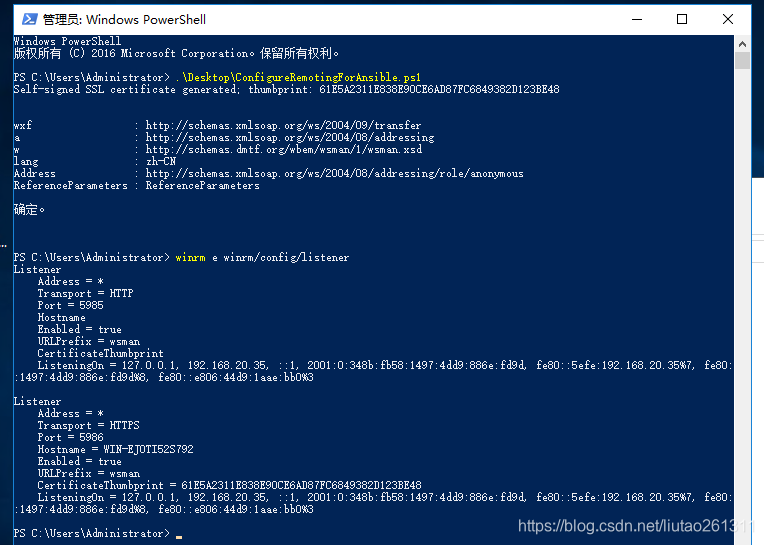
2.3 使用官方脚本自动配置
Ansible 官方提供 PowerShell 脚本,可一键完成 WinRM 的自动化配置。以管理员身份打开 PowerShell,执行以下命令下载并运行脚本:
powershell
$ansibleconfigurl = "https://raw.githubusercontent.com/ansible/ansible/devel/examples/scripts/ConfigureRemotingForAnsible.ps1"
$ansibleconfig = "$env:temp\ConfigureRemotingForAnsible.ps1"
(New-Object -TypeName System.Net.WebClient).DownloadFile($ansibleconfigurl, $ansibleconfig)
powershell.exe -ExecutionPolicy ByPass -File $ansibleconfig
脚本执行完成后,WinRM 将默认以 HTTPS 方式监听在 5986 端口:
powershell
netstat -an | Select-String -Pattern '5986'

  TCP    0.0.0.0:5986           0.0.0.0:0              LISTENING
  TCP    [::]:5986              [::]:0                 LISTENING
三、Ansible 主控机配置
3.1 安装 Ansible
3.1.1 在线安装
更新系统源:
apt update安装组件库:
apt install software-properties-common添加 Ansible 源:
apt-add-repository --yes --update ppa:ansible/ansible安装 Ansible:
apt install ansible验证安装:
ansible --version3.1.2 离线安装
针对无互联网接入的环境,可使用离线安装包:
tar -xzvf ansible_v2.9.9_install.tar.gz
cd ansible_v2.9.9_install
chmod +x ansible_v2.9.0_install.sh
sh ansible_v2.9.0_install.sh
3.2 安装 pywinrm
Ansible 管理 Windows 主机需安装 Python 的 winrm 包:
pip install "pywinrm>=0.3.0"或通过源码编译安装:https://pypi.org/project/pywinrm/#files
3.3 配置 SSH 密钥(Linux 被控节点)
在 WSL Ubuntu 环境中,首先确认 SSH 服务状态:
bash
service ssh status
生成密钥对:
ssh-keygen -t rsa分发公钥至目标主机:
单台分发:
ssh-copy-id -i /root/.ssh/id_rsa.pub root@192.168.1.114批量分发可通过编写 Playbook 实现:
yaml
---
- hosts: jgxt
  user: root
  tasks:
    - name: ssh-copy
      authorized_key: user=root key="{{ lookup('file', '/root/.ssh/id_rsa.pub')}}"
      tags:
        - sshkey
3.4 Inventory 主机清单配置
Inventory 文件用于定义被管理主机的分组和连接参数。
3.4.1 Windows 主机 Inventory 配置
ini
[windows]
192.168.200.14 ansible_user=junmajinlong

[windows:vars]
ansible_password="123456"
ansible_port=5986
ansible_connection=winrm
ansible_winrm_server_cert_validation=ignore
配置说明:
ansible_connection=winrm:指定使用 WinRM 连接方式ansible_winrm_server_cert_validation=ignore:自签证书场景下必须设置为 ignore- 密码不建议直接写在 Inventory 中,应采用 Vault 加密或
--ask-pass选项 - 域用户格式为:
USERNAME@domain_name
3.4.2 Linux 主机 Inventory 配置
ini
[jgxt]
192.168.4.12    ansible_ssh_user=root    ansible_ssh_pass="xxxxxxxx"
192.168.4.13    ansible_ssh_user=root    ansible_ssh_pass="xxxxxxxx"
192.168.4.15    ansible_ssh_user=root    ansible_ssh_pass="xxxxxxxx"
192.168.4.16    ansible_ssh_user=root    ansible_ssh_pass="xxxxxxxx"
或采用分组变量方式:
ini
[jgxt]
192.168.4.12
192.168.4.13
192.168.4.15
192.168.4.16

[jgxt:vars]
ansible_ssh_user=root
ansible_ssh_pass="xxxxxxxx"
3.4.3 变量文件配置
也可将变量写入独立文件(如 group_vars/windows.yml):
yaml
ansible_user: Administrator
ansible_ssh_pass: Mlxg2234
ansible_ssh_port: 5986
ansible_connection: winrm
ansible_winrm_server_cert_validation: ignore
使用 Vault 对变量文件进行加密:
ansible-vault encrypt group_vars/windows.yml
ansible-vault decrypt group_vars/windows.yml
3.5 测试连接
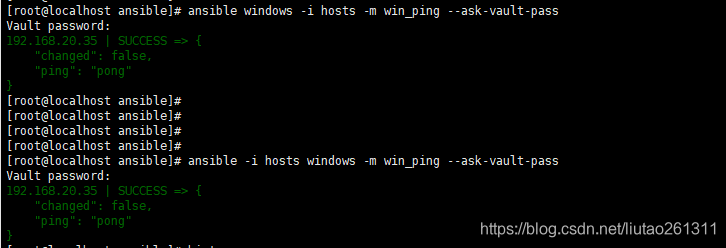
使用 win_ping 模块测试 Ansible 是否能成功连接 Windows 主机:
ansible -i hosts windows -m win_ping --ask-vault-pass预期输出:
192.168.200.14 | SUCCESS => {
    "changed": false,
    "ping": "pong"
}

查看 Ansible 提供的所有 Windows 相关模块:
ansible-doc -l | grep win_
所有 Windows 相关模块均以 win_ 开头,完整模块列表参见官方文档:https://docs.ansible.com/ansible/latest/modules/list_of_windows_modules.html
四、文件操作
4.1 创建目录
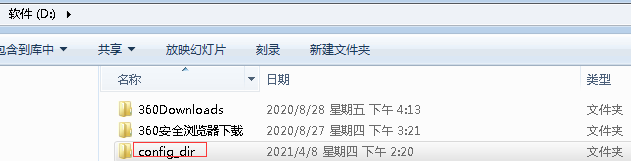
使用 win_file 模块创建目录:
ansible -i hosts windows -m win_file -a 'dest=c:\config_dir state=directory' --ask-vault-pass在 Linux 主控端操作示例:
ansible -i win_hosts -m win_file -a 'dest=d:\config_dir state=directory' test
192.168.0.9 | CHANGED => {
    "changed": true
}
4.2 文件拷贝
将 Ansible 主机上的文件复制到 Windows 主机指定目录:
ansible -i hosts windows -m win_copy -a 'src=/etc/hosts dest=c:\config_dir\hosts.txt' --ask-vault-pass在 Linux 主控端操作示例:
ansible -i win_hosts -m win_copy -a 'src=/etc/hosts dest=d:\config_dir\hosts.txt' test
192.168.0.9 | CHANGED => {
    "changed": true,
    "checksum": "7335999eb54c15c67566186bdfc46f64e0d5a1aa",
    "dest": "d:\config_dir\hosts.txt",
    "operation": "file_copy",
    "original_basename": "hosts",
    "size": 158,
    "src": "/etc/hosts"
}
从被控端拉取文件到主控端:
ansible jgxt3 -m fetch -a "src=/data/file/task.yml dest=/root/devops/backup/192.168.1.12/data/file/"4.3 从网站下载文件
使用 win_get_url 模块从网站下载文件:
ansible -i hosts -c winrm -m win_get_url -a "url=<file_url> dest='C:\site_test'" windows --ask-vault-passPlaybook 方式下载(force 参数控制仅在文件不存在或发生变化时下载):
yaml
- hosts: windows
  gather_facts: false
  tasks:
    - name: Download file
      win_get_url:
        url: '<download_url>'
        dest: 'C:\site_test'
        force: no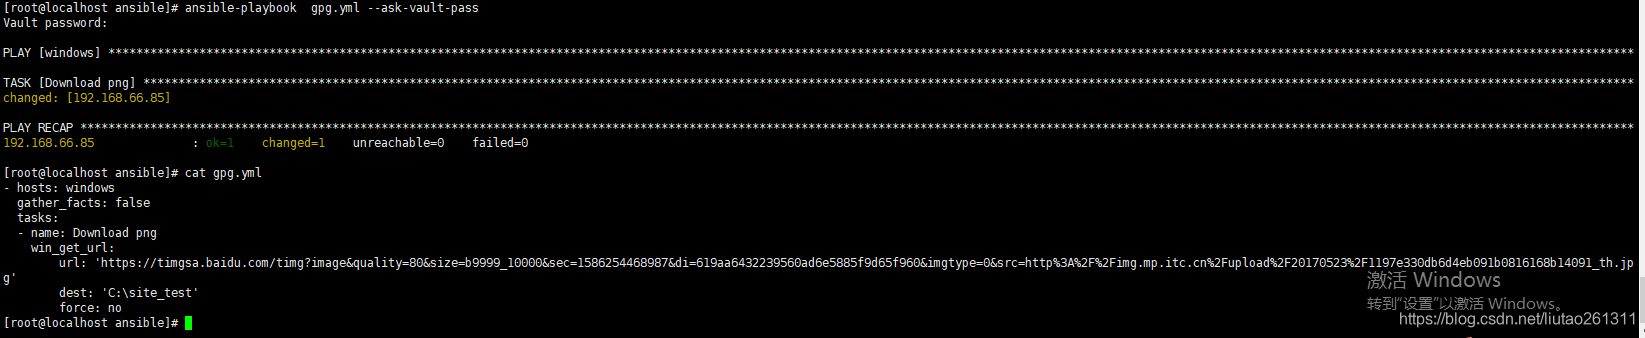
4.4 删除文件/目录
使用 win_file 模块删除文件或目录(state=absent):
ansible -i hosts windows -m win_file -a 'dest=c:\config_dir\hosts.txt state=absent' --ask-vault-pass
ansible -i hosts windows -m win_file -a 'dest=c:\config state=absent' --ask-vault-pass
在 Linux 主控端操作示例:
ansible -i win_hosts -m win_file -a 'dest=d:\config_dir\hosts.txt state=absent' test
192.168.0.9 | CHANGED => {
    "changed": true
}
ansible -i win_hosts -m win_file -a 'dest=d:\config_dir state=absent' test
192.168.0.9 | CHANGED => {
    "changed": true
}
五、命令执行
5.1 执行 PowerShell 命令
使用 win_shell 模块执行 PowerShell 命令:
ansible -i hosts windows -m win_shell -a 'ipconfig' --ask-vault-pass在 Linux 主控端操作示例:
ansible -i win_hosts -m win_shell -a "ipconfig" 192.168.0.9
192.168.0.9 | CHANGED | rc=0 >>

Windows IP Configuration


Ethernet adapter :

  Connection-specific DNS Suffix  . :
  IPv4 Address. . . . . . . . . . . : 192.168.0.9
  Subnet Mask . . . . . . . . . . . : 255.255.255.0
  Default Gateway . . . . . . . . . : 192.168.0.1
在 Playbook 中执行 PowerShell 命令:
yaml
- name: create a dir use powershell
  win_shell: New-Item -Path C:\testfile -ItemType Directory
5.2 执行 CMD 命令
win_shell 模块默认使用 PowerShell,可通过指定 executable 参数使用 CMD:
yaml
- name: create a dir use cmd
  win_shell: mkdir C:\testfilecmd
    args:
      executable: cmd
5.3 远程重启服务器
使用 win_reboot 模块重启 Windows 服务器:
ansible -i hosts windows -m win_reboot --ask-vault-pass或通过 win_shell 执行 shutdown 命令:
ansible -i hosts windows -m win_shell -a 'shutdown -r -t 0' --ask-vault-pass六、用户管理
6.1 创建用户
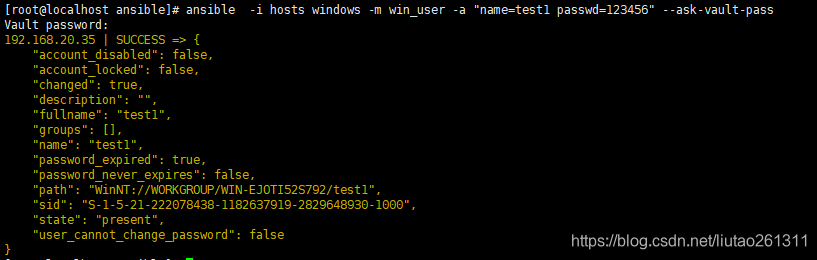
使用 win_user 模块在远程 Windows 主机上创建用户:
ansible -i hosts windows -m win_user -a "name=test1 passwd=Mlxg2234" --ask-vault-pass在 Linux 主控端操作示例:
ansible -i win_hosts -m win_user -a "name=test1 passwd=123456" test
192.168.0.9 | CHANGED => {
    "account_disabled": false,
    "account_locked": false,
    "changed": true,
    "description": "",
    "fullname": "test1",
    "groups": [],
    "name": "test1",
    "password_expired": true,
    "password_never_expires": false,
    "path": "WinNT://WorkGroup/XTZJ-2020DWDIHQ/test1",
    "sid": "S-1.5.21-1672353480-595772364-1259071024-1007",
    "state": "present",
    "user_cannot_change_password": false
}
Playbook 方式创建用户并加入 Administrators 组:
yaml
---
- name: manage win user
  hosts: windows
  gather_facts: no
  tasks:
    - name: create new user named "junma"
      win_user:
        name: junma
        password: 123456
        state: present
        groups_action: add
        groups: Administrators
        password_never_expires: yes
6.2 删除用户
ansible -i hosts windows -m win_user -a "name=test1 state=absent" --ask-vault-pass在 Linux 主控端操作示例:
ansible -i win_hosts -m win_user -a "name=test1 state=absent" test
192.168.0.9 | CHANGED => {
    "changed": true,
    "msg": "User 'test1' deleted successfully",
    "name": "test1",
    "state": "absent"
}
七、服务管理
7.1 管理服务状态
使用 win_service 模块管理 Windows 服务:
yaml
- hosts: windows
  gather_facts: false
  tasks:
    - name: DNS Client(Dnscache)
      win_service:
        name: Dnscache
        start_mode: auto
        state: started
也可通过 win_shell 使用 net 命令启停服务:
ansible -i hosts windows -m win_shell -a "net stop spooler" --ask-vault-pass
ansible -i hosts windows -m win_shell -a "net start spooler" --ask-vault-pass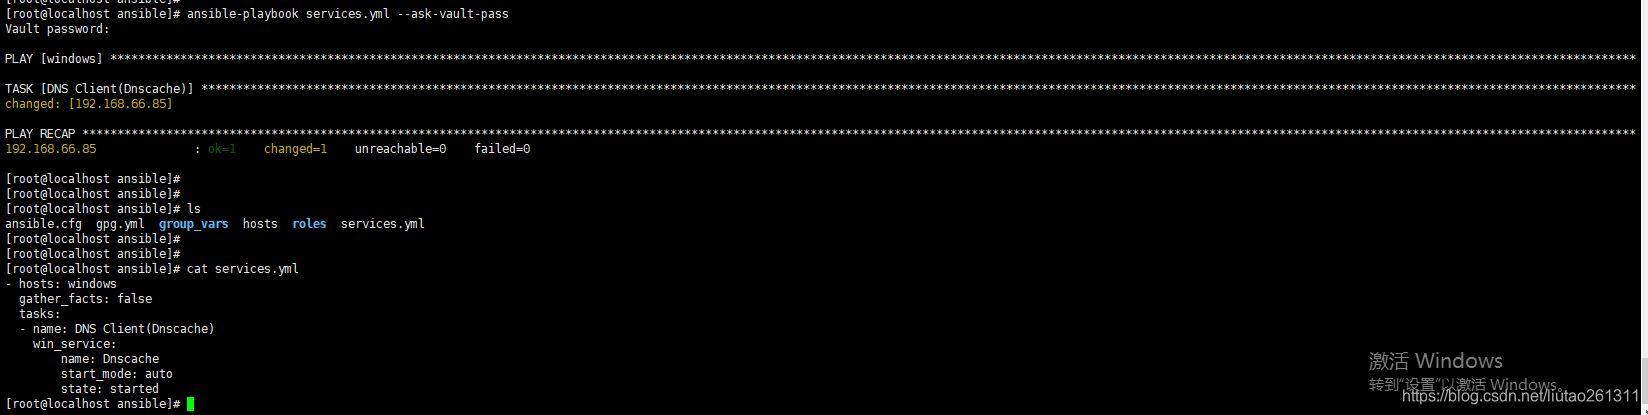
八、IIS 管理
8.1 安装 IIS 服务
使用 win_feature 模块安装 IIS 功能:
ansible -i hosts windows -m win_feature -a "name=Web-Server" --ask-vault-pass
ansible -i hosts windows -m win_feature -a "name=Web-Server,Web-Common-Http" --ask-vault-pass
8.2 获取 IIS 站点信息
ansible -i hosts -m win_iis_website -a "name='Default Web Site'" windows --ask-vault-pass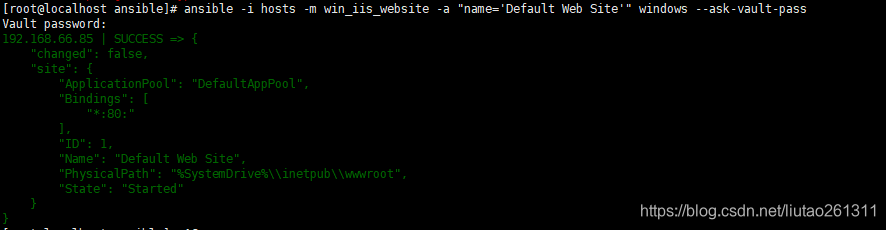
8.3 站点启停
支持的 state 参数值:started、restarted、stopped、absent
ansible -i hosts windows -m win_iis_website -a "name='Default Web Site' state=stopped" --ask-vault-pass
ansible -i hosts windows -m win_iis_website -a "name='Default Web Site' state=started" --ask-vault-pass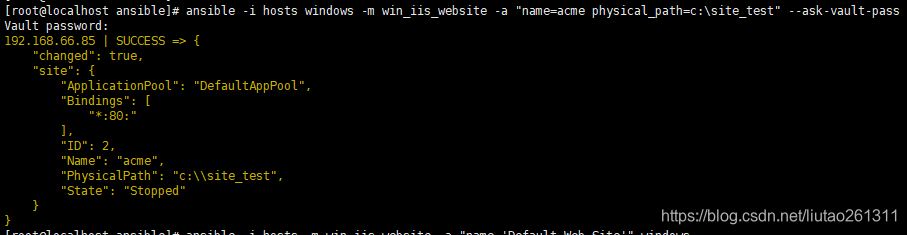
8.4 添加站点
ansible -i hosts windows -m win_iis_website -a "name=acme physical_path=c:\site_test" --ask-vault-pass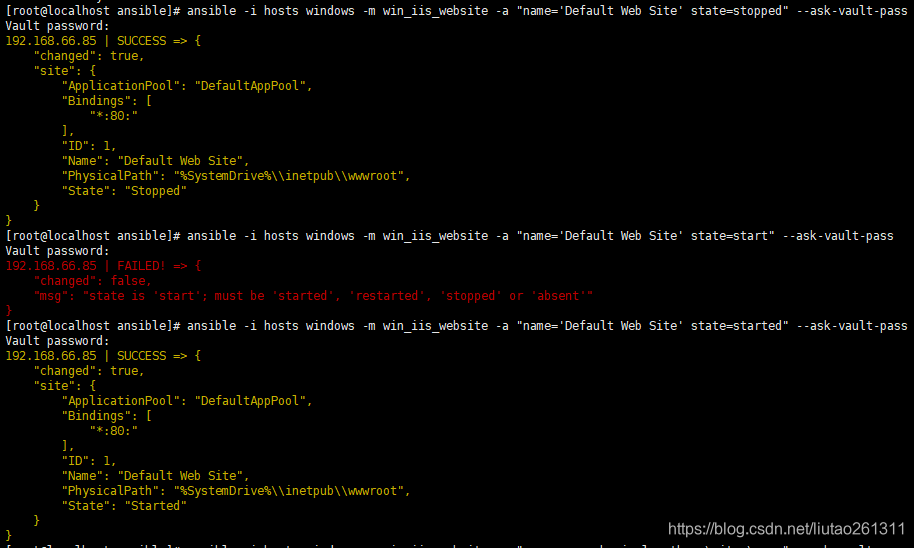
九、域管理
9.1 创建域控制器
假设 Windows Server 已开启 WinRM,IP 地址为 192.168.200.75,使用默认管理员 administrator。以下 Playbook 从零开始创建域控制器(DC, Domain Controller):
dc 节点 Inventory 配置:
ini
[dc_controller]
192.168.200.75

[dc_controller:vars]
ansible_user=administrator
ansible_password="123456"
ansible_port=5986
ansible_connection=winrm
ansible_winrm_server_cert_validation=ignore
Playbook 文件内容:
yaml
- name: install first domain controller
  hosts: dc_controller
  gather_facts: no
  tasks:
    # 按需修改主机名,修改主机名可能要求重启
    - name: set dc hostname
      win_hostname:
        name: "dc1"
      register: res
    - name: Reboot
      win_reboot:
      when: res.reboot_required

    # 等待重启完成
    - name: Wait dc to become reachable
      wait_for_connection:
        timeout: 900

    # 安装 Active Directory 相关功能
    - name: install ad
      win_feature: >
          name=AD-Domain-Services
          include_management_tools=yes
          include_sub_features=yes
          state=present
      register: result

    # 创建域控制器,要求重启
    # safe_mode_password 参数指定域控制器的恢复密码
    - name: install domain
      win_domain: >
         dns_domain_name="junmajinlong.com"
         safe_mode_password='P@ssword1!'
      register: ad
    - name: reboot server
      win_reboot:
        msg: "Installing AD. Rebooting..."
        pre_reboot_delay: 3
      when: ad.changed

    # 等待重启结束后重连
    - name: Wait dc to become reachable
      wait_for_connection:
        timeout: 900

    # 设置域控制器的 DNS 指向自己
    - name: set dc dns pointer to self
      win_dns_client:
        adapter_names: "*"
        ipv4_addresses:
          - "{{inventory_hostname}}"
执行完上述 Playbook 后,将创建一个 junmajinlong.com 的域环境。
注:示例中将所有属性直接硬编码在 Playbook 中,合理做法应将其定义为 Inventory 变量或普通变量,然后在 Playbook 中引用。
9.2 将主机加入域
将 Windows 主机加入域环境,需先修改其 DNS 指向域控制器:
Inventory 配置:
ini
[windows]
192.168.200.14 ansible_user=junmajinlong

[windows:vars]
ansible_password='123456'
ansible_port=5986
ansible_connection=winrm
ansible_winrm_server_cert_validation=ignore
Playbook 内容:
yaml
- name: add win 10 to domain junmajinlong.com
  hosts: windows
  gather_facts: no
  tasks:
    - name: configure DNS pointer to Domain Controller
      win_dns_client:
        adapter_names: "*"
        ipv4_addresses:
          - 192.168.200.75

    - name: set dc hostname
      win_hostname:
        name: "win10"
      register: res
    - name: Reboot
      win_reboot:
      when: res.reboot_required

    - name: join to domain
      win_domain_membership:
        dns_domain_name: junmajinlong.com
        domain_admin_user: administrator@junmajinlong.com
        domain_admin_password: 123456
        state: domain
      register: domain_state

    - name: Reboot after joining
      win_reboot:
        msg: "Joining Domain. Rebooting..."
        pre_reboot_delay: 3
      when: domain_state.reboot_required
十、实际部署场景
10.1 环境说明
以下部署场景基于如下环境:
| 名称 | 型号 | 备注 |
|---|---|---|
| 宿主计算机 | Thinkpad X250 | 主操作系统 Windows 10 教育版 64 位 18363 |
| WSL | 1.0 | 子系统 |
| Linux | Ubuntu 18.04 LTS | 子操作系统 |
| Ansible | 2.9.10 | 运维工具 |
| Python | 2.7.17 | 编译器 |
| Centos7 | 7.9.2009 | 远程主机 |
10.2 前端应用部署
前端应用使用 Vue 编码实现,部署方式为解压部署文件至对应目录。
前端服务器:jgxt1,IP 地址 192.168.1.12
前端应用目录:/data/docker/volumes/isgs-app_nginx-www/_data/
部署步骤:
- 将现有文件备份
- 上传部署升级包文件
- 解压缩升级包文件
以升级 tasks.zip 文件为例:
ansible jgxt1 -m shell -a "chdir=/data/docker/volumes/isgs-app_nginx-www/_data/ mv tasks tasks.bak"

ansible jgxt1 -m copy -a "src=tasks.zip dest=/data/docker/volumes/isgs-app_nginx-www/_data/"

ansible jgxt1 -m shell -a "chdir=/data/docker/volumes/isgs-app_nginx-www/_data/ unzip tasks.zip"
至此前端程序部署完毕,刷新浏览器缓存进行验证。
10.3 后端应用部署
后端应用使用 Java 程序编码实现,部署方式使用 Docker 方式部署。
后端服务器:jgxt3,IP 地址 192.168.1.125
后端应用目录:/data/images/
部署步骤:
- 拷贝现有文件至升级目录
- 删除当前镜像
- 加载新的镜像文件
- 重新打标签
- 推送镜像到仓库
- 重新加载配置应用服务
以升级 tasks.tar 文件为例:
ansible jgxt3 -m copy -a "src=tasks.tar dest=/data/images/ backup=yes"

ansible jgxt3 -m shell -a "docker rmi -f tasks_IMAGE_ID"

ansible jgxt3 -m shell -a "docker load < tasks.tar"

ansible jgxt3 -m shell -a "docker tag isgs/tasks:1.0 192.168.1.15:5000/gajg/tasks:1.0"

ansible jgxt3 -m shell -a "docker push 192.168.1.15:5000/gajg/tasks:1.0"

ansible jgxt1 -m shell -a "docker stack deploy --with-registry-auth -c tasks.yml"
10.4 配置文件部署
配置文件为 YAML 格式编写,为后端应用程序的部署配置。
服务器:jgxt1,IP 地址 192.168.1.12
应用目录:/data/file/
部署步骤:
- 将配置文件拷贝至服务器目录
以升级 tasks.yml 文件为例:
ansible jgxt1 -m copy -a "src=tasks.yml dest=/data/file/ backup=yes"10.5 自动化部署脚本
为降低长命令行操作成本和错误率,可使用 Python 脚本实现自动化部署。
设计思路:
- 将升级文件统一下载拷贝至统一目录
- 获取文件夹中的文件类型
- 判断文件类型:后端文件以 .tar 结尾,前端文件以 .zip 结尾,配置文件以 .yml 结尾
- 将判断的文件拷贝至对应服务器目录
- 根据不同文件类型执行不同操作
- 操作完毕输出升级完成
伪代码实现:
python
#!/bin/bash
# -*- coding=utf8 -*-

import os
import sys

def oper_tar_file(name):
    '''
    步骤:
    1. 拷贝现有文件
    2. 删除当前镜像
    3. 加载新的镜像文件
    4. 重新打标签
    5. 推送镜像到服务器
    6. 重新加载部署
    '''
    print("=后端配置文件:" + name[:-4] + " 已开始升级部署=")
    pass
    print("=后端配置文件:" + name[:-4] + " 已升级部署完毕=")

def oper_zip_file(name):
    '''
    步骤:
    1. 将文件拷贝至目录
    2. 将原文件重命名备份
    3. 解压缩包文件
    '''
    print("=前端配置文件:" + name[:-4] + " 已开始升级部署=")
    pass
    print("=前端配置文件:" + name[:-4] + " 已升级部署完毕=")

def oper_yml_file(name):
    '''
    步骤:
    1. 将文件拷贝至目录(如存在文件重命名文件)
    '''
    print("=配置文件:" + name[:-4] + " 已开始升级部署=")
    cmd_copy = 'ansible jgxt1 -m copy -a ' + '"src=' + name + ' dest=/data/file/ backup=yes"'
    print("=配置文件:" + name[:-4] + " 已升级部署完毕=")

def judge_file_type():
    path = os.getcwd()
    for root, dirs, files in os.walk(path, topdown=True):
        for name in files:
            if name[-3:] == "tar":
                oper_tar_file(name)
            elif name[-3:] == "zip":
                oper_zip_file(name)
            elif name[-3:] == "yml":
                oper_yml_file(name)
            else:
                print(name + " 不是升级文件")

def main():
    judge_file_type()

if __name__ == "__main__":
    main()
编码优化建议:
| 序号 | 优化项 | 解决思路 |
|---|---|---|
| 1 | 删除当前镜像 | 通过名称匹配 REPOSITORY 项并获取 IMAGE ID |
| 2 | 文件夹会产生冗余文件 | 建议设置时间策略将冗余文件删除 |
| 3 | 判断文件 | 如果 checksum 与上一次一致,则不执行命令 |
| 4 | 异常捕获 | 异常信息日志记录 |
十一、常见问题与排查
11.1 新版 Windows 系统注意事项
在使用 Windows 11、Windows Server 2022 或 Windows Server 2025 时,需注意以下事项:
(1)WinRM 配置差异
Windows Server 2022 和 2025 默认安全策略更为严格。若使用 winrm 连接插件遇到认证失败,可尝试切换至 psrp 连接插件(Ansible 2.8+ 支持),其在高负载场景下超时问题更少、代理支持更好:
ini
[windows:vars]
ansible_connection=psrp
(2)SSH 连接方式的官方支持
自 Ansible 2.18 起,基于 SSH 的 Windows 连接获得官方正式支持(此前自 2.8 版本起为实验性功能)。官方仅支持 Windows 自带的 OpenSSH 实现,不支持上游 Win32-OpenSSH 包;OpenSSH 版本需不低于 7.9.0.0,因此实际官方支持范围从 Windows Server 2022 开始。在 Windows 11 和 Windows Server 2022/2025 上可通过 OpenSSH 启用 SSH 连接,其优势包括:非域环境下配置更简便、支持密钥认证、文件传输速度优于 WinRM。
(3).NET Framework 版本要求
Windows 11 和 Windows Server 2022/2025 默认搭载 .NET Framework 4.8 或更高版本,满足 Ansible 的最低要求(.NET 4.0+)。无需额外安装 .NET Framework 即可使用 Ansible 管理。
(4)PowerShell 7.x 与 Ansible 兼容性
Ansible 的 Windows 模块基于 PowerShell 编写,兼容 PowerShell 5.1 和 PowerShell 7.x。若目标主机仅安装 PowerShell 7.x 而未保留 PowerShell 5.1(如 Windows Server 2025 Core 版未安装桌面体验组件时可能发生),需确保 WinRM 服务配置为监听 PowerShell 7.x 的引擎。可通过以下命令验证:
winrm enumerate winrm/config/winrs11.2 执行 win_ping 时报错 No module named winrm
报错信息:

报错原因:未安装 pywinrm 模块。
解决方案:
pip install pywinrm --upgrade预期输出:
Installing collected packages: ntlm-auth, requests-ntlm, pywinrm
Running setup.py install for pywinrm ... done
Successfully installed ntlm-auth-1.5.0 pywinrm-0.4.1 requests-ntlm-1.1.0
11.3 其他注意事项
- 执行 Ansible 命令时需确保 Windows 主机防火墙已开放对应端口(5985 或 5986)
- 使用自签证书时需设置
ansible_winrm_server_cert_validation=ignore - 密码管理建议使用 Ansible Vault 或环境变量,避免明文存储
- PowerShell 远程处理需确保执行策略允许远程脚本执行(Remotesigned 或 Unrestricted)
十二、场景分析与选型建议
12.1 仍然适用的场景
以下场景中使用 Ansible 管理 Windows 主机仍然具有实用价值:
(1)中小规模 Windows 服务器集群的批量配置管理
当企业存在数十台至数百台 Windows 服务器时,通过 Ansible 的 Inventory 分组和 Playbook 编排,可实现配置的批量下发和一致性维护。相比逐个登录服务器进行手动配置,Ansible 可显著降低操作成本和出错概率。
(2)Windows 环境的基础设施初始化
新部署的 Windows 服务器通常需要执行一系列标准化配置操作(如安装 .NET Framework、配置 PowerShell 执行策略、启用 WinRM、配置防火墙规则等)。通过 Ansible Playbook 将这些操作编排为可重复执行的脚本,可实现服务器的一键初始化。
(3)Windows 域环境的自动化部署
对于需要频繁创建域控制器或将主机加入域的场景,Ansible 的 win_domain、win_domain_membership 等模块可替代手动通过 GUI 或 PowerShell 逐个执行操作,提高部署效率并确保配置一致性。
(4)混合云环境下的统一运维
当企业同时管理 Linux 和 Windows 混合环境时,Ansible 提供统一的操作界面和模块体系,运维人员可使用同一套工具和流程管理异构基础设施,降低运维复杂度。
(5)IIS 网站的批量部署与管理
对于需要批量部署 IIS 网站的场景(如多环境部署、蓝绿部署),Ansible 的 win_iis_website 模块可自动化完成站点的创建、启停和配置管理。
12.2 正在被替代的场景
以下场景中 Ansible 管理 Windows 主机的使用率正在下降,逐渐被其他方案替代:
(1)容器化部署场景
随着 Docker 和 Kubernetes 的普及,传统虚拟机/物理机上的应用部署逐渐向容器化迁移。容器编排平台(如 K8s)提供了更强大的应用生命周期管理能力,Ansible 在容器化场景中的作用逐渐从"直接管理应用"转变为"基础设施配置"层面。
(2)大规模云原生环境
在公有云环境中,云服务商提供的托管服务(如 AWS EC2 Systems Manager、Azure Automation、Google Cloud OS Config)内置了远程命令执行和配置管理功能,可直接管理 Windows 实例,无需额外部署 Ansible。
(3)Configuration Management 的现代化替代
Puppet、Chef 等 Configuration Management 工具在大规模企业环境中仍有一定市场,其声明式配置模型在配置漂移检测和自动修复方面具有优势。此外,SaltStack 在大规模并发执行场景下性能优于 Ansible。
(4)Windows 原生远程管理方案
Windows 自带的 PowerShell Remoting(PSRemoting)结合 Just Enough Administration(JEA)和 Desired State Configuration(DSC),可在纯 Windows 环境中实现细粒度的远程管理和配置漂移纠正,无需依赖 Ansible 等第三方工具。
(5)GitOps 工作流
现代 DevOps 团队逐渐采用 GitOps 工作流,将基础设施配置版本化并通过 Git 仓库进行变更管理。ArgoCD、Flux 等 GitOps 工具主要面向 Kubernetes 环境,在纯 Windows 场景中 GitHub Actions、Azure DevOps Pipelines 等 CI/CD 工具逐渐承担部分 Ansible 的编排角色。
12.3 场景选择建议
根据实际环境特征选择合适的基础设施管理方案,参考以下决策逻辑:
(1)环境规模评估
| 环境规模 | 推荐方案 | 说明 |
|---|---|---|
| 少量 Windows 主机(<10 台) | PowerShell Remoting + 脚本 | 学习成本低,原生支持,无需额外组件 |
| 中等规模(10-200 台) | Ansible | Agentless 架构,模块丰富,学习曲线平缓 |
| 大规模(>200 台) | SaltStack / Puppet | 并发执行能力强,配置漂移检测完善 |
| 混合云/多云环境 | Ansible + 云厂商工具 | 统一接口管理异构资源,结合云平台原生能力 |
(2)技术栈评估
| 技术栈特征 | 推荐方案 | 说明 |
|---|---|---|
| 纯 Windows 环境 | PowerShell DSC + JEA | 原生集成,细粒度权限控制 |
| Linux + Windows 混合 | Ansible | 统一工具链,WinRM 模块完善 |
| 容器化/K8s 环境 | Ansible(仅用于节点初始化)+ K8s 编排 | Ansible 负责基础设施层,K8s 负责应用层 |
| 云原生环境 | 云厂商托管服务 | 无需自建运维工具链 |
(3)安全合规评估
| 安全需求 | 推荐方案 | 说明 |
|---|---|---|
| 需要细粒度权限控制 | PowerShell JEA | 基于角色的受限 PowerShell 会话 |
| 需要审计追踪 | Ansible Tower / AWX | 提供操作审计、审批工作流 |
| 需要配置漂移纠正 | Puppet / DSC | 声明式模型自动修复配置偏差 |
| 需要加密密钥管理 | Ansible Vault + HashiCorp Vault | 多层加密保护敏感信息 |
(4)团队技能评估
| 团队技能背景 | 推荐方案 | 说明 |
|---|---|---|
| 熟悉 Shell/Python | Ansible | YAML 语法直观,Python 模块可扩展 |
| 熟悉 PowerShell | PowerShell DSC | 复用现有技能,学习成本最低 |
| 熟悉 Ruby | Puppet | 基于 Ruby DSL 编写 manifest(.pp 文件),用于声明目标节点期望状态;manifest 为 Puppet 专属术语,非 Ansible 概念 |
| 熟悉 Ruby | Chef | 基于 Ruby DSL 编写 recipe(食谱),Cookbook 为 recipe 集合 |
综上所述,Ansible 管理 Windows 主机在中小规模混合环境、基础设施初始化和域环境自动化部署等场景中仍然具有实用价值。在容器化、云原生和大规模纯 Windows 环境中,其角色正逐渐被更专业的工具替代。实际选型应综合考虑环境规模、技术栈、安全需求和团队技能等因素。
Reference
- Ansible 如何在 Windows 部署:从环境配置到自动化实践指南-百度开发者中心
https://developer.baidu.com/article/detail.html?id=3661525 - ansible 管理 windows 主机-CSDN 博客
https://blog.csdn.net/liutao261311/article/details/105488654 - Ansible 管理 Windows 主机 - 骏马金龙 - 博客园
https://www.cnblogs.com/f-ck-need-u/p/17718541.html - Ansible 之管理 windows 主机_ansible 管理 windows 主机-CSDN 博客
https://blog.csdn.net/carefree2005/article/details/115491241 - win10 系统下 ansible 环境的搭建_ansible windows-CSDN 博客
https://blog.csdn.net/shallow72/article/details/119135203