1. 部署nfs
1. 安装nfs
#所有节点安装
yum install -y nfs-utils

## 在master节点创建nfs共享目录


mkdir -pv /data/kubernetes


## 编写配置文件


cat > /etc/exports <<'EOF'

/data/kubernetes *(rw,no_root_squash)

EOF


## master节点启动nfs


`systemctl enable --now rpcbind nfs`
2. 使用helm部署nfs动态存储
a. 创建名称空间
[root@master100 ~]# kubectl create ns nfs-sc-defaultb. 下载chart
[root@master100 ~]# helm pull nfs-subdir-external-provisioner/nfs-subdir-external-provisioner#解压后可以看到values.yaml
cat values.yaml | egrep -v '#|^$'
###########
replicaCount: 1
strategyType: Recreate
image:
  repository: registry.cn-hangzhou.aliyuncs.com/haiweigit/nfs-subdir-external-provisioner
  tag: v4.0.2
  pullPolicy: IfNotPresent
imagePullSecrets: []
nfs:
  server: 10.1.129.86		#指定nfs地址
  path: /data/nfs-data		#指定nfs的共享目录
  mountOptions:
  volumeName: nfs-subdir-external-provisioner-root
  reclaimPolicy: Retain
storageClass:
  create: true
  defaultClass: true		#指定为默认sc
  name: nfs-sc-default		#指定sc的名字
  allowVolumeExpansion: true
  reclaimPolicy: Delete
  archiveOnDelete: true
  onDelete:
  pathPattern:
  accessModes: ReadWriteOnce
  annotations: {}
leaderElection:
  enabled: true
rbac:
  create: true
podSecurityPolicy:
  enabled: false
podAnnotations: {}
podSecurityContext: {}
securityContext: {}
serviceAccount:
  create: true
  annotations: {}
  name:
resources: {}
nodeSelector: {}
tolerations: []
affinity: {}
labels: {}
###########
#就修改了上面4处参数后使用values.yaml文件进行安装
helm install nfs-subdir-external-provisioner \
    /root/nfs/nfs-subdir-external-provisioner \
    -f values.yaml \
    -n nfs-sc-default
#nfs-subdir-external-provisioner #是名称
#/root/nfs/nfs-subdir-external-provisioner #目录所在的路径
#-f values.yaml #指定values.yaml,这里是在当前路径
#-n nfs-sc-default #指定名称空间
#查看创建的sc
[root@master100 ~]# kubectl get sc
NAME                       PROVISIONER                                     RECLAIMPOLICY   VOLUMEBINDINGMODE   ALLOWVOLUMEEXPANSION   AGE
nfs-sc-default (default)   cluster.local/nfs-subdir-external-provisioner   Delete          Immediate           true                   38m
2. ECK简介
2.1. ECK是什么
要理解ECK,首先需要了解CRD、Controller、Operator这三个基础概念。
什么是CRD
CRD(Custom Resource Definitions)也就是自定义K8S资源类型。当内置的POD、Deployment、Configmap等资源类型不满足需求时,我们就需要扩展k8s,常用方式有三种:
- 使用CRD自定义资源类型
- 开发自定义的APIServer(例如HPA)
- 定制扩展二次开发Kubernetes源码(例如阿里云ACK、腾讯云TKE)
在 Kubernetes中,资源是 Kubernetes API中的一个端点,用于存储一堆特定类型的API对象。它允许我们通过向集群添加更多种类的对象来扩展Kubernetes。添加新种类的对象之后,我们可以像其他任何内置对象一样,使用 kubectl 来访问我们自定义的 API 对象,CRD无须修改Kubernetes源代码就能扩展它支持使用API资源类型。
什么是Controller
Kubernetes 的所有控制器,都有一个控制循环,负责监控集群中特定资源的更改,并确保特定资源在集群里的当前状态与控制器自身定义的期望状态保持一致。
Controller是需要CRD配套开发的程序,它通过Apiserver监听相应类型的资源对象事件,例如:创建、删除、更新等等,然后做出相应的动作,例如一个 Deployment 控制器管控着集群里的一组 Pod ,当你 Kill 掉一个 Pod 。控制器发现定义中期望的Pod数量与当前的数量不匹配,它就会马上创建一个 Pod 让当前状态与期望状态匹配。
什么是Operator
operator 是一种 kubernetes的扩展形式,利用自定义资源对象CRD来管理应用和组件,允许用户以 Kubernetes 的声明式 API 风格来管理应用及服务。operator 定义了一组在 Kubernetes 集群中打包和部署复杂业务应用的方法,operator主要是为解决特定应用或服务关于如何运行、部署及出现问题时如何处理提供的一种特定的自定义方式。
什么是eck
Elastic Cloud on Kubernetes(ECK) 是一种 Kubernetes Operator,为了方便我们管理Elastic Stack全家桶中的各种组件,例如 Elasticsearch,Kibana,APM,Beats 等。通过Operator我们可以快速部署一套Elasticsearch集群,并大大简化日常运维工作。
2.2. ECK功能
- 快速部署、管理和监控多个集群
- 快速扩展集群规模和存储空间
- 通过滚动升级完成配置更改
- 使用 TLS 证书保护集群安全
- 设置具有可用性区域感知功能的热-温-冷体系结构
2.3. 版本支持
以eck2.7为例,支持的组件版本如下:
- Kubernetes 1.22-1.26
- OpenShift 4.8-4.12
- Google Kubernetes Engine (GKE), Azure Kubernetes Service (AKS), and Amazon Elastic Kubernetes Service (EKS)
- Helm: 3.2.0+
- Elasticsearch, Kibana, APM Server: 6.8+, 7.1+, 8+
- Enterprise Search: 7.7+, 8+
- Beats: 7.0+, 8+
- Elastic Agent: 7.10+ (standalone), 7.14+ (Fleet), 8+
- Elastic Maps Server: 7.11+, 8+
每个eck版本都有对应支持的kubernetes版本范围,需要根据当前kubernetes版本选择尽可能新的eck版本,版本对应关系参考文档
3. 集群部署与规划
3.1. 组件版本
操作系统版本:CentOS Linux release 7.9.2009 (Core)
内核版本:5.4.260-1.el7.elrepo.x86_64
kubernetes版本:v1.23.17
Docker版本:20.10.9
kube-vip版本:0.6.0
ECK版本:2.7.0
ELK版本:8.9.1
3.2. 环境准备
3.2.1. 系统参数调整
修改文件描述符数目
-
设置环境变量
修改环境变量文件
vim /etc/profile
ulimit -n 65535使配置生效
source /etc/profile
-
修改limits.conf配置文件
修改limits.conf配置
vim /etc/security/limits.conf
- soft nofile 65535
- hard nofile 65535
-
验证
ulimit -n
65535
修改虚拟内存数大小
-
内核设置可以直接在主机上设置,也可以通过具有特权的初始化容器中设置,通常情况下直接在主机上设置。
临时设置sysctl -w vm.max_map_count=262144
vm.max_map_count = 262144
-
永久设置
cat >> /etc/sysctl.conf << EOF
vm.max_map_count=262144
EOF
sysctl -p
在Kubernetes集群中部署ECK
快速入门手册:https://www.elastic.co/guide/en/cloud-on-k8s/2.7/k8s-quickstart.html
在开始之前要考虑的事情:
-
安装自定义资源定义
[root@master100 ~]# wget https://download.elastic.co/downloads/eck/2.7.0/crds.yaml
[root@master100 ~]# kubectl create -f crds.yaml#输出如下
customresourcedefinition.apiextensions.k8s.io/agents.agent.k8s.elastic.co created
customresourcedefinition.apiextensions.k8s.io/apmservers.apm.k8s.elastic.co created
customresourcedefinition.apiextensions.k8s.io/beats.beat.k8s.elastic.co created
customresourcedefinition.apiextensions.k8s.io/elasticmapsservers.maps.k8s.elastic.co created
customresourcedefinition.apiextensions.k8s.io/elasticsearches.elasticsearch.k8s.elastic.co created
customresourcedefinition.apiextensions.k8s.io/enterprisesearches.enterprisesearch.k8s.elastic.co created
customresourcedefinition.apiextensions.k8s.io/kibanas.kibana.k8s.elastic.co created
2.安装operator及其RBAC规则
[root@master100 ~]# wget https://download.elastic.co/downloads/eck/2.7.0/operator.yaml
[root@master100 ~]# kubectl apply -f operator.yaml
ECK操作符默认在elastic-system命名空间中运行。建议您为工作负载选择专用的命名空间,而不是使用elastic-system或默认命名空间。
3.1. 部署Elasticsearch集群
-
编写资源清单
cat <
elasticsearch.yaml
apiVersion: elasticsearch.k8s.elastic.co/v1
kind: Elasticsearch
metadata:
name: elasticsearch
spec:
version: 8.9.1
# Elasticsearch 不会使用 HTTPS,而是使用 HTTP
http:
tls:
selfSignedCertificate:
disabled: true
nodeSets:
- name: master
count: 3
config:
node.store.allow_mmap: false
podTemplate:
spec:
initContainers:
- name: sysctl
securityContext:
privileged: true
command: ['sh', '-c', 'sysctl -w vm.max_map_count=262144']
EOF
-
创建
[root@master100 ~]# kubectl apply -f elasticsearch.yaml
Operator自动创建和管理Kubernetes资源,以实现Elasticsearch集群的期望状态。可能需要几分钟的时间才能创建所有资源并准备好使用群集。
-
监视群集运行状况和创建进度
[root@master100 ~]# kubectl get elasticsearch
NAME HEALTH NODES VERSION PHASE AGE
elasticsearch green 3 8.9.1 Ready 79s -
访问该Pod的日志
[root@master100 ~]# kubectl logs -f elasticsearch-es-master-0
-
请求Elasticsearch访问权限
[root@master100 ~]# kubectl get service elasticsearch-es-http
NAME TYPE CLUSTER-IP EXTERNAL-IP PORT(S) AGE
elasticsearch-es-http ClusterIP 10.96.35.639200/TCP 3m25s -
获取es集群的账号密码
一个名为elastic的默认用户会自动创建,密码存储在Kubernetes secret中:
[root@master100 ~/01-ECK]# PASSWORD=$(kubectl get secret elasticsearch-es-elastic-user -o go-template='{{.data.elastic | base64decode}}')-
请求Elasticsearch集群。
#从本地工作站,在单独的终端中使用以下命令:
[root@master100 ~/01-ECK]# kubectl port-forward --address 0.0.0.0 service/elasticsearch-es-http 9200
Forwarding from 0.0.0.0:9200 -> 9200从Kubernetes集群内部:
curl -u "elastic:PASSWORD" -k "https://(kubectl get svc elasticsearch-es-http -o jsonpath='{.spec.clusterIP}'):9200"
然后请求localhost:
[root@master100 ~]# curl -u "elastic:$PASSWORD" -k "https://localhost:9200"
{
"name" : "elasticsearch-es-master-1",
"cluster_name" : "elasticsearch",
"cluster_uuid" : "08sMKAPrTB64kS8xewGfQQ",
"version" : {
"number" : "8.9.1",
"build_flavor" : "default",
"build_type" : "docker",
"build_hash" : "a813d015ef1826148d9d389bd1c0d781c6e349f0",
"build_date" : "2023-08-10T05:02:32.517455352Z",
"build_snapshot" : false,
"lucene_version" : "9.7.0",
"minimum_wire_compatibility_version" : "7.17.0",
"minimum_index_compatibility_version" : "7.0.0"
},
"tagline" : "You Know, for Search"
}
[root@master100 ~]#
检查 Elasticsearch 健康
[root@master100 ~/01-ECK]# curl -u "elastic:$PASSWORD" -k "https://localhost:9200/_cluster/health?pretty`"
{
"cluster_name" : "elasticsearch",
"status" : "yellow",
"timed_out" : false,
"number_of_nodes" : 3,
"number_of_data_nodes" : 3,
"active_primary_shards" : 17,
"active_shards" : 32,
"relocating_shards" : 0,
"initializing_shards" : 3,
"unassigned_shards" : 0,
"delayed_unassigned_shards" : 0,
"number_of_pending_tasks" : 12,
"number_of_in_flight_fetch" : 0,
"task_max_waiting_in_queue_millis" : 33955,
"active_shards_percent_as_number" : 91.42857142857143
}
[root@master100 ~/01-ECK]#`
`
`
检查 Elasticsearch 健康
3.2. 部署Kibana实例
要部署Kibana 实例,请参考以下步骤
-
指定一个Kibana实例并将其与Elasticsearch集群关联:
cat <
> kibana.yaml
apiVersion: kibana.k8s.elastic.co/v1
kind: Kibana
metadata:
name: kibana
spec:
version: 8.9.1
count: 1
elasticsearchRef:
#替换为你实际的 Elasticsearch 集群名称
name: elasticsearch
podTemplate:
spec:
containers:
- name: kibana
env:
- name: I18N_LOCALE # 中文配置
value: "zh-CN"
EOF创建
[root@master100 ~]# kubectl apply -f kibana.yaml
kibana.kibana.k8s.elastic.co/kibana created
[root@master100 ~]# -
监控Kibana的健康和创建进度。
kubectl get kibana
以及相关的Pod:
[root@master100 ~/01-ECK]# kubectl get pod --selector='kibana.k8s.elastic.co/name=kibana'-
访问Kibana。
系统会自动为Kibana创建一个ClusterIP服务:kubectl get service kibana-kb-http
[root@master100 ~/01-ECK]# kubectl port-forward --address 0.0.0.0 service/kibana-kb-http 5601
Forwarding from 0.0.0.0:5601 -> 5601
修改为NodePort类型
kubectl edit service kibana-kb-http在这些信息中,找到 type 字段并将其修改为 NodePort,然后保存并退出即可。
3.2.1. 浏览器访问
以elastic用户身份登录。可以使用以下命令获取密码:
kubectl get secret elasticsearch-es-elastic-user -o=jsonpath='{.data.elastic}' | base64 --decode; echo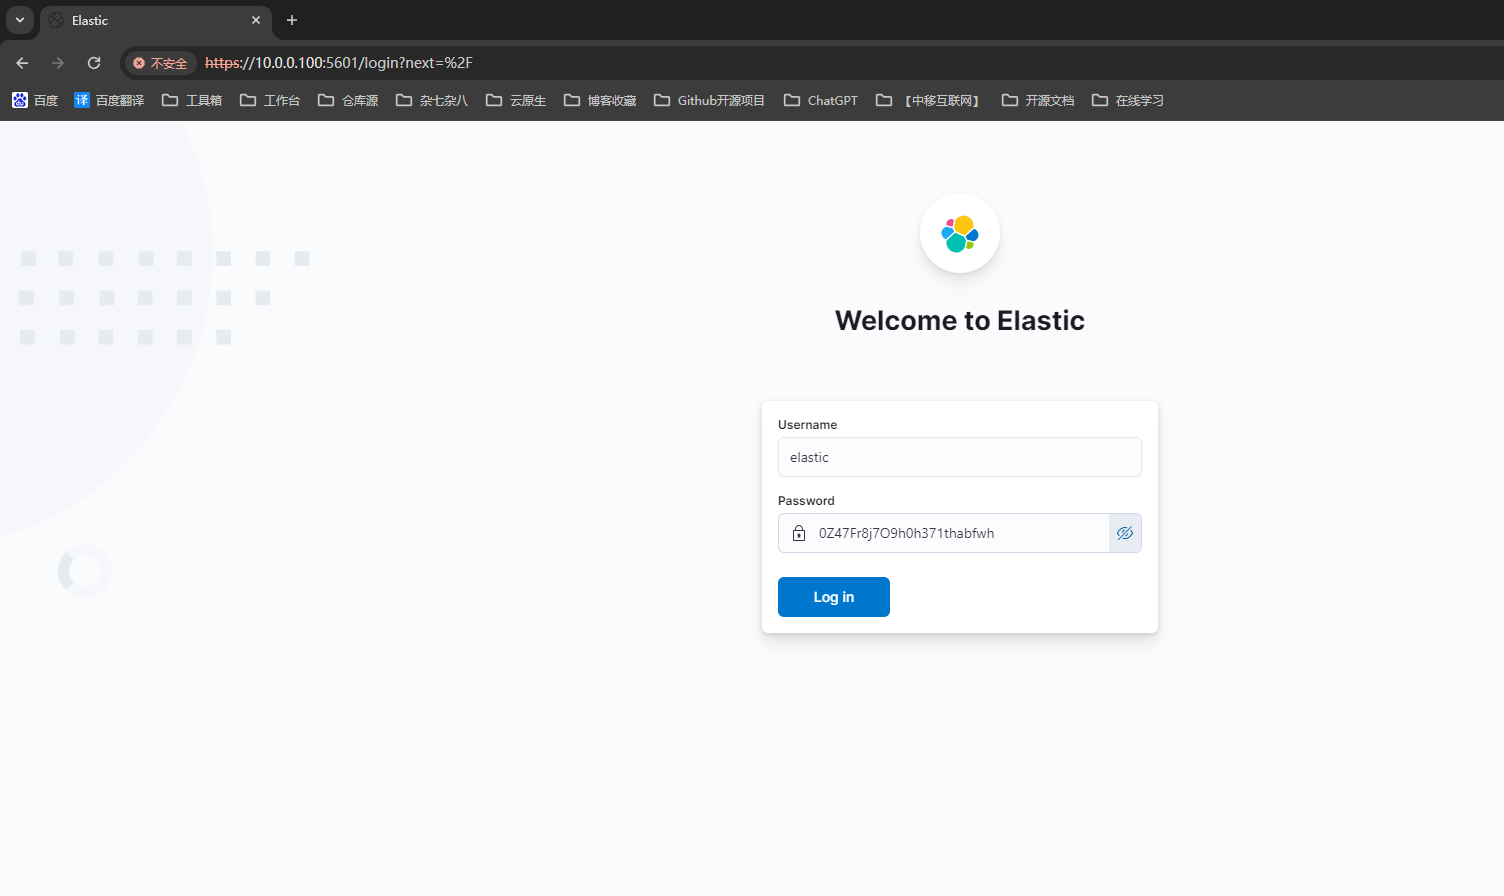
3.3. 部署 filebeat
3.3.1. 参考链接:
---
apiVersion: v1
kind: ConfigMap
metadata:
  name: filebeat-config
  namespace: default
  labels:
    k8s-app: filebeat
data:
  filebeat.yml: |-
    filebeat.inputs:
    - type: container
      paths:
        - /var/log/containers/*.log
      processors:
        - add_kubernetes_metadata:
            host: ${NODE_NAME}
            matchers:
            - logs_path:
                logs_path: "/var/log/containers/"

    # To enable hints based autodiscover, remove `filebeat.inputs` configuration and uncomment this:
    #filebeat.autodiscover:
    #  providers:
    #    - type: kubernetes
    #      node: ${NODE_NAME}
    #      hints.enabled: true
    #      hints.default_config:
    #        type: container
    #        paths:
    #          - /var/log/containers/*${data.kubernetes.container.id}.log

    processors:
      - add_cloud_metadata:
      - add_host_metadata:

    cloud.id: ${ELASTIC_CLOUD_ID}
    cloud.auth: ${ELASTIC_CLOUD_AUTH}

    output.elasticsearch:
      hosts: ['${ELASTICSEARCH_HOST:elasticsearch}:${ELASTICSEARCH_PORT:9200}']
      username: ${ELASTICSEARCH_USERNAME}
      password: ${ELASTICSEARCH_PASSWORD}


*** ** * ** ***


## apiVersion: apps/v1
kind: DaemonSet
metadata:
name: filebeat
namespace: default
labels:
k8s-app: filebeat
spec:
selector:
matchLabels:
k8s-app: filebeat
template:
metadata:
labels:
k8s-app: filebeat
spec:
serviceAccountName: filebeat
terminationGracePeriodSeconds: 30
hostNetwork: true
dnsPolicy: ClusterFirstWithHostNet
containers:
- name: filebeat
image: docker.elastic.co/beats/filebeat:7.15.2
args: [
"-c", "/etc/filebeat.yml",
"-e",
]
env:
- name: ELASTICSEARCH_HOST
value: elasticsearch-es-http
- name: ELASTICSEARCH_PORT
value: "9200"
- name: ELASTICSEARCH_USERNAME
value: elastic
- name: ELASTICSEARCH_PASSWORD
value: 0hha56I2uWDtu28Q4l4j4eW9
- name: ELASTIC_CLOUD_ID
value:
- name: ELASTIC_CLOUD_AUTH
value:
- name: NODE_NAME
valueFrom:
fieldRef:
fieldPath: spec.nodeName
securityContext:
runAsUser: 0
# If using Red Hat OpenShift uncomment this:
#privileged: true
resources:
limits:
memory: 200Mi
requests:
cpu: 100m
memory: 100Mi
volumeMounts:
- name: config
mountPath: /etc/filebeat.yml
readOnly: true
subPath: filebeat.yml
- name: data
mountPath: /usr/share/filebeat/data
- name: varlibdockercontainers
mountPath: /var/lib/docker/containers
readOnly: true
- name: varlog
mountPath: /var/log
readOnly: true
volumes:
- name: config
configMap:
defaultMode: 0640
name: filebeat-config
- name: varlibdockercontainers
hostPath:
path: /var/lib/docker/containers
- name: varlog
hostPath:
path: /var/log
# data folder stores a registry of read status for all files, so we don't send everything again on a Filebeat pod restart
- name: data
hostPath:
# When filebeat runs as non-root user, this directory needs to be writable by group (g+w).
path: /var/lib/filebeat-data
type: DirectoryOrCreate


apiVersion: rbac.authorization.k8s.io/v1

kind: ClusterRoleBinding

metadata:

name: filebeat

subjects:


* kind: ServiceAccount

  name: filebeat

  namespace: default

  roleRef:

  kind: ClusterRole

  name: filebeat

  apiGroup: rbac.authorization.k8s.io


*** ** * ** ***


apiVersion: rbac.authorization.k8s.io/v1

kind: RoleBinding

metadata:

name: filebeat

namespace: default

subjects:


* kind: ServiceAccount

  name: filebeat

  namespace: default

  roleRef:

  kind: Role

  name: filebeat

  apiGroup: rbac.authorization.k8s.io


*** ** * ** ***


apiVersion: rbac.authorization.k8s.io/v1

kind: RoleBinding

metadata:

name: filebeat-kubeadm-config

namespace: default

subjects:


* kind: ServiceAccount

  name: filebeat

  namespace: default

  roleRef:

  kind: Role

  name: filebeat-kubeadm-config

  apiGroup: rbac.authorization.k8s.io


*** ** * ** ***


apiVersion: rbac.authorization.k8s.io/v1

kind: ClusterRole

metadata:

name: filebeat

labels:

k8s-app: filebeat

rules:


* apiGroups: [""] # "" indicates the core API group

  resources:


  * namespaces


  * pods


  * nodes

    verbs:


  * get


  * watch


  * list


* apiGroups: ["apps"]

  resources:


  * replicasets

    verbs: ["get", "list", "watch"]


*** ** * ** ***


apiVersion: rbac.authorization.k8s.io/v1

kind: Role

metadata:

name: filebeat


# should be the namespace where filebeat is running


namespace: default

labels:

k8s-app: filebeat

rules:


* apiGroups:


  * coordination.k8s.io

    resources:


  * leases

    verbs: ["get", "create", "update"]


*** ** * ** ***


apiVersion: rbac.authorization.k8s.io/v1

kind: Role

metadata:

name: filebeat-kubeadm-config

namespace: default

labels:

k8s-app: filebeat

rules:


* apiGroups: [""]

  resources:


  * configmaps

    resourceNames:


  * kubeadm-config

    verbs: ["get"]


*** ** * ** ***


`apiVersion: v1`
`
kind: ServiceAccount`
`
metadata:`
`
name: filebeat`
`
namespace: default`
`
labels:`
`
k8s-app: filebeat`
`
---`
3.3.2. 创建
[root@master100 ~/01-ECK]# kubectl apply -f filebeat-kubernetes.yaml