一、需求
二、开发步骤
2-1、路由的安装

vue-router3才能在vue2中使用!现在默认是vue-router4版本,要在vue3中使用!所以,安装的时候要指定版本。
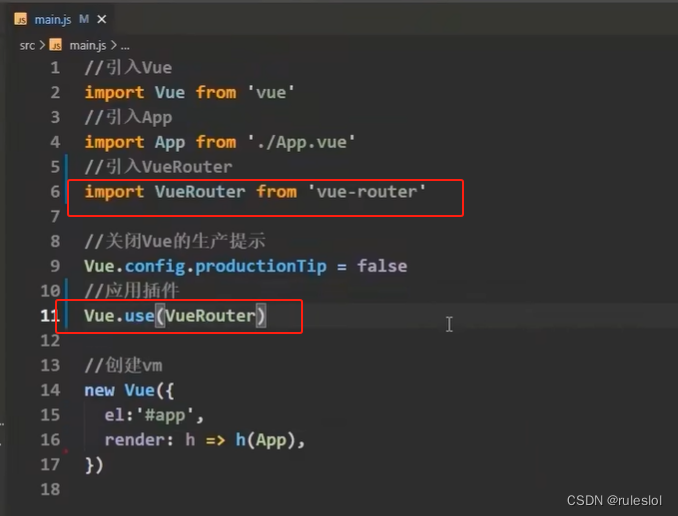
2-2、在main.js中引入和使用路由
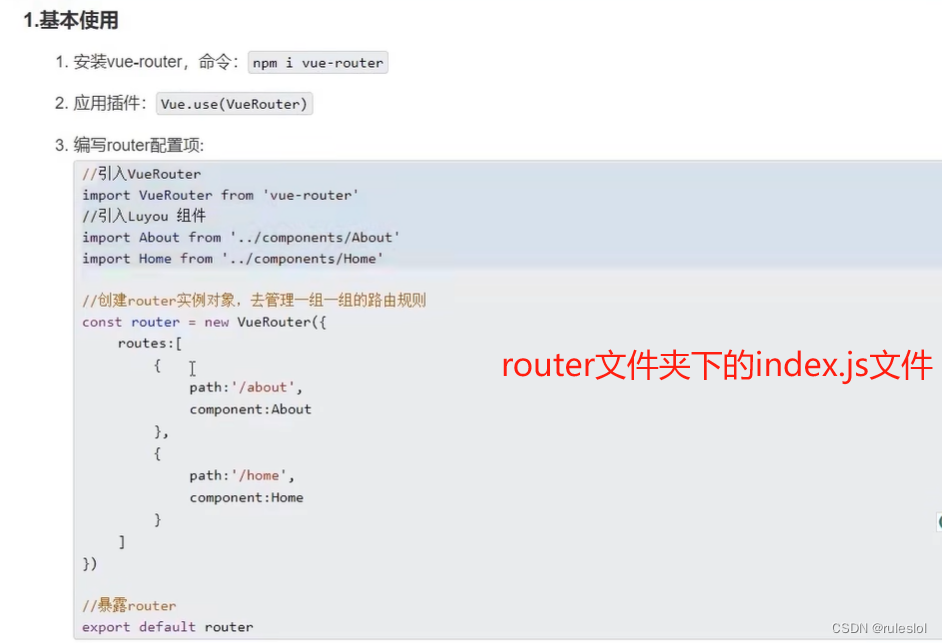
2-3、创建router文件夹
一般在vue中用了vue-router都会在src下新建一个router文件夹,里面也写一个index.js文件。

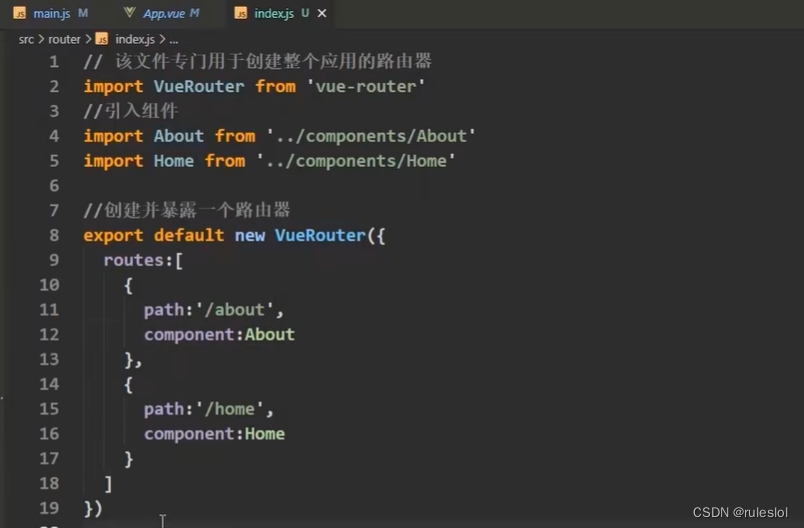
一个应用有一个路由器就够了!
2-4、路由就绪
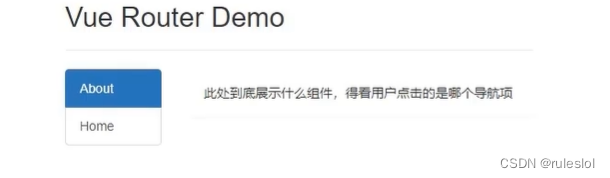
2-5、编辑对应的导航页面
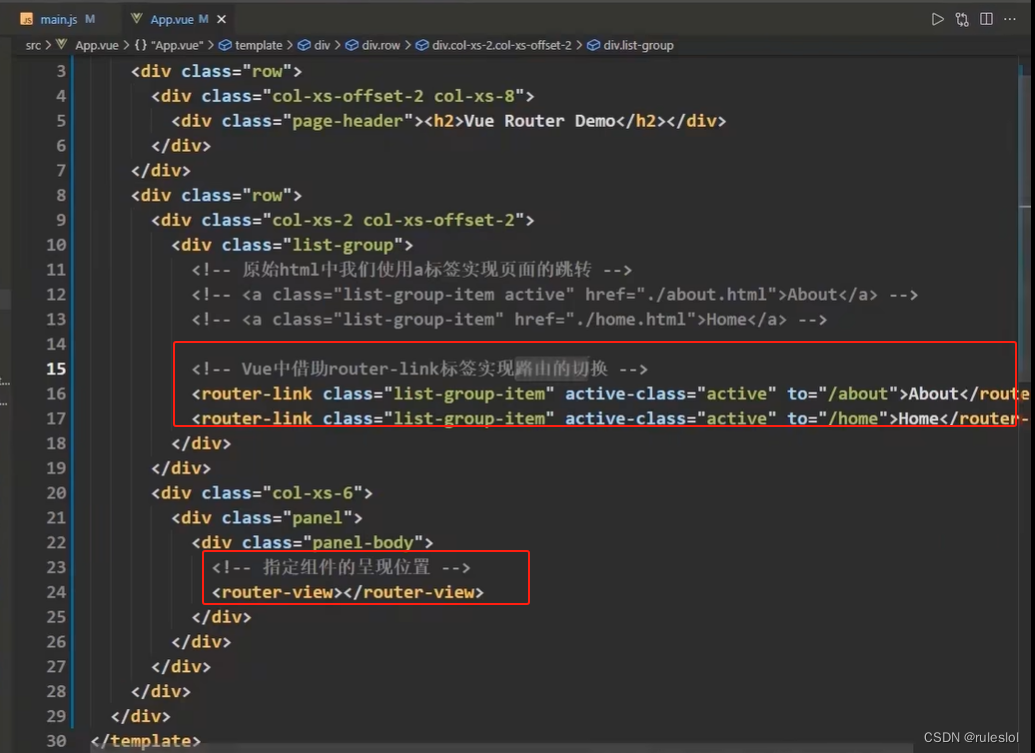
属性to的值就是/组件名
vue-router3才能在vue2中使用!现在默认是vue-router4版本,要在vue3中使用!所以,安装的时候要指定版本。
一般在vue中用了vue-router都会在src下新建一个router文件夹,里面也写一个index.js文件。
一个应用有一个路由器就够了!
属性to的值就是/组件名