本篇介绍一下使用vue3-openlayers点击多边形弹框,高亮多边形,自定义属性传递,鼠标悬浮多边形上动态修改鼠标样式
1 需求
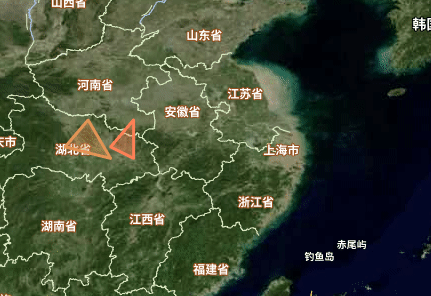
- 加载天地图,polygon
- 传递自定义属性
- 标悬浮在polygon上,根据自定义属性,动态修改鼠标样式为pointer
- 点击polygon,根据自定义属性,高亮,弹框
2 分析
主要是 vue3-openlayers 中 地图事件,overlay等功能的使用
3 实现
javascript
<template>
  <ol-map
    :loadTilesWhileAnimating="true"
    :loadTilesWhileInteracting="true"
    style="width: 100%; height: 100%"
    ref="mapRef"
    @click="handleClick"
    @pointermove="handlePointerMove"
  >
    <ol-view
      ref="view"
      :center="center"
      :rotation="rotation"
      :zoom="zoom"
      :projection="projection"
    />

    <ol-tile-layer>
      <ol-source-tianditu
        layerType="img"
        :projection="projection"
        :tk="key"
        :hidpi="true"
        ref="sourceRef"
      ></ol-source-tianditu>
    </ol-tile-layer>
    <ol-tile-layer>
      <ol-source-tianditu
        :isLabel="true"
        layerType="img"
        :projection="projection"
        :tk="key"
        :hidpi="true"
      ></ol-source-tianditu>
    </ol-tile-layer>
    <ol-vector-layer>
      <ol-source-vector>
        <ol-feature :properties="{ pointer: true }">
          <ol-geom-polygon
            :coordinates="[
              [
                [112, 31],
                [113, 32.2],
                [114, 30.5],
                [112, 31]
              ]
            ]"
          ></ol-geom-polygon>
          <ol-style>
            <ol-style-fill color="rgba(228, 147, 87, 0.4)"></ol-style-fill>
            <ol-style-stroke color="rgba(228, 147, 87, 1)" :width="3"></ol-style-stroke>
          </ol-style>
        </ol-feature>
				<ol-feature >
          <ol-geom-polygon
            :coordinates="[
              [
                [114, 31],
                [115, 32.2],
                [115, 30.5],
                [114, 31]
              ]
            ]"
          ></ol-geom-polygon>
          <ol-style>
            <ol-style-fill color="rgba(255, 128, 87, 0.4)"></ol-style-fill>
            <ol-style-stroke color="rgba(255, 128, 87, 1)" :width="3"></ol-style-stroke>
          </ol-style>
        </ol-feature>
      </ol-source-vector>
    </ol-vector-layer>
    <ol-overlay ref="overlayRef" :autoPan="true" :position="position" v-if="info">
      <div class="overlay-content">
        {{ info }}
      </div>
    </ol-overlay>
  </ol-map>
</template>

<script setup lang="ts">
import { Fill, Stroke, Style } from 'ol/style';
import { toStringHDMS } from 'ol/coordinate.js';
import {  toLonLat } from 'ol/proj';


const center = ref([121, 31]);
const projection = ref('EPSG:4326');
const zoom = ref(5);
const rotation = ref(0);
const mapRef = ref();
const overlayRef = ref(null);
const key = '替换为天地图key';
const sourceRef = ref(null);
const feature = ref();
const info=ref();
const position=ref();
// layerType  img, vec, ter, cia, cta
//  'vec', 'cva'  矢量底图, 矢量注记
//  'img', 'cia'  影像底图, 影像注记
//  'ter', 'cta'  地形晕渲, 地形注记

const style = new Style({
  fill: new Fill({
    color: 'rgba(228, 147, 87, 0.4)'
  }),
  stroke: new Stroke({
    color: 'rgba(228, 147, 87, 1)',
    width: 3
  })
});

onMounted(() => {
  const source = sourceRef.value?.source;
	const overlay = overlayRef.value?.overlay;
});

const handleClick = e => {
  //click事件也可以用mapRef在mounted中进行绑定 mapRef.value.map.on('click', (e: any) => {}),类似openlayers原生写法
  if (feature.value) {
    feature.value.setStyle(style);
		info.value='';
  }
  const features = mapRef.value.map.getFeaturesAtPixel(e.pixel);
  const f = features.find(f => f.getProperties().pointer);
  const highLight = style.clone();
  highLight.getFill()?.setColor('rgba(255, 255, 100, 0.4)');
  highLight.getStroke()?.setColor('rgba(255, 255, 100, 1)');
  if (f) {
    feature.value = f;
    f.setStyle(highLight);
    const coordinate = e.coordinate;
    const hdms = toStringHDMS(toLonLat(coordinate));
		info.value='当前经纬度:'+ hdms ;
		position.value=coordinate;
  }
};

const handlePointerMove = e => {
  mapRef.value.map.getTargetElement().style.cursor = 'auto';
  const features = mapRef.value.map.getFeaturesAtPixel(e.pixel);
  features.forEach(feature => {
    const property = feature.getProperties();
    if (property.pointer) {
      mapRef.value.map.getTargetElement().style.cursor = 'pointer'; //设置鼠标样式
    } else {
      mapRef.value.map.getTargetElement().style.cursor = 'auto';
    }
  });
};
</script>
<style scoped lang="scss">
.overlay-content {
  background: rgba(255, 255, 255, 0.7);
  box-shadow: 0 5px 10px rgb(2 2 2 / 20%);
  padding: 10px 20px;
  font-size: 16px;
  color: black;
}</style>