一、RESTFUL
redtful是一种软件架构的风格,当传输值时不再用?传参,而是用/进行传参。
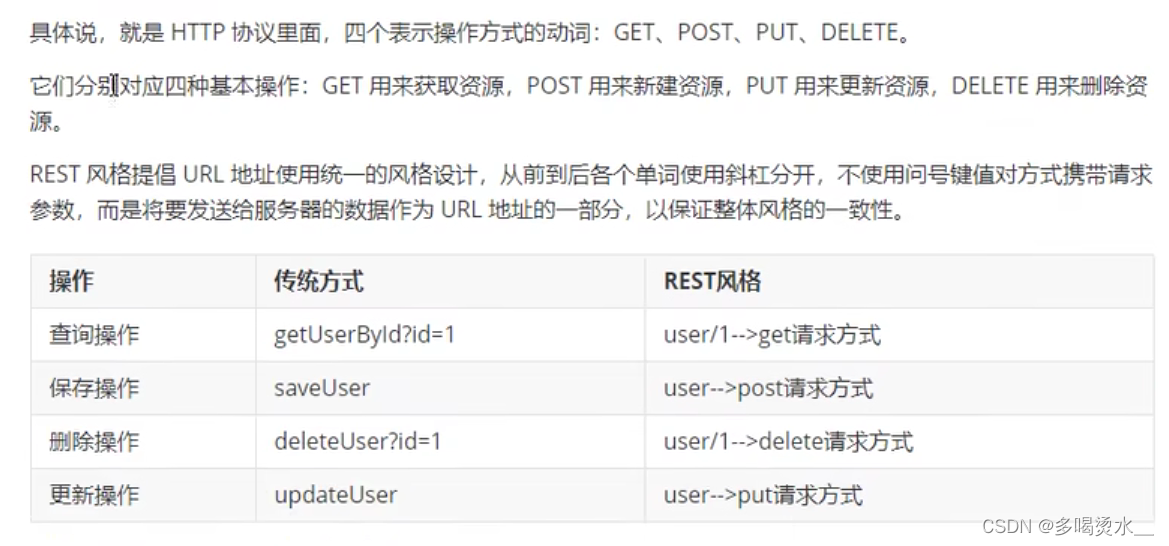
使用REDTFUL模拟用户资源(增、删、改、查)
先写查询和增加操作
testController中:
java
@Controller
public class UserController {
    // /user Get 查询用户所有信息
    // /user/1  Get 根据id查询用户所有信息
    //  /user  Post  添加用户信息
    //  /user/1  Delete 删除用户信息
    //  /user  Put  修改用户信息
    //查询用户
    @RequestMapping(value = "/user",method = RequestMethod.GET)
    public String GetAllUser(){
        System.out.println("获取所有用户信息");
        return "hi";
    }
    //根据id查询用户
    @RequestMapping(value = "/user/{id}",method = RequestMethod.GET)
    public String GetUserById(){
        System.out.println("根据id获取用户信息");
        return "hi";
    }
    //添加用户信息
    @RequestMapping(value = "/user",method = RequestMethod.POST)
    public String InsertUser((String username,String password){
        System.out.println("添加用户信息");
        return "hi";
    }
}
html
<!DOCTYPE html>
<html lang="en" xmlns:th="http://www.thymeleaf.org">
<head>
    <meta charset="UTF-8">
    <title>Title</title>
</head>
<body>
<h1>首页</h1>
<a th:href="@{/user}">获取用户所有信息</a>
<a th:href="@{/user/1}">根据用户id获取信息</a>
<form th:action="@{/user}" method="post">
    用户名:<input type="text" name="username"><br>
    密码:<input type="password" name="password"><br>
    <input type="submit" value="提交">
</form>
</body>
</html>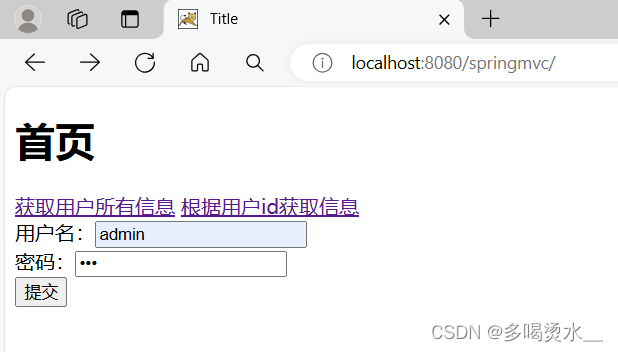


注:Put和Delete请求,要配置HiddenHttpMethodFilter过滤器才能使用
在web.xml中添加HiddenHttpMethodFilter过滤器:
XML
 <!--配置HiddenHttpMethodFilter-->
    <filter>
        <filter-name>hiddenHttpMethodFilter</filter-name>
        <filter-class>org.springframework.web.filter.HiddenHttpMethodFilter</filter-class>
    </filter>
    <filter-mapping>
        <filter-name>hiddenHttpMethodFilter</filter-name>
        <url-pattern>/*</url-pattern>
    </filter-mapping>
修改用户信息
java
@Controller
public class UserController {
    // /user Get 查询用户所有信息
    // /user/1  Get 根据id查询用户所有信息
    //  /user  Post  添加用户信息
    //  /user/1  Delete 删除用户信息
    //  /user  Put  修改用户信息
//修改用户信息
    @RequestMapping(value = "/user",method = RequestMethod.PUT)
    public String updateUser(String username,String password){
        System.out.println("username:"+username+",password:"+password);
        System.out.println("修改用户信息");
        return "hi";
    }
}
html
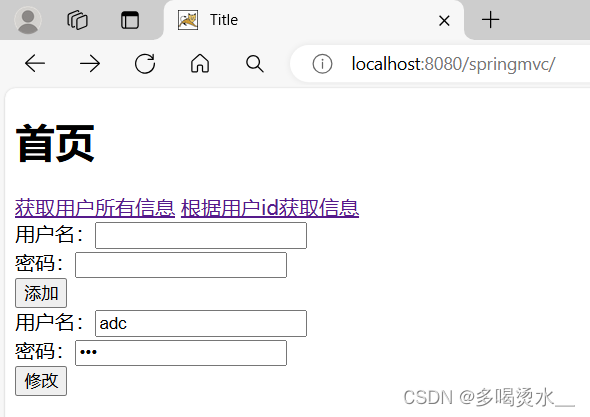
<form th:action="@{/user}" method="post">
    <input type="hidden" name="_method" value="PUT">
    用户名:<input type="text" name="username"><br>
    密码:<input type="password" name="password"><br>
    <input type="submit" value="修改">
</form>

案例
要满足删除操作,需要有表单提交,Post请求方式,还有HiddenHttpMethodFilter过滤器,还有配合使用前端的vue.js,要引入vue.js,编写<script></script>,进行删除操作的具体描述。

引入vue之后,在spring.xml中还需配置开放对静态资源的访问。
静态资源:先对DispatcherServlet进行处理,如果在匹配请求时,没有找到请求映射,那当前的请求就会被defaultservlet处理。

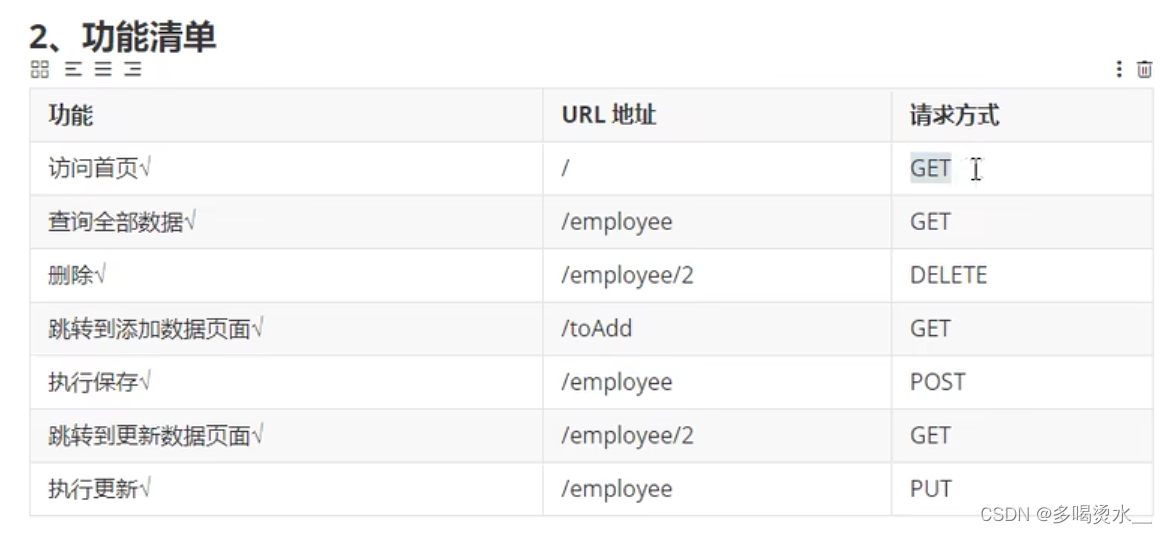 因为删除操作设计vue.js所以只在上面作为说明,下面为增删改。
框架:
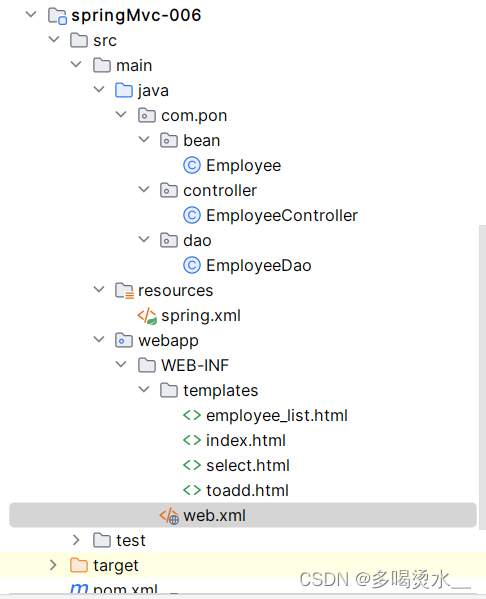
先创建bean和dao对象:
java
package com.pon.bean;
public class Employee {
    private Integer id;
    private String lastName;
    private String email;
    private Integer gender;
    public Employee() {
    }
    public Employee(Integer id, String lastName, String email, Integer gender) {
        this.id = id;
        this.lastName = lastName;
        this.email = email;
        this.gender = gender;
    }
    public Integer getId() {
        return id;
    }
    public void setId(Integer id) {
        this.id = id;
    }
    public String getLastName() {
        return lastName;
    }
    public void setLastName(String lastName) {
        this.lastName = lastName;
    }
    public String getEmail() {
        return email;
    }
    public void setEmail(String email) {
        this.email = email;
    }
    public Integer getGender() {
        return gender;
    }
    public void setGender(Integer gender) {
        this.gender = gender;
    }
    @Override
    public String toString() {
        return "Employee{" +
                "id=" + id +
                ", lastName='" + lastName + '\'' +
                ", email='" + email + '\'' +
                ", gender=" + gender +
                '}';
    }
}
java
package com.pon.dao;
import com.pon.bean.Employee;
import org.springframework.stereotype.Repository;
import java.util.Collection;
import java.util.Collections;
import java.util.HashMap;
import java.util.Map;
@Repository
public class EmployeeDao {
    private static Map<Integer, Employee> employeees=null;
    static {
        employeees=new HashMap<Integer,Employee>();
        employeees.put(1001,new Employee(1001,"E-AA","AA@163.com",1));
        employeees.put(1002,new Employee(1002,"E-BB","BB@163.com",1));
        employeees.put(1003,new Employee(1003,"E-CC","CC@163.com",0));
        employeees.put(1004,new Employee(1004,"E-DD","DD@163.com",0));
        employeees.put(1005,new Employee(1005,"E-EE","EE@163.com",1));
    }
    private static Integer initId=1006;
    public void save(Employee employee){
        if(employee.getId()==null){
            employee.setId(initId++);
        }
        employeees.put(employee.getId(),employee);
    }
    public Collection<Employee> getAll(){
        return employeees.values();
    }
    public Employee get(Integer id){
        return employeees.get(id);
    }
    public void delete(Integer id){
        employeees.remove(id);
    }
}
创建EemployeeController:
java
package com.pon.controller;
import com.pon.bean.Employee;
import com.pon.dao.EmployeeDao;
import org.springframework.beans.factory.annotation.Autowired;
import org.springframework.stereotype.Controller;
import org.springframework.ui.Model;
import org.springframework.web.bind.annotation.GetMapping;
import org.springframework.web.bind.annotation.PathVariable;
import org.springframework.web.bind.annotation.RequestMapping;
import org.springframework.web.bind.annotation.RequestMethod;
import java.util.Collection;

@Controller
public class EmployeeController {
    @Autowired
    private EmployeeDao employeeDao;

    @RequestMapping("/")
    public String First(){
        return "index";
    }
    @GetMapping("/employee")
    public String GetAllInfo(Model model){
        //用域对象来获取对象
       Collection<Employee> employeeList= employeeDao.getAll();
       model.addAttribute("employeeList",employeeList);
        return "employee_list";
    }
    @RequestMapping("/toAdd")
    public String Toadd(){
        return "toadd";
    }
    @RequestMapping(value = "/employee",method = RequestMethod.POST)
    public String AddUser(Employee employee){
        employeeDao.save(employee);
        return "redirect:/employee";
    }
    //要想实现更新功能,先要查询到此id下并让他回显
    @RequestMapping(value = "/employee/{id}",method = RequestMethod.GET)
    public String SelectUser(@PathVariable Integer id, Model model){
       Employee employee= employeeDao.get(id);
       model.addAttribute("employee",employee);
        return "select";
    }
    //更新
    @RequestMapping(value = "/employee",method = RequestMethod.PUT)
    public String UpdateUser(Employee employee){
        employeeDao.save(employee);
        return "redirect:/employee";
    }

}
首页index.html:
html
<!DOCTYPE html>
<html lang="en" xmlns:th="http://www.thymeleaf.org">
<head>
    <meta charset="UTF-8">
    <title>Title</title>
</head>
<body>
<h1>首页</h1>
<a th:href="@{/employee}">查询全部信息</a>
</body>
</html>
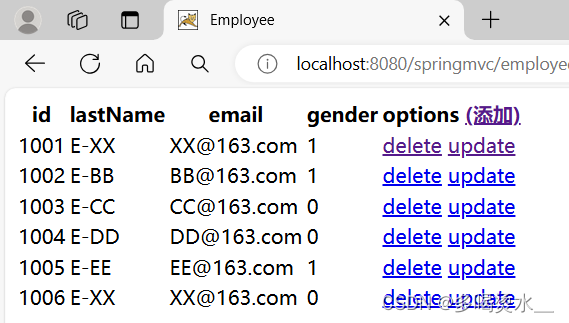
用表格来展示写的信息employee_list.html:
html
<!DOCTYPE html>
<html lang="en" xmlns:th="http://www.thymeleaf.org">
<head>
    <meta charset="UTF-8">
    <title>Employee</title>
</head>
<body>
<!--用表格来表示数据-->
<table>
    <tr>
        <th>id</th>
        <th>lastName</th>
        <th>email</th>
        <th>gender</th>
        <th>options <a th:href="@{/toAdd}">(添加)</a> </th>
    </tr>
    <tr th:each="employee:${employeeList}">
        <td th:text="${employee.id}"></td>
        <td th:text="${employee.lastName}"></td>
        <td th:text="${employee.email}"></td>
        <td th:text="${employee.gender}"></td>
        <td>
            <a th:href="@{'/employee/'+${employee.id}}">delete</a>
            <a th:href="@{'/employee/'+${employee.id}}">update</a>
        </td>

    </tr>
</table>
</body>
</html>
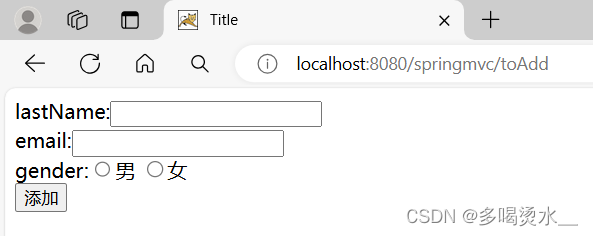
添加页面toadd.html:
html
<!DOCTYPE html>
<html lang="en" xmlns:th="http://www.thymeleaf.org">
<head>
    <meta charset="UTF-8">
    <title>Title</title>
</head>
<body>
<form th:action="@{/employee}" method="post">
    lastName:<input type="text" name="lastName"><br>
    email:<input type="text" name="email"><br>
    gender:<input type="radio" name="gender" value="1">男
           <input type="radio" name="gender" value="0">女<br>
    <input type="submit" value="添加">
</form>
</body>
</html>
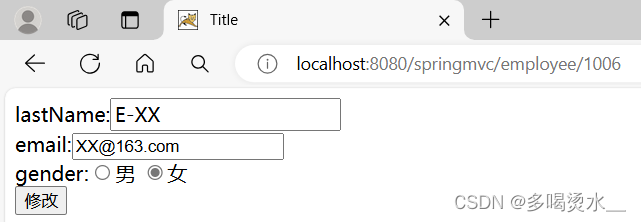
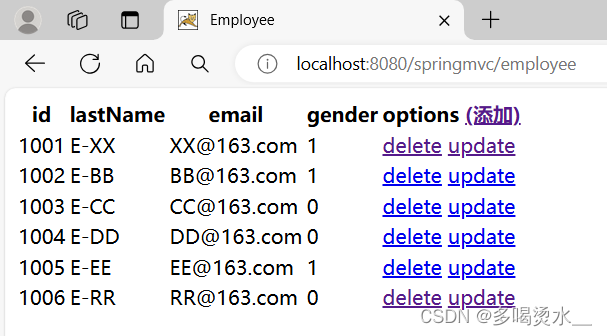
修改页面select.html:
html
<!DOCTYPE html>
<html lang="en" xmlns:th="http://www.thymeleaf.org">
<head>
    <meta charset="UTF-8">
    <title>Title</title>
</head>
<body>
<form th:action="@{/employee}" method="post">
    <input type="hidden" name="_method" value="put">
    <input type="hidden" name="id" th:value="${employee.id}" >
    lastName:<input type="text" name="lastName" th:value="${employee.lastName}"><br>
    email:<input type="text" name="email" th:value="${employee.email}"><br>
    gender:<input type="radio" name="gender" value="1" th:field="${employee.gender}">男
           <input type="radio" name="gender" value="0" th:field="${employee.gender}">女<br>
    <input type="submit" value="修改">
</form>
</body>
</html>
运行界面
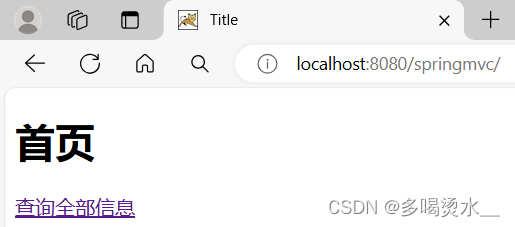
首页
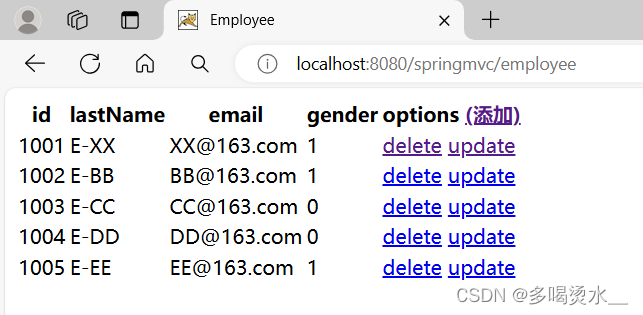
查看所有信息
 '
'
添加页面
修改界面
二、HttpMessageConverter

请求报文:浏览器到服务器。
响应报文:服务器到浏览器。
1.@RequestBody
将请求报文的请求体转换成java对象。要用post方法。
 HttpController中:
java
package com.pon.controller;
import org.springframework.stereotype.Controller;
import org.springframework.web.bind.annotation.RequestBody;
import org.springframework.web.bind.annotation.RequestMapping;

@Controller
public class HttpController {
    @RequestMapping("/")
    public String first(){
        return "index";
    }
    @RequestMapping("/testRequestBody")
    public String test(@RequestBody String requestBody){
        System.out.println("requestBoody"+requestBody);
        return "success";
    }
}
首页index.html:
html
<!DOCTYPE html>
<html lang="en" xmlns:th="http://www.thymeleaf.org">
<head>
    <meta charset="UTF-8">
    <title>Title</title>
</head>
<body>
<h1>首页</h1>
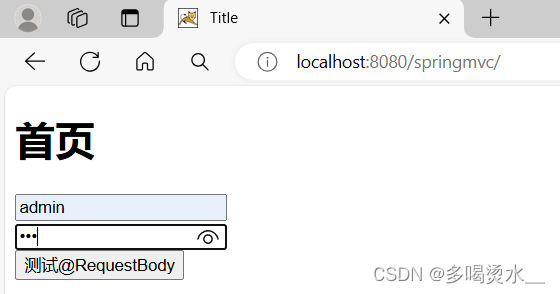
<form th:action="@{/testRequestBody}" method="post">
    <input type="text" name="username"><br>
    <input type="password" name="password"><br>
    <input type="submit" value="测试@RequestBody">
</form>
</body>
</html>
成功后的页面success.html:
html
<!DOCTYPE html>
<html lang="en">
<head>
    <meta charset="UTF-8">
    <title>Title</title>
</head>
<body>
成功
</body>
</html>
运行界面


2.RequestEntity
 HttpController中:
java
@Controller
public class HttpController {
 @RequestMapping("/testRequestEntity")
    public String test1(RequestEntity<String> requestEntity){
        //requestEntity请求报文的整个信息
        System.out.println("请求头:"+requestEntity.getHeaders());
        System.out.println("请求体"+requestEntity.getBody());
        return "success";
    }
}
首页index.html:
html
<form th:action="@{/testRequestEntity}" method="post">
    <input type="text" name="username"><br>
    <input type="password" name="password"><br>
    <input type="submit" value="测试RequestEntity">
</form>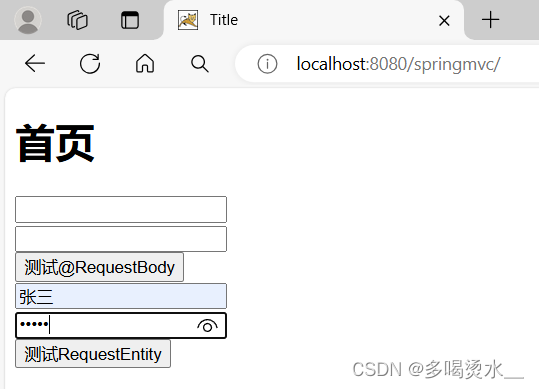


3.@ResponseBody
方法返回值return ".."(双引号里),是什么浏览器界面显示什么。例如 retrun "你好" 浏览器界面显示你好。

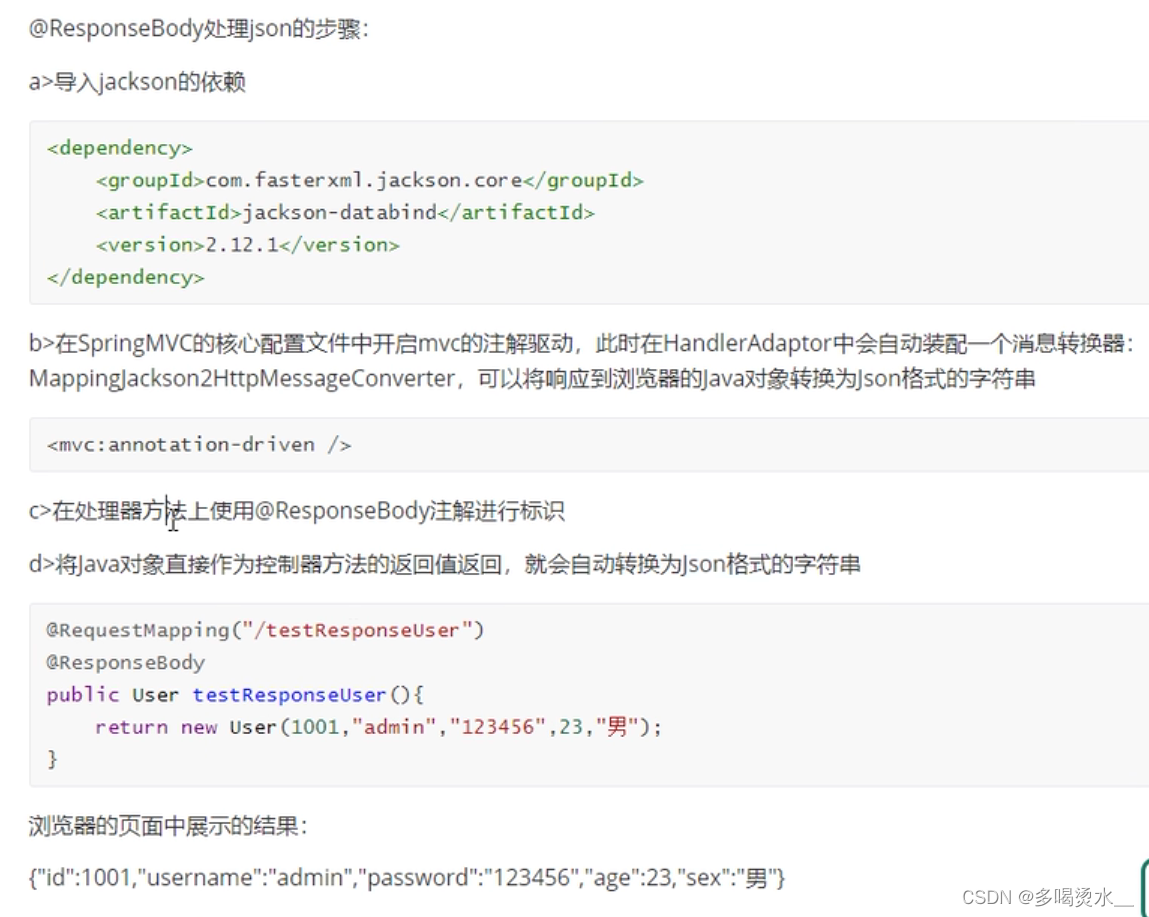
4.@ResponseBody处理json对象
创建一个User实体类对象:
java
package com.pon.bean;

public class User {
    private String username;
    private Integer age;
    private String sex;
    public User() {
    }
    public User(String username, Integer age, String sex) {
        this.username = username;
        this.age = age;
        this.sex = sex;
    }
    public String getUsername() {
        return username;
    }
    public void setUsername(String username) {
        this.username = username;
    }
    public Integer getAge() {
        return age;
    }
    public void setAge(Integer age) {
        this.age = age;
    }
    public String getSex() {
        return sex;
    }
    public void setSex(String sex) {
        this.sex = sex;
    }
}
HttpController:
java
@Controller
public class HttpController {
@RequestMapping("/testResponseUser")
@ResponseBody
    public User test2(){
        return new User("adimin",21,"男");
}
}
首页index.html:
html
<a th:href="@{/testResponseUser}">测试ResponseUser</a>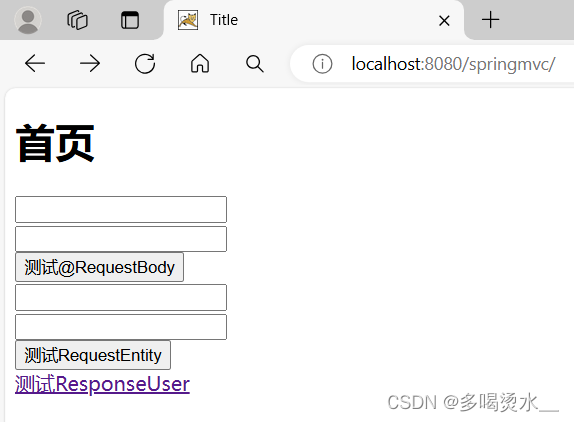

5.@RestController

6.ResponseEntity

1)文件下载
用ResponseEntity实现文件的下载功能。
在webapp创建static目录,在static目录下创建img,里面复制一张图片
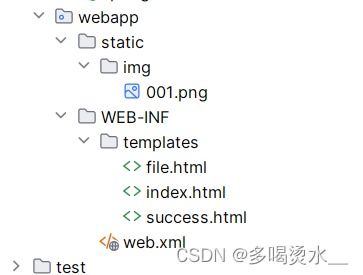
在controller包下,FileDown类:
java
package com.pon.controller;

import jakarta.servlet.ServletContext;
import jakarta.servlet.http.HttpSession;
import org.springframework.http.HttpHeaders;
import org.springframework.http.HttpStatus;
import org.springframework.http.ResponseEntity;
import org.springframework.stereotype.Controller;
import org.springframework.util.MultiValueMap;
import org.springframework.web.bind.annotation.RequestMapping;
import java.io.FileInputStream;
import java.io.FileNotFoundException;
import java.io.IOException;
import java.io.InputStream;

@Controller
public class FileDown {
    @RequestMapping("/file")
    public String testfile(){
        return "file";
    }
    @RequestMapping("/testDown")
    public ResponseEntity<byte[]> test(HttpSession httpSession) throws IOException {
    //获取serveletcontext对象
        ServletContext servletContext=httpSession.getServletContext();
        //获取服务器中文件的真实路径
        String realPath=servletContext.getRealPath("/static/img/001.png");
        //创建输入流
        InputStream is=new FileInputStream(realPath);
        //创建字节流
        byte[] bytes=new byte[is.available()];
        is.read(bytes);
        //创建HttpHeaders对象设置响应头信息
        MultiValueMap<String,String> headers=new HttpHeaders();
        //设置下载方式及下载文件的名字
        headers.add("Content-Disposition","attachment;filename=001.png");
        //设置响应状态码
        HttpStatus status=HttpStatus.OK;
        //创建responseEntity对象
        ResponseEntity<byte []> responseEntity=new ResponseEntity<>(bytes,headers,status);
        is.close();
        return responseEntity;

    }
}
file.html:
html
<!DOCTYPE html>
<html lang="en" xmlns:th="http://www.thymeleaf.org">
<head>
    <meta charset="UTF-8">
    <title>Title</title>
</head>
<body>
<a th:href="@{/testDown}">图片下载</a>
</body>
</html>

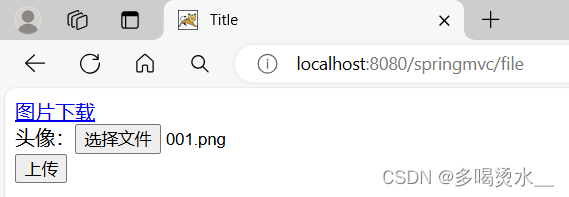
2)文件上传
文件上传用的是post。
先在pom.xml中添加所需要的依赖:
要将spring-webmvc的版本配置为5.3.19,如果使用6.0.X的话,在spring.xml中配置文件上传解析器配置不了。
XML
 <dependency>
            <groupId>commons-fileupload</groupId>
            <artifactId>commons-fileupload</artifactId>
            <version>1.3.1</version>
        </dependency>
在spring.xml中配置文件上传解析器
XML
<bean id="multipartResolver" class="org.springframework.web.multipart.commons.CommonsMultipartResolver"></bean>在fileUp类中:
java
package com.pon.controller;

import jakarta.servlet.ServletContext;
import jakarta.servlet.http.HttpSession;
import org.springframework.stereotype.Controller;
import org.springframework.web.bind.annotation.RequestMapping;
import org.springframework.web.multipart.MultipartFile;
import java.io.File;
import java.io.IOException;

@Controller
public class FileUp {
    @RequestMapping("/testUp")
    public String testup(MultipartFile photo, HttpSession session) throws IOException {
        String fileName=photo.getOriginalFilename();
        ServletContext context=session.getServletContext();
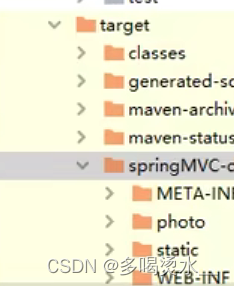
        String photoPath=context.getRealPath("photo");
        File file=new File(photoPath);
        //判断phoroPath路径是否存在
        if(!file.exists()){
            //不存在创建
            file.mkdir();
        }
        String finalPath=photoPath+File.separator+fileName;
        photo.transferTo(new File(finalPath));
        return "success";
    }
}
testUp.html中:
html
<!DOCTYPE html>
<html lang="en" xmlns:th="http://www.thymeleaf.org">
<head>
    <meta charset="UTF-8">
    <title>Title</title>
</head>
<body>
<a th:href="@{/testDown}">图片下载</a>
<form th:action="@{/testUp}" method="post" enctype="multipart/form-data">
    头像:<input type="file" name="photo"><br>
    <input type="submit" value="上传">
</form>
</body>
</html>
在target中:
三、拦截器
拦截器作用于controller前后,过滤器作用于请求到DispatcherServlet之间。

拦截器类FirstInterceptor :
java
package com.pon.interceptor;

import jakarta.servlet.http.HttpServletRequest;
import jakarta.servlet.http.HttpServletResponse;
import org.springframework.stereotype.Component;
import org.springframework.web.servlet.HandlerInterceptor;
import org.springframework.web.servlet.ModelAndView;

public class FirstInterceptor implements HandlerInterceptor {
    //控制器方法执行前执行
    @Override
    public boolean preHandle(HttpServletRequest request, HttpServletResponse response, Object handler) throws Exception {
        System.out.println("拦截器preHandle方法执行");
        return true;
    }
    //控制器方法执行后执行
    @Override
    public void postHandle(HttpServletRequest request, HttpServletResponse response, Object handler, ModelAndView modelAndView) throws Exception {
        System.out.println("拦截器postHandle方法执行");
    }
   //渲染视图完毕后执行
    @Override
    public void afterCompletion(HttpServletRequest request, HttpServletResponse response, Object handler, Exception ex) throws Exception {
        System.out.println("拦截器afterCompletion方法执行");
    }
}
配置拦截器:在spring.xml中进行配置
第一种方法:
对所有请求都进行拦截
XML
 <!--配置拦截器-->
    <mvc:interceptors>
        <bean class="com.pon.interceptor.FirstInterceptor"/>
    </mvc:interceptors>
第二种方法:
要在拦截器类上配置@Component注解
也是对所有请求都进行拦截。
XML
 <mvc:interceptors>
        <ref bean="firstInterceptor"></ref>
    </mvc:interceptors>
第三种方法:
可设置当前的拦截路径
XML
 <!--配置拦截器-->
    <mvc:interceptors>
        <mvc:interceptor>
            <mvc:mapping path="/*"/>
            <mvc:exclude-mapping path="/"/>
            <ref bean="firstInterceptor"></ref>
        </mvc:interceptor>
    </mvc:interceptors>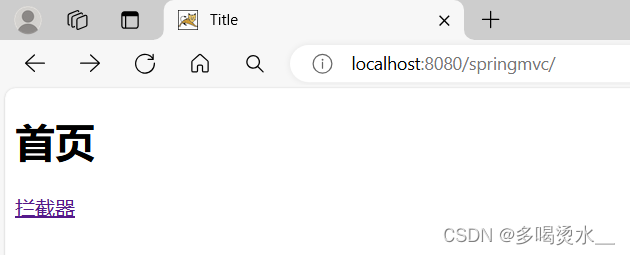
点击拦截器会触发拦截,控制台输出拦截语句:

拦截器三个抽象方法

多个拦截器执行顺序

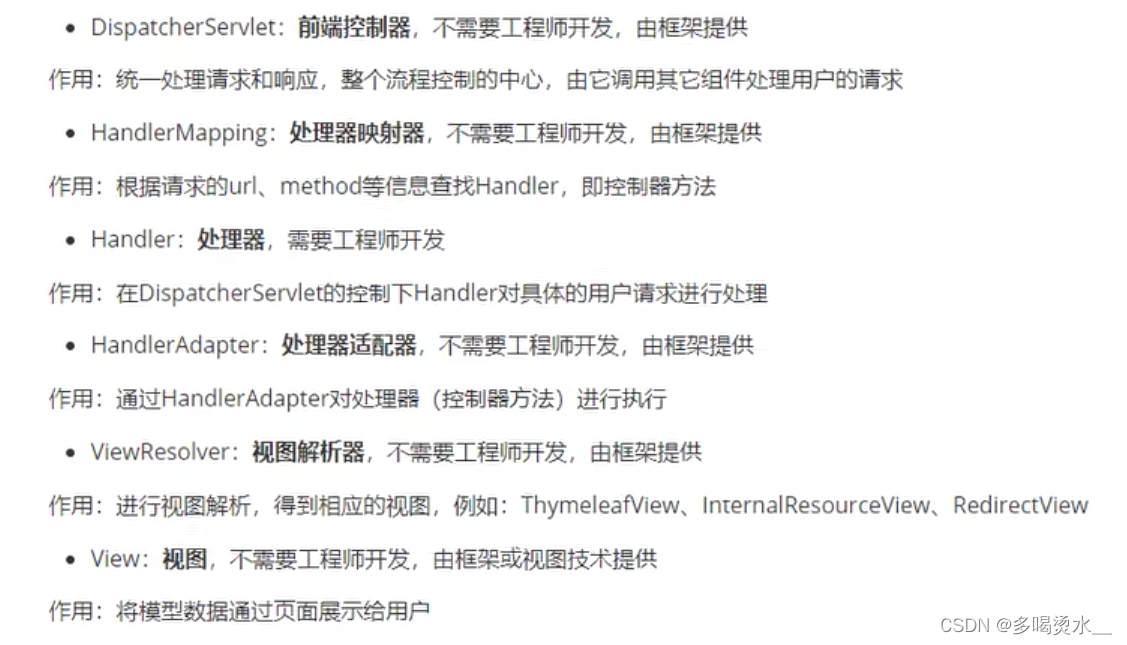
四、SpringMvc常用组件
