前提:官网安装了PHP
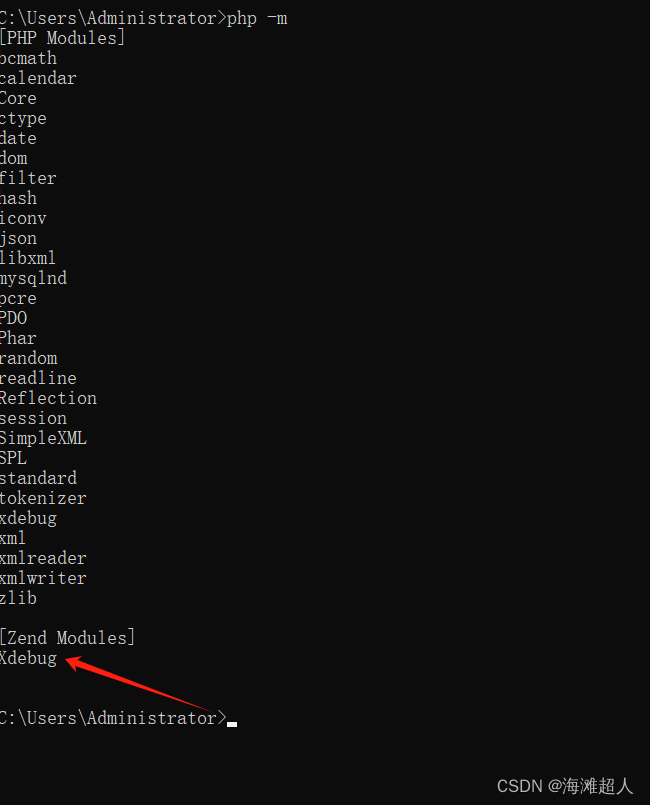
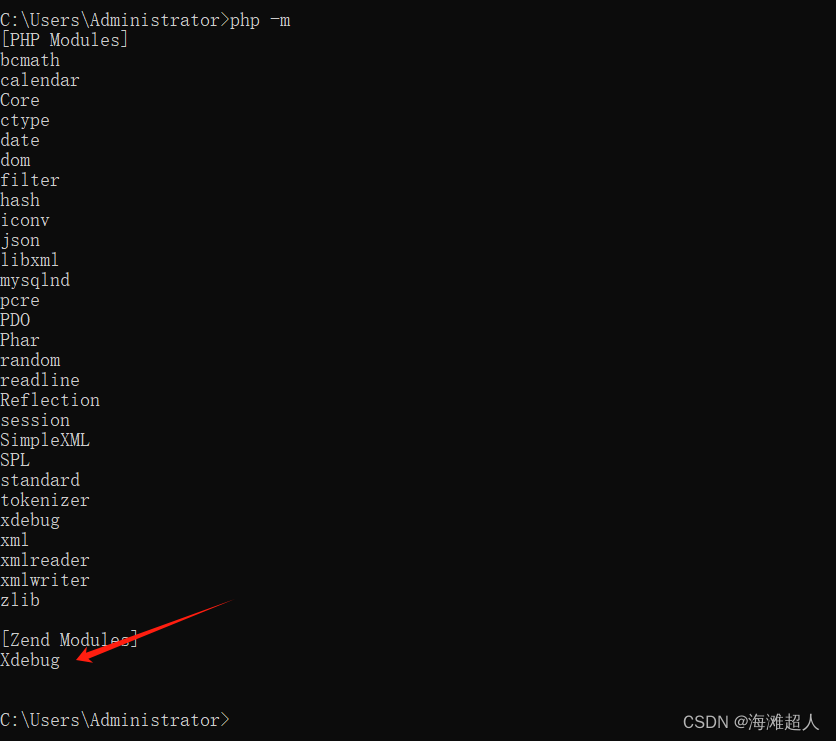
一、检测是否有xdebug插件
二、如果没有插件,下载对应版本的插件,并且配置php
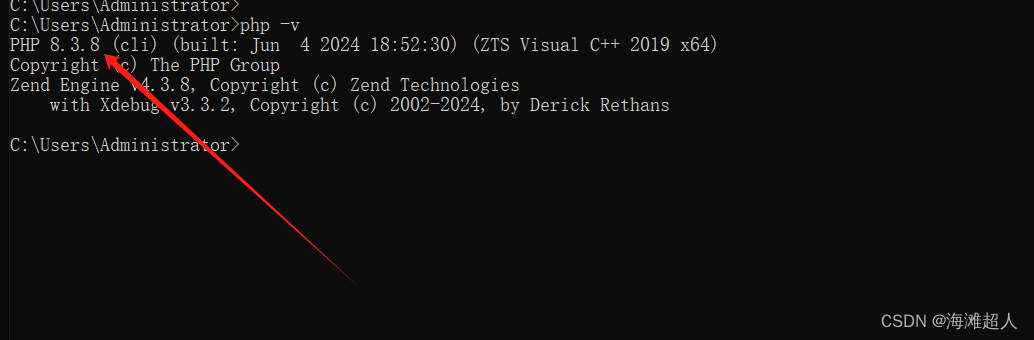
1、查看自己php版本:
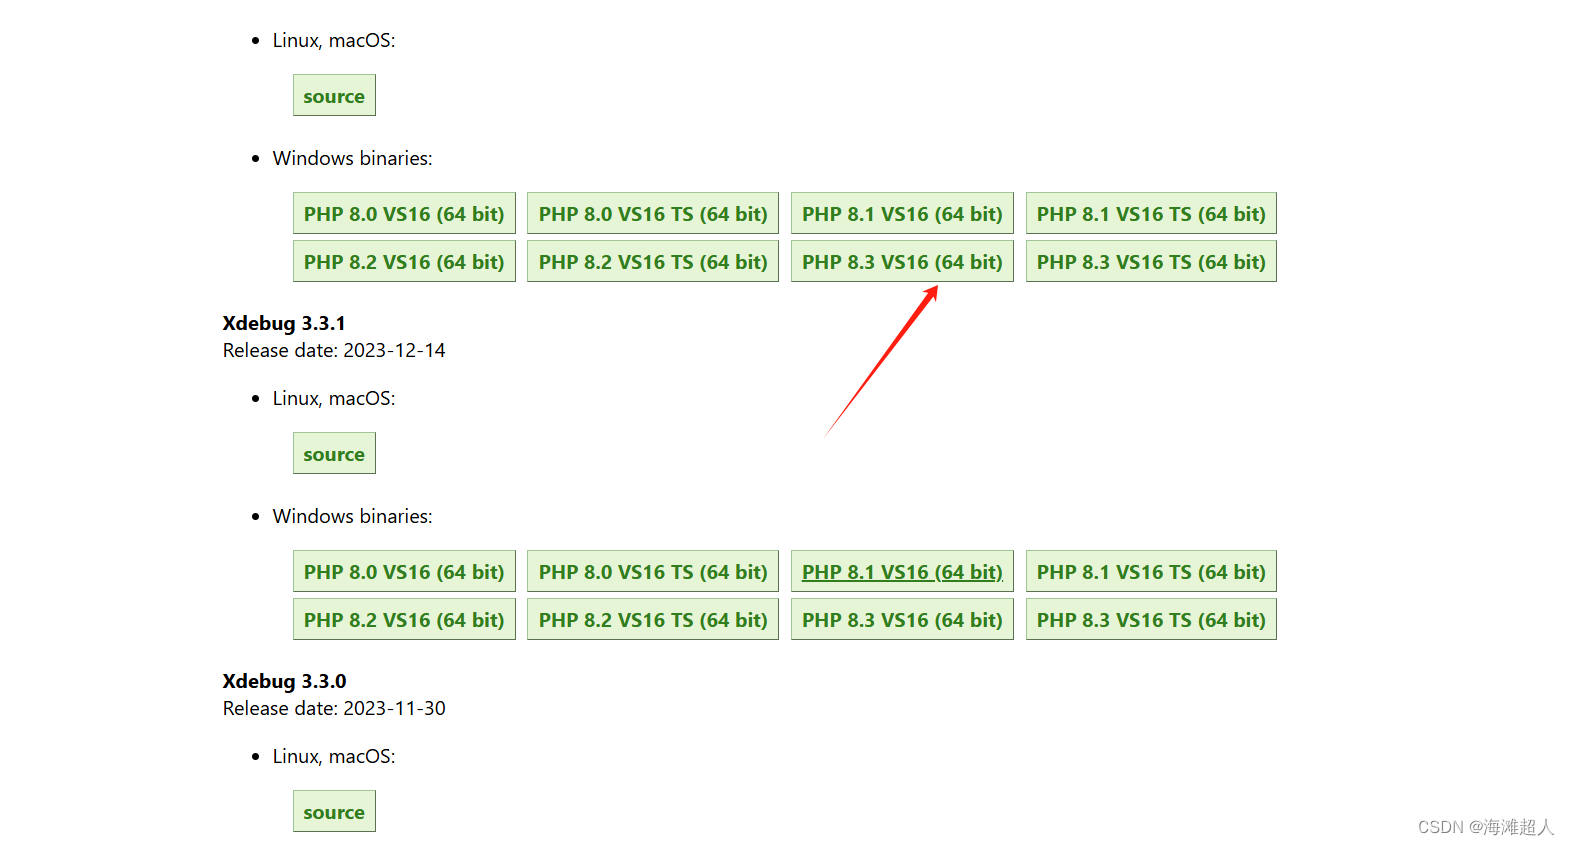
2、xdebug下载地址:
https://xdebug.org/download/historical
我下载的是箭头所示,和PHP版本号和系统对应
3、下载的插件放入php的ext目录,并且改个名字

4、复制一份php.ini-development,并且重重命名为php.ini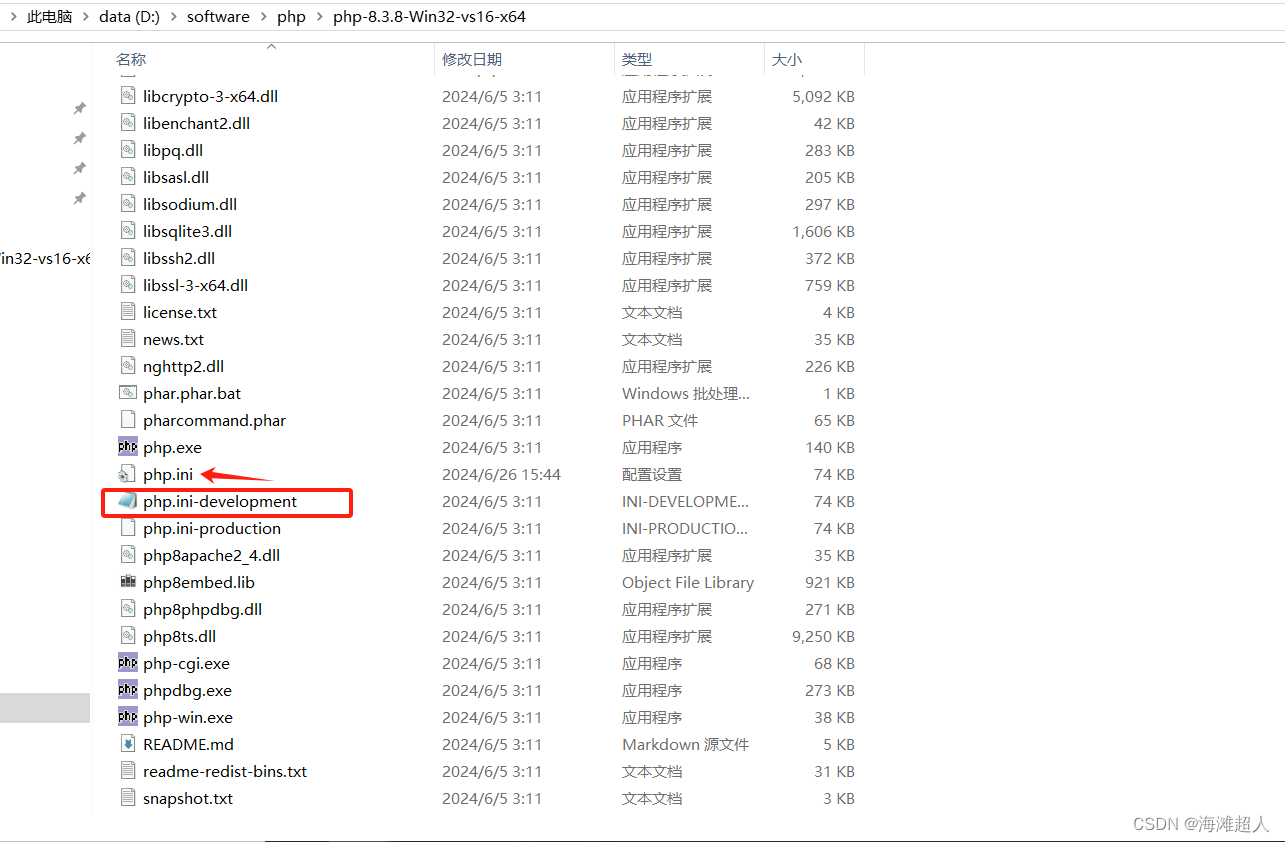
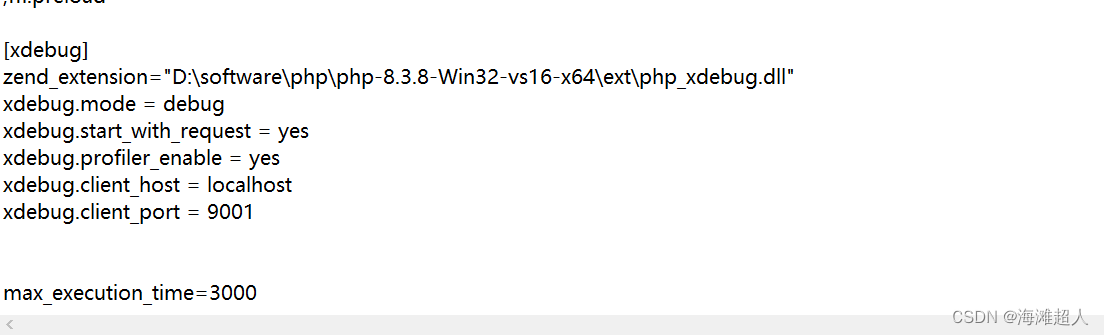
5、php.ini配置文件增加Xdebug插件配置:
zend_extension :换成自己的地址
c
[xdebug]
zend_extension="D:\software\php\php-8.3.8-Win32-vs16-x64\ext\php_xdebug.dll"
xdebug.mode = debug
xdebug.start_with_request = yes
xdebug.profiler_enable = yes
xdebug.client_host = localhost
xdebug.client_port = 9001
检测是否配置成功
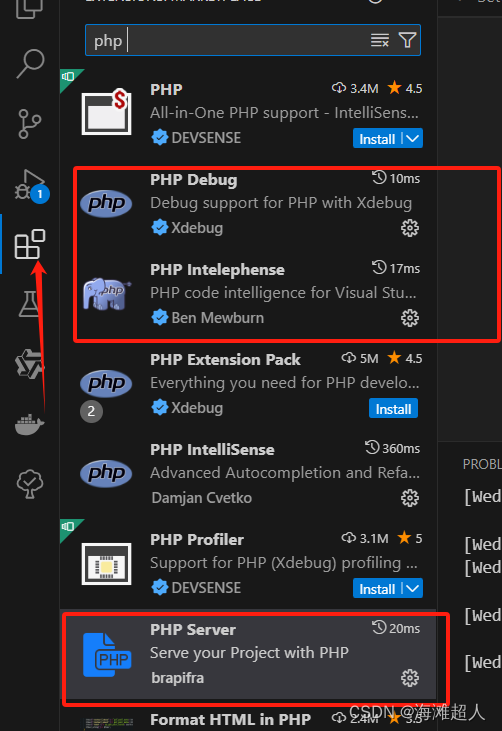
三、配置vscode
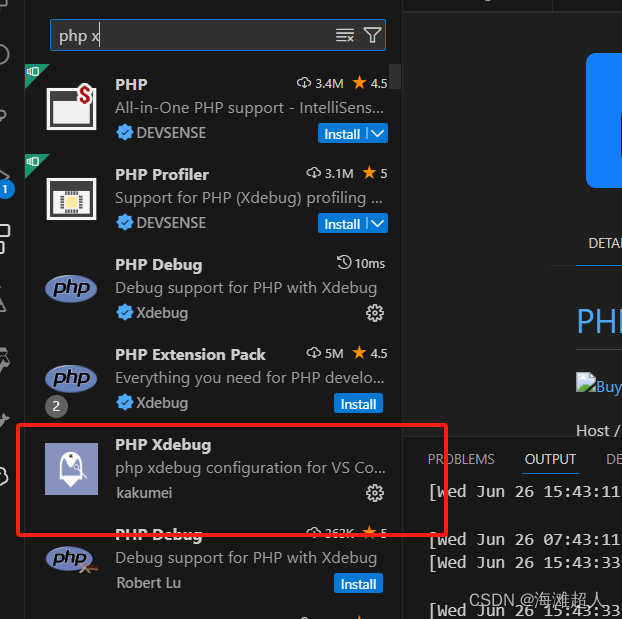
1、下载如下插件并且启用:
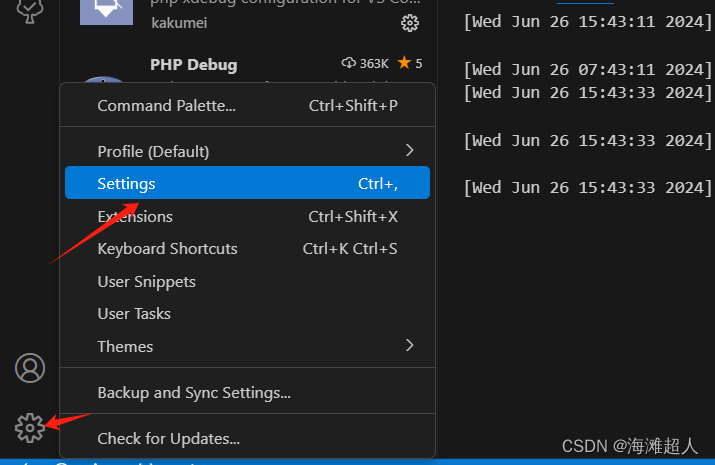
1、打开配置设置
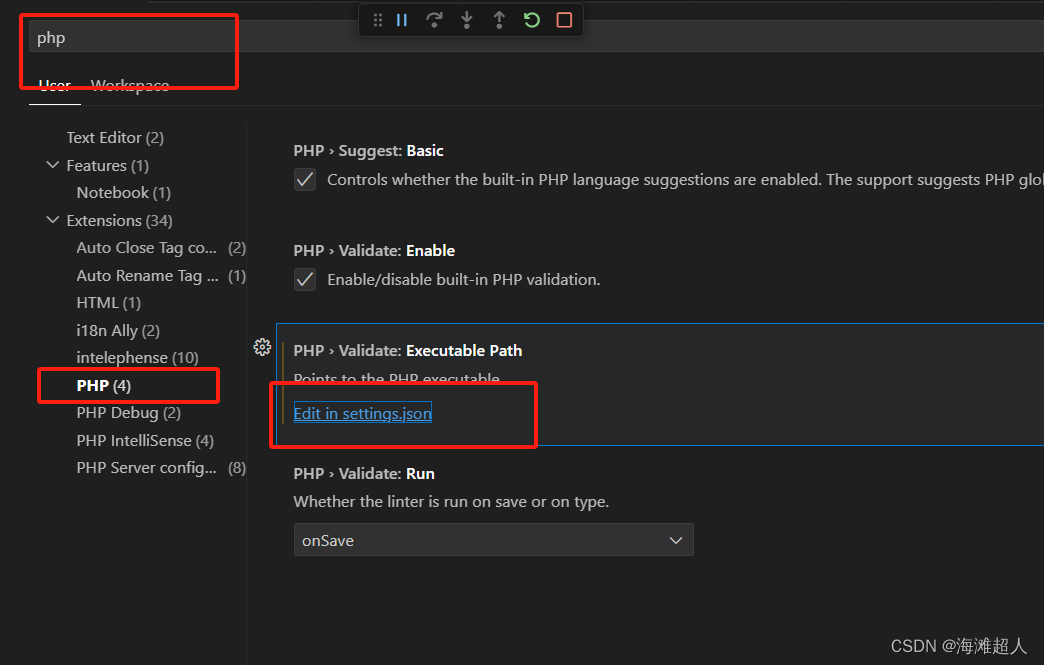
2、增加配置,保存:
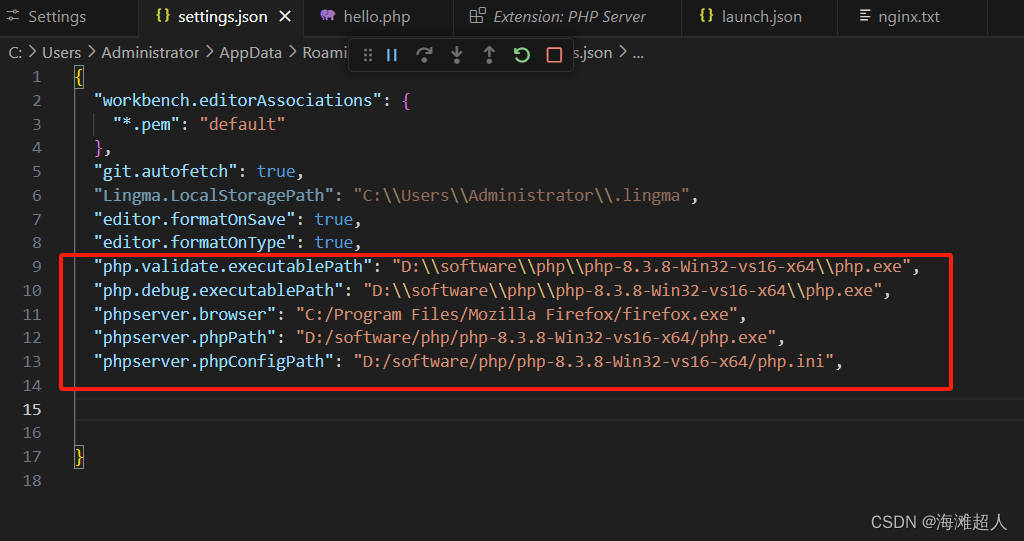
c
  "php.validate.executablePath": "D:\\software\\php\\php-8.3.8-Win32-vs16-x64\\php.exe",   //php.exe路径
  "php.debug.executablePath": "D:\\software\\php\\php-8.3.8-Win32-vs16-x64\\php.exe",       //php.exe路径
  "phpserver.browser": "C:/Program Files/Mozilla Firefox/firefox.exe",                      //浏览器执行文件路径
  "phpserver.phpPath": "D:/software/php/php-8.3.8-Win32-vs16-x64/php.exe",                    //php.exe路径
  "phpserver.phpConfigPath": "D:/software/php/php-8.3.8-Win32-vs16-x64/php.ini",              //刚才复制配置的配置文件路径
四、代码中使用debug
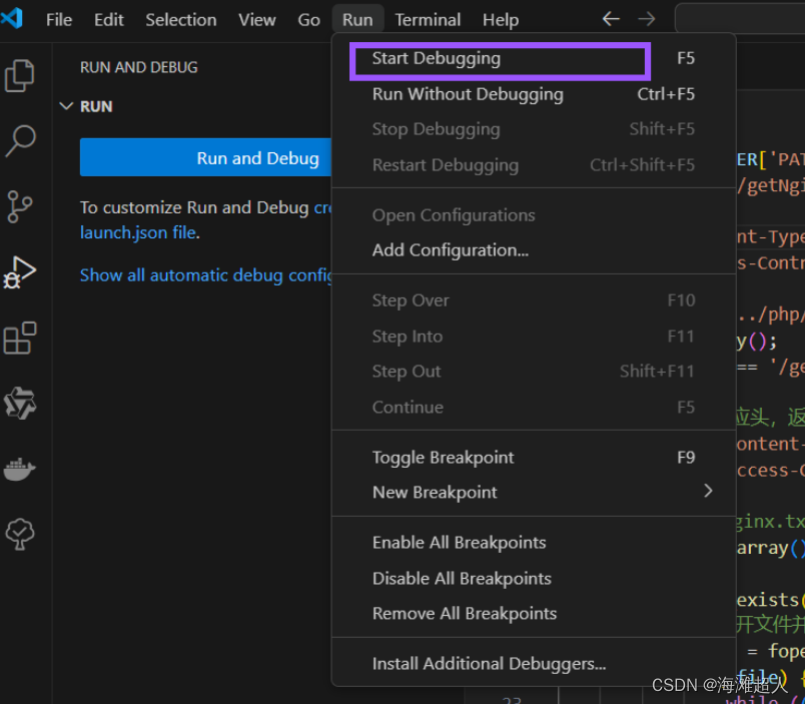
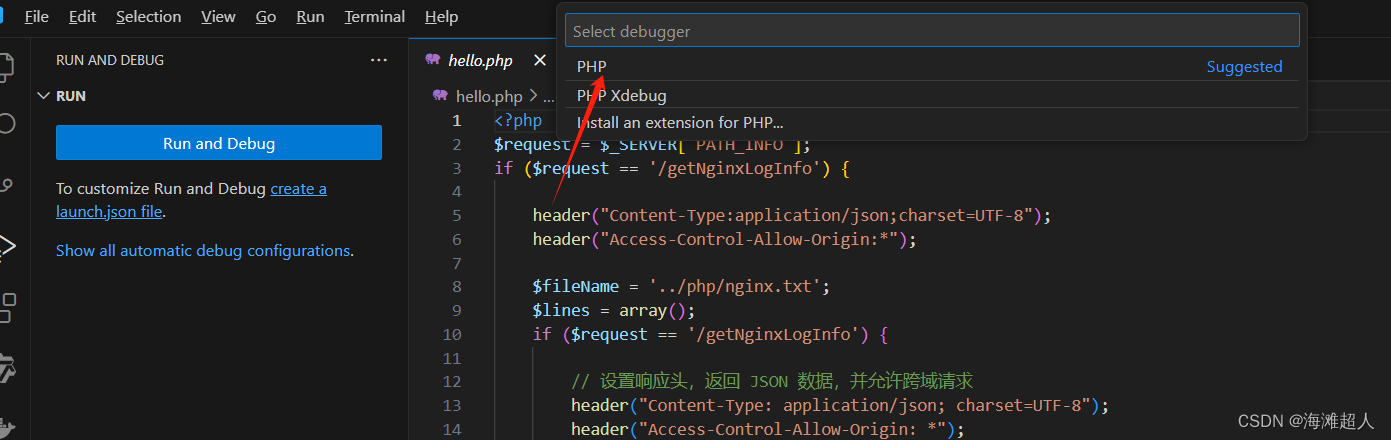
1、创建一个launch.json 文件

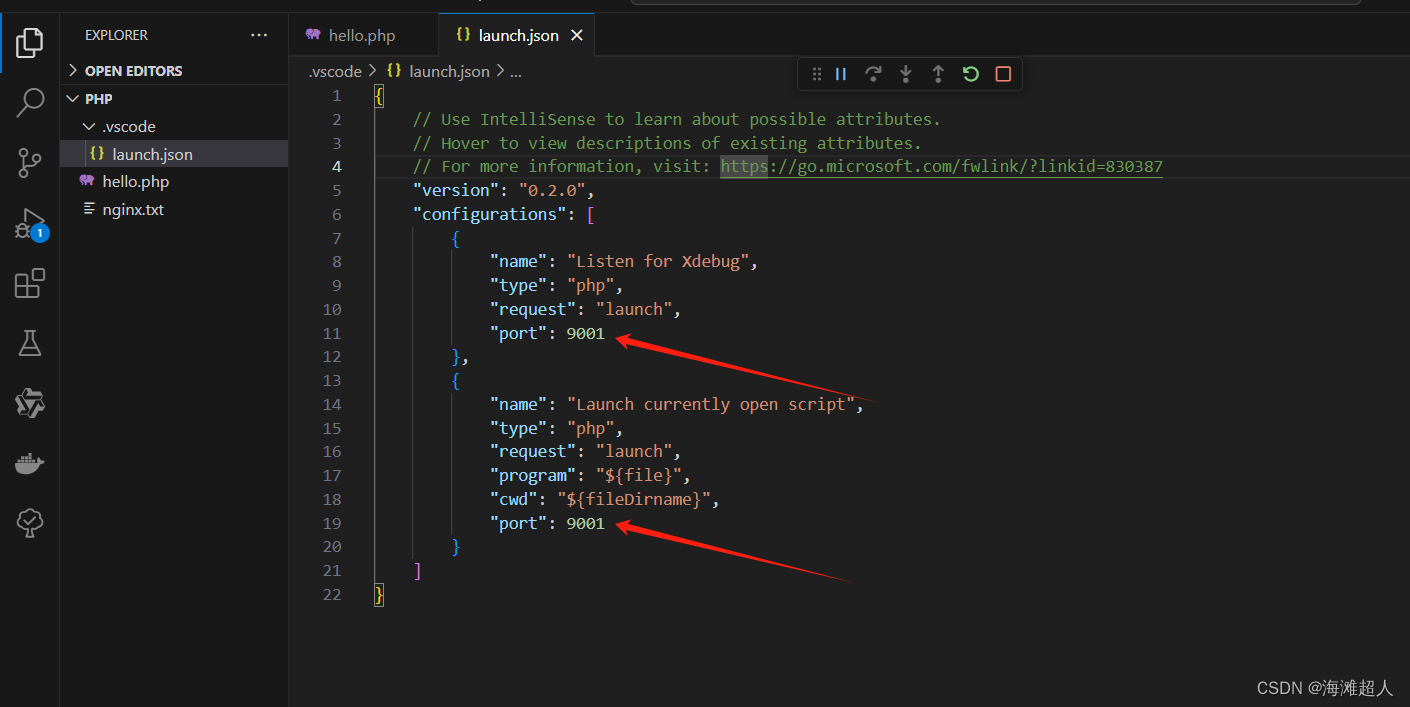
创建成功完成如下: 箭头指的端口号和php,ini的端口号保持一致,如果没有加上。
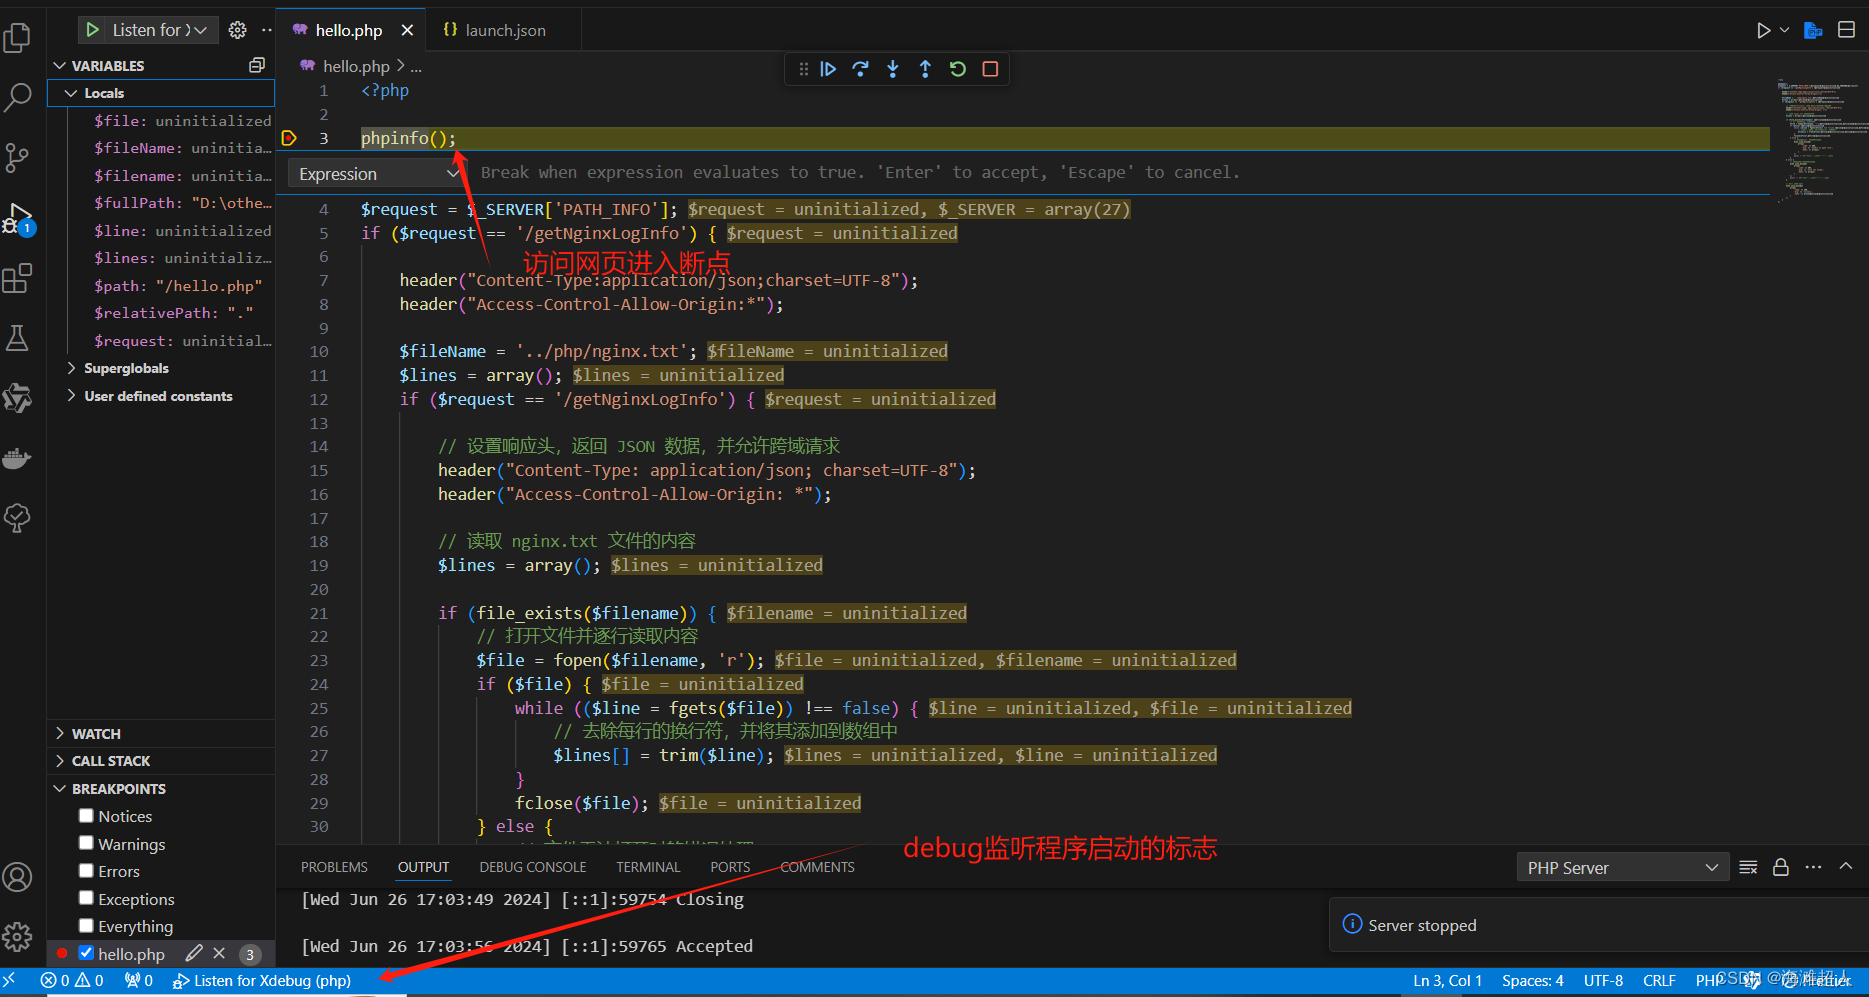
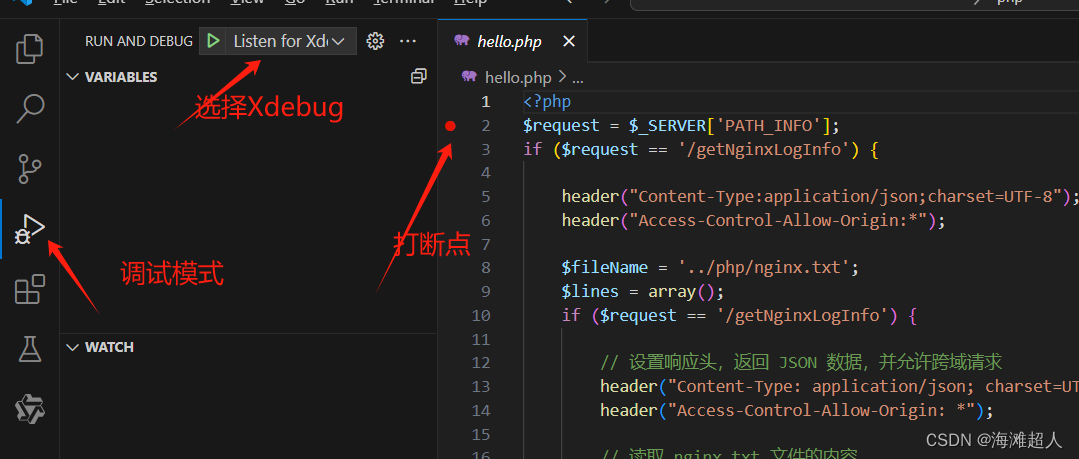
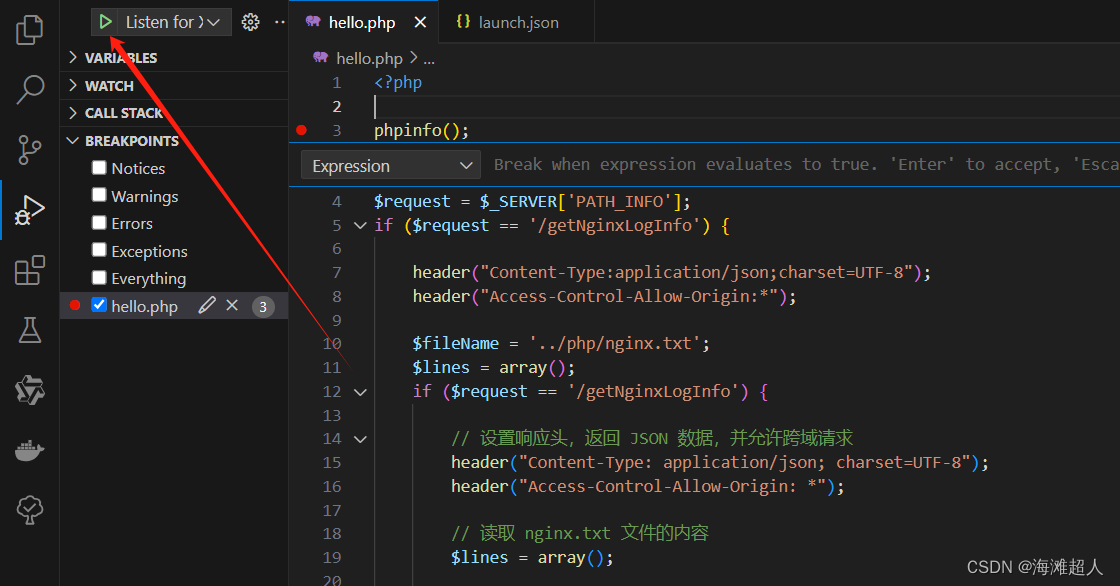
2、dubug
①打断点,②选择调试模式 ③选择listen for xdebug
3、dubug
1、启动xdebug监听php
3、启动PHP