依赖注入
依赖注入方式
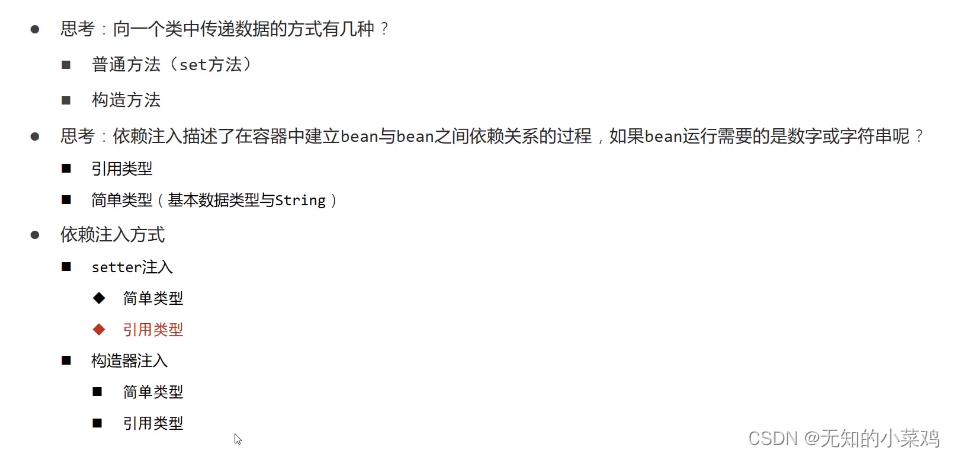
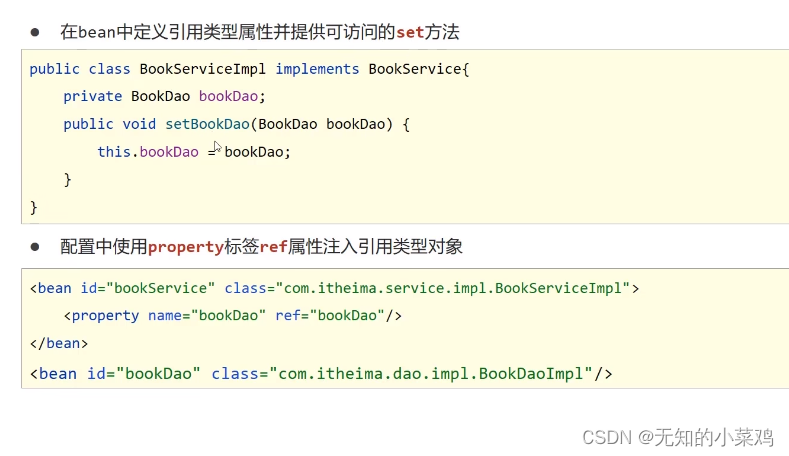
setter注入------引用类型
setter注入------简单类型
python
public class BookDaoImpl implements BookDao {

    public void setDatabaseName(String databaseName) {
        this.databaseName = databaseName;
    }

    public void setNum(int num) {
        this.num = num;
    }

    private String databaseName;
    private int num;

    public void save() {
        System.out.println("book dao save ..." + databaseName + "," + num);
    }
}为databaseName和num两个属性提供可访问的set方法,然后在applicationContext.xml里进行配置
python
<?xml version="1.0" encoding="UTF-8"?>
<beans xmlns="http://www.springframework.org/schema/beans"
       xmlns:xsi="http://www.w3.org/2001/XMLSchema-instance"
       xsi:schemaLocation="http://www.springframework.org/schema/beans http://www.springframework.org/schema/beans/spring-beans.xsd">


    <bean id="bookDao" class="com.itheima.dao.impl.BookDaoImpl">
        <property name="databaseName" value="mysql"/>
        <property name="num" value="100"/>
    </bean>
</beans>
运行时会自动把设置好的值注入进去
构造器注入------引用类型
BookServiceImpl.java
python
public class BookServiceImpl implements BookService {
    public BookServiceImpl(BookDao bookDao) {
        this.bookDao = bookDao;
    }

    private BookDao bookDao;

    public void save() {
        System.out.println("book service save ...");
        bookDao.save();
    }

}
applicationContext.xml
python
<?xml version="1.0" encoding="UTF-8"?>
<beans xmlns="http://www.springframework.org/schema/beans"
       xmlns:xsi="http://www.w3.org/2001/XMLSchema-instance"
       xsi:schemaLocation="http://www.springframework.org/schema/beans http://www.springframework.org/schema/beans/spring-beans.xsd">


    <bean id="bookDao" class="com.itheima.dao.impl.BookDaoImpl" />
    <bean id="bookService" class="com.itheima.service.impl.BookServiceImpl">
        <constructor-arg name="bookDao" ref="bookDao" />
    </bean>
</beans>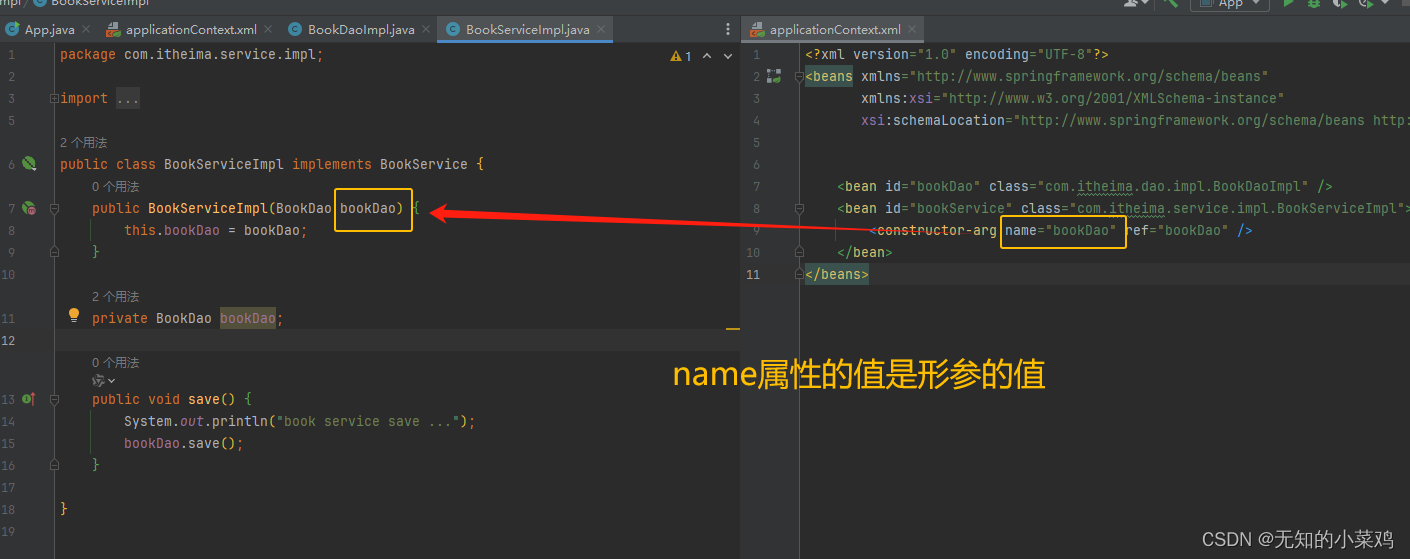
构造器注入------简单类型
BookDaoImpl.java
python
public class BookDaoImpl implements BookDao {
public BookDaoImpl(String databaseName, int num) {
this.databaseName = databaseName;
this.num = num;
}
private String databaseName;
private int num;
public void save() {
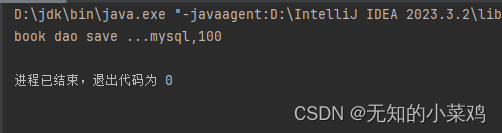
System.out.println("book dao save ..." + databaseName + "," + num);
}
}applicationContext.xml
python
<?xml version="1.0" encoding="UTF-8"?>
<beans xmlns="http://www.springframework.org/schema/beans"
       xmlns:xsi="http://www.w3.org/2001/XMLSchema-instance"
       xsi:schemaLocation="http://www.springframework.org/schema/beans http://www.springframework.org/schema/beans/spring-beans.xsd">


    <bean id="bookDao" class="com.itheima.dao.impl.BookDaoImpl">
        <constructor-arg name="databaseName" value="mysql"/>
        <constructor-arg name="num" value="100"/>
    </bean>
    <bean id="bookService" class="com.itheima.service.impl.BookServiceImpl">
        <constructor-arg name="bookDao" ref="bookDao"/>
    </bean>
</beans>
自动装配
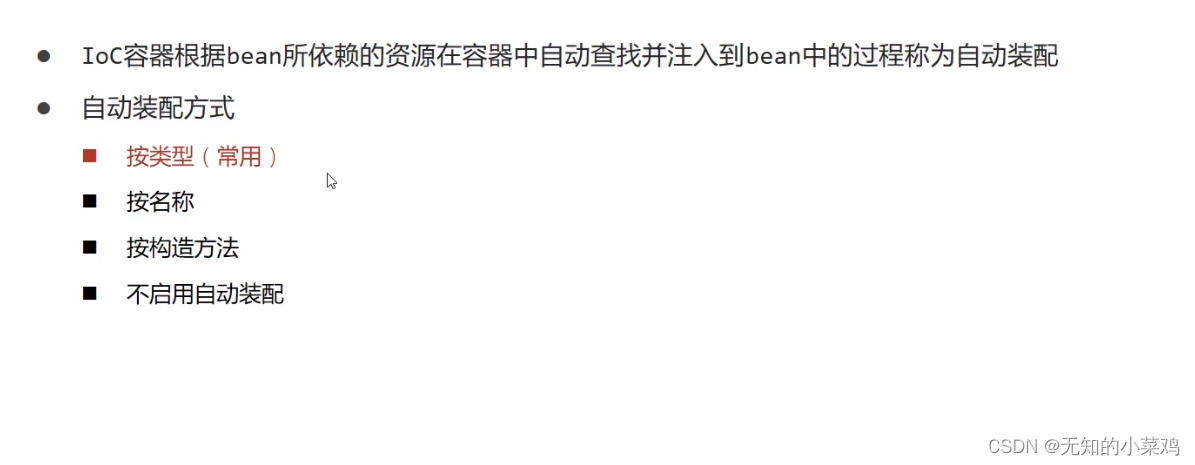
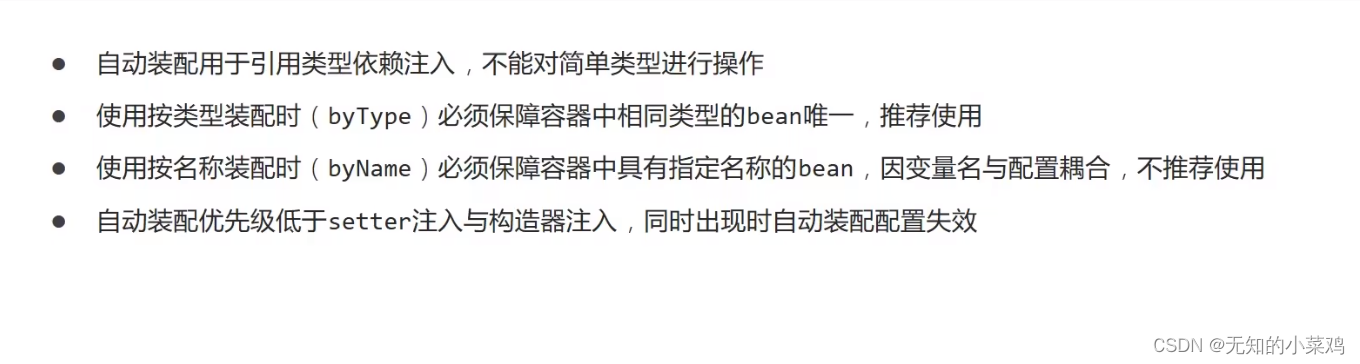
按类型
BookServiceImpl
python
public class BookServiceImpl implements BookService{
    private BookDao bookDao;

    public void setBookDao(BookDao bookDao) {
        this.bookDao = bookDao;
    }

    public void save() {
        System.out.println("book service save ...");
        bookDao.save();
    }
}
applicationContext.xml
python
<?xml version="1.0" encoding="UTF-8"?>
<beans xmlns="http://www.springframework.org/schema/beans"
       xmlns:xsi="http://www.w3.org/2001/XMLSchema-instance"
       xsi:schemaLocation="http://www.springframework.org/schema/beans http://www.springframework.org/schema/beans/spring-beans.xsd">

    <bean class="com.itheima.dao.impl.BookDaoImpl"/>
    <!--autowire属性:开启自动装配,通常使用按类型装配-->
    <bean id="bookService" class="com.itheima.service.impl.BookServiceImpl" autowire="byType"/>

</beans>
使用这种方式:
1、必须提供对应的set方法
2、必须有要装配类的对应的bean配置
python
<bean class="com.itheima.dao.impl.BookDaoImpl"/>3、按类型装配时,对应的bean需要是唯一的
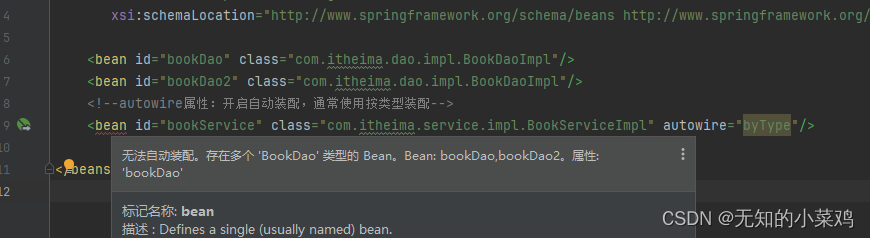
按名称
python
<?xml version="1.0" encoding="UTF-8"?>
<beans xmlns="http://www.springframework.org/schema/beans"
       xmlns:xsi="http://www.w3.org/2001/XMLSchema-instance"
       xsi:schemaLocation="http://www.springframework.org/schema/beans http://www.springframework.org/schema/beans/spring-beans.xsd">

    <bean id="bookDao" class="com.itheima.dao.impl.BookDaoImpl"/>
    <bean id="bookService" class="com.itheima.service.impl.BookServiceImpl" autowire="byName"/>
</beans>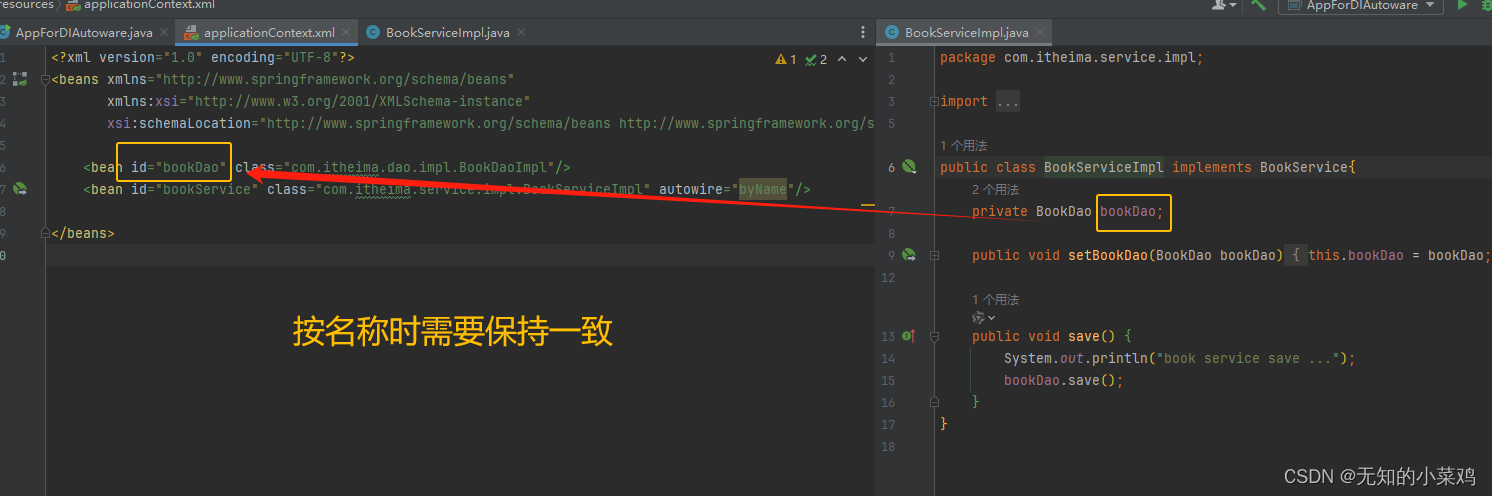
注意点
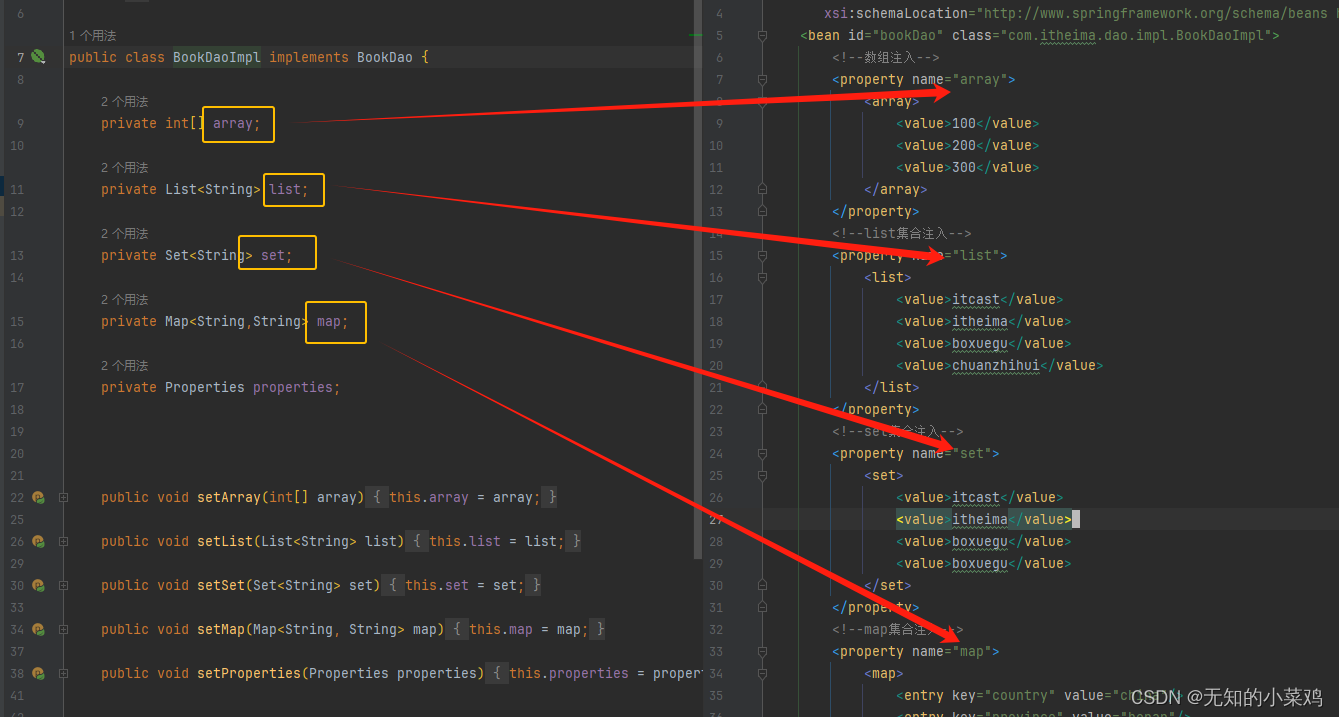
集合注入
BookDaoImpl
python
public class BookDaoImpl implements BookDao {

    private int[] array;

    private List<String> list;

    private Set<String> set;

    private Map<String,String> map;

    private Properties properties;


    public void setArray(int[] array) {
        this.array = array;
    }

    public void setList(List<String> list) {
        this.list = list;
    }

    public void setSet(Set<String> set) {
        this.set = set;
    }

    public void setMap(Map<String, String> map) {
        this.map = map;
    }

    public void setProperties(Properties properties) {
        this.properties = properties;
    }


    public void save() {
        System.out.println("book dao save ...");

        System.out.println("遍历数组:" + Arrays.toString(array));

        System.out.println("遍历List" + list);

        System.out.println("遍历Set" + set);

        System.out.println("遍历Map" + map);

        System.out.println("遍历Properties" + properties);
    }
}
applicationContext.xml
python
<?xml version="1.0" encoding="UTF-8"?>
<beans xmlns="http://www.springframework.org/schema/beans"
       xmlns:xsi="http://www.w3.org/2001/XMLSchema-instance"
       xsi:schemaLocation="http://www.springframework.org/schema/beans http://www.springframework.org/schema/beans/spring-beans.xsd">
    <bean id="bookDao" class="com.itheima.dao.impl.BookDaoImpl">
        <!--数组注入-->
        <property name="array">
            <array>
                <value>100</value>
                <value>200</value>
                <value>300</value>
            </array>
        </property>
        <!--list集合注入-->
        <property name="list">
            <list>
                <value>itcast</value>
                <value>itheima</value>
                <value>boxuegu</value>
                <value>chuanzhihui</value>
            </list>
        </property>
        <!--set集合注入-->
        <property name="set">
            <set>
                <value>itcast</value>
                <value>itheima</value>
                <value>boxuegu</value>
                <value>boxuegu</value>
            </set>
        </property>
        <!--map集合注入-->
        <property name="map">
            <map>
                <entry key="country" value="china"/>
                <entry key="province" value="henan"/>
                <entry key="city" value="kaifeng"/>
            </map>
        </property>
        <!--Properties注入-->
        <property name="properties">
            <props>
                <prop key="country">china</prop>
                <prop key="province">henan</prop>
                <prop key="city">kaifeng</prop>
            </props>
        </property>
    </bean>
</beans>
名称要一一对应
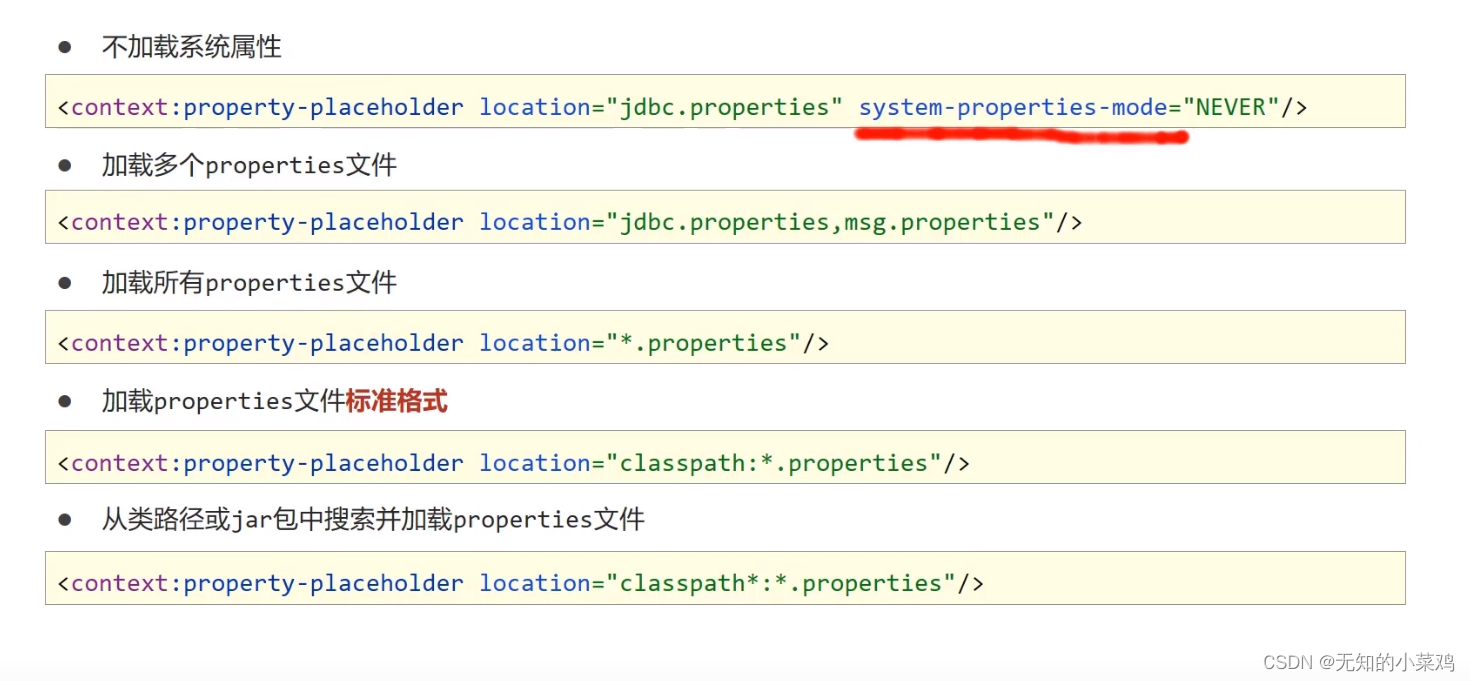
加载properties文件
jdbc.properties
python
jdbc.driver=com.mysql.jdbc.Driver
jdbc.url=jdbc:mysql://127.0.0.1:3306/spring_db
jdbc.username=root
jdbc.password=root
applicationContext.xml
python
<?xml version="1.0" encoding="UTF-8"?>
<beans xmlns="http://www.springframework.org/schema/beans"
       xmlns:xsi="http://www.w3.org/2001/XMLSchema-instance"
       xmlns:context="http://www.springframework.org/schema/context"
       xsi:schemaLocation="
            http://www.springframework.org/schema/beans
            http://www.springframework.org/schema/beans/spring-beans.xsd
            http://www.springframework.org/schema/context
            http://www.springframework.org/schema/context/spring-context.xsd
            ">


    <!--    1.开启context命名空间-->
    <!--    2.使用context空间加载properties文件-->
    <!--classpath*:*.properties  :  设置加载当前工程类路径和当前工程所依赖的所有jar包中的所有properties文件-->
    <context:property-placeholder location="classpath*:*.properties" system-properties-mode="NEVER"/>

    <!--    3.使用属性占位符${}读取properties文件中的属性-->
    <!--    说明:idea自动识别${}加载的属性值,需要手工点击才可以查阅原始书写格式-->
    <bean class="com.alibaba.druid.pool.DruidDataSource">
        <property name="driverClassName" value="${jdbc.driver}"/>
        <property name="url" value="${jdbc.url}"/>
        <property name="username" value="${jdbc.username}"/>
        <property name="password" value="${jdbc.password}"/>
    </bean>
</beans>
加载properties文件