📢 大家好,我是 【战神刘玉栋】,有10多年的研发经验,致力于前后端技术栈的知识沉淀和传播。 💗
🌻 CSDN入驻不久,希望大家多多支持,后续会继续提升文章质量,绝不滥竽充数,欢迎多多交流。👍
文章目录

写在前面的话
本系列博文已连载到第三回,通过前三回博文,我们已完成了前后端基础服务的搭建,也完成后端的完整接口清单,前端还差一些,本篇博文,把前端功能补充完整,让它像那么回事。
本篇博文,还有几个目标要完成:
- 回顾一下之前三篇文章,将一些知识点补充一下;
- 针对需求内容,把前端服务的CURD功能丰富起来;
- 对部分前端细节不到位的地方进行修复,同时分享相关经验;
加油,程序猿,保持住Tempo,开干,玩的就是真实!
关联文章:
《程序猿入职必会(1) · 搭建拥有数据交互的 SpringBoot 》
《程序猿入职必会(2) · 搭建具备前端展示效果的 Vue》
《程序猿入职必会(3) · SpringBoot 各层功能完善 》
《程序猿入职必会(4) · Vue 完成 CURD 案例 》
《程序猿入职必会(5) · CURD 页面细节规范 》
《程序猿入职必会(6) · 返回结果统一封装》
教师信息管理 CURD
Tips:一直说CURD、CURD的,行业内的默认术语,如果有小伙伴不知道这是什么,那大概是代表创建(Create)、更新(Update)、读取(Read)和删除(Delete)操作的集合,可以指代某个实体表对应的维护页面,也是程序猿最基础的拧螺丝工作。
前文回顾
先回顾一下之前第二篇的结尾,我们引入 ElementUI 后,实现的效果如下。
效果还可以,不过只是功能的冰山一角。

不对,登记时间怎么是这个鬼样子?先给它修正,不然很别扭。
日期格式化
实现日期格式化可以后端来,也可以前端。
后端实现效果
Step1、引入 fastjson 依赖
xml
<fastjson.version>2.0.33</fastjson.version>

<!-- JSON处理 -->
<dependency>
    <groupId>com.alibaba</groupId>
    <artifactId>fastjson</artifactId>
    <version>${fastjson.version}</version>
</dependency>
Step2、实体类添加注释
java
@JSONField(format = "yyyy-MM-dd HH:mm")
private java.util.Date createdTime;
Step3、前端正常展示
vue
<span>{{ scope.row.createdTime}}</span>效果如下:
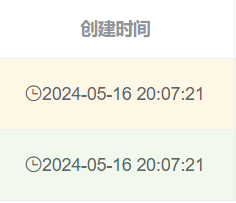
前端实现效果
使用vue的管道符实现,代码如下:
vue
<span>{{ scope.row.createdTime | timeFilter}}</span>

timeFilter(time) {
  // 这边将字符串进行日期转换
}
前端代码生成
这里先使用代码生成器生成教师实体对应的前端基础页面和接口,不然一个个写是挺耗时的,也比较基础。
企业实际开发中,这部分代码通常也是代码生成或者CV其他代码,再进行调整。
先来一段完整的Vue:
vue
<template>
  <div class="app-container">

    <!-- 表头 查询与新增 -->
    <el-row>
      <el-col :span="24">
        <div class="filter-container">
          <el-input placeholder="关键词过滤" v-model="listQuery.query" style="width: 200px;" class="filter-item"
                    @keyup.enter.native="handleFilter"
          />
          <el-select v-model="listQuery.validFlag" placeholder="有效标志" clearable class="filter-item" style="width: 150px"
                     @change="handleFilter"
          >
            <el-option v-for="(value, key) in statusOptions" :key="key" :label="value" :value="key"/>
          </el-select>
          <el-button v-waves class="filter-item" type="primary" icon="el-icon-search" @click="handleFilter">搜索
          </el-button>
          <el-button class="filter-item" style="margin-left: 10px;" type="primary" icon="el-icon-circle-plus-outline"
                     @click="handleCreate"
          >新增
          </el-button>
        </div>
      </el-col>
    </el-row>

    <!-- 表格list -->
    <el-row>
      <el-col :span="24" :gutter="24">
        <el-table
          :row-class-name="rowClassName"
          v-loading="listLoading"
          :key="tableKey"
          :data="list"
          element-loading-text="Loading"
          border
          fit
          :height="tableHeight"
          style="width: 100%;"
          highlight-current-row
        >
          <el-table-column align="center" label="序号" width="80">
            <template slot-scope="scope">
              {{ scope.$index }}
            </template>
          </el-table-column>
          <el-table-column show-overflow-tooltip label="教师编号" show-overflow-tooltip min-width="10%" align="center">
            <template slot-scope="scope">
              {{ scope.row.teaCode }}
            </template>
          </el-table-column>
          <el-table-column show-overflow-tooltip label="教师名称" show-overflow-tooltip min-width="10%" align="center">
            <template slot-scope="scope">
              {{ scope.row.teaName }}
            </template>
          </el-table-column>
          <el-table-column show-overflow-tooltip label="教师头像" show-overflow-tooltip min-width="10%" align="center">
            <template slot-scope="scope">
              {{ scope.row.teaImg }}
            </template>
          </el-table-column>
          <el-table-column show-overflow-tooltip label="教师电话" show-overflow-tooltip min-width="10%" align="center">
            <template slot-scope="scope">
              {{ scope.row.teaPhone }}
            </template>
          </el-table-column>
          <el-table-column show-overflow-tooltip label="教师学科" show-overflow-tooltip min-width="10%" align="center">
            <template slot-scope="scope">
              {{ scope.row.stuItem }}
            </template>
          </el-table-column>
          <el-table-column show-overflow-tooltip label="教师身份" show-overflow-tooltip min-width="10%" align="center">
            <template slot-scope="scope">
              {{ scope.row.teaType }}
            </template>
          </el-table-column>
          <el-table-column show-overflow-tooltip label="教师配置" show-overflow-tooltip min-width="10%" align="center">
            <template slot-scope="scope">
              {{ scope.row.teaConfig }}
            </template>
          </el-table-column>
          <el-table-column show-overflow-tooltip label="排序号" show-overflow-tooltip min-width="10%" align="center">
            <template slot-scope="scope">
              {{ scope.row.sortNo }}
            </template>
          </el-table-column>
          <el-table-column show-overflow-tooltip class-name="status-col" label="创建时间" min-width="20%" align="center">
            <template slot-scope="scope">
              <i class="el-icon-time"/>
              <span>{{ scope.row.createdTime }}</span>
            </template>
          </el-table-column>
          <el-table-column show-overflow-tooltip class-name="status-col" label="修改时间" min-width="20%" align="center">
            <template slot-scope="scope">
              <i class="el-icon-time"/>
              <span>{{ scope.row.modifiedTime }}</span>
            </template>
          </el-table-column>
          <el-table-column show-overflow-tooltip class-name="status-col" label="有效标志" min-width="10%" align="center">
            <template slot-scope="scope">
              <el-tag :type="scope.row.validFlag | statusFilter">{{ scope.row.validFlag | validFilter }}</el-tag>
            </template>
          </el-table-column>
          <el-table-column label="操作" align="center" width="180" class-name="small-padding fixed-width">
            <template slot-scope="scope">
              <el-button size="mini" type="primary" @click="handleUpdate(scope.row)">
                编辑
              </el-button>
              <el-button size="mini" type="danger" @click="handleDelete(scope.row)">
                删除
              </el-button>
            </template>
          </el-table-column>
        </el-table>
      </el-col>
    </el-row>

    <!-- 分页控件 -->
    <pagination v-show="total>0" :total="total"
                :page.sync="listQuery.pageNum"
                :limit.sync="listQuery.pageSize"
                layout="total, sizes, prev, pager, next"
                style="float:right;"
                @pagination="fetchData"
    />

    <!-- 编辑弹窗 -->
    <el-dialog
      :close-on-click-modal="false"
      :title="textMap[dialogStatus]"
      :visible.sync="dialogFormVisible"
    >
      <el-form
        ref="dataForm"
        :rules="rules"
        :model="temp"
        label-position="right"
        label-width="100px"
        style=""
      >
        <el-row :gutter="20">
          <el-col :span="12">
            <el-form-item label="教师编号" label-width="105px" prop="teaCode">
              <el-input v-model="temp.teaCode" :disabled="dialogStatus === 'update'"/>
            </el-form-item>
          </el-col>
        </el-row>
        <el-row :gutter="20">
          <el-col :span="12">
            <el-form-item label="教师名称" label-width="105px" prop="teaName">
              <el-input v-model="temp.teaName"/>
            </el-form-item>
          </el-col>
          <el-col :span="12">
            <el-form-item label="教师头像" label-width="105px" prop="teaImg">
              <el-input v-model="temp.teaImg"/>
            </el-form-item>
          </el-col>
        </el-row>
        <el-row :gutter="20">
          <el-col :span="12">
            <el-form-item label="教师电话" label-width="105px" prop="teaPhone">
              <el-input v-model="temp.teaPhone"/>
            </el-form-item>
          </el-col>
          <el-col :span="12">
            <el-form-item label="教师学科" label-width="105px" prop="stuItem">
              <el-input v-model="temp.stuItem"/>
            </el-form-item>
          </el-col>
        </el-row>
        <el-row :gutter="20">
          <el-col :span="12">
            <el-form-item label="教师身份" label-width="105px" prop="teaType">
              <el-input v-model="temp.teaType"/>
            </el-form-item>
          </el-col>
          <el-col :span="12">
            <el-form-item label="教师配置" label-width="105px" prop="teaConfig">
              <el-input v-model="temp.teaConfig"/>
            </el-form-item>
          </el-col>
        </el-row>
        <el-row :gutter="20">
          <el-col :span="12">
            <el-form-item label="排序号" label-width="105px" prop="sortNo">
              <el-input v-model.number="temp.sortNo"/>
            </el-form-item>
          </el-col>
          <el-col :span="12">
          </el-col>
        </el-row>
        <el-row :gutter="20">
          <el-col :span="12">
          </el-col>
          <el-col :span="12">
            <el-form-item label="有效标志" label-width="105px">
              <el-switch
                v-model="validSwitch"
                active-color="#13ce66"
                inactive-color="#ff4949"
              >
              </el-switch>
            </el-form-item>
          </el-col>
        </el-row>
      </el-form>
      <div slot="footer" class="dialog-footer">
        <el-button type="primary" @click="dialogStatus==='create'?createData():updateData()">确认</el-button>
        <el-button @click="dialogFormVisible = false">取消</el-button>
      </div>
    </el-dialog>

  </div>
</template>

<script>
import ZyTeacherInfoApi from '@/api/study/ZyTeacherInfoApi'
import waves from '@/directive/waves' // Waves directive
import Pagination from '@/components/Pagination' // Secondary package based on el-pagination
export default {
  directives: { waves },
  components: { Pagination },
  filters: {
    statusFilter(status) {
      const statusMap = {
        1: 'success',
        2: 'blue',
        3: 'warning',
        4: 'info',
        0: 'danger'
      }
      return statusMap[status]
    },
    commonFilter(status, data) {
      if (status) {
        return data[status].text || data[status]
      } else {
        return ''
      }
    },
    validFilter(status) {
      const statusMap = {
        1: '有效',
        0: '作废'
      }
      return statusMap[status]
    },
    timeFilter(time) {
      if (time) {
        return new Date(time).Format('yyyy-MM-dd hh:mm:ss')
      } else {
        return ''
      }
    }
  },
  data() {
    return {
      tableKey: 0,//表格key值
      list: null, //表格对象
      listLoading: true, //表格加载框
      total: 0, //分页总数
      tableHeight: window.innerHeight - 220, //表格高度
      listQuery: { //表格查询对象
        pageNum: 1,
        pageSize: 10,
        query: '',
        validFlag: undefined,
        teaCode: ''
      },
      temp: {}, //编辑框临时变量
      statusOptions: { //有效无效下拉框
        '1': '有效',
        '0': '作废'
      },
      dialogFormVisible: false, //编辑框显示
      dialogStatus: '', //编辑框更新插入状态
      textMap: { //编辑框标题
        update: '编辑',
        create: '创建'
      },
      rules: { //编辑框校验规则
        teaCode: [{ required: true, message: '请输入教师编号', trigger: 'change' }],
        teaName: [{ required: true, message: '请输入教师名称', trigger: 'change' }],
        teaImg: [{ required: true, message: '请输入教师头像', trigger: 'change' }],
        teaPhone: [{ required: true, message: '请输入教师电话', trigger: 'change' }],
        stuItem: [{ required: true, message: '请输入教师学科', trigger: 'change' }],
        teaType: [{ required: true, message: '请输入教师身份', trigger: 'change' }],
        teaConfig: [{ required: true, message: '请输入教师配置', trigger: 'change' }],
        sortNo: [
          {
            type: 'number', required: false, message: '排序号必须为整数值', transform(value) {
              if (value === '' || value === null) {
                return 0
              }
              if (_.isInteger(value)) {
                return value
              } else {
                return false
              }
            }
          }
        ],
        validFlag: [{ required: true, message: '请输入有效标志', trigger: 'change' }]
      }
    }
  },
  computed: {
    validSwitch: {
      // getter
      get: function() {
        return this.temp.validFlag === '1'
      },
      // setter
      set: function(newValue) {
        if (newValue) {
          this.temp.validFlag = '1'
        } else {
          this.temp.validFlag = '0'
        }
      }
    }
  },
  created() {
    this.fetchData()
  },
  methods: {
    /**
     * 获取表格数据
     */
    fetchData() {
      let that = this
      this.listLoading = true
      this.$http.all([ZyTeacherInfoApi.getPage(this.listQuery)])
        .then(this.$http.spread(function(perms) {
          that.list = perms.rows
          that.total = perms.total
          that.listLoading = false
        }))
    },
    /**
     * 新增弹窗
     */
    handleCreate() {
      this.resetTemp()
      this.dialogStatus = 'create'
      this.dialogFormVisible = true
      this.$nextTick(() => {
        this.$refs['dataForm'].clearValidate()
      })
    },
    /**
     * 清空弹窗内容
     */
    resetTemp() {
      this.temp = {
        teaCode: '',
        teaName: '',
        teaImg: '',
        teaPhone: '',
        stuItem: '',
        teaType: '',
        teaConfig: '',
        sortNo: '',
        createdTime: '',
        modifiedTime: '',
        validFlag: '1'
      }
    },
    /**
     * 确定新增
     */
    createData() {
      let that = this
      this.$refs['dataForm'].validate((valid) => {
        if (valid) {
          ZyTeacherInfoApi.insert(this.temp).then(() => {
            this.dialogFormVisible = false
            this.$notify({
              title: '成功',
              message: '创建成功',
              type: 'success',
              duration: 1000,
              onClose() {
                that.fetchData()
              }
            })
          })
        }
      })
    },
    /**
     * 编辑弹窗
     */
    handleUpdate(row) {
      this.temp = Object.assign({}, row)
      this.dialogStatus = 'update'
      this.dialogFormVisible = true
      this.$nextTick(() => {
        this.$refs['dataForm'].clearValidate()
      })
    },
    /**
     * 确认编辑
     */
    updateData() {
      let that = this
      this.$refs['dataForm'].validate((valid) => {
        if (valid) {
          const tempData = Object.assign({}, this.temp)
          ZyTeacherInfoApi.update(tempData).then(() => {
            this.dialogFormVisible = false
            this.$notify({
              title: '成功',
              message: '更新成功',
              type: 'success',
              duration: 1000,
              onClose() {
                that.fetchData()
              }
            })
          })
        }
      })
    },
    /**
     * 删除操作
     */
    handleDelete(row) {
      let that = this
      ZyTeacherInfoApi.remove({ teaCode: row.teaCode }).then(() => {
        this.$notify({
          title: '成功',
          message: '删除成功',
          type: 'success',
          duration: 1000,
          onClose() {
            that.fetchData()
          }
        })
      })
    },
    /**
     * 搜索过滤
     */
    handleFilter() {
      this.listQuery.pageNum = 1
      this.fetchData()
    },

    rowClassName({ rowIndex }) {
      return rowIndex % 2 === 0 ? 'warning-row' : 'success-row'
    }
  }
}
</script>

<style>
.el-table .warning-row {
  background-color: #fff7e6;
}

.el-table .success-row {
  background-color: #f0f9eb;
}
</style>
再来一段完整的api:
javascript
import request from '@/utils/request'

export default {
  getList(params) {
    return request({
      url: '/zyTeacherInfo/', method: 'get', params
    })
  },

  get(params) {
    return request({
      url: '/zyTeacherInfo/' + params.teaCode, method: 'get', params
    })
  },

  getPage(params) {
    return request({
      url: '/zyTeacherInfo/page', method: 'get', params
    })
  },

  update(params) {
    return request({
      url: '/zyTeacherInfo/update', method: 'post', params
    })
  },

  insert(params) {
    return request({
      url: '/zyTeacherInfo/insert', method: 'post', params
    })
  },

  remove(params) {
    return request({
      url: '/zyTeacherInfo/delete', method: 'post', params
    })
  }
}
接着配一下路由,router.js
Tips:路由前面可能还没介绍,后续专题介绍。
javascript
{
  path: '/tea', component: () => import('@/views/study/ZyTeacherInfoManage'), hidden: true
},
最后,看一下效果,有那么回事吧。
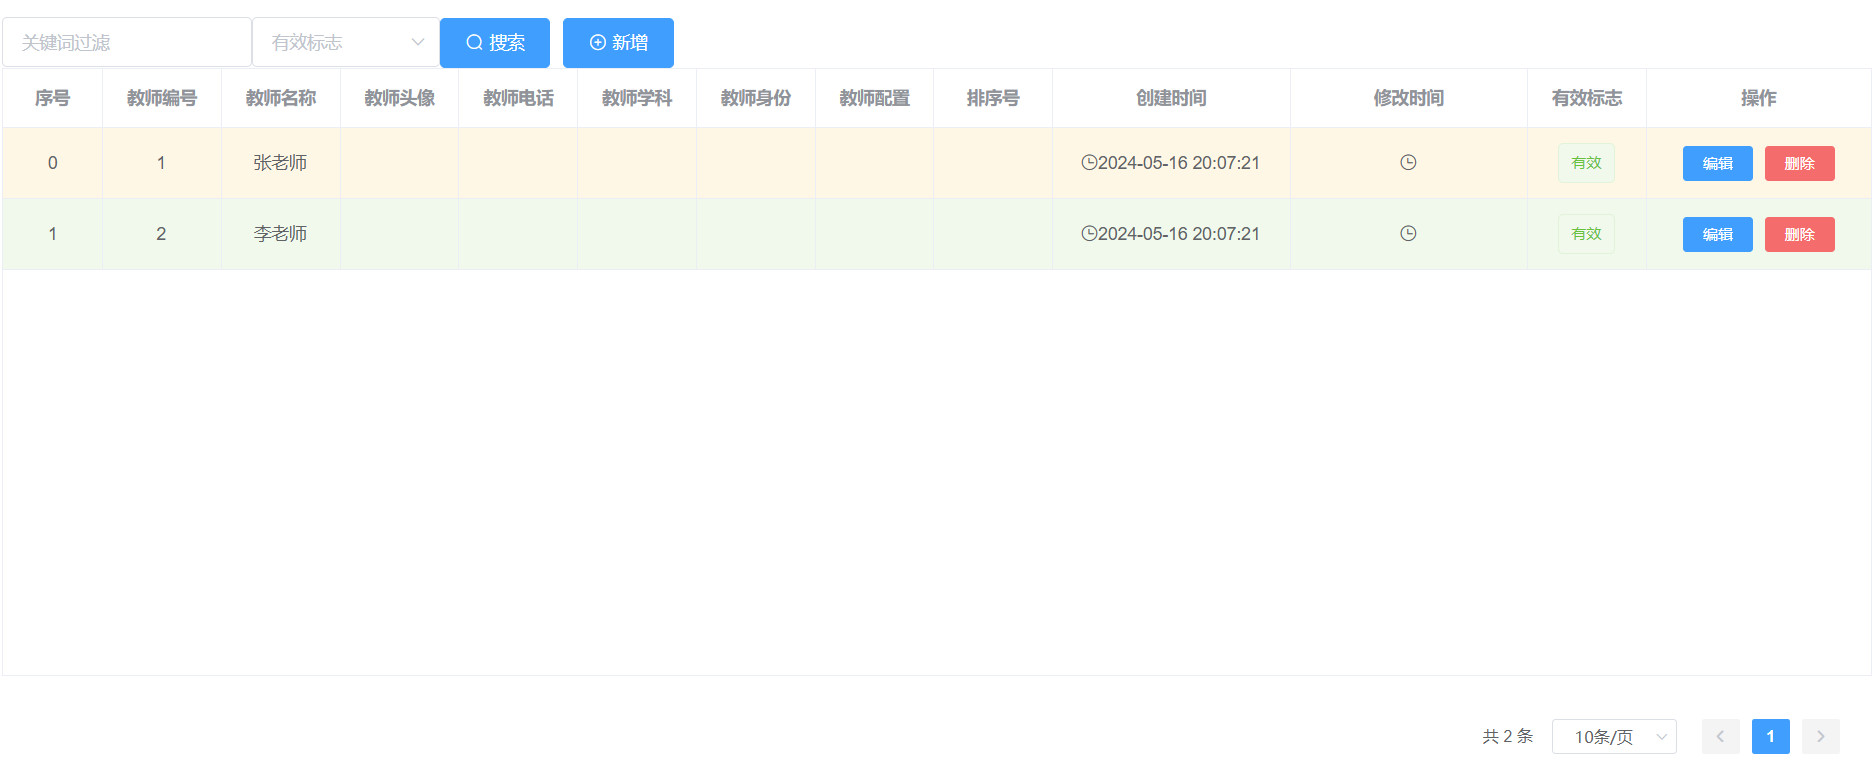
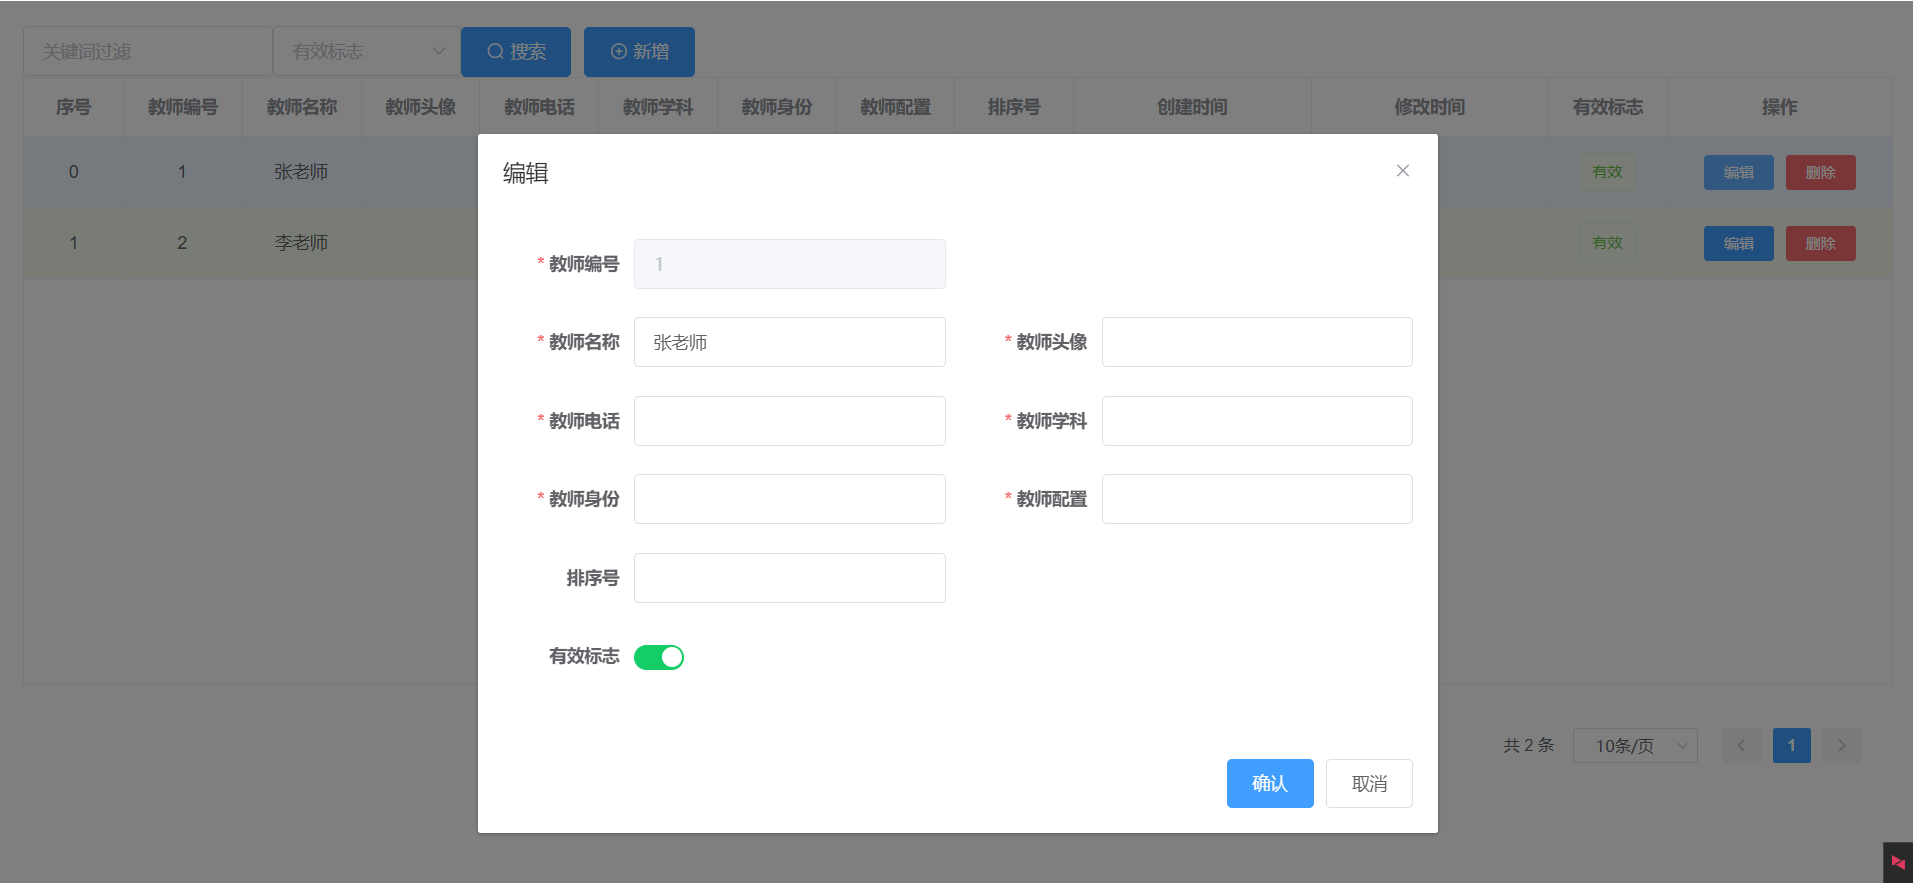
操作一下增删改查,基本功能都正常,你敢相信,使用一套合适的代码生成器,仅仅几分钟就可以实现一个CURD功能。
代码修修补补
虽然功能全部正常,但是要拿去交差还是要完善一些。
【查询页面调整】
首先,表格页面代码生成的是全部字段,先把不重要的字段去掉,效果如下: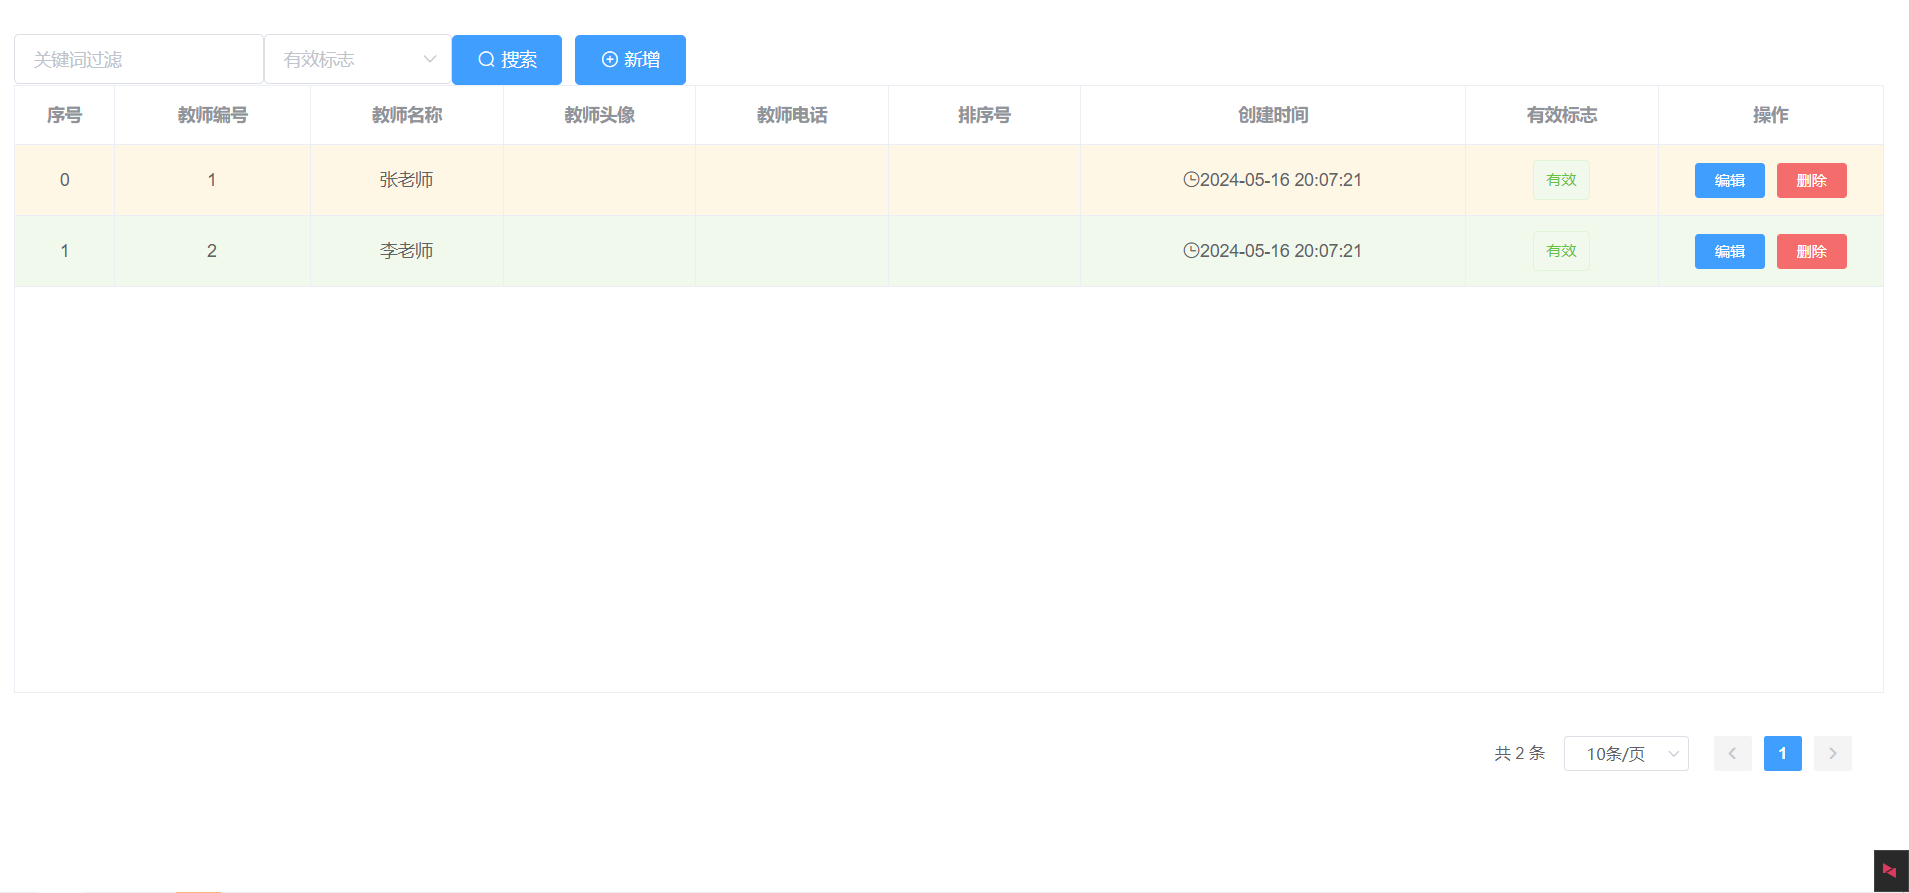
表单元素太紧凑了,加一点间距,上一篇文章刚介绍了《企业实战分享 · CodeGeeX 初体验》,给它一个机会,练练手,如下所示:
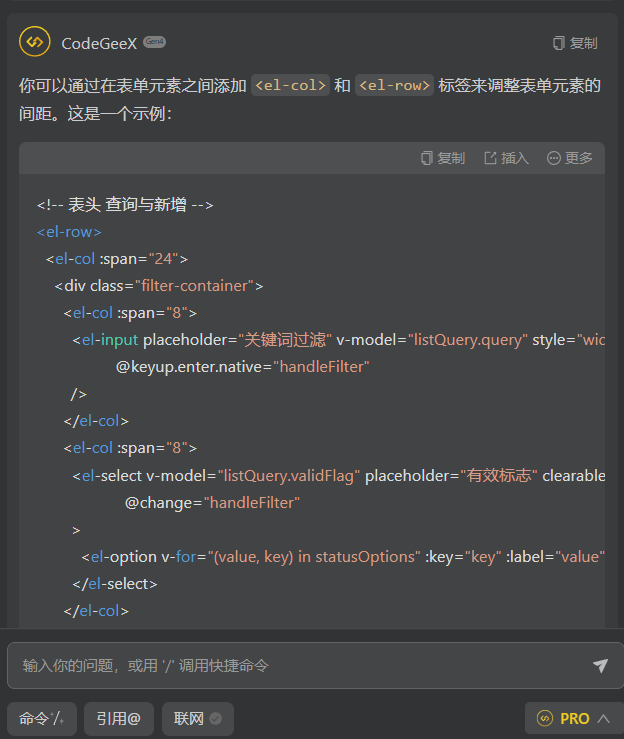
生成很快,试试,效果如下图:

啧啧,什么鬼,没理解我意图,直接用 span 拆开间距了,也可能我没说清楚。
那给ChatGpt一个机会:
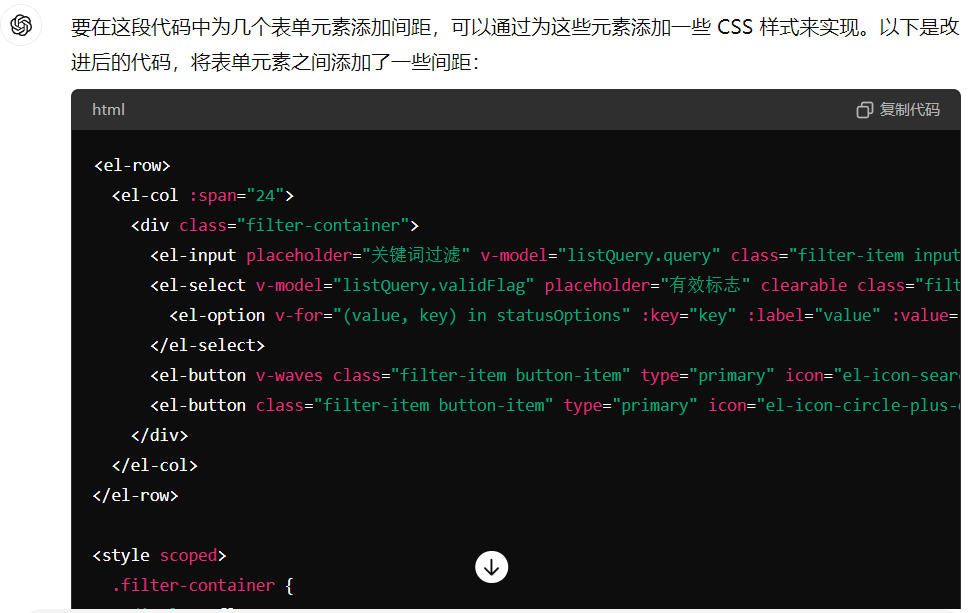
效果如下图,好像还不错,就这样吧。

【分页查询功能】
代码生成器是没办法那么智能知道你想用哪些字段作为搜索条件,当然生成的时候,给字段添加一些额外标识就另说,但感觉这样效率更低,还不如生成之后再来调整。
这边设计代码生成器的时候,固定保留了一个模糊搜索框和有效标志下拉框,可以覆盖大部分场景的最小需要。
看一下对应前端代码:
1、前端定义listQuery对象代表查询入参,传递query和validFlag两个属性,点击搜索触发handleFilter逻辑。
2、触发的JS逻辑,其实就是利用基于axios封装的请求工具,异步请求相关接口获取分页数据。
Tips:关于前端请求后端的工具封装,后续专栏介绍。
vue
<el-input placeholder="关键词过滤" v-model="listQuery.query" class="filter-item input-item"
          @keyup.enter.native="handleFilter"
/>
<el-select v-model="listQuery.validFlag" placeholder="有效标志" clearable class="filter-item select-item"
           @change="handleFilter">
  <el-option v-for="(value, key) in statusOptions" :key="key" :label="value" :value="key"/>
</el-select>
<el-button v-waves class="filter-item button-item" type="primary" icon="el-icon-search" @click="handleFilter">
  搜索
</el-button>
javascript
/**
 * 搜索过滤
 */
handleFilter() {
  this.listQuery.pageNum = 1
  this.fetchData()
},

/**
 * 获取表格数据
 */
fetchData() {
  let that = this
  this.listLoading = true
  this.$http.all([ZyTeacherInfoApi.getPage(this.listQuery)])
    .then(this.$http.spread(function(perms) {
      that.list = perms.rows
      that.total = perms.total
      that.listLoading = false
    }))
},
再看看后端代码:
1、这边是借助PageHelper插件,轻松实现分页效果;
2、第二段是XML里面的SQL写法,参考一下即可,根据query模糊搜索,根据validFlag是精确查询;
java
@Service
public class ZyTeacherInfoService extends CrudService<ZyTeacherInfo, ZyTeacherInfoMapper> {

    /**
     * 获取用户分页列表
     *
     * @param query    搜索关键词
     * @param pageInfo 分页实体
     * @param zyTeacherInfo 实体入参
     * @return 用户列表
     */
    public PageInfo<ZyTeacherInfo> findListPage(String query, PageInfo pageInfo, ZyTeacherInfo zyTeacherInfo) {
        PageHelper.startPage(pageInfo);
        List<ZyTeacherInfo> zyTeacherInfolist = this.dao.findListPage(query, zyTeacherInfo);
        return new PageInfo<>(zyTeacherInfolist);
    }
}

@Mapper
public interface ZyTeacherInfoMapper extends BaseMapper<ZyTeacherInfo> {

    /**
     * 分页获取教师信息表列表
     *
     * @param query 搜索关键词
     * @param zyTeacherInfo 查询实体
     * @return 用户列表
     */
    List<ZyTeacherInfo> findListPage(@Param("query") String query, @Param("model") ZyTeacherInfo zyTeacherInfo);
}
xml
<!-- 分页查询教师信息表列表 -->
<select id="findListPage" resultType="zyTeacherInfo">
    select
    t.*
    from
    zy_teacher_info t
    where 1=1
    <if test="query != null and query != ''">
        AND (INSTR(t.TEA_NAME , #{query})>0 OR t.TEA_CODE = #{query})
    </if>
    <if test="model.validFlag != null and model.validFlag != ''">
        and t.VALID_FLAG = #{model.validFlag}
    </if>
</select>
【关于增删改】
这部分属于基操,前面示例都能看懂,这边以更新为例简单说明。
前端:
1、填写完表单信息,触发updateData函数,先针对表单信息做一个校验(参考ElementUI);
2、触发 ZyTeacherInfoApi 接口,该接口也是利用 Axios,触发 Post 请求,调用后端;
javascript
updateData() {
  let that = this
  this.$refs['dataForm'].validate((valid) => {
    if (valid) {
      const tempData = Object.assign({}, this.temp)
      ZyTeacherInfoApi.update(tempData).then(() => {
        this.dialogFormVisible = false
        this.$notify({
          title: '成功',
          message: '更新成功',
          type: 'success',
          duration: 1000,
          onClose() {
            that.fetchData()
          }
        })
      })
    }
  })
},

update(params) {
  return request({
    url: '/zyTeacherInfo/update', method: 'post', params
  })
},
后端:好像没什么特别的,就是正常的 MyBatis - Update,搞定!
前端知识拓展
图形化方式创建 Vue
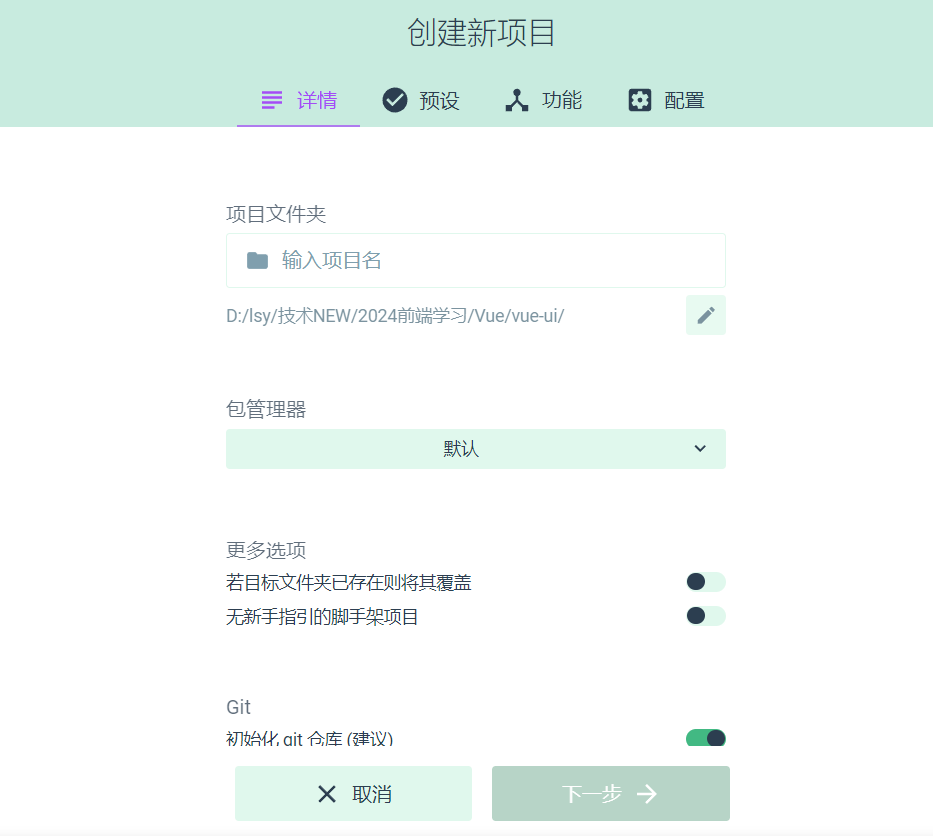
在这篇博文《程序猿学会 Vue · 基础与实战篇》中,介绍创建Vue项目的多种方式,漏介绍了一种图形化。
命令行输入:vue ui
会自动打开一个图形化页面,如下图,按步骤傻瓜式操作即可。
Tips:好像也没有什么特别的,不详细介绍。
Tips:SpringBoot也有类似界面,总之就是越来越简单了,怎么傻瓜怎么来。
整合路由 Vue-Router
【安装使用】
Step1、安装路由
npm install vue-router
Step2、编写路由配置文件,/router/index.js
javascript
import {createRouter, createWebHashHistory} from 'vue-router'
import HomeView from '../views/Home.vue'

const routes = [{
    path: '/home', name: 'home', component: HomeView
}, {
    path: '/about', name: 'about', component: () => import('../views/About.vue')
}]

const router = createRouter({
    history: createWebHashHistory(), routes
})

export default router
Step3、引入上述 JS,在 main.js 操作
javascript
// 引入路由
import router from './router/index.js'
app.use(router)
Step4、效果使用
App.vue 页面在合适地方添加:
地址栏输入/home或/about,内容会随之变化。
总结陈词
本系列博文更新到第四篇了,基本实现了教师的CURD功能。
接下来几篇博文将针对其中涉及的几个框架封装知识点进行专题说明。
总之,目标是帮助初入职场的大家,快速适应企业开发,多一些机会。
💗 如果觉得内容还可以,麻烦点个关注不迷路,您的鼓励是我创作的动力。
