VS2019 新建项目里没有CUDA选项

问题

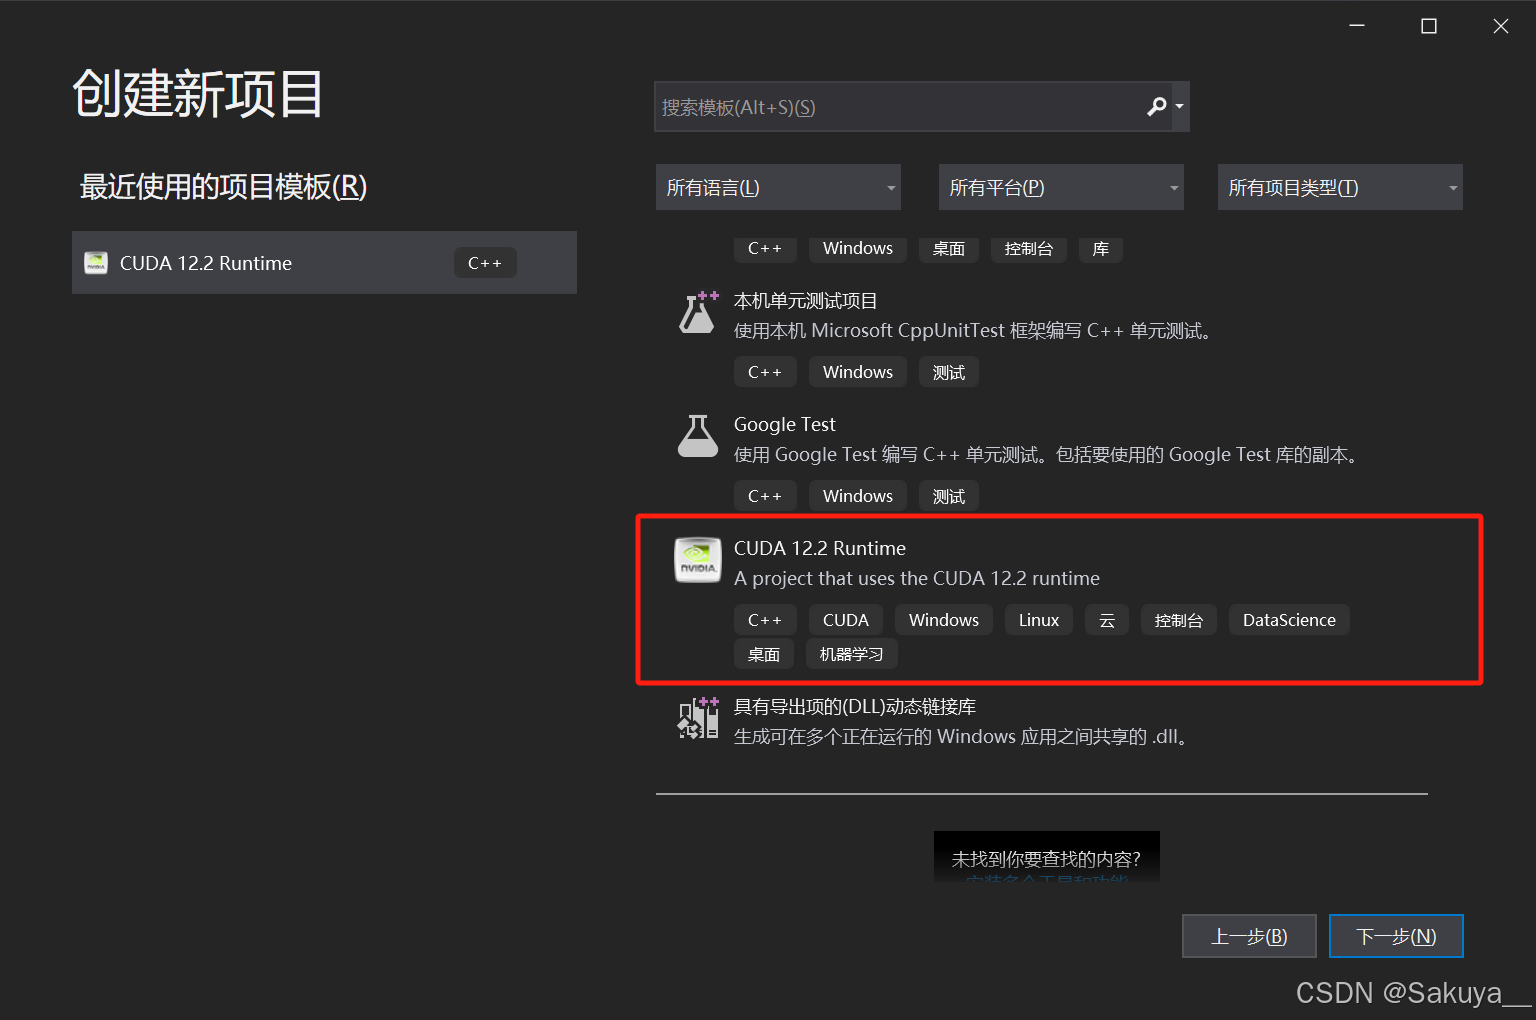
在Visual Studio 2019安装之前,先安装了CUDA Toolkit。在使用Visual Studio 2019创建新项目的时候,发现新建项目里没有CUDA的选项。

这时候有两种办法,一种是把CUDA Toolkit卸载重装,重装的时候,CUDA会自己在Visual Studio中安装扩展。如果不想卸载重装的话,可以使用下面这种第二种方法。


1.进入路径

首先进入到你的Visual Studio 2019的安装路径下的 D:\Program Files (x86)\Microsoft Visual Studio\2019\Professional\Common7\IDE\Extensions(这个路径根据你的个人情况而定,是到你安装VS的目录)。

2.新建目录

创建新的文件夹 NVIDIA->CUDA 12.2 Wizards->12.2。

3.复制文件

找到CUDA Toolkit的安装路径(这个路径根据你的个人情况而定)C:\ProgramData\NVIDIA GPU Computing Toolkit\v12.2\extras\visual_studio_integration\CudaProjectVsWizards

进入16的文件夹,16是Visual Studio 2019的内部代号,17是Visual Studio 2022。

把该文件夹下的所有文件和文件夹拷贝到上一步我们创建的NVIDIA->CUDA 12.2 Wizards->12.2目录下。

4.运行命令

打开 Visual Studio 2017 的开发者命令控制台,然后以管理员权限运行命令:

devenv.com /setup /nosetupvstemplates

5.重启Visual Studio 2019

这样在新建工程的时候就可以看到CUDA工程模板出现了。
相关推荐
fpcc2 天前
并行编程实战—CUDA中的Tile编程之八优化提示
cuda·1024程序员节·并行编程
本地化文档2 天前
cutile-rs-book-l10n
rust·gpu·nvidia·cuda·sphinx·crowdin
Web3&Basketball4 天前
TorchTPU 迁移实战:3 个 CUDA 卡点
pytorch·性能调优·cuda·tpu·模型迁移·torchtpu
燃烧的枫7 天前
Windows 下 YOLO26 的 TensorRT C++ 部署
人工智能·pytorch·windows·计算机视觉·tensorrt·cuda·yolo26
_nibel7 天前
第五章:其余页面与全篇收束 ⭐教你读懂 Nsight Compute 报告 系列合集⭐
cuda·ncu·nsight compute
_nibel8 天前
第四章:Source 细读 ⭐教你读懂 Nsight Compute 报告 系列合集⭐
cuda·ncu·nsight compute
fleaxin9 天前
国产 AI 卡推理引擎工程对标调研(C++ CUDA + TensorRT → 国产栈)
gpu·信创·cuda
智码看视界10 天前
深度学习:环境搭建PyTorch vs TensorFlow 选型
pytorch·深度学习·tensorflow·gpu·环境搭建·cuda·框架选型
Zip-List10 天前
工作小记-pytorch的算子优化: 转gpu核函数 python调c
c语言·c++·pytorch·python·cuda
_nibel11 天前
第三章:Details 剩余数据补读 ⭐教你读懂 Nsight Compute 报告 系列合集⭐
cuda·ncu·nsight compute