一、注册zoom 账号、以便在zoom app maketplace创建app。
二、安装git、node.js、vscode开发环境(略)。
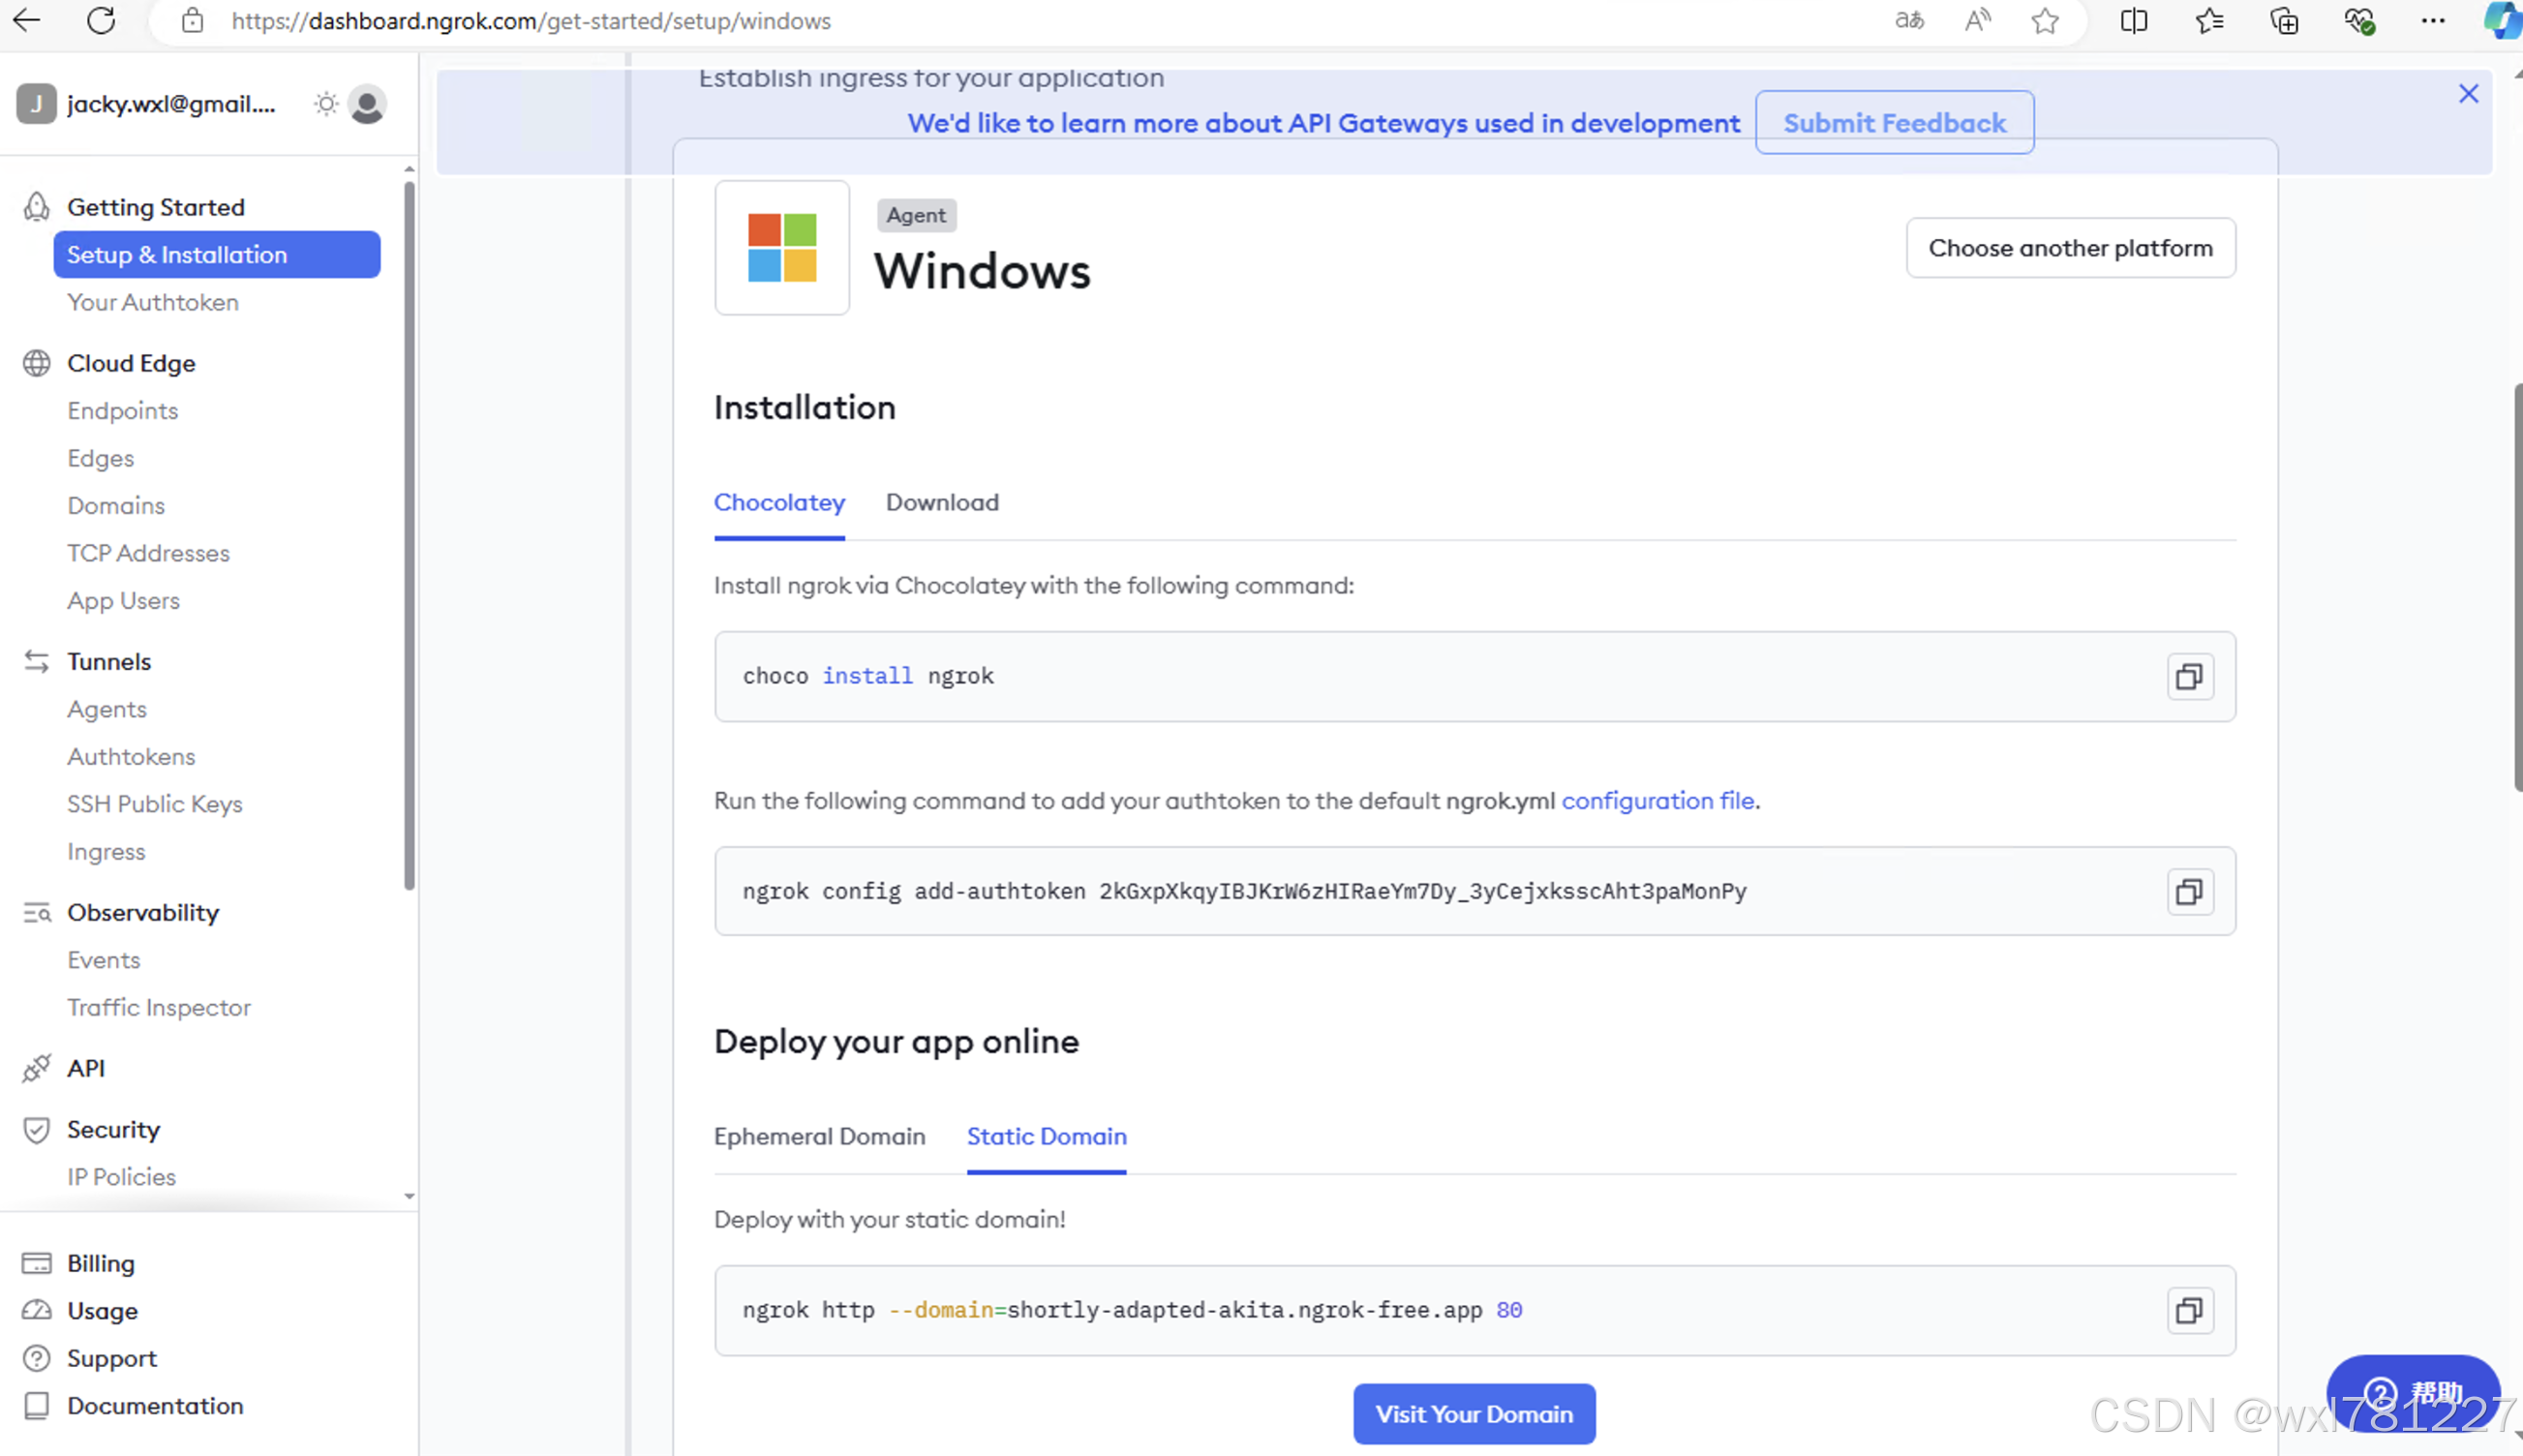
三、注册ngrok账号,获得一个免费的https静态域名。
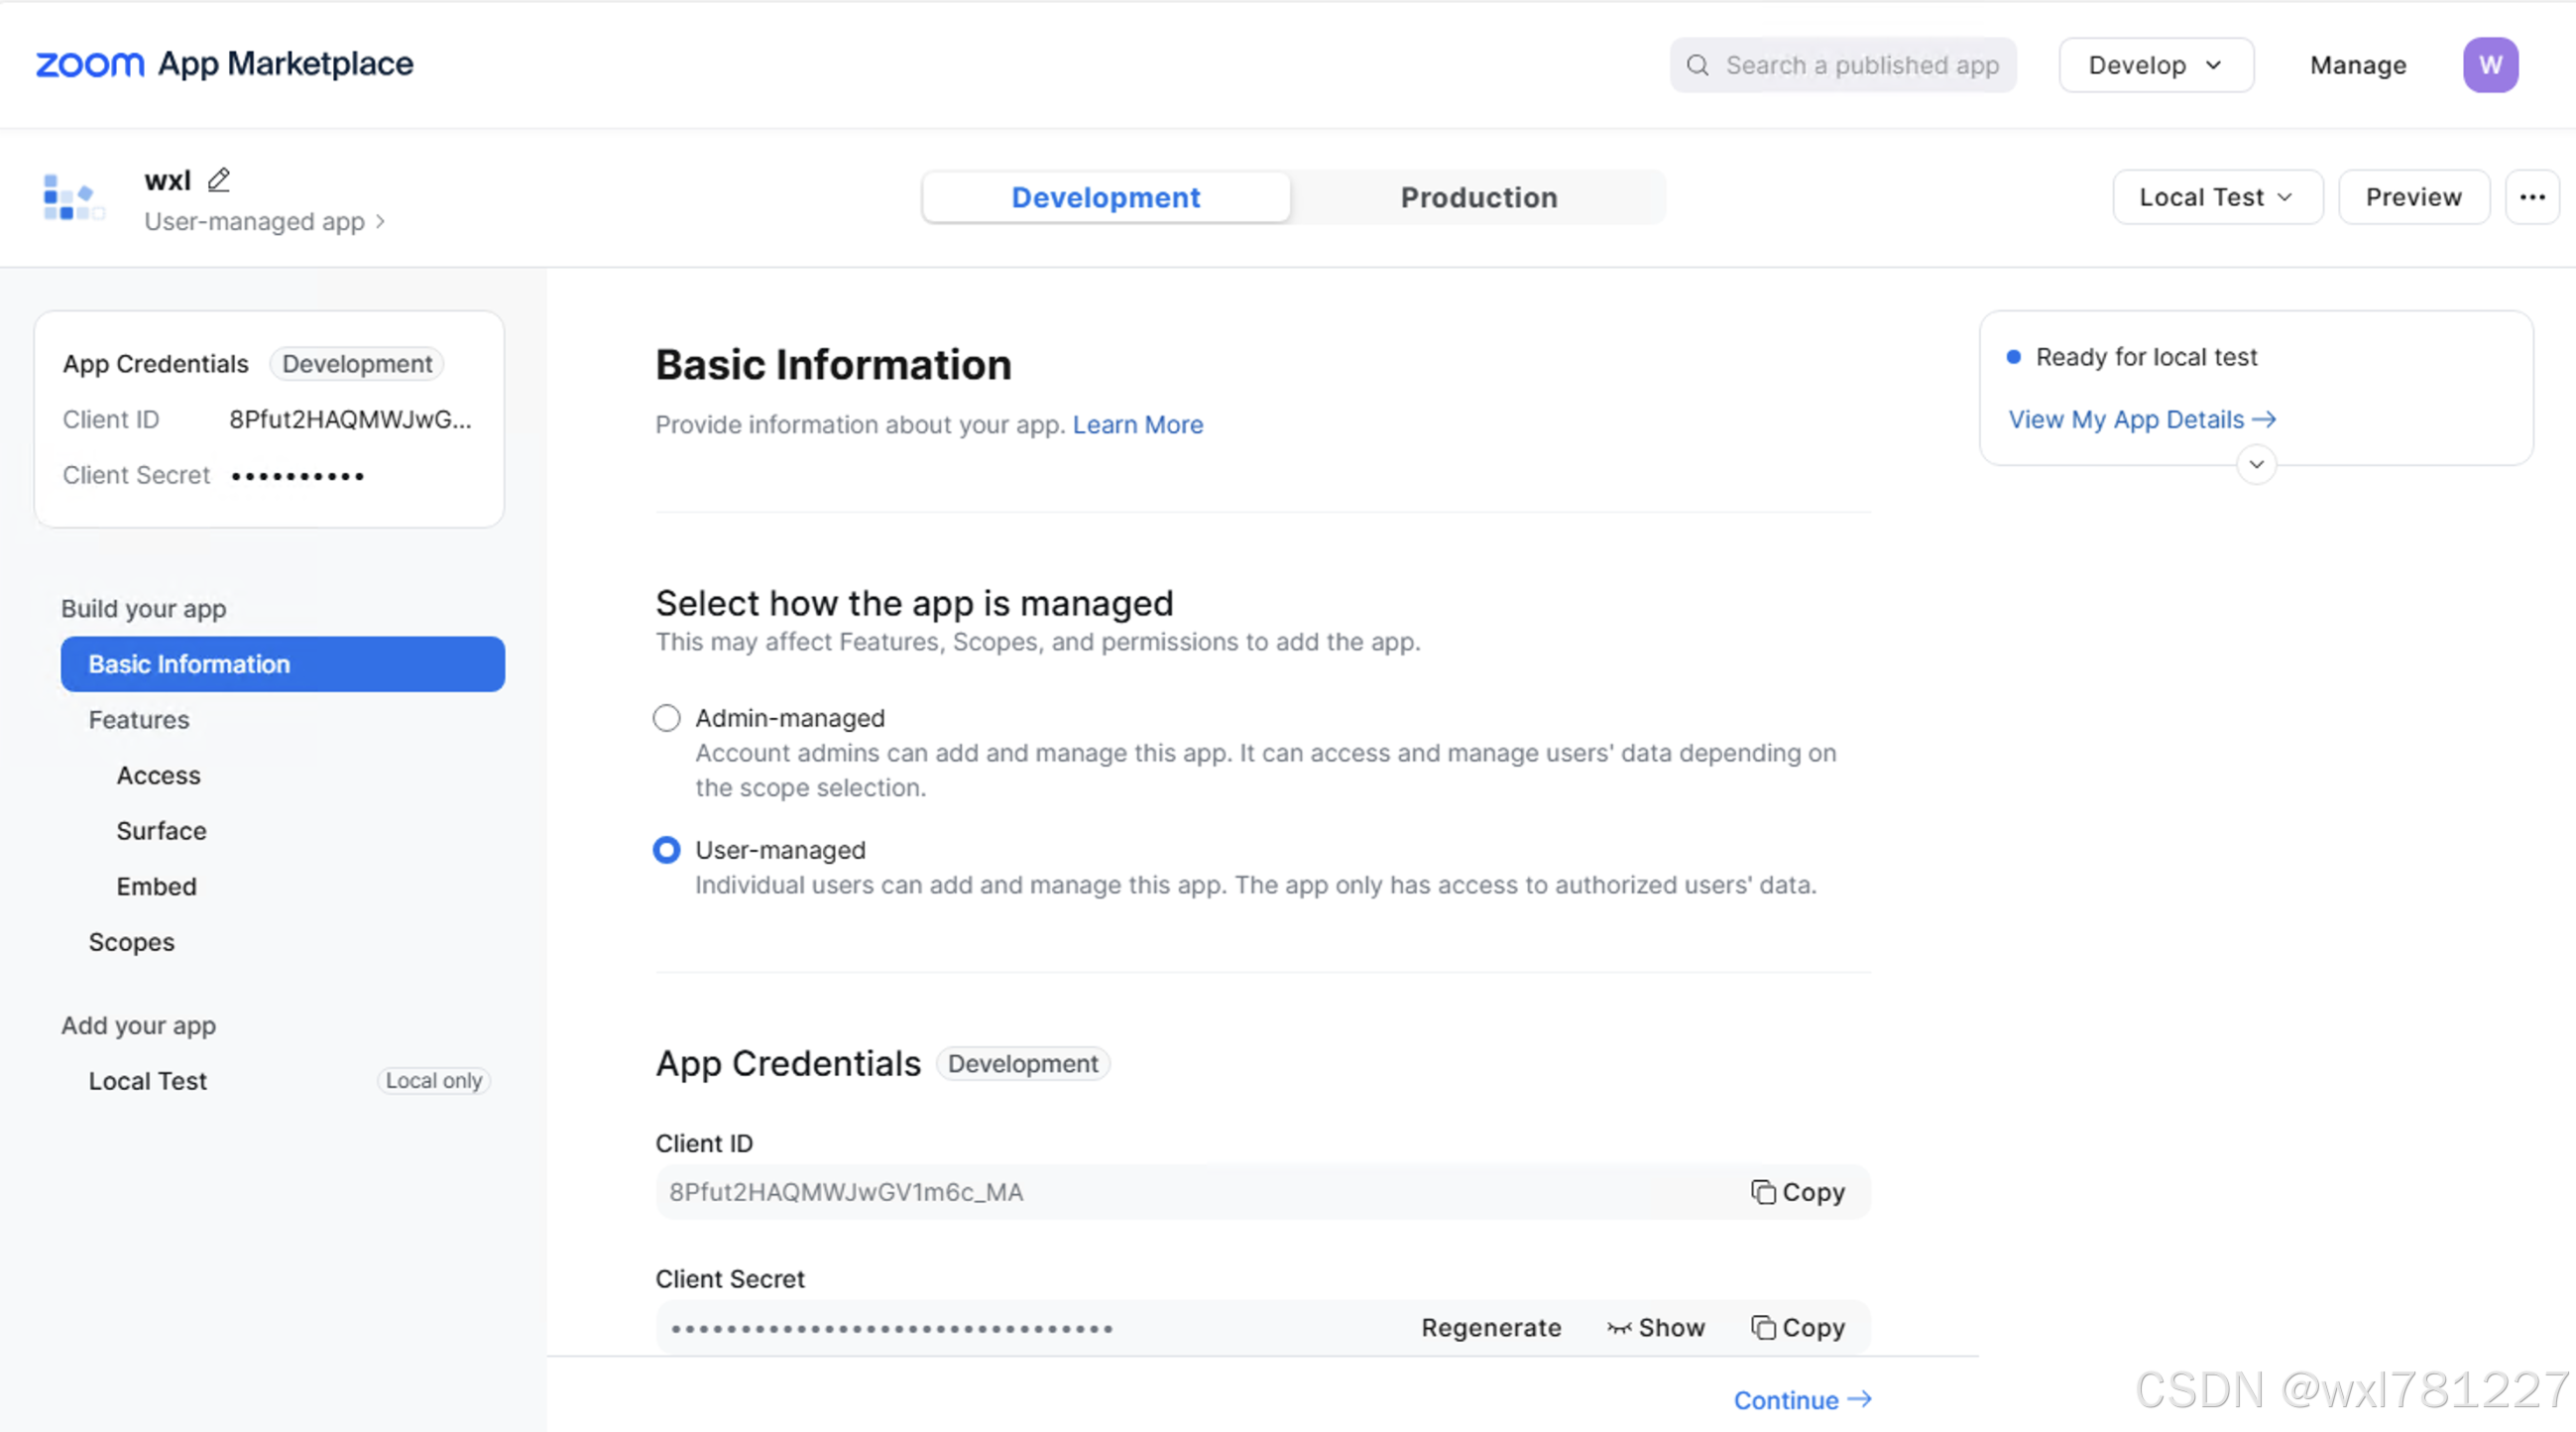
四、配置zoom app(wxl),设置上一步获得的https静态域名,验证地址为/auth

五、事件订阅(会议开始和会议结束,也可以订阅其它事件)

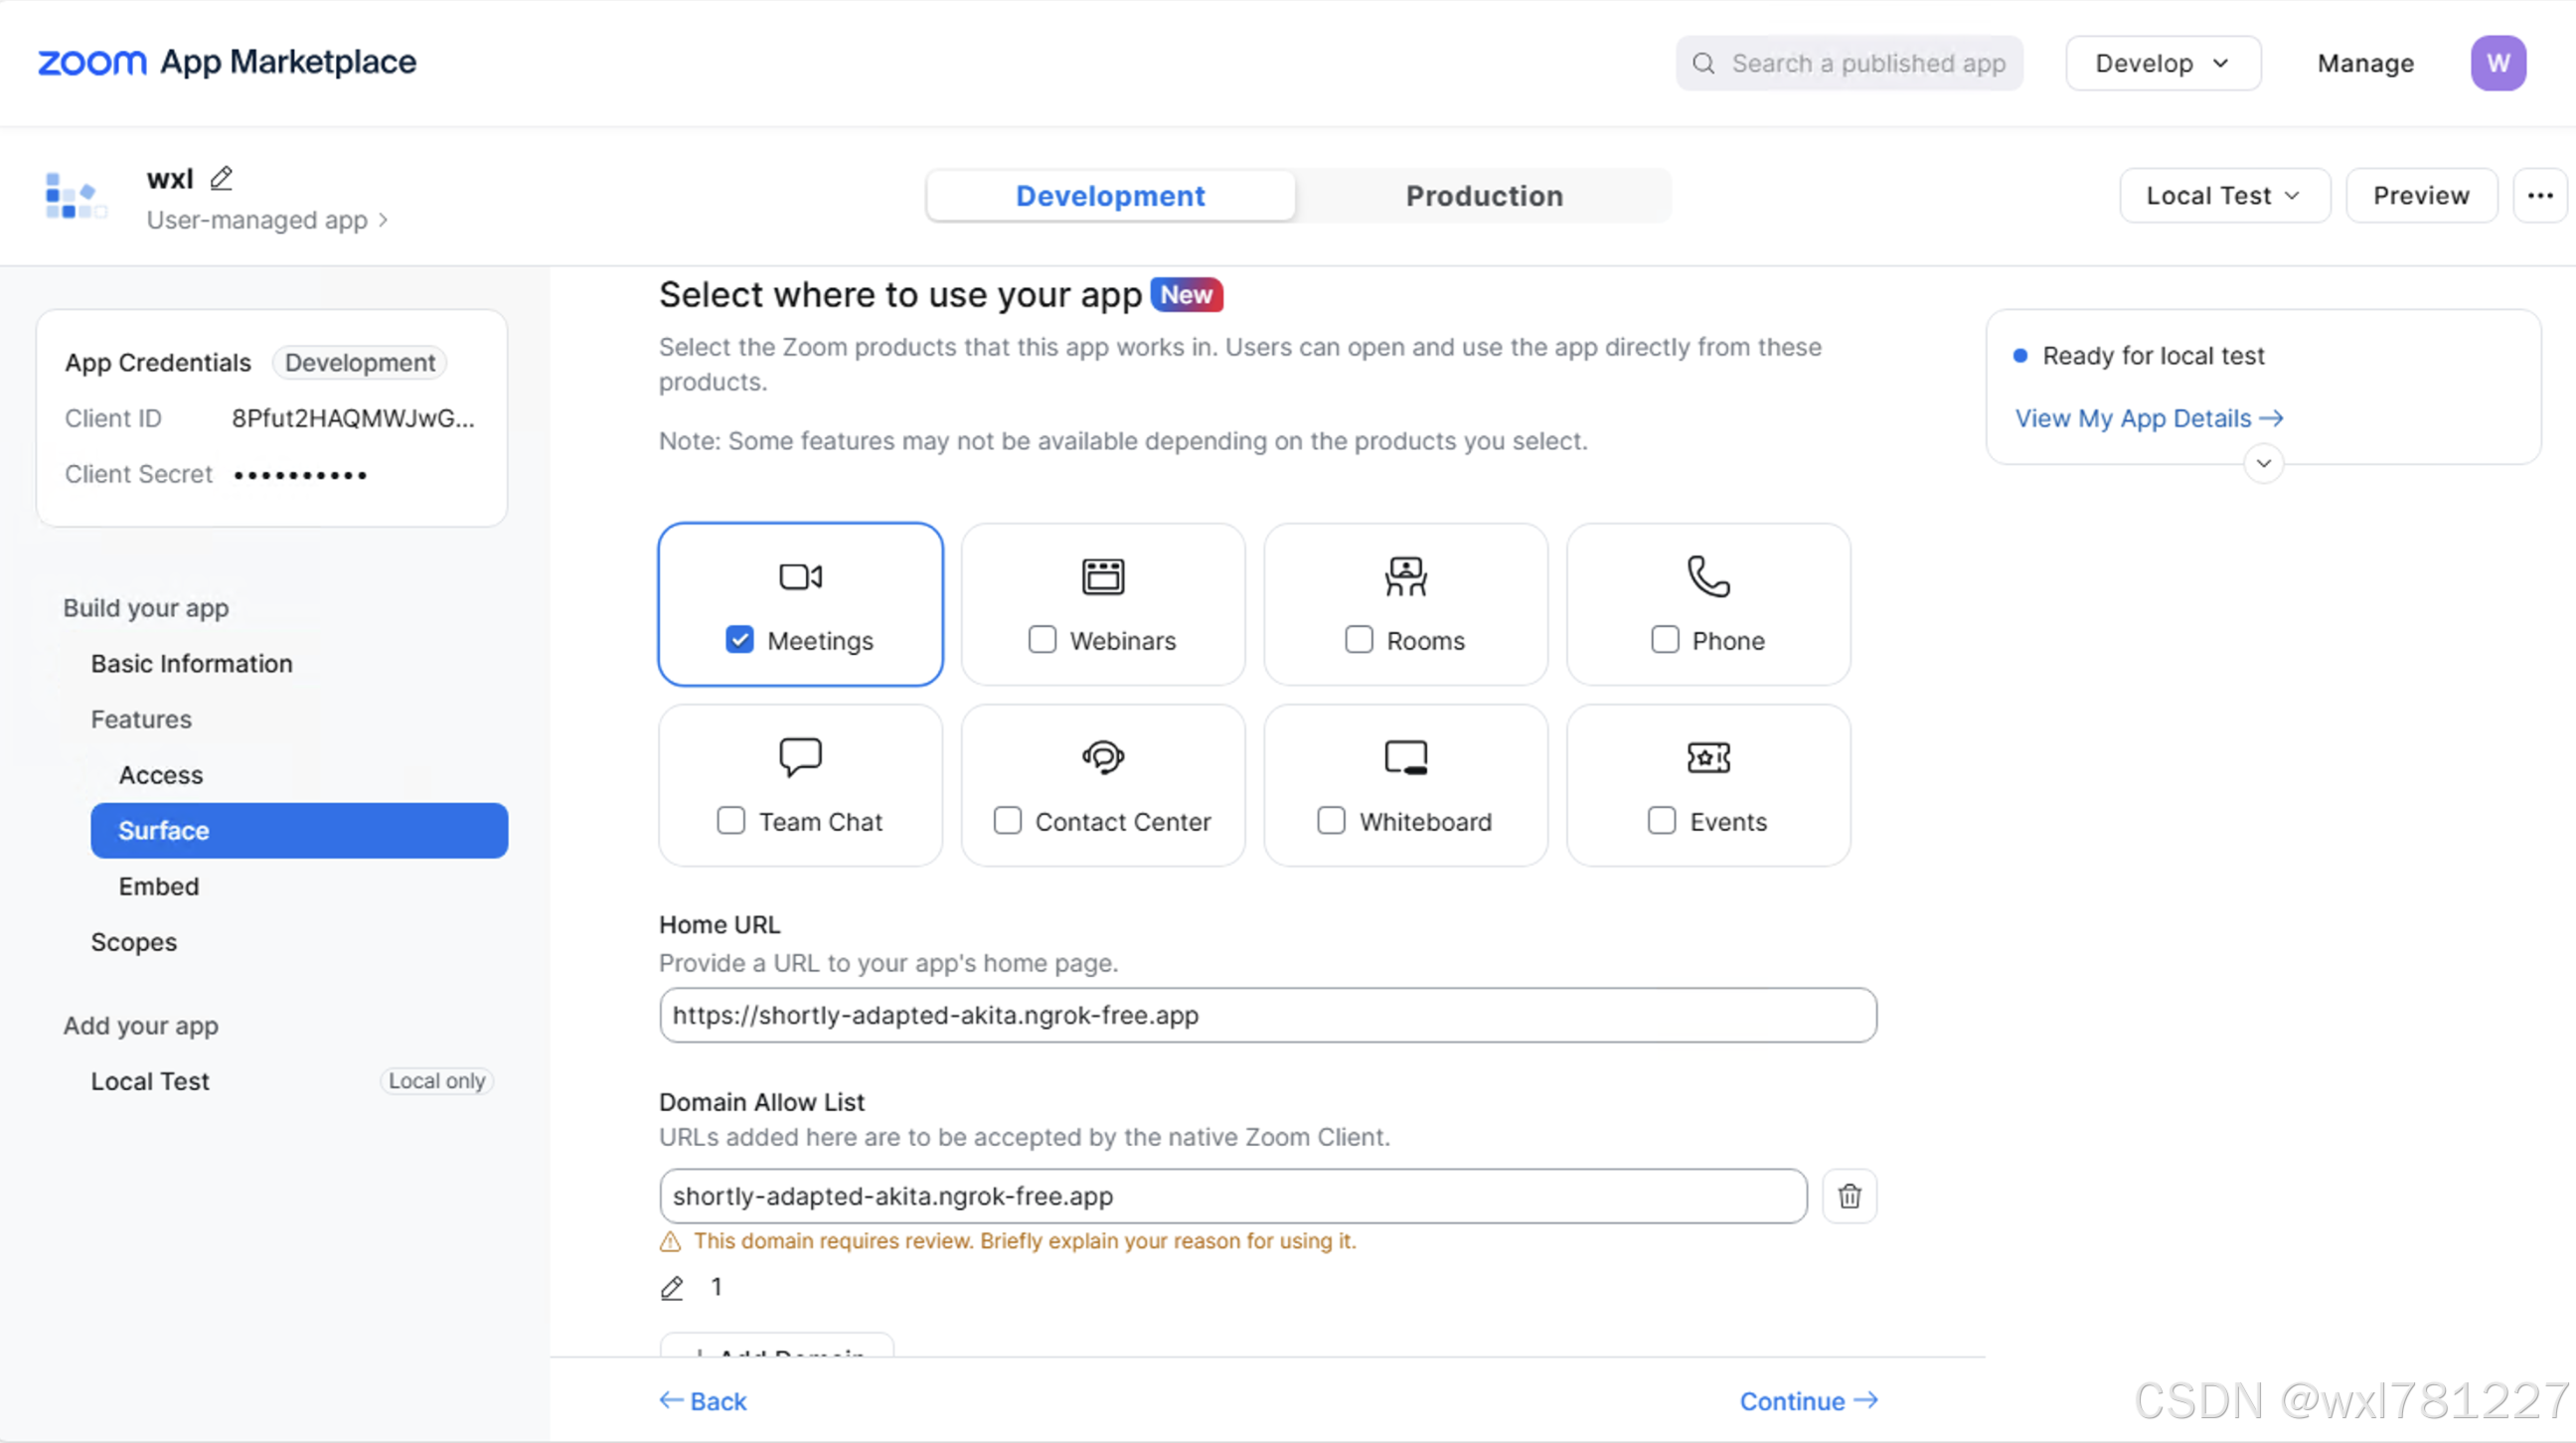
六、选择在哪些界面使用app(wxl)、设置主页和允许访问的域名。
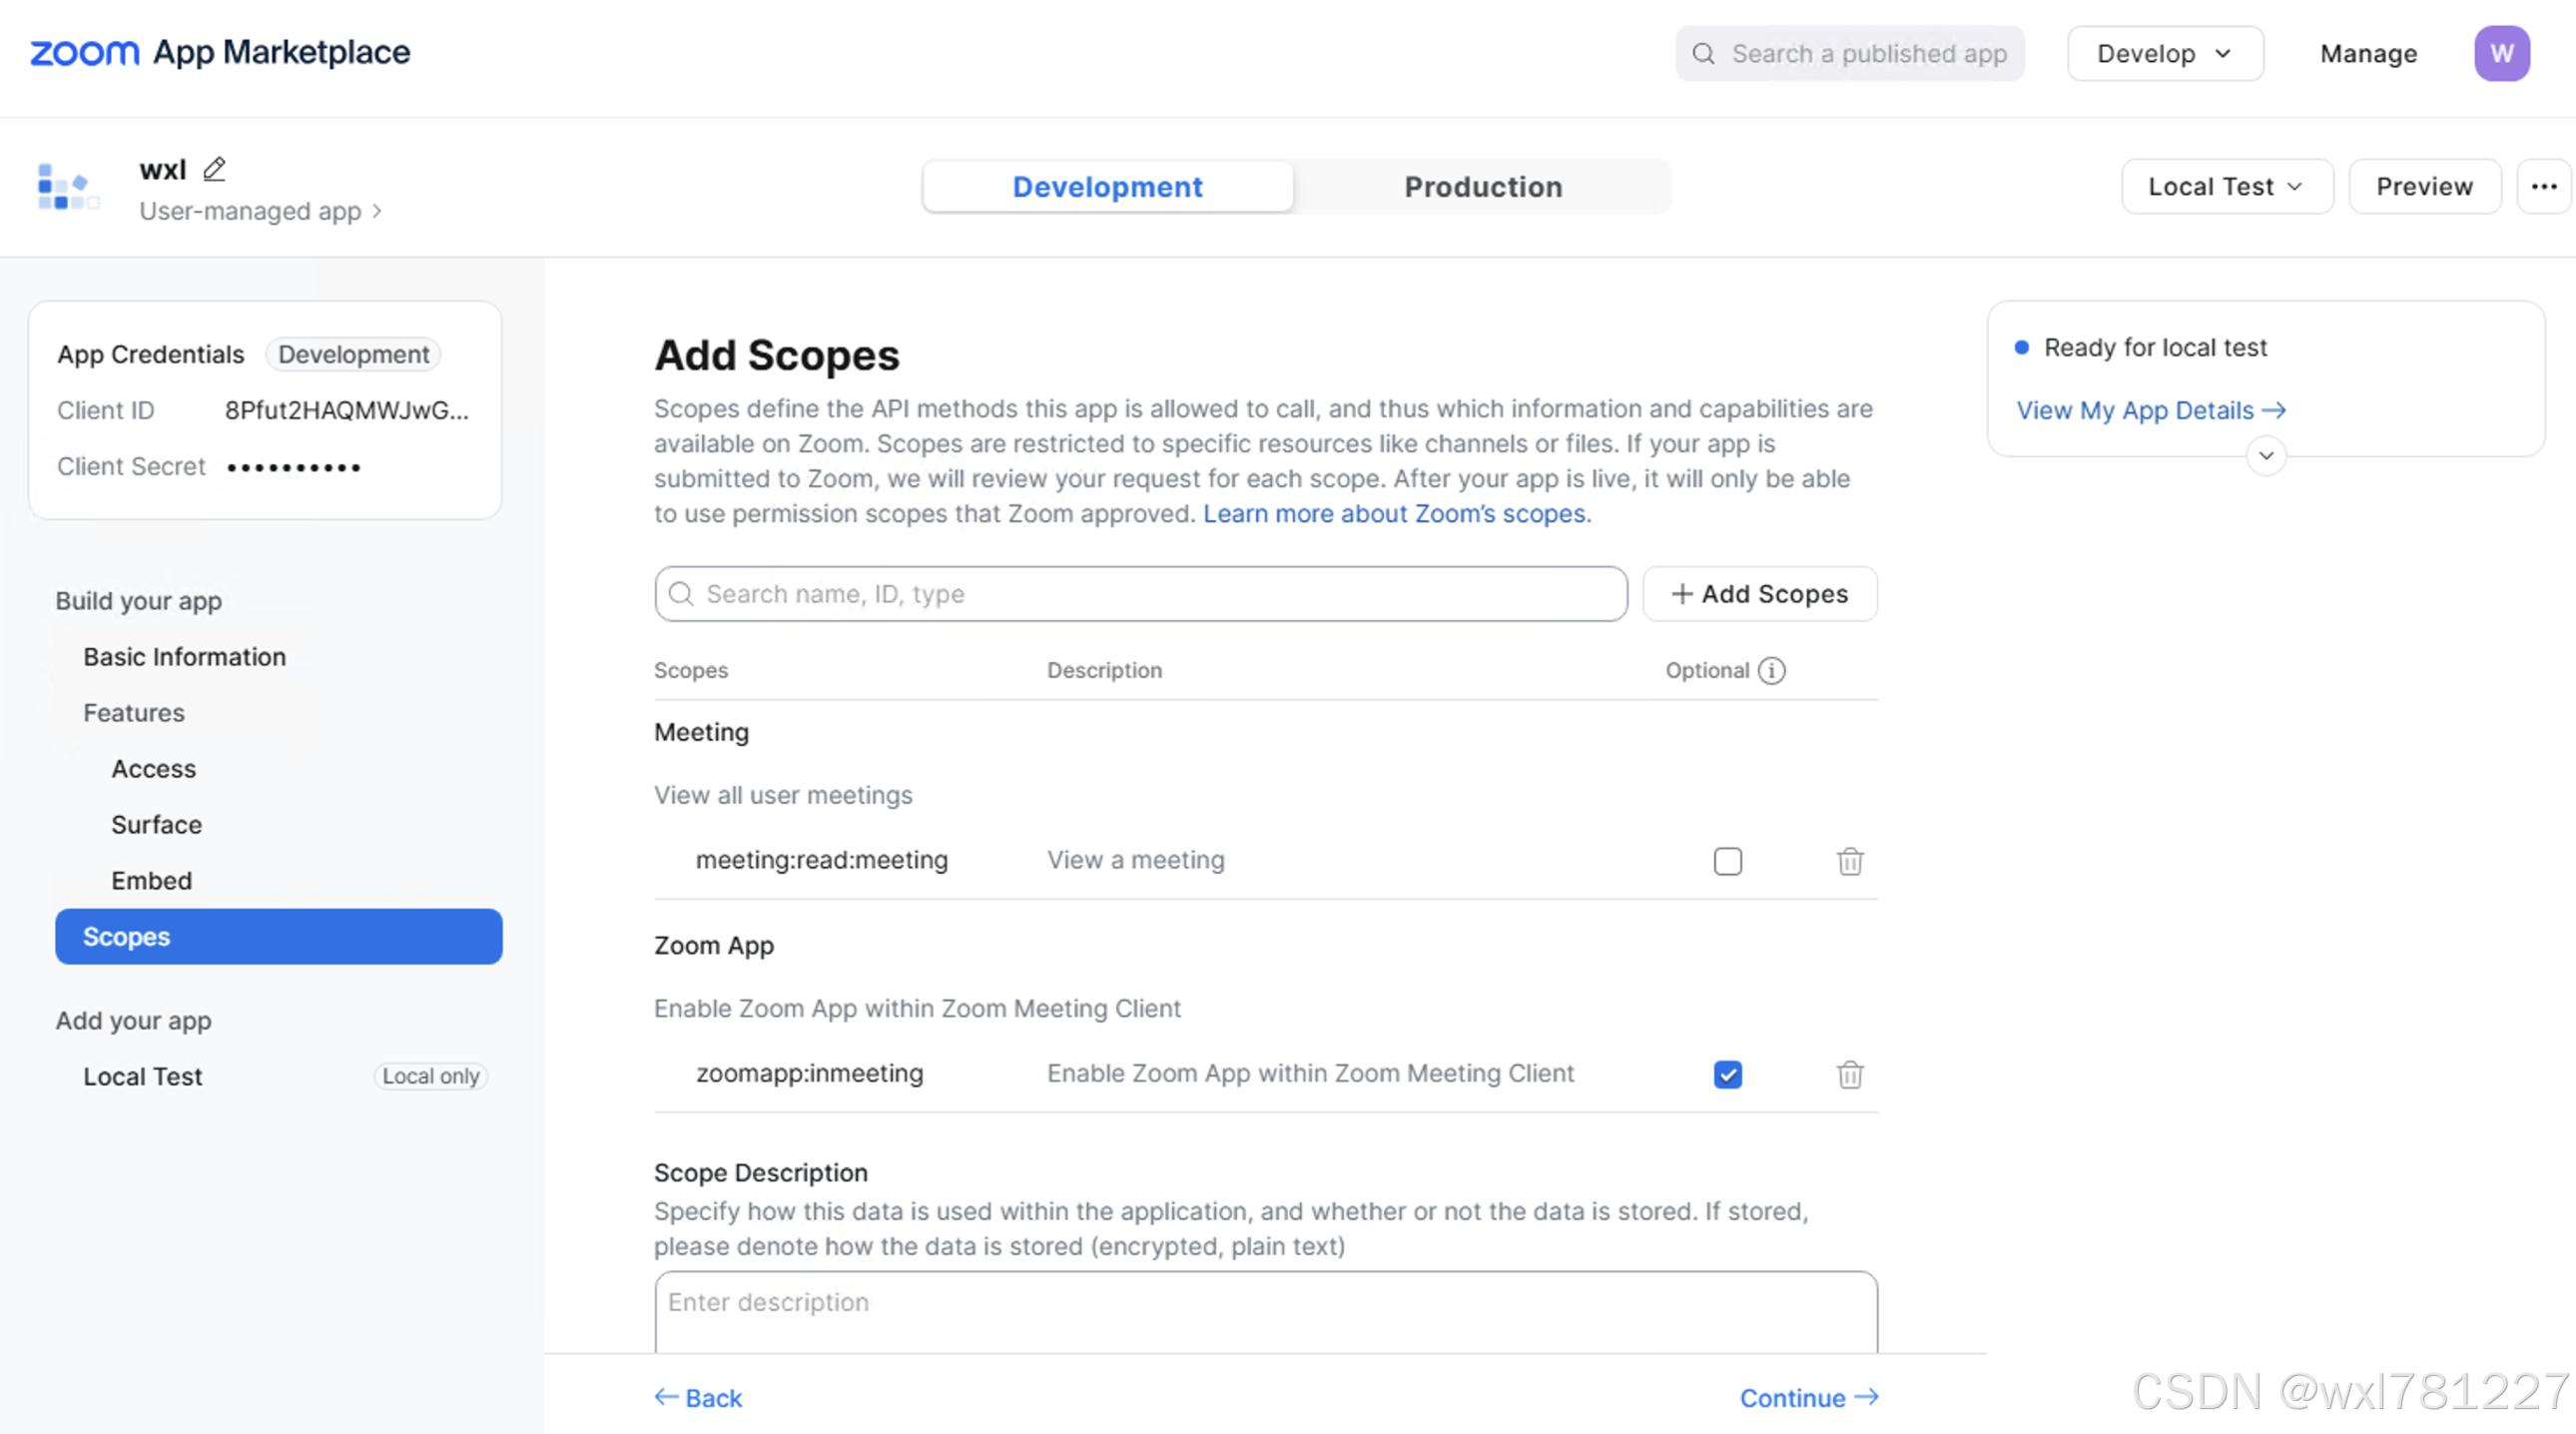
七、设置访问范围
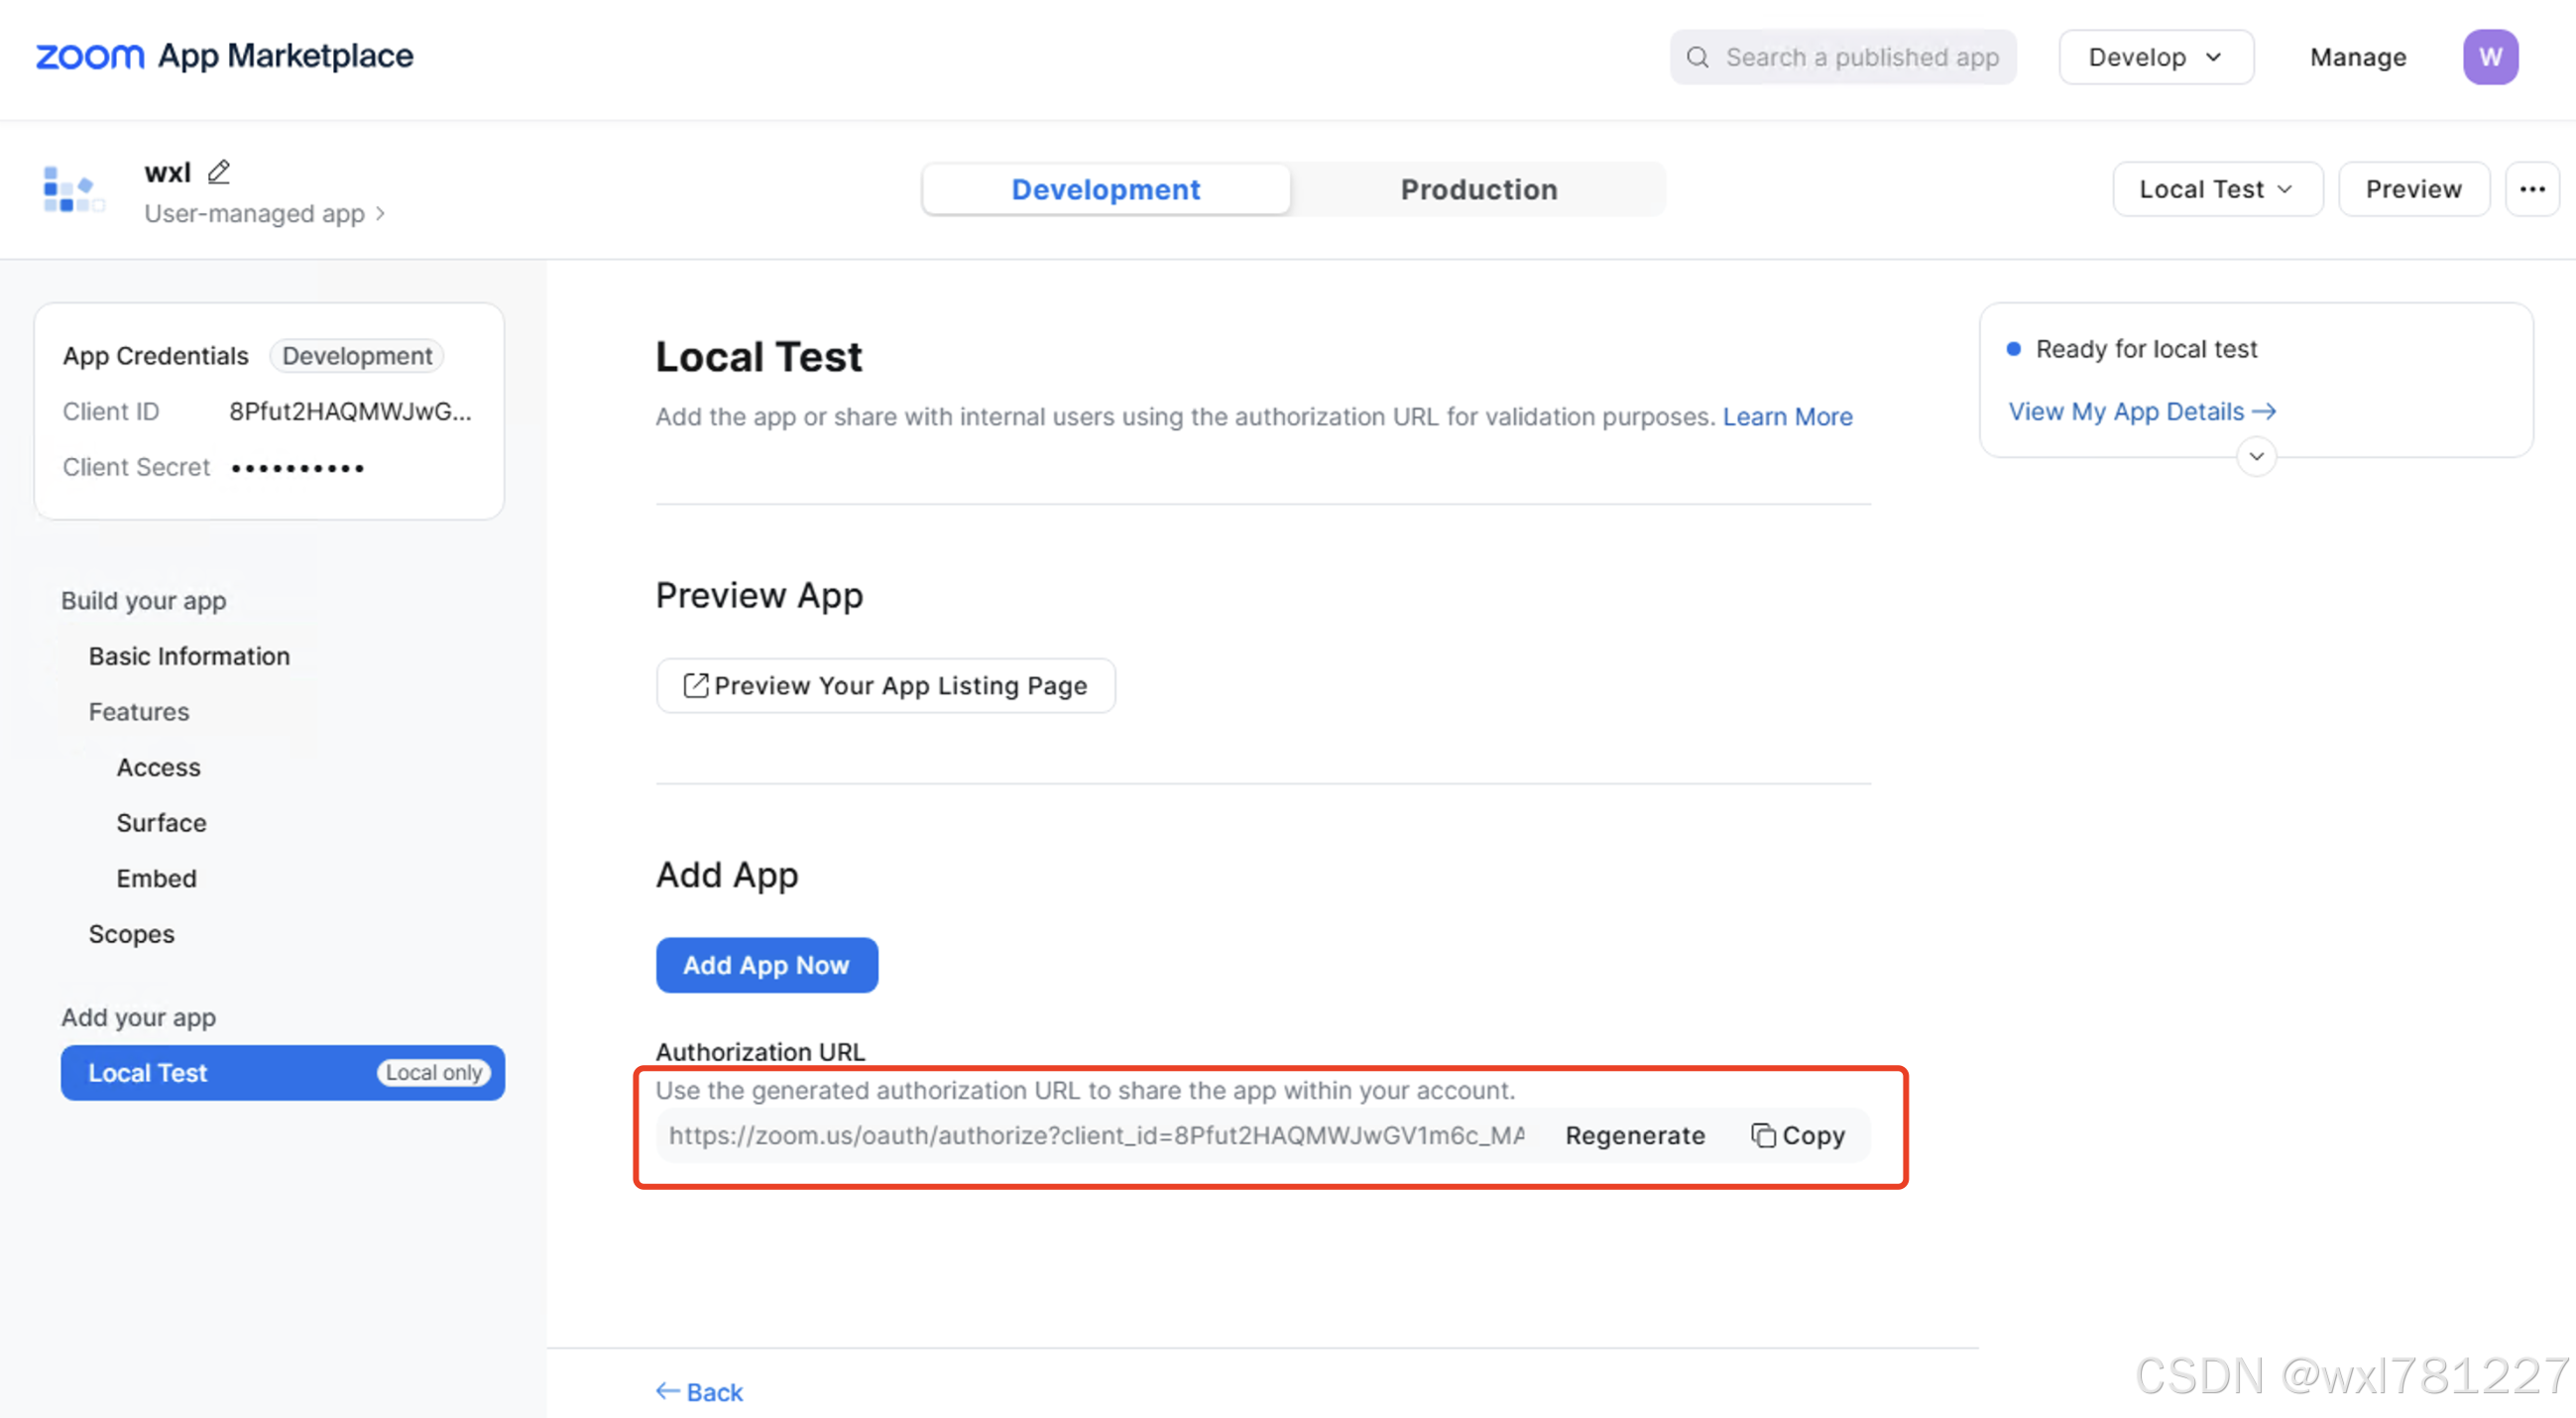
八、生成共享app(wxl)的链接
九、开始开发过程(power shell)
1、git clone https://github.com/zoom/zoomapps-sample-js
2、cd zoomapps-sample-js
3、npm install
4、配置.env(参数来源创建app的过程,SESSION_SECRET为随机初始化值)

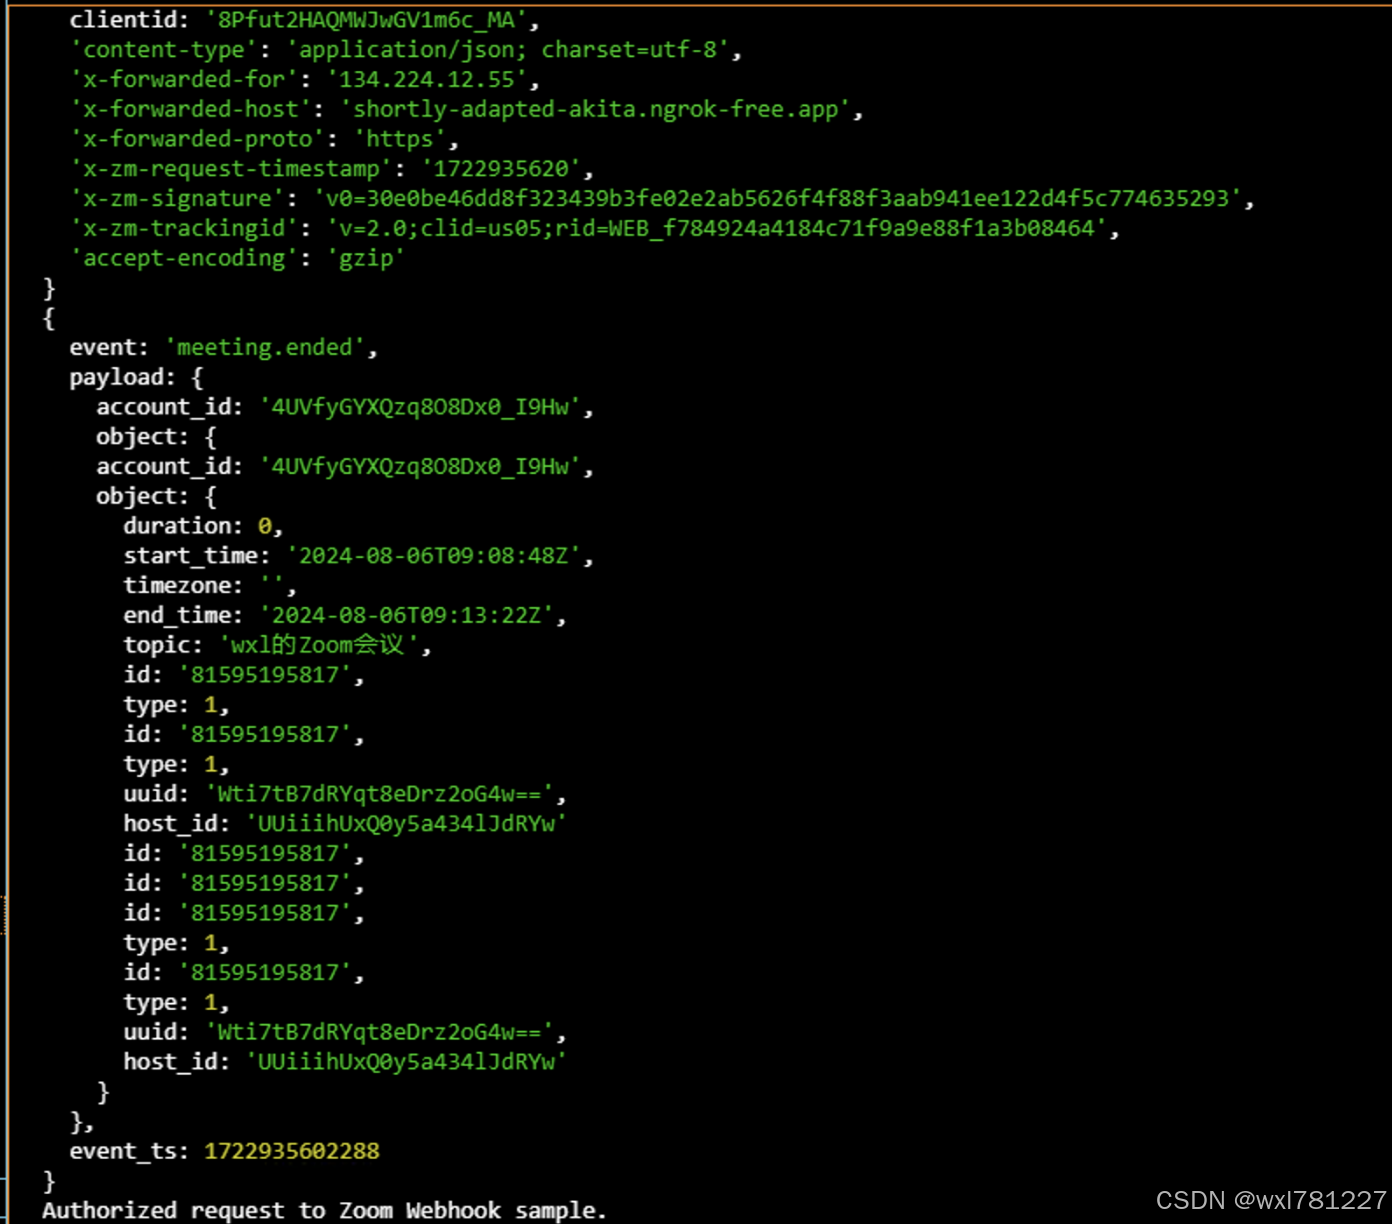
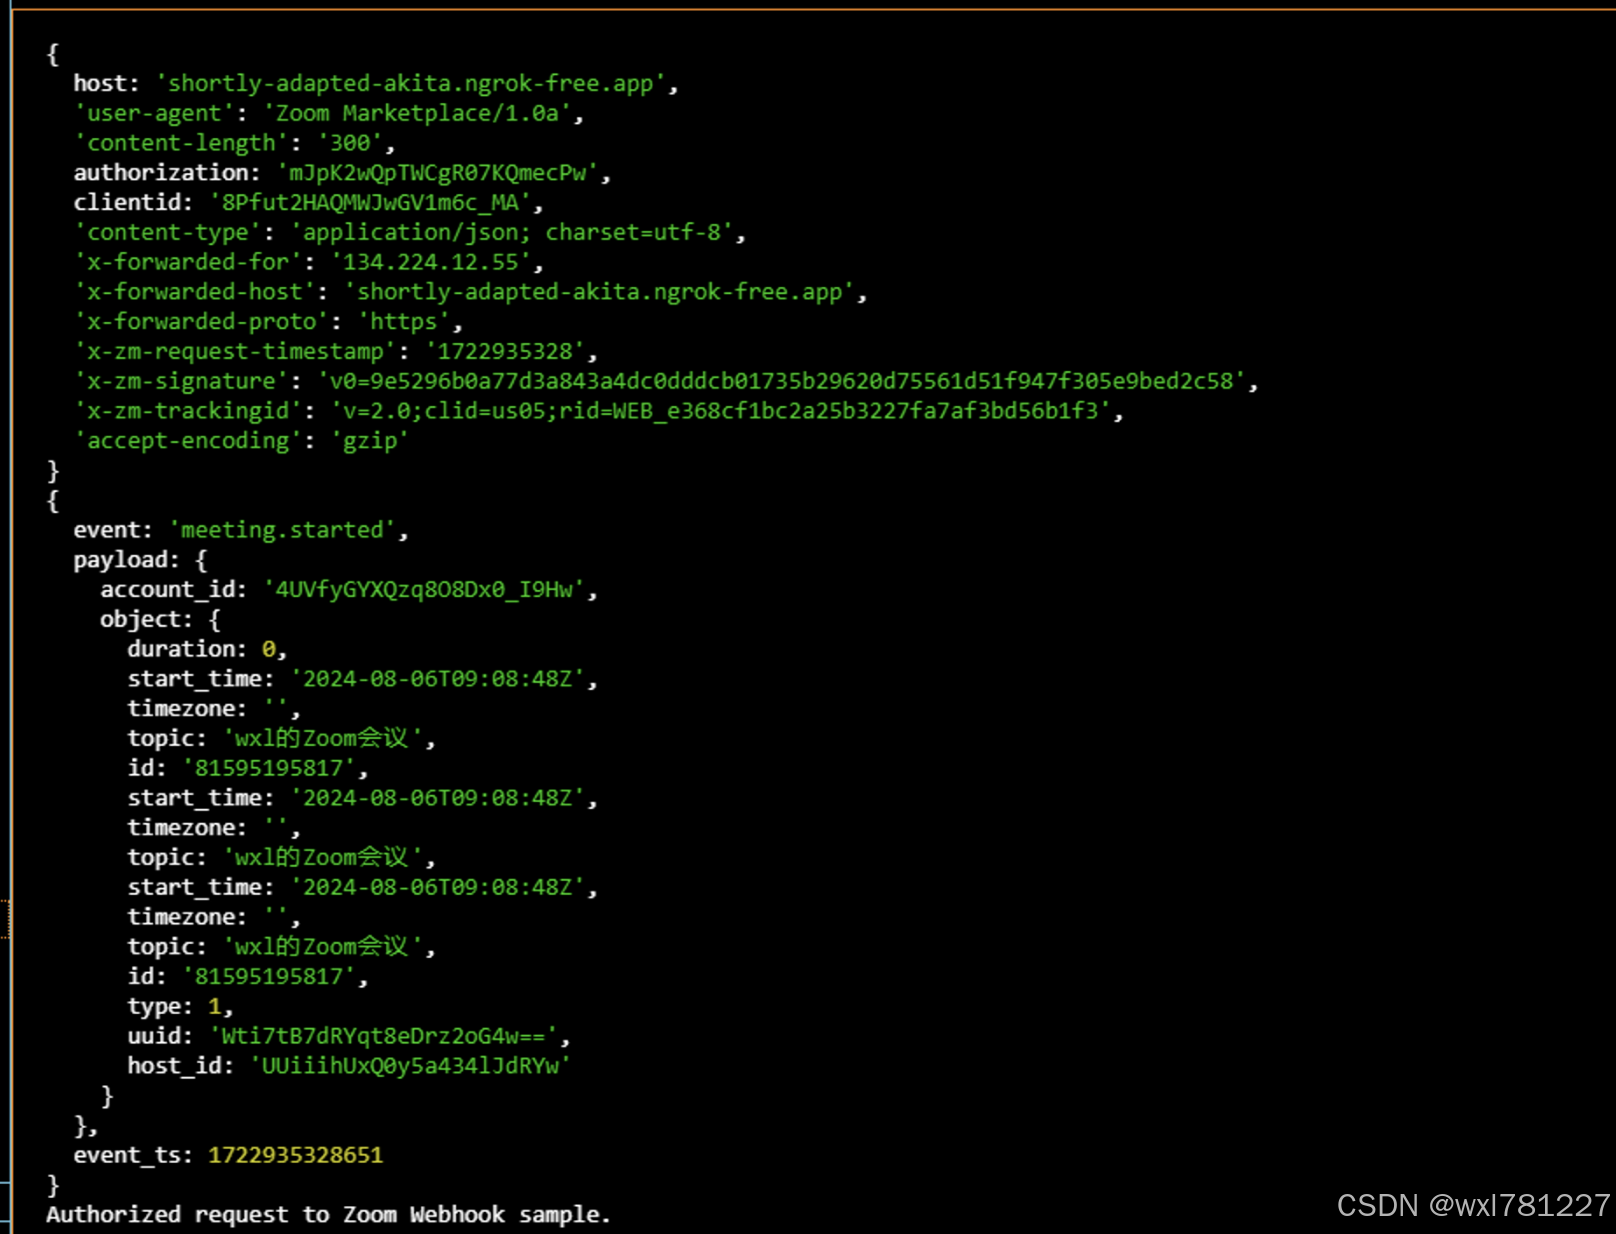
5、在app.js文件的95行-149行增加/webhook的处理(接收会议开始和结束事情的订阅信息)
app.post('/webhook', (req, res) => {

    var response

    console.log(req.headers)
    console.log(req.body)

    // construct the message string
    const message = `v0:${req.headers['x-zm-request-timestamp']}:${JSON.stringify(req.body)}`

    const hashForVerify = crypto.createHmac('sha256', secretToken).update(message).digest('hex')

    // hash the message string with your Webhook Secret Token and prepend the version semantic
    const signature = `v0=${hashForVerify}`

    // you validating the request came from Zoom https://marketplace.zoom.us/docs/api-reference/webhook-reference#notification-structure
    if (req.headers['x-zm-signature'] === signature) {

      // Zoom validating you control the webhook endpoint https://marketplace.zoom.us/docs/api-reference/webhook-reference#validate-webhook-endpoint
      if(req.body.event === 'endpoint.url_validation') {
        const hashForValidate = crypto.createHmac('sha256', secretToken).update(req.body.payload.plainToken).digest('hex')

        response = {
          message: {
            plainToken: req.body.payload.plainToken,
            encryptedToken: hashForValidate
          },
          status: 200
        }

        console.log(response.message)

        res.status(response.status)
        res.json(response.message)
      } else {
        response = { message: 'Authorized request to Zoom Webhook sample.', status: 200 }

        console.log(response.message)

        res.status(response.status)
        res.json(response)

        // business logic here, example make API request to Zoom or 3rd party

      }
    } else {

      response = { message: 'Unauthorized request to Zoom Webhook sample.', status: 401 }

      console.log(response.message)

      res.status(response.status)
      res.json(response)
    }
  })
6、npm start dev
7、ngrok http --domain=shortly-adapted-akita.ngrok-free.app 3000

8、访问静态域名
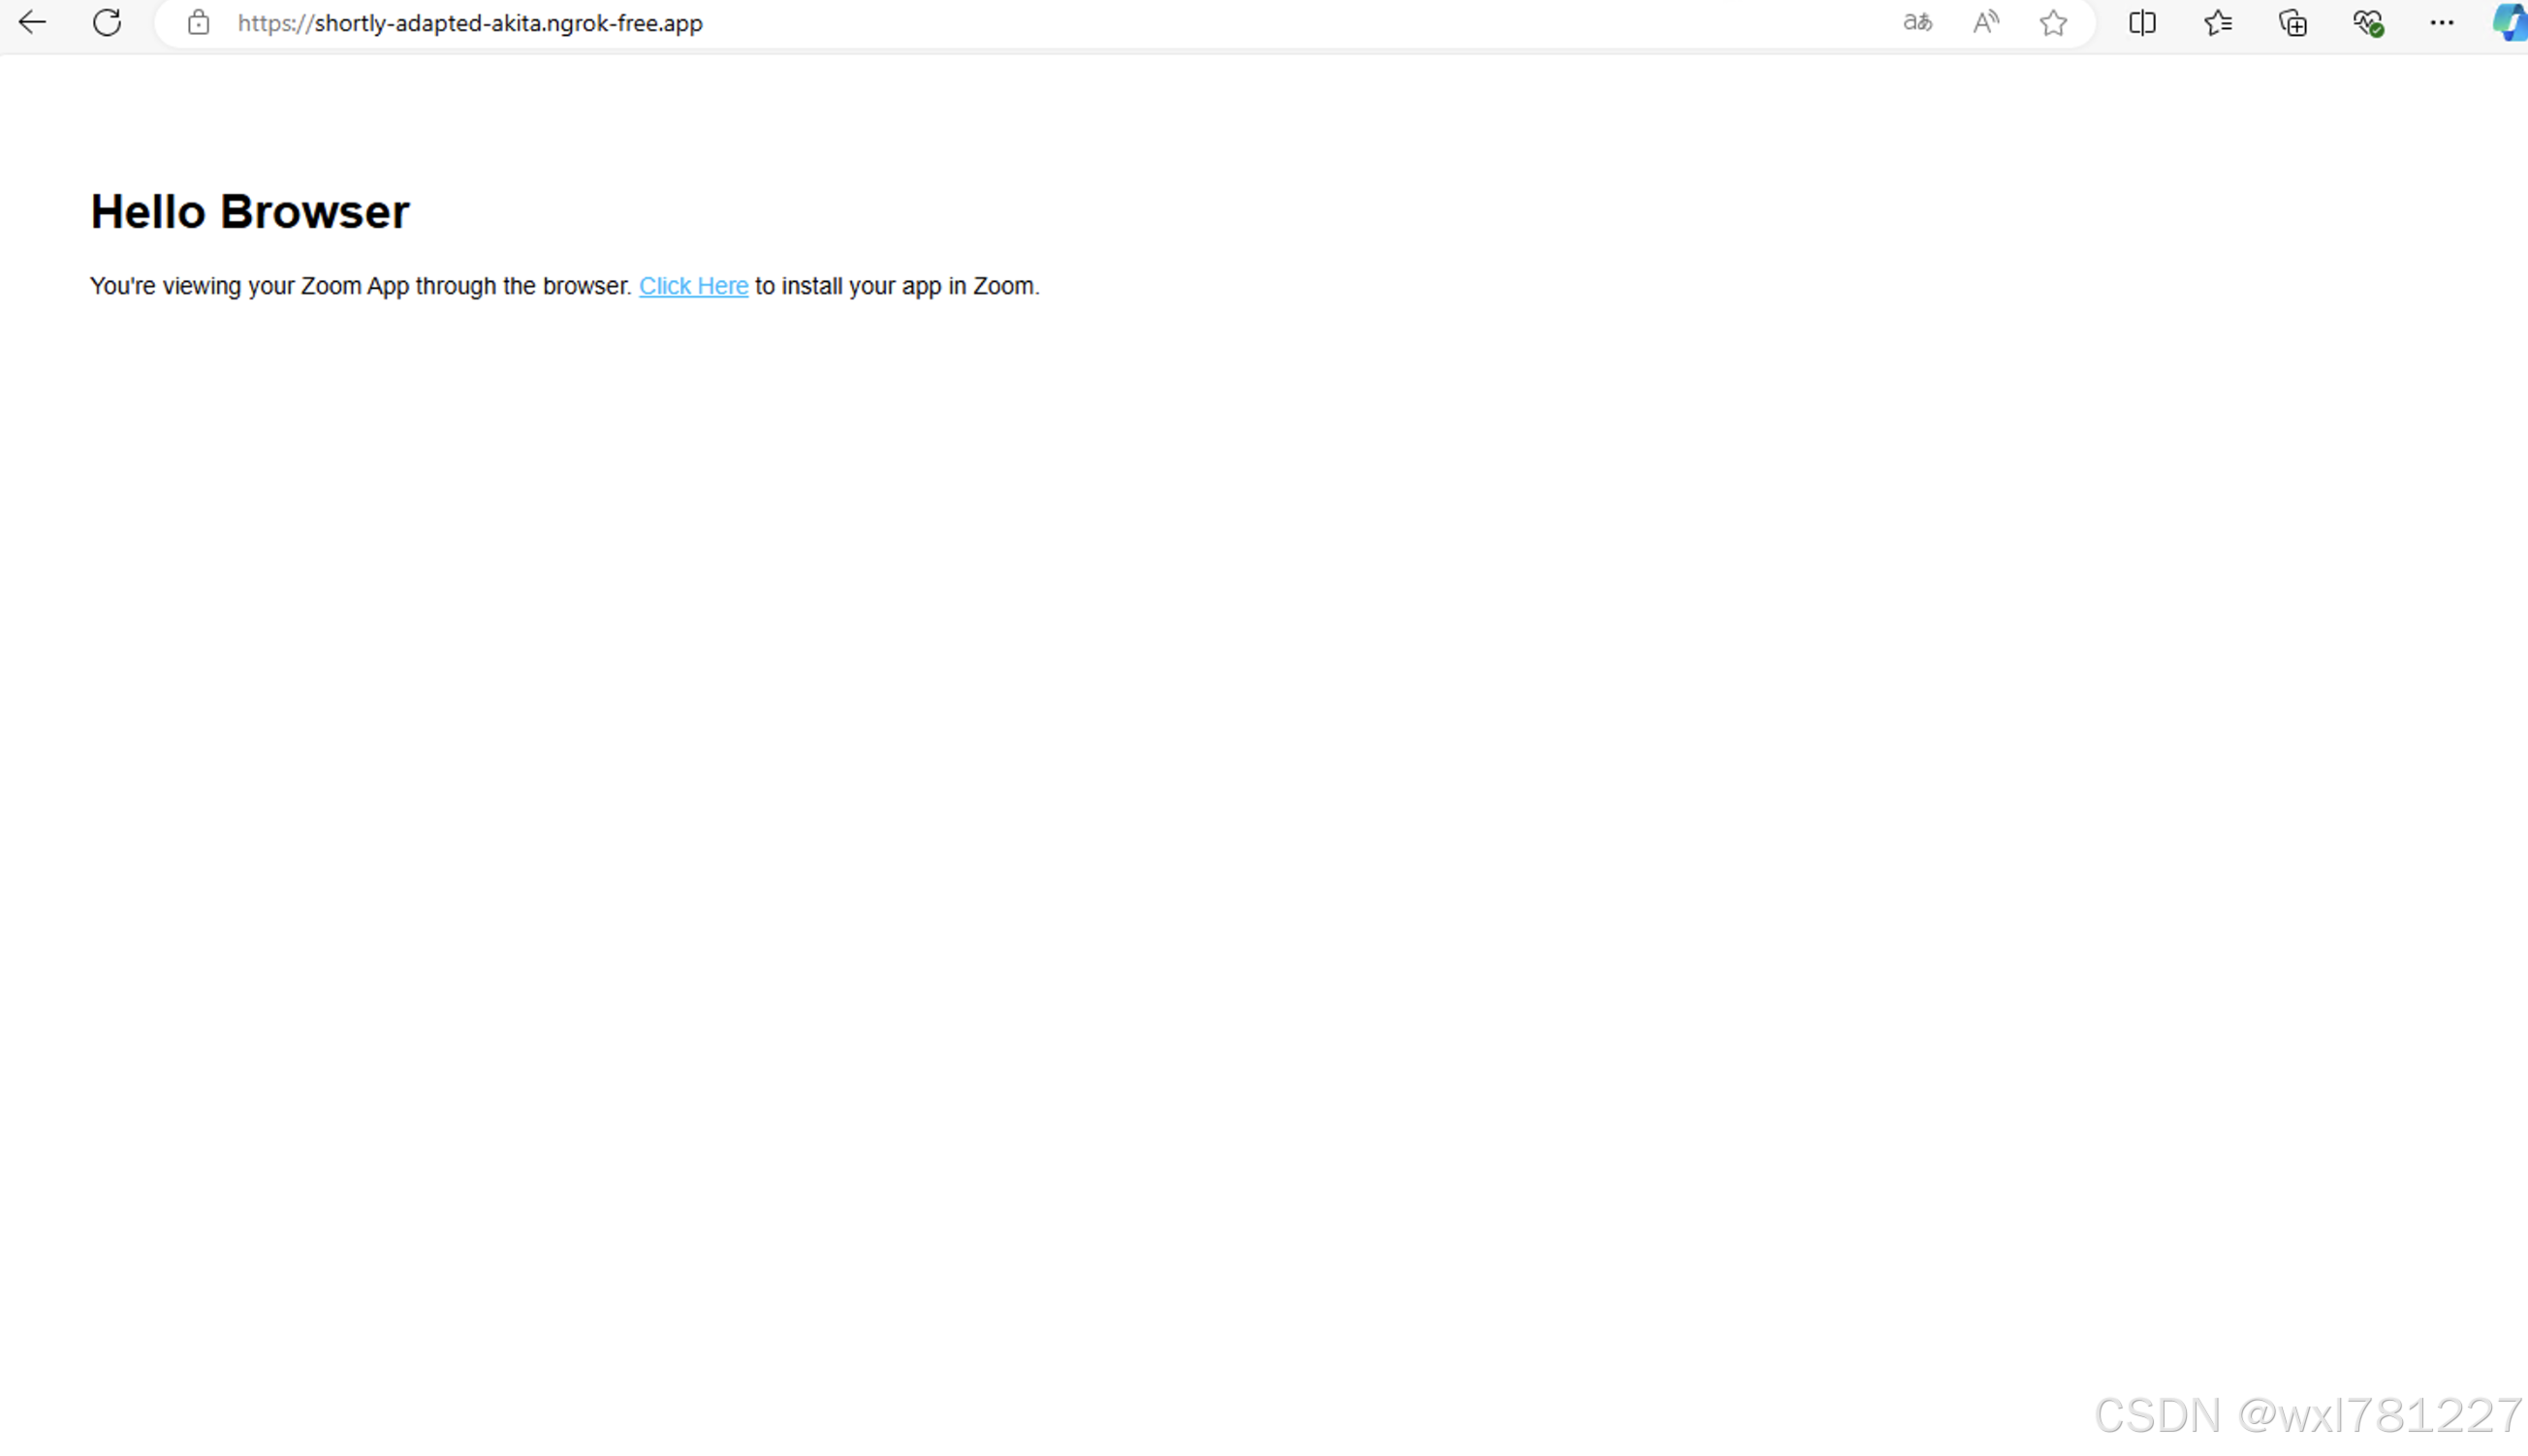
9、点击click here 安装app到zoom中
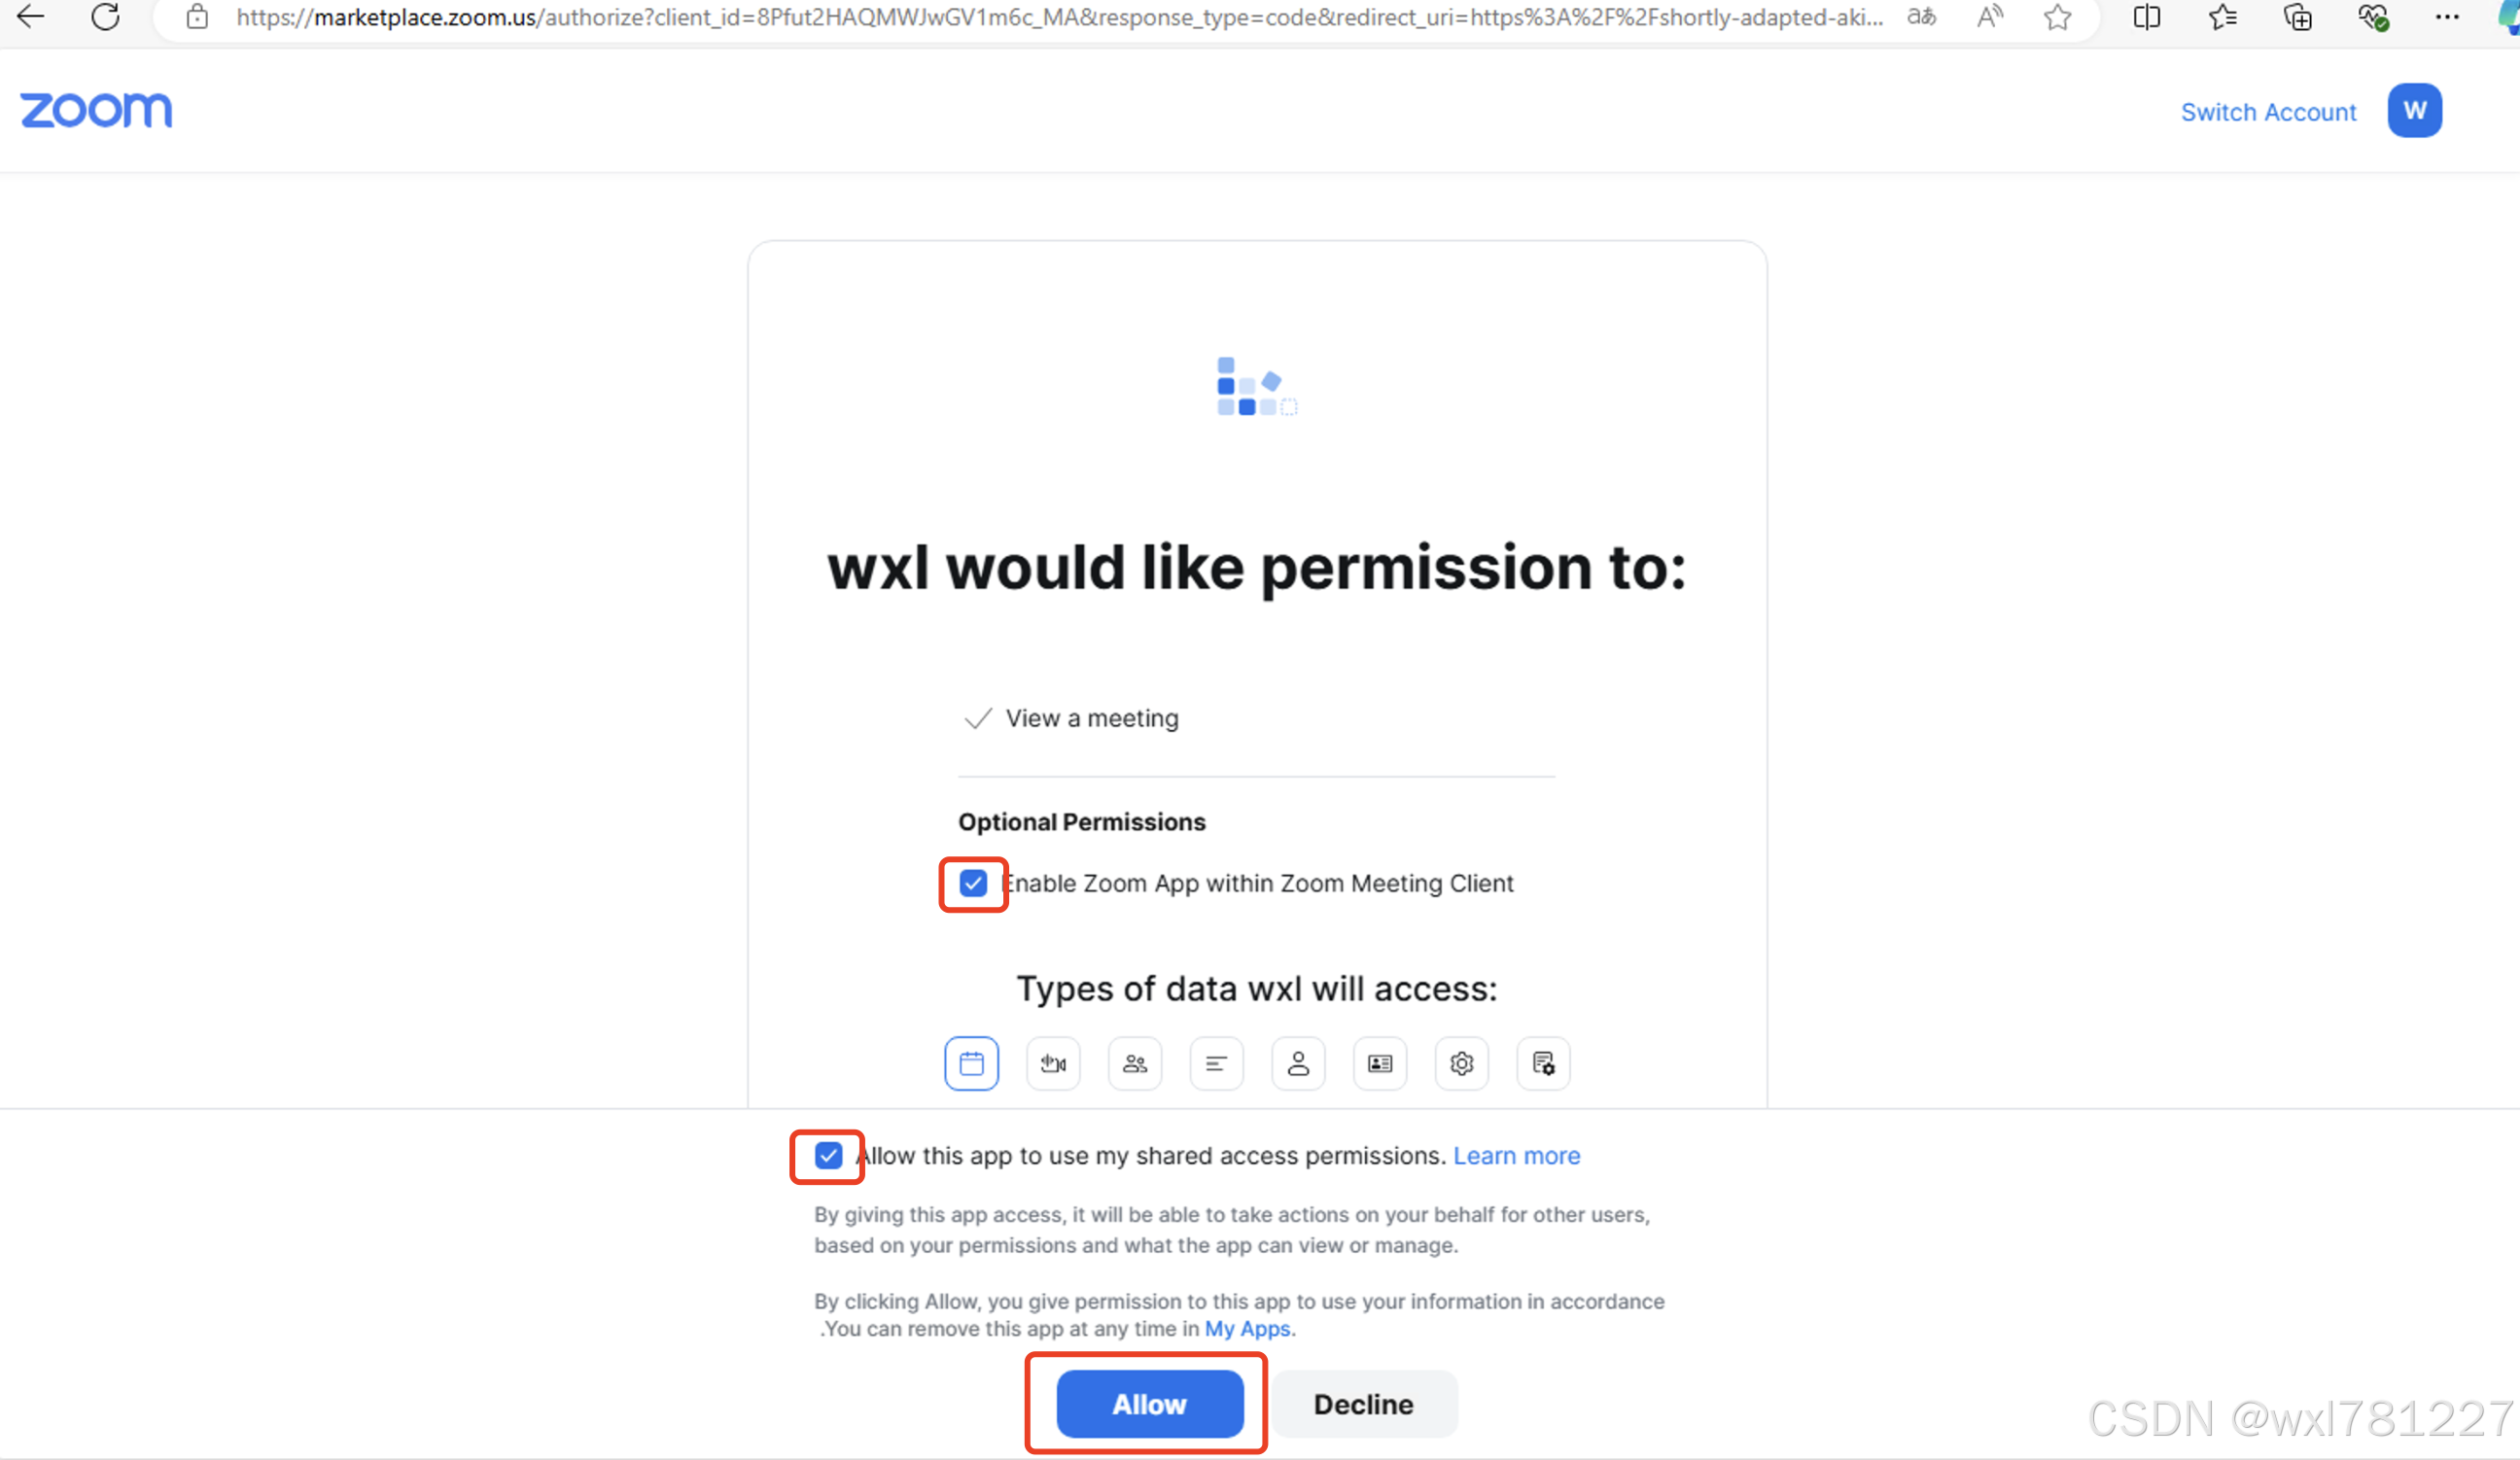
10、允许后

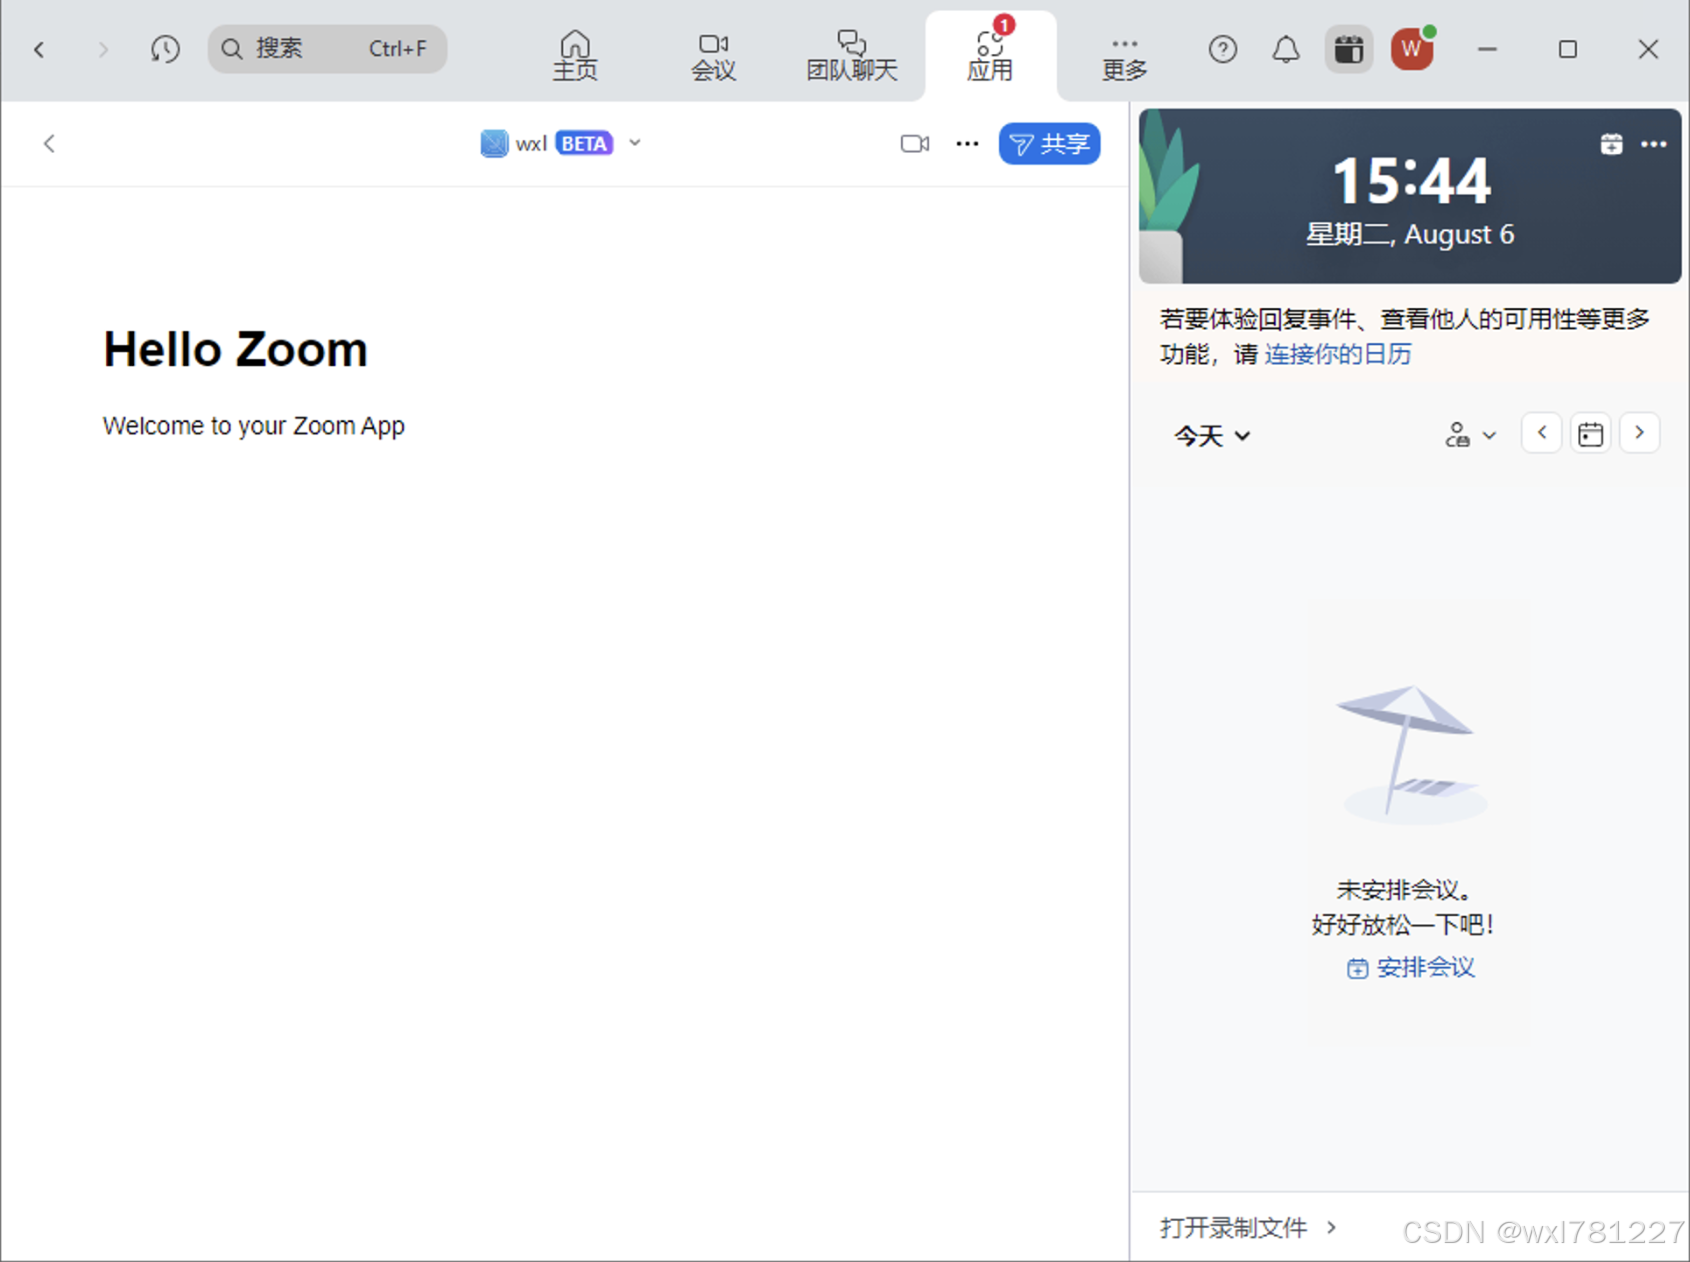
11、打开zoom应用,app(wxl)显示就在zoom窗口中了。
12、点击开始视频会议,获得开始会议事件的订阅信息
13、点击结束会议,获得结束会议事件订阅信息