一、CICD概念
1、什么是CI/CD?
通俗来说就是启动一个服务,能够监听代码变化,然后自动执行构建、测试、打包、发布等流程;
2、CI 持续集成
指在开发人员频繁地提交新代码,都会自动执行构建、测试。根据测试结果,我们可以确定新代码能否合并到主分支。假设现在有个应用的代码存储在仓库上,每天开发人员都会提交很多次新代码,针对每次提交,我们可以创建一系列脚本进行自动测试,降低往应用里引入错误的概率。持续集成过程中很重视自动化测试验证结果,以保障所有的提交在合并主线之后的质量问题,如果构建或测试的失败,可以快速地反馈到相关负责人,以尽快解决达到一个更稳定的版本。
3、CD 持续交付
指将完成CI的最新代码部署到类生产环境进行功能验证,以确保新增的代码在生产环境中是可用的。
4、CD 持续部署
指在持续交付的基础上,通过自动化部署的手段将软件功能频繁的部署到生产环境中。
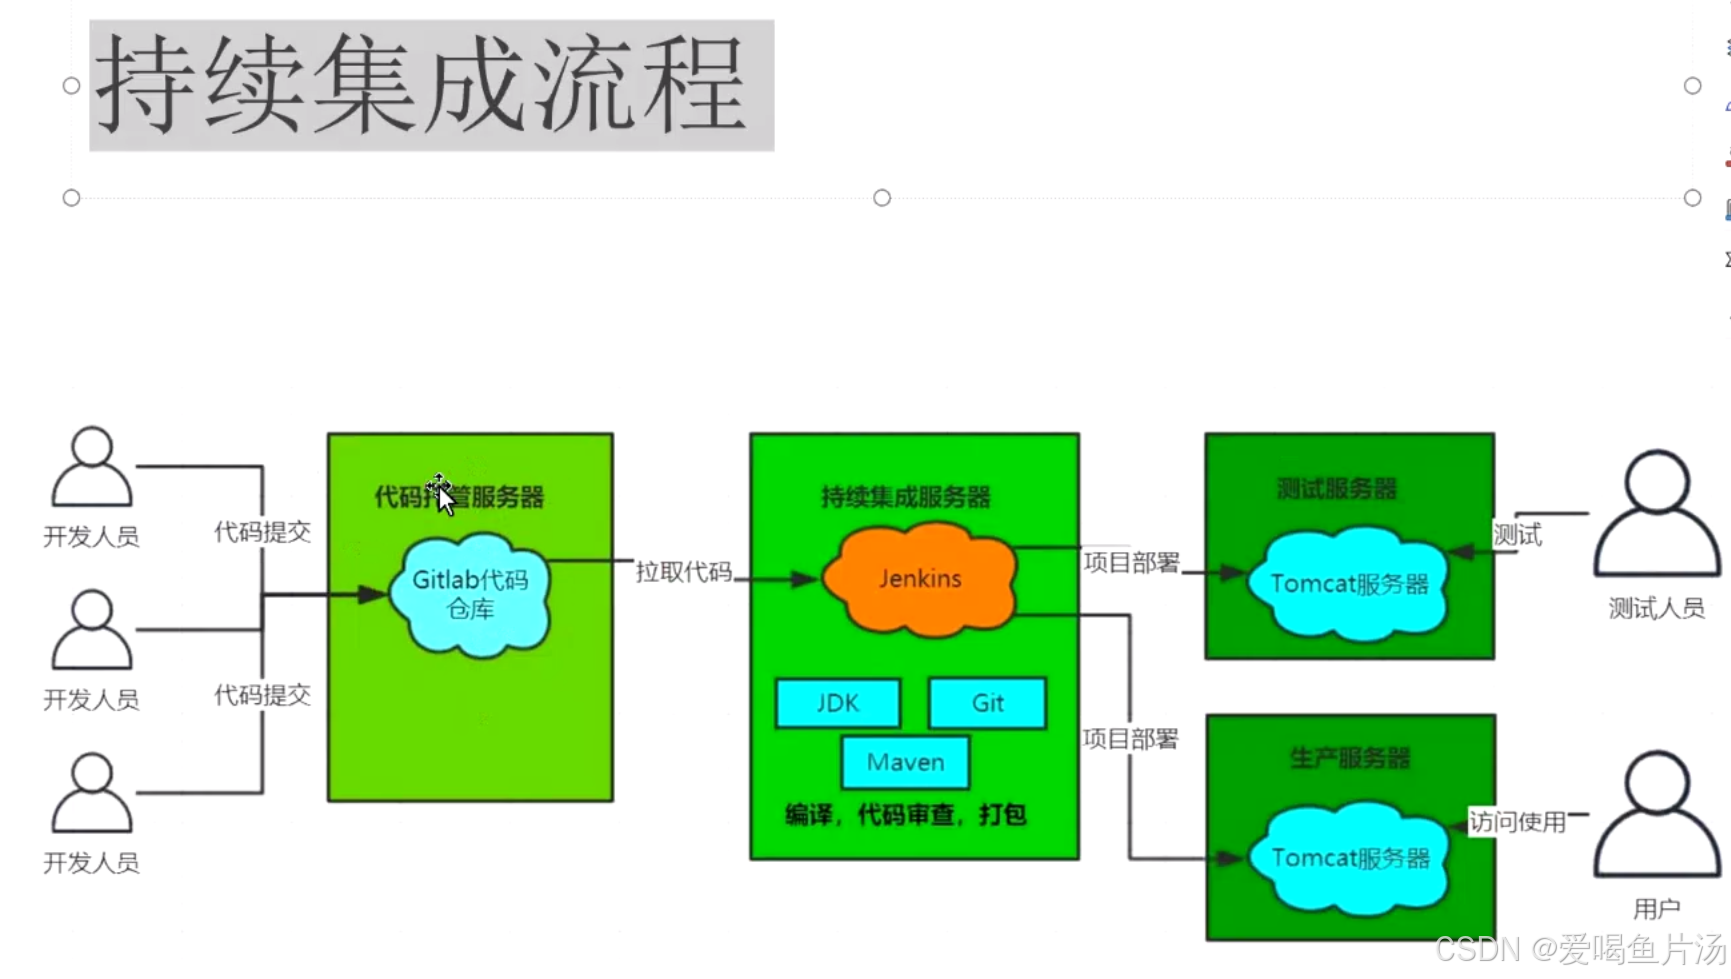
二、CICD部署流程
1、首先部署gitlab代码仓库服务器,用于接收开发人员提交的代码
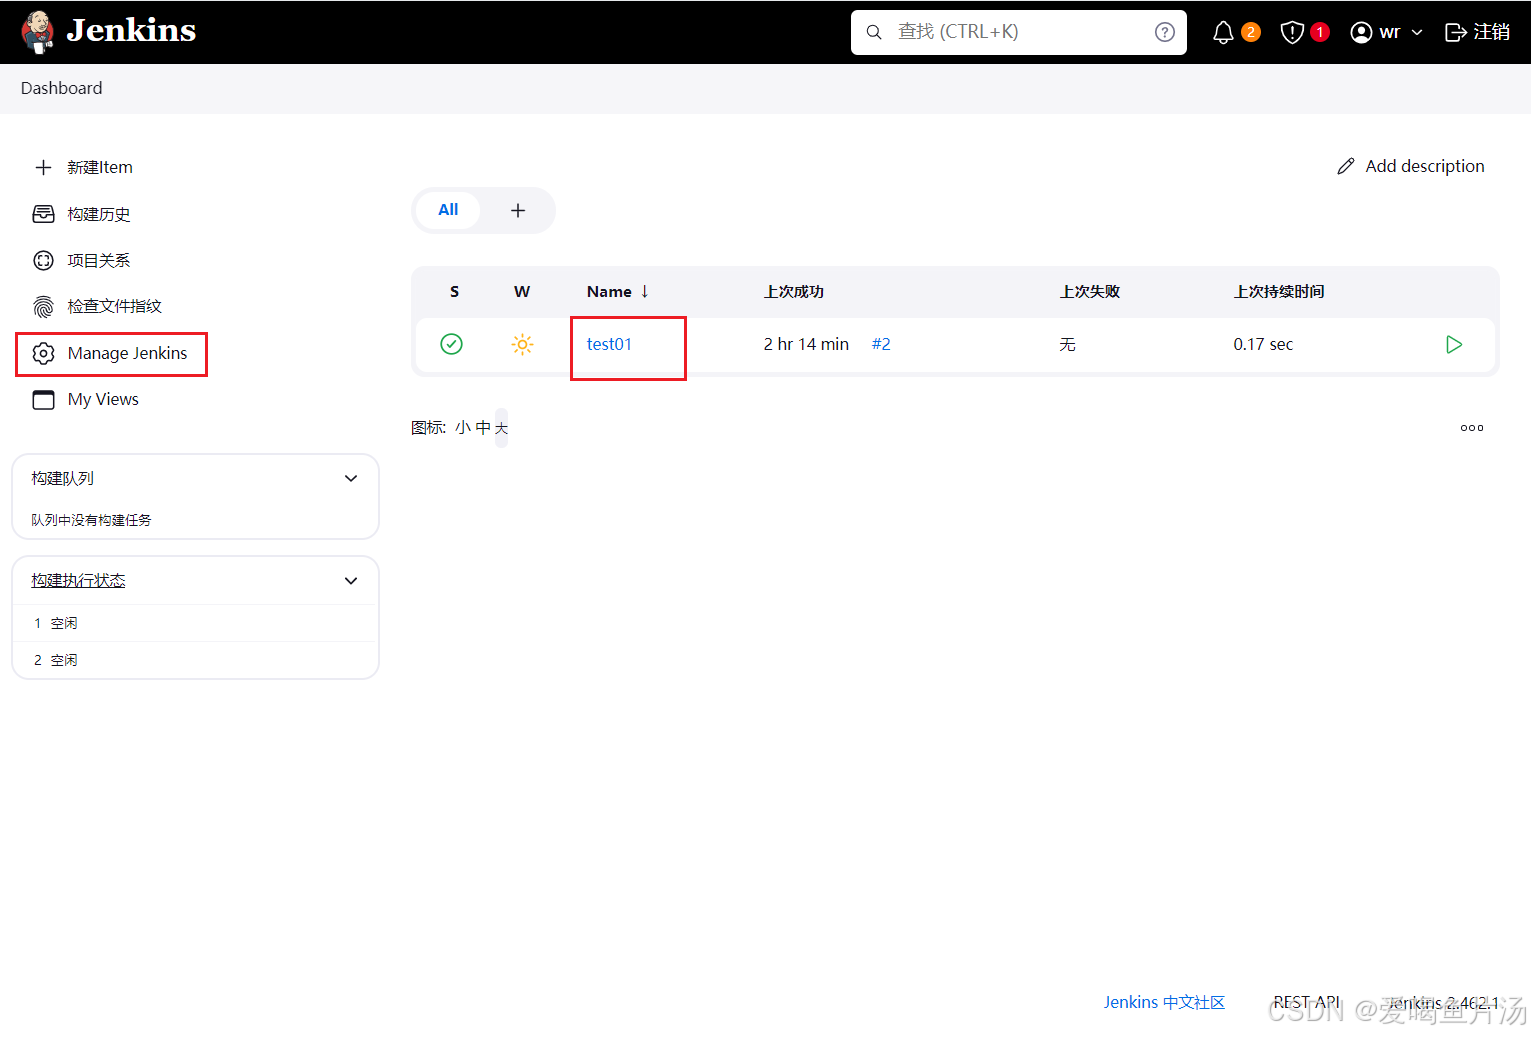
2、部署Jenkins服务器作为CICD服务器,Jenkins可以通过手动或自动的方式拉取代码。在本地对大妈进行编译、审查、打包。然后Jenkins把打包好的应用部署到tomcat服务器中(通过CD持续部署部署到生产环境或预生产环境)
|-----------------|-----------------|
| 192.168.170.100 | gitlab代码仓库服务器 |
| 192.168.170.200 | CICD持续集成持续部署服务器 |
| 192.168.170.4 | 模拟生产环境的服务器 |
1、初始化
关闭防火墙、关闭seliux、修改主机名
2、部署gitlab服务器
修改配置文件/etc/gitlab/gitlab.rb
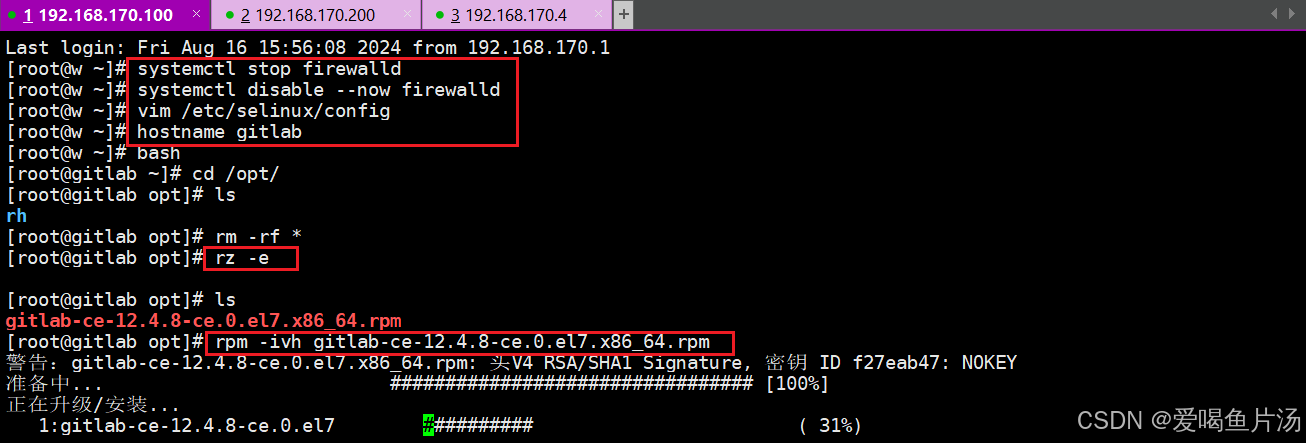
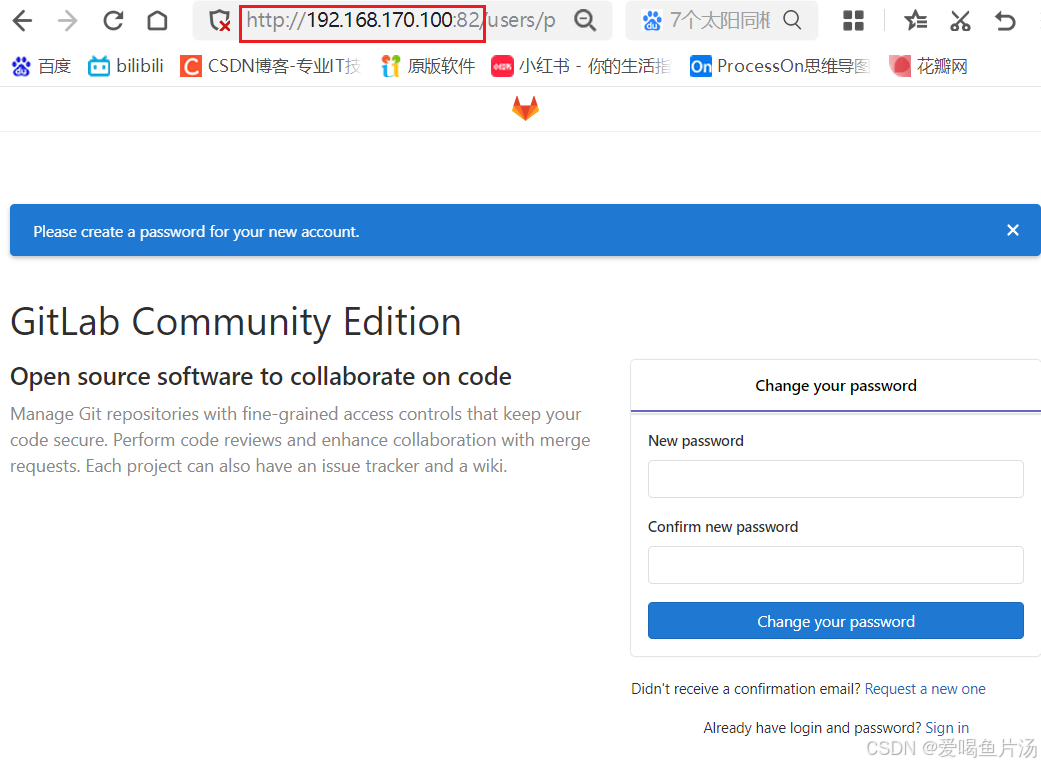
修改访问地址为当前服务器地址,默认80端口,可以换成别的端口,我换成82
bash
vim /etc/gitlab/gitlab.rb
---------------------------------------------------
external_url 'http://192.168.170.100:82'
1112 nginx['listen_port'] = 82
---------------------------------------------------
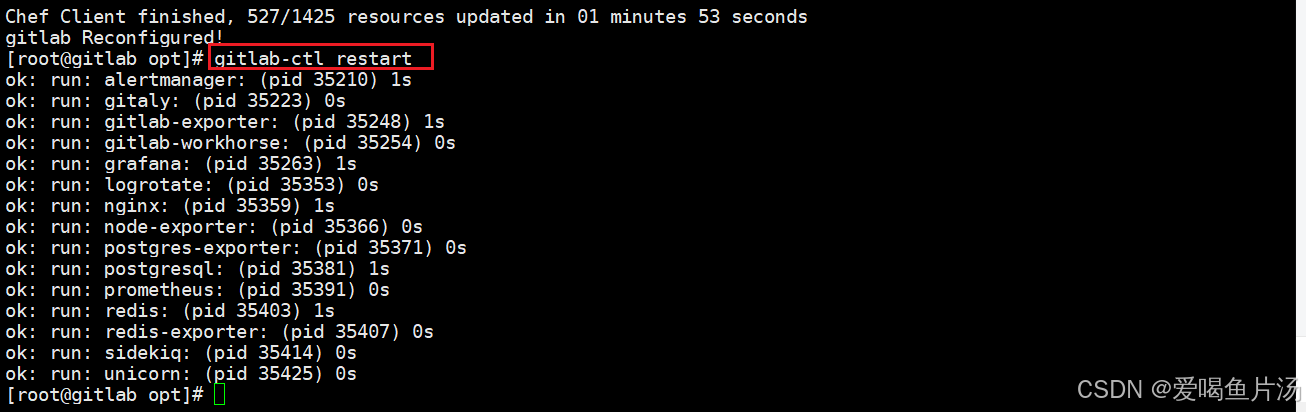
gitlab-ctl reconfigure #重新生成配置
gitlab-ctl restart #重启

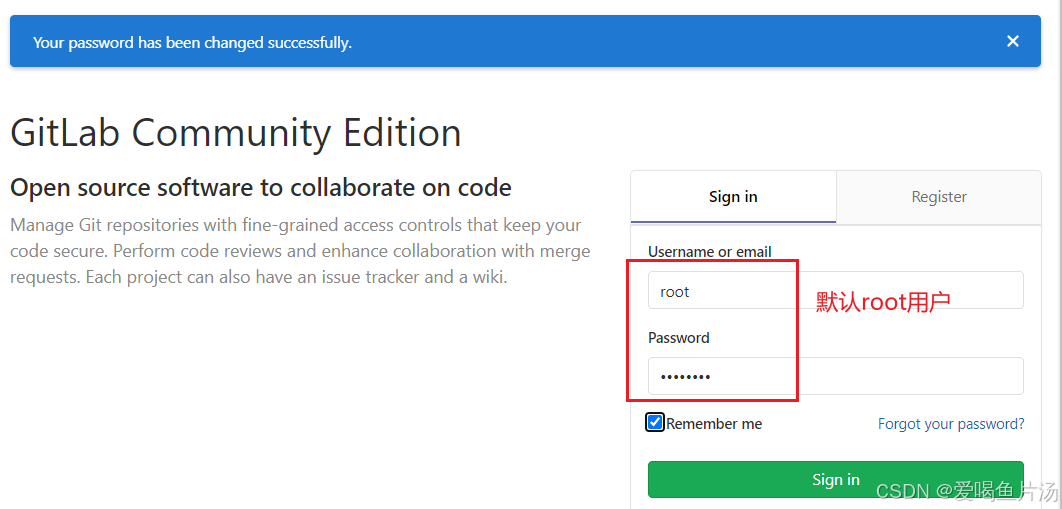
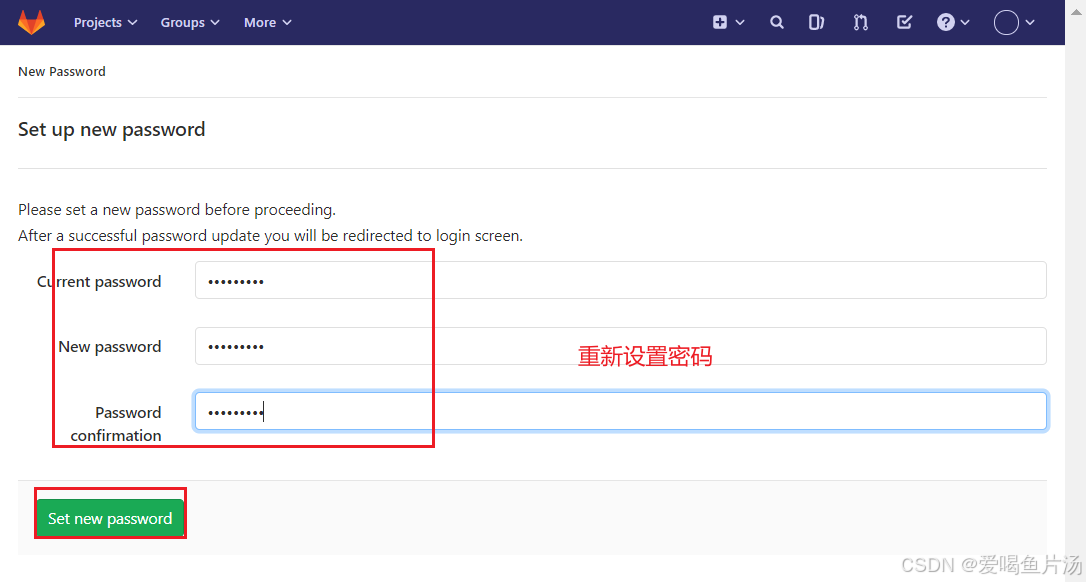
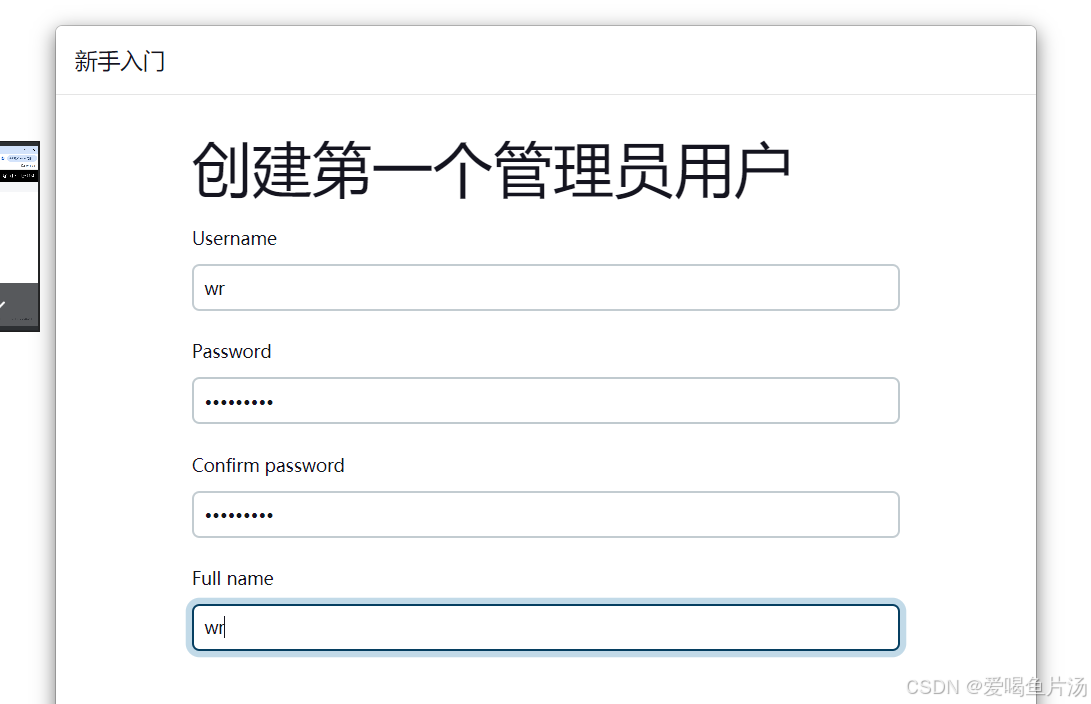
浏览器访问,先自定义密码,然后登录仓库
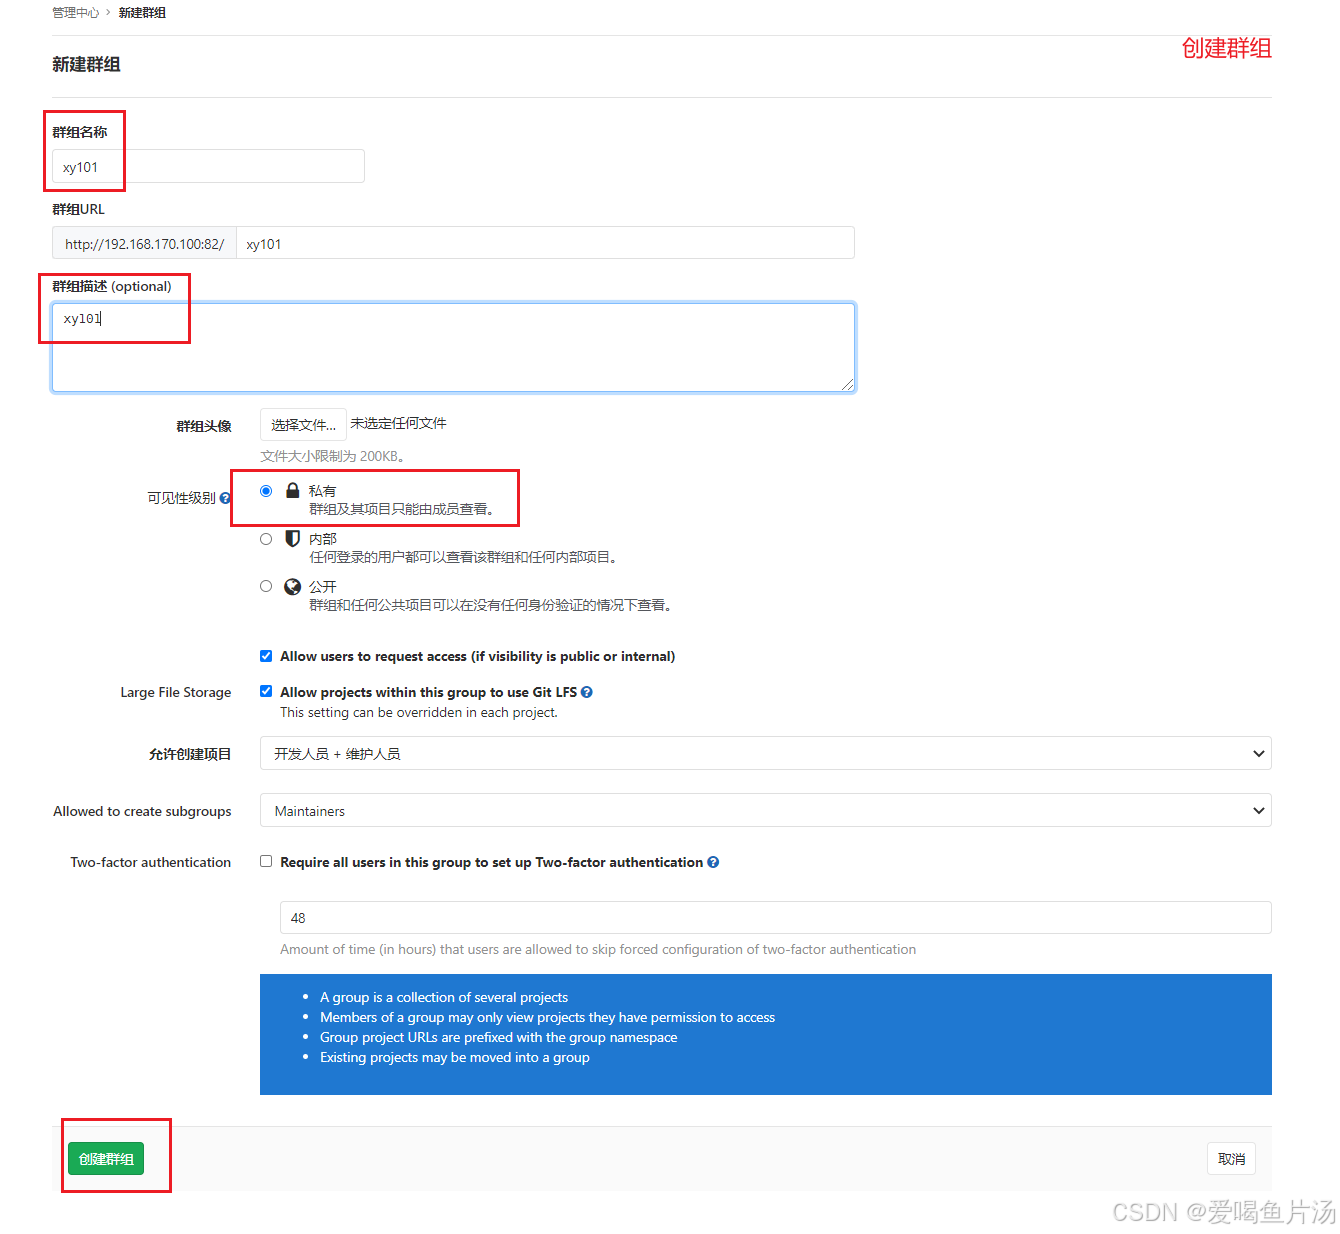
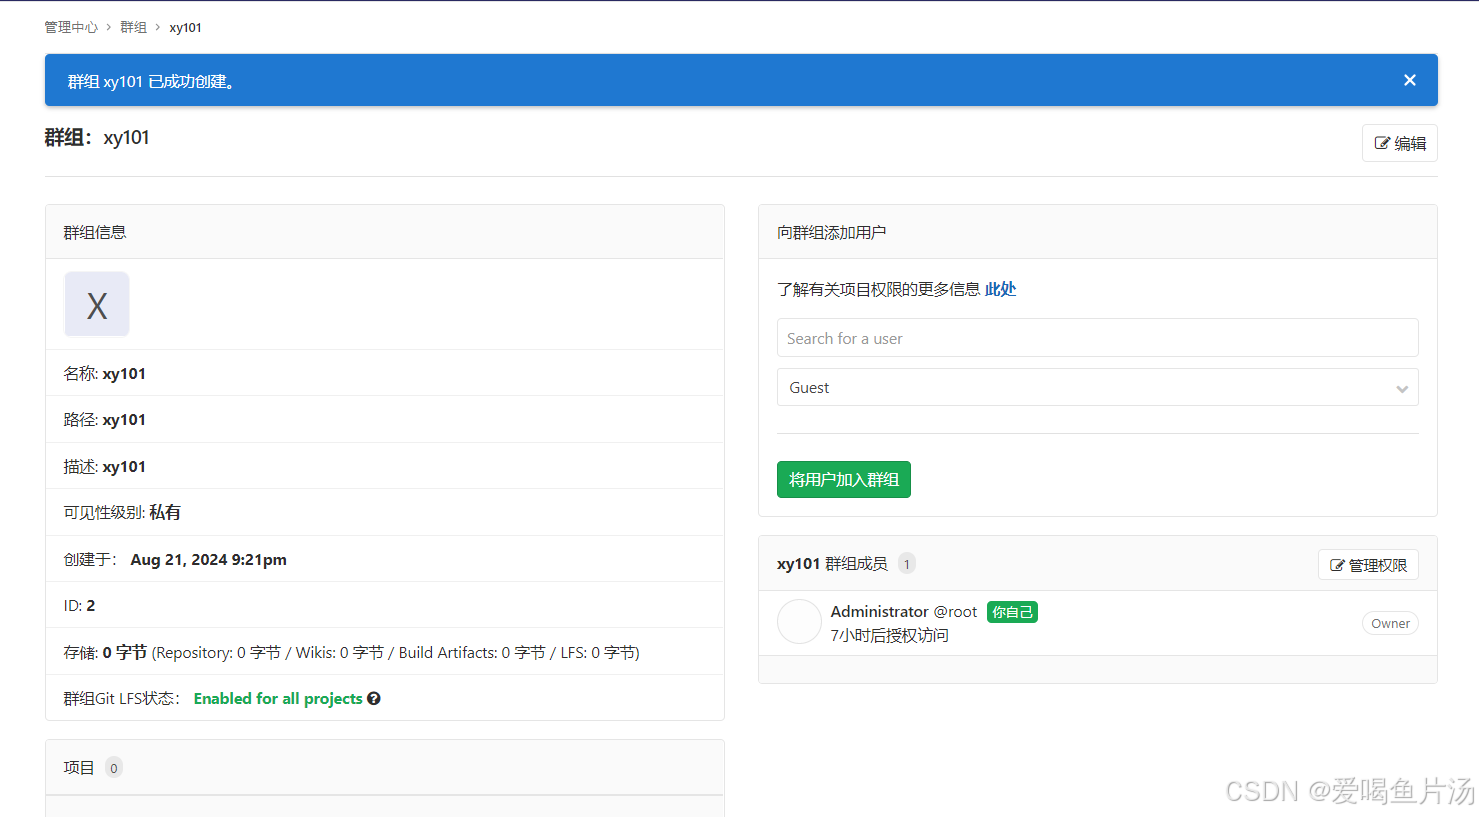
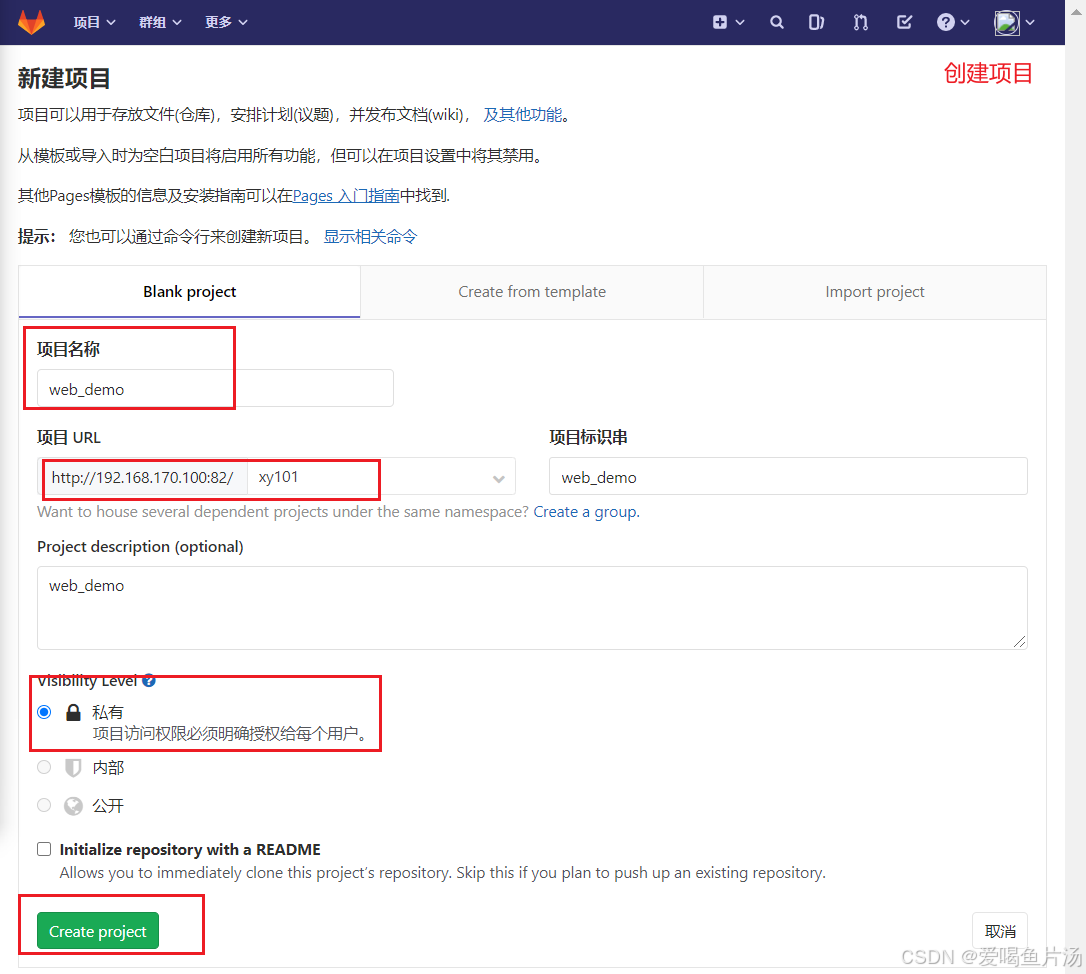
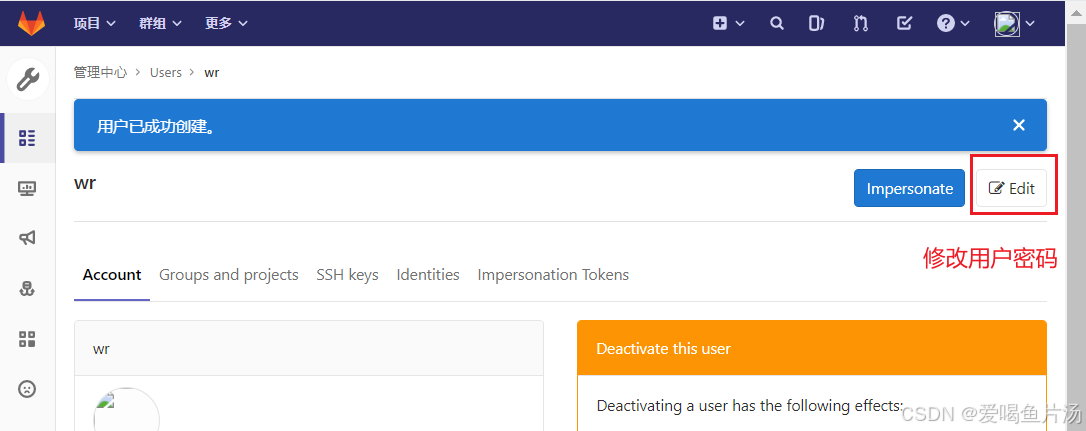
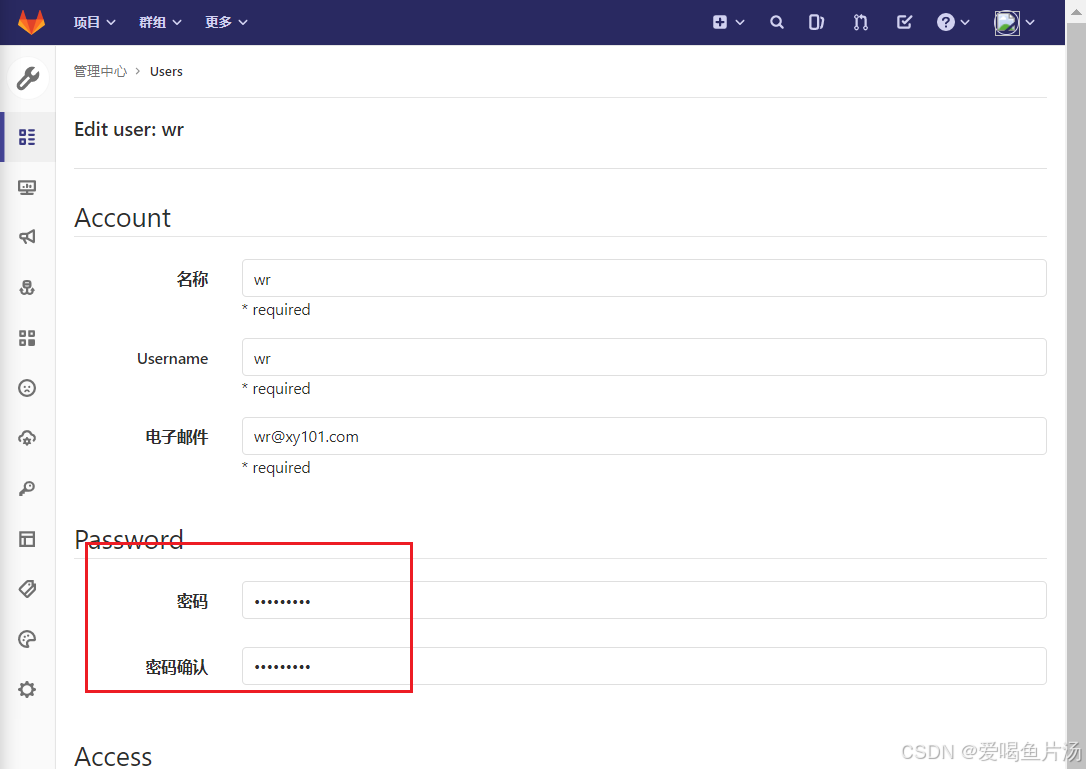
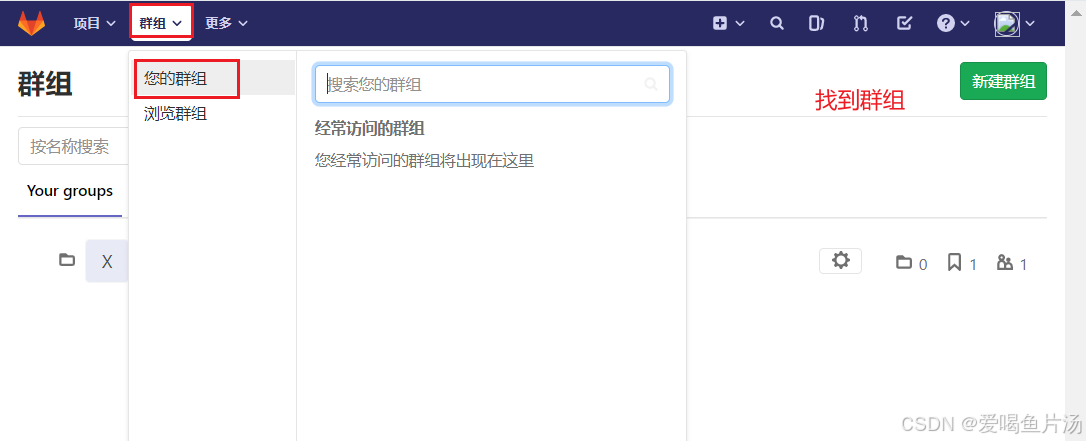
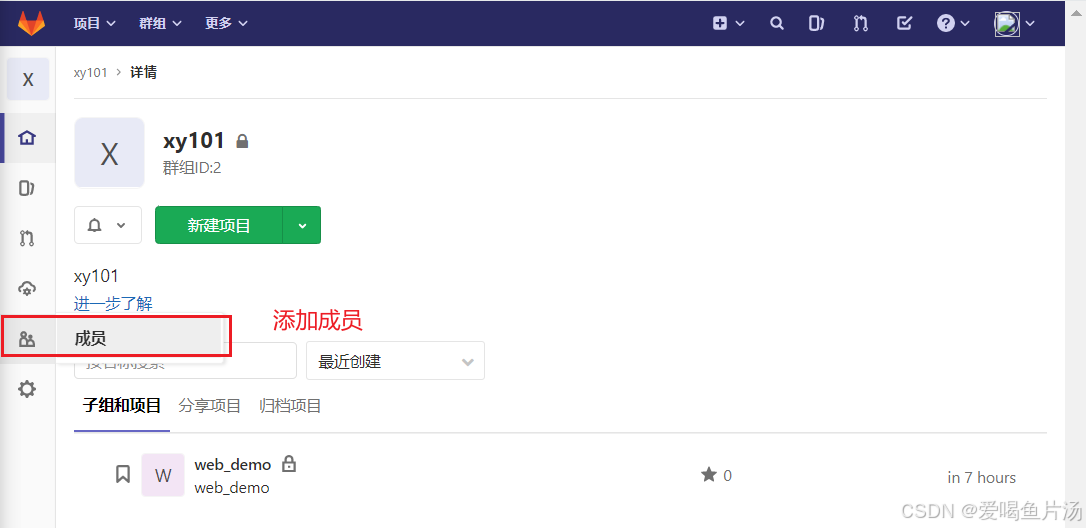
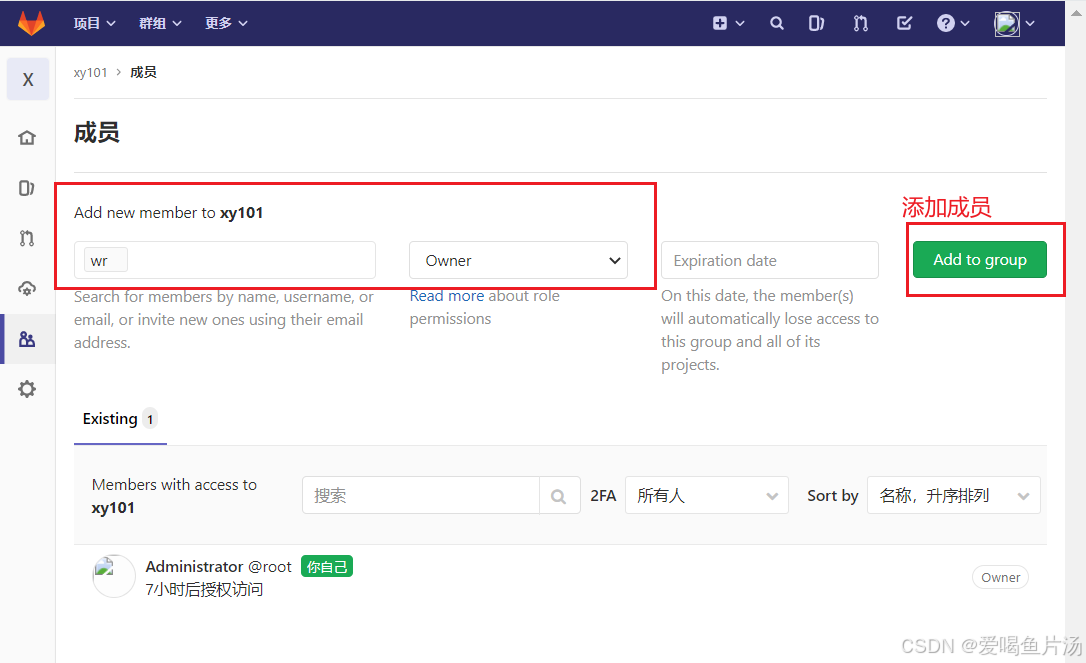
创建组、创建项目、创建用户
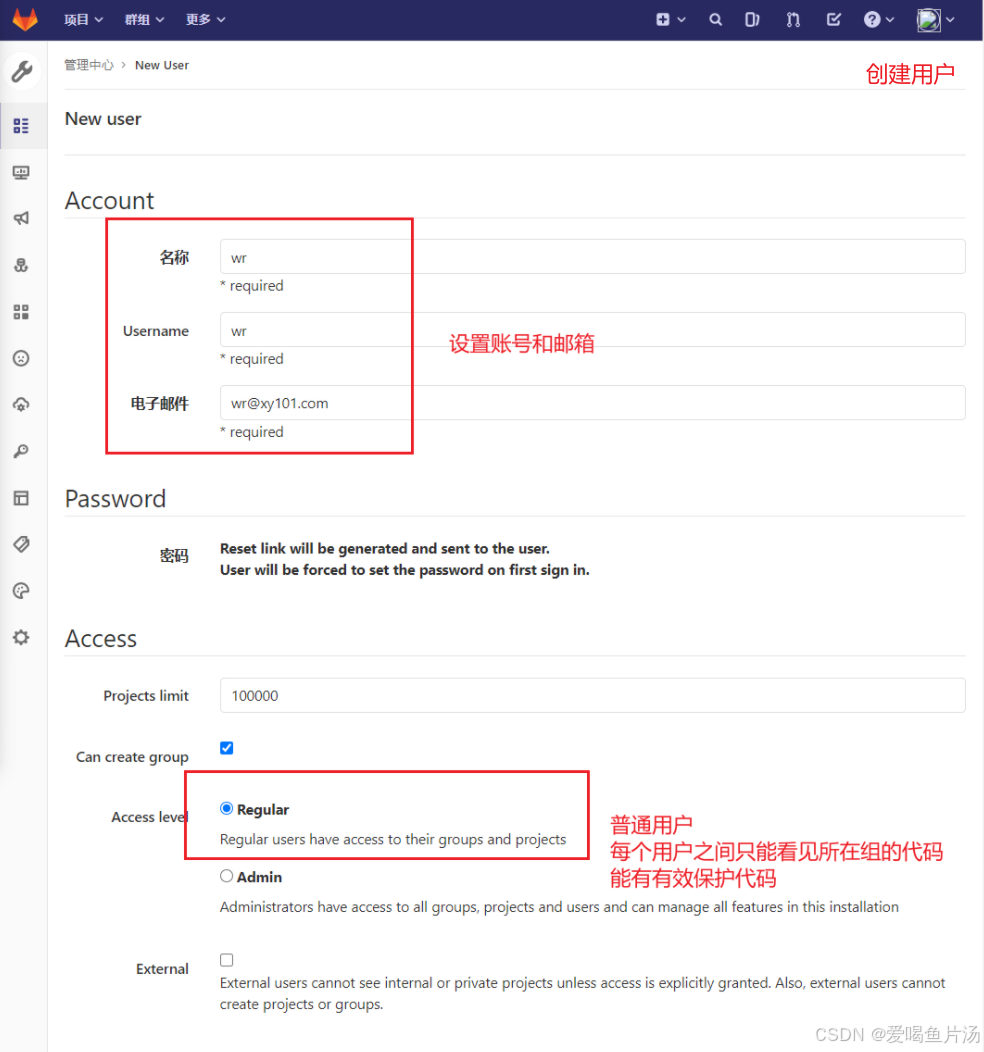
把用户加到群组中,选择角色

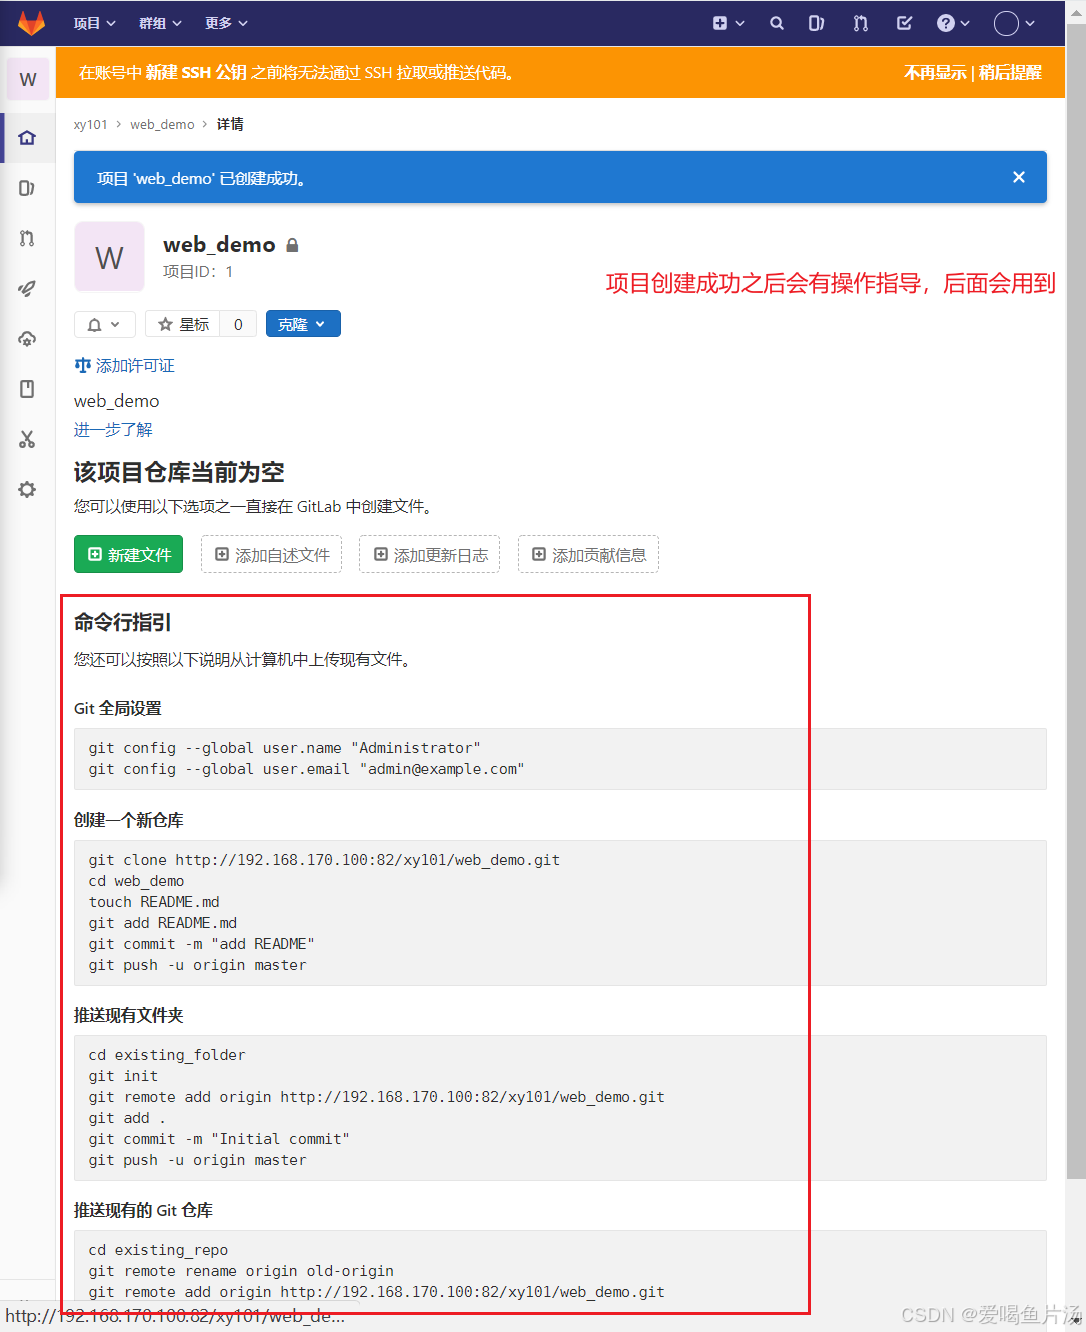
上传代码包,解压
bash
unzip web_demo.zip
cd web_demo/ 进入代码目录
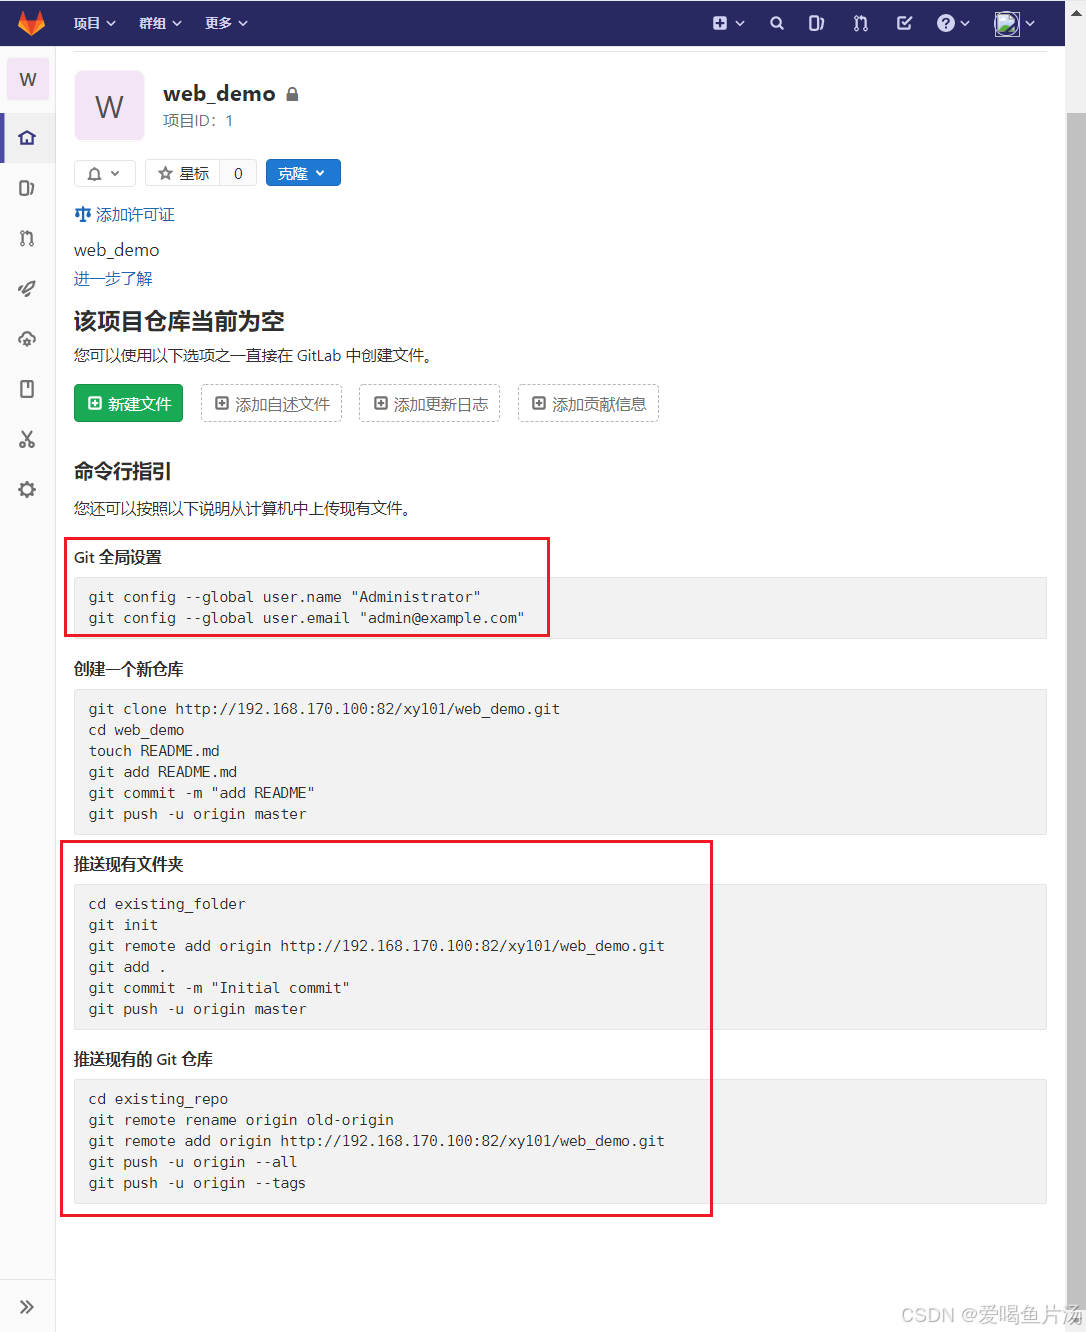
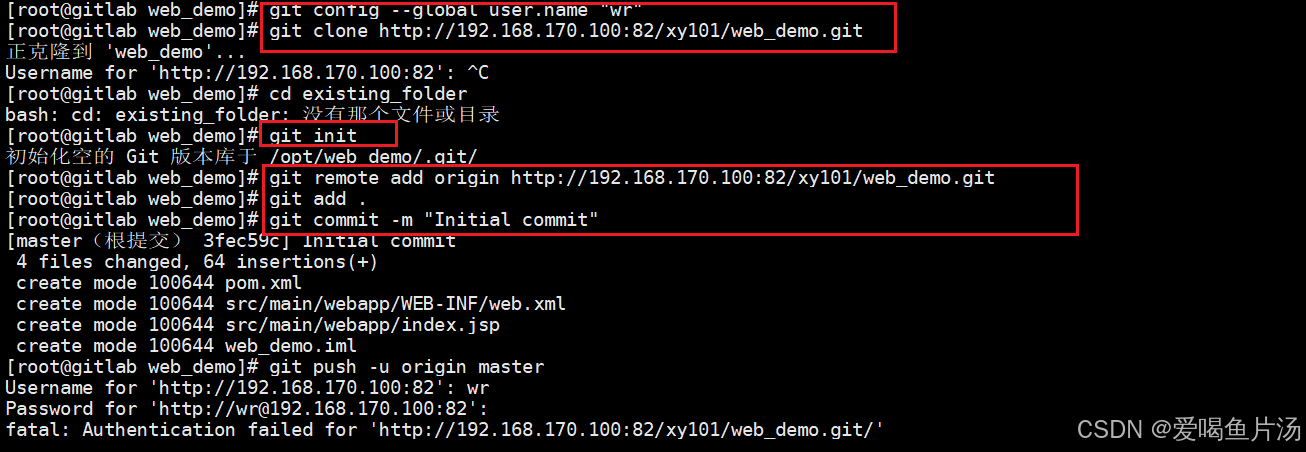
#Git 全局设置
git config --global user.name "wr"
git config --global user.email "wr@xy101.com"
#推送现有文件夹(先执行init初始化,把gitlab仓库远程添加进来并且把代码添加并提交,推送代码)
cd existing_folder
git init
git remote add origin http://192.168.170.100:82/xy101/web_demo.git
git add .
git commit -m "Initial commit"
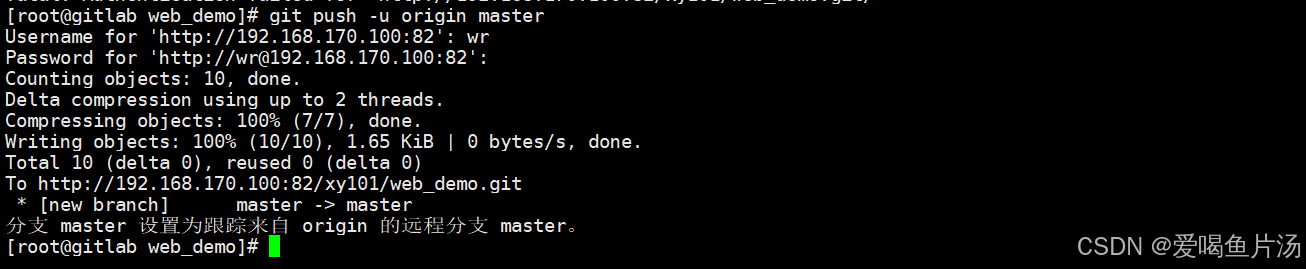
git push -u origin master
#推送现有的 Git 仓库
cd existing_repo
git remote rename origin old-origin
git remote add origin http://192.168.170.100:82/xy101/web_demo.git
git push -u origin --all
git push -u origin --tags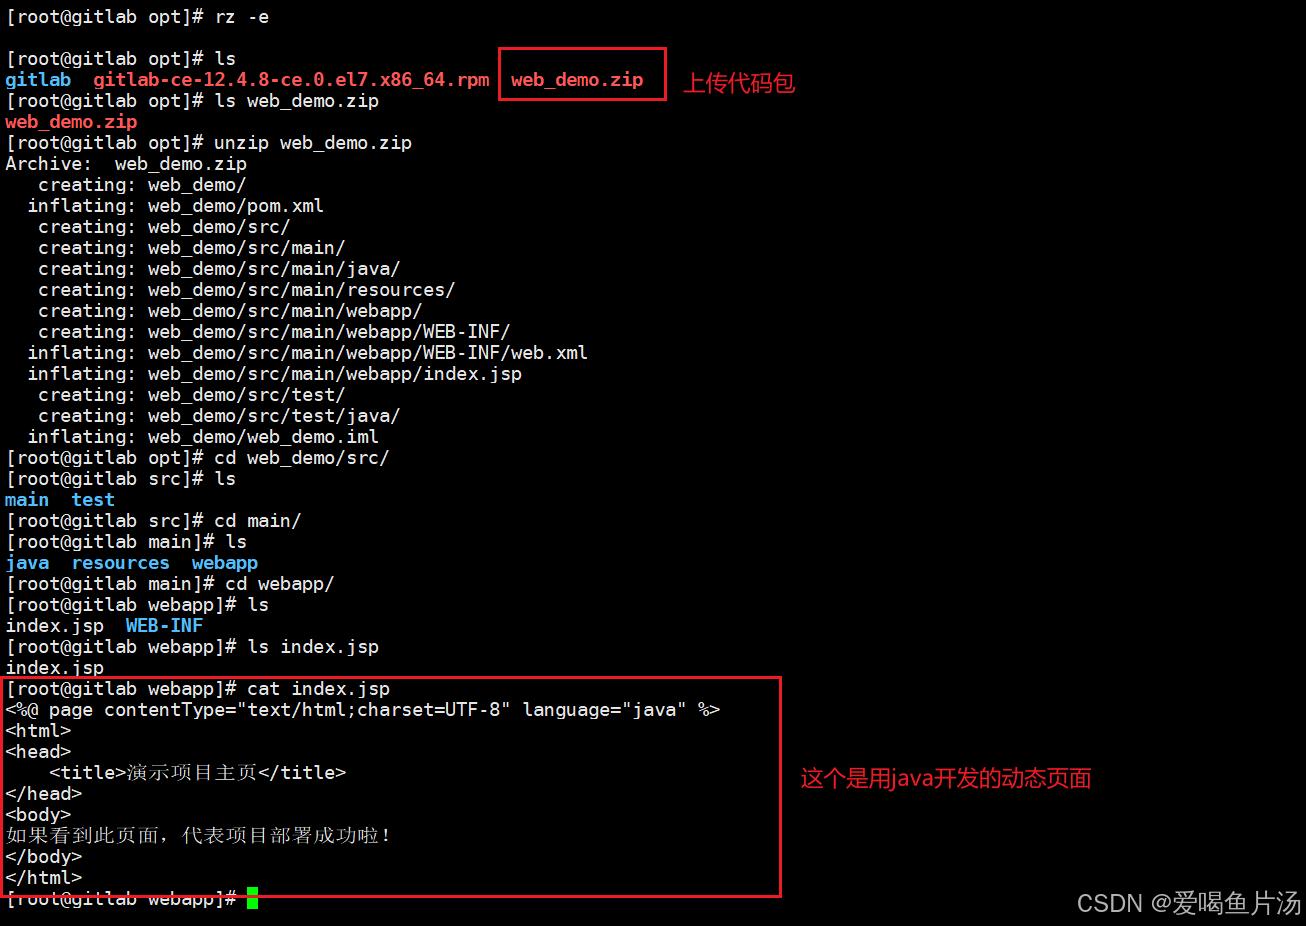

至此gitlab代码仓库服务器部署成功
3、部署Jenkins服务器
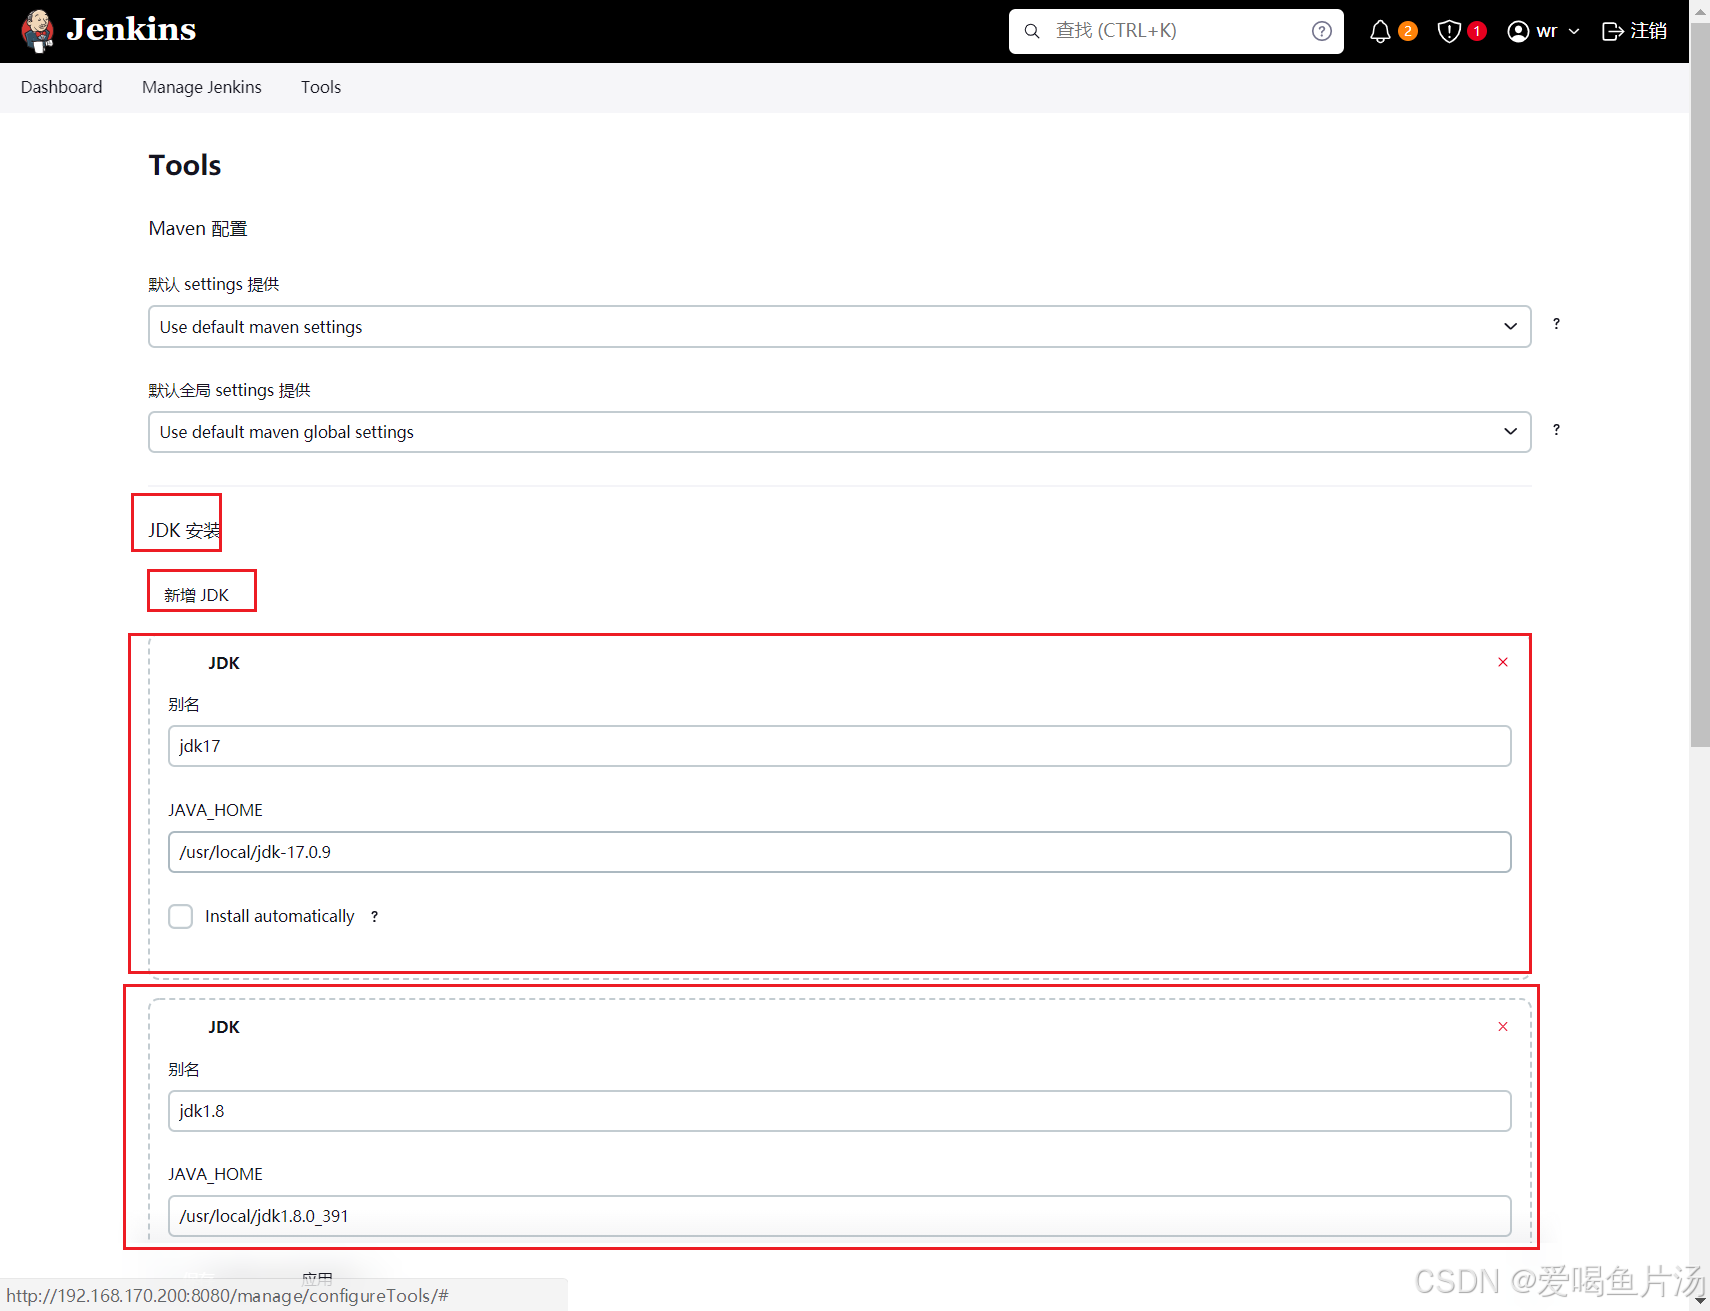
先准备jdk环境(11版本以上),修改jdk配置文件。部署Jenkins
//准备jdk环境
cd /opt/
rz -E

tar xf jdk-8u391-linux-x64.tar.gz
tar xf jdk1.8.0_391
mv jdk-17.0.9/ /usr/local/
mv jdk1.8.0_391/ /usr/local/
cd /usr/local/

vim /etc/profile
-----------------------------------------------
export JAVA_HOME=/usr/local/jdk1.8.0_391
export CLASSPATH=.:${JAVA_HOME}/lib
export PATH=${JAVA_HOME}/bin:$PATH
-----------------------------------------------
source /etc/profile
java -version

bash
//部署Jenkins,加载Jenkins的yum源
wget -O /etc/yum.repos.d/jenkins.repo https://pkg.jenkins.io/redhat-stable/jenkins.repo --no-check-certificate
rpm --import https://pkg.jenkins.io/redhat-stable/jenkins.io-2023.key
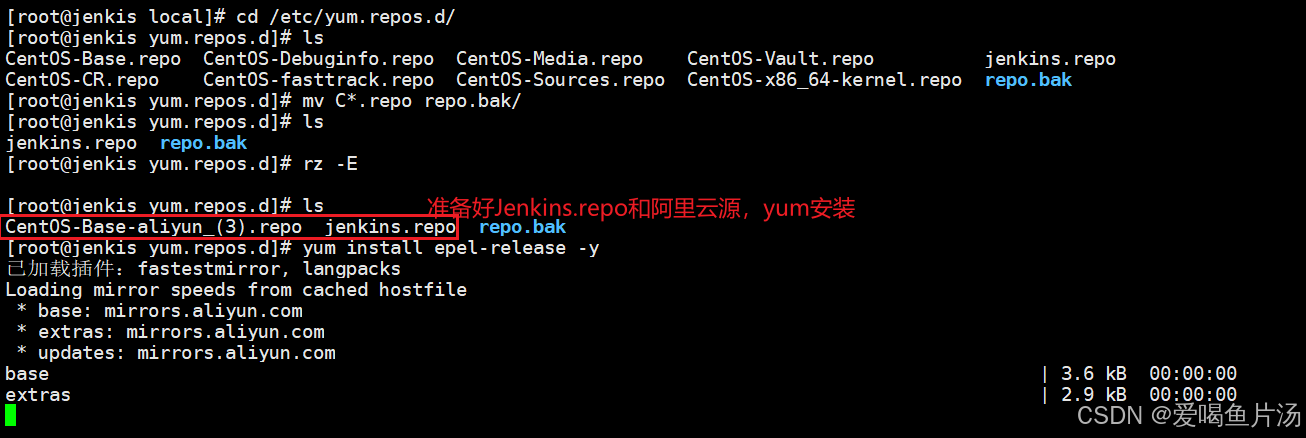
yum install epel-release -y
yum install jenkins -y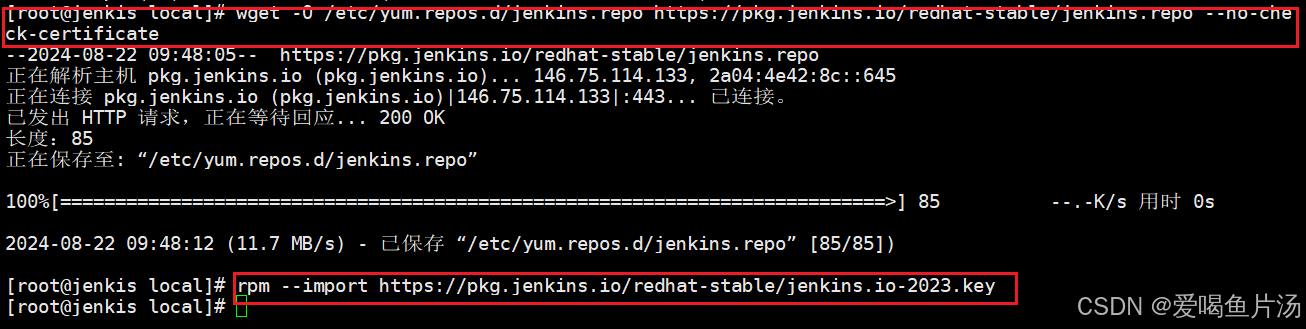
修改Jenkins的服务管理文件,修改启动参数,指定java环境为17
bash
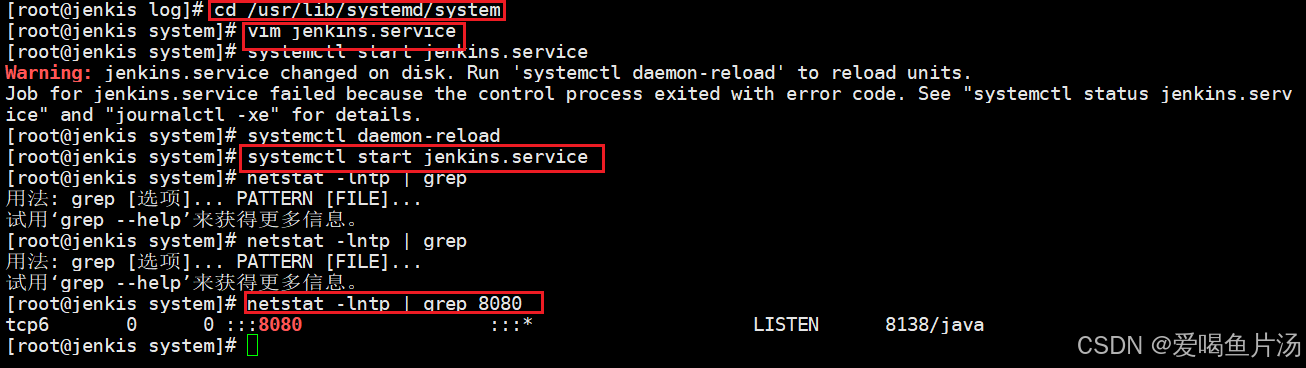
cd /usr/lib/systemd/system
vim jenkins.service
-----------------------------------------
 34 User=root
 35 Group=root
 51 Environment="JAVA_HOME=/usr/local/jdk-17.0.9"
 70 Environment="JENKINS_PORT=8080"
--------------------------------------------------
systemctl start jenkins.service
netstat -lntp | grep


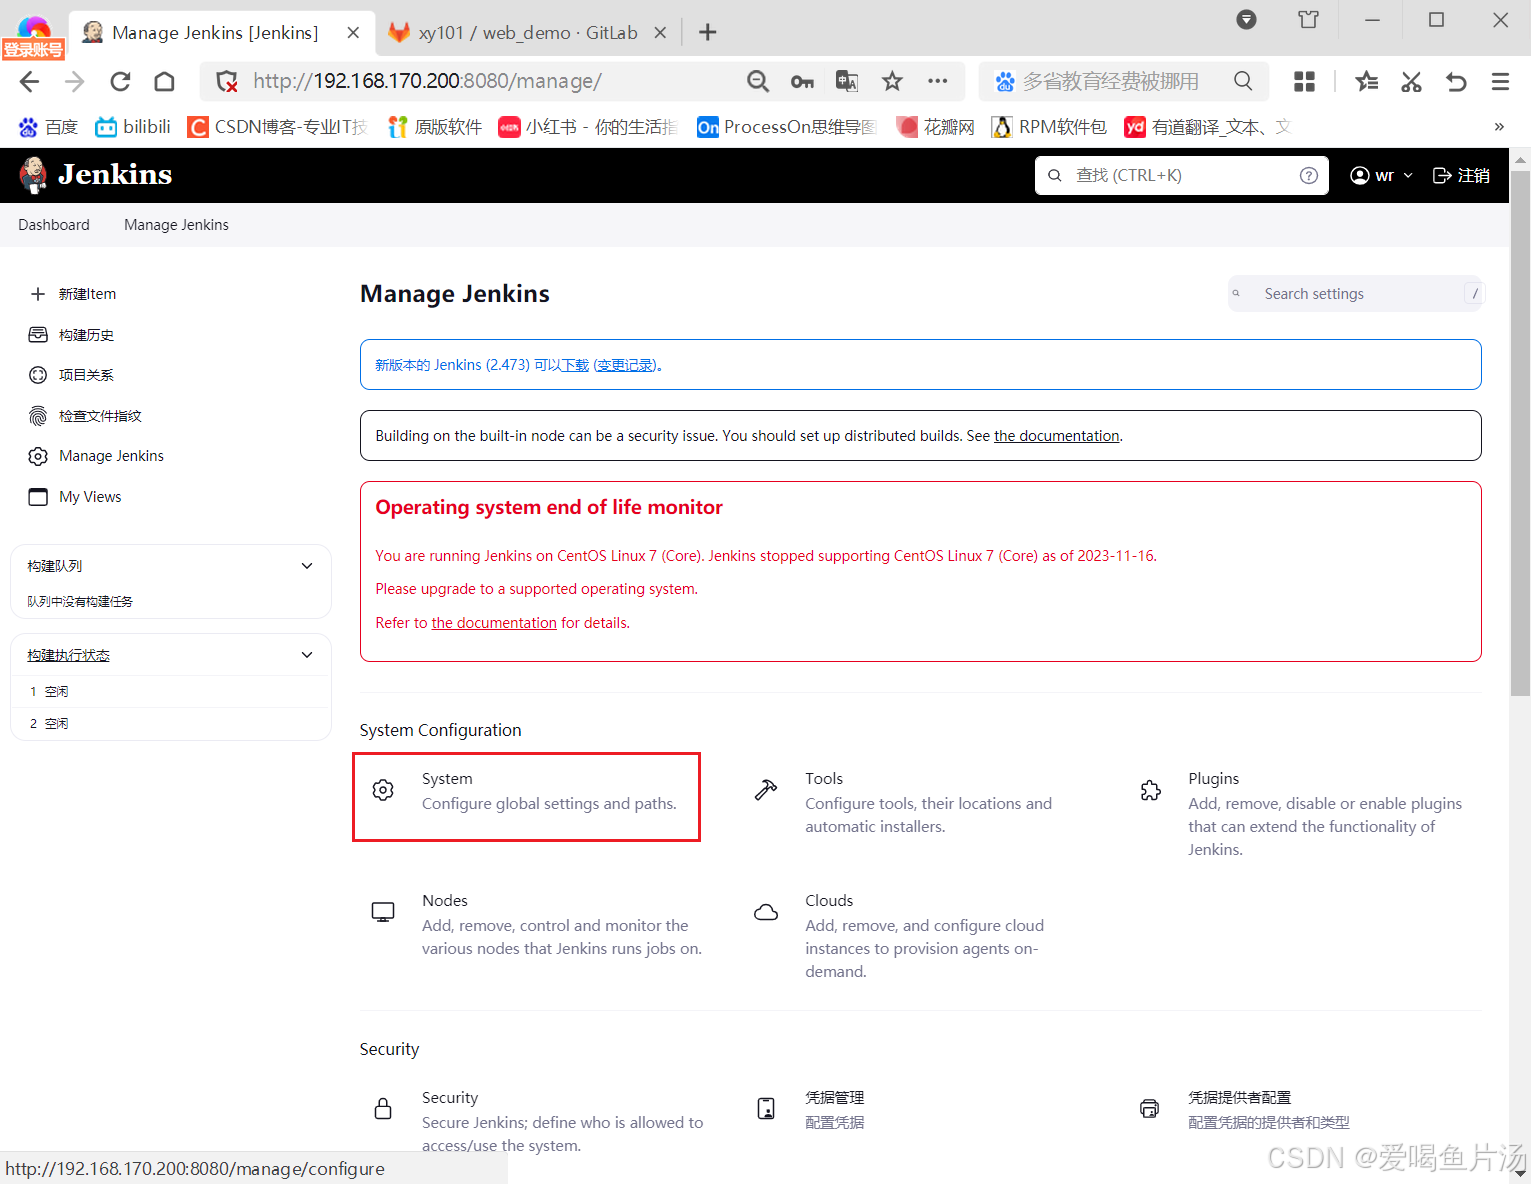
访问之前先进入Jenkins的工作目录做些修改,更新下Jenkins的插件源地址
bash
#替换插件更新源
sed -i 's#https://updates.jenkins.io/update-center.json#https://mirrors.tuna.tsinghua.edu.cn/jenkins/updates/update-center.json#g' /var/lib/jenkins/hudson.model.UpdateCenter.xml

sed -i 's#https://updates.jenkins.io/download#https://mirrors.tuna.tsinghua.edu.cn/jenkins#g' /var/lib/jenkins/updates/default.json
sed -i 's#https://www.google.com#https://www.baidu.com#g' /var/lib/jenkins/updates/default.json

systemctl restart jenkins
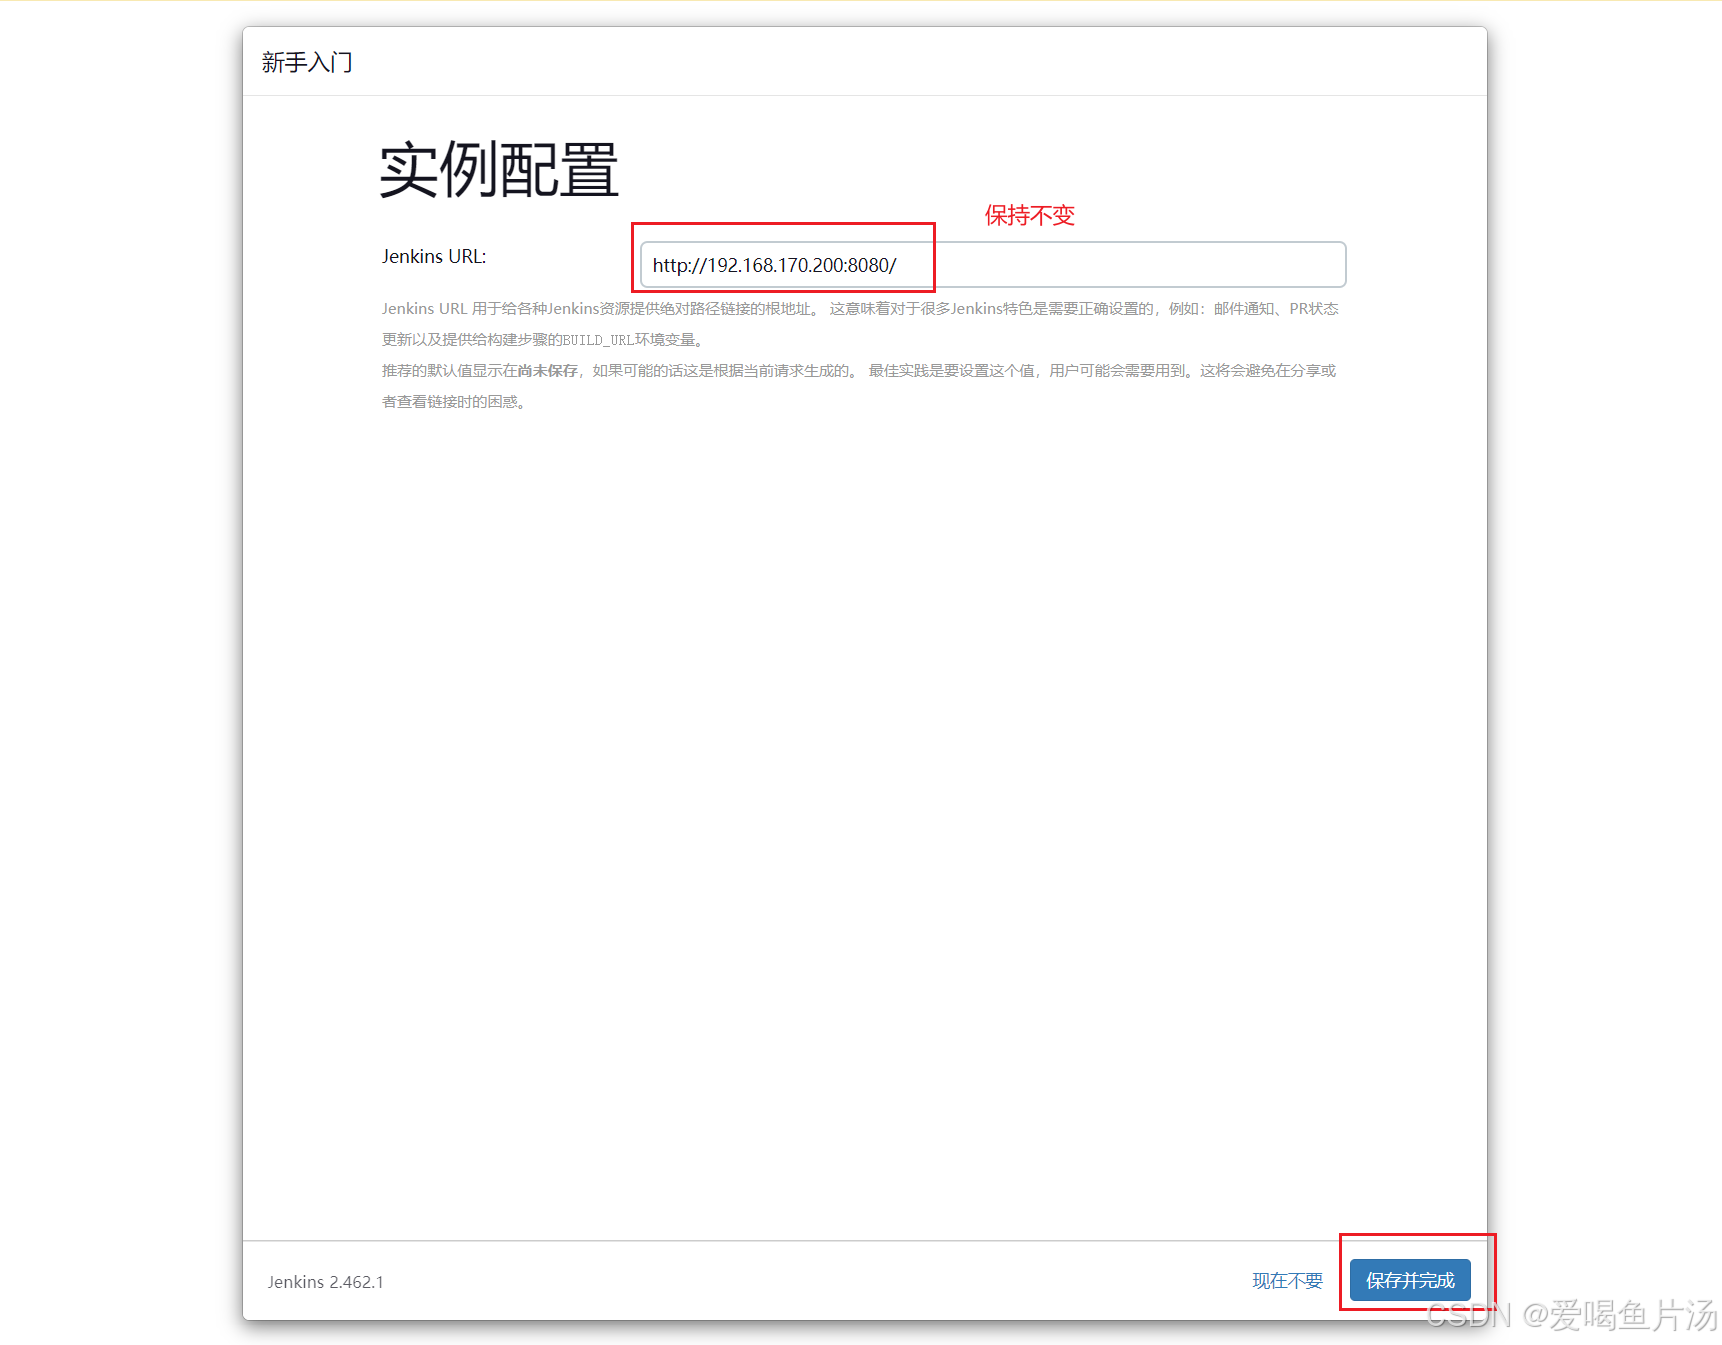
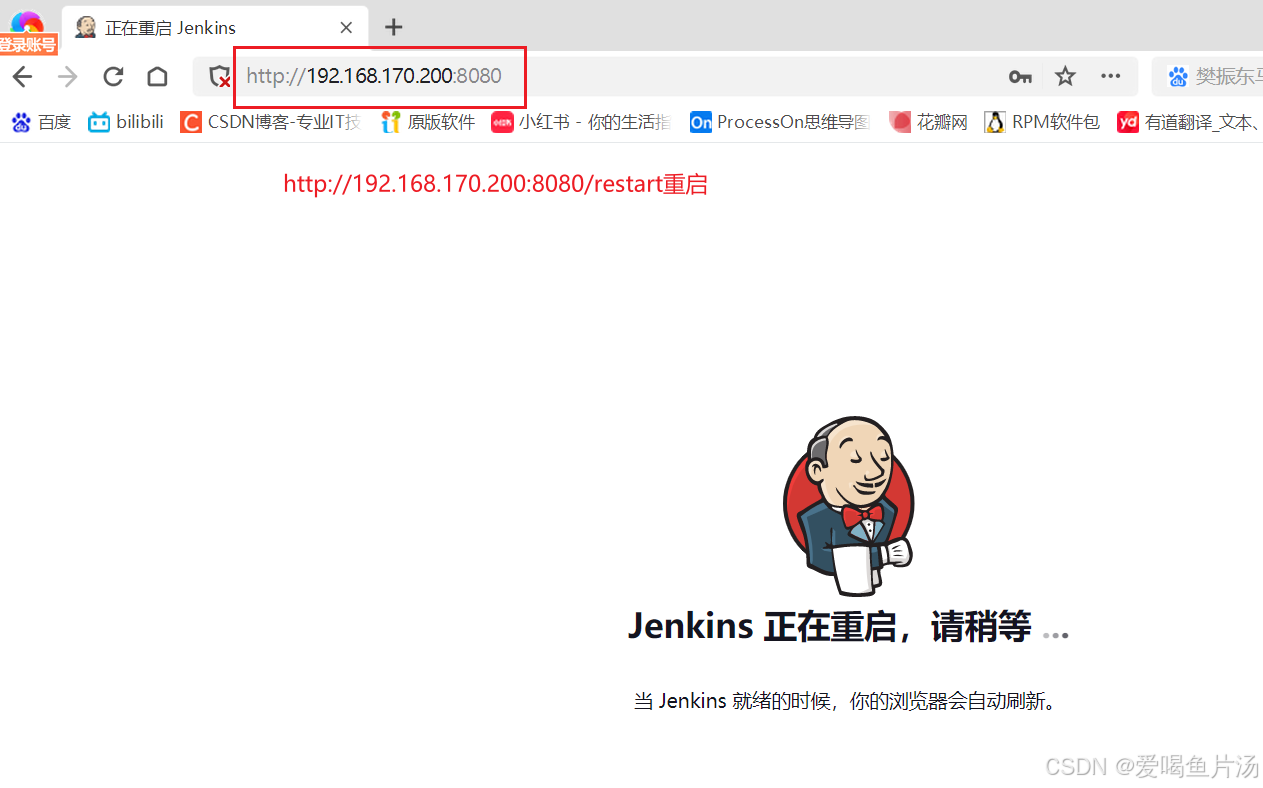
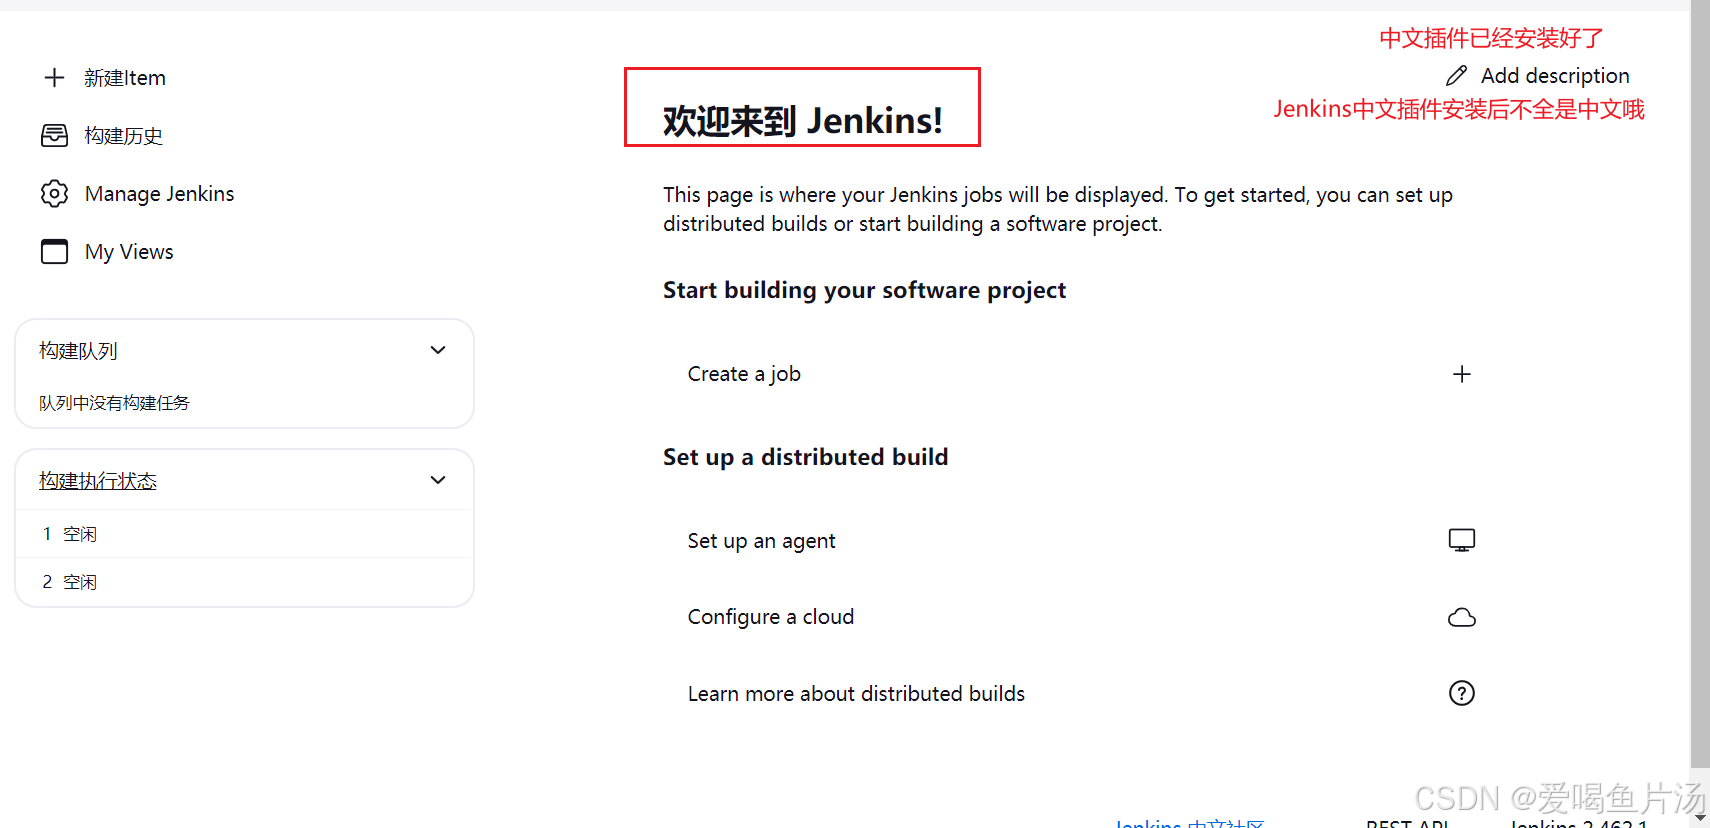
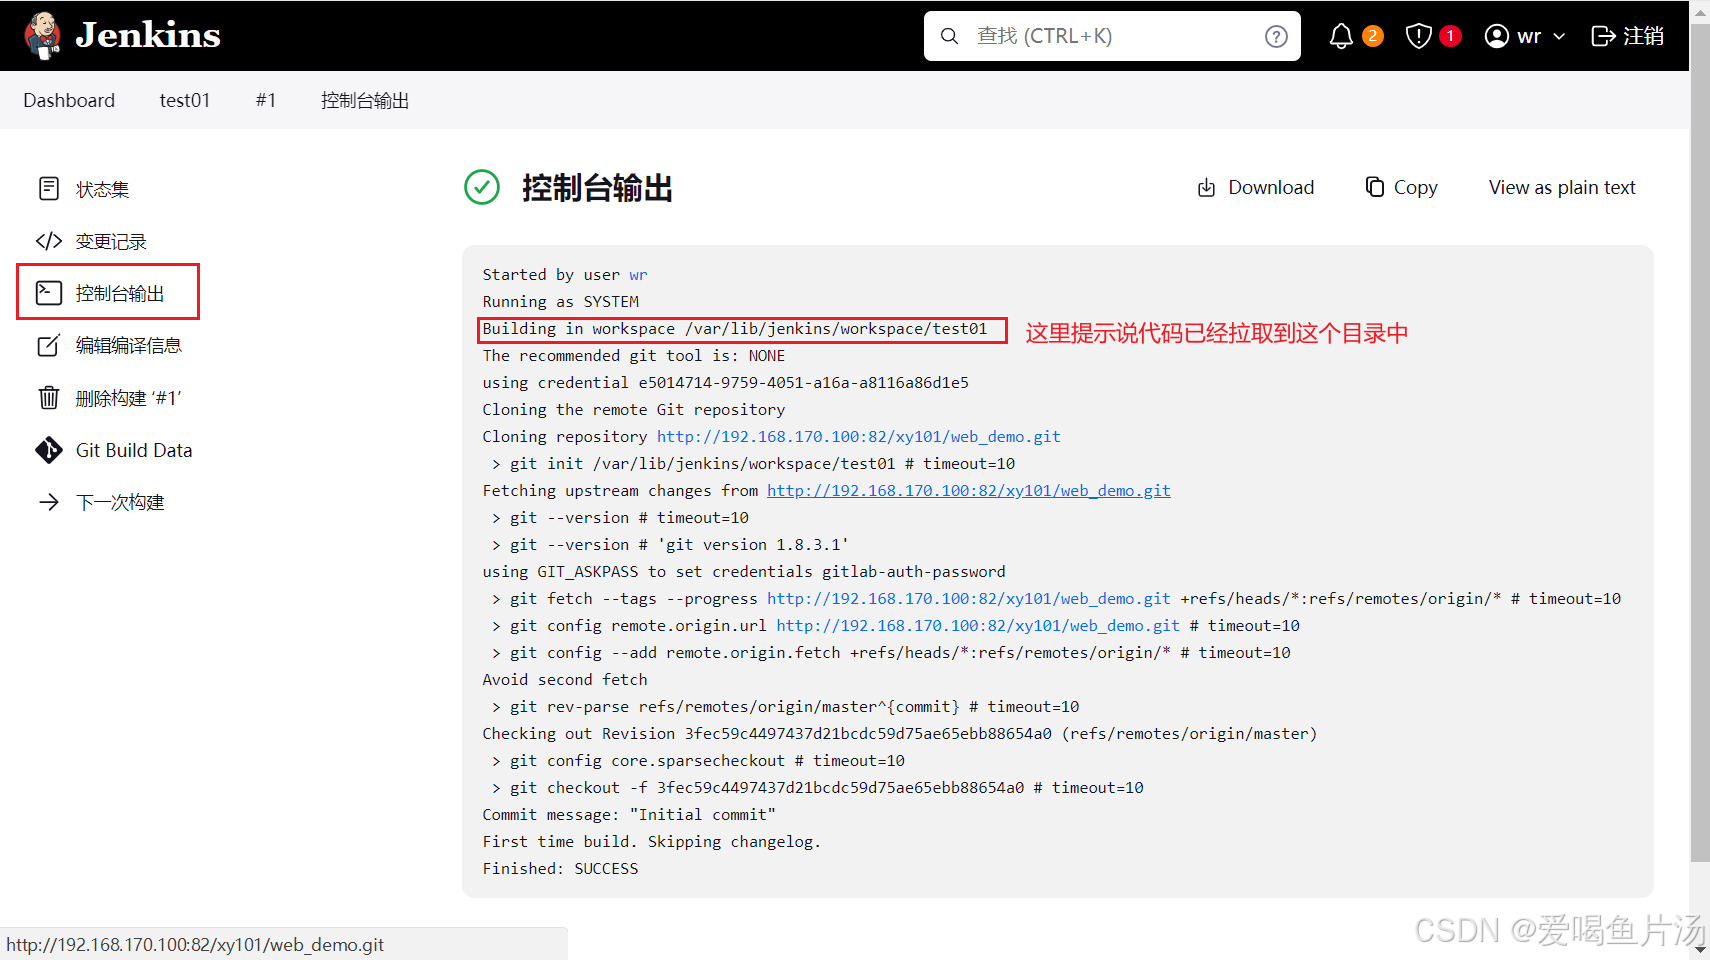
首次访问时会需要访问服务器文件获取密码,浏览器访问http://192.168.170.200:8080


如果安装出现卡顿可以重启再试
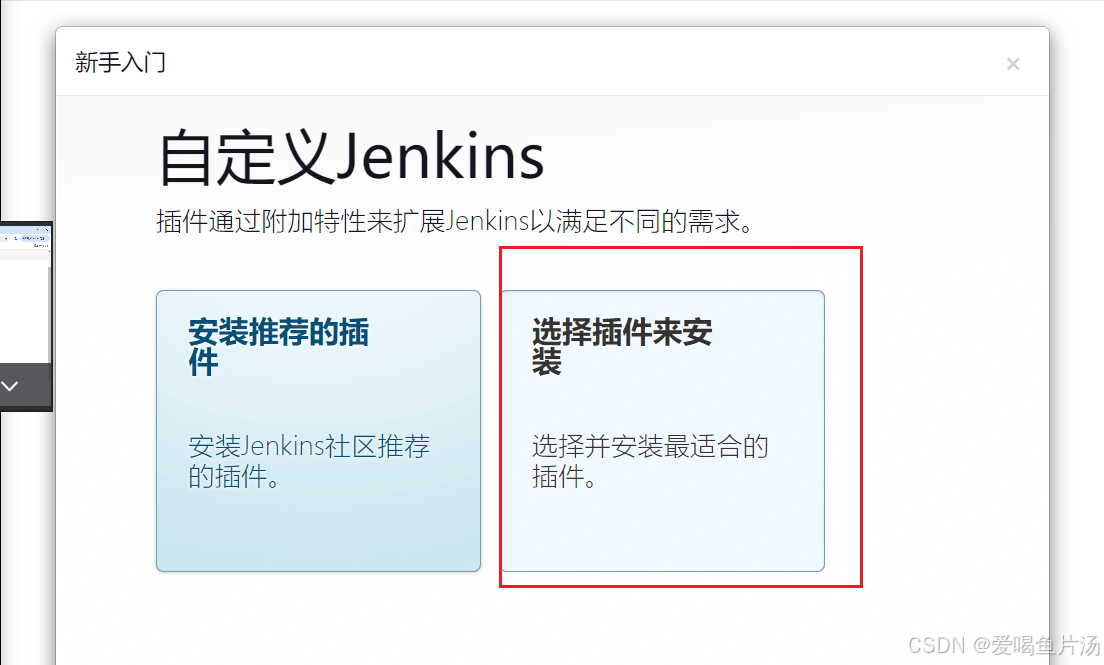
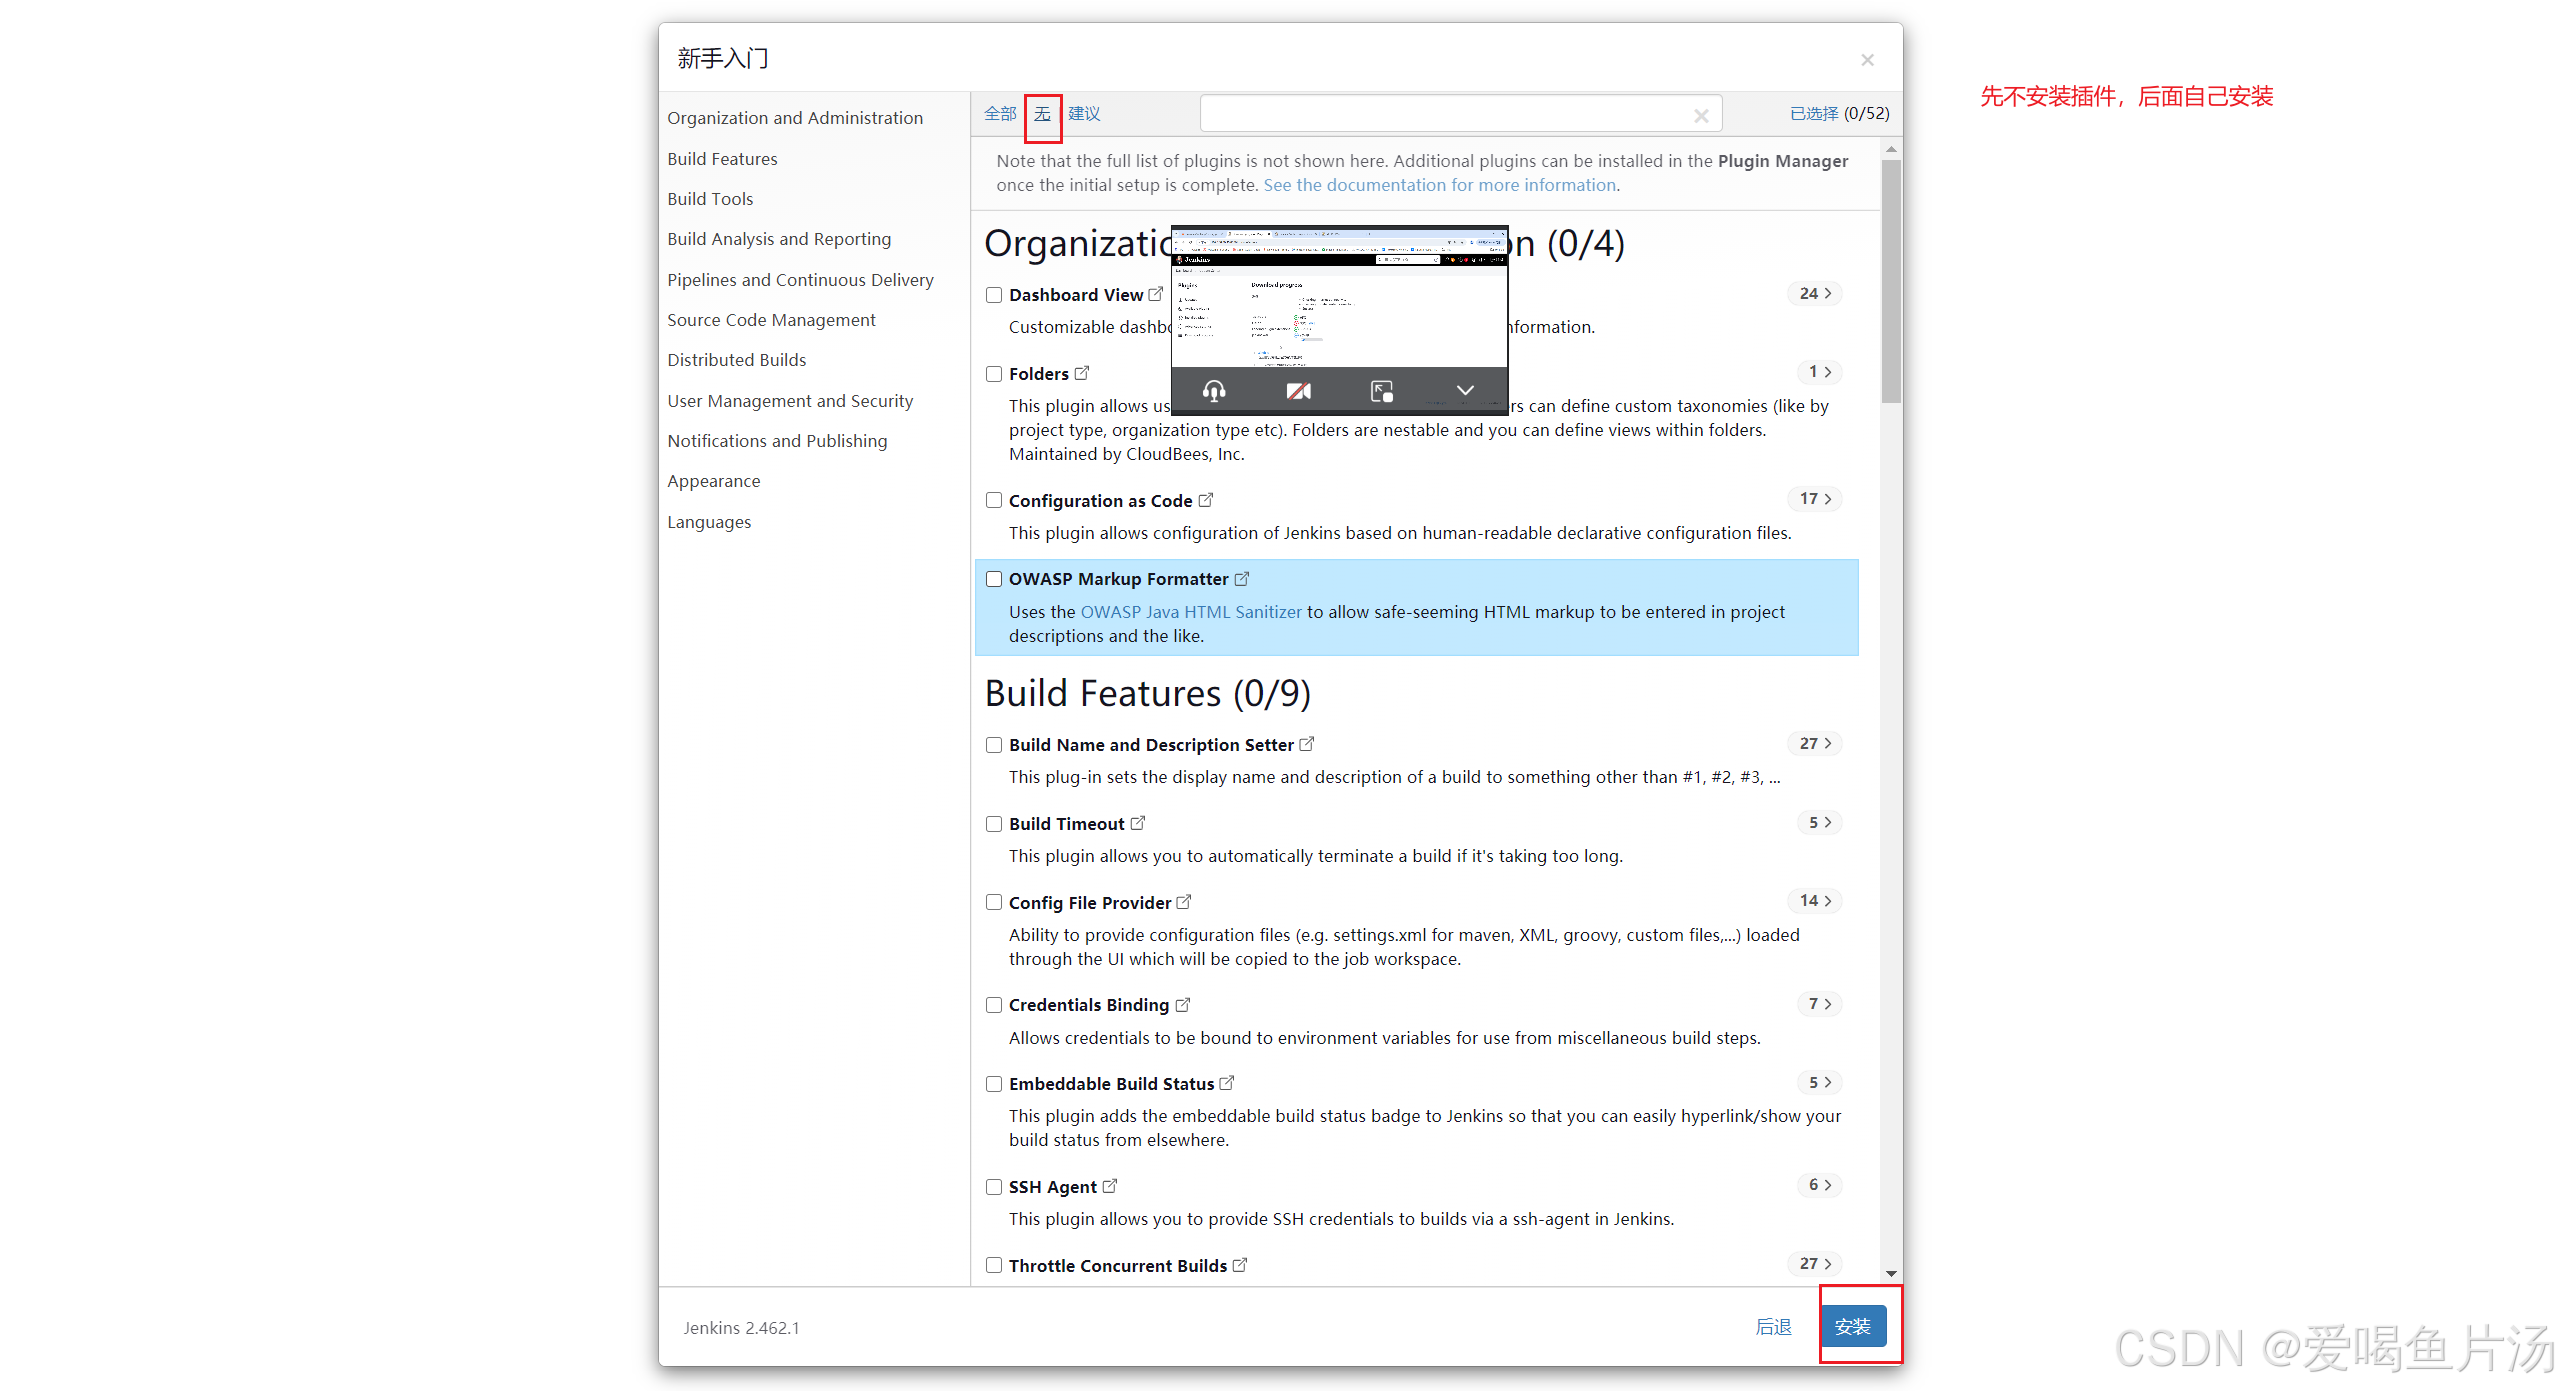
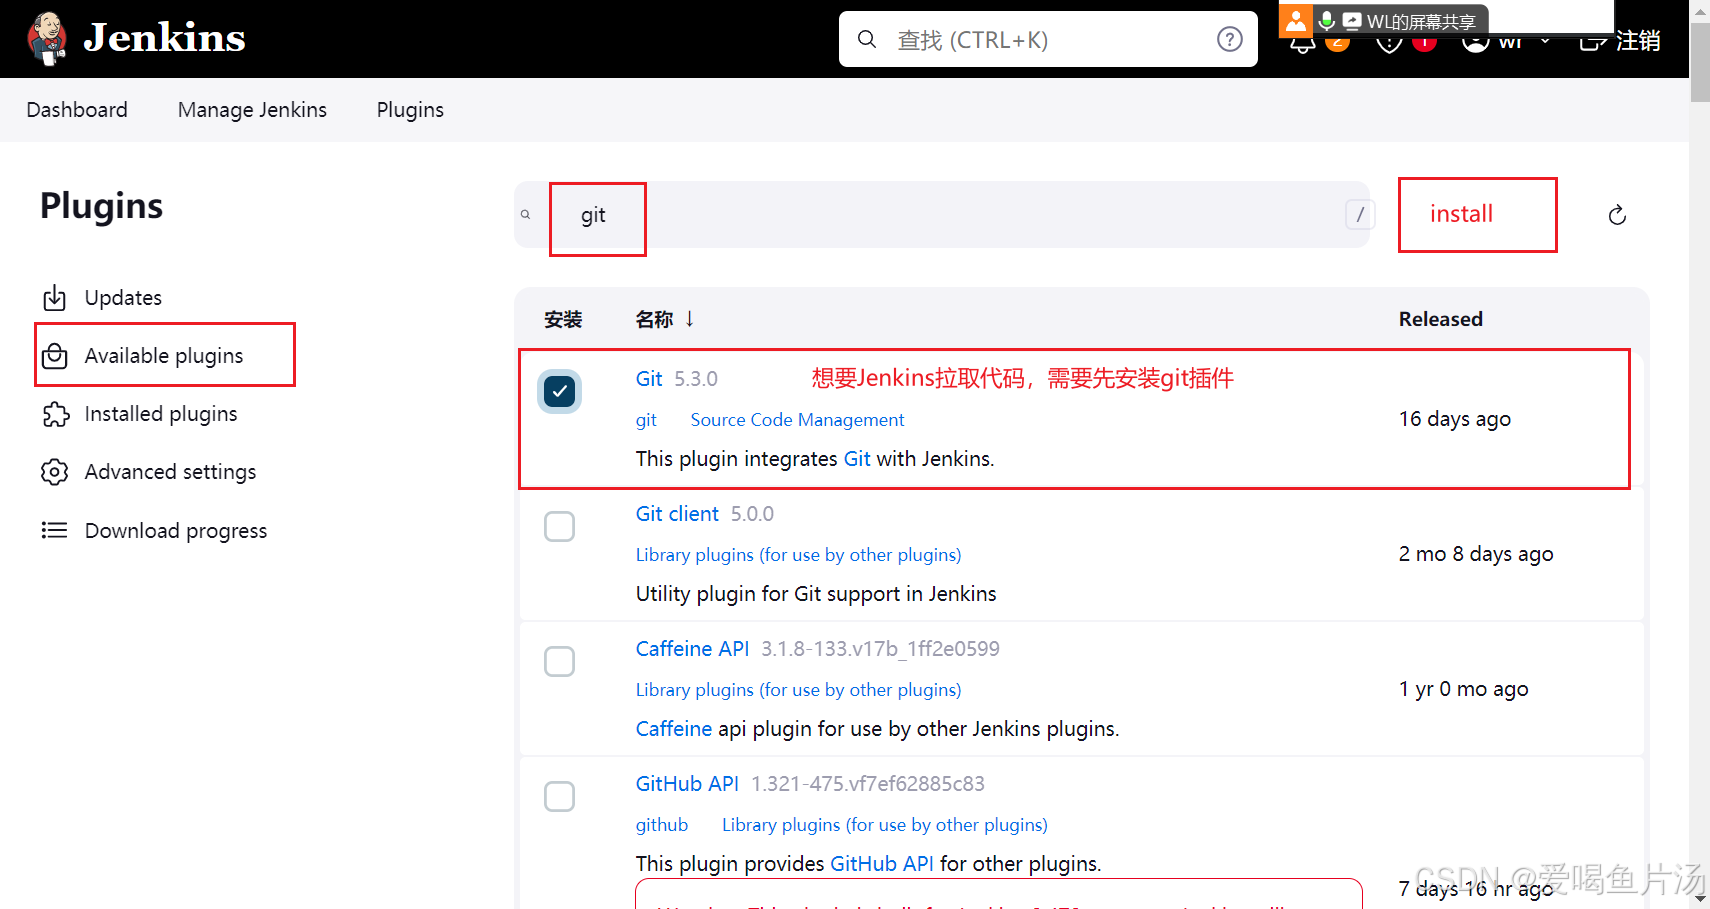
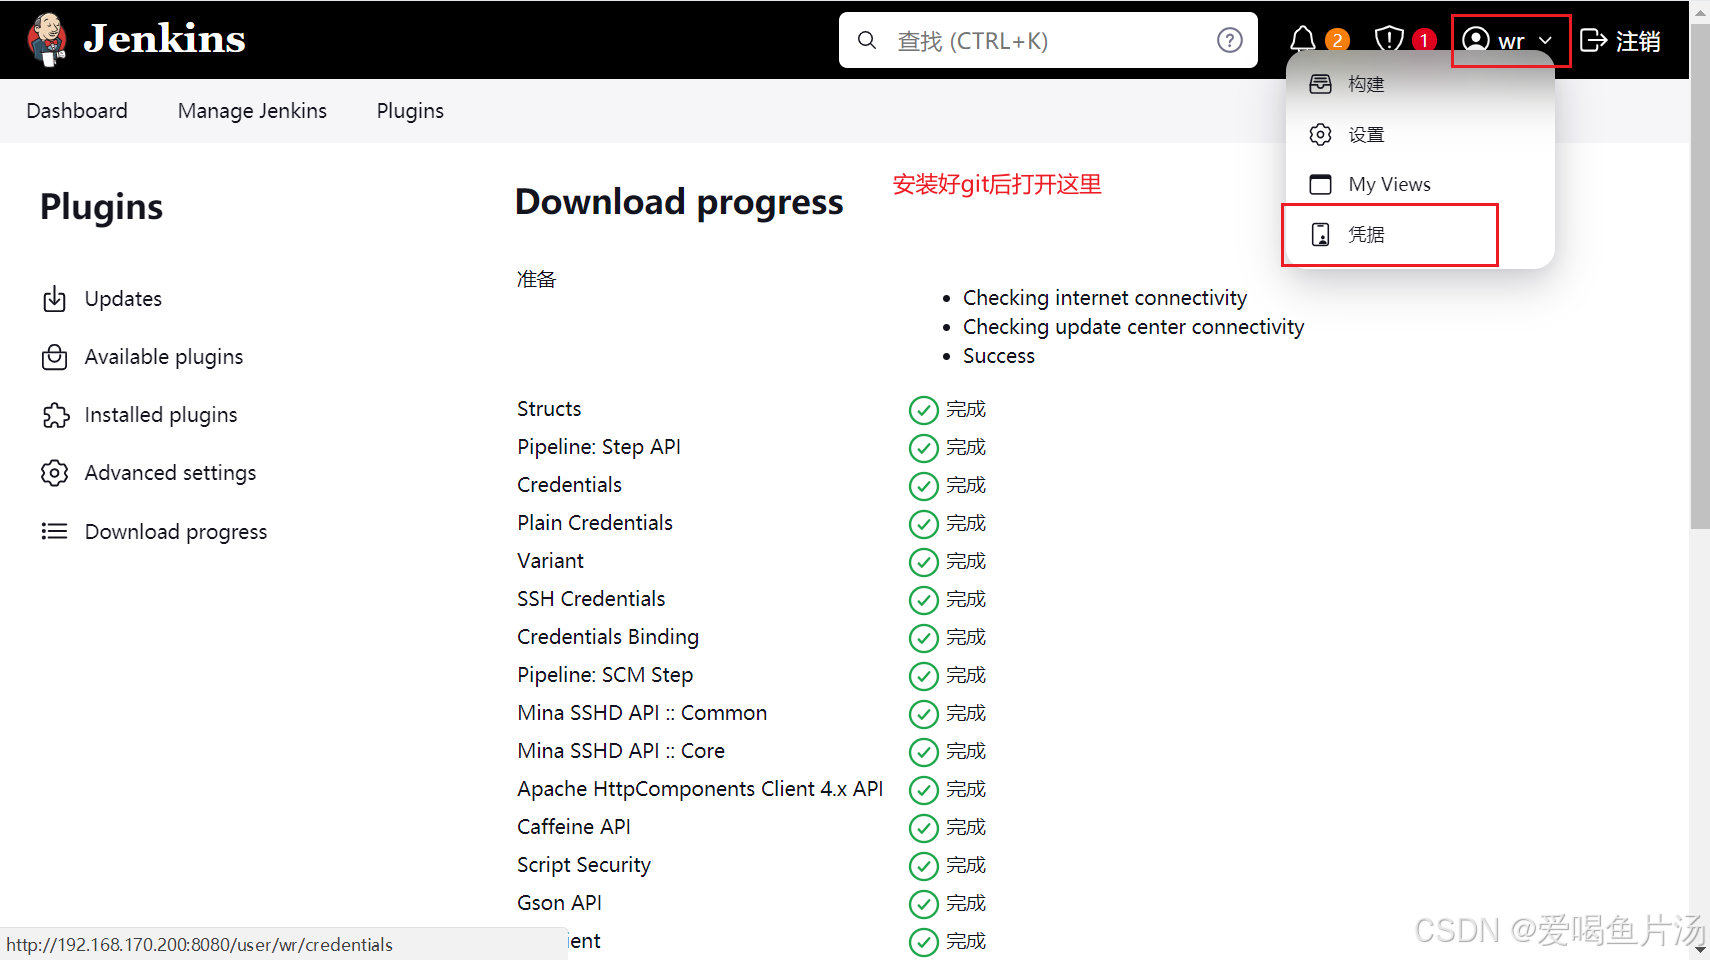
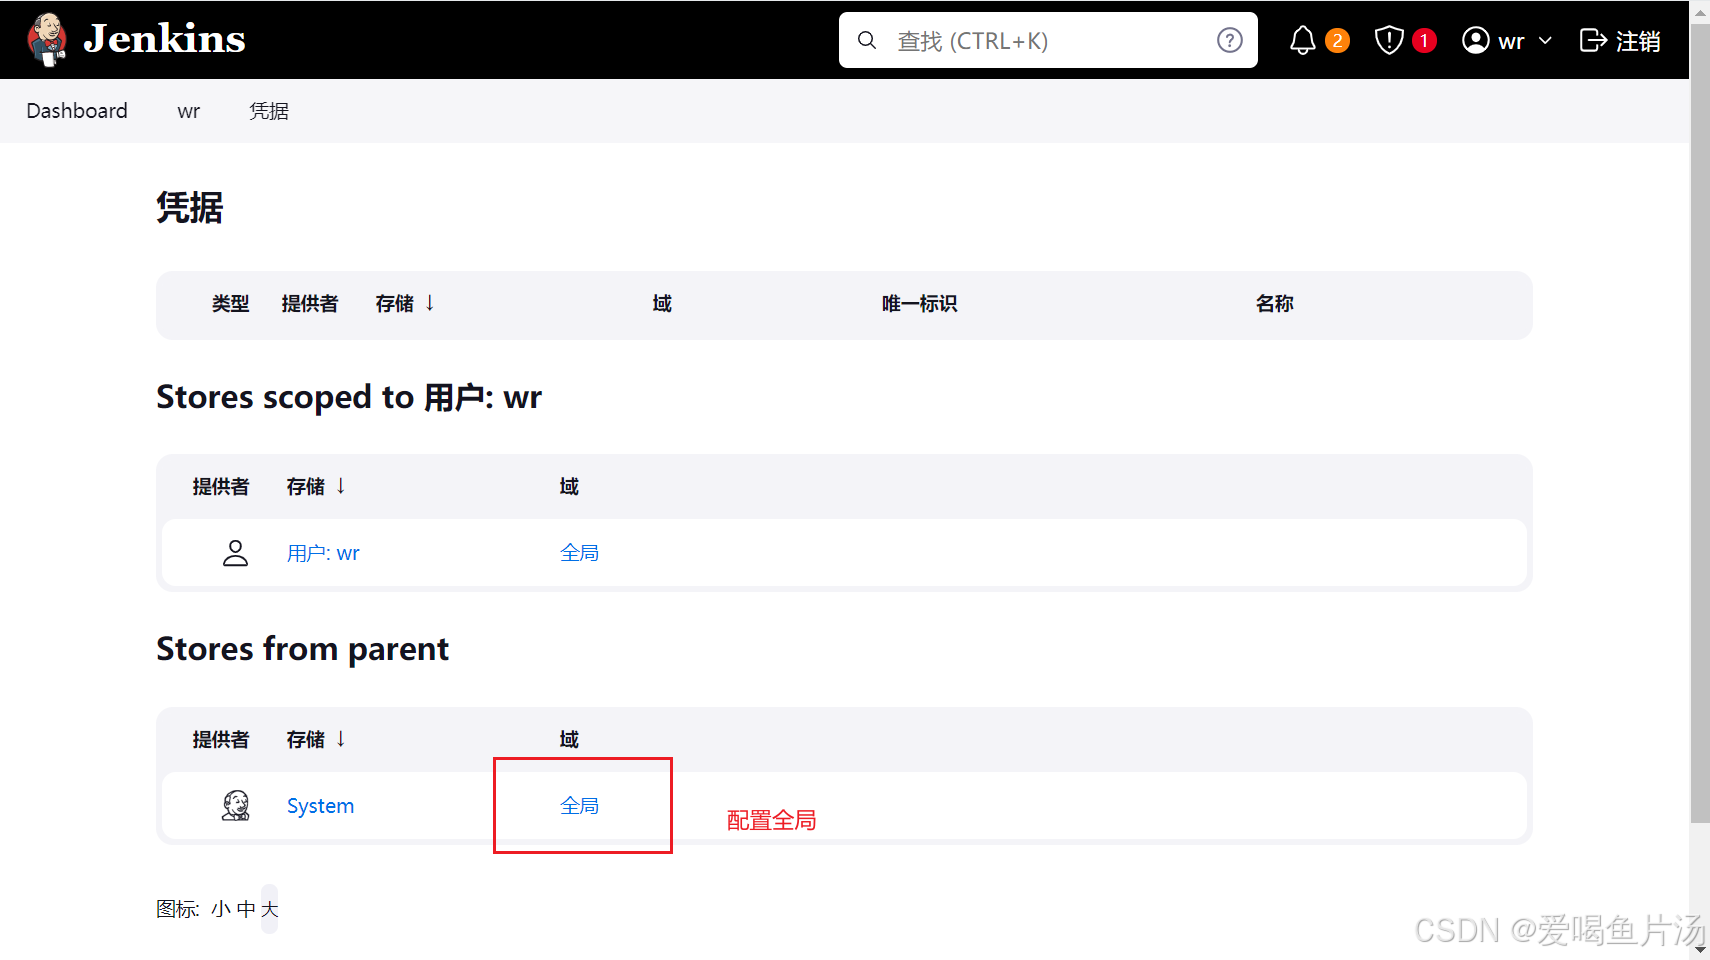
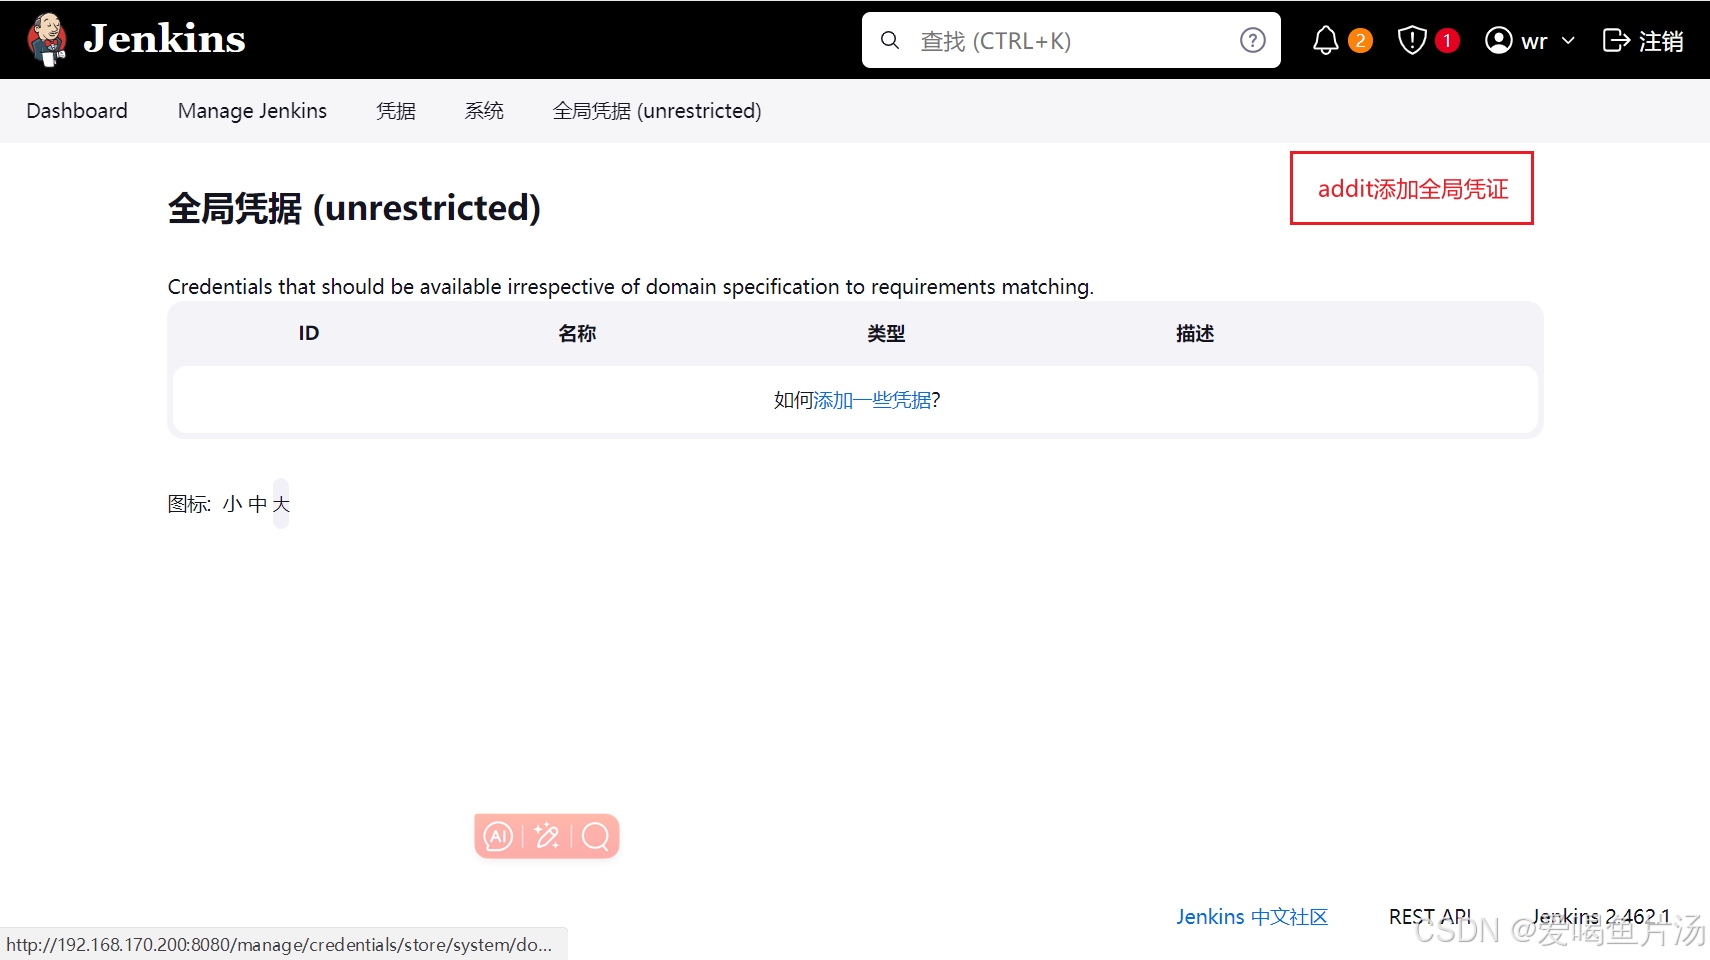
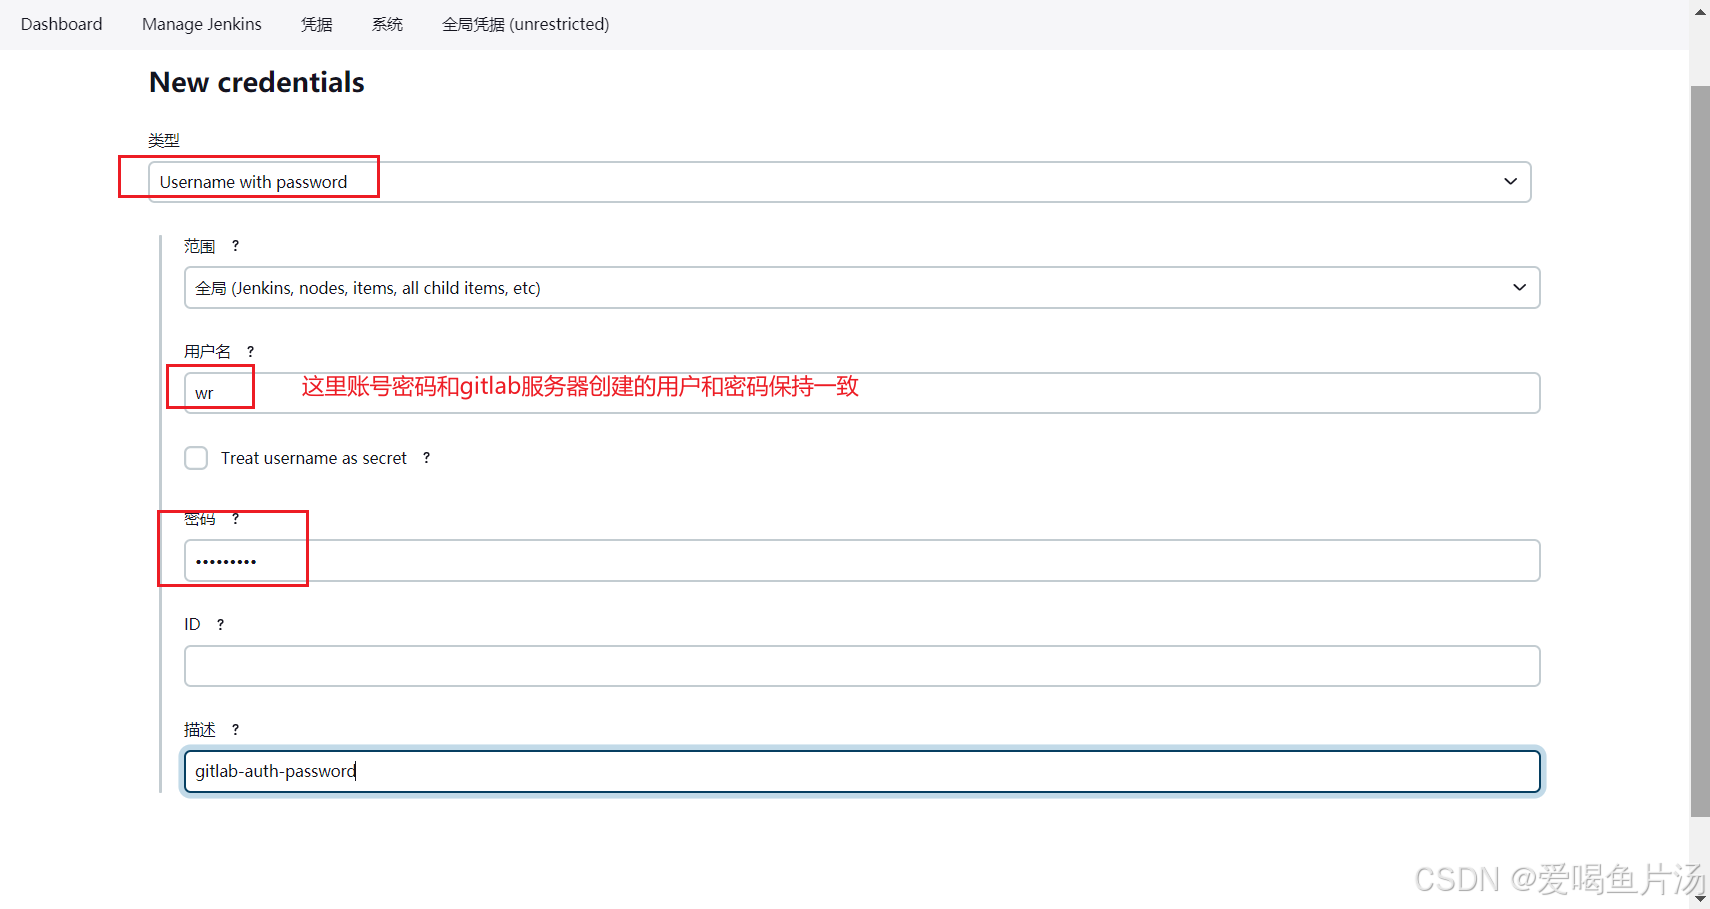
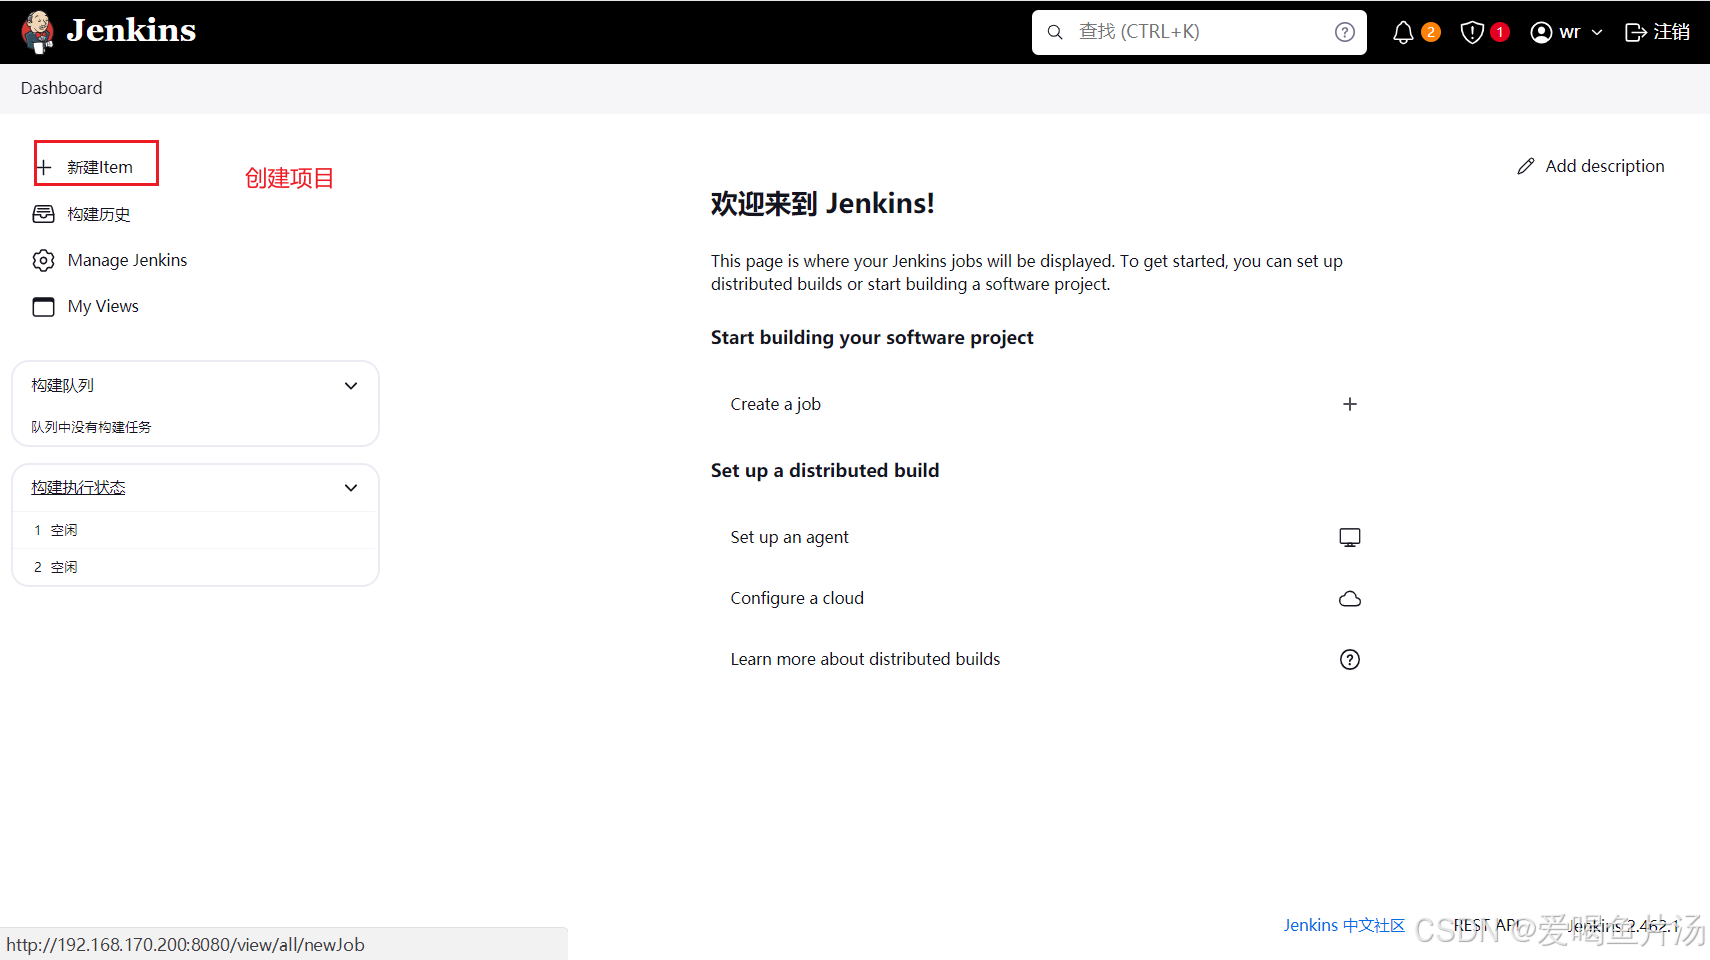
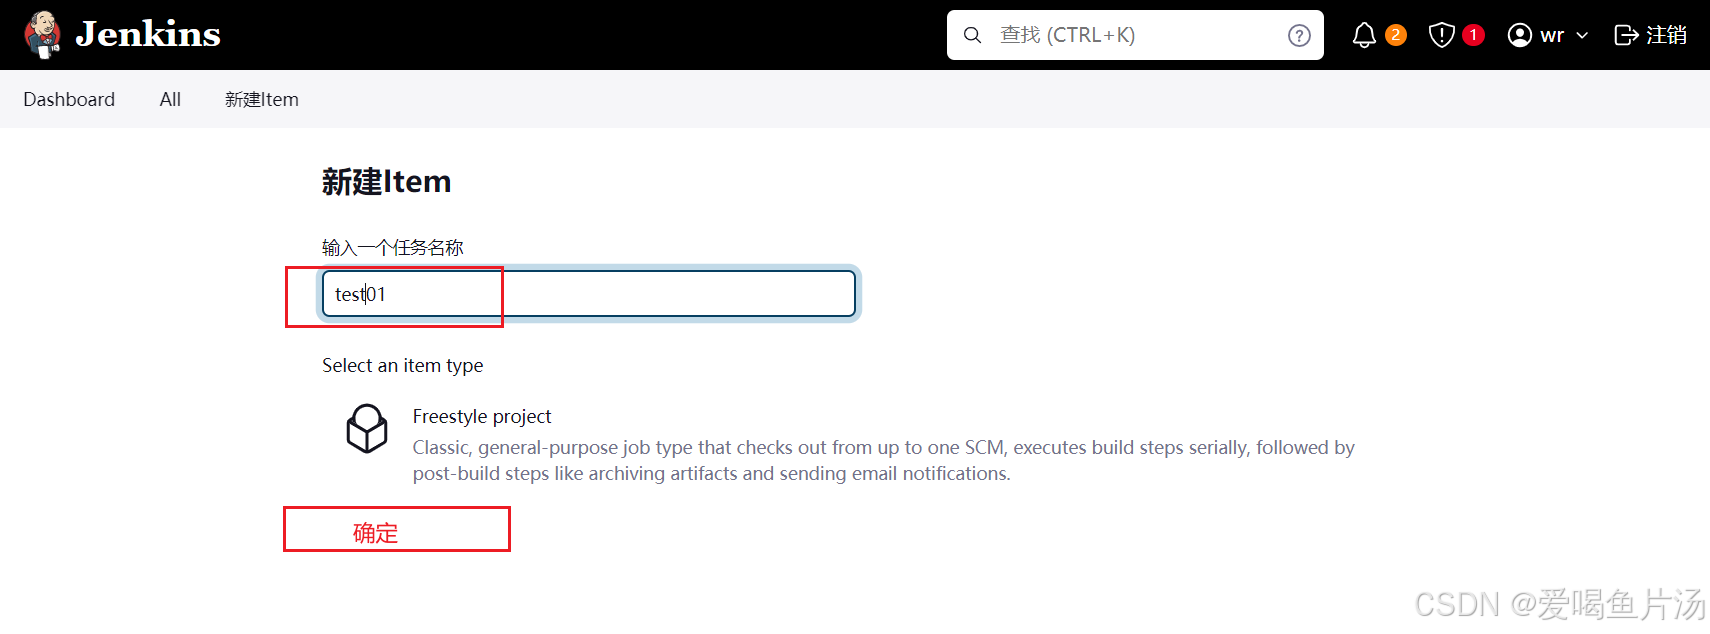
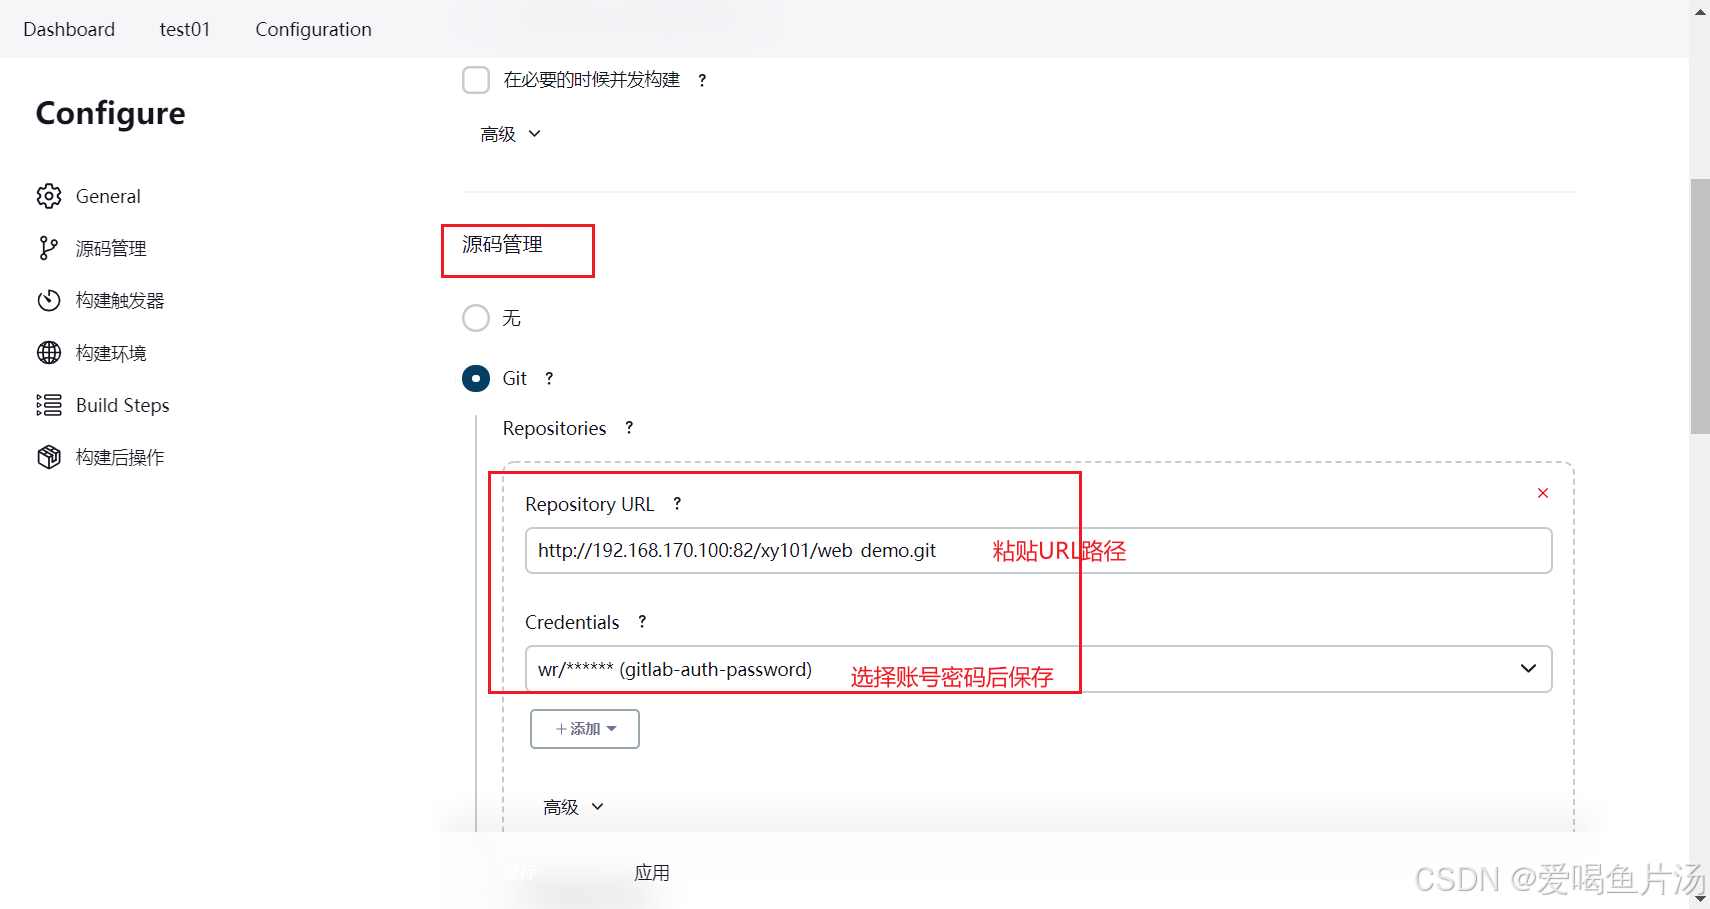
想要Jenkins能够从代码仓库中拉取代码,首先安装git插件支持账号密码认证,
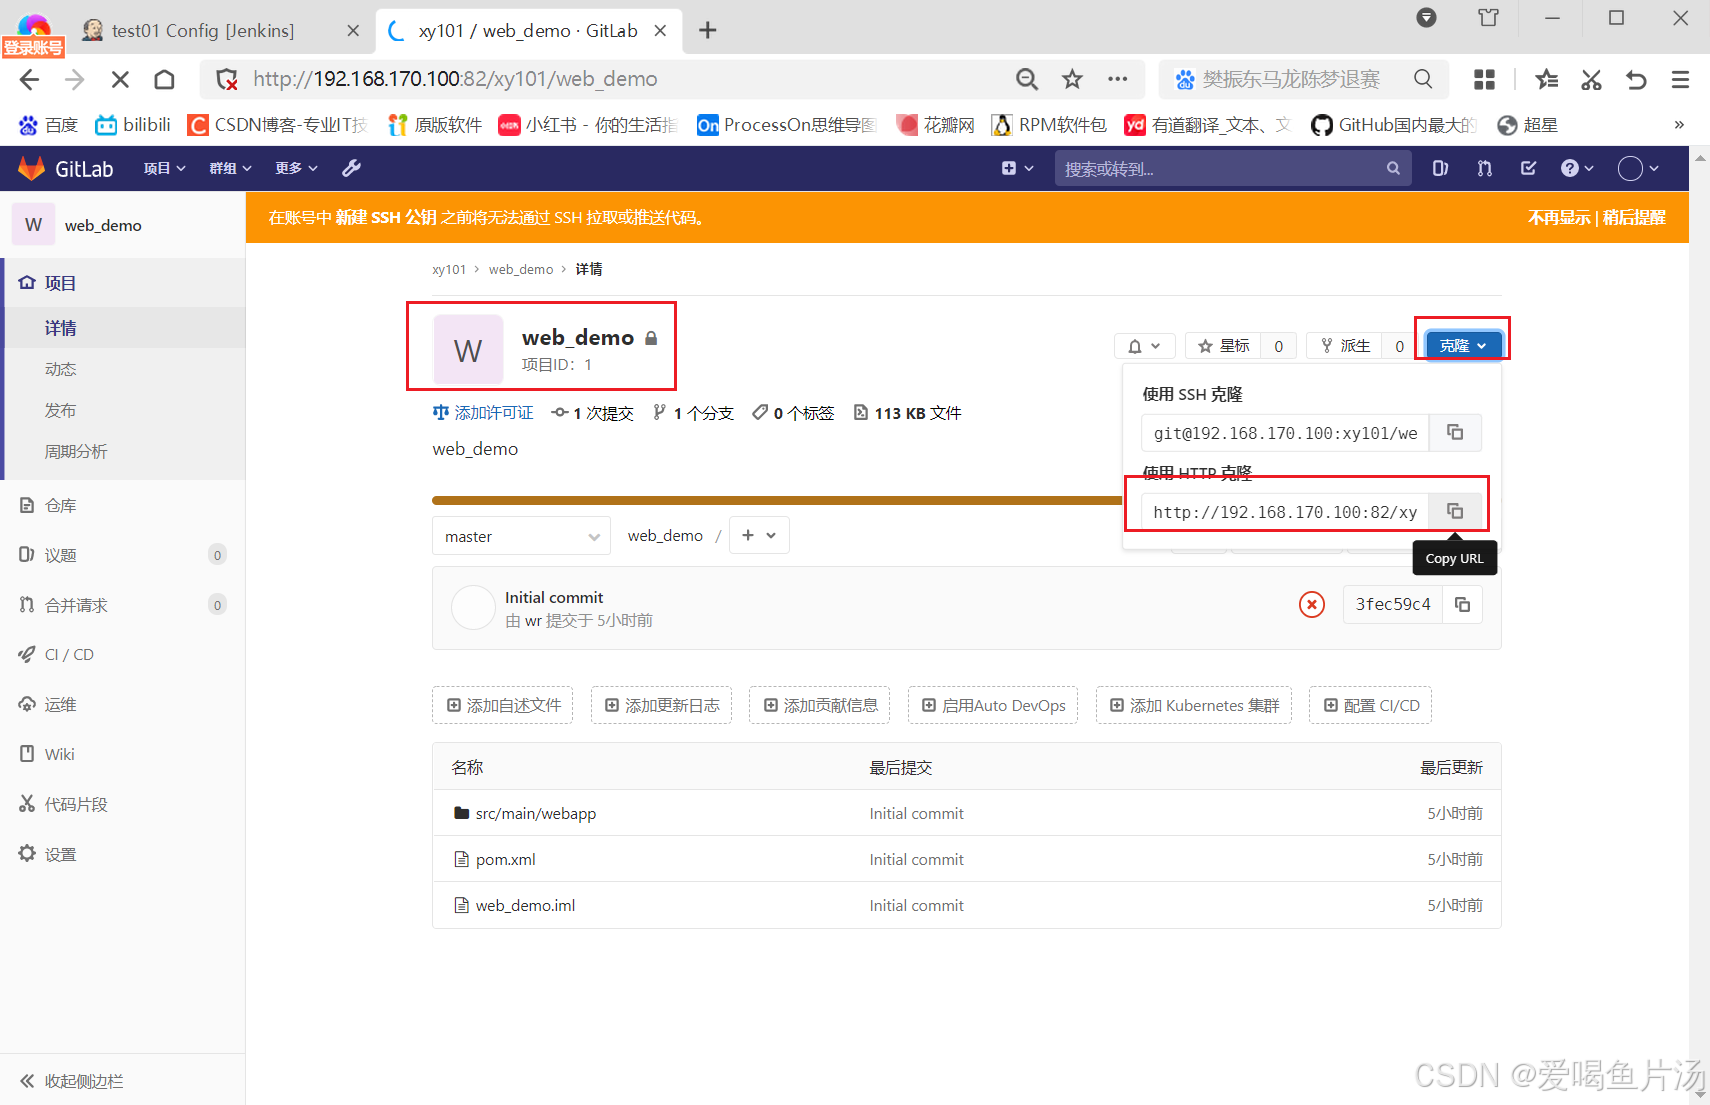
到git的访问页面复制URL

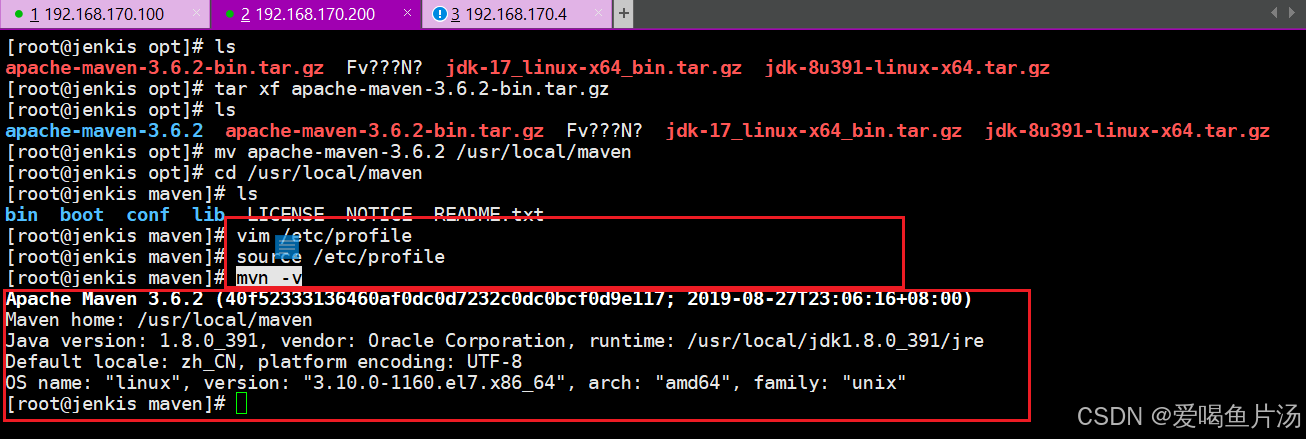
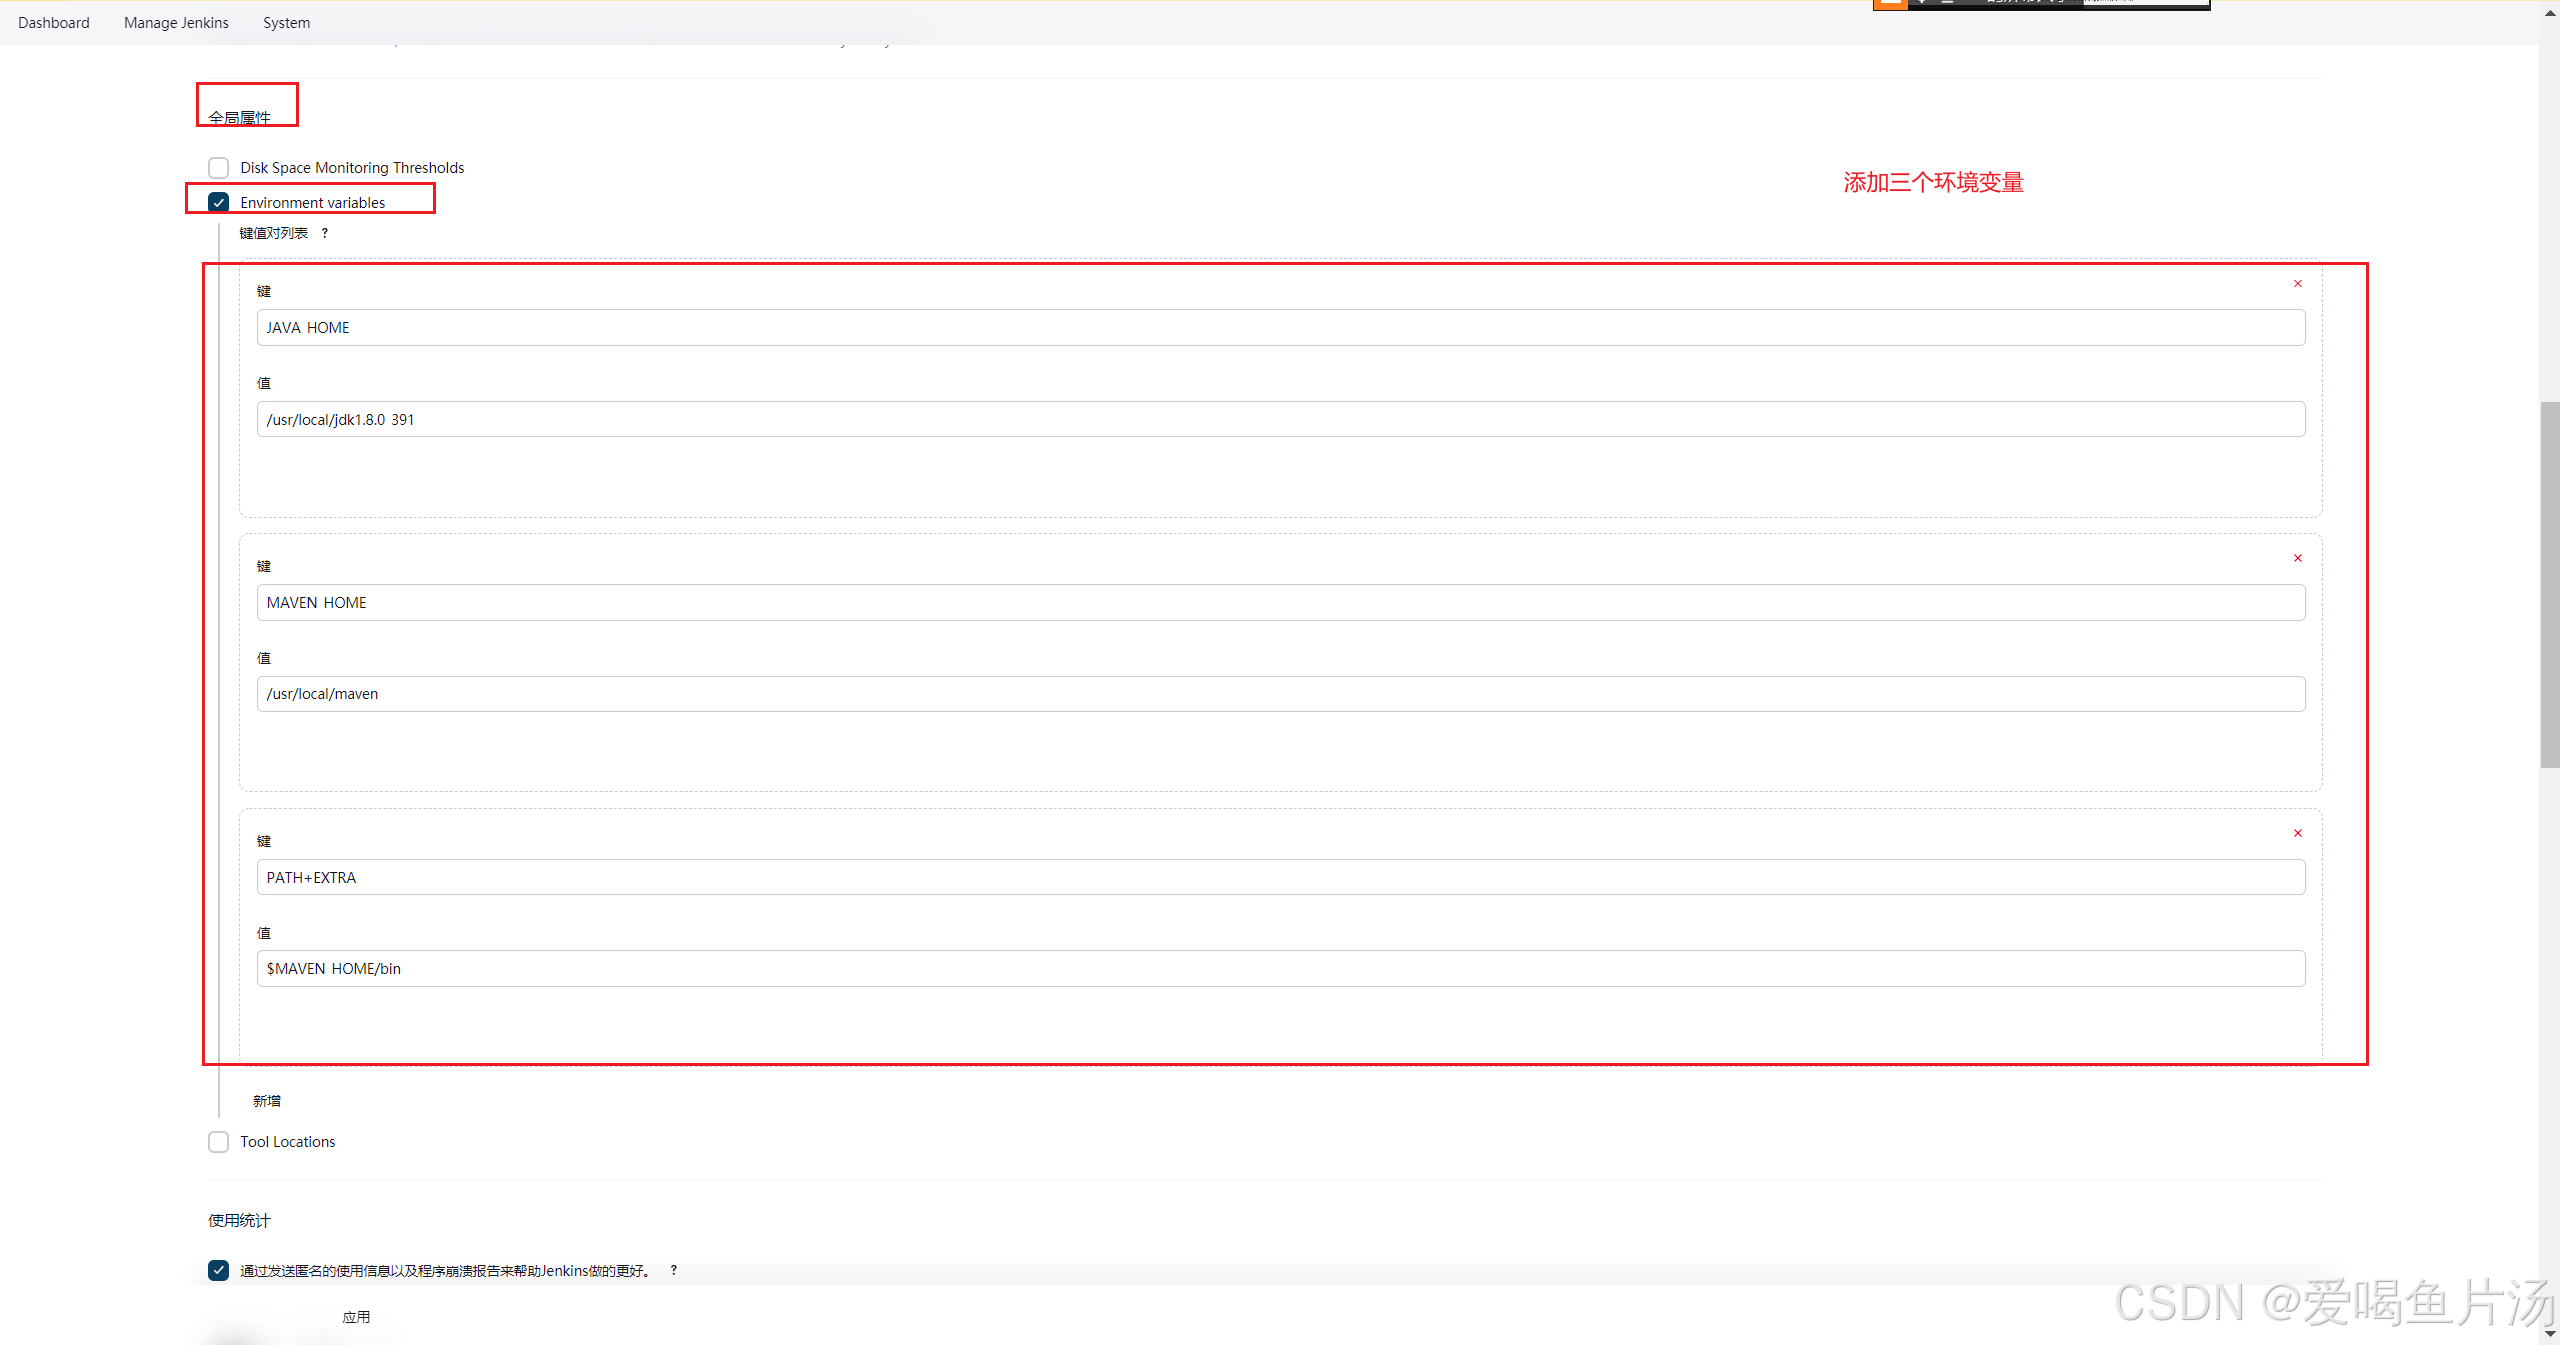
然后第二步对代码进行编译打包。上传apache-maven-3.6.2-bin.tar.gz,Maven工具主要用于对java项目自动化构建,把java代码打包成jar包或者war包。修改环境变量
bash
cd /opt/
rz -E
tar xf apache-maven-3.6.2-bin.tar.gz
mv apache-maven-3.6.2 /usr/local/maven
cd /usr/local/maven
vim /etc/profile
--------------------------------------------------------------
export MAVEN_HOME=/usr/local/maven
export JAVA_HOME=/usr/local/jdk1.8.0_391
export CLASSPATH=.:${JAVA_HOME}/lib
export PATH=${MAVEN_HOME}/bin:${JAVA_HOME}/bin:$PATH
--------------------------------------------------------------
source /etc/profile
//查看mvn版本和环境
mvn -v
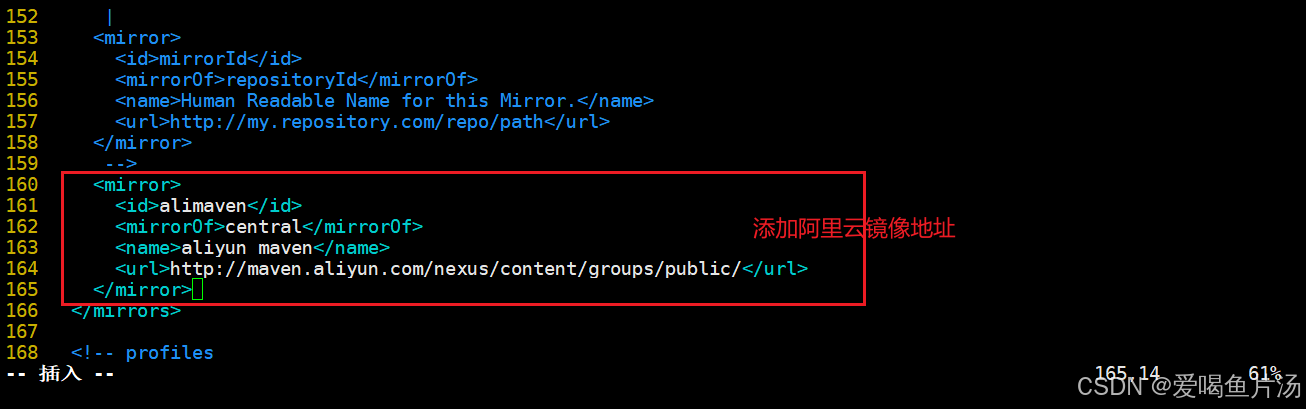
//在Maven目录中创建repo文件,用于存放Maven下载的依赖包文件,修改设置
mkdir repo
cd conf/
vim settings.xml 添加一行配置
--------------------------------------------------------------
55 <localRepository>/usr/local/maven/repo</localRepository>
160 <mirror>
161 <id>alimaven</id>
162 <mirrorOf>central</mirrorOf>
163 <name>aliyun maven</name>
164 <url>http://maven.aliyun.com/nexus/content/groups/public/</url>
165 </mirror>
-----------------------------------------------------------------

设置Jenkins,将其与Maven关联起来

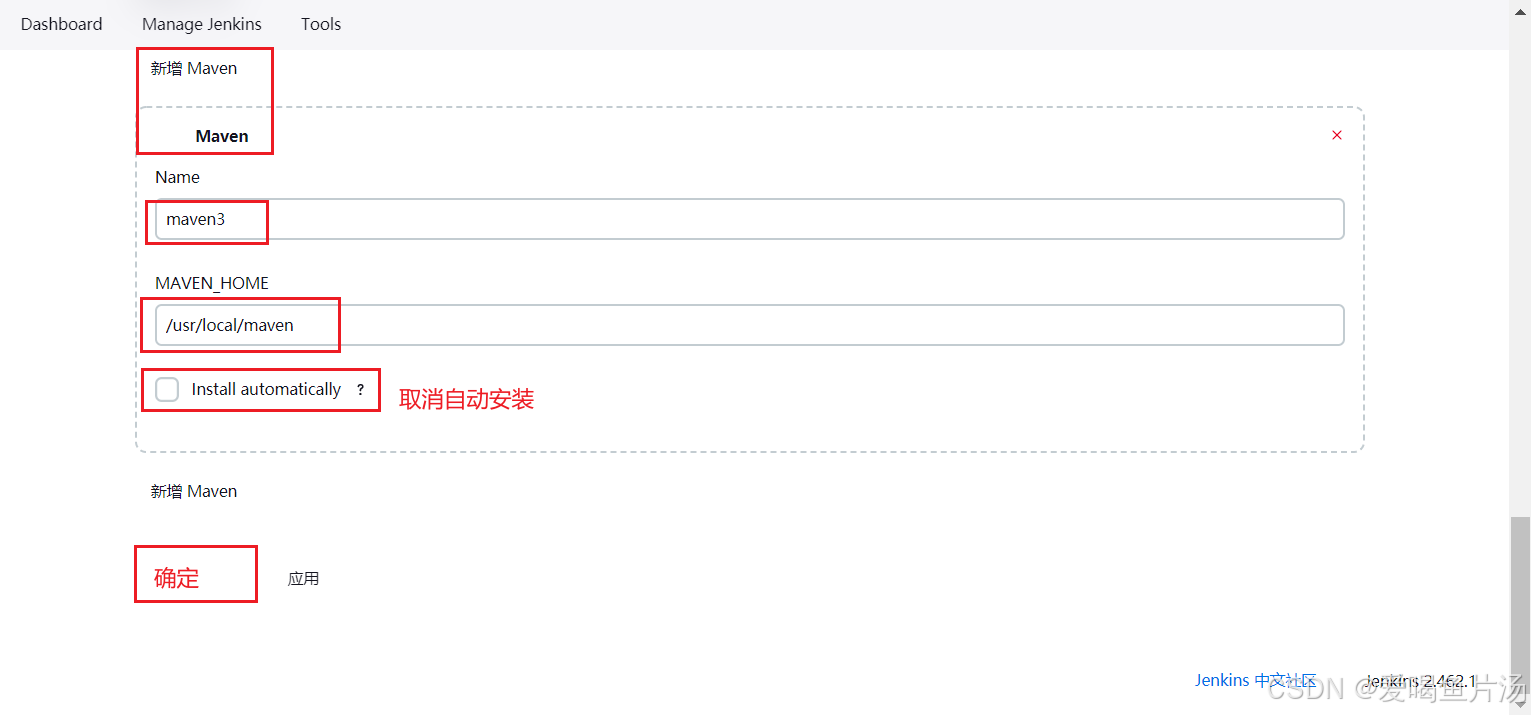
设置系统配置
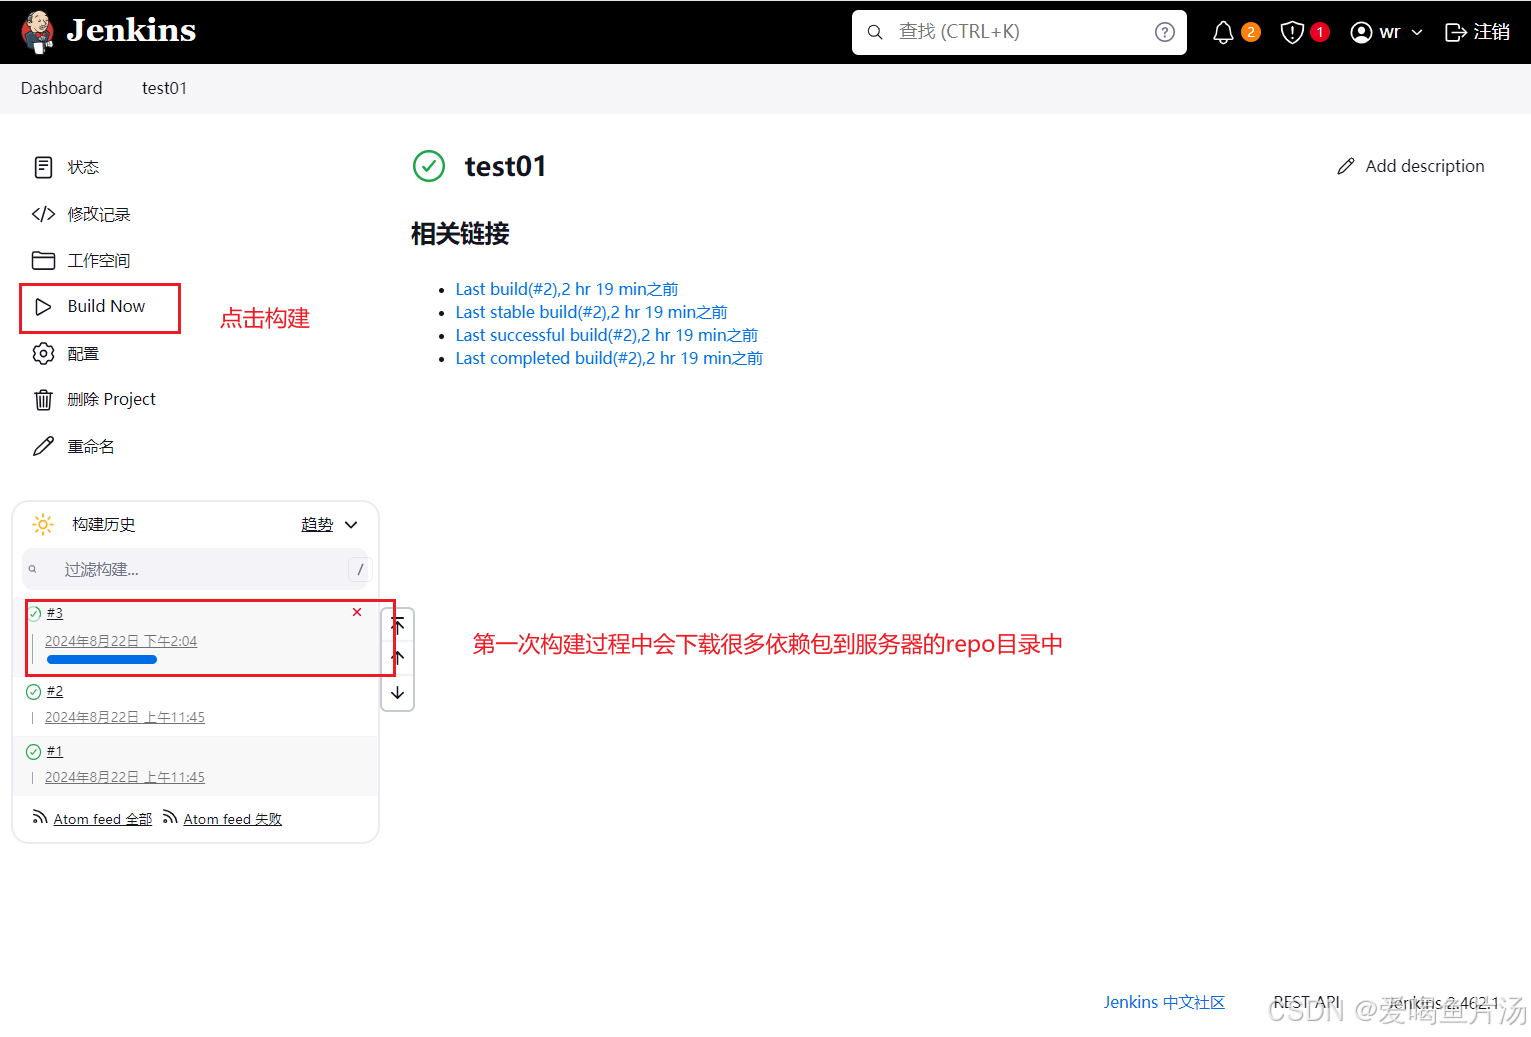
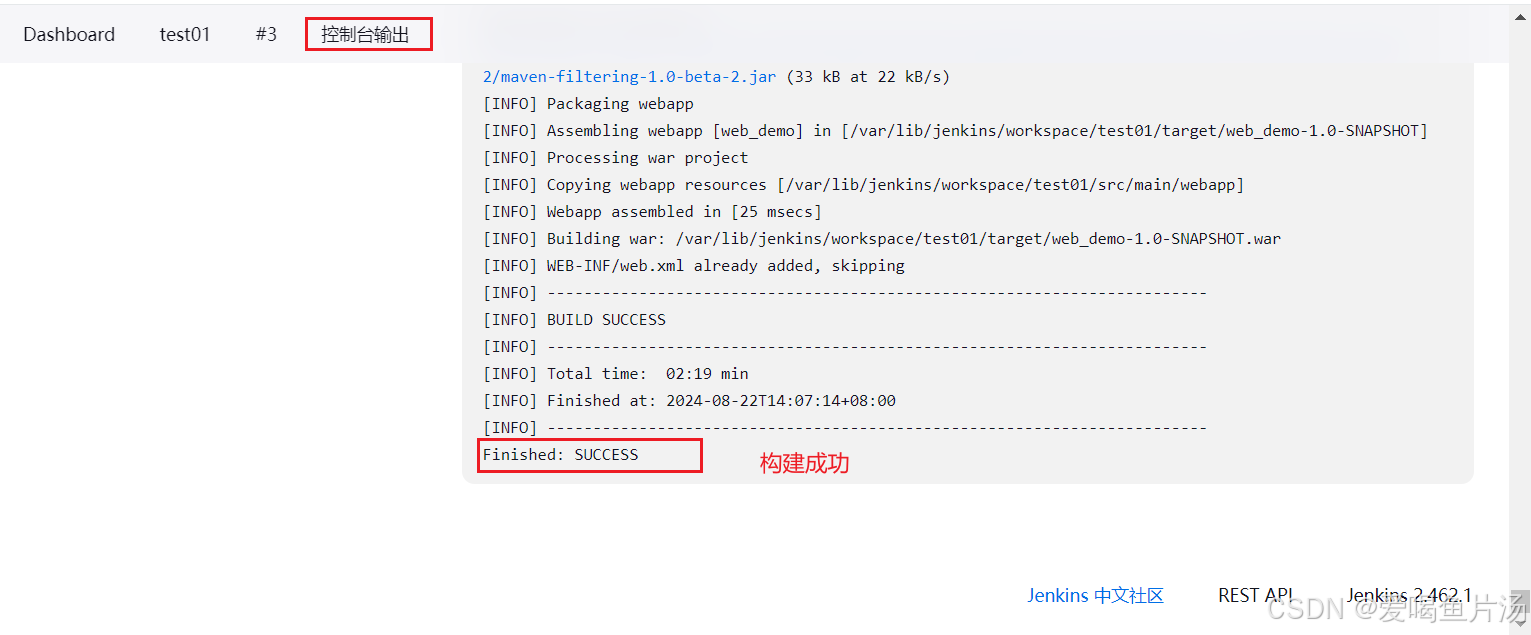
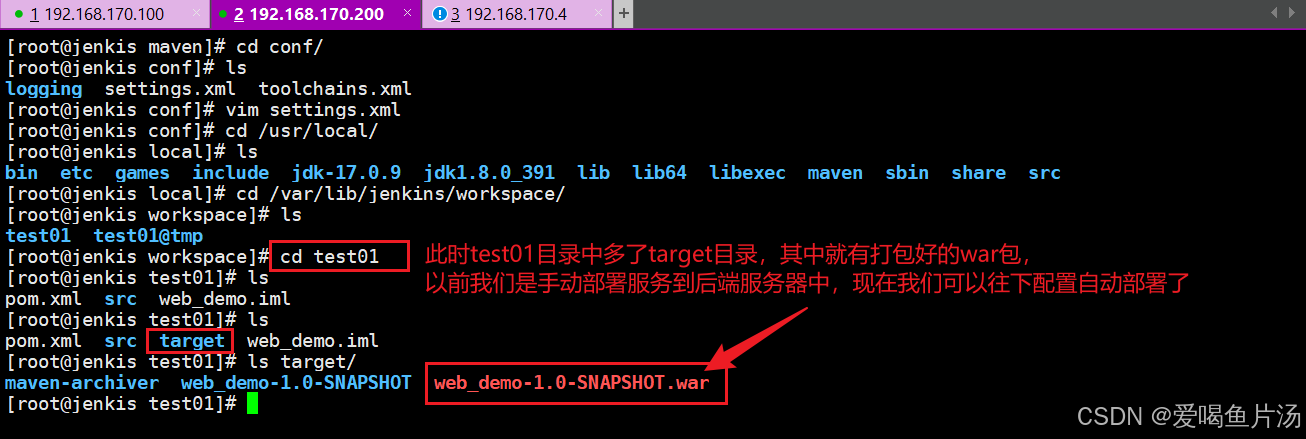
现在可以使用Jenkins调用Maven,对拉取的代码进行打包

4、远程部署代码到tomcat服务器
安装tomcat,修改配置文件
bash
cd /opt/
rz -e
tar xf apache-tomcat-9.0.16.tar.gz
mv apache-tomcat-9.0.16 /usr/local/tomcat
cd /usr/local/tomcat/conf/
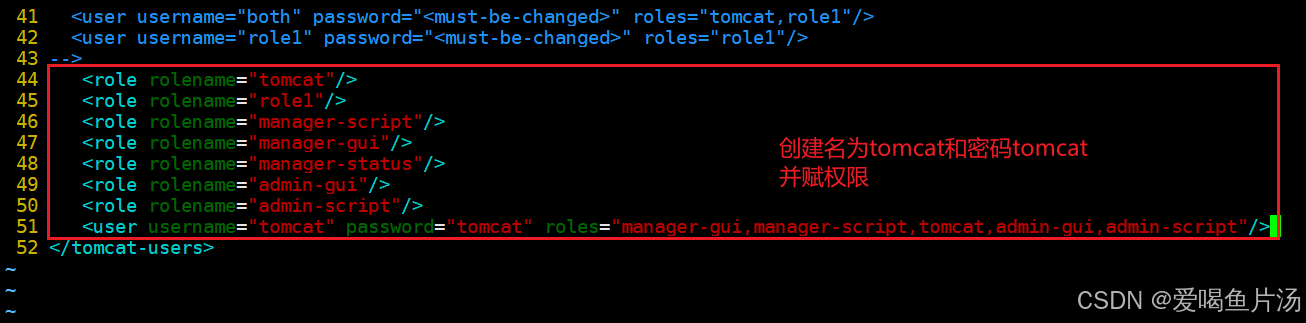
vim tomcat-users.xml
--------------------------------------------------------------
<role rolename="tomcat"/>
<role rolename="role1"/>
<role rolename="manager-script"/>
<role rolename="manager-gui"/>
<role rolename="manager-status"/>
<role rolename="admin-gui"/>
<role rolename="admin-script"/>
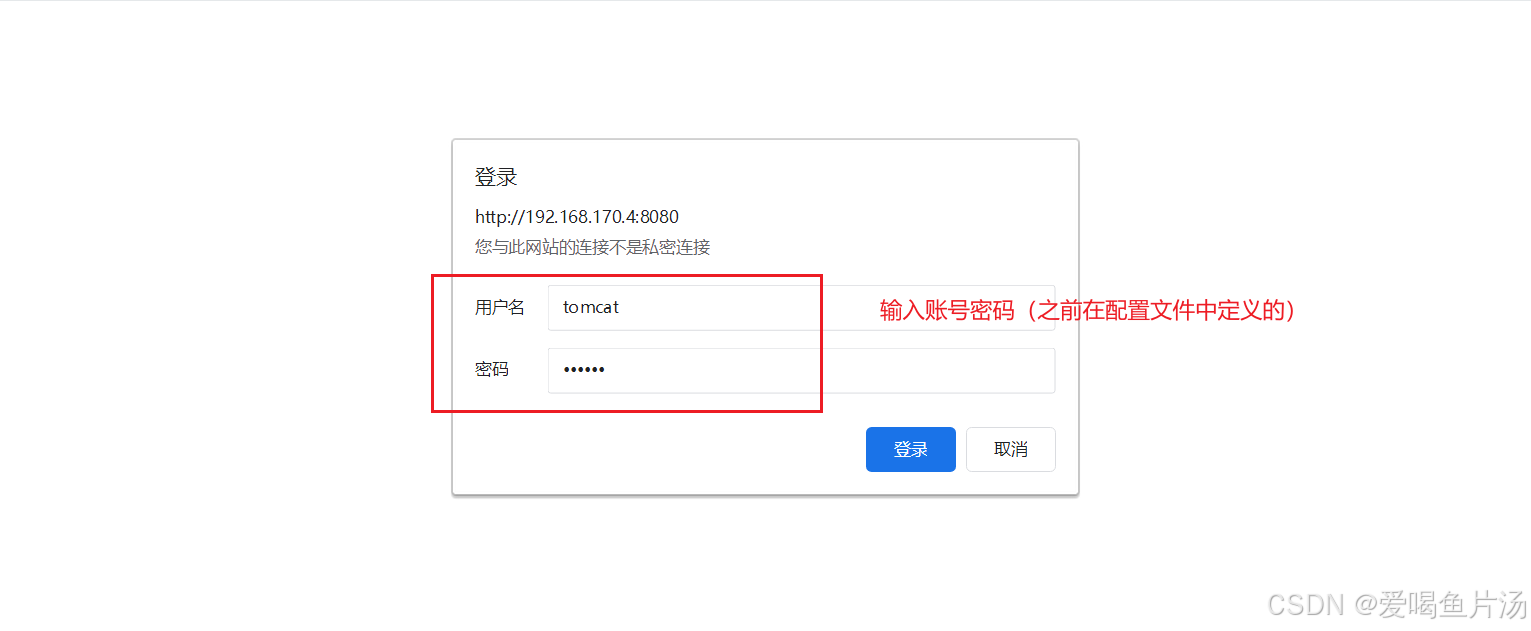
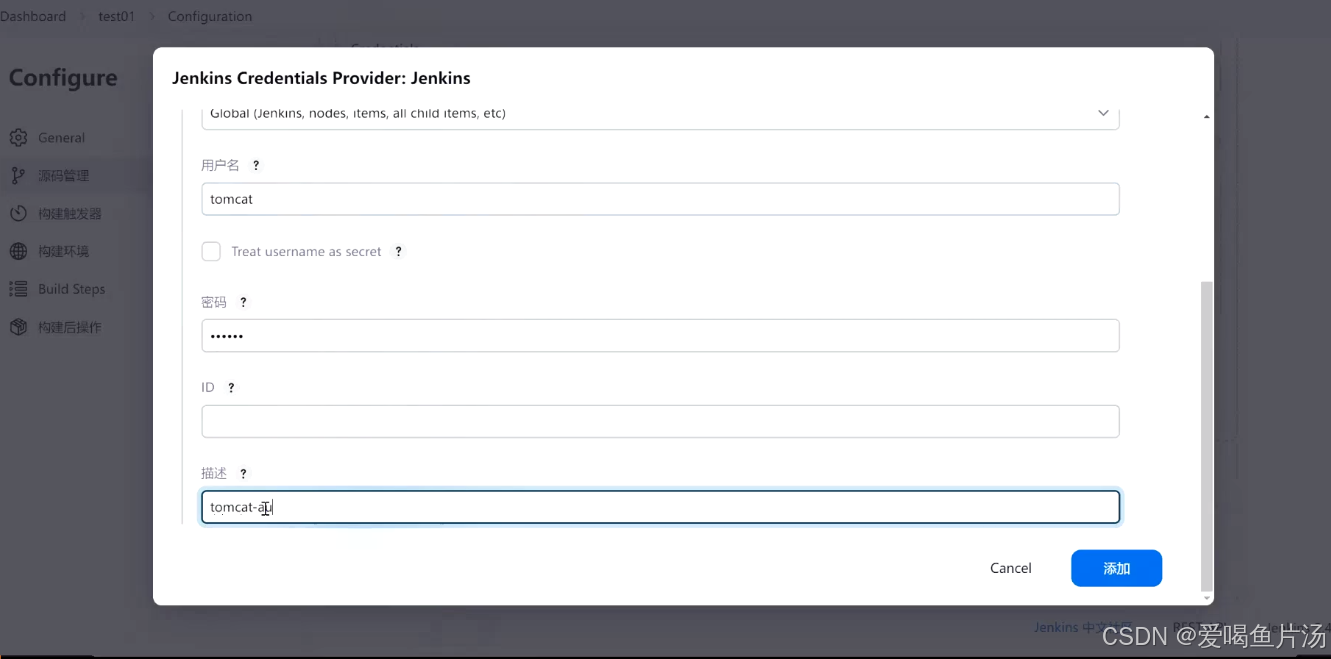
<user username="tomcat" password="tomcat" roles="manager-gui,manager-script,tomcat,admin-gui,admin-script"/>
-----------------------------------------------------------------
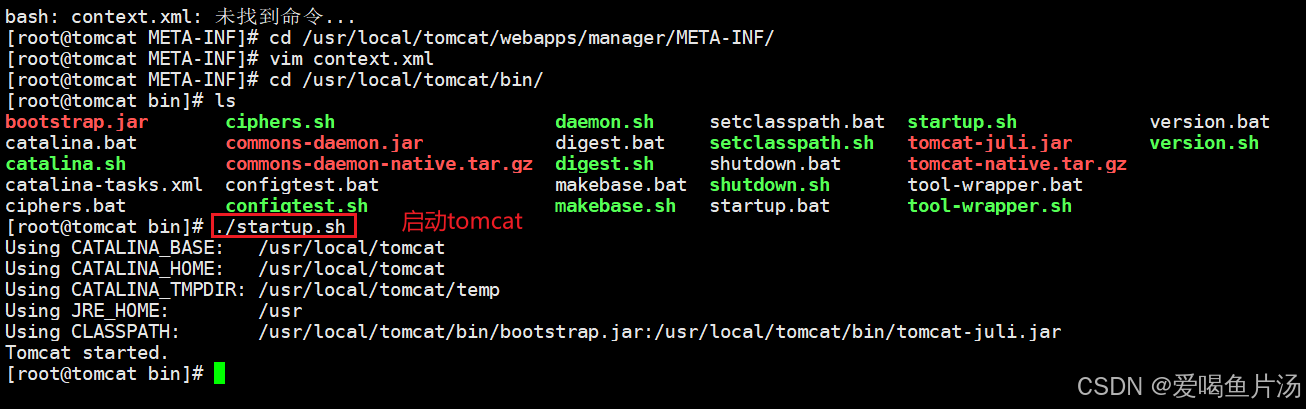
修改配置文件,启动tomcat
bash
cd /usr/local/tomcat/webapps/manager/META-INF/
vim context.xml
------------------------------------------------------
<!--
  <Valve className="org.apache.catalina.valves.RemoteAddrValve"
         allow="127\.\d+\.\d+\.\d+|::1|0:0:0:0:0:0:0:1" />
-->
----------------------------------------------------------
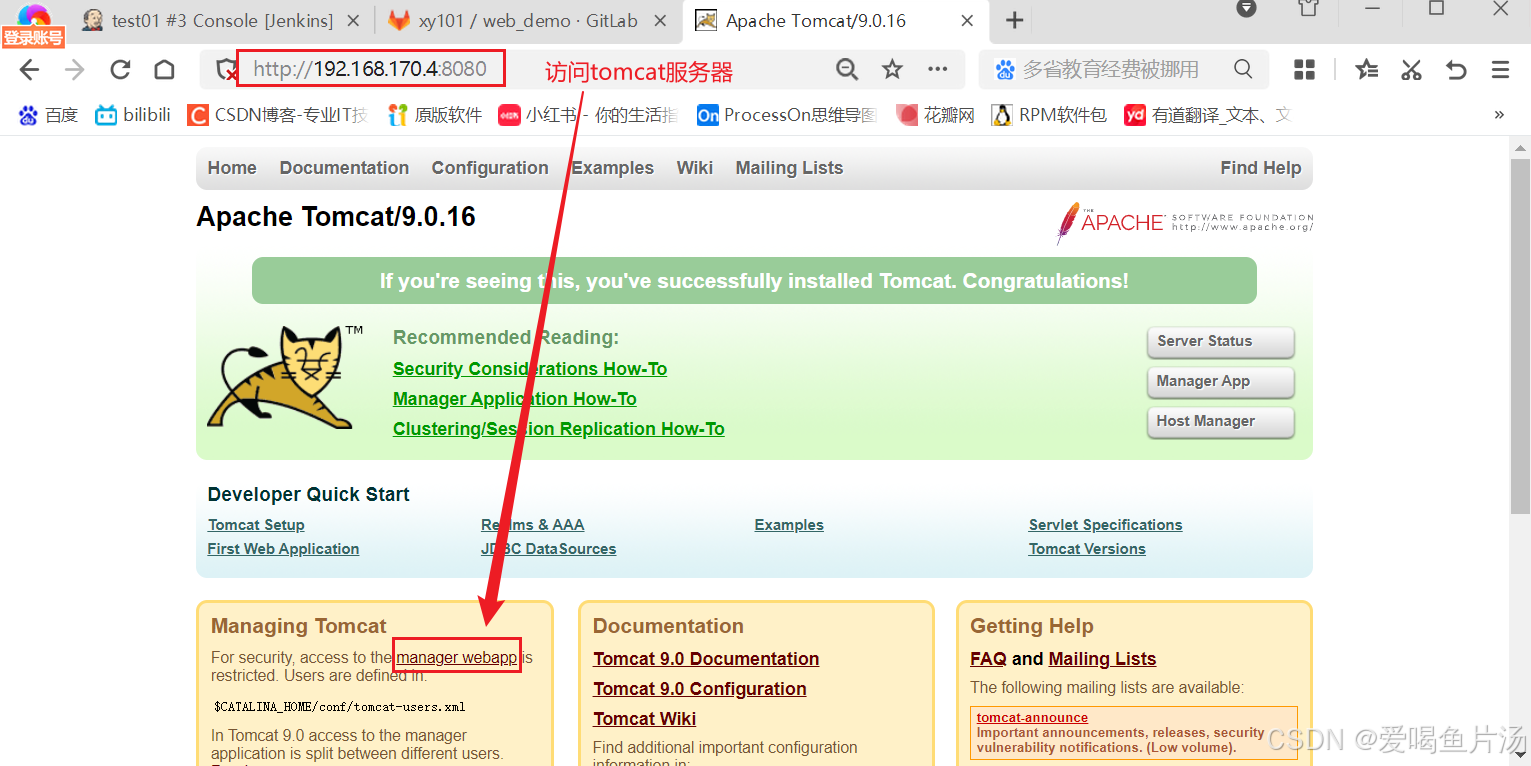
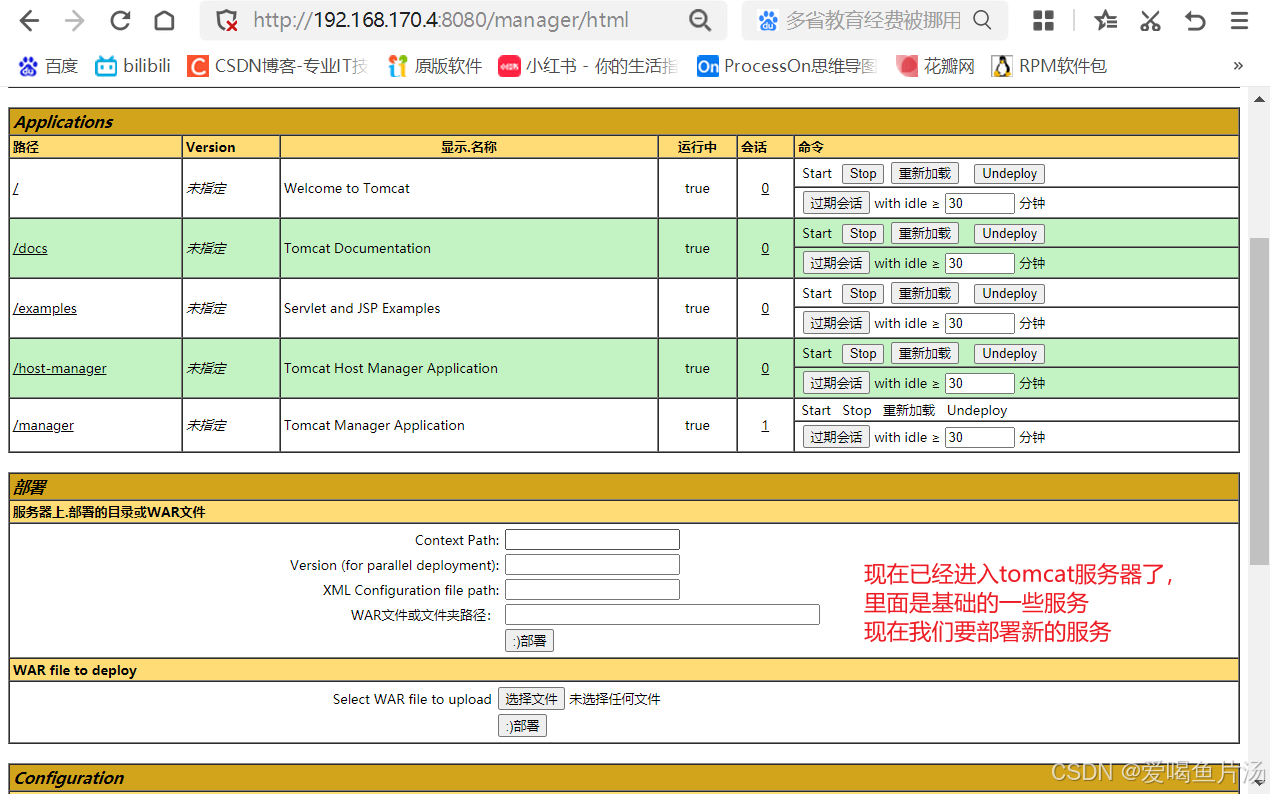
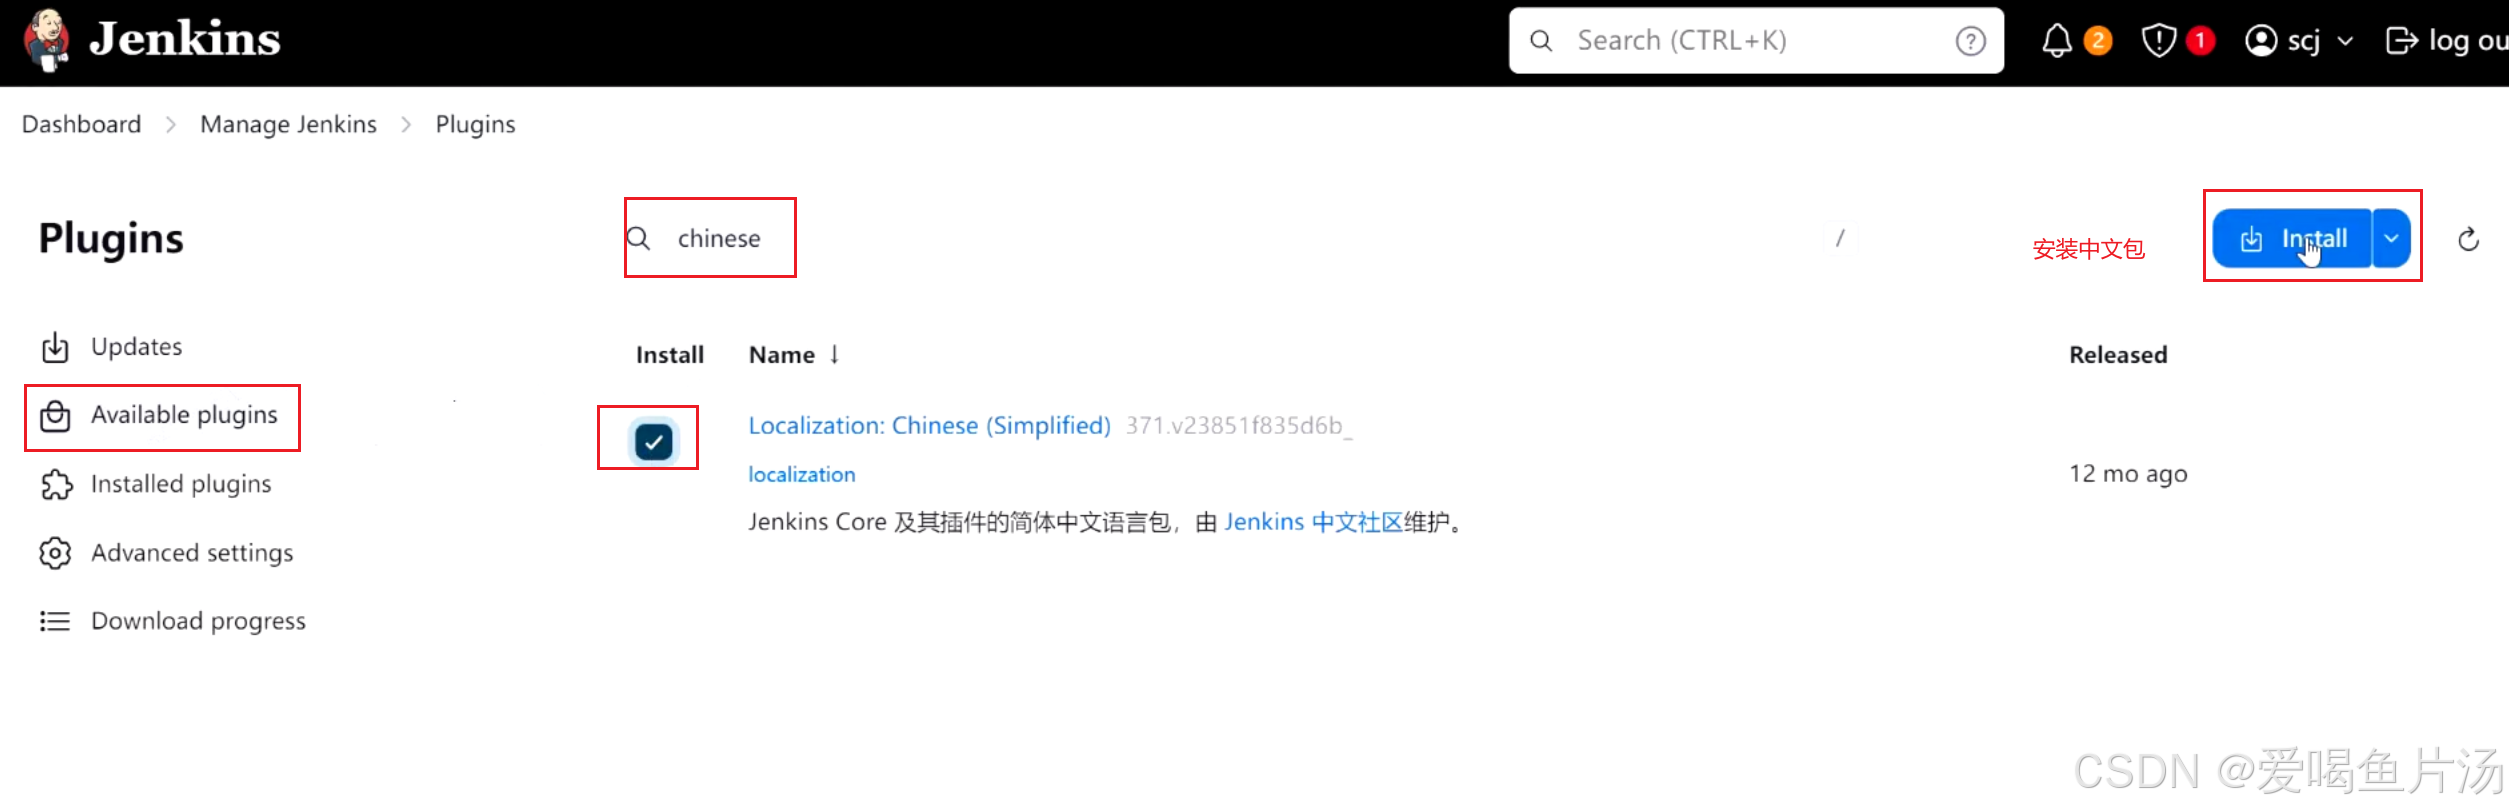
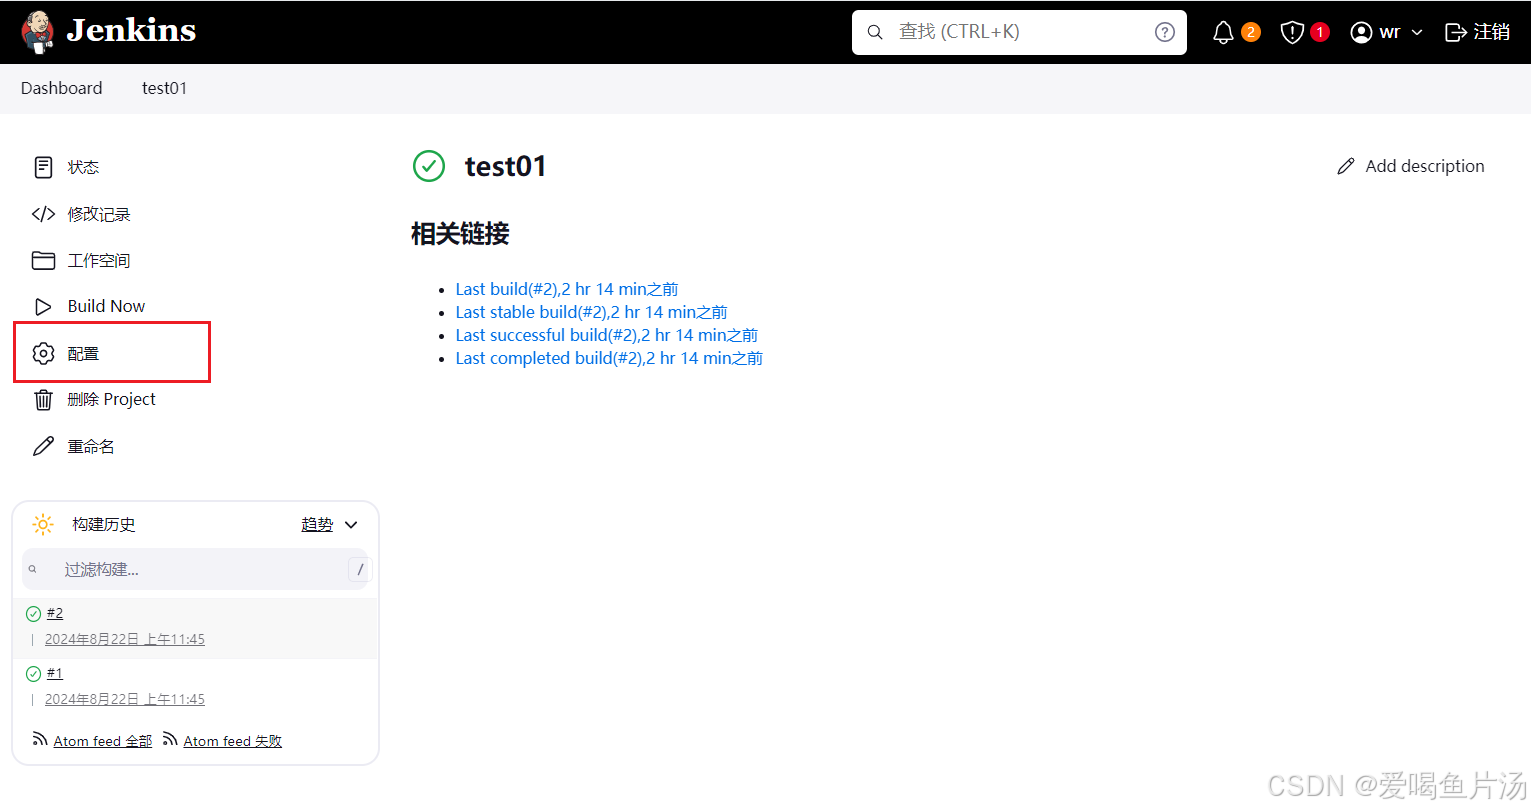
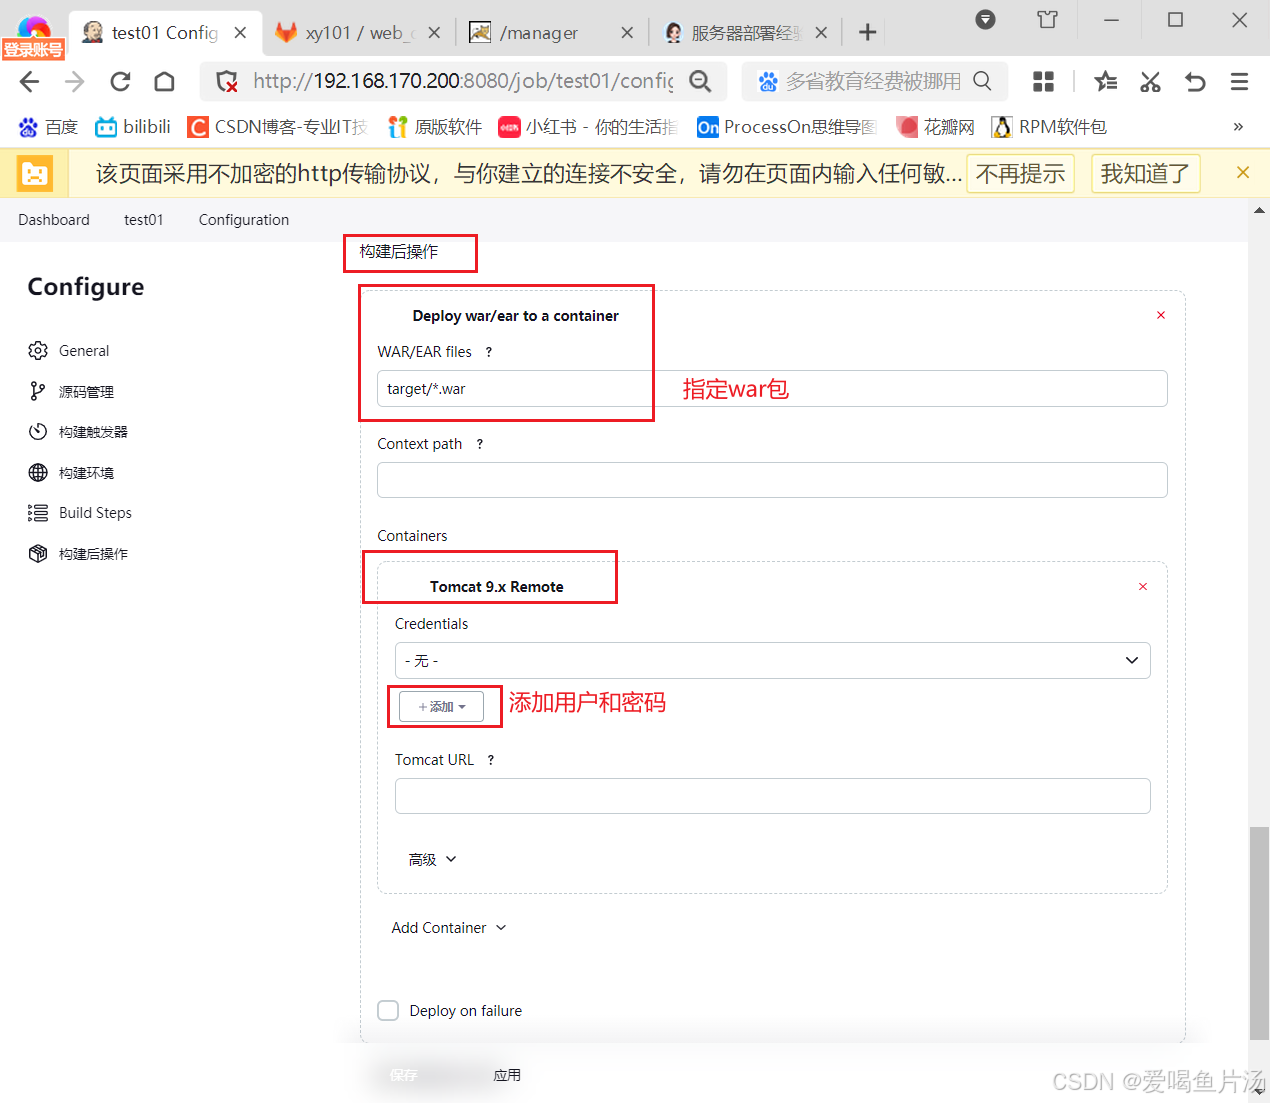
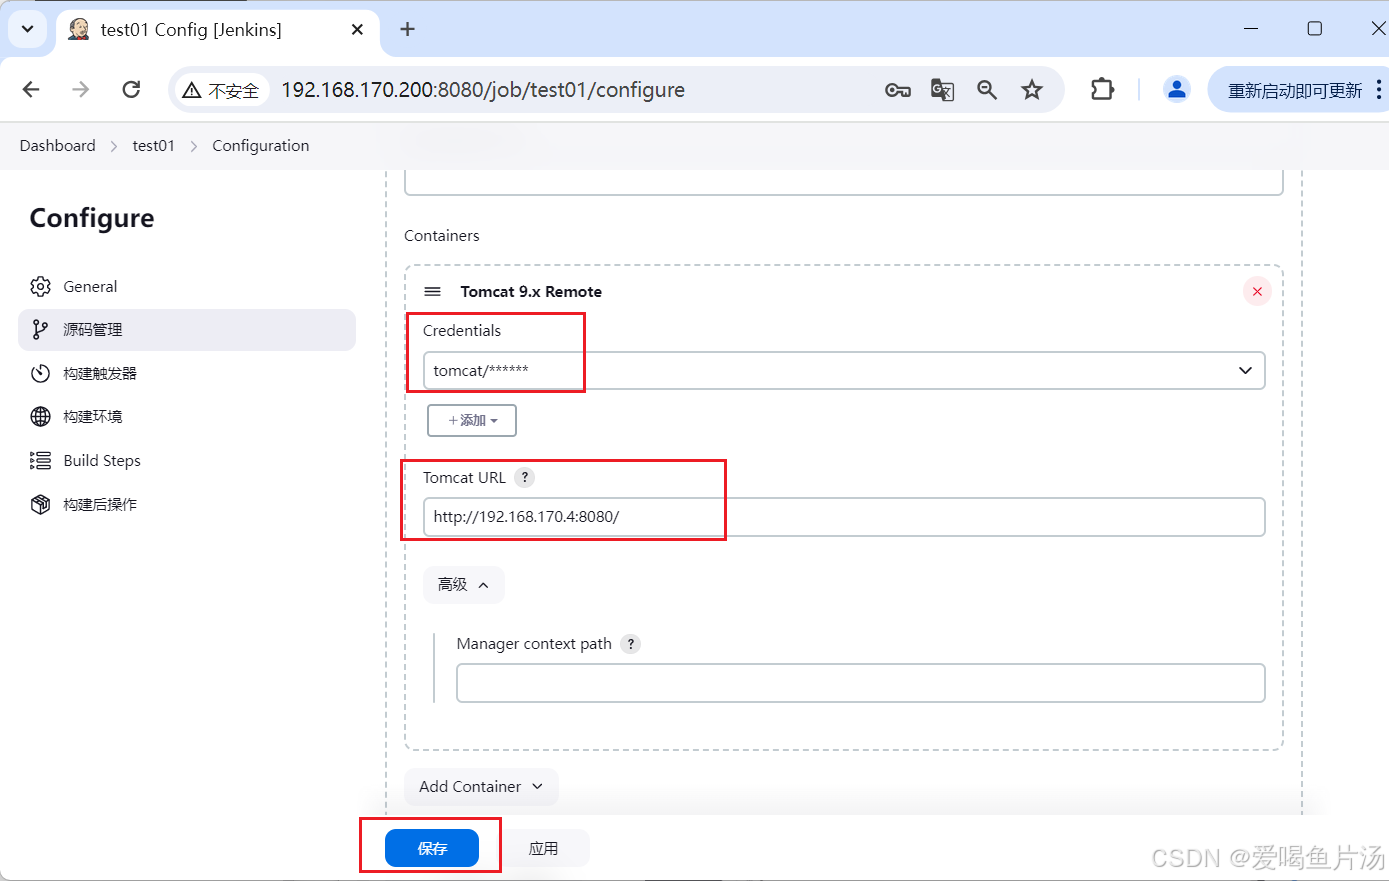
回到Jenkins服务端,安装插件
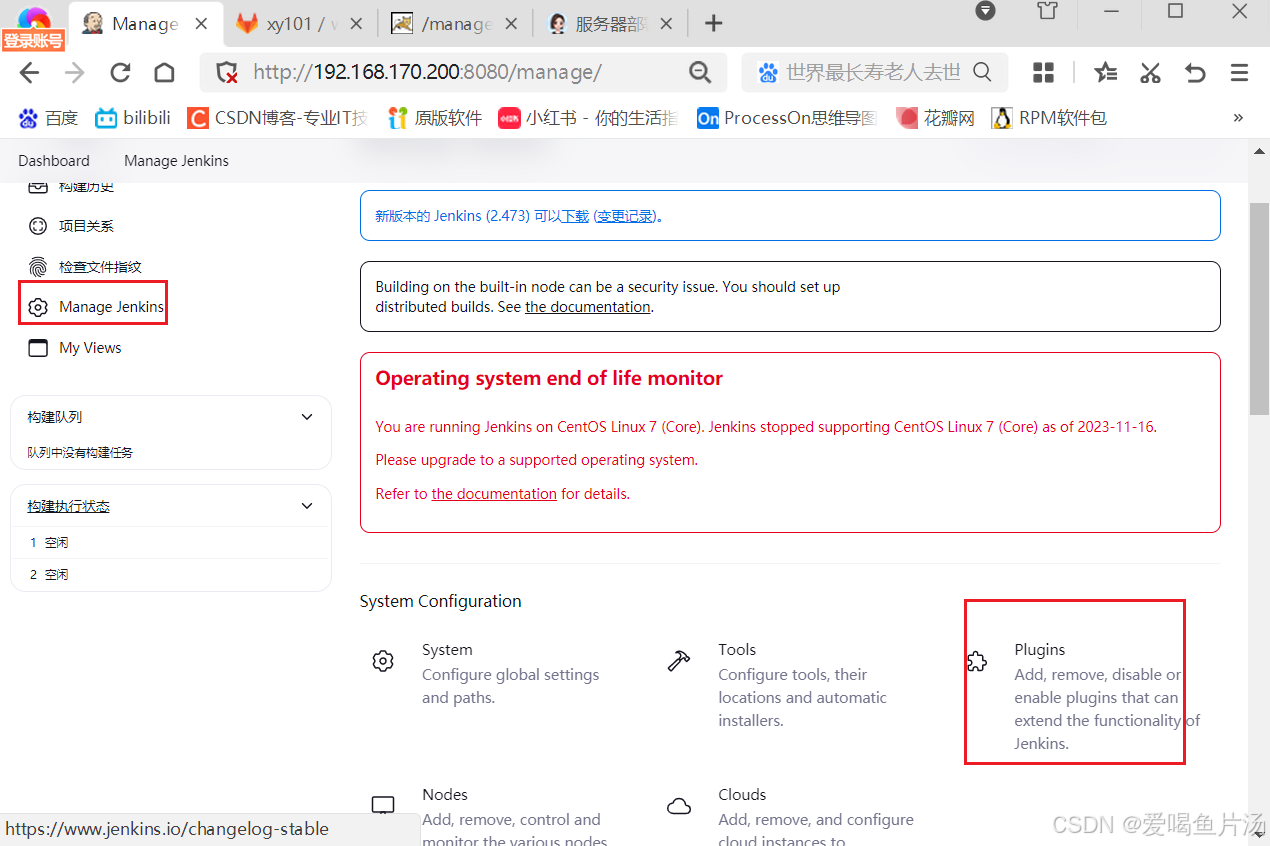
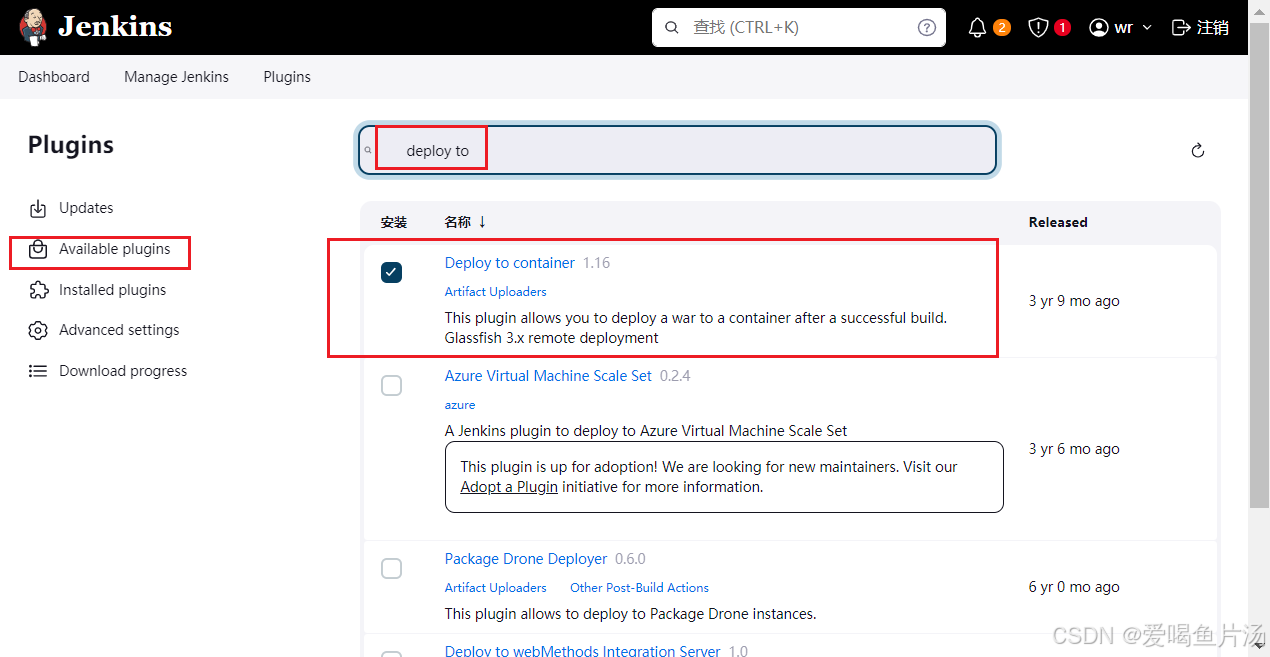
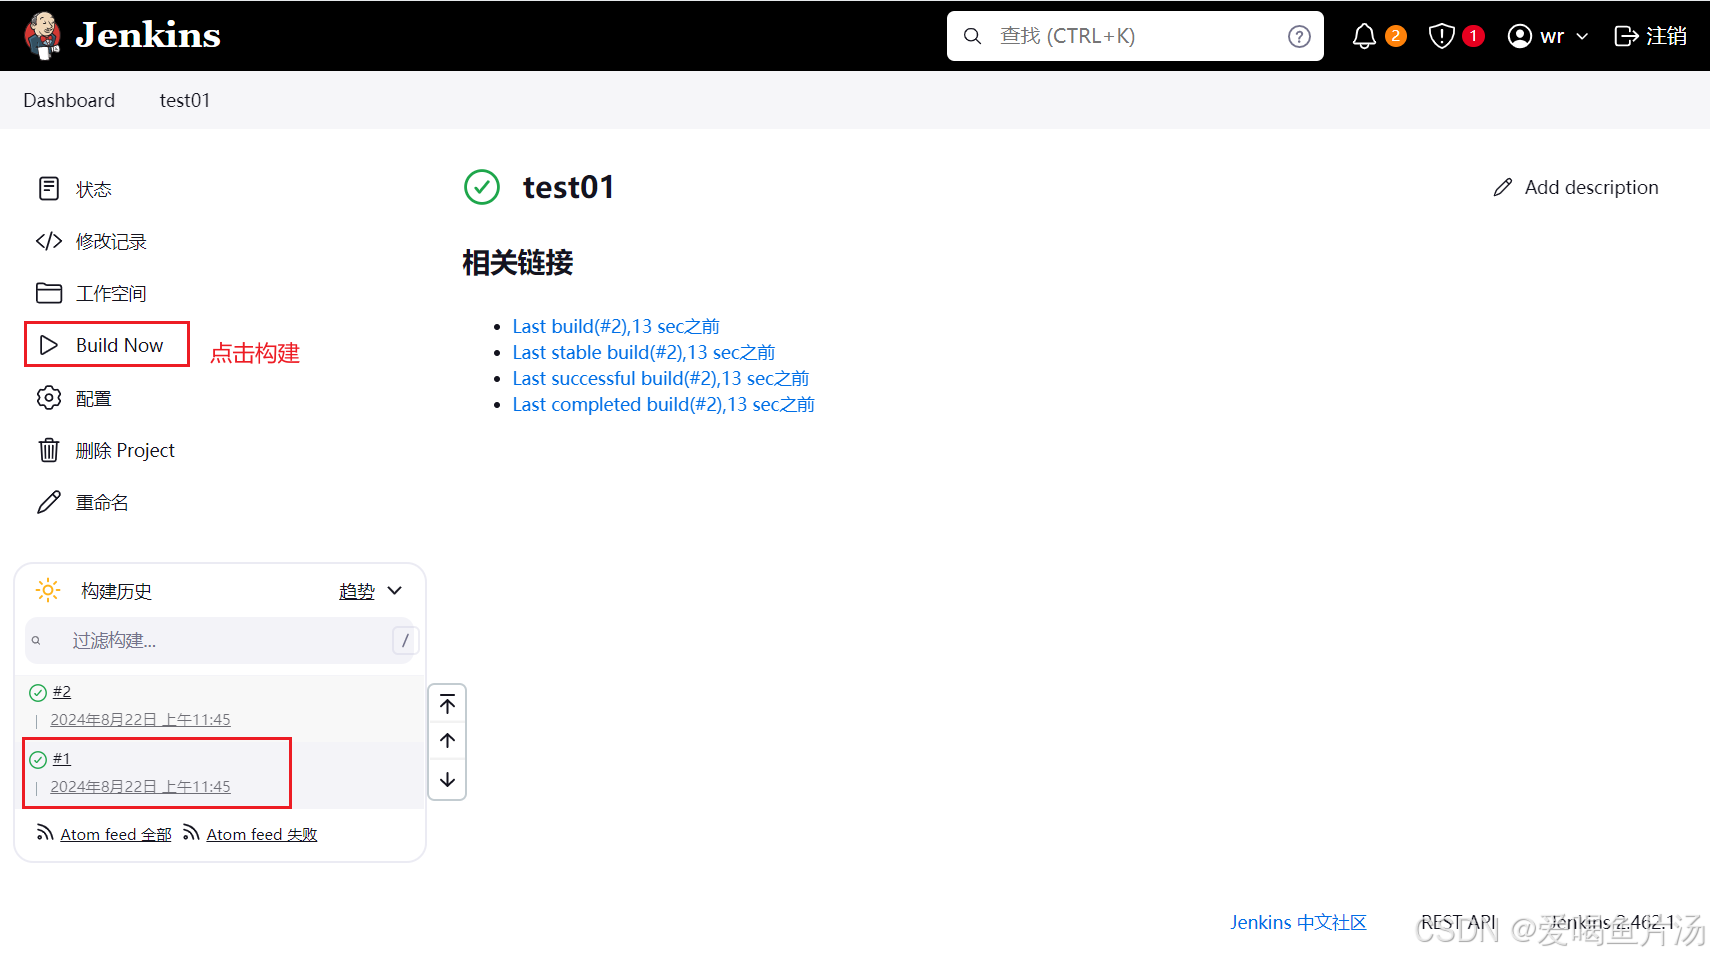
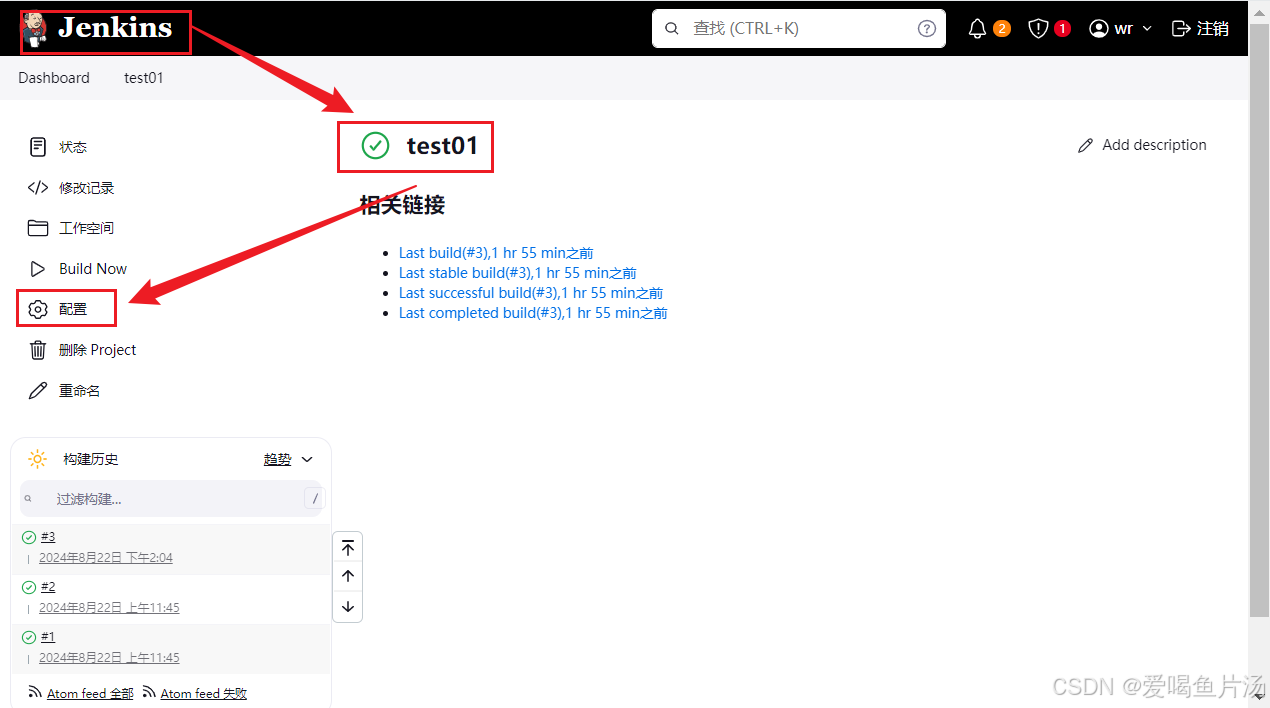
插件安装好了之后,快速配置一下


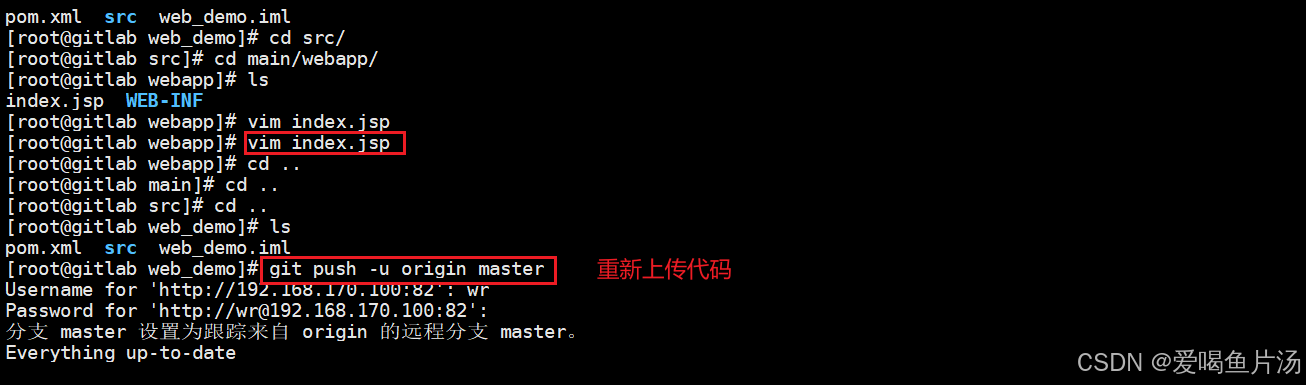
5、代码更新
bash
cd /opt/web_demo/src/main/webapp/
vim index.jsp

cd /opt/web_demo
git push -u origin master
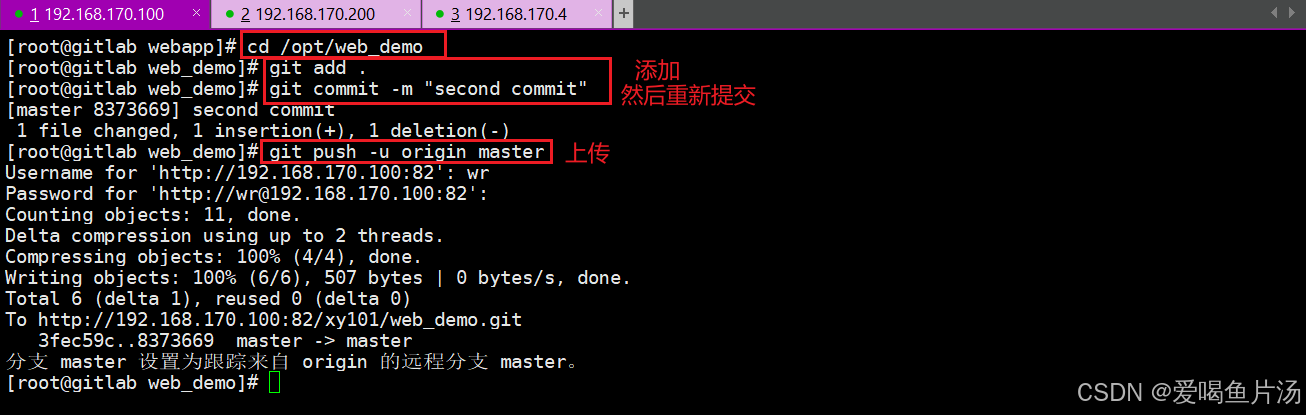
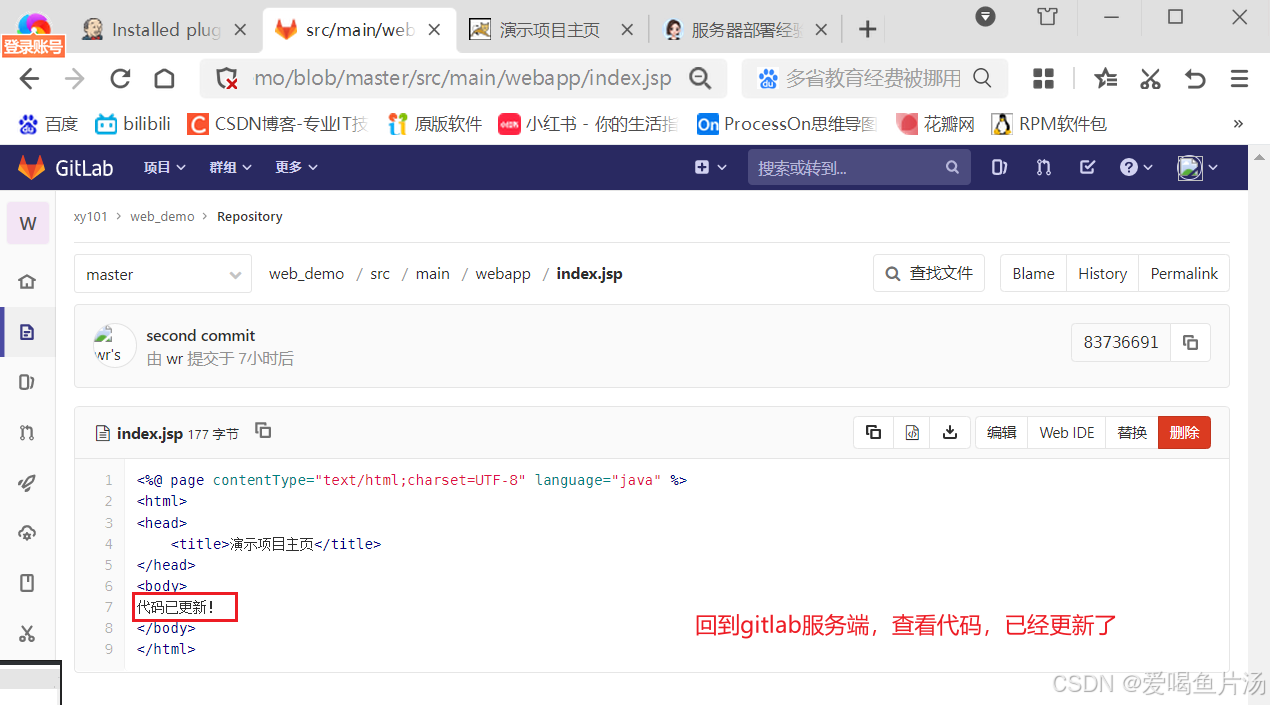
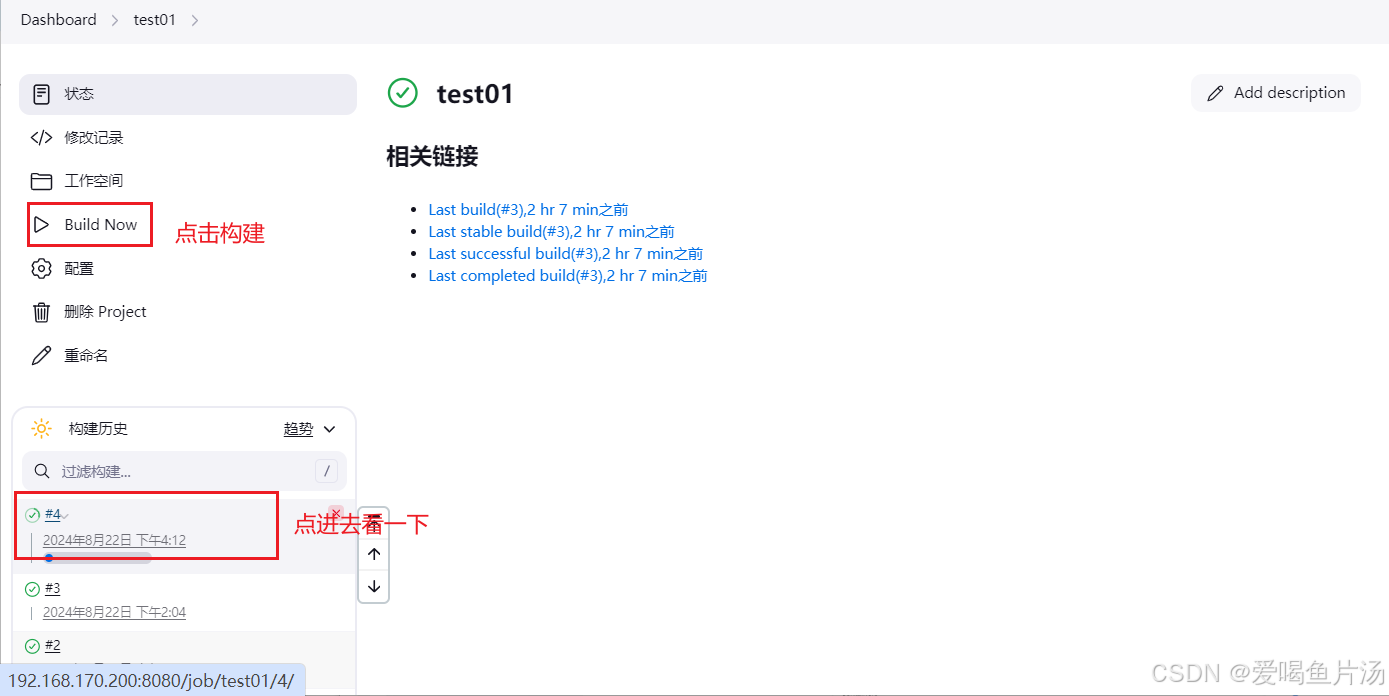
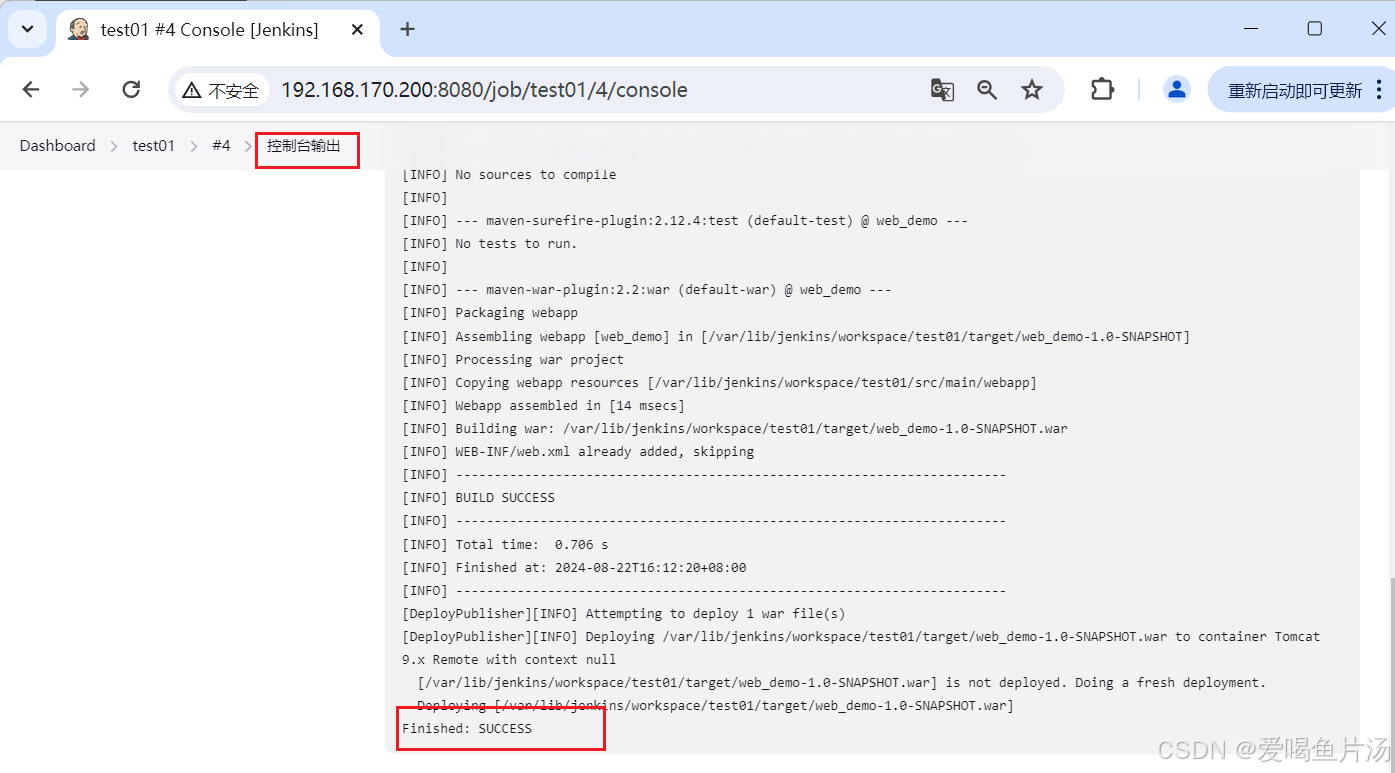
更新代码后我们没有手动打包、部署到远程服务器,这就是CICD自动完成相关的流程。
在本章实验中我们是通过手动在Jenkins表单填入相关操作的参数进行操作的,实际上这不利于我们维护,生产环境中是通过代码维护的。通过写一些流水线的代码,自动化实现代码拉取、代码编译打包和远程部署工作,我们称这个为编写teplem流水线脚本。