前言
在前端开发中,卡片遮罩层是一种常见的交互设计元素,用于强调某个区域或内容,并提供用户操作的入口。本文将带大家在
vue中结合实际案例实现此功能。
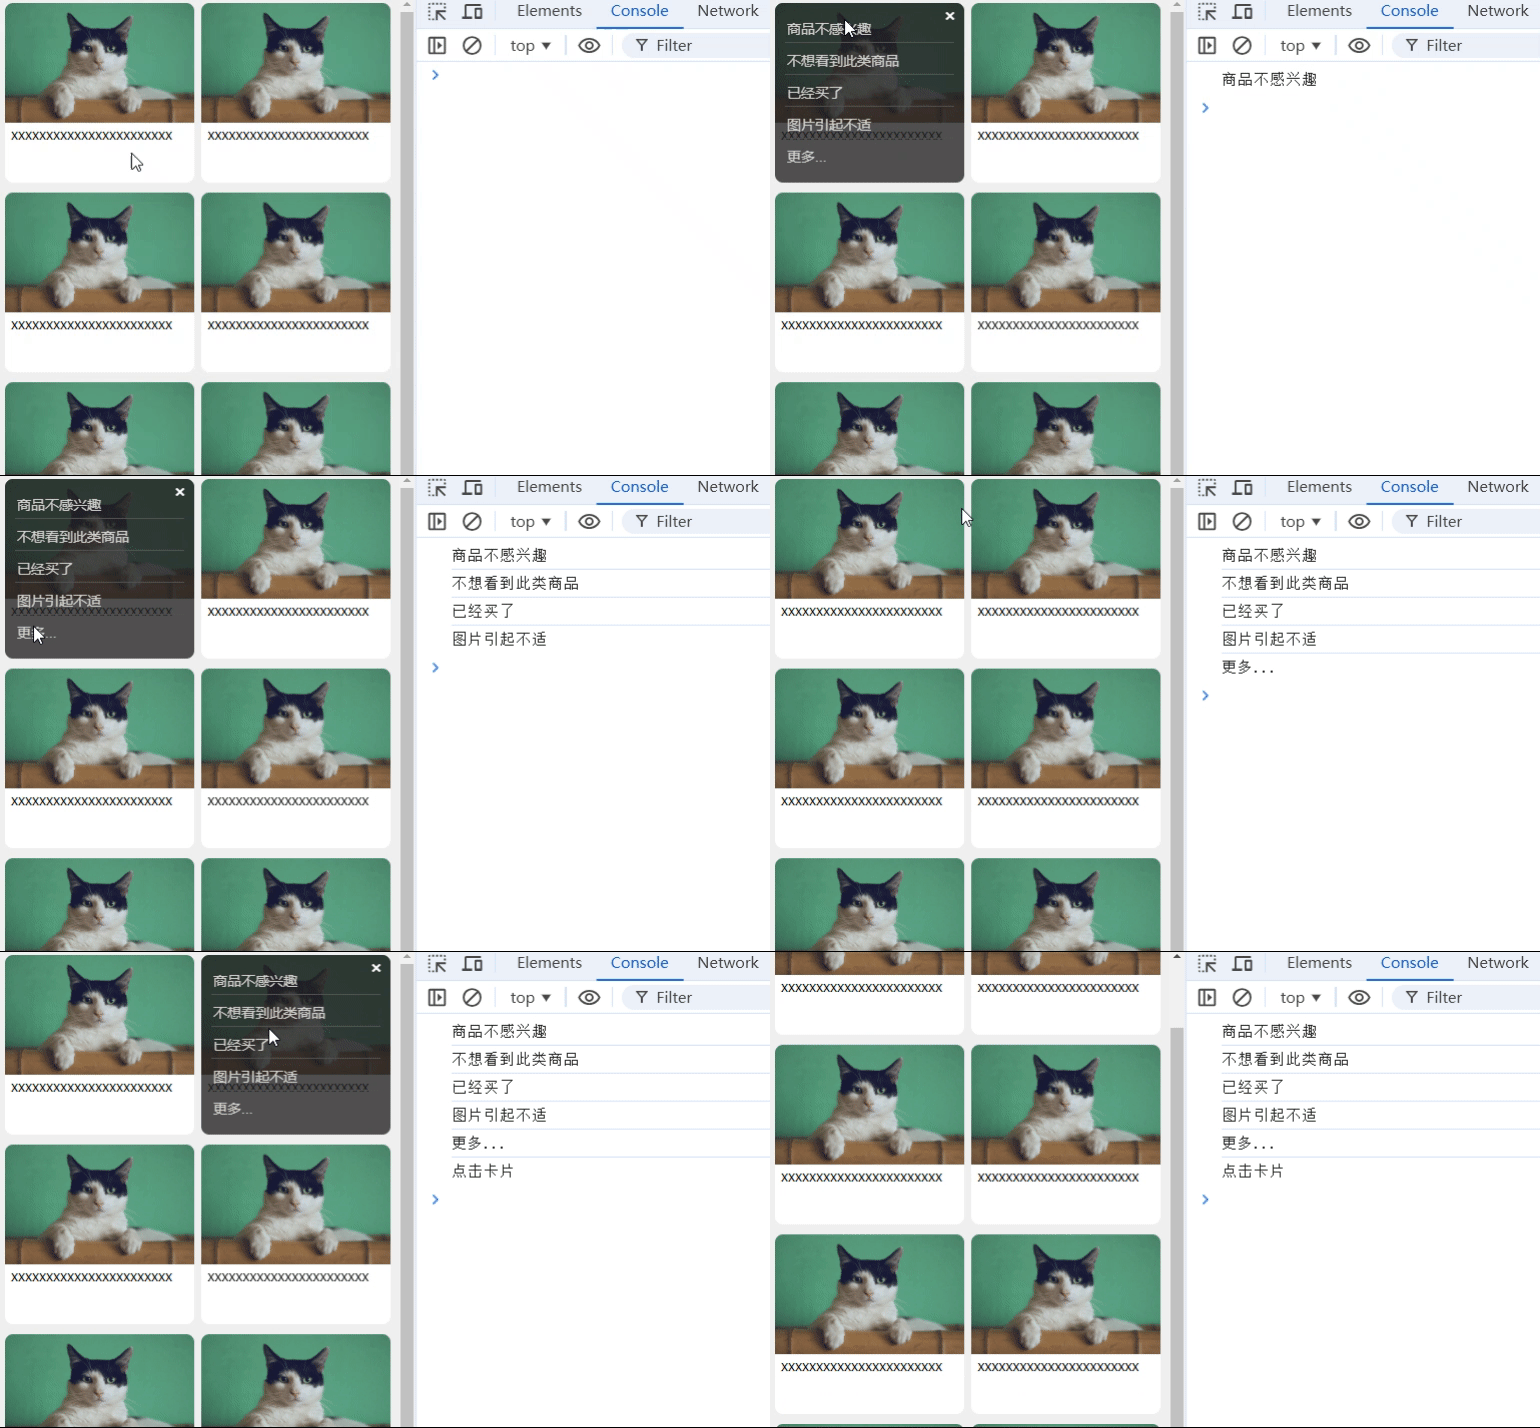
实现效果

完整代码
html
html
<template>
<!-- 主容器 -->
<div class="box">
<div
class="card"
@click="cardDetails(index)"
@mousedown.prevent="startLongPress($event, index)"
@mouseup="stopLongPress"
@mouseleave="stopLongPress"
v-for="(item, index) in list"
:key="index"
ref="cardRef"
>
<!-- 卡片内容 -->
<div class="content">
<div class="cardImg">
<img :src="item.imgUrl" alt="" />
</div>
<div class="introduce">{{ item.name }}</div>
</div>
<!-- 长按时显示的遮罩层 -->
<div
v-show="item.showOverlay"
class="overlay"
:class="{ 'expand-animation': item.showOverlay }"
@click.stop
>
<div class="buttonCon">
<div
v-for="(shadeItem, shadeIndex) in shadeList"
:key="shadeIndex"
@click="onShade(shadeItem.title)"
>
{{ shadeItem.title }}
</div>
</div>
<span class="close" @click="closeOverlay($event, index)">×</span>
</div>
</div>
</div>
</template>js
js
<script>
export default {
  data() {
    return {
      shadeList: [
        { title: "商品不感兴趣" },
        { title: "不想看到此类商品" },
        { title: "已经买了" },
        { title: "图片引起不适" },
        { title: "更多..." },
      ],
      longPressTimer: null, // 用于存储长按计时器
      list: [
        {
          imgUrl: "https://img01.yzcdn.cn/vant/cat.jpeg",
          name: "xxxxxxxxxxxxxxxxxxxxxxx",
          showOverlay: false,
        },
        {
          imgUrl: "https://img01.yzcdn.cn/vant/cat.jpeg",
          name: "xxxxxxxxxxxxxxxxxxxxxxx",
          showOverlay: false,
        },
        {
          imgUrl: "https://img01.yzcdn.cn/vant/cat.jpeg",
          name: "xxxxxxxxxxxxxxxxxxxxxxx",
          showOverlay: false,
        },
        {
          imgUrl: "https://img01.yzcdn.cn/vant/cat.jpeg",
          name: "xxxxxxxxxxxxxxxxxxxxxxx",
          showOverlay: false,
        },
        {
          imgUrl: "https://img01.yzcdn.cn/vant/cat.jpeg",
          name: "xxxxxxxxxxxxxxxxxxxxxxx",
          showOverlay: false,
        },
        {
          imgUrl: "https://img01.yzcdn.cn/vant/cat.jpeg",
          name: "xxxxxxxxxxxxxxxxxxxxxxx",
          showOverlay: false,
        },
        {
          imgUrl: "https://img01.yzcdn.cn/vant/cat.jpeg",
          name: "xxxxxxxxxxxxxxxxxxxxxxx",
          showOverlay: false,
        },
        {
          imgUrl: "https://img01.yzcdn.cn/vant/cat.jpeg",
          name: "xxxxxxxxxxxxxxxxxxxxxxx",
          showOverlay: false,
        },
      ],
    };
  },
  mounted() {
    // 监听窗口滚动
    window.addEventListener("scroll", this.closeAllOverlaysOnScroll);
  },
  // 实例销毁前移除监听窗口的滚动
  beforeDestroy() {
    window.removeEventListener("scroll", this.closeAllOverlaysOnScroll);
  },
  methods: {
    // 滚动时关闭遮罩层
    closeAllOverlaysOnScroll() {
      this.list.forEach((item) => {
        this.$set(item, "showOverlay", false);
      });
    },
    // 开始长按事件
    startLongPress(event, index) {
      event.preventDefault();
      event.stopPropagation();
      this.closeOtherOverlays(index);
      this.longPressTimer = setTimeout(() => {
        this.list[index].showOverlay = true;
        document.addEventListener("click", this.checkClickOutside);
      }, 100);
    },
    closeOtherOverlays(index) {
      this.list.forEach((item, i) => {
        if (i !== index) {
          item.showOverlay = false;
        }
      });
    },
    // 点击卡片详情
    cardDetails(index) {
      if (!this.list[index].showOverlay) {
        console.log("点击卡片");
      }
    },
    // 结束长按事件
    stopLongPress() {
      clearTimeout(this.longPressTimer);
      document.removeEventListener("click", this.checkClickOutside);
    },
    // 关闭遮罩层
    closeOverlay(event, index) {
      event.stopPropagation(); // 阻止事件冒泡
      this.$set(this.list[index], "showOverlay", false); // 关闭当前卡片的遮罩层
      document.removeEventListener("click", this.checkClickOutside);
    },
    // 检查点击区域是否在遮罩层外
    checkClickOutside(event) {
      // 遍历所有卡片,关闭非点击卡片的遮罩层
      this.list.forEach((item, index) => {
        if (!this.$refs.cardRef[index].contains(event.target)) {
          this.$set(item, "showOverlay", false);
        }
      });
      document.removeEventListener("click", this.checkClickOutside);
    },
    // 点击遮罩层内容
    onShade(name) {
      console.log(name);
    },
  },
};
</script>
css
css
<style scoped lang="less">
.box {
  font-size: 16px;
  min-height: 100vh;
  background: #f0f0f0;
  padding: 8px;
  .card {
    width: 49%;
    display: inline-block;
    background-color: white;
    position: relative;
    overflow-wrap: break-word;
    user-select: none;
    margin-bottom: 10px;
    border-radius: 8px;
    .introduce {
      text-align: justify;
      overflow: hidden;
      padding: 0px 6px 6px 6px;
      font-size: 14px;
      height: 50px;
      font-size: 14px;
    }
    .cardImg {
      img {
        border-top-left-radius: 8px;
        border-top-right-radius: 8px;
        width: 100%;
        height: 120px;
      }
    }
    .overlay {
      padding: 16px 10px;
      box-sizing: border-box;
      border-radius: 8px;
      position: absolute;
      top: 0;
      left: 0;
      width: 100%;
      height: 100%;
      background-color: rgba(35, 35, 35, 0.8);
      &.expand-animation {
        animation: expand 0.3s forwards;
      }
    }

    .buttonCon {
      font-size: 14px;
      width: 100%;
      color: rgb(213, 207, 207);
      div:not(:last-child) {
        border-bottom: 1px solid rgb(82, 82, 82);
        margin-bottom: 8px;
      }
      div {
        padding: 0px 2px 4px 2px;
      }
    }

    .close {
      position: absolute;
      top: 2px;
      right: 8px;
      font-size: 20px;
      cursor: pointer;
      color: white;
    }
  }
  .card:nth-child(even) {
    margin-left: 2%;
  }
}

@keyframes expand {
  0% {
    transform: scale(0);
    opacity: 0;
  }
  100% {
    transform: scale(1);
    opacity: 1;
  }
}
</style>
实现思路
这段代码实现了一个交互式的卡片列表功能,其中每个卡片包含一个图片和一些文字介绍。用户可以通过点击卡片来查看详情,同时也可以通过长按卡片来显示一个遮罩层,遮罩层上有一些操作按钮,如"商品不感兴趣"、"不想看到此类商品"等选项。此外,用户还可以点击遮罩层外的区域来关闭遮罩层。整体功能类似于一个商品展示页面,用户可以对商品进行不同的操作和反馈。
首先,实现卡片列表展示功能。通过循环遍历一个包含图片和文字介绍的数据数组,动态生成多个卡片组件。每个卡片组件包含一个图片元素和一个文字介绍元素,通过 vue 的 v-for 指令实现数据绑定,将对应的图片和文字展示在每个卡片上。
其次,实现点击卡片查看详情的功能。为每个卡片组件添加点击事件监听器,当用户点击某个卡片时,触发相应的事件处理函数,展示该卡片的详细信息。这可以通过 vue 的 @click 指令实现,为每个卡片元素添加点击事件处理逻辑。
接着,实现长按卡片显示遮罩层的功能。在代码中,为每个卡片组件添加长按事件监听器,当用户长按某个卡片时,显示遮罩层。通过 vue 的 @touchstart 指令监听长按事件,并在事件触发时显示遮罩层。遮罩层可以是一个覆盖在卡片上方的半透明层,用来提供操作按钮和用户反馈选项。
在遮罩层上添加操作按钮,如"商品不感兴趣"、"不想看到此类商品"等选项。用户可以通过点击这些按钮来进行不同的操作和反馈。通过在遮罩层组件中添加按钮元素,并为每个按钮添加点击事件处理逻辑来实现。
最后,实现点击遮罩层外的区域关闭遮罩层的功能。为遮罩层外的区域添加点击事件监听器,当用户点击遮罩层外的区域时,关闭遮罩层。通过 vue 的 @click 指令监听遮罩层外区域的点击事件,并在事件触发时关闭遮罩层。