目录
一、项目开发周期
传统开发: 是指将整个项目完全开发完交付给用户(客户)。
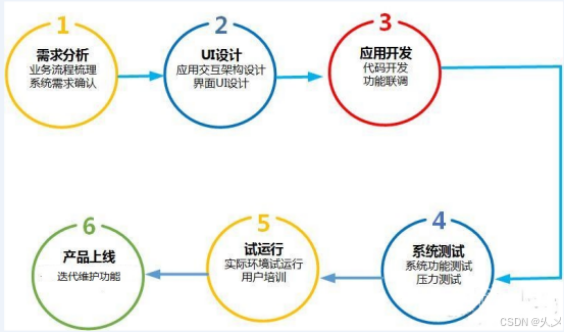
敏捷开发: 交给用户的时候可能用户感觉没有达到他们想要的效果,所以出现了现在的敏捷开发。项目非常大,前期先开发核心功能,把核心功能上线后,后期根据计划(2-3周迭代一次),把非核心功能逐步上线,最终达到所有功能上线完成,在核心功能上线后,项目一直可用状态。敏捷开发以用户的需求进化为核心,采用迭代、循序渐进的方法进行软件开发。就是把一个大项目分为多个相互联系,但也可独立运行的小项目,并分别完成,在此过程中软件一直处于可使用状态。(微服务项目非常适合敏捷开发)
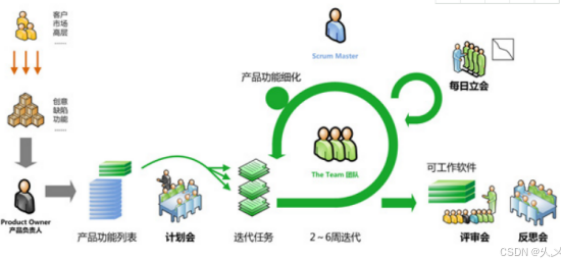
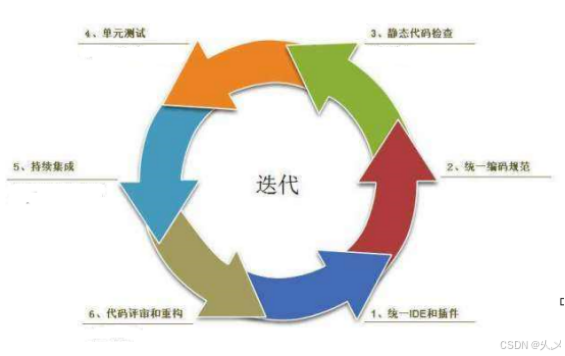
在敏捷开发过程中迭代开发
二、jenkins的简介和作用
作为领先的开源自动化服务器,Jenkins 提供了数百个插件来支持构建、部署和自动化任何项目。
构建伟大,无所不能。Jenkins是开源CI(持续集成Continuous Integration)&CD(持续开发Continuous deployment)软件领导者, 提供超过1000个插件来支持构建、部署、自动化, 满足任何项目的部署需要(如何把我们项目部署到测试或者生产环境技术)。
Jenkins是一款开源 CI(Continuous integration)&CD(Continuous deployment) 软件,用于自动化各种任务,包括构建、测试和部署软件。
Jenkins是一个开源软件项目,是基于Java开发的一种持续集成工具,用于监控持续重复的工作,旨在提供一个开放易用的软件平台,使软件的持续集成变成可能。上图中持续集成就是jenkins的用武之地。
CI系统在整个开发过程中的主要作用是控制:当系统在代码存储库(git服务器(gitee,github等),svn服务器,私服(gitlab))中探测到修改时,它将运行构建的任务委托给构建过程本身(jenkins)。如果构建失败了,那么CI系统将通知相关人员,然后继续监视存储库。 能保证开发人员以及相关人员省时省力提高开发效率。(提高运维的效率,让项目部署速度加快,缩短整个开发周期)
三、jenkins下载
jenkins.war:jenkins.war
tomcat.tar:tomcat9.0.52
maven:maven3.8.6.tar
1、使用war包安装
#解压tomcat
tar -xzvf /software/apache-tomcat-9.0.52.tar.gz -C /usr/

#把war包放入tomat webapp/  运行tomcat即可
#更换jdk11(jdk8出现404错误)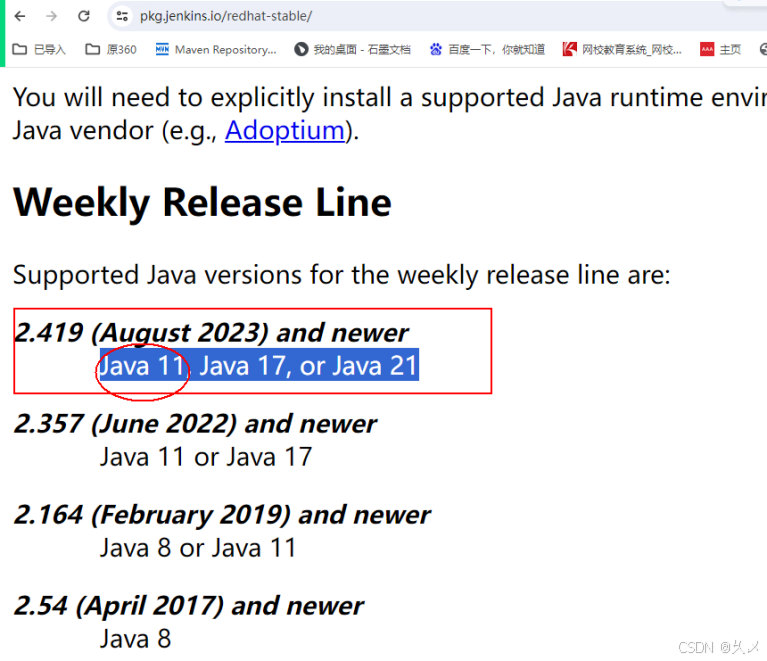
#更换jdk版本为11

java -version
echo $JAVA_HOME
rpm -qa|grep jdk
rpm -evh jdk1.8-1.8.0_151-fcs.x86_64
yum install fontconfig java-11-openjdk -y
rpm -qa|grep jdk


rpm -ql java-11-openjdk
ls /usr/lib/jvm/java-11-openjdk-11.0.23.0.9-2.el7_9.x86_64/
vim /etc/profile
source /etc/profile
java -version 
配置好jdk之后:浏览器输入:ip+端口/jenkins访问
比如我的是:192.168.37.155:8080/jenkins
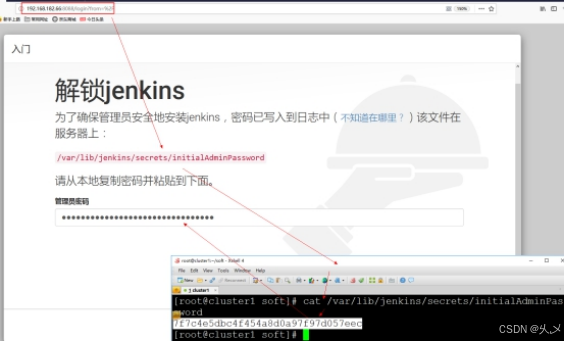
2、初始化配置
根据提示复制密码,登录
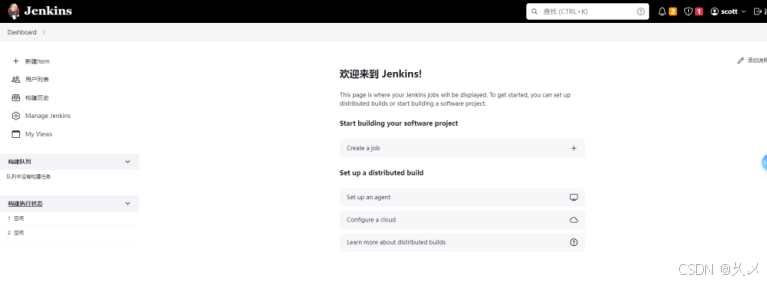
登录之后
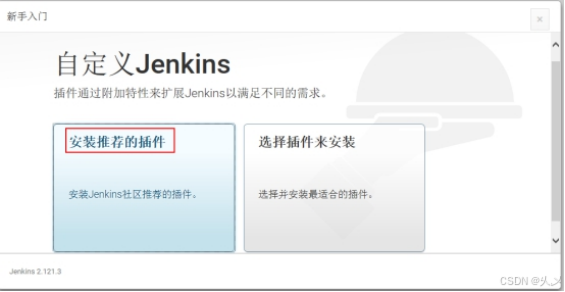
选择install suggested plugins,等待安装完毕
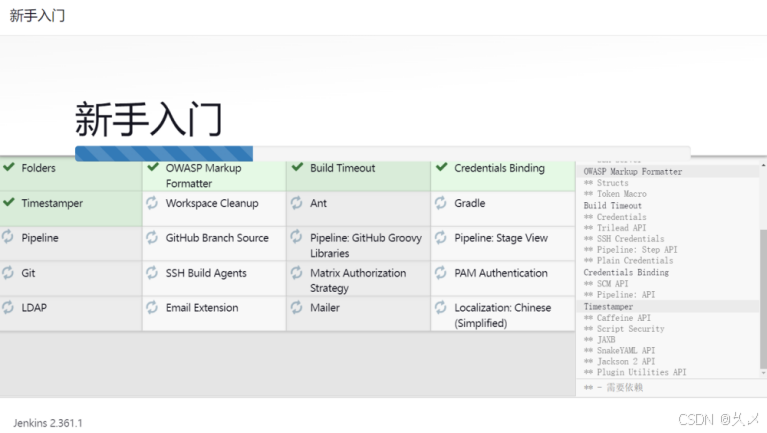
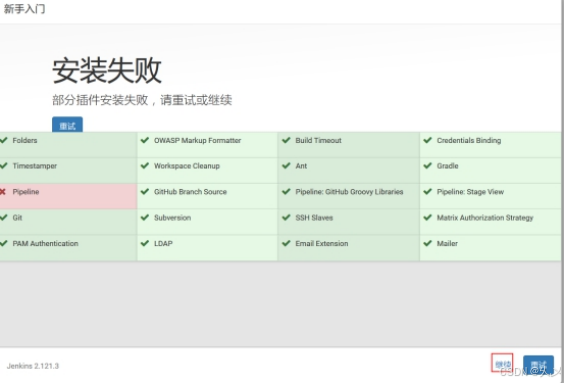
如果有安装失败的可以跳过,之后可以手动根据需求安装
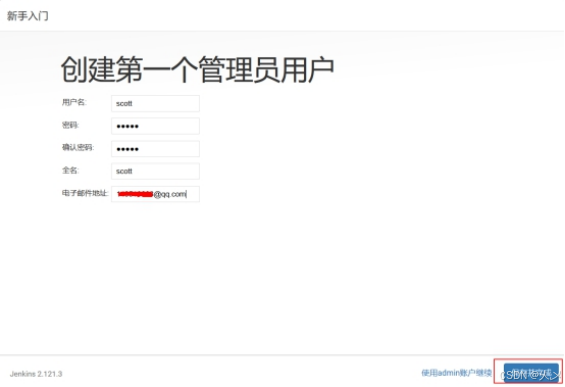
创建自己的用户名和密码
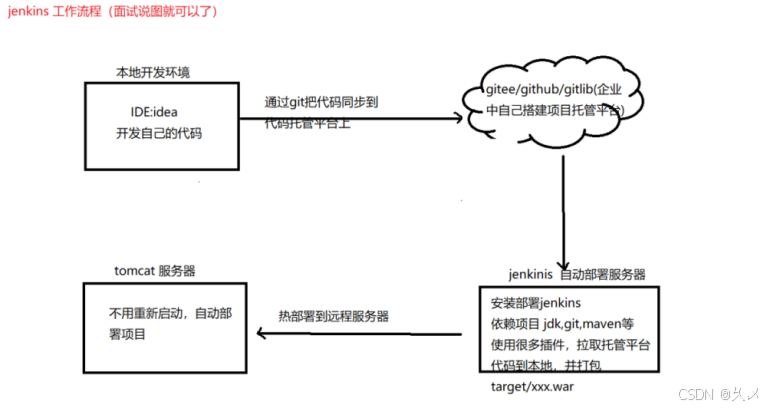
3、工作流程图
4、Jenkins安装配置maven和git
maven
#解压maven
tar -xzvf /software/apache-maven-3.8.6-bin.tar.gz -C /usr/


#配置环境变量
vim /etc/profile

export JAVA_HOME=/usr/lib/jvm/java-11-openjdk-11.0.16.0.8-1.el7_9.x86_64
export MAVEN_HOME=/usr/apache-maven-3.8.6
export PATH=$PATH:$MAVEN_HOME/bin:$JAVA_HOME/bin

#让配置生效
source /etc/profile
#查看结果
mvn -v

#查看是否是阿里云配置
vim /usr/apache-maven-3.8.2/conf/settings.xml

#在mirrors中加入:
<mirror>
<id>nexus-aliyun</id>
<mirrorOf>*</mirrorOf>
<name>Nexus aliyun</name>
<url>http://maven.aliyun.com/nexus/content/groups/public</url>
</mirror>
git
#安装git
yum install -y git
#查看git安装目录
which git     #/usr/bin/git
5、jenkins安装插件
安装github Integration
安装maven Integration
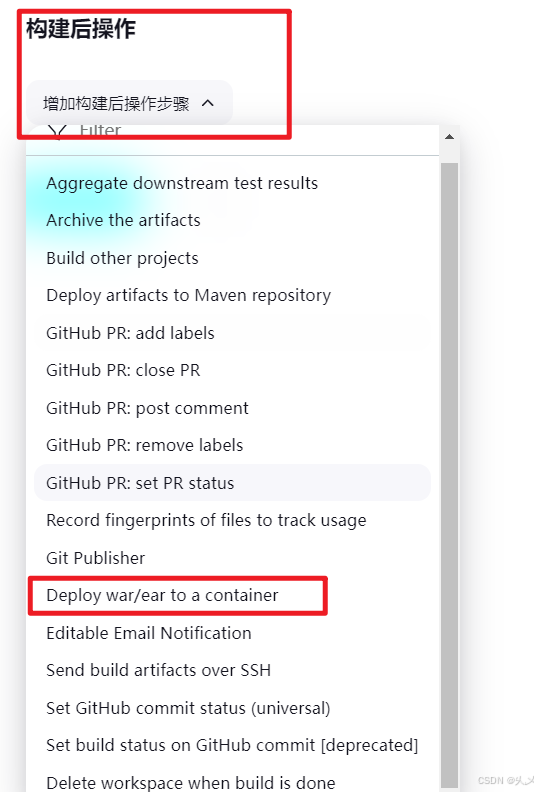
安装deploy to container
6、配置maven,git,jdk
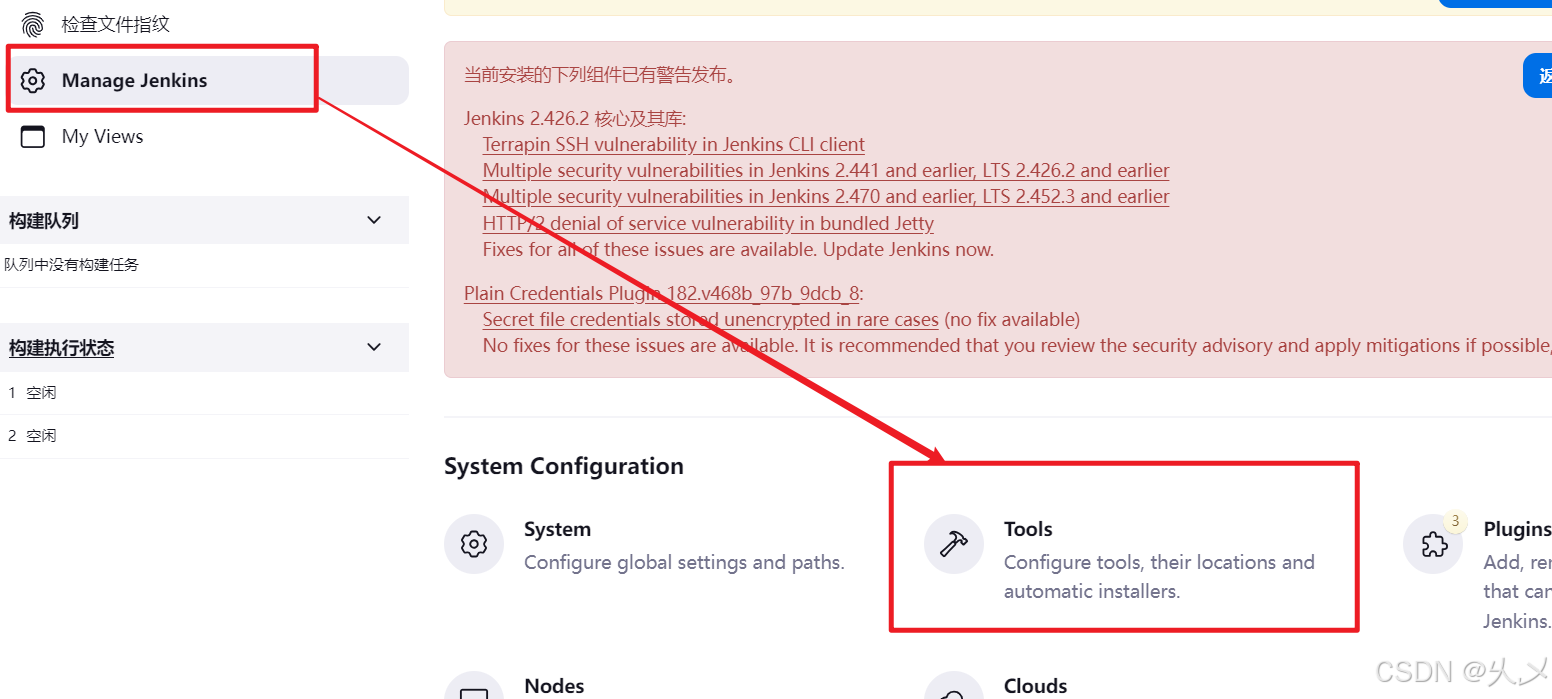
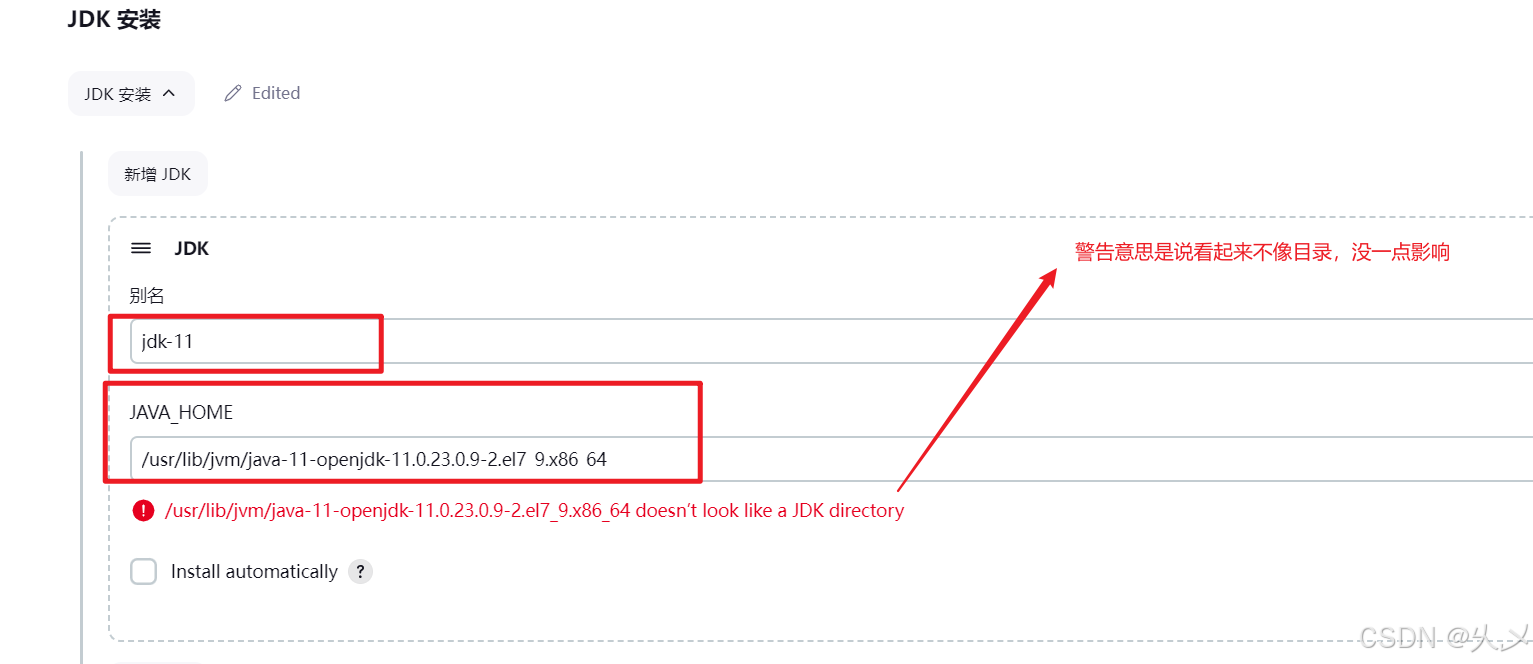
jdk配置
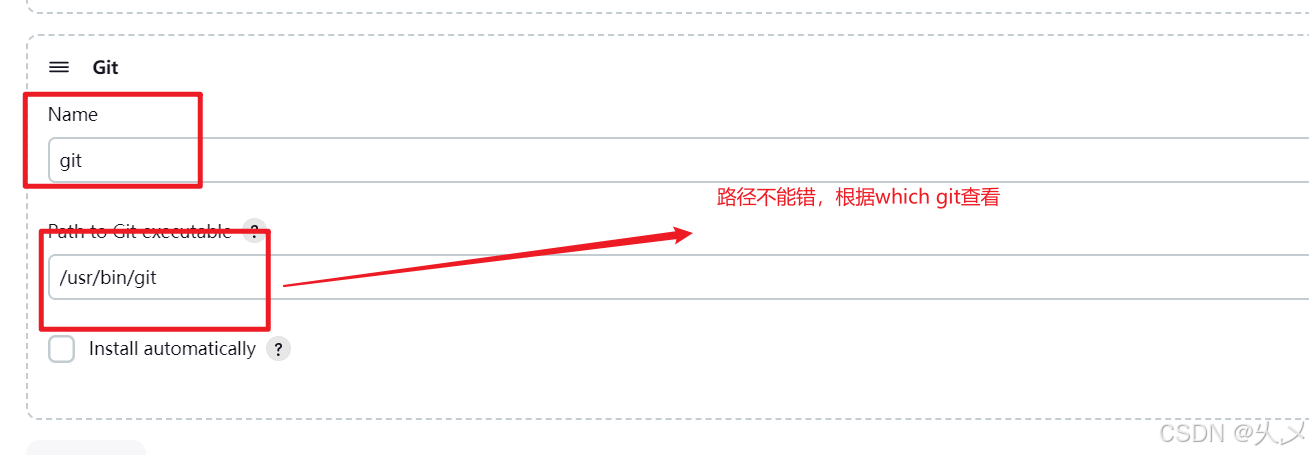
Git配置
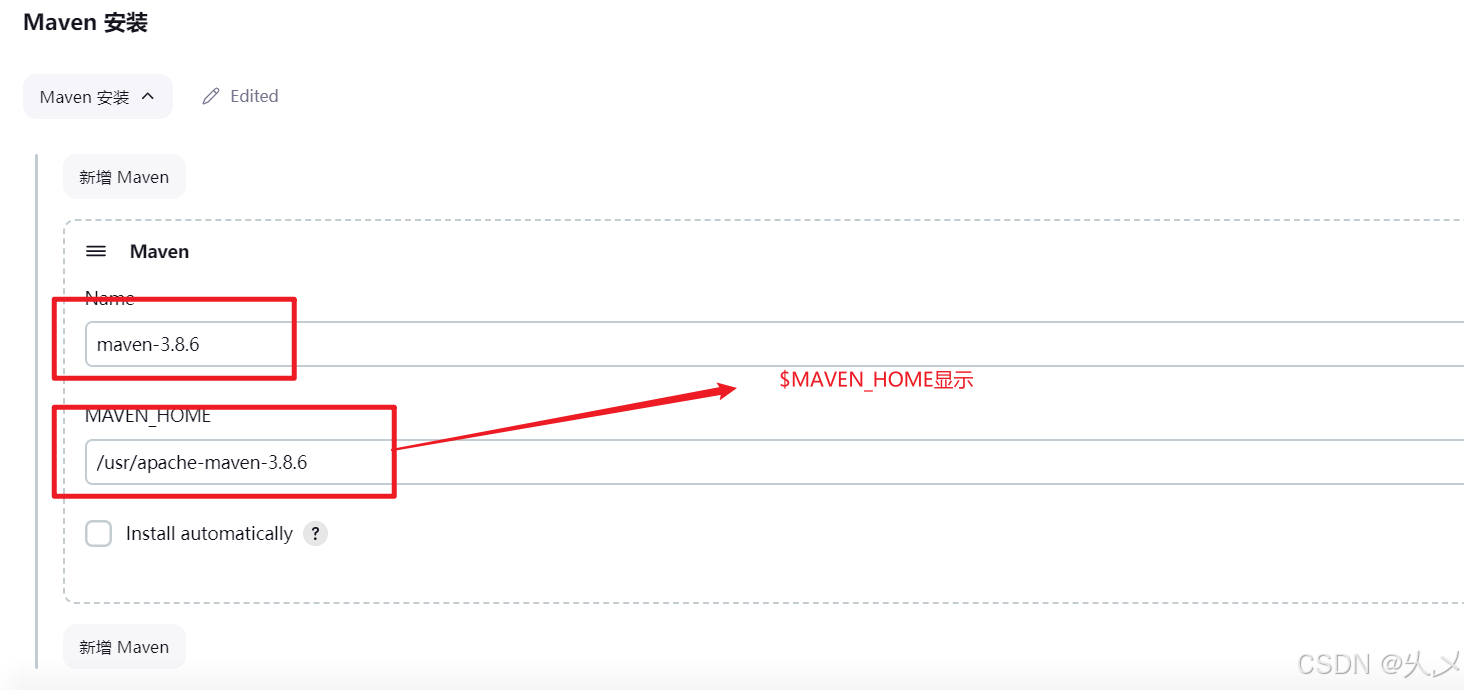
Maven配置
点击保存就可以了
四、修改tomcat的一些配置
登录tomcat,你会发现这三个页面进不去,报403错误,也就是权限不够
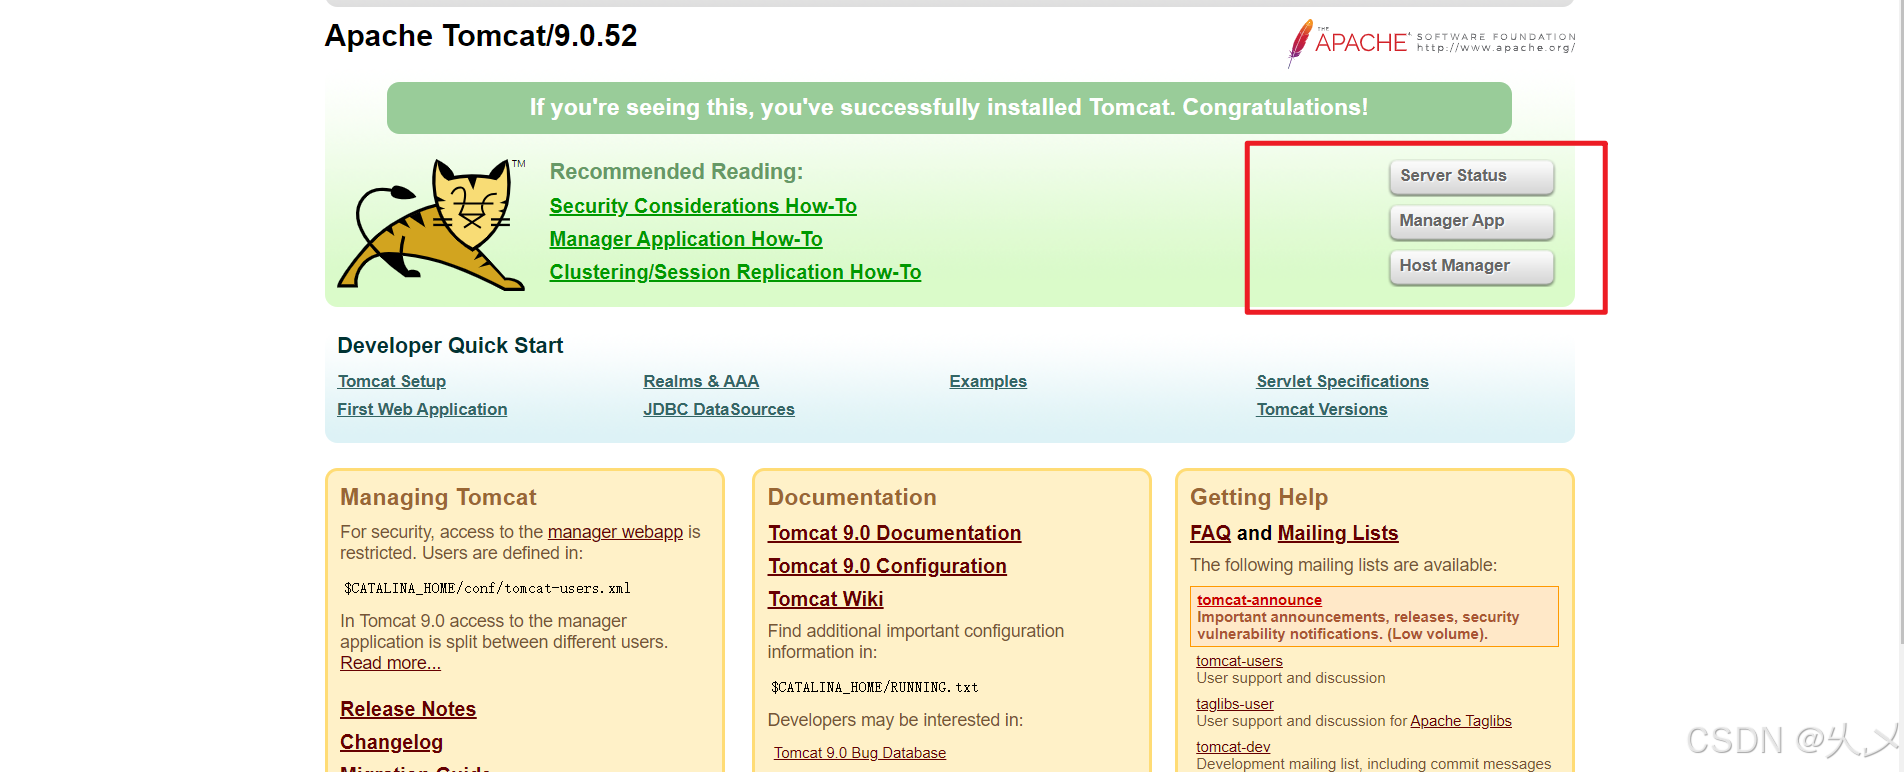
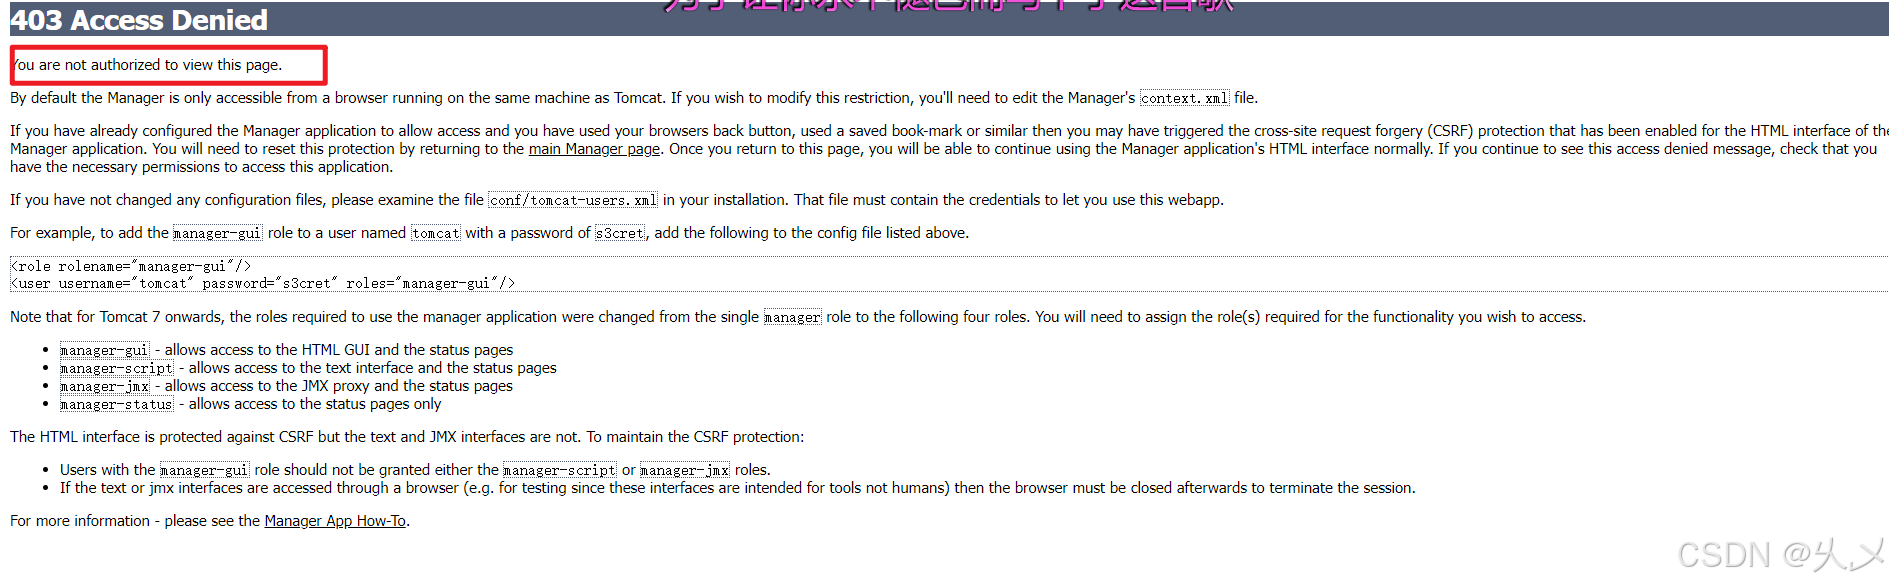
接下来我们修改一下配置信息
改配置:
vim /usr/apache-tomcat-8.5.49/conf/tomcat-users.xml
加入下面配置:
<role rolename="manager-gui"/>
<role rolename="manager-script"/>
<role rolename="manager-jmx"/>
<role rolename="manager-status"/>
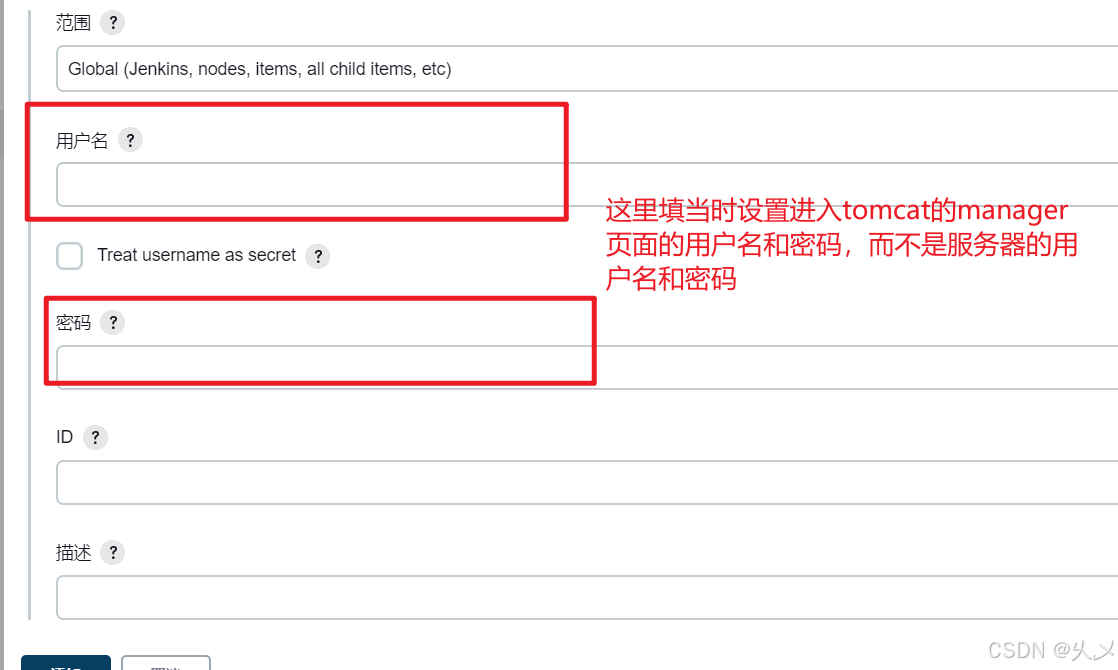
<user username="admin" password="123456" roles="manager-gui,manager-script,manager-jmx,manager-status"/>
#修改远程访问权限
vim webapps/manager/META-INF/context.xml
注释掉下面内容:
<!-- <Valve className="org.apache.catalina.valves.RemoteAddrValve"
allow="127\.\d+\.\d+\.\d+|::1|0:0:0:0:0:0:0:1" />
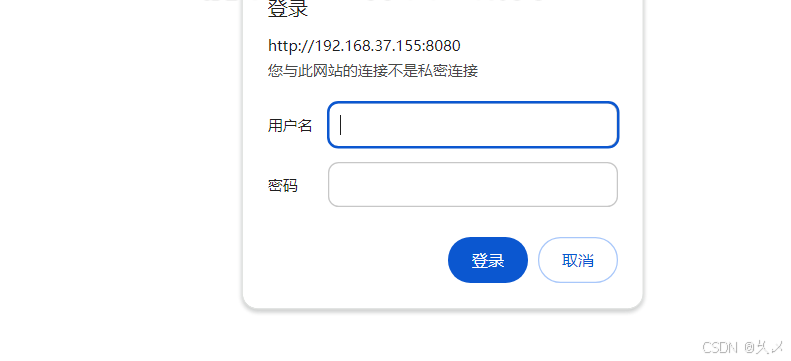
-->修改好之后,重启一下tomcat,再次访问就可以了,这次需要输入用户名和密码
五、idea上传项目到gitee
上传个可以打成war包的项目,这个例子测试的是war包部署
参考之前的文章:https://blog.csdn.net/m0_73376570/article/details/140399520
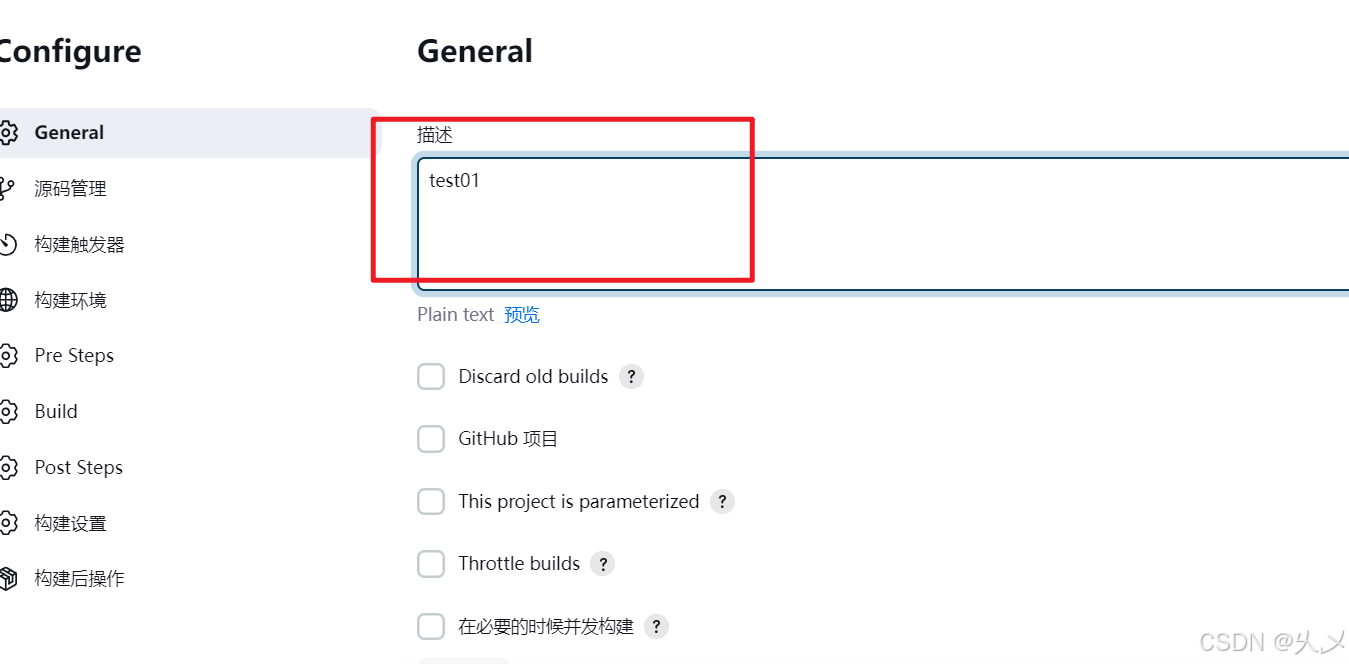
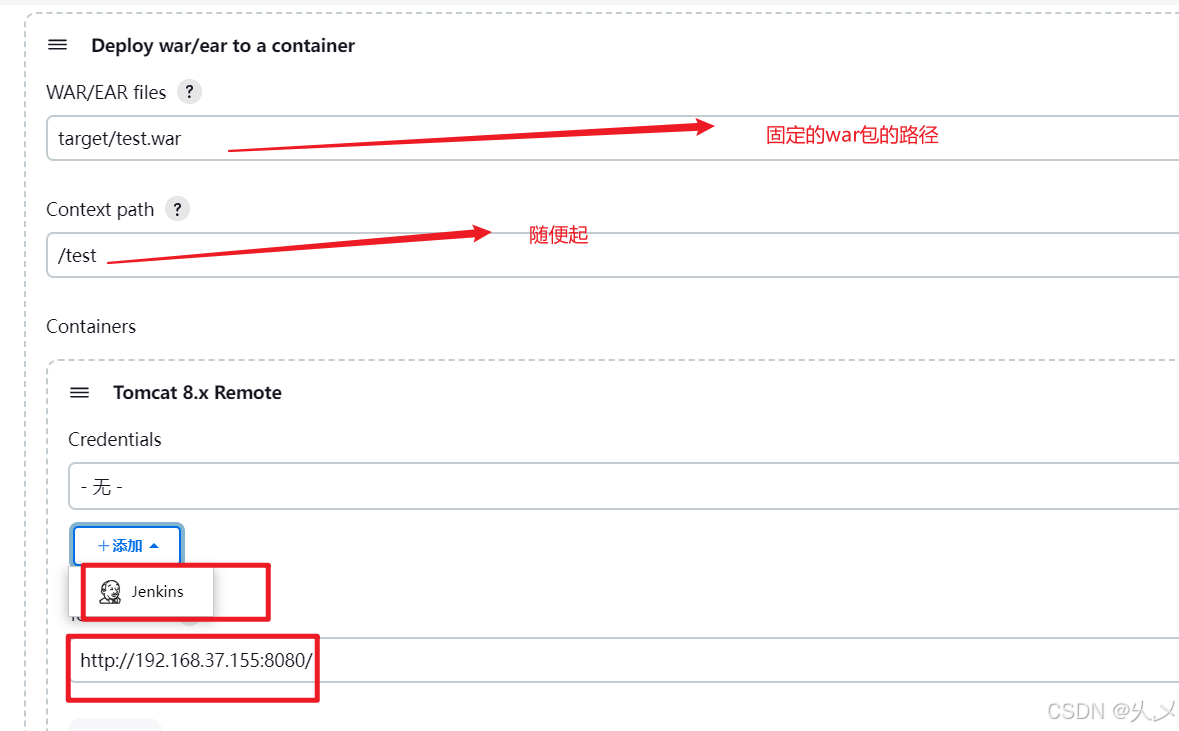
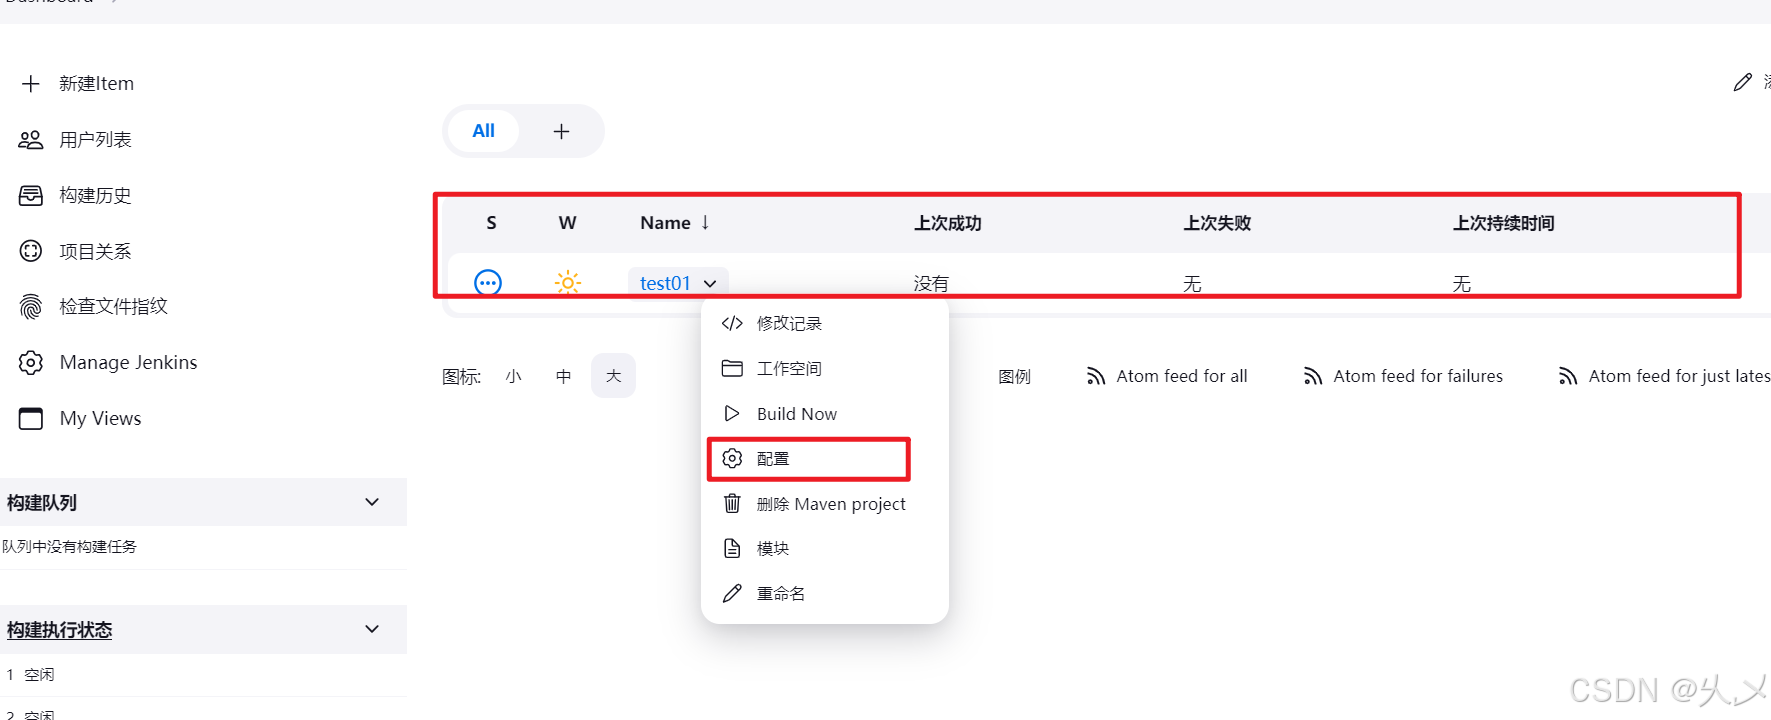
六、构建Maven项目到运行的tomcat
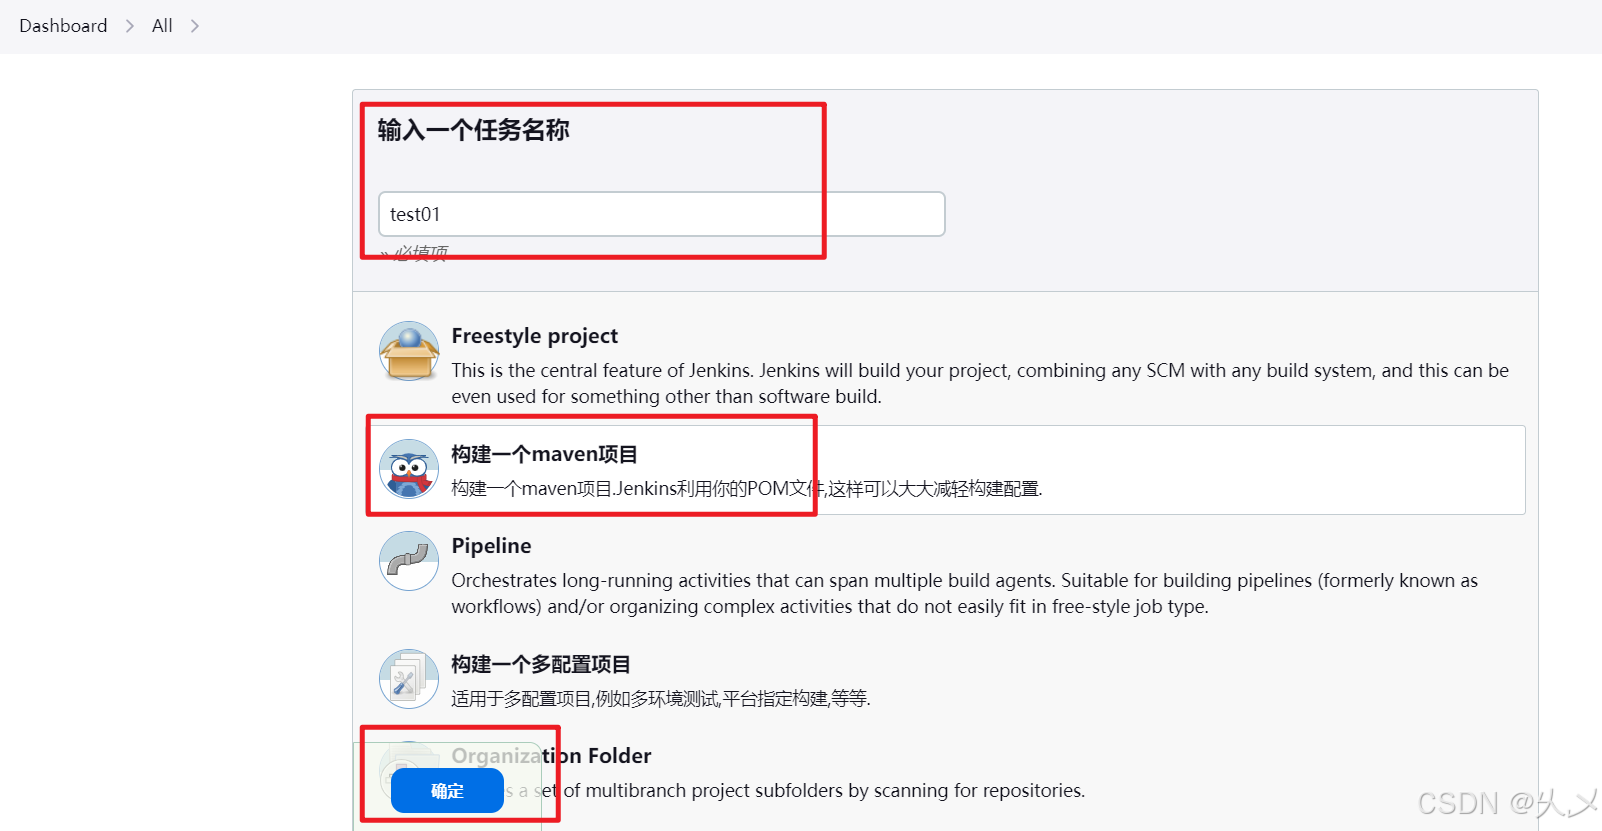
源码管理
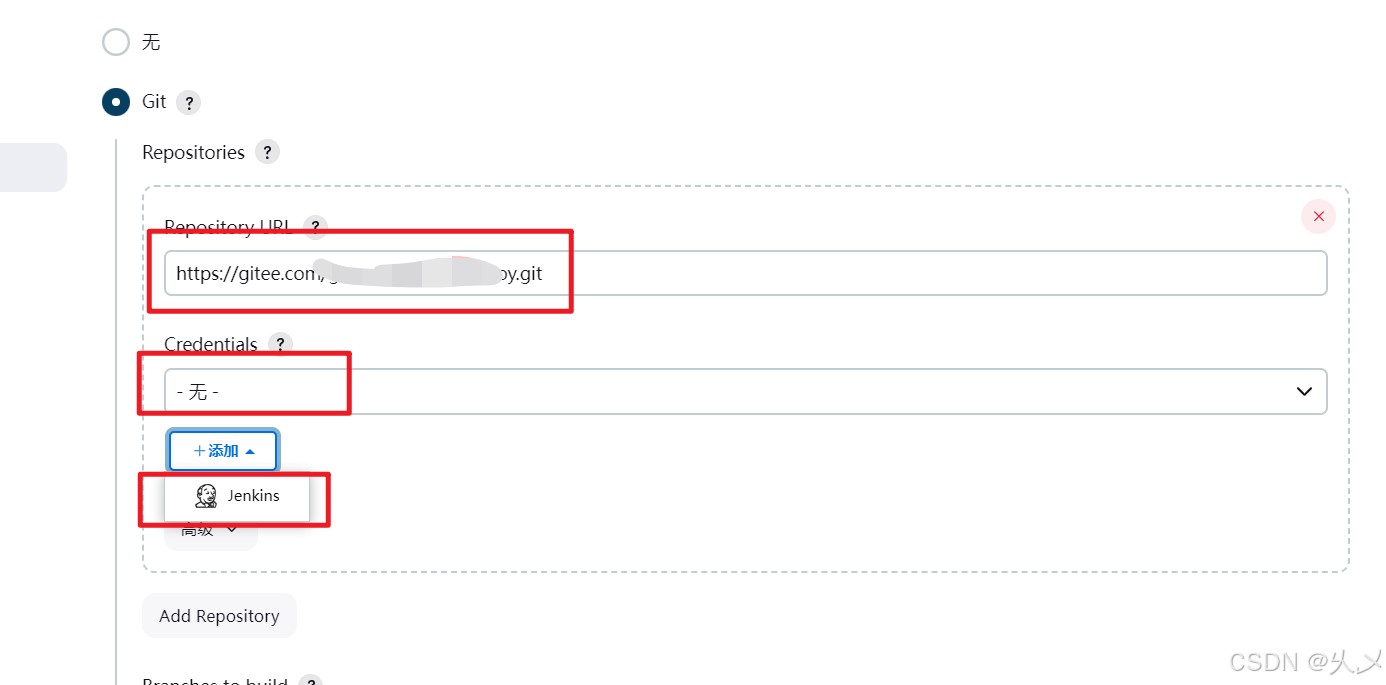
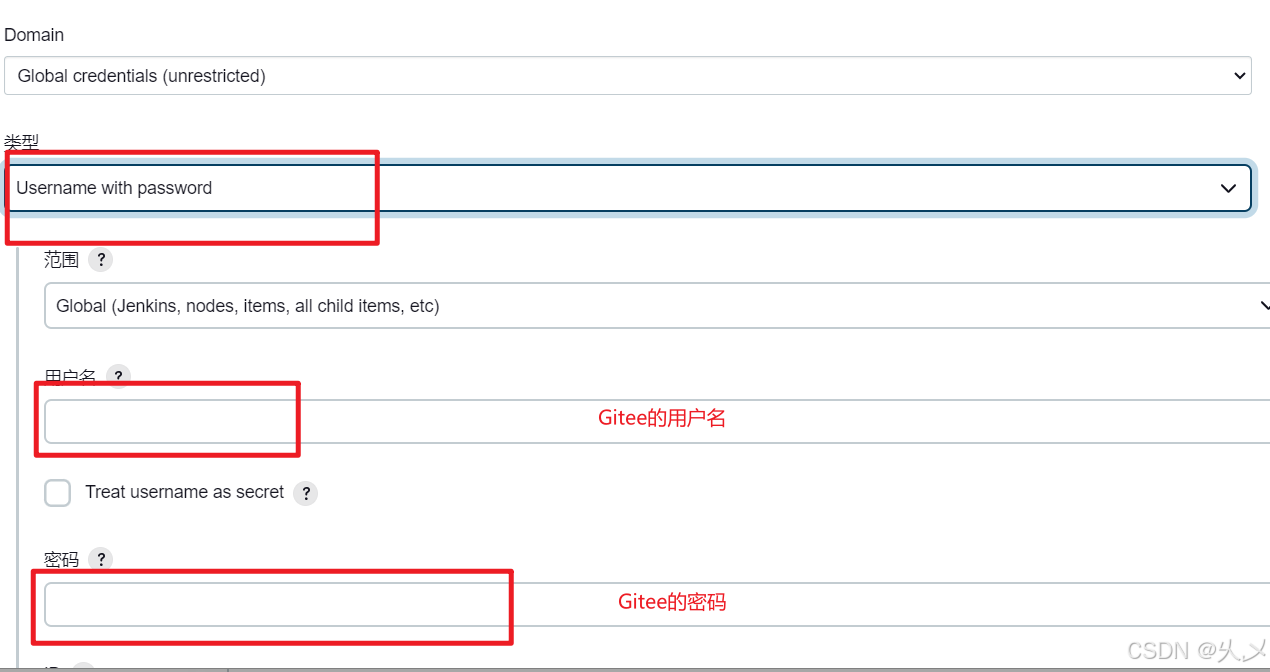
先添加一下凭证

配置Build
clean package -Dmaven.test.skip=true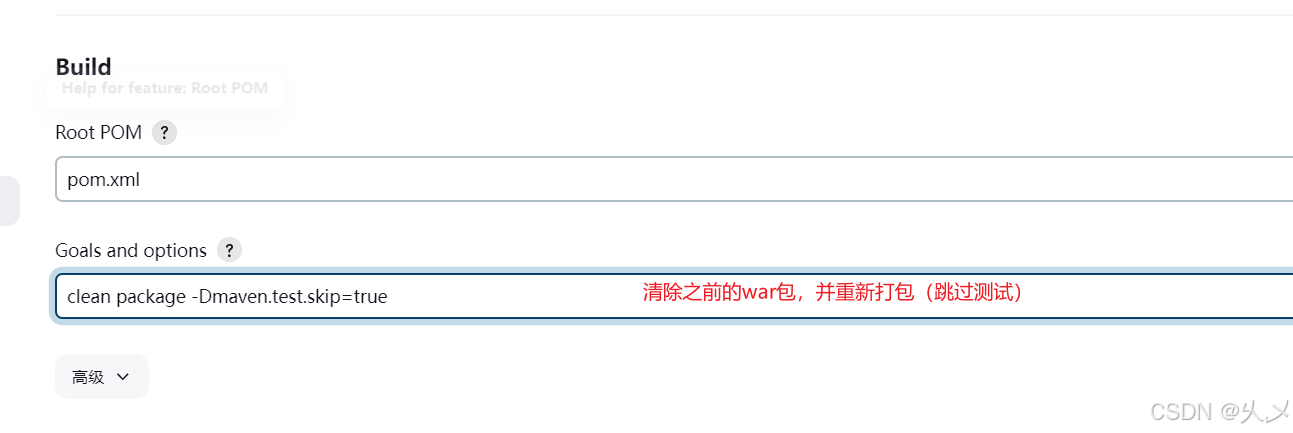

点击保存,如果配置有问题,还可以修改
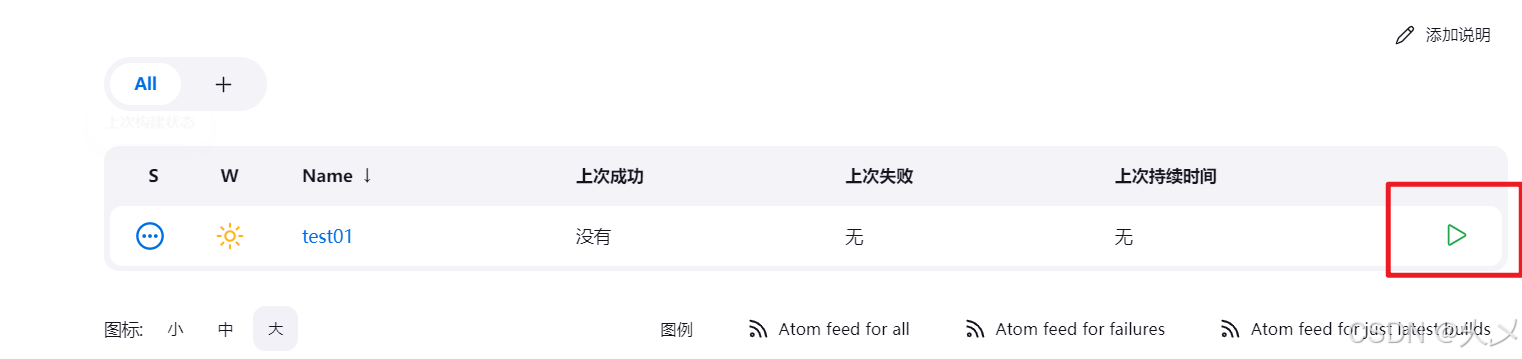
点击绿色按钮,开始构建
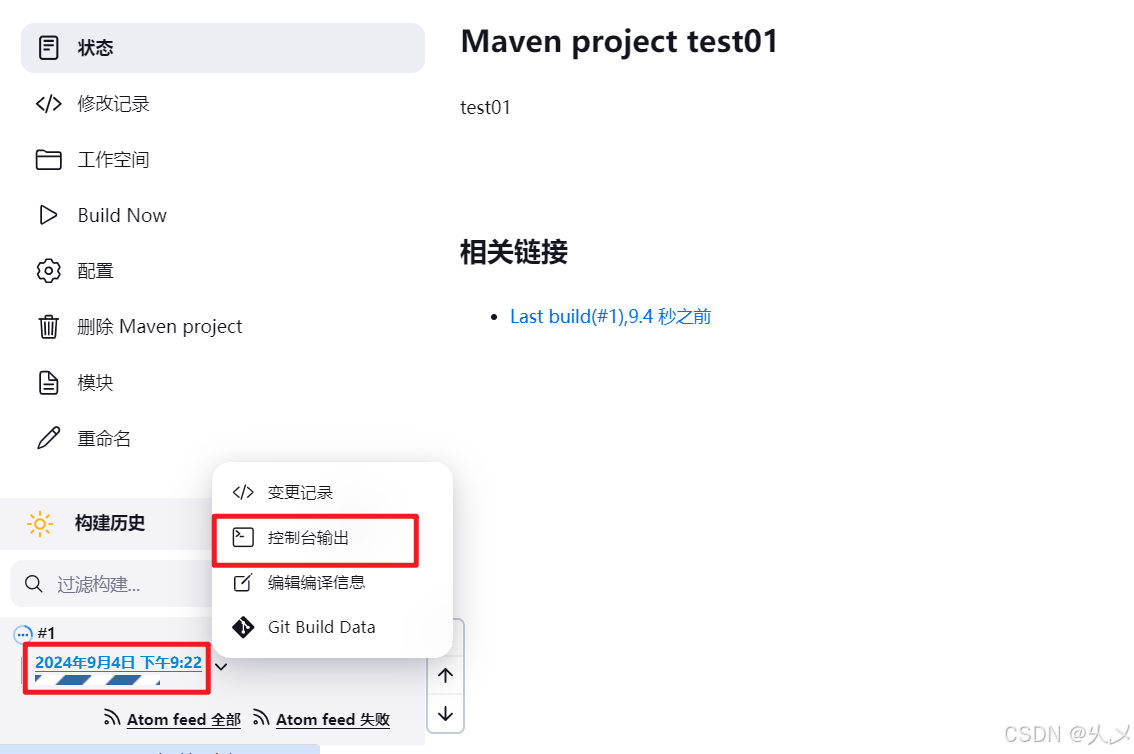

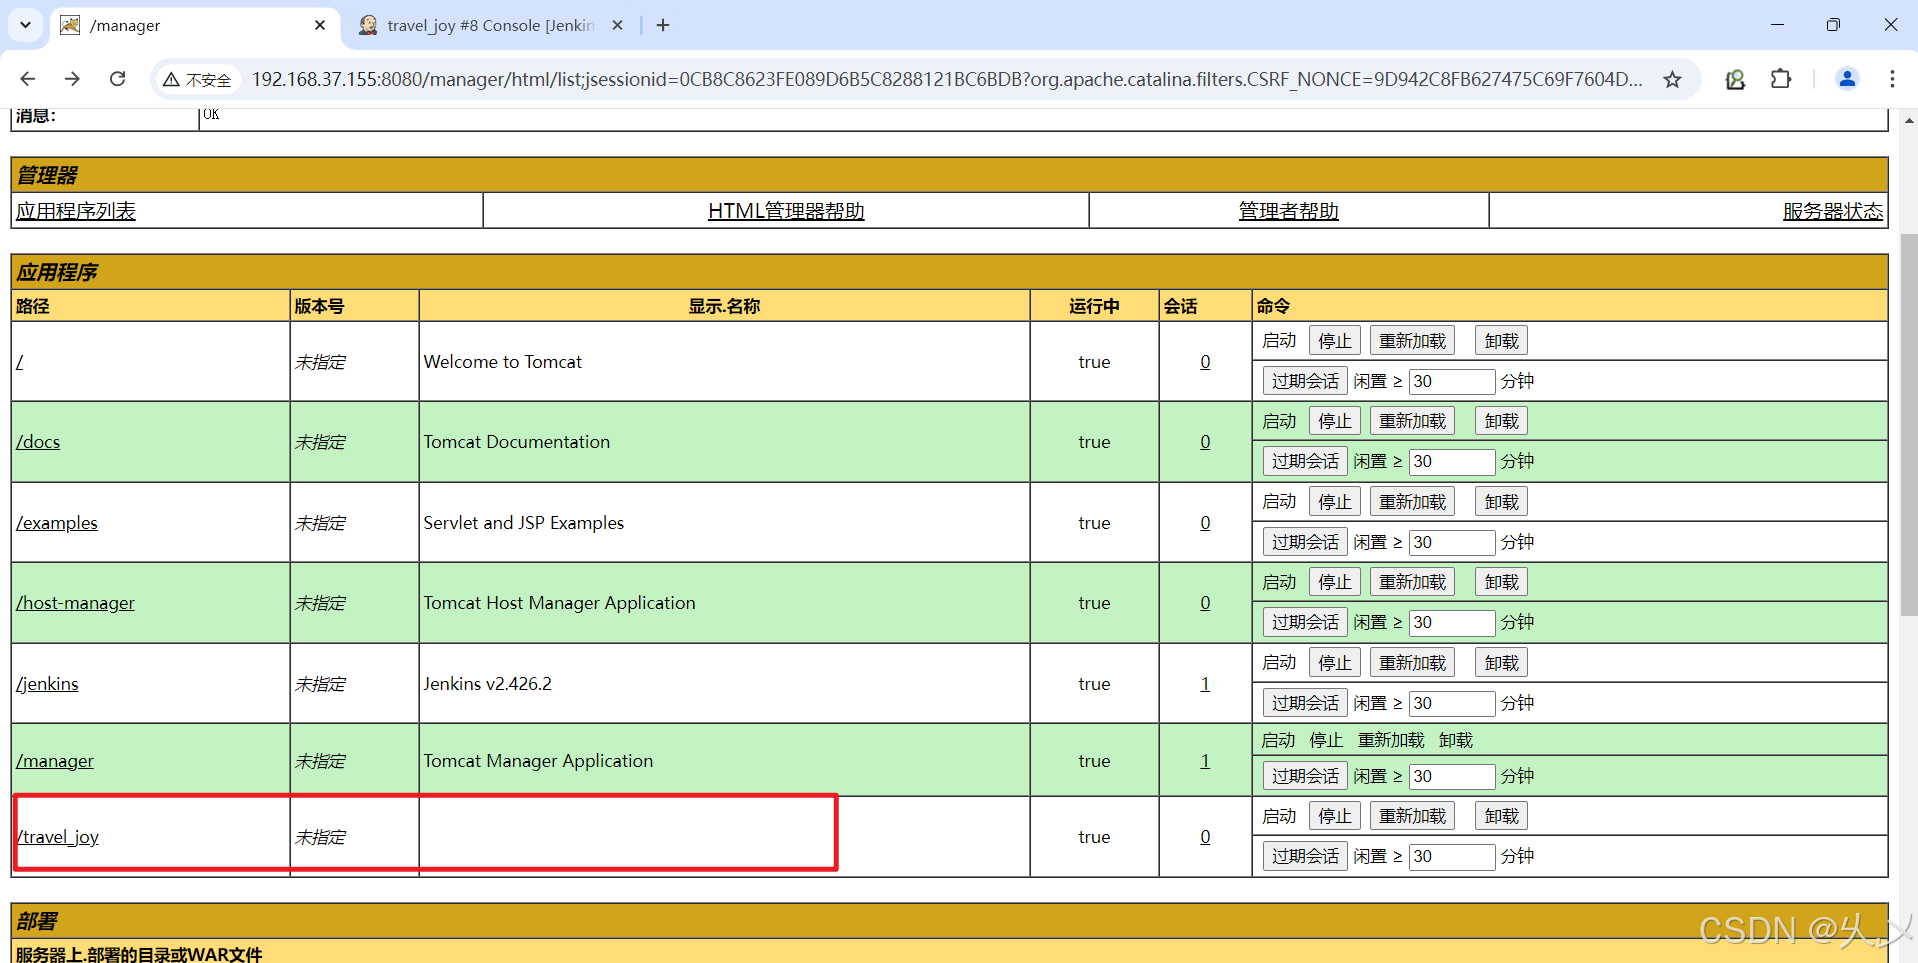
构建成功
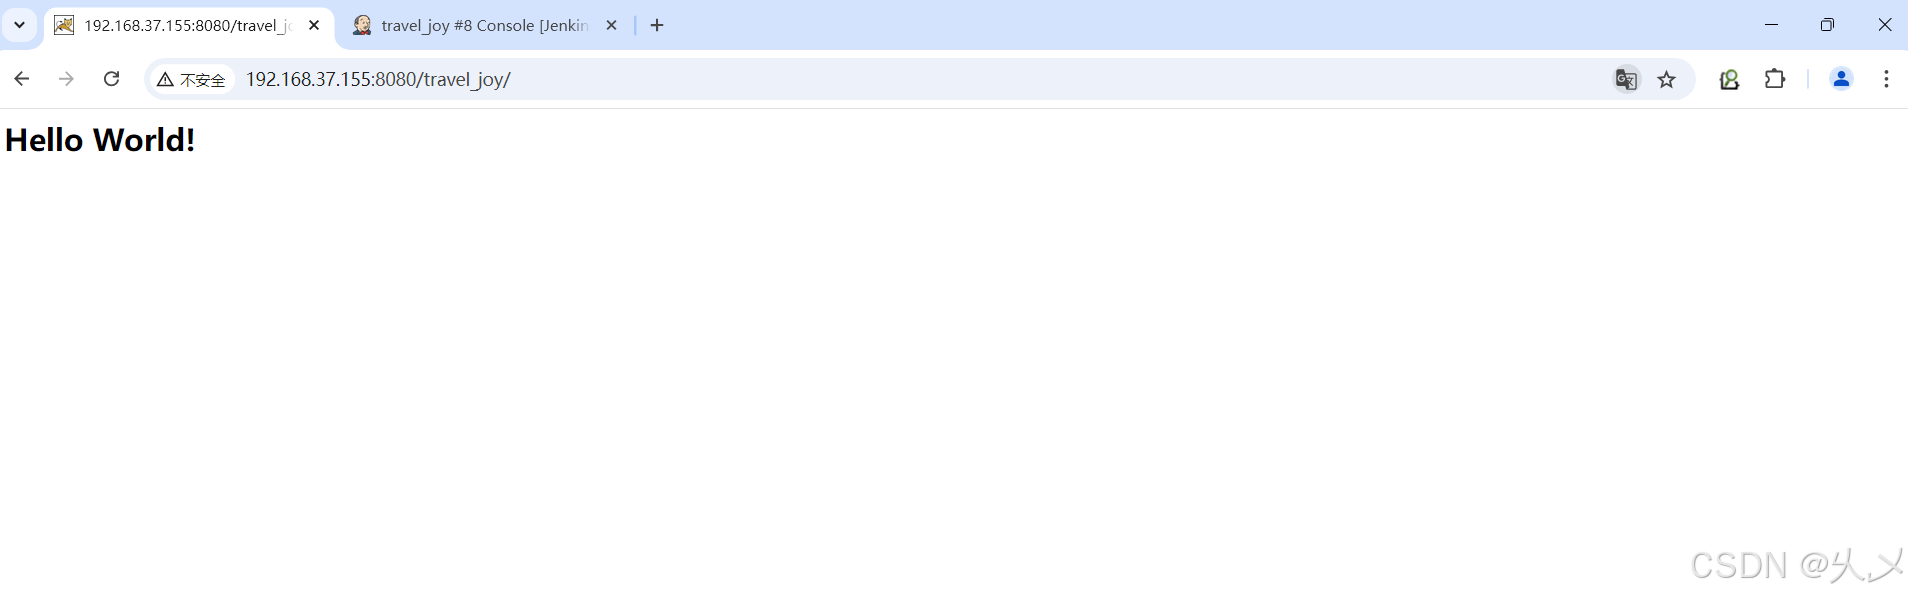
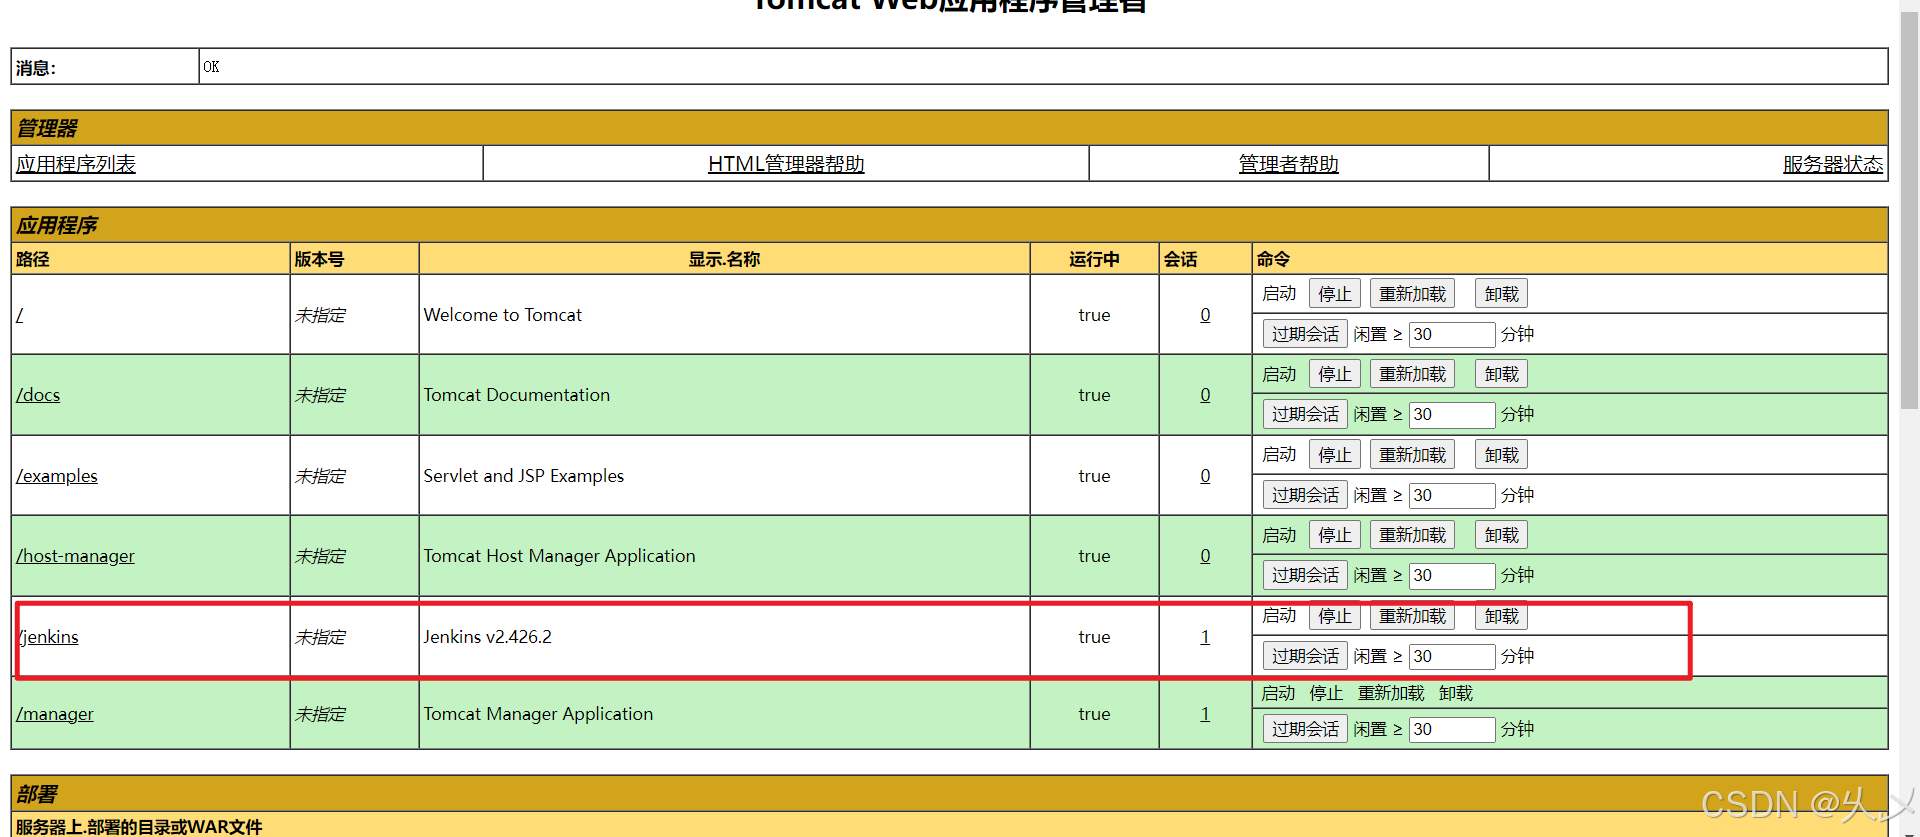
回到Tomcat的manager的页面,就会发现多一个服务点击可以跳转