4.7 Sensors -- useScroll
https://vueuse.org/core/useScroll/
作用
响应式的监听滚动位置和状态。
官方示例
html
<script setup lang="ts">
import { useScroll } from '@vueuse/core'

const el = ref<HTMLElement | null>(null)
const { x, y, isScrolling, arrivedState, directions } = useScroll(el)
</script>

<template>
  <div ref="el" />
</template>- 带偏移量的版本
typescript
const { x, y, isScrolling, arrivedState, directions } = useScroll(el, {
  offset: { top: 30, bottom: 30, right: 30, left: 30 },
})- 手动设置滚动位置
html
<script setup lang="ts">
import { useScroll } from '@vueuse/core'

const el = ref<HTMLElement | null>(null)
const { x, y } = useScroll(el)
</script>

<template>
  <div ref="el" />
	<!-- 手动修改滚动偏移量 -->
  <button @click="x += 10">
    Scroll right 10px
  </button>
  <button @click="y += 10">
    Scroll down 10px
  </button>
</template>-
平滑滚动
设置
behavior: smooth实现平滑滚动.。默认行为是auto,也就是非平滑滚动。更多滚动行为,请看https://developer.mozilla.org/en-US/docs/Web/API/Window/scrollTo
typescript
import { useScroll } from '@vueuse/core'

const el = ref<HTMLElement | null>(null)
const { x, y } = useScroll(el, { behavior: 'smooth' })

// Or as a `ref`:
const smooth = ref(false)
const behavior = computed(() => smooth.value ? 'smooth' : 'auto')
// 通过options传递
const { x, y } = useScroll(el, { behavior })- 无渲染组件代码,同样支持传递回调函数和数组
html
<script setup lang="ts">
import type { UseScrollReturn } from '@vueuse/core'
import { vScroll } from '@vueuse/components'

const data = ref([1, 2, 3, 4, 5, 6])

function onScroll(state: UseScrollReturn) {
  console.log(state) // {x, y, isScrolling, arrivedState, directions}
}
</script>

<template>
  <div v-scroll="onScroll">
    <div v-for="item in data" :key="item">
      {{ item }}
    </div>
  </div>

  <!-- with options -->
  <div v-scroll="[onScroll, { throttle: 10 }]">
    <div v-for="item in data" :key="item">
      {{ item }}
    </div>
  </div>
</template>
源码分析
- 这个
hook的参数比较常用,先看一下
typescript
export interface UseScrollOptions {
  /**
   * 对滚动事件进行节流,默认不节流。也就是throttle时间段内,只会触发一次
   * @default 0毫秒。
   */
  throttle?: number

  /**
   * 滚动结束后多久进行检查
   * 如果设置了throttle,这个值等于如果设置了throttle+idle
   * @default 200
   */
  idle?: number

  /**
   * left 表示距离左边距多远,arrived状态会变成true。其他方向类推。
   */
  offset?: {
    left?: number
    right?: number
    top?: number
    bottom?: number
  }

  /**
   * 滚动时触发的事件
   */
  onScroll?: (e: Event) => void

  /**
   * 滚动结束触发的事件
   */
  onStop?: (e: Event) => void

  /**
   * 滚动事件监听器的配置
   * @default {capture: false, passive: true}
   */
  eventListenerOptions?: boolean | AddEventListenerOptions

  /**
   * 平滑滚动还是立即跳转
   * @default 'auto'
   */
  behavior?: MaybeComputedRef<ScrollBehavior>
}

/**
 * 我们必须检查滚动量是否足够接近某个阈值,以便更准确地计算arrivedState。
 * 这是因为scrollTop/scrollLeft是整数的数字,而scrollHeight/scrollWidth和clienttheight /clientWidth是四舍五入的。
 * https://developer.mozilla.org/enUS/docs/Web/API/Element/scrollHeight#determine_if_an_element_has_been_totally_scrolled
 */
const ARRIVED_STATE_THRESHOLD_PIXELS = 1- 再看一下代码实现,大量代码都是用来定义变量的。
typescript
/**
* 代码中一些函数的定义
*/
// 1 空函数
export const noop = () => {}

// 2 防抖函数:如果多次调用,只有最后一次起作用,会在最后一次调用后,经过一段时候后触发回调。
useDebounceFn()

// 3 节流函数:如果多次调用,那么在一个时间段内,只有第一次起作用。到了下个时间段,依旧只有第一次起作用。
useThrottleFn()
typescript
export function useScroll(
  element: MaybeComputedRef<HTMLElement | SVGElement | Window | Document | null | undefined>,
  options: UseScrollOptions = {},
) {
  /**
  * 处理用户传递的参数
  */
  const {
    throttle = 0,
    idle = 200,
    onStop = noop,
    onScroll = noop,
    offset = {
      left: 0,
      right: 0,
      top: 0,
      bottom: 0,
    },
    eventListenerOptions = {
      capture: false,
      passive: true,
    },
    behavior = 'auto',
  } = options

  /**
  * x方向和y方向的偏移量。默认是0,也就是视口在页面左上角。
  */
  const internalX = ref(0)
  const internalY = ref(0)

  /**
  * 提供给外部的计算属性。当用户设置x和y的时候,要出发滚动事件。
  * 在'scrollTo()'期间,不会在进程中触发额外的'scrollTo()'。
  */
  const x = computed({
    get() {
      return internalX.value
    },
    set(x) {
      scrollTo(x, undefined)
    },
  })

  const y = computed({
    get() {
      return internalY.value
    },
    set(y) {
      scrollTo(undefined, y)
    },
  })

  /**
  * 使用 scrollTo 方法来滚动,传递目标位置的高度、左边距、滚动方式。
  */
  function scrollTo(_x: number | undefined, _y: number | undefined) {
    const _element = resolveUnref(element)

    if (!_element)
      return

    (_element instanceof Document ? document.body : _element)?.scrollTo({
      top: resolveUnref(_y) ?? y.value,
      left: resolveUnref(_x) ?? x.value,
      behavior: resolveUnref(behavior),
    })
  }

  /**
  * 是否在滚动中
  */
  const isScrolling = ref(false)

  /**
  * 四边的到达状态,默认左上角。
  */
  const arrivedState = reactive({
    left: true,
    right: false,
    top: true,
    bottom: false,
  })

  /**
  * 朝着哪个方向滚动,默认哪边都不是。
  */
  const directions = reactive({
    left: false,
    right: false,
    top: false,
    bottom: false,
  })

  /**
  * 滚动结束后,把滚动方向都设置为false。设置防抖时间:throttle + idle、
  * 同时调用用户传递的onStop
  */
  const onScrollEnd = useDebounceFn((e: Event) => {
    isScrolling.value = false
    directions.left = false
    directions.right = false
    directions.top = false
    directions.bottom = false
    onStop(e)
  }, throttle + idle)

  // ......
  // 最重要的滚动函数单独来看

  /**
  * 监听目标的scroll事件。如果发生了滚动,先看throttle的值
  * 如果设置了throttle,那么throttle的时间段内只调用一次。否则滚动即调用onScrollHandler。
  */
  useEventListener(
    element,
    'scroll',
    throttle ? useThrottleFn(onScrollHandler, throttle, true, false) : onScrollHandler,
    eventListenerOptions,
  )

  return {
    x,
    y,
    isScrolling,
    arrivedState,
    directions,
  }
}
typescript
/**
* 滚动过程中触发的函数
*/
const onScrollHandler = (e: Event) => {
  const eventTarget = (
  e.target === document ? (e.target as Document).documentElement : e.target) as HTMLElement

  const scrollLeft = eventTarget.scrollLeft
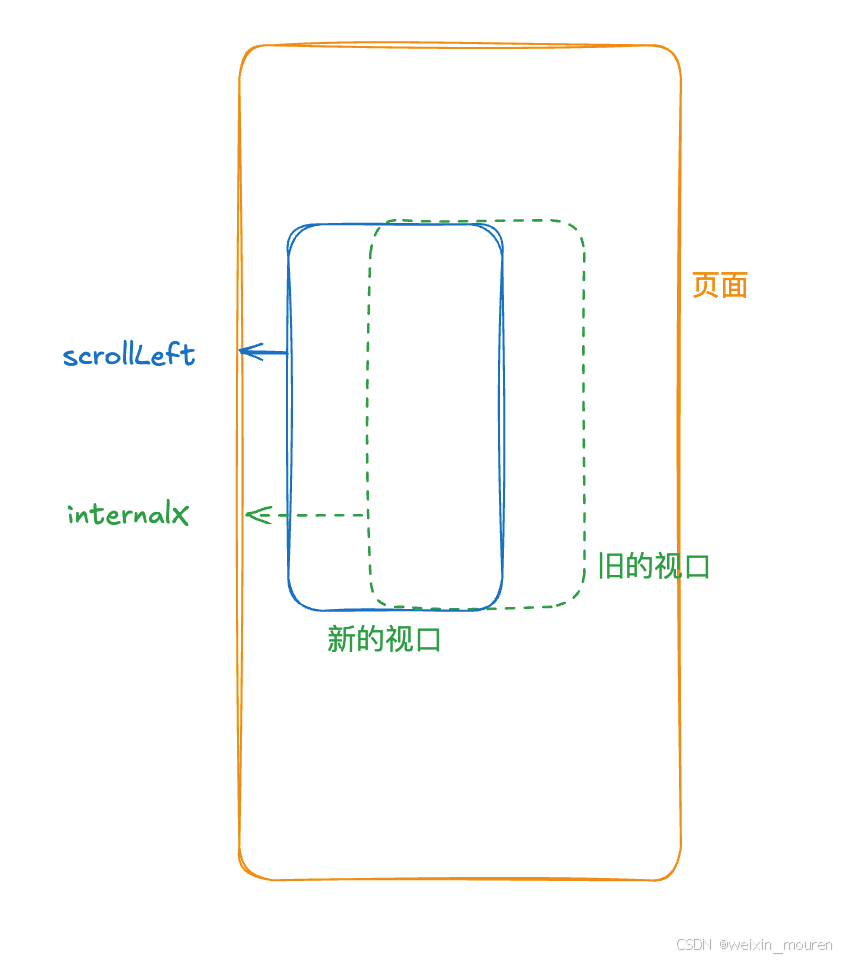
  // 如果滚动后的左边距小于原来的边距,说明时往左边滚动了。见下图1
  directions.left = scrollLeft < internalX.value
  directions.right = scrollLeft > internalY.value

  // 是否到达左边距。如果用户设置了offset.left,那么滚动后的左边距小于这个值就代表抵达到左边了
  arrivedState.left = scrollLeft <= 0 + (offset.left || 0)
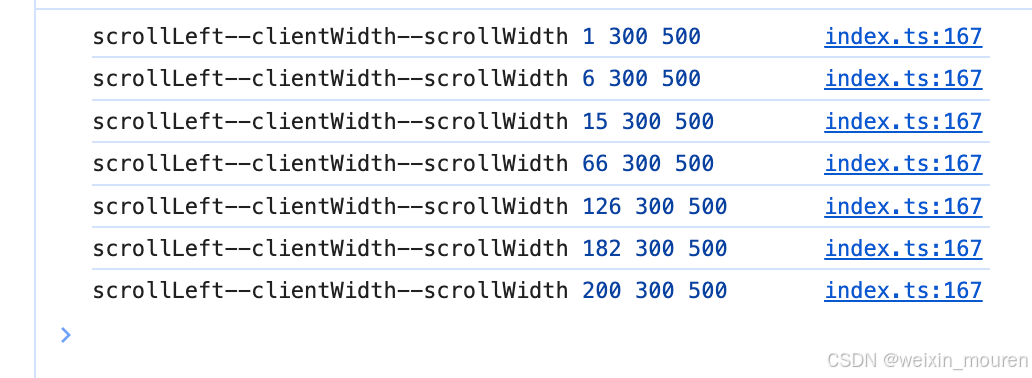
  // 在从左往右滚动的过程中,这几个值变化如下图2
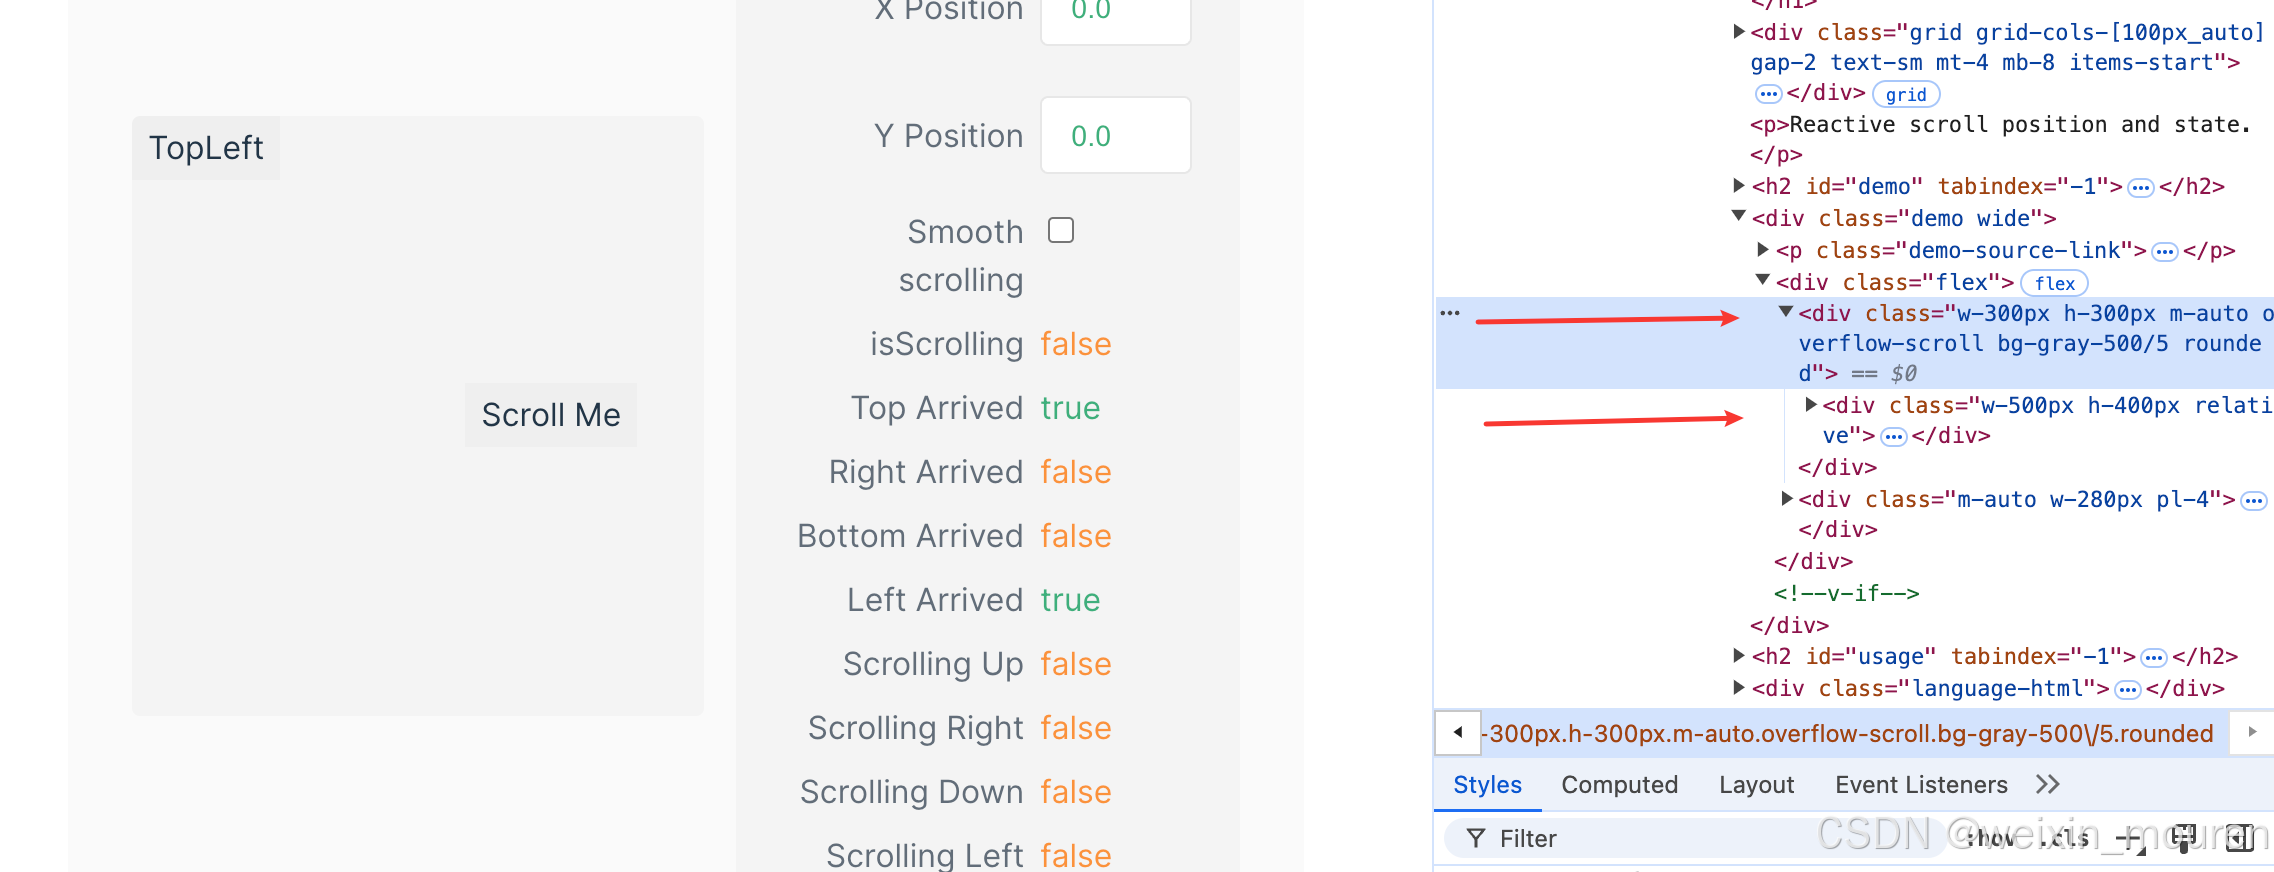
  // 可以简单理解,clientWidth是用户可见区域的宽度,scrollWidth是内容区真正的宽度。见下图3
  arrivedState.right
  = scrollLeft + eventTarget.clientWidth >= eventTarget.scrollWidth - (offset.right || 0) - ARRIVED_STATE_THRESHOLD_PIXELS
  // 实时更新滚动的距离
  internalX.value = scrollLeft

  let scrollTop = eventTarget.scrollTop

  // 移动端兼容
  if (e.target === document && !scrollTop)
  scrollTop = document.body.scrollTop

  // 上下的处理和左右是一致的
  directions.top = scrollTop < internalY.value
  directions.bottom = scrollTop > internalY.value
  arrivedState.top = scrollTop <= 0 + (offset.top || 0)
  arrivedState.bottom
  = scrollTop + eventTarget.clientHeight >= eventTarget.scrollHeight - (offset.bottom || 0) - ARRIVED_STATE_THRESHOLD_PIXELS
  internalY.value = scrollTop

  // 滚动中状态设置为true
  isScrolling.value = true

  // 不断触发scrollEnd事件,但是这个事件设置了防抖,只有在停顿超过throttle + idle时间后才会触发状态修改
  onScrollEnd(e)
  // 实时调用用户传递的函数
  onScroll(e)
}