文章目录
- [一 . ElementUI 的基本安装](#一 . ElementUI 的基本安装)
-
- [1.1 通过 Vue 脚手架创建项目](#1.1 通过 Vue 脚手架创建项目)
- [1.2 在 vue 脚手架中安装 ElementUI](#1.2 在 vue 脚手架中安装 ElementUI)
- [1.3 编写页面](#1.3 编写页面)
ElementUI 是 Vue.js 的强大 UI 框架,让前端界面开发变得简单高效。本教程将带你从安装到实战,快速掌握 ElementUI 的核心技巧。
核心内容:
项目搭建: 快速设置 Vue 项目并集成 ElementUI。
组件使用: 学习如何在你的 Vue 应用中使用 ElementUI 组件。
页面与路由: 创建组件,配置路由,实现页面导航。
样式与图标: 定制按钮样式,使用图标库增强界面。
ElementUI 专栏 : https://blog.csdn.net/m0_53117341/category_12780595.html

一 . ElementUI 的基本安装
1.1 通过 Vue 脚手架创建项目
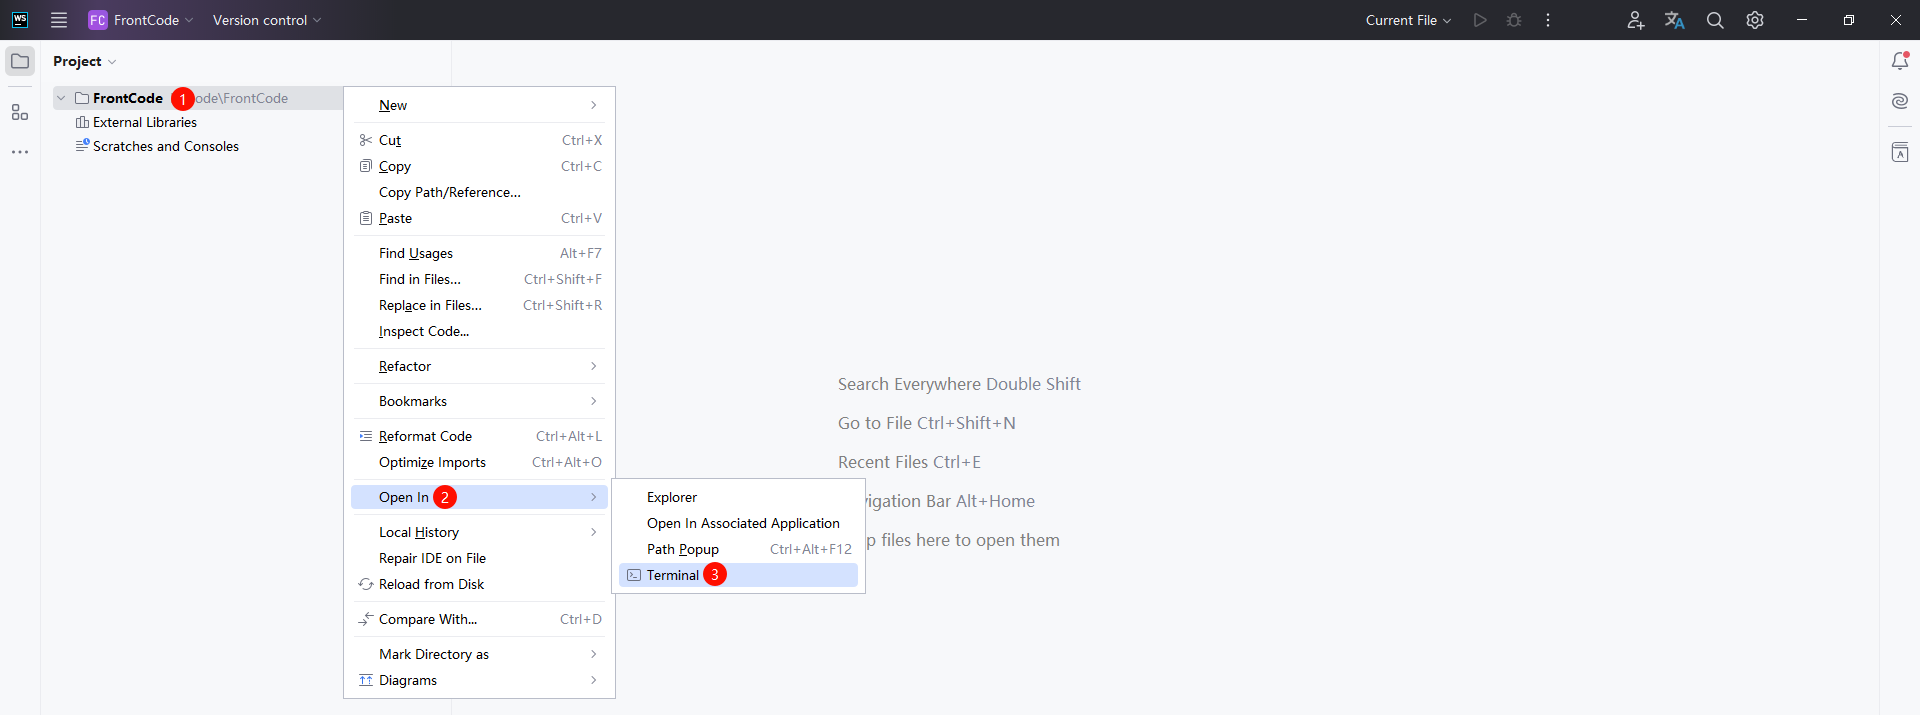
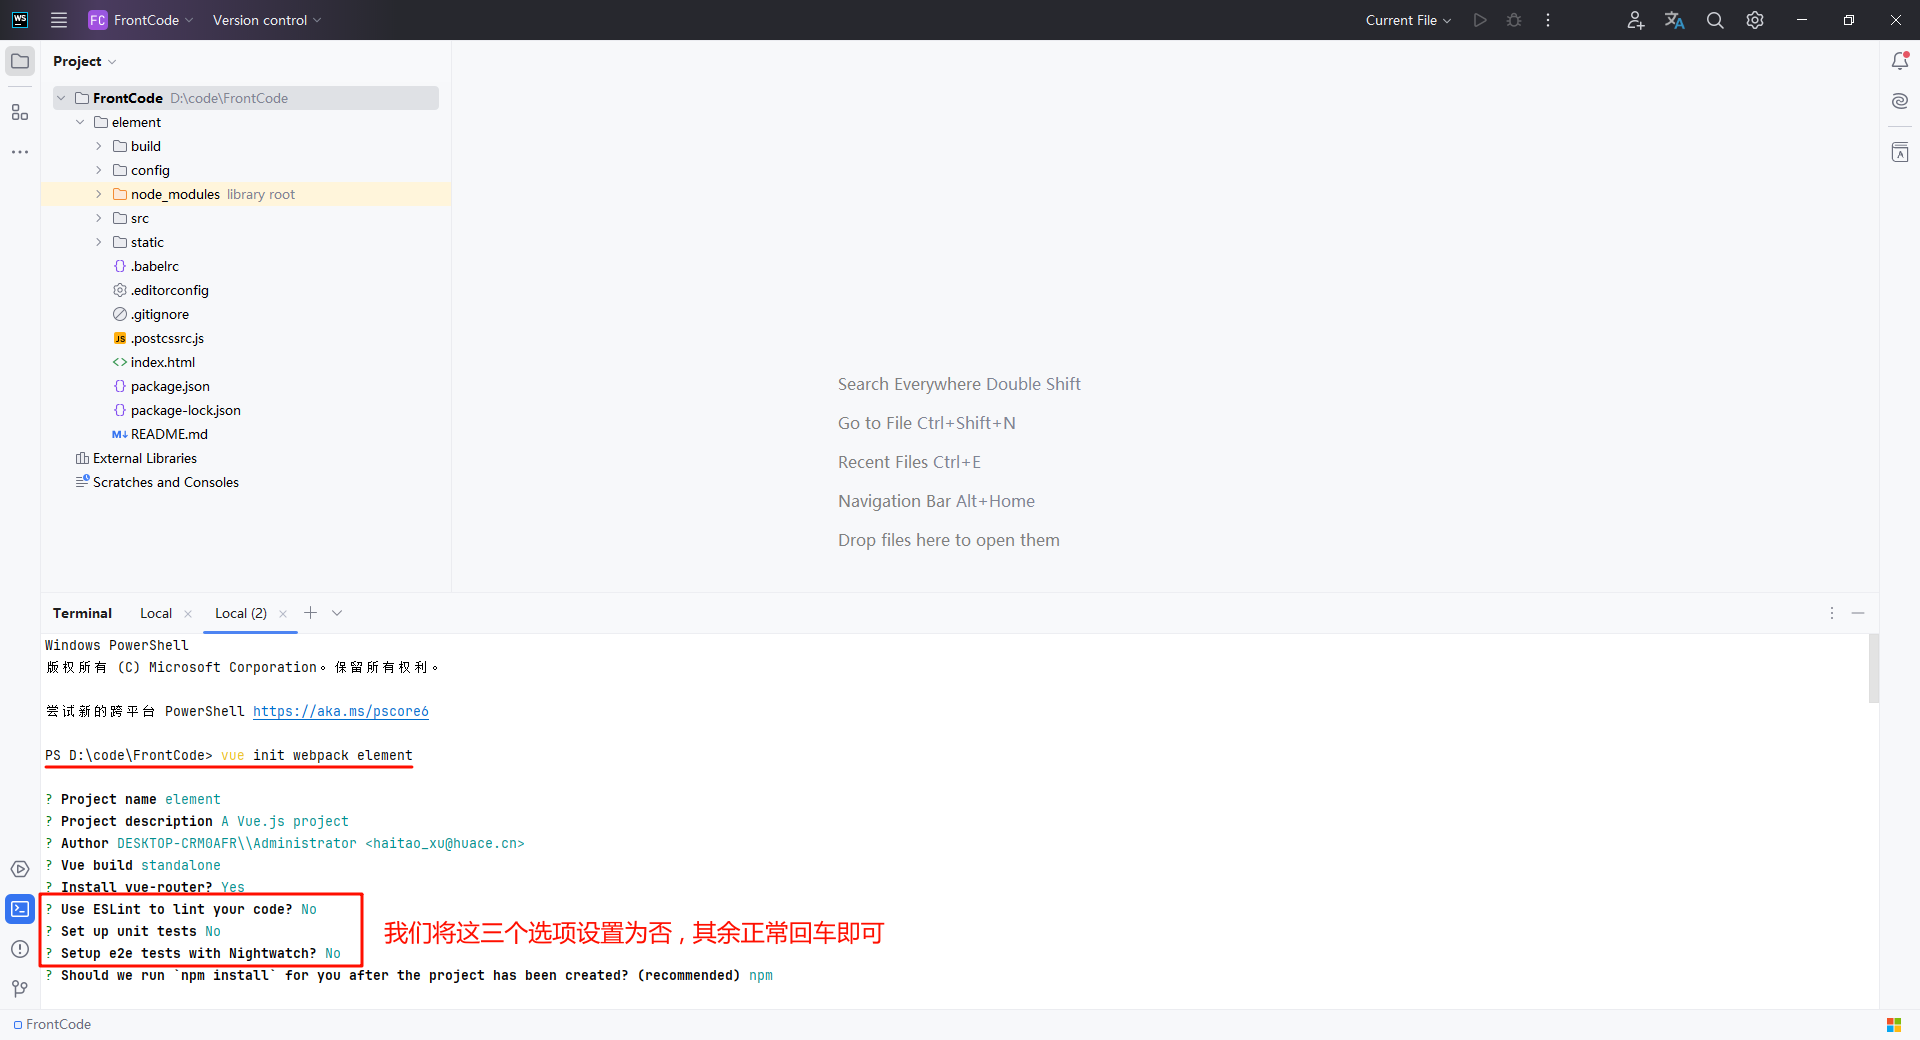
我们使用这个命令 , 就可以创建出项目名称为 element 的项目
bash
vue init webpack element全称是 vue-cli init webpack element , 直接使用缩写形式即可
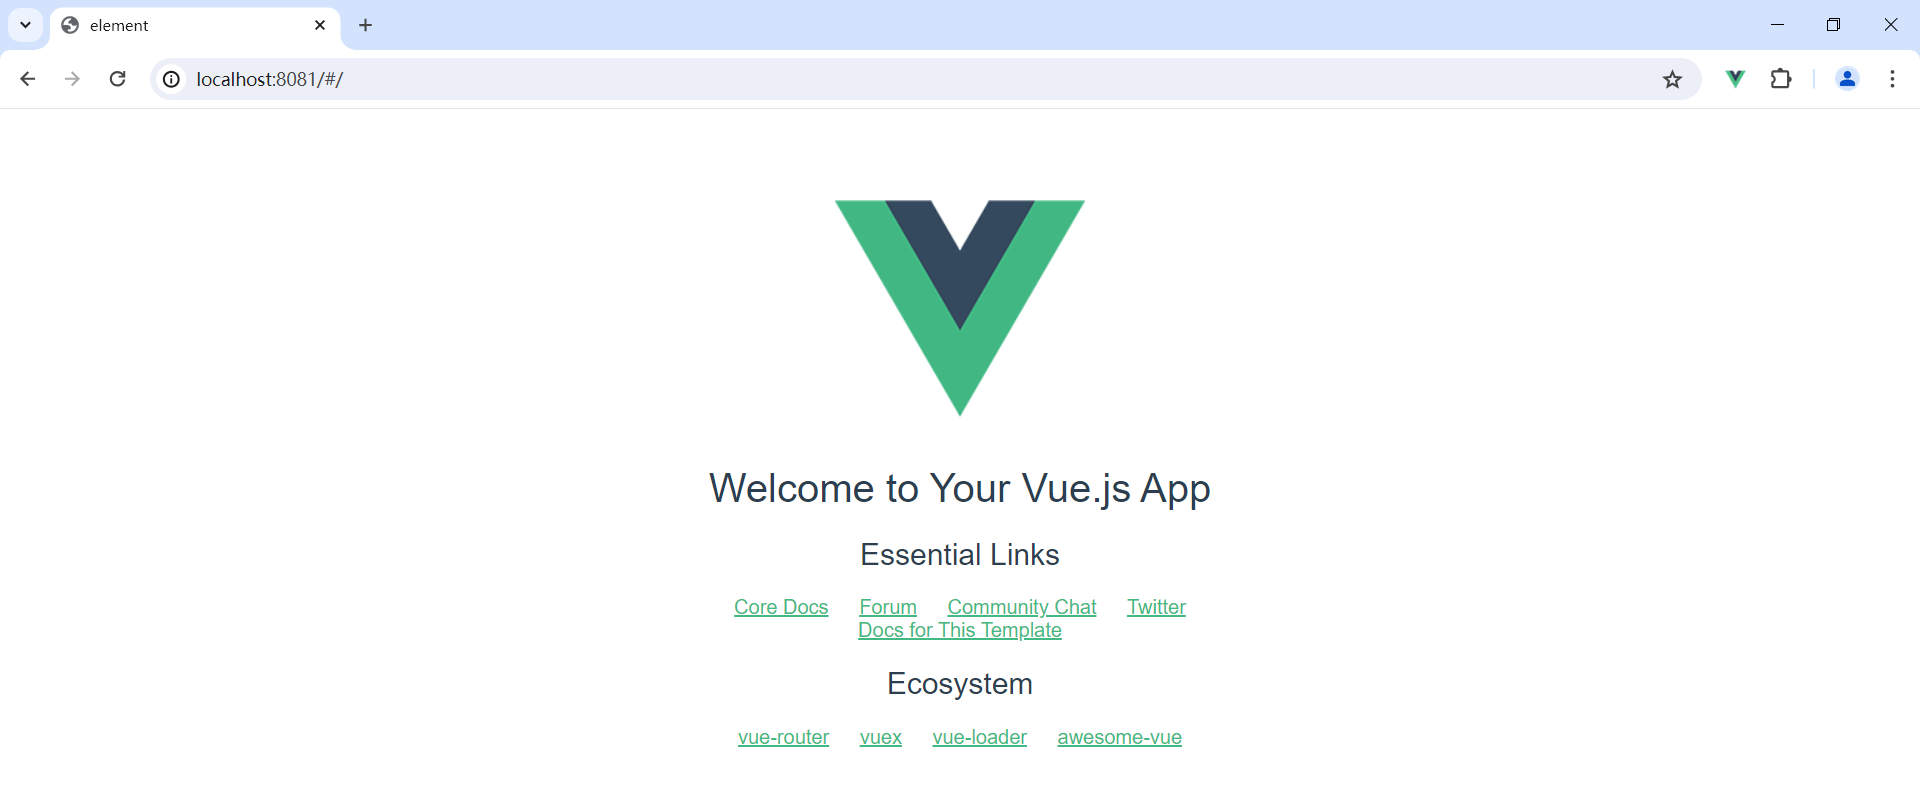
我们可以直接运行当前项目
bash
cd element
npm start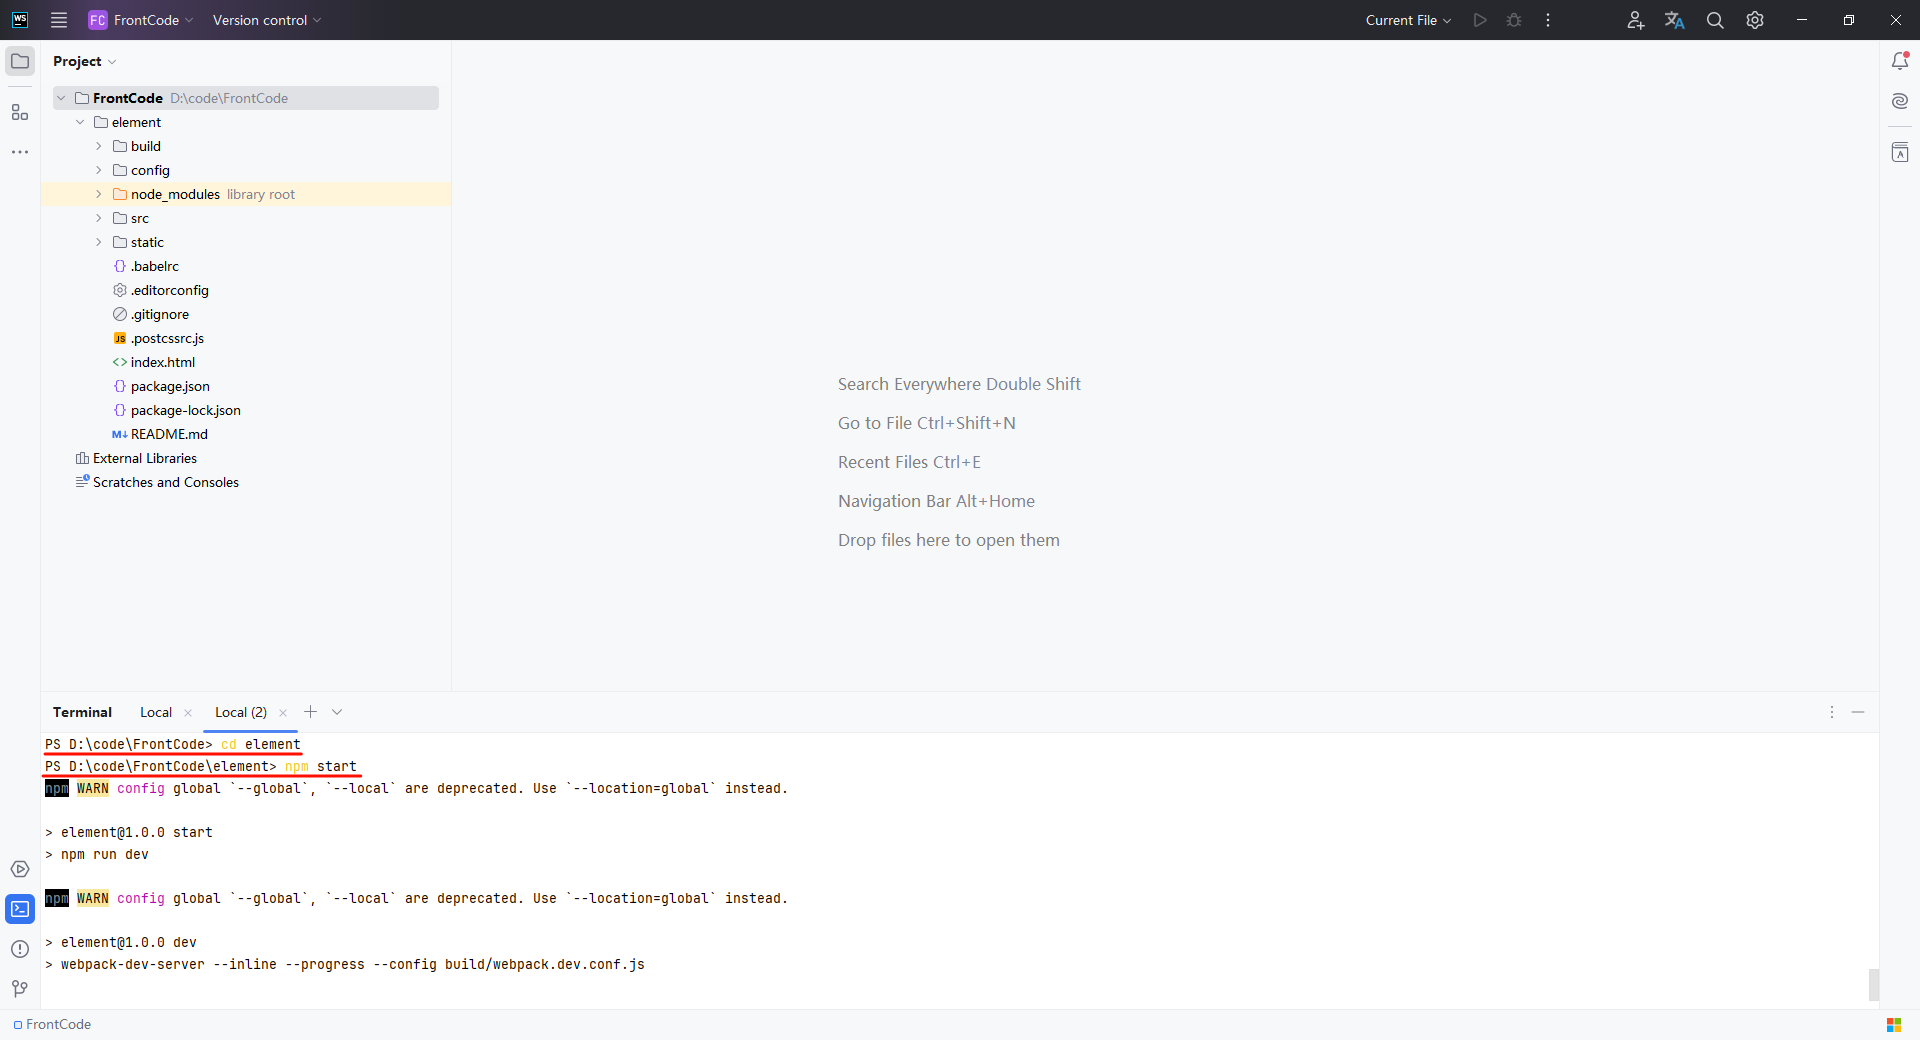
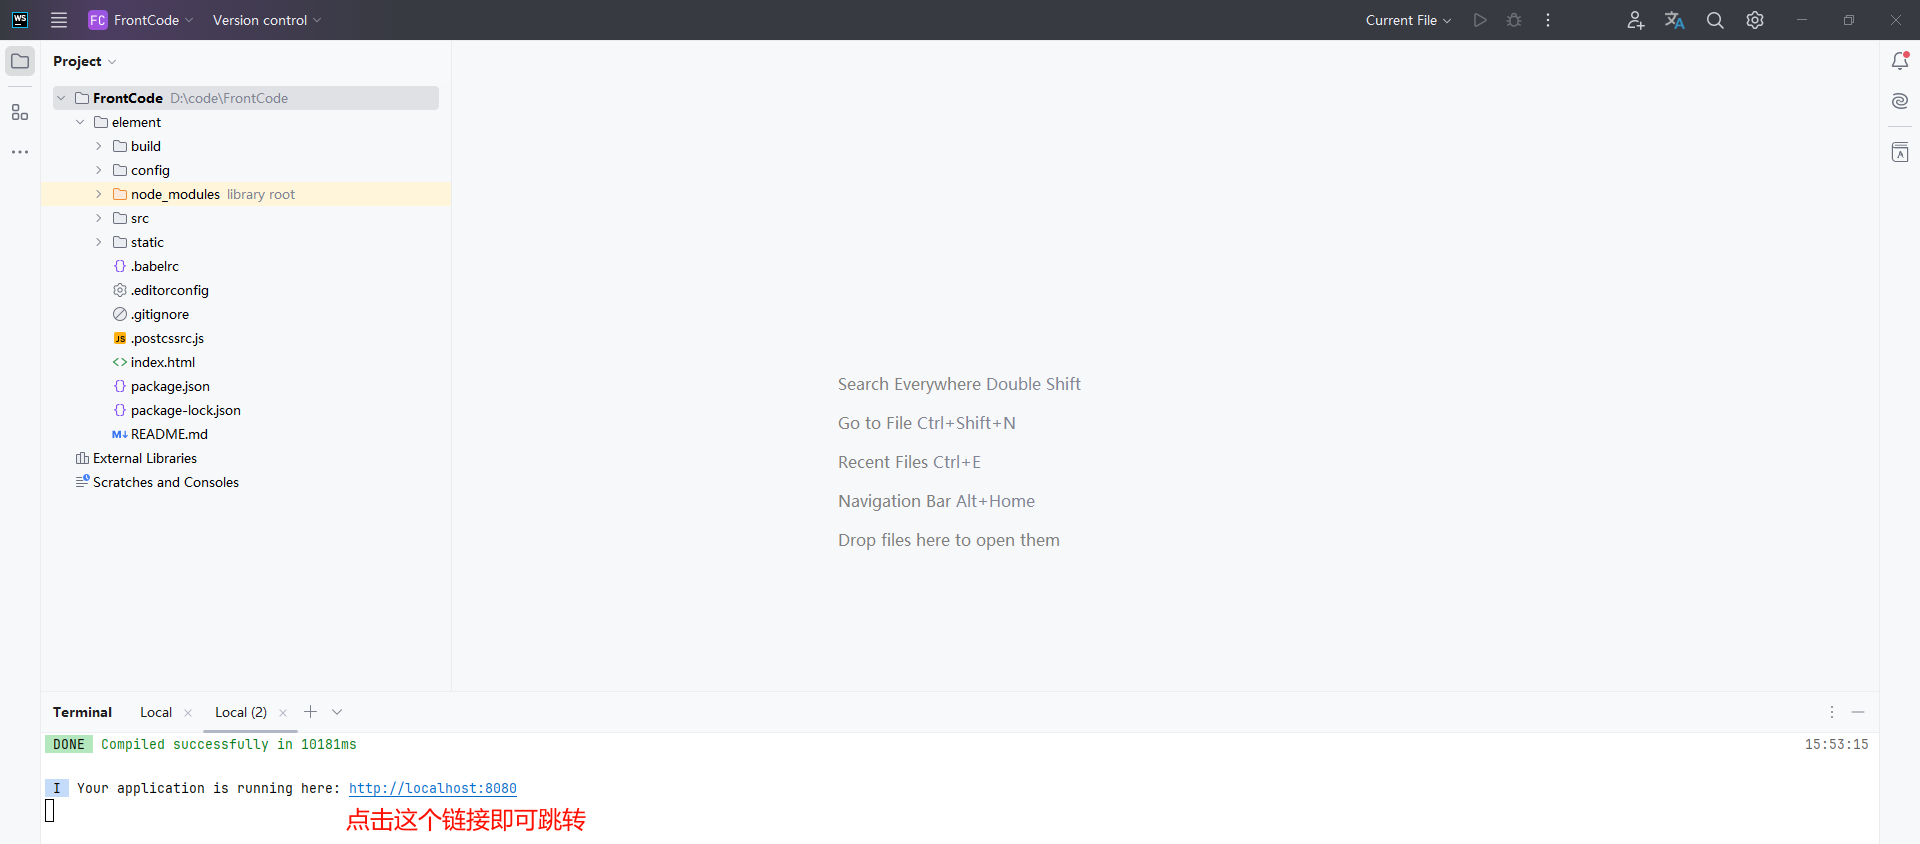
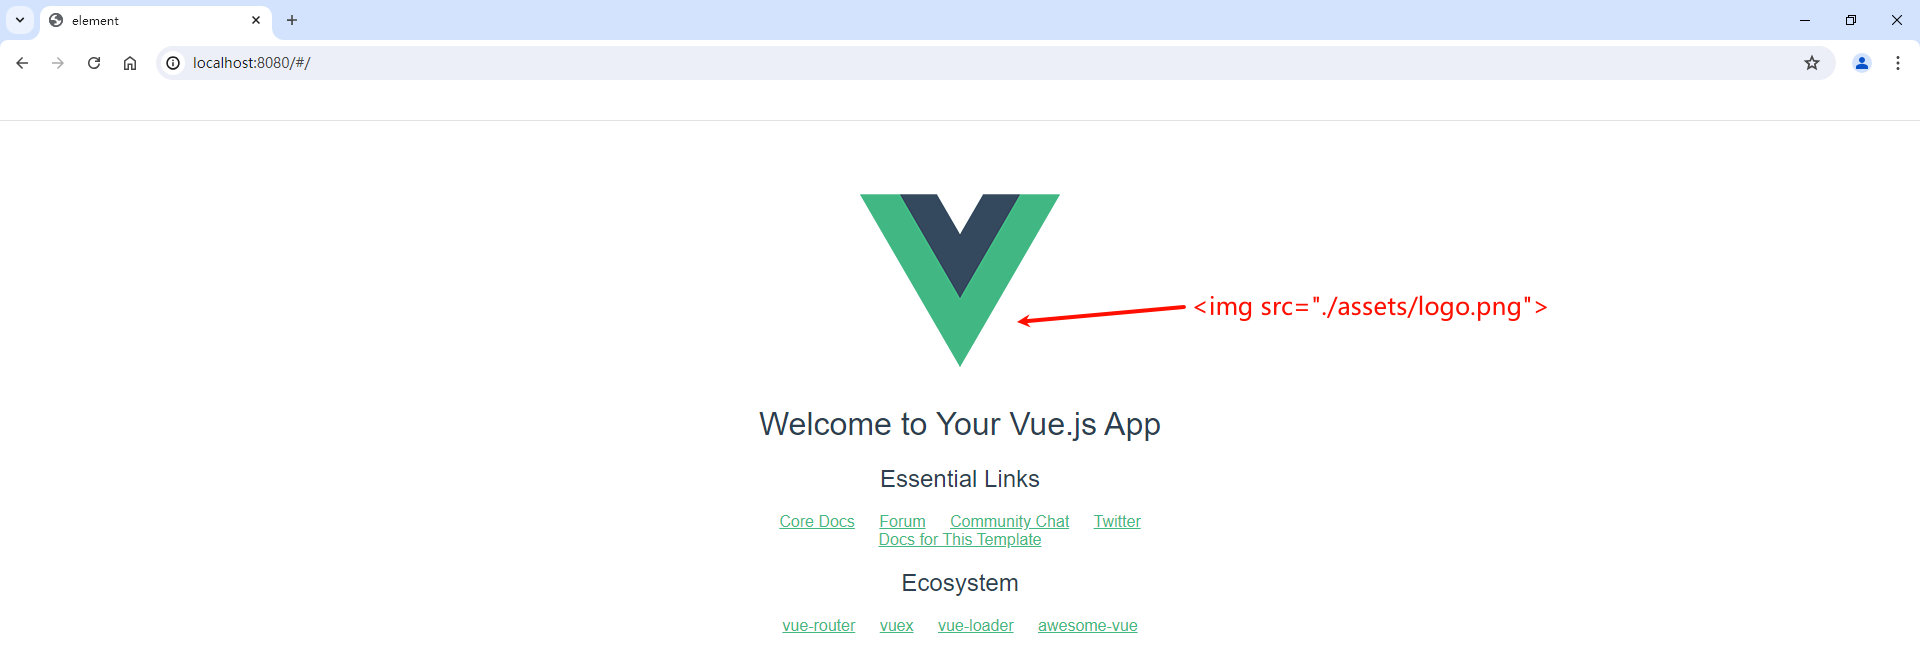
稍等片刻 , 我们访问控制台提供给我们的链接 , 我们就可以访问到 Vue 的主页了
1.2 在 vue 脚手架中安装 ElementUI
我们访问 ElementUI 的介绍文档
https://element.eleme.cn/#/zh-CN/component/installation
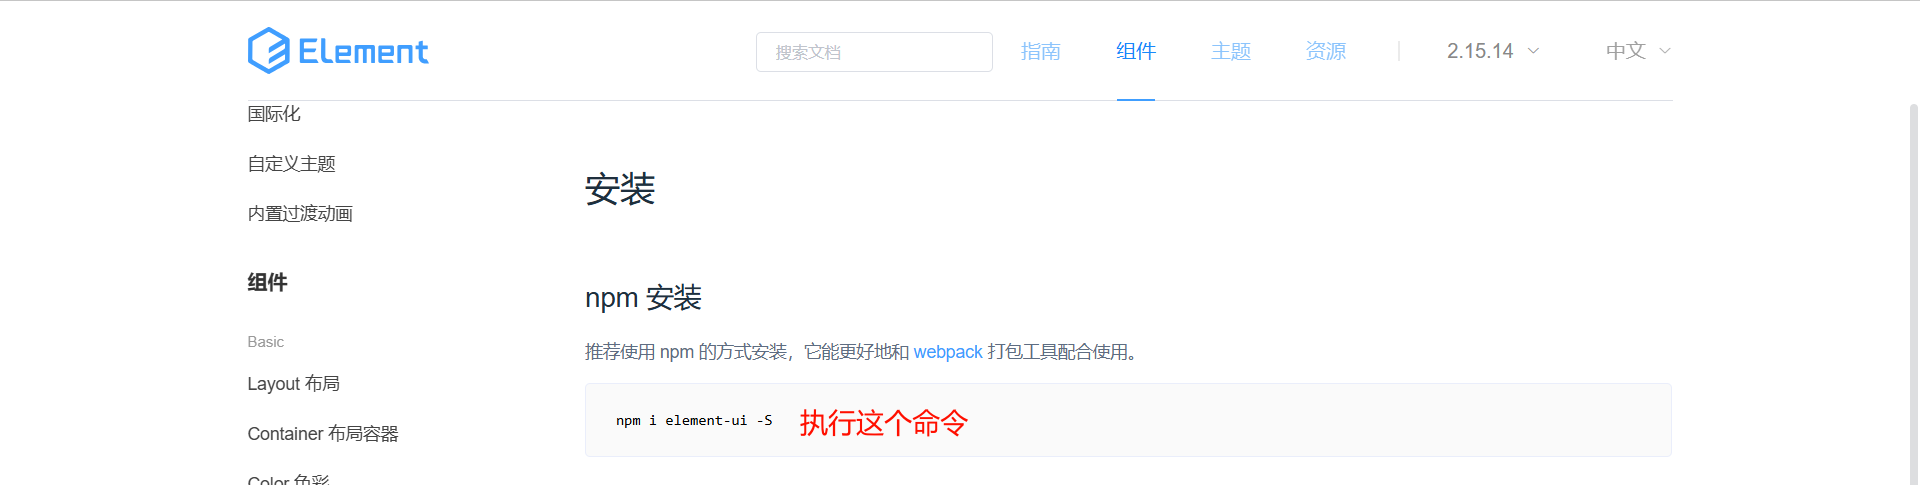
bash
npm i element-ui -S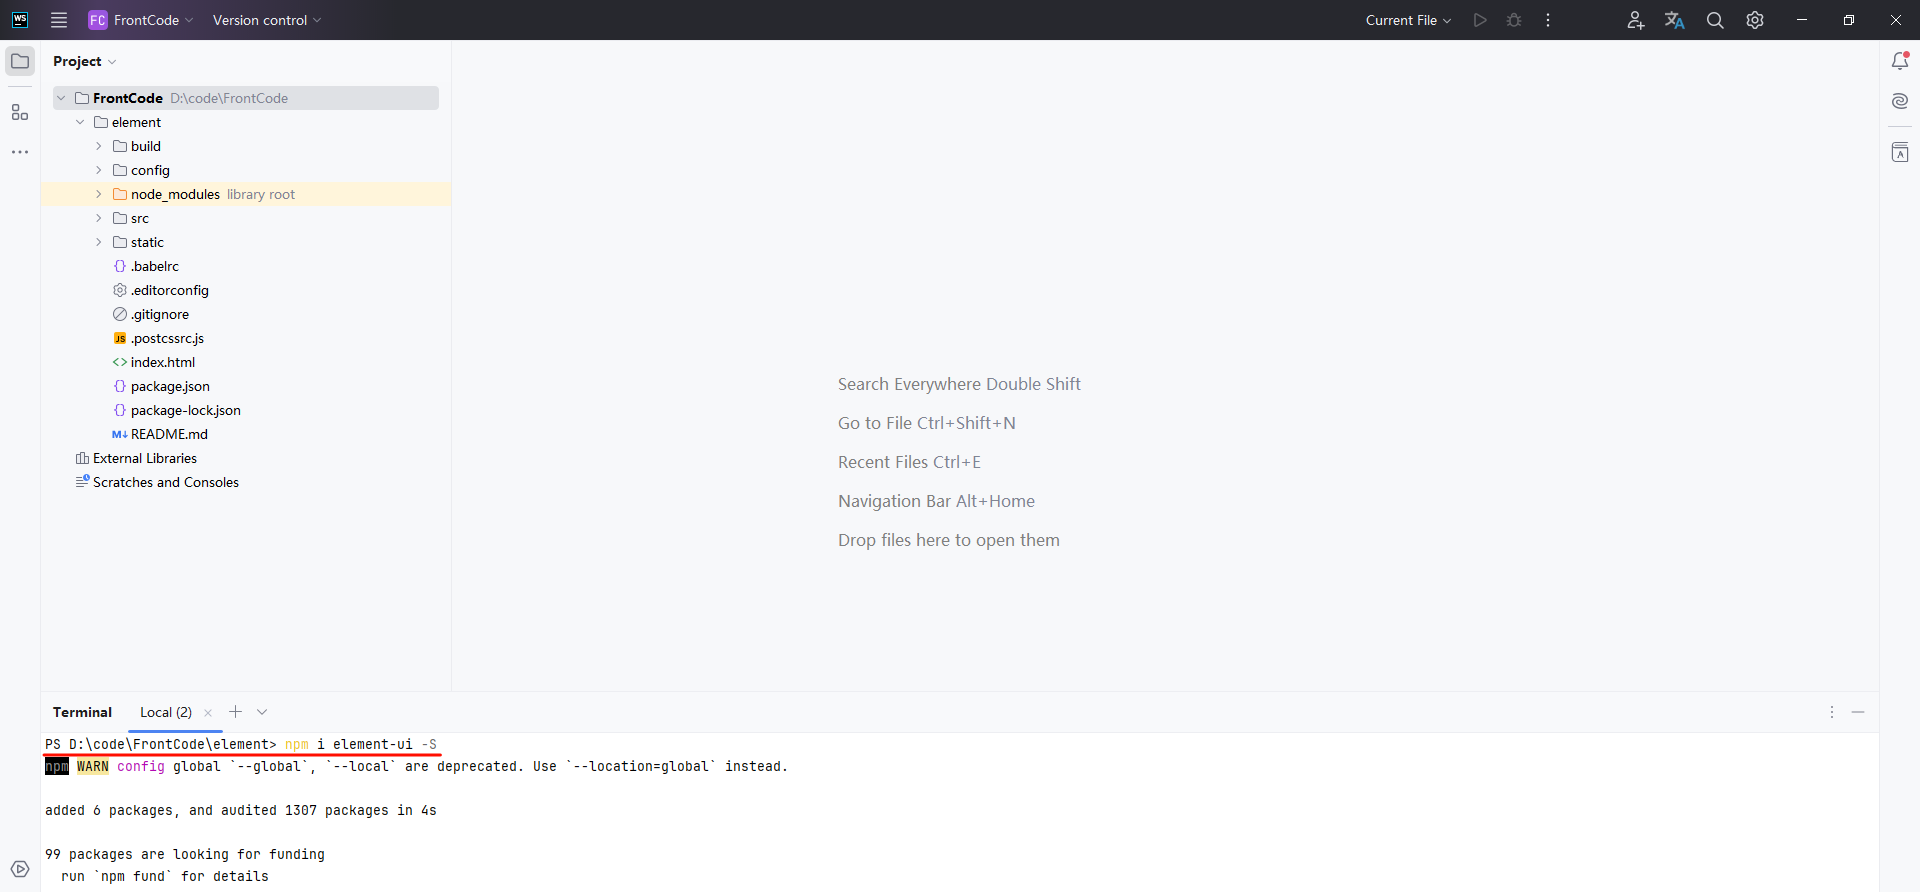
那接下来 , 我们还需要指定当前项目使用 ElementUI
https://element.eleme.cn/#/zh-CN/component/quickstart
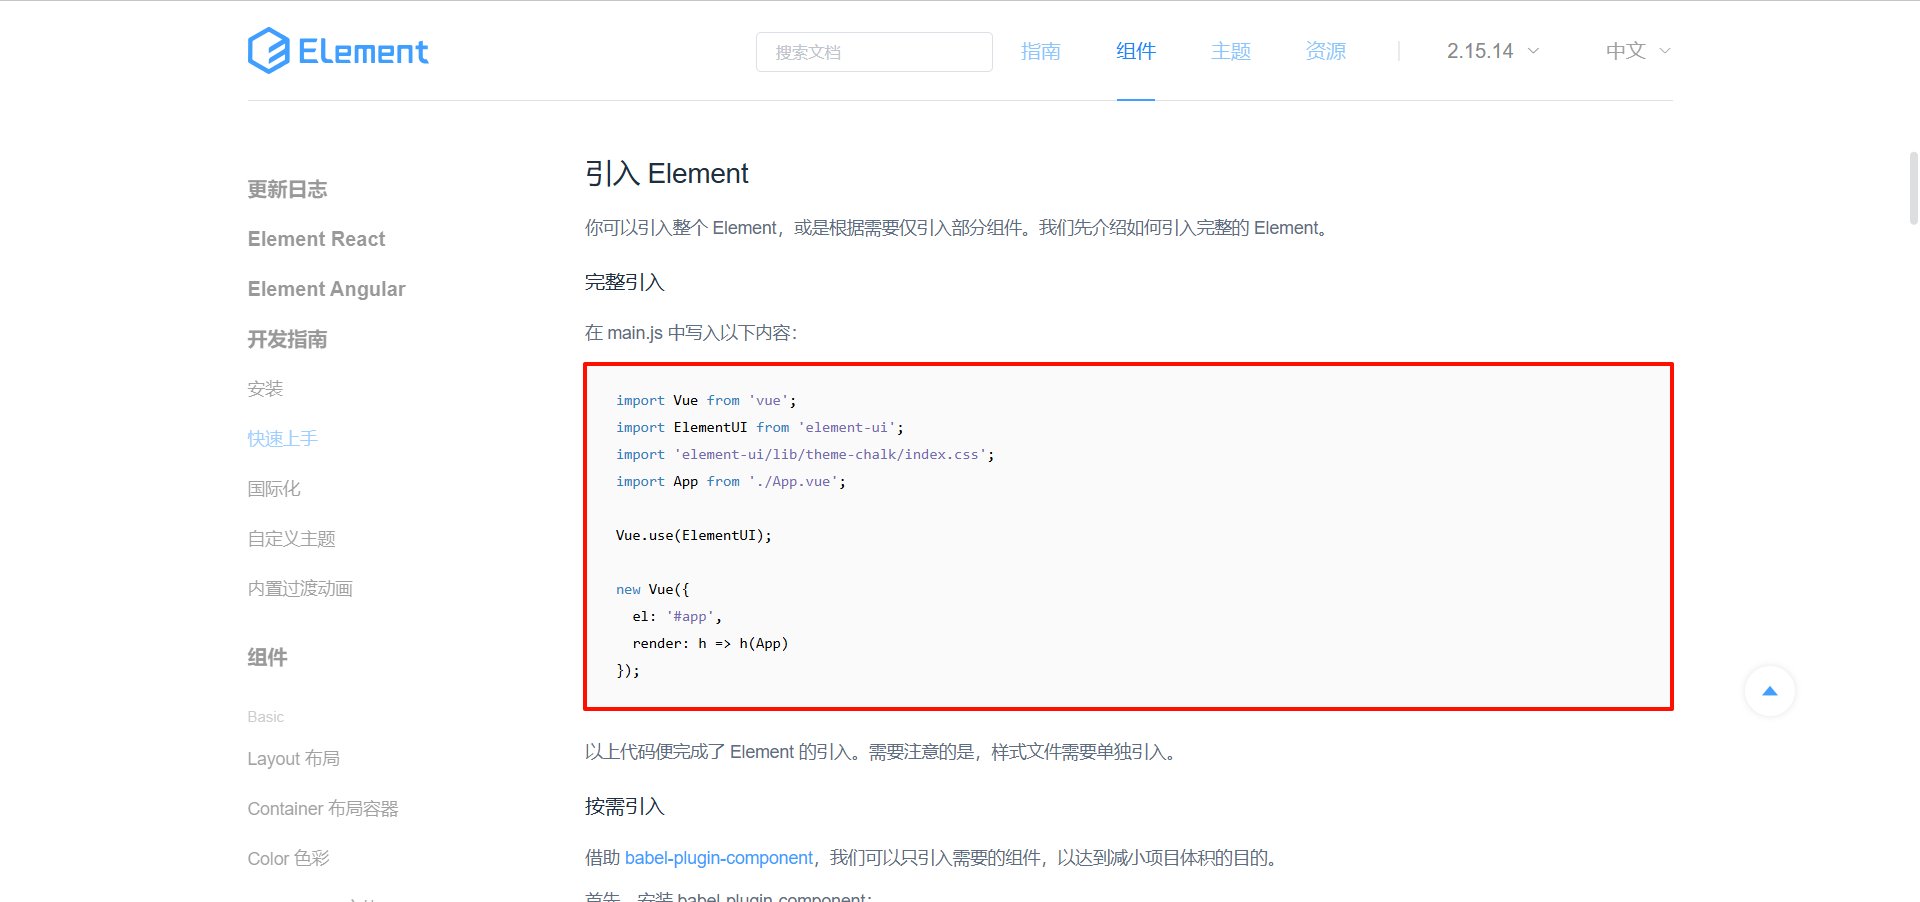
那我们将这段代码粘贴到 main.js 中
vue
import ElementUI from 'element-ui';
import 'element-ui/lib/theme-chalk/index.css';

Vue.use(ElementUI);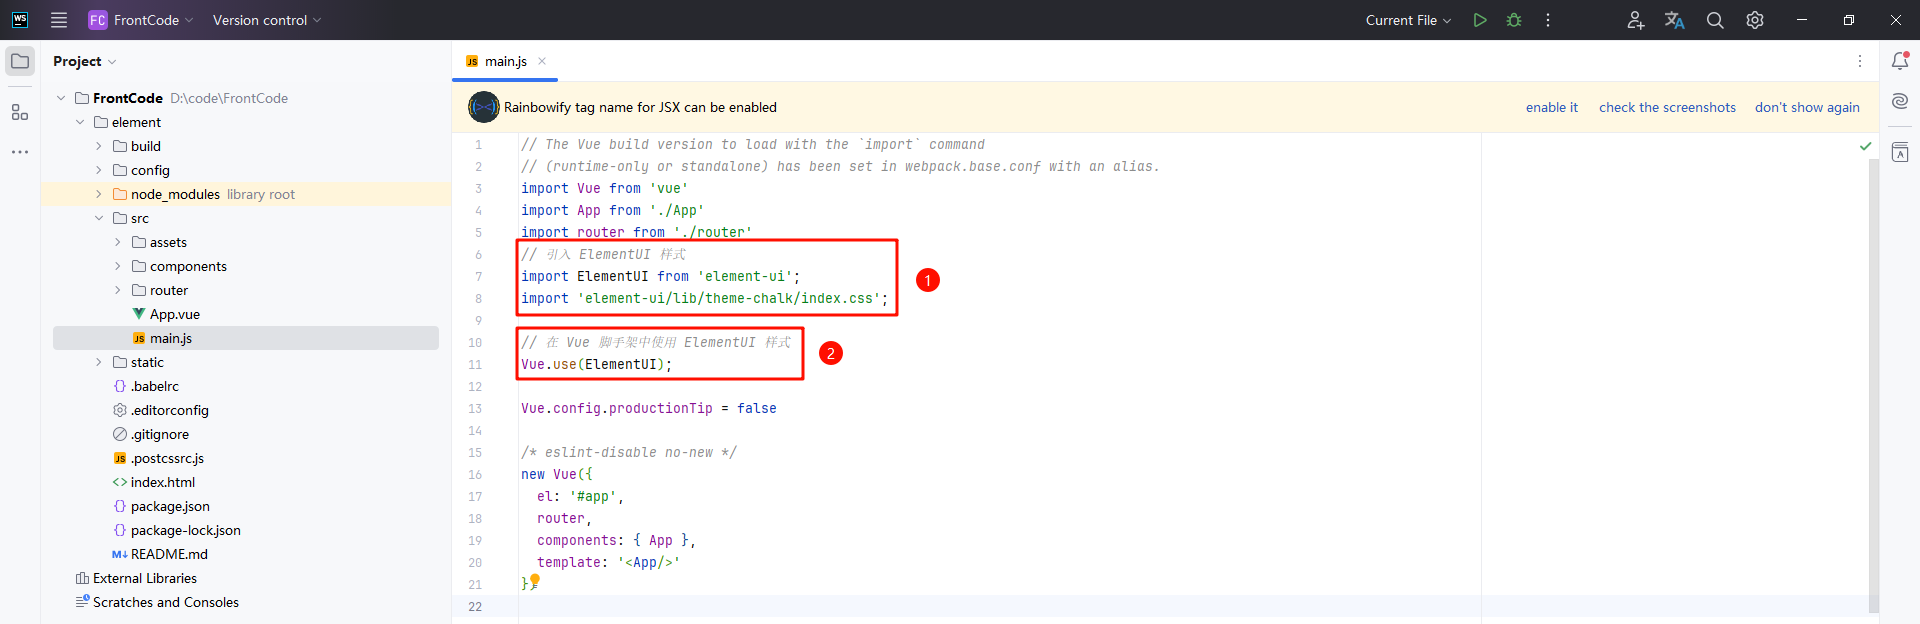
那我们重新启动项目
bash
npm start然后我们观察一下
![]() :
:
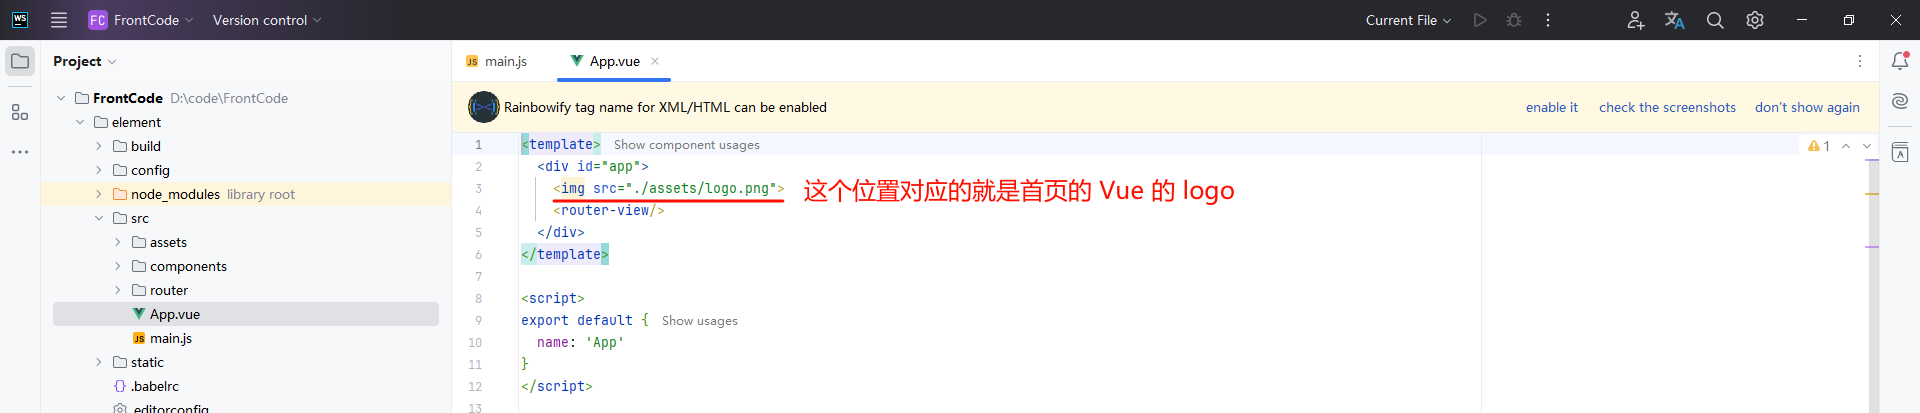
: 这句代码指的是路由相关内容
那我们也可以将自己写的页面作为组件装载到 vue 中展示给用户
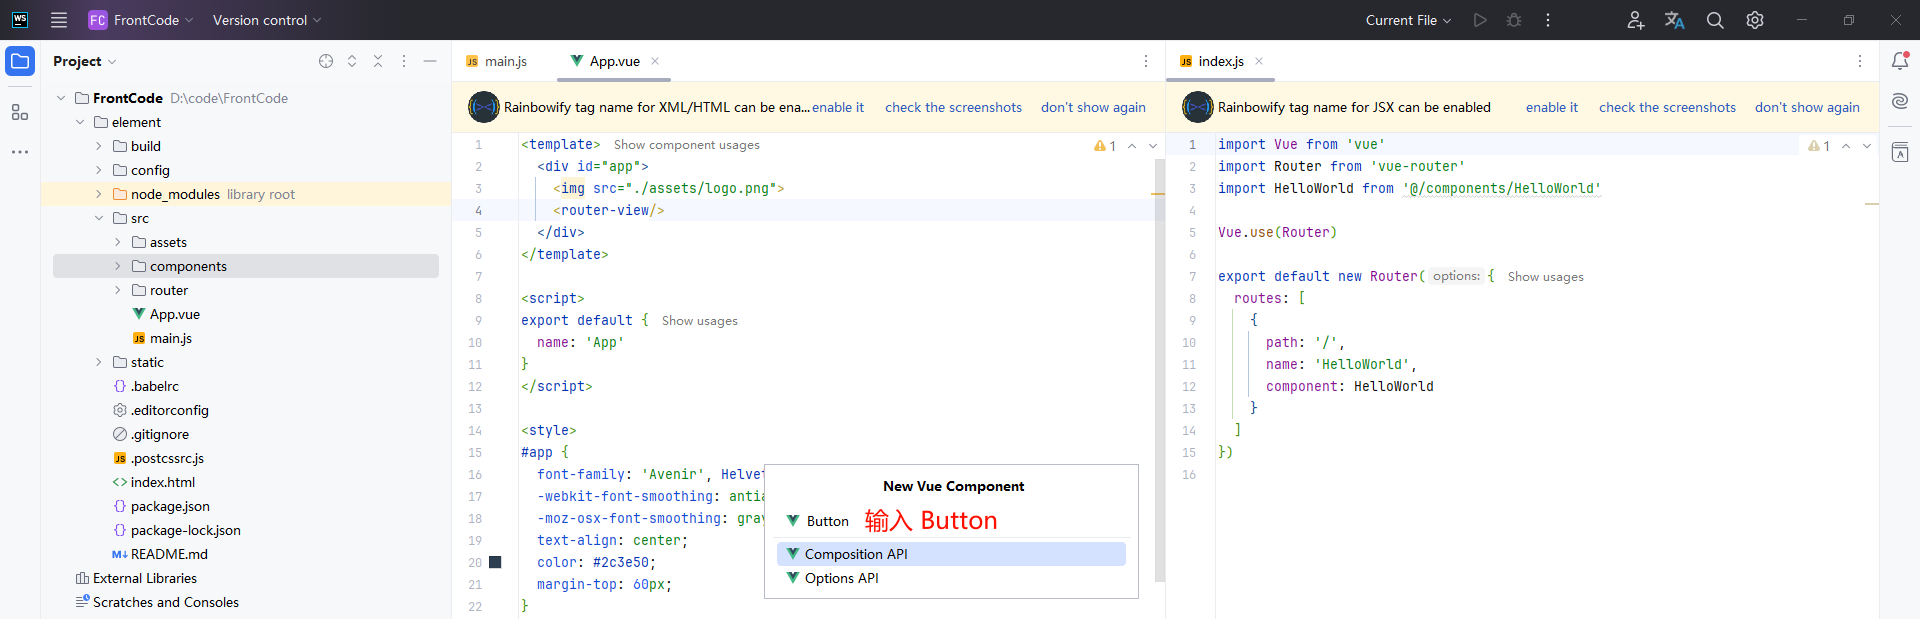
1.3 编写页面
我们需要在 components 文件夹下编写我们的页面

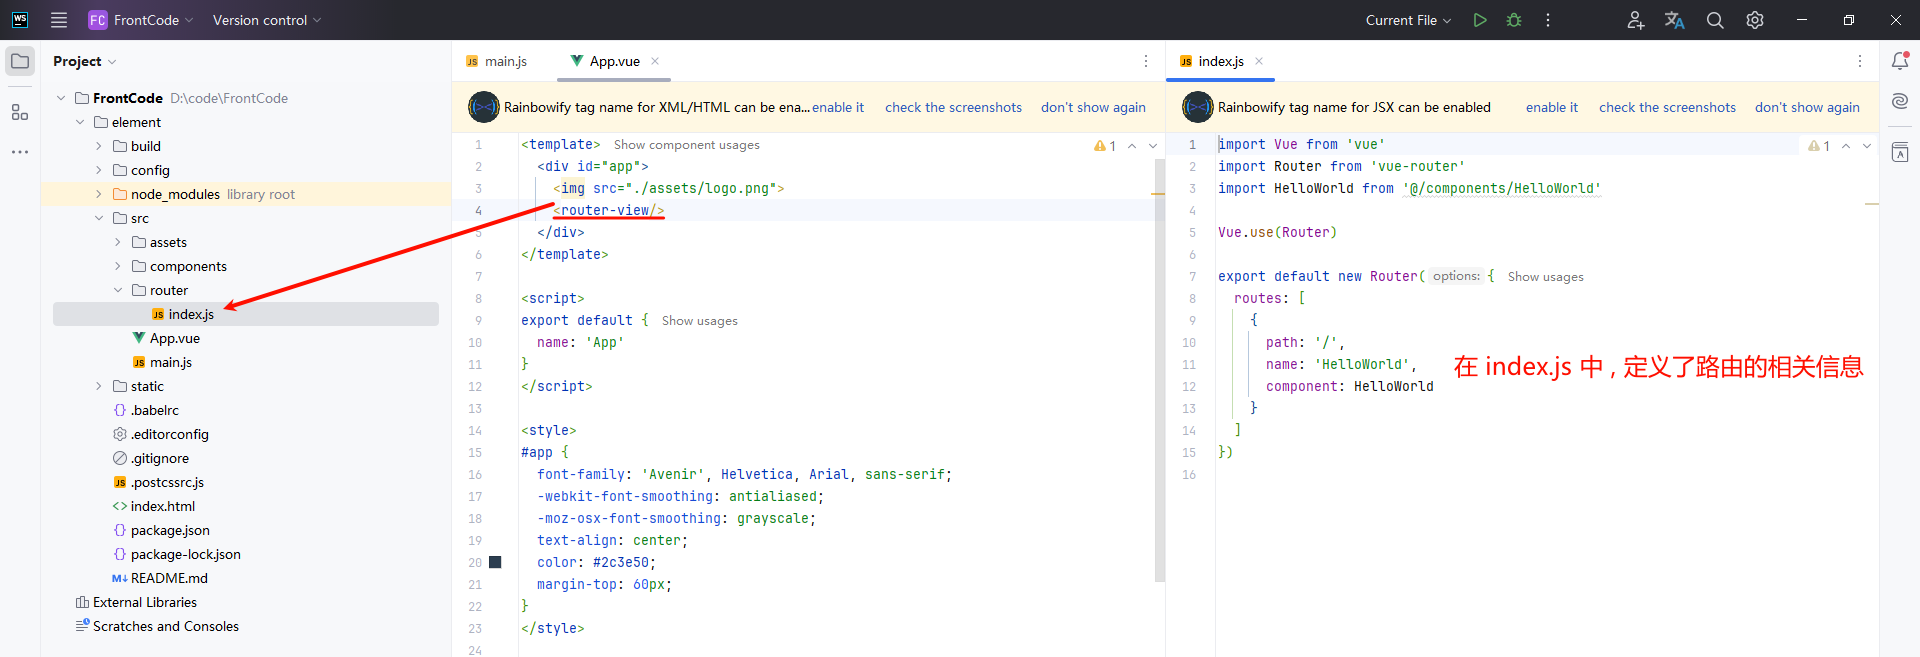
我们先将这个组件注册到 vue 中 , 打开 router 目录下面的 index.js
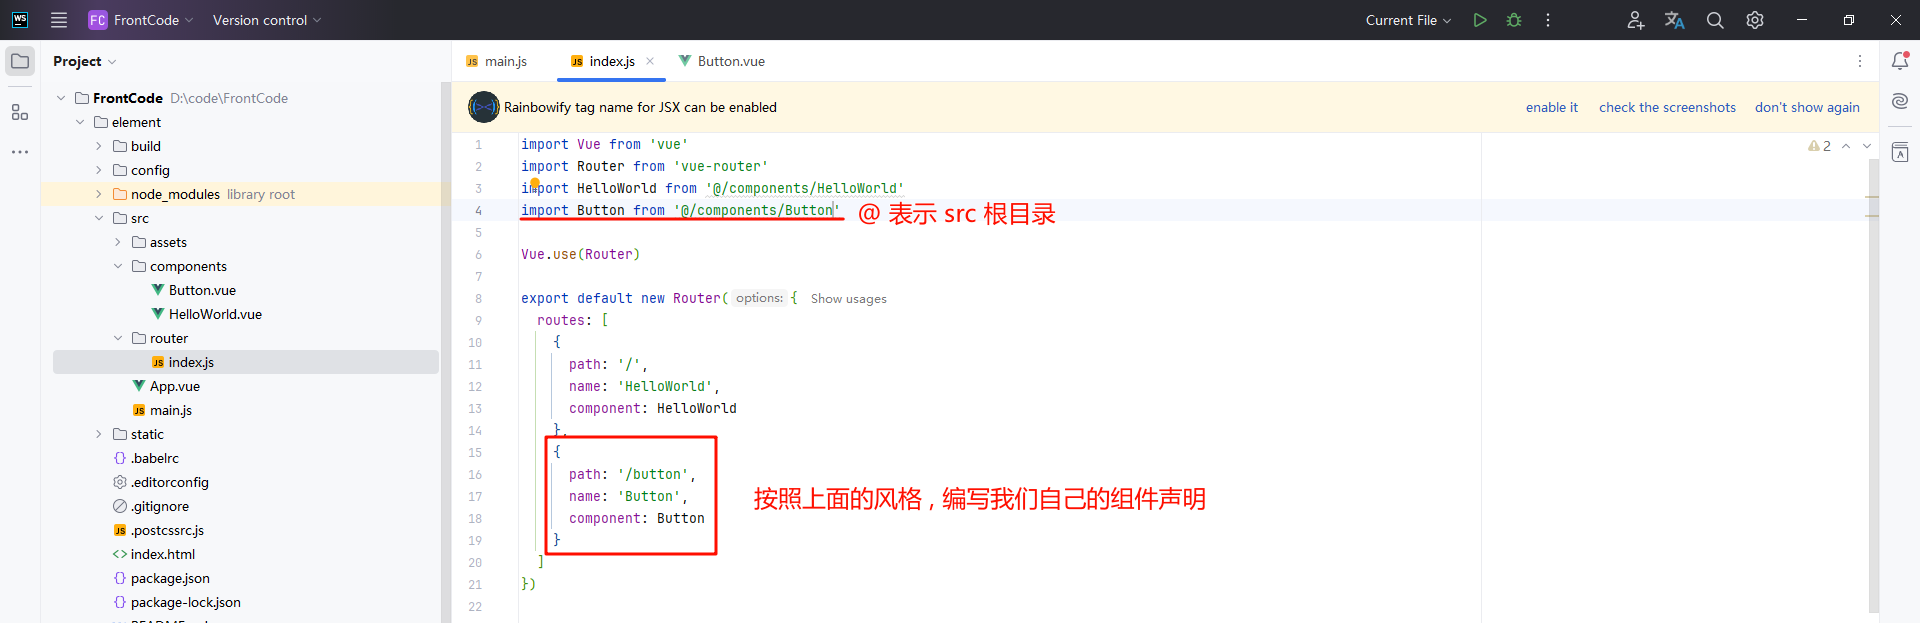
javascript
import Vue from 'vue'
import Router from 'vue-router'
import HelloWorld from '@/components/HelloWorld'
import Button from '@/components/Button'

Vue.use(Router)

export default new Router({
  routes: [
    {
      path: '/',
      name: 'HelloWorld',
      component: HelloWorld
    },
    {
      path: '/button',
      name: 'Button',
      component: Button
    }
  ]
})
其中 , name 属性也是可以省略的
然后我们在首页也添加一个超链接 , 点击即可跳转到我们的 Button 页面
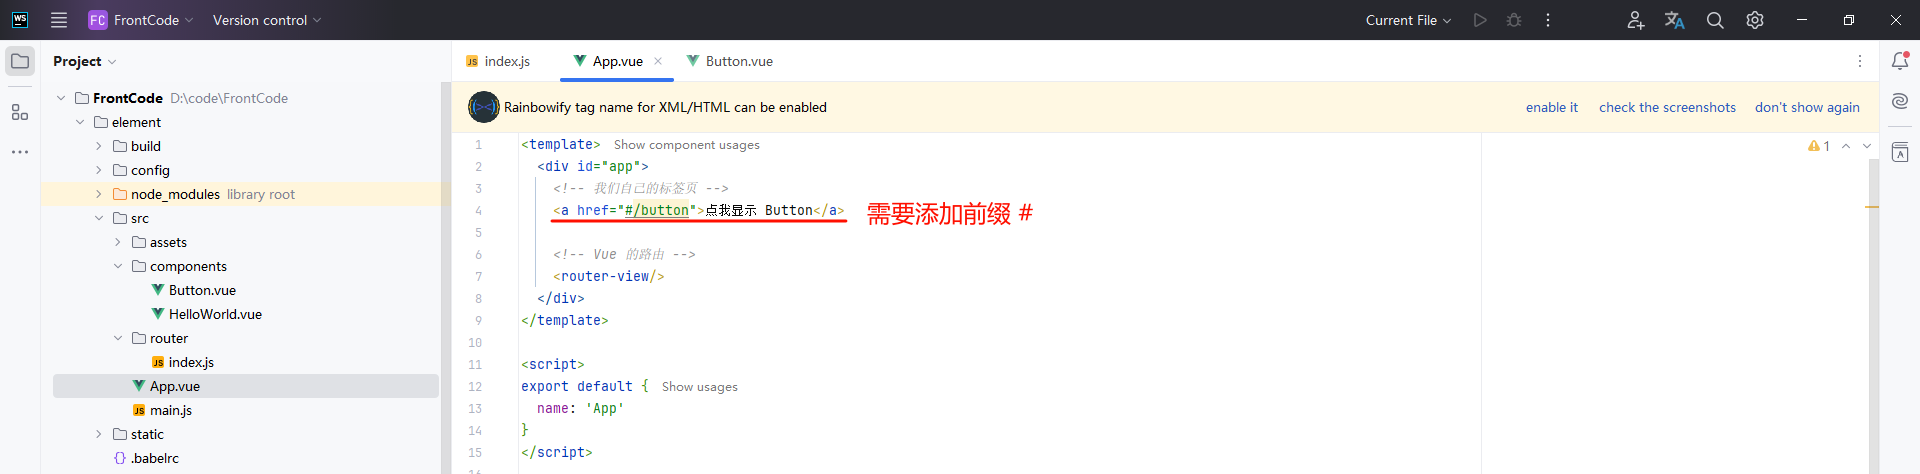
vue
<template>
<div id="app">
<!-- 我们自己的标签页 -->
<a href="#/button">点我显示 Button</a>
<!-- Vue 的路由 -->
<router-view/>
</div>
</template>
<script>
export default {
name: 'App'
}
</script>
<style>
#app {
font-family: 'Avenir', Helvetica, Arial, sans-serif;
-webkit-font-smoothing: antialiased;
-moz-osx-font-smoothing: grayscale;
text-align: center;
color: #2c3e50;
margin-top: 60px;
}
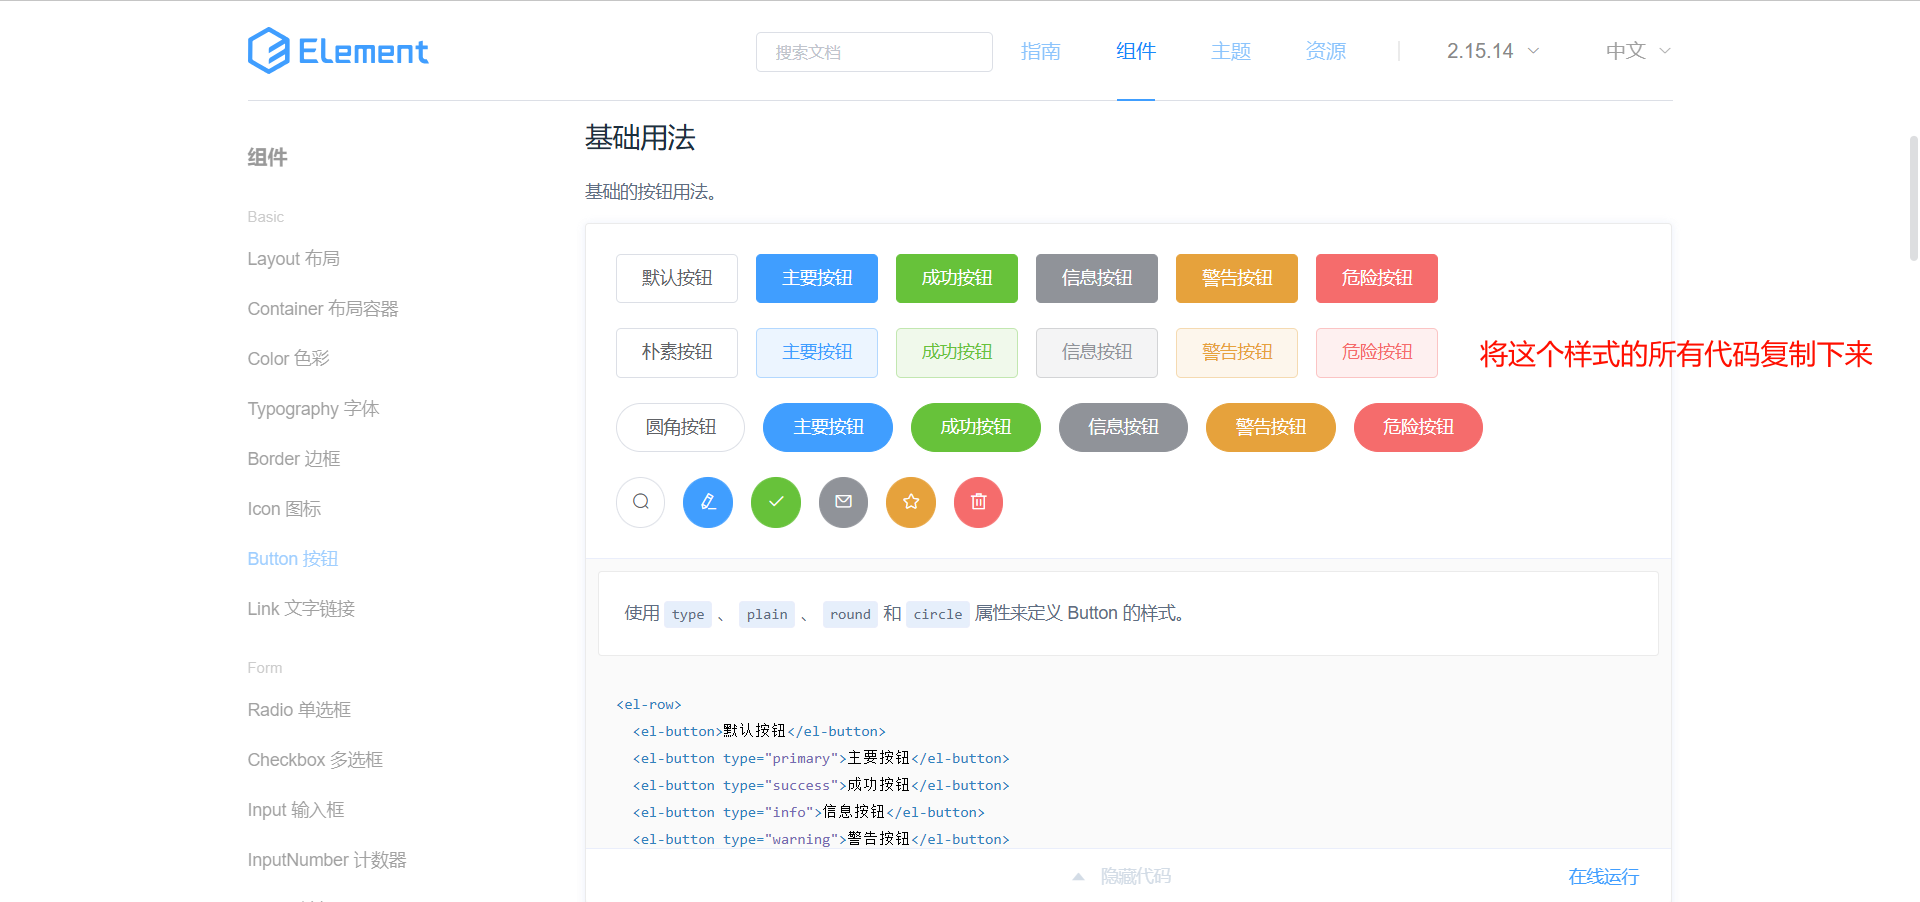
</style>接下来 , 我们就可以实现 Button.vue 组件了
我们将 ElementUI 官网提供给我们的样式全部复制
https://element.eleme.cn/#/zh-CN/component/button

vue
<script setup>

</script>

<template>
  <!-- <template> 标签内要求只能有一个 div 标签 -->
  <div>
    <!-- 默认按钮 -->
    <el-row>
      <el-button>默认按钮</el-button>
      <el-button type="primary">主要按钮</el-button>
      <el-button type="success">成功按钮</el-button>
      <el-button type="info">信息按钮</el-button>
      <el-button type="warning">警告按钮</el-button>
      <el-button type="danger">危险按钮</el-button>
    </el-row>

    <!-- 简洁按钮 -->
    <!-- 鼠标移动上去才会显示背景颜色 -->
    <!-- 在所有标签属性中指定 plain 属性即可 -->
    <el-row>
      <el-button plain>朴素按钮</el-button>
      <el-button type="primary" plain>主要按钮</el-button>
      <el-button type="success" plain>成功按钮</el-button>
      <el-button type="info" plain>信息按钮</el-button>
      <el-button type="warning" plain>警告按钮</el-button>
      <el-button type="danger" plain>危险按钮</el-button>
    </el-row>

    <!-- 圆角按钮 -->
    <!-- 在所有标签属性中指定 round 属性即可 -->
    <el-row>
      <el-button round>圆角按钮</el-button>
      <el-button type="primary" round>主要按钮</el-button>
      <el-button type="success" round>成功按钮</el-button>
      <el-button type="info" round>信息按钮</el-button>
      <el-button type="warning" round>警告按钮</el-button>
      <el-button type="danger" round>危险按钮</el-button>
    </el-row>

    <!-- 简洁按钮 -->
    <!-- 在所有标签属性中指定 circle 属性即可 -->
    <el-row>
      <el-button icon="el-icon-search" circle></el-button>
      <el-button type="primary" icon="el-icon-edit" circle></el-button>
      <el-button type="success" icon="el-icon-check" circle></el-button>
      <el-button type="info" icon="el-icon-message" circle></el-button>
      <el-button type="warning" icon="el-icon-star-off" circle></el-button>
      <el-button type="danger" icon="el-icon-delete" circle></el-button>
    </el-row>
  </div>
</template>

<style scoped>

</style>
我们刷新页面
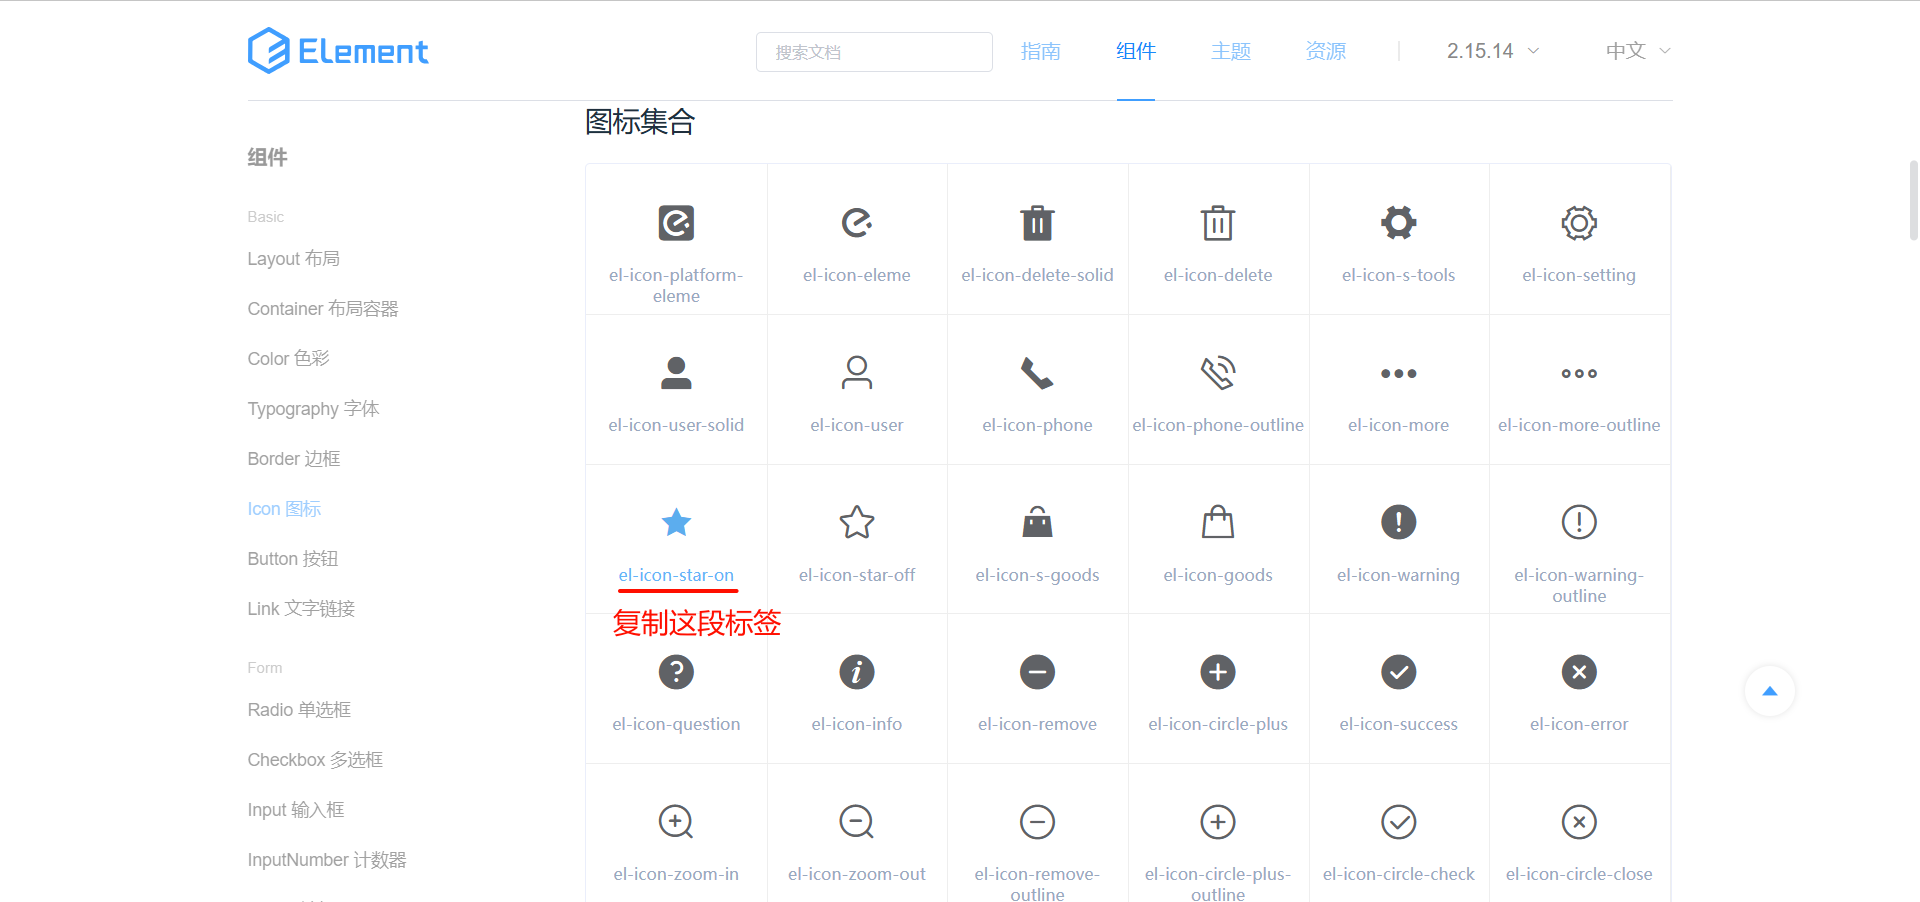
那我们还可以更换简洁按钮的图标 , 打开 ElementUI 的图标库 : https://element.eleme.cn/#/zh-CN/component/icon
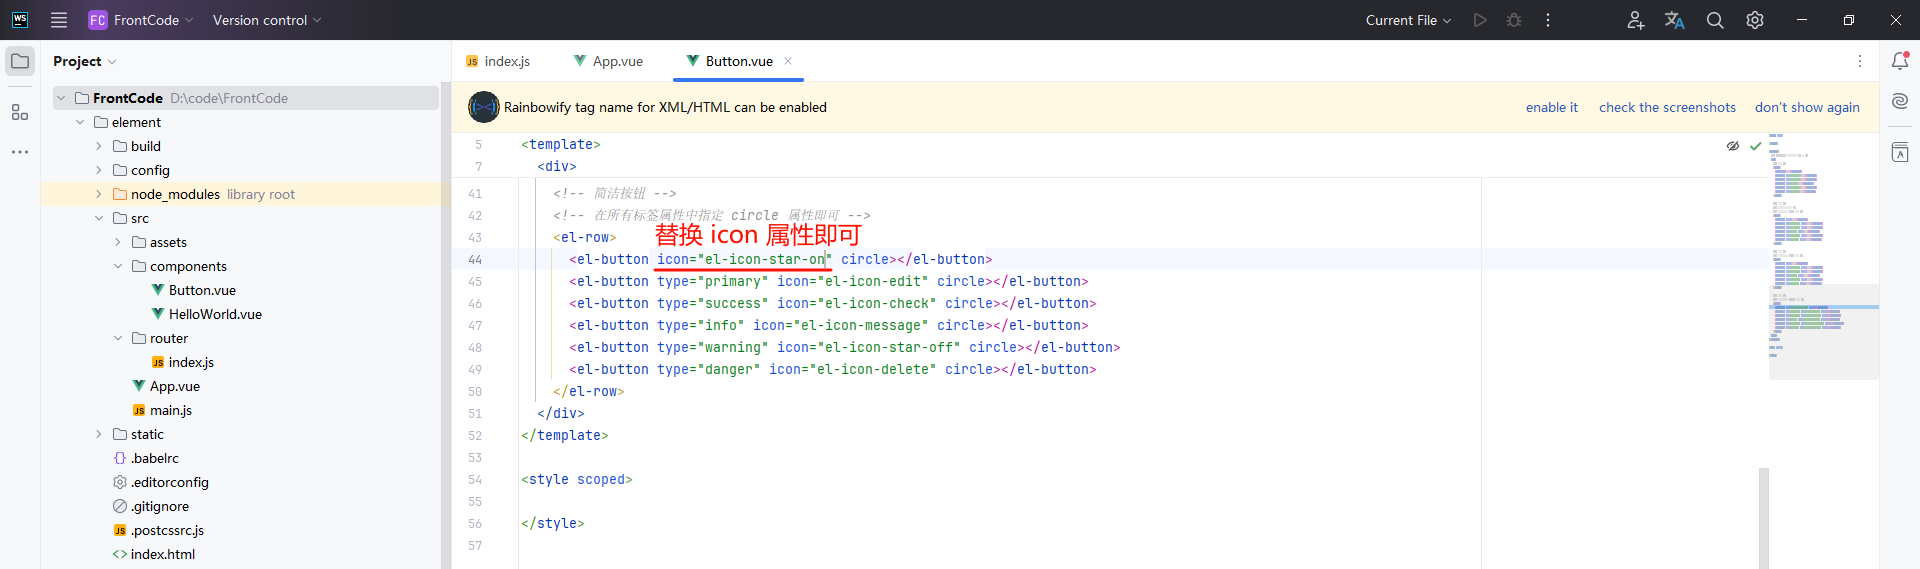
选择一个自己喜欢的图标 , 复制它的名称然后替换 icon 即可
vue
<script setup>

</script>

<template>
  <!-- <template> 标签内要求只能有一个 div 标签 -->
  <div>
 type="danger" round>危险按钮</el-button>
    </el-row>
    <!-- 简洁按钮 -->
    <!-- 在所有标签属性中指定 circle 属性即可 -->
    <el-row>
      <!-- 替换 icon 属性 -->
      <el-button icon="el-icon-star-on" circle></el-button>
      <el-button type="primary" icon="el-icon-edit" circle></el-button>
      <el-button type="success" icon="el-icon-check" circle></el-button>
      <el-button type="info" icon="el-icon-message" circle></el-button>
      <el-button type="warning" icon="el-icon-star-off" circle></el-button>
      <el-button type="danger" icon="el-icon-delete" circle></el-button>
    </el-row>
  </div>
</template>

<style scoped>

</style>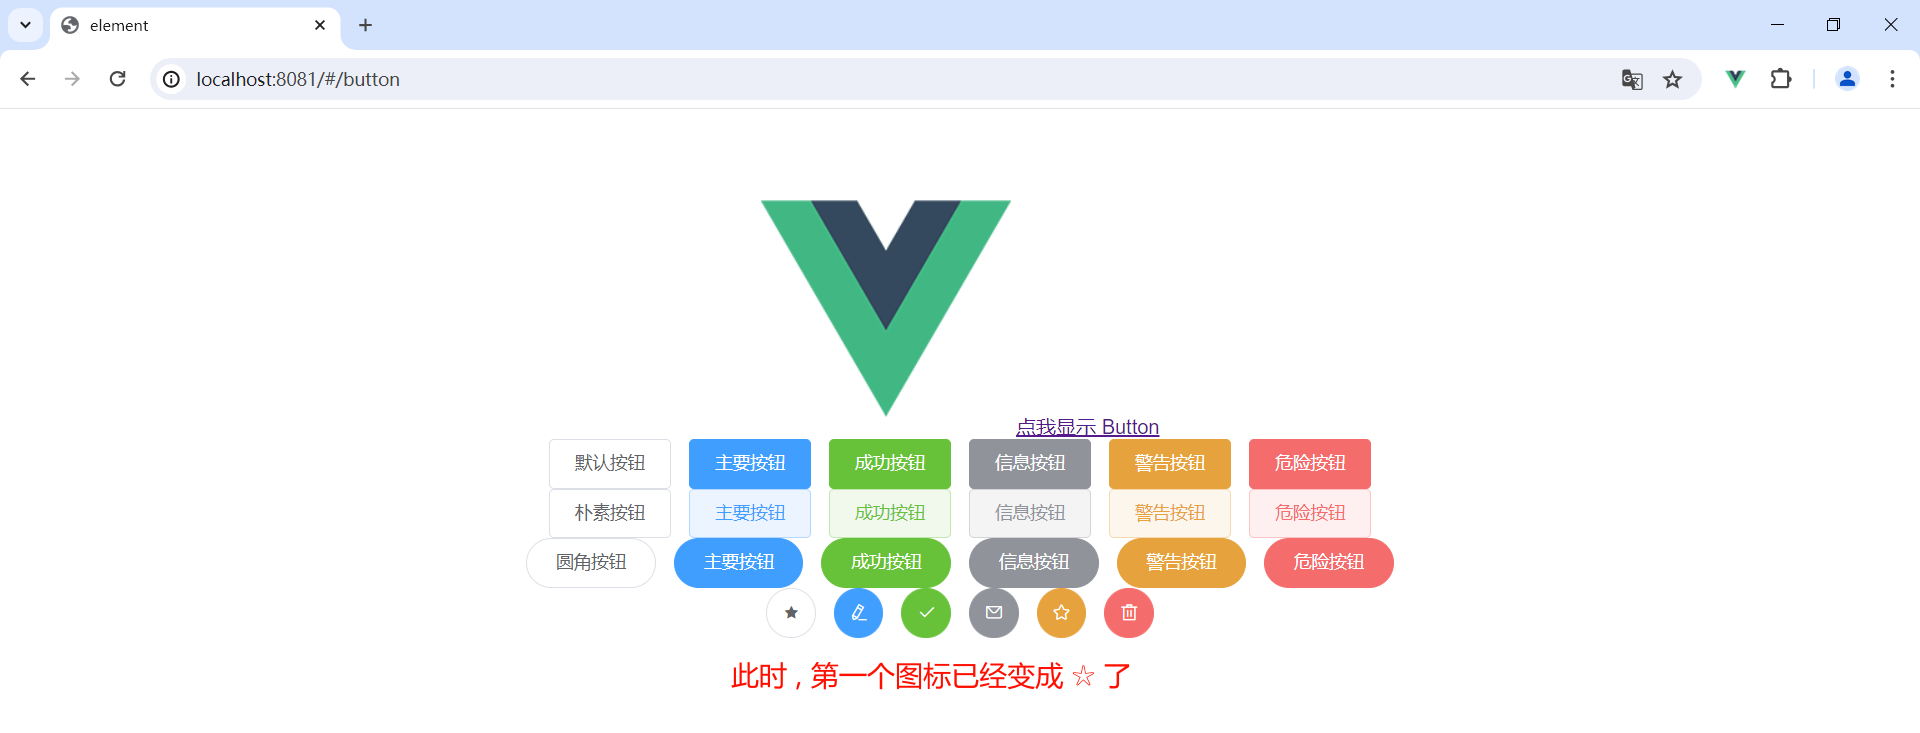
不知道你的 Vue 工程是否创建成功 , 如果对你有帮助的话 , 还请一键三连~
