前言导读
鸿蒙next web组件这个专题之前一直想讲一下 苦于没有时间,周末把代码研究的差不多了,所以就趁着现在这个时间节点分享给大家。也希望能对各位读者网友工作和学习有帮助,废话不多说我们正式开始。
效果图
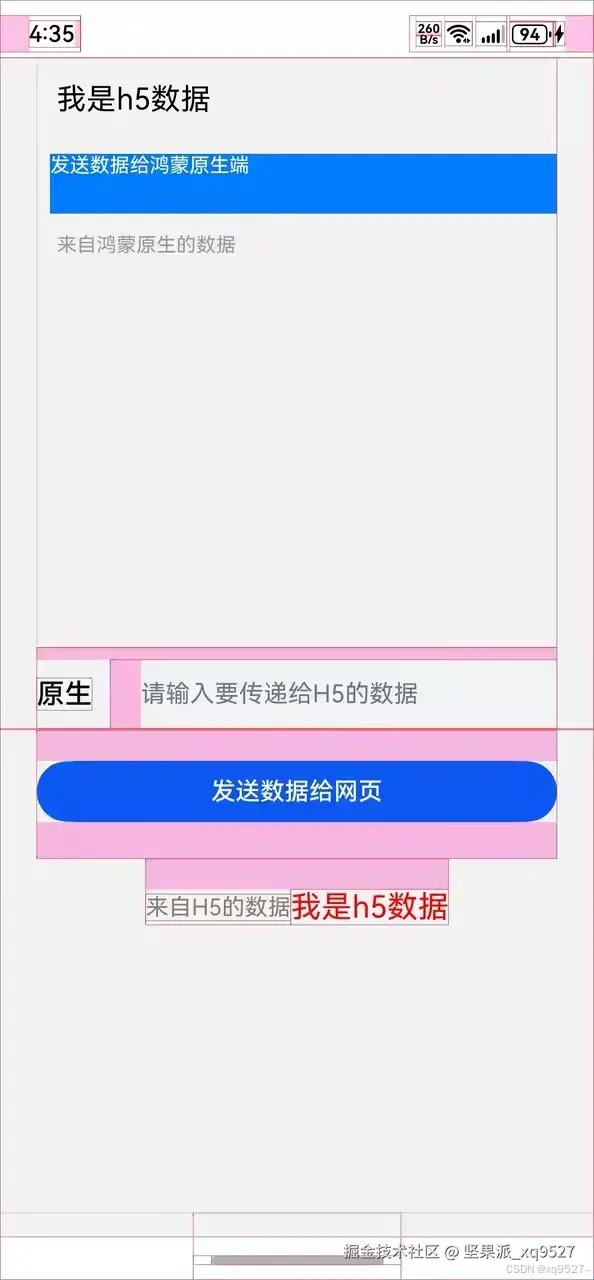
默认页面 上面H5 下面ArkUI

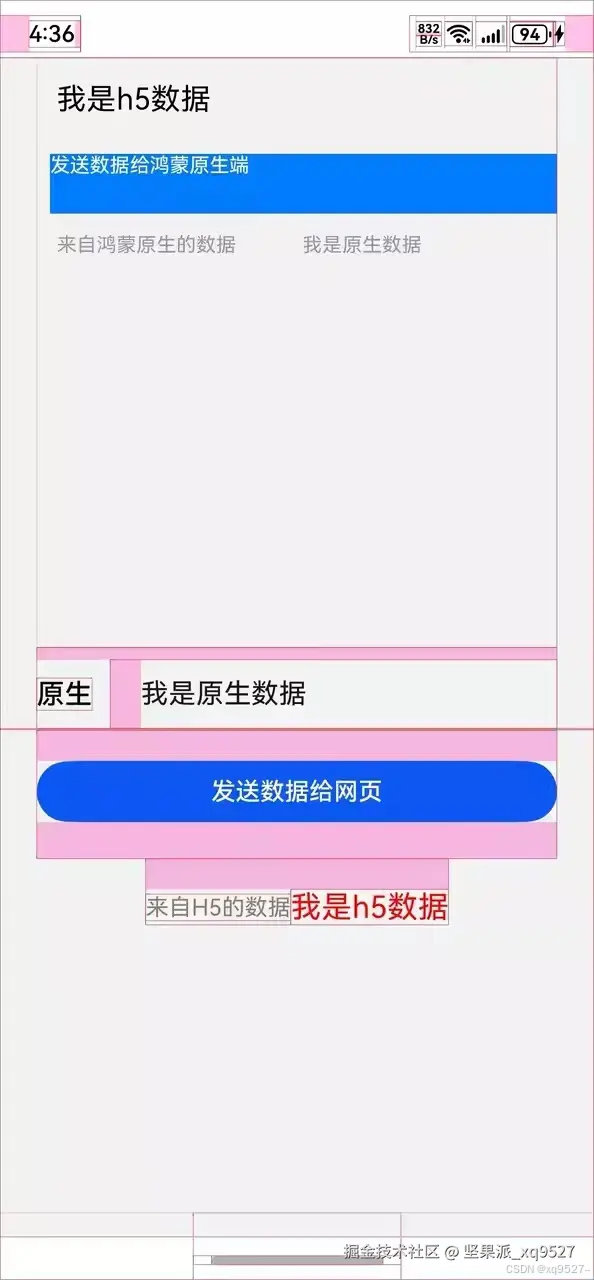
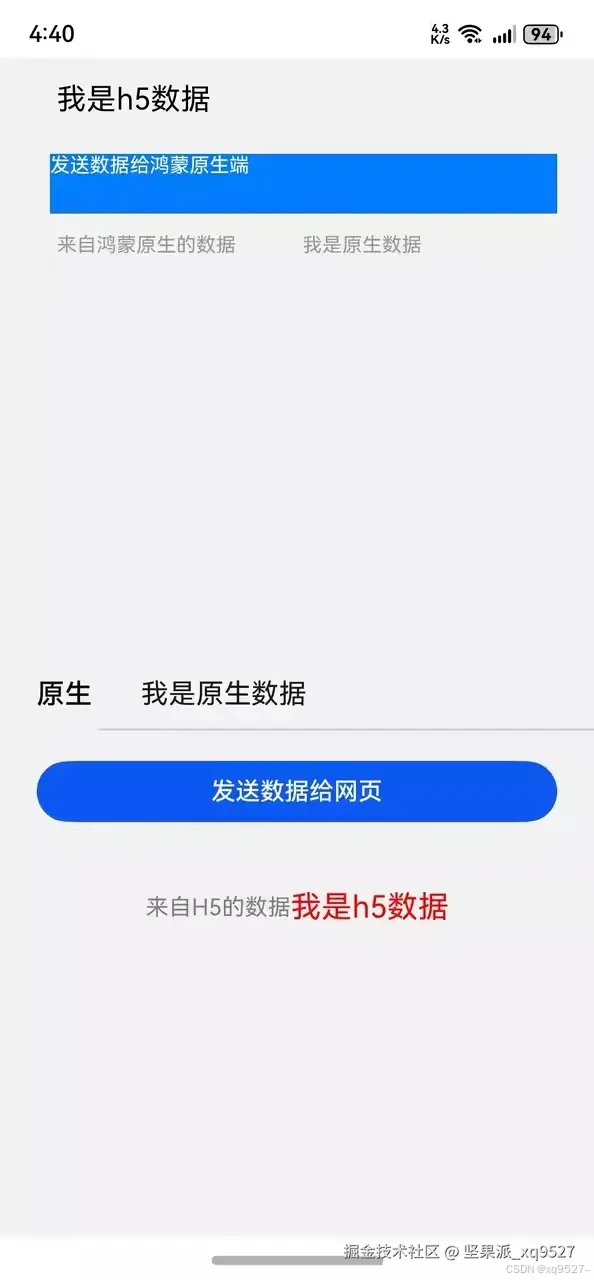
在H5输入框输入需要传递的参数 点击按钮发送到ArkUI 展示
在ArkU输入框输入需要传递的参数 点击按钮发送到H5端 展示
最终效果 H5调用ArkUI ArkUI调用H5完成流程
具体实现
H5调 ArkUI
H5端代码简单实现
<!-- MainPage.html -->
<!DOCTYPE html>
<html>
<head>
    <link rel="stylesheet" type="text/css" href="./css/main.css">
    <meta charset="utf-8">
    <meta name="viewport" content="width=device-width, initial-scale=1.0">
    <title>testApp</title>
</head>
<script>
    window.ohosCallNative.callNative('getProportion', {}, (data) => {
        document.getElementsByTagName("html")[0].style.fontSize = data + 'px';
    })
</script>
<body>
<div class="container">
    <div class="selectConcat">

        <div class="flex-input">
            <input type="tel" id="phone" placeholder="请输入你要传输的数据" oninput="changeVal(event)" value=""/>
        </div>
    </div>
        <div class="bottom-tip" onclick="towebview()">发送数据给鸿蒙原生端</div>

    <div class="select_tips">
        <div id="phone_tip">来自鸿蒙原生的数据</div>
        <div id="concat_tip"></div>
    </div>

</div>
<script src="./js/mainPage.js"></script>
</body>
</html>
调用ArkUI原生方法
function towebview() {
  let input = event.target.value;
  const tel = document.getElementById('phone').value;
  window.ohosCallNative.callNative('changeTel', { tel: tel });
}
添加js和ArkUI交互
Web({
  src: $rawfile('MainPage.html'),
  controller: this.webController
})
  .javaScriptAccess(true)
  .javaScriptProxy(this.jsBridge.javaScriptProxy)
  .height('50%')
  .onPageBegin(() => {
    this.jsBridge.initJsBridge();
  })
调用原生ArkUI 方法
get javaScriptProxy(): JavaScriptItem {
  let result: JavaScriptItem = {
    object: {
      call: this.call
    },
    name: 'JSBridgeHandle',
    methodList: ['call'],
    controller: this.controller
  }
  return result;
}


call = (func: string, params: string): void => {
  const paramsObject: ParamsItem = JSON.parse(params);
  let result: Promise<string> = new Promise((resolve) => resolve(''));
  switch (func) {
    case 'chooseContact':
      result = this.chooseContact();
      break;
    case 'changeTel':
      result = this.changeTel(paramsObject);
      break;
    case 'changeAmount':
      result = this.changeAmount();
      break;
    case 'getProportion':
      result = this.getProportion();
      break;
    default:
      break;
  }
  result.then((data: string) => {
    this.callback(paramsObject?.callID, data);
  })
}


/**
 * Change tel function.
 */
changeTel = (params: ParamsItem): Promise<string> => {
  Logger.info('手机号', JSON.stringify(params));
  const tel: string = params.data.tel ?? '';
  Logger.error("tel -- > "+tel)
  AppStorage.set<string>('tel', tel);
  return new Promise((resolve) => {
    resolve('success');
  })
}
我们通过JavaScriptItem 中的call 接收到H5那边调用 ArkUI 这边方法 拿到传过来的数据然后从存储再 AppStorage然后我们在UI上面展示
ArkUI 端代码实现
import { webview } from '@kit.ArkWeb';
import { display } from '@kit.ArkUI';
import { promptAction } from '@kit.ArkUI';
import JSBridge from '../common/utils/JsBridge';
import { CommonConstants } from '../common/constant/CommonConstant';
import Logger from '../common/utils/Logger';


@Extend(TextInput) function  inputStyle(){
  .placeholderColor($r('app.color.placeholder_color'))
  .height(45)
  .fontSize(18)
  .backgroundColor($r('app.color.background'))
  .width('80%')
  .padding({left:0})
  .margin({top:12})
}
//线条样式
@Extend(Line) function  lineStyle(){
  .width('100%')
  .height(1)
  .backgroundColor($r('app.color.line_color'))
}
//黑色字体样式
@Extend(Text) function  blackTextStyle(size?:number ,height?:number){
  .fontColor($r('app.color.black_text_color'))
  .fontSize(18)
  .fontWeight(FontWeight.Medium)
}


@Entry
@Component
struct SelectContact {
  @StorageLink('isClick') isClick: boolean = false;
  @StorageLink('tel') phoneNumber: string = '';
  @StorageLink('proportion') proportion: number = 0;
  @State towebstr:string='';


  @State chargeTip: Resource = $r('app.string.recharge_button');
  webController: webview.WebviewController = new webview.WebviewController();
  private jsBridge: JSBridge = new JSBridge(this.webController,this.towebstr,"获取到的数据");

  aboutToAppear() {
    display.getAllDisplays((err, displayClass: display.Display[]) => {
      if (err.code) {
        Logger.error('SelectContact Page', 'Failed to obtain all the display objects. Code: ' + JSON.stringify(err));
        return;
      }
      this.proportion = displayClass[0].densityDPI / CommonConstants.COMMON_VALUE;
      Logger.info('Succeeded in obtaining all the display objects. Data: ' + JSON.stringify(displayClass));
    });
  }

  build() {
    Column() {

      Web({
        src: $rawfile('MainPage.html'),
        controller: this.webController
      })
        .javaScriptAccess(true)
        .javaScriptProxy(this.jsBridge.javaScriptProxy)
        .height('50%')
        .onPageBegin(() => {
          this.jsBridge.initJsBridge();
        })

      Row(){
        Text('原生').blackTextStyle()
        TextInput({placeholder:'请输入要传递给H5的数据'})
          .maxLength(12)
          .type(InputType.Normal)
          .inputStyle()
          .onChange((value:string)=>{
            this.towebstr=value;
          }).margin({left:20})
      }.justifyContent(FlexAlign.SpaceBetween)
      .width('100%')
      .margin({top:8})
      Line().lineStyle().margin({left:80})

      Button('发送数据给网页')
        .width(CommonConstants.FULL_SIZE)
        .height($r('app.float.button_height'))
        .margin({ bottom: $r('app.float.button_margin_bottom'),top:20 })
        .onClick(() => {
          Logger.error("towebstr " +this.towebstr)
          this.jsBridge.chooseContact();
          this.webController.runJavaScript(`window.fromNative("${this.towebstr}")`)

        })

      Row(){
        Text('来自H5的数据').fontSize(15).fontColor(Color.Gray)
        Text(this.phoneNumber).fontSize(20).fontColor(Color.Red)
      }.justifyContent(FlexAlign.Center).margin({top:20})
    }
    .width(CommonConstants.FULL_SIZE)
    .height(CommonConstants.FULL_SIZE)
    .backgroundColor($r('app.color.page_color'))
    .padding({
      left: $r('app.float.margin_left_normal'),
      right: $r('app.float.margin_right_normal')
    })
  }
}
ArkUI 调用H5
Button('发送数据给网页')
  .width(CommonConstants.FULL_SIZE)
  .height($r('app.float.button_height'))
  .margin({ bottom: $r('app.float.button_margin_bottom'),top:20 })
  .onClick(() => {
    Logger.error("towebstr " +this.towebstr)
    this.jsBridge.chooseContact();
    this.webController.runJavaScript(`window.fromNative("${this.towebstr}")`)

  })
H5 端接收
window.fromNative = (text) => {
  document.getElementById('concat_tip').innerHTML = text
}
最后总结:
鸿蒙这边web组件和安卓的webview 以及ios的 wkwebview 比较像官方也给出了接口原生 ArkUI和H5能互相交互。文章案例中也给出具体的用法,各位可以查阅。如果有什么疑问也可以留言, 如果需要学习更多鸿蒙的知识可以瓜子你好我B站教程
课程地址
B站课程地址:www.bilibili.com/cheese/play...
项目内容:
1 常用布局组件的学习
2 网络请求工具类封装
3 arkui 生命周期启动流程
4 日志工具类的封装
5 自定义组合组件的封装
6 路由导航跳转的使用
7 本地地数据的缓存 以及缓存工具类的封装
8 欢迎页面的实现
9 登录案例和自动登录效果实现
10 请求网络数据分页上拉加载 下拉刷新的实现
11 list数据懒加载实现
12 webview组件的使用
团队介绍
团队介绍:作者: 坚果派-徐庆 坚果派由坚果等人创建,团队由12位华为HDE以及若干热爱鸿蒙的开发者和其他领域的三十余位万粉博主运营。专注于分享 HarmonyOS/OpenHarmony,ArkUI-X,元服务,仓颉,团队成员聚集在北京,上海,南京,深圳,广州,宁夏等地,目前已开发鸿蒙 原生应用,三方库60+,欢迎进行课程,项目等合作。