ByteCTF
极限逃脱
题目描述:本题需要通过动态调试分析出要输入的内容,可能在某些地方会有提示出现。
这是一个IOS逆向,因为没有设备只能静态分析
流程和安卓逆向大概一致 解压拖进ida
提示输入flag格式 根据"-"进行切割
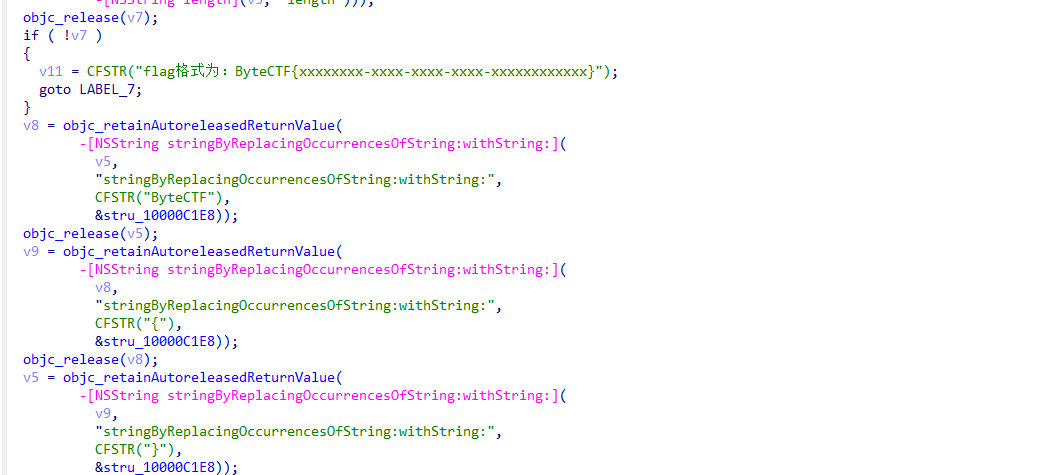
其实就是uuid格式,正确输入后有一个赋值操作

然后往下看注意到
{%@-%@-%@-%@-%@} part5,part2,part3,part4,part5
计算这个字符串的sha256
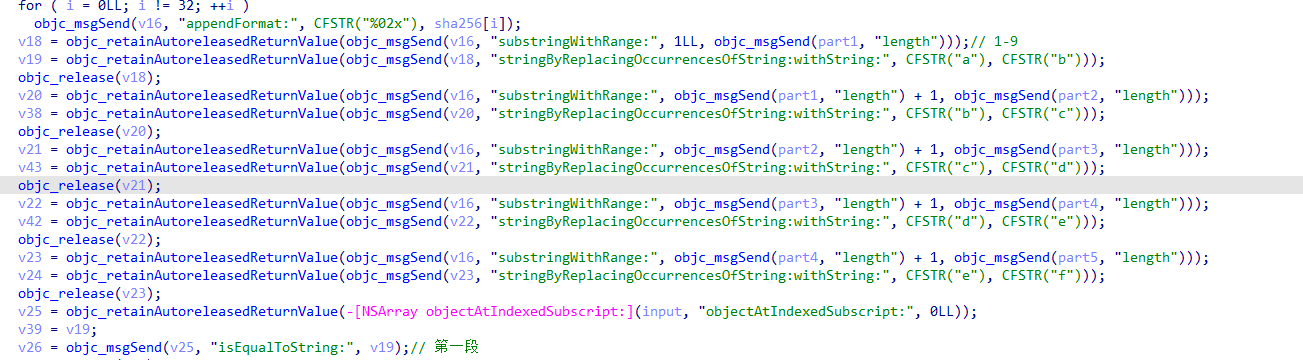
后面是根据每一部分的长度进行切片操作,然后是一个替换
注意每个部分的起始位置
最后进行比较
最后切片进行替换
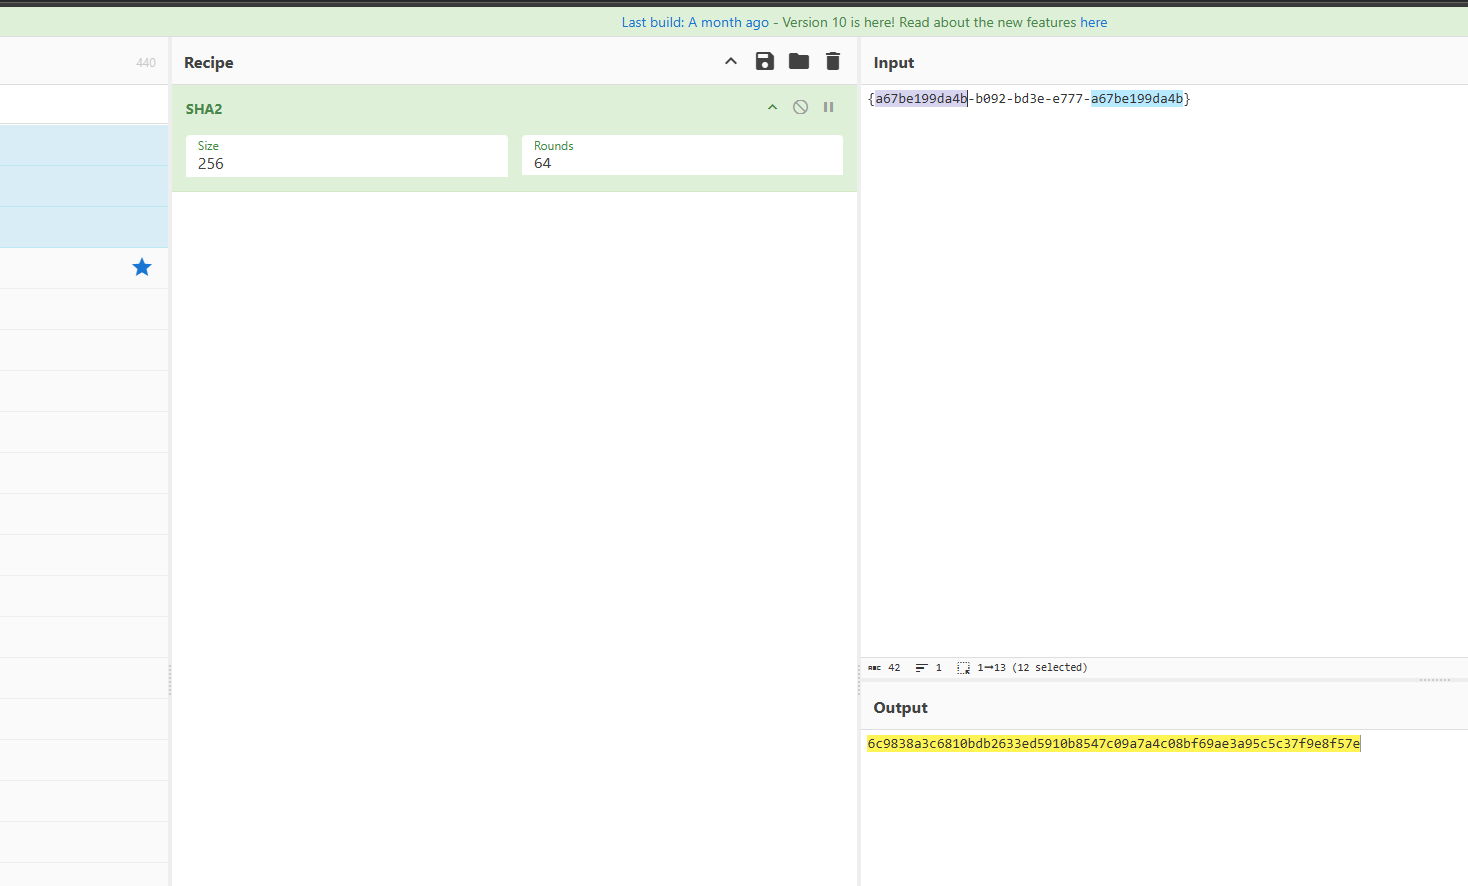
python
a="6c9838a3c6810bdb2633ed5910b8547c09a7a4c08bf69ae3a95c5c37f9e8f57e"
#print 1 to 9
for i in range(1,9):
    print(a[i],end='')
print("-",end='')
for i in range(9,13):
    print(a[i],end='')
print("-",end='')
for i in range(5,9):
    print(a[i],end='')
print("-",end='')
for i in range(5,9):
    print(a[i],end='')
print("-",end='')
for i in range(5,17):
    print(a[i],end='')


# c9838a3c-6810-8a3c-8a3c-8a3c6810bdb2
ByteBuffer
FlatBuffers 的序列化格式
FlatBuffers 就是把对象数据,保存在一个一维的数组中,将数据都缓存在一个 ByteBuffer 中,每个对象在数组中被分为两部分。
元数据部分:负责存放索引。真实数据部分:存放实际的值
使用 4 字节的 UInt 来存储 10 位数字的整数。
FlatBuffers 对序列化基本使用原则:
- 小端模式。FlatBuffers 对各种基本数据的存储都是按照小端模式来进行的,因为这种模式目前和大部分处理器的存储模式是一致的,可以加快数据读写的数据。
- 写入数据方向和读取数据方向不同
从给的二进制文件看
一部分给的是dot数据

另一部分给的是Edge数据
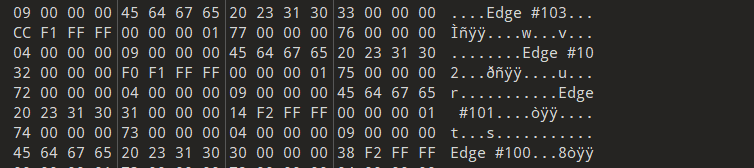
对应着点和边,我们需要恢复原来的数据
dot数据 每4位为一组

这里采用小端序排序
x1=06 40=1600 y1=4B=75 依次每四位可以拿到所有的点的数据
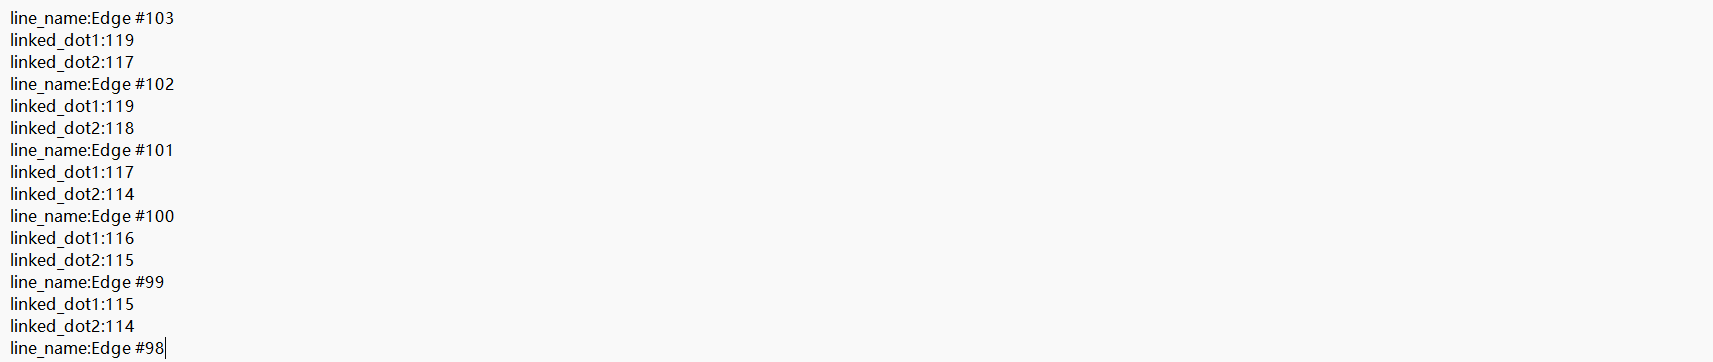
同理 在边上

Edge #103对应着 0x77 0x75 即点119 117
根据原理可以写出梭哈脚本
cnt = 0

with open("ByteBuffer.bin", "rb") as file:
    ans = file.read()

# print(ans)
import struct

edge_index = 0x3AC
dot_index = 0x1230

while edge_index < 0x120C:
    tmp = struct.unpack("<Q", ans[edge_index : edge_index + 8])[0]
    edge_index += 8
    dot1 = struct.unpack("<L", ans[edge_index : edge_index + 4])[0]
    edge_index += 4
    dot2 = struct.unpack("<L", ans[edge_index : edge_index + 4])[0]
    edge_index += 4
    edge_index += 4
    length = ((struct.unpack("<L", ans[edge_index : edge_index + 4])[0] + 4) // 4) * 4
    # print(length)
    edge_index += 4
    name = ans[edge_index : edge_index + length].decode()

    print("line_name:" + name)
    print("linked_dot1:" + str(dot1))
    print("linked_dot2:" + str(dot2))
    edge_index += length

print("line_name:" + "Edge #0")
print("linked_dot1:" + str(2))
print("linked_dot2:" + str(1))

while dot_index < 0x1F88:
    tmp = struct.unpack("<L", ans[dot_index : dot_index + 4])[0]
    dot_index += 4
    x1 = struct.unpack("<L", ans[dot_index : dot_index + 4])[0]
    dot_index += 4
    y1 = struct.unpack("<L", ans[dot_index : dot_index + 4])[0]
    dot_index += 4
    dot_index += 4
    length = ((struct.unpack("<L", ans[dot_index : dot_index + 4])[0] + 4) // 4) * 4
    # print(length)
    dot_index += 4
    name = ans[dot_index : dot_index + length].decode()

    print("dot_name:" + name)
    print("x:" + str(x1))
    print("y:" + str(y1))
    dot_index += length

print("dot_name:" + "Dot #2")
print("x:" + str(0x19))
print("y:" + str(0x4B))
得到
然后根据点和线的关系进行绘图
import matplotlib.pyplot as plt

# 读取数据
dots = {}
edges = []

with open("1(1).txt", "r") as f:
    lines = f.readlines()

for i in range(0, len(lines), 3):
    line = lines[i].strip()
    if line.startswith("dot_name"):
        dot_name = line.split(":")[1].split("#")[1]
        line2 = lines[i + 1].strip()
        line3 = lines[i + 2].strip()
        x = int(line2.split(":")[1])
        y = int(line3.split(":")[1])
        dots[dot_name] = (y, x)
    elif line.startswith("line_name"):
        line_name = line.split(":")[1]
        line2 = lines[i + 1].strip()
        line3 = lines[i + 2].strip()
        dot1 = line2.split(":")[1]
        dot2 = line3.split(":")[1]
        edges.append((dot1, dot2))

# 绘制点
for dot_name, (x, y) in dots.items():
    plt.plot(x, y)

# 绘制线段
for dot1, dot2 in edges:
    x1, y1 = dots[dot1]
    x2, y2 = dots[dot2]
    plt.plot([x1, x2], [y1, y2], "b-")

# 设置标签
plt.xlabel("X")
plt.ylabel("Y")
plt.legend()
plt.show()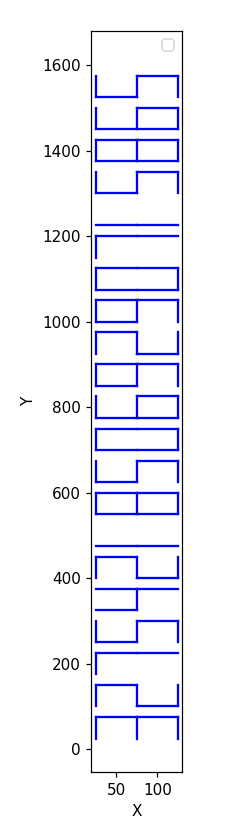
得到flag