准备工作
| 工具 | 说明 |
|---|---|
| IDEA | 开发工具 |
| JAVA JDK | java开发环境 |
| Git | 拉取代码工具 |
| GPG | 签名验证工具 |
| Maven | maven仓库 |
| 一个gihub账号 |
接下来按着操作来执行:
1.登录你的github账号 >>> https://github.com/

2.登录完成之后 前去新版本maven中央仓库上传地址
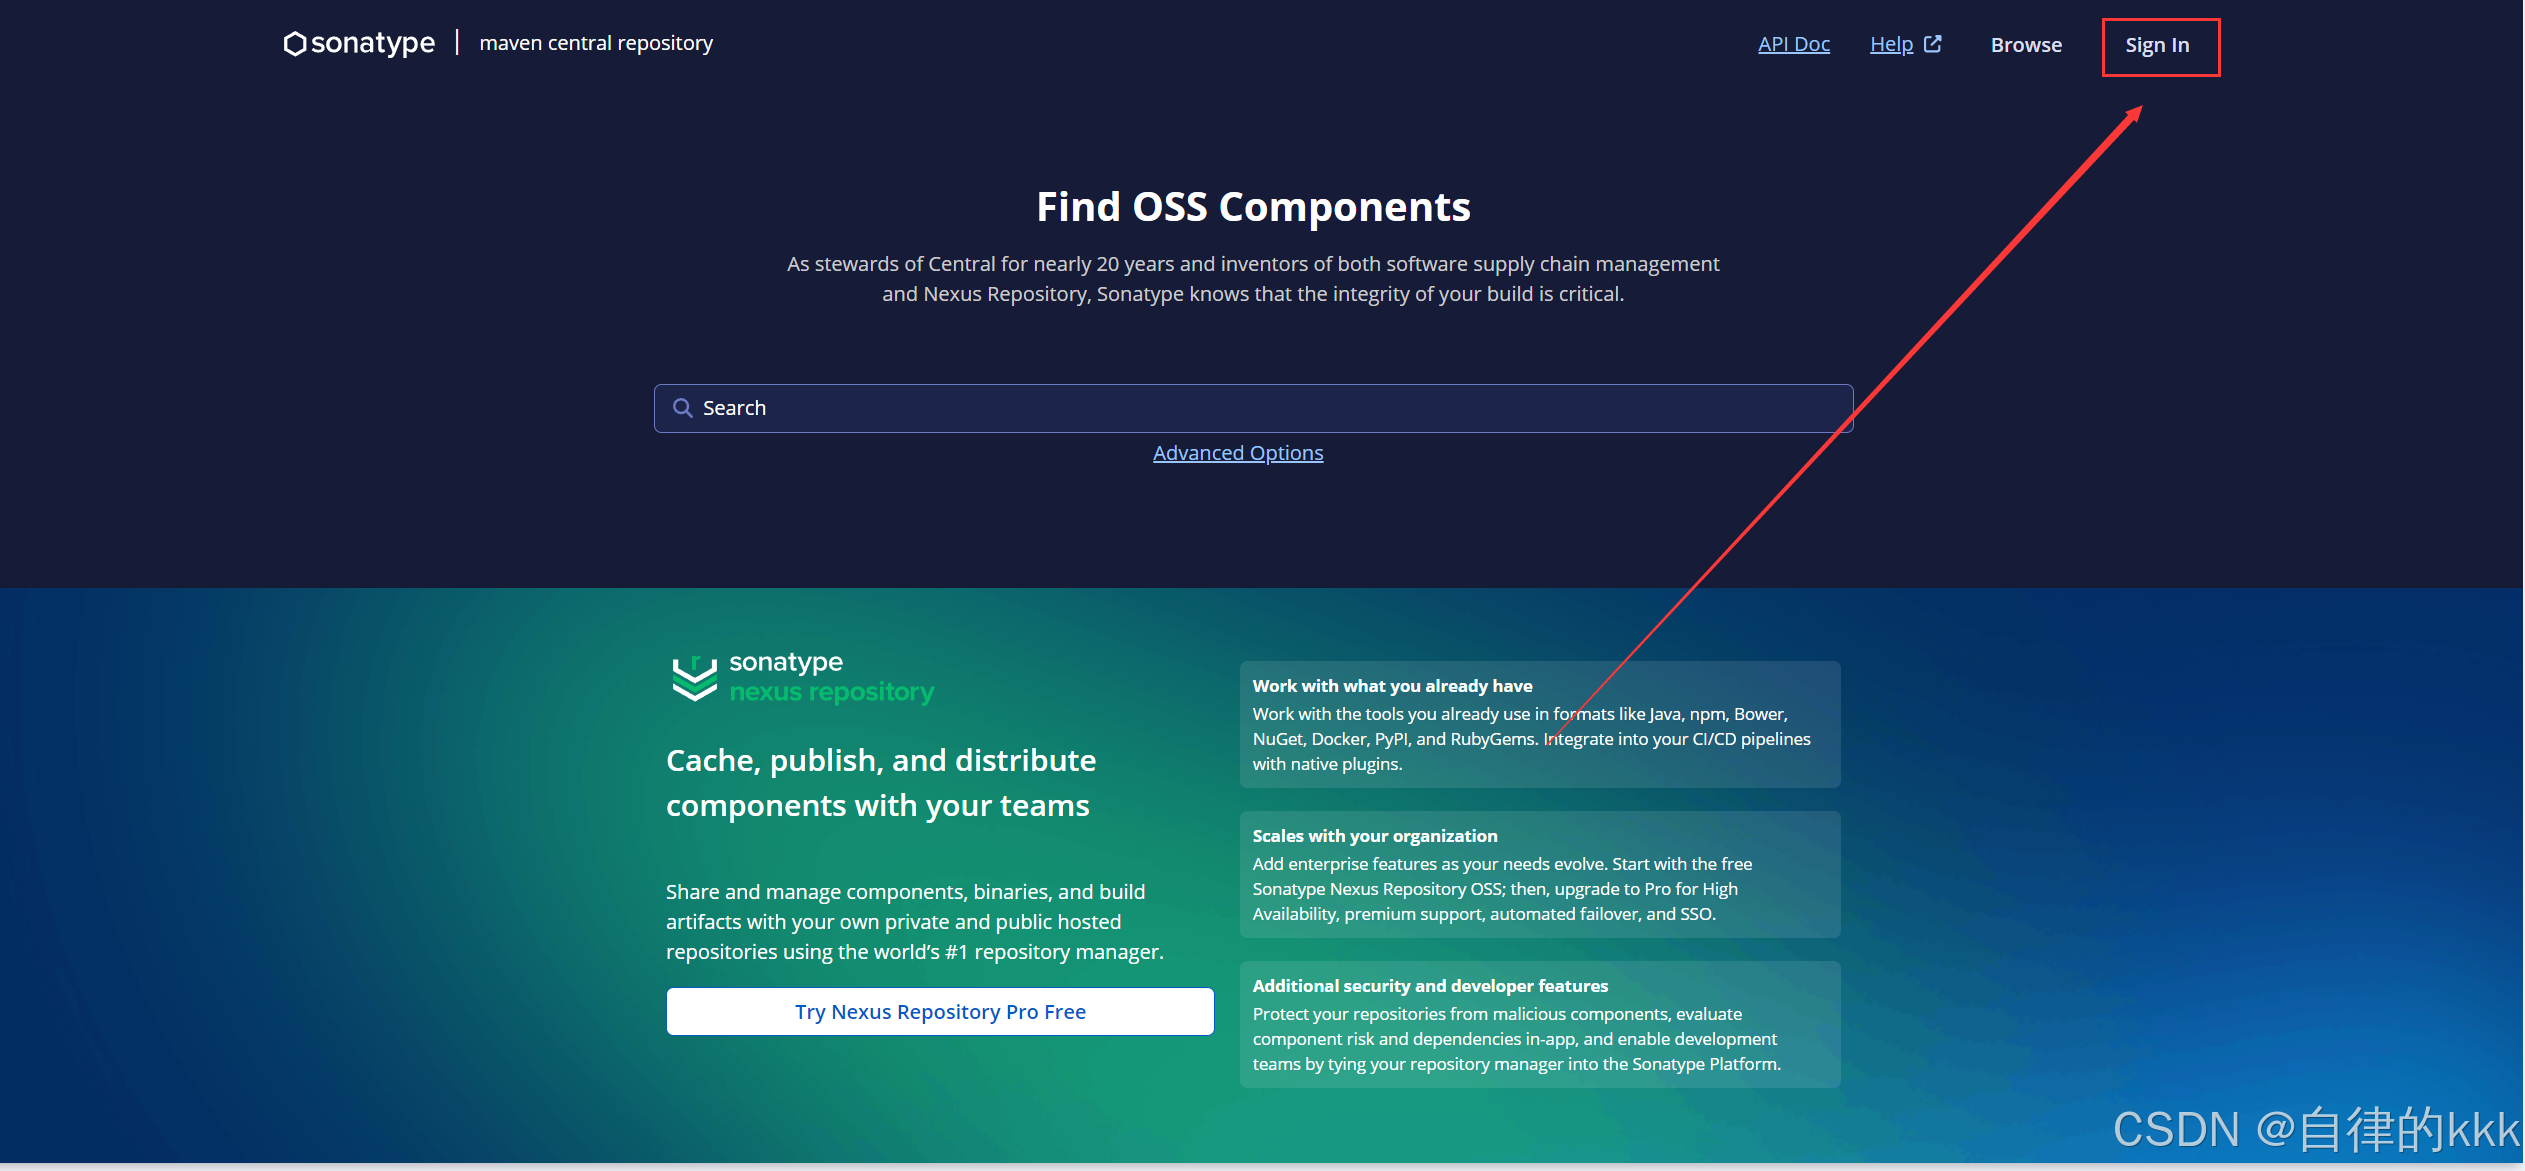
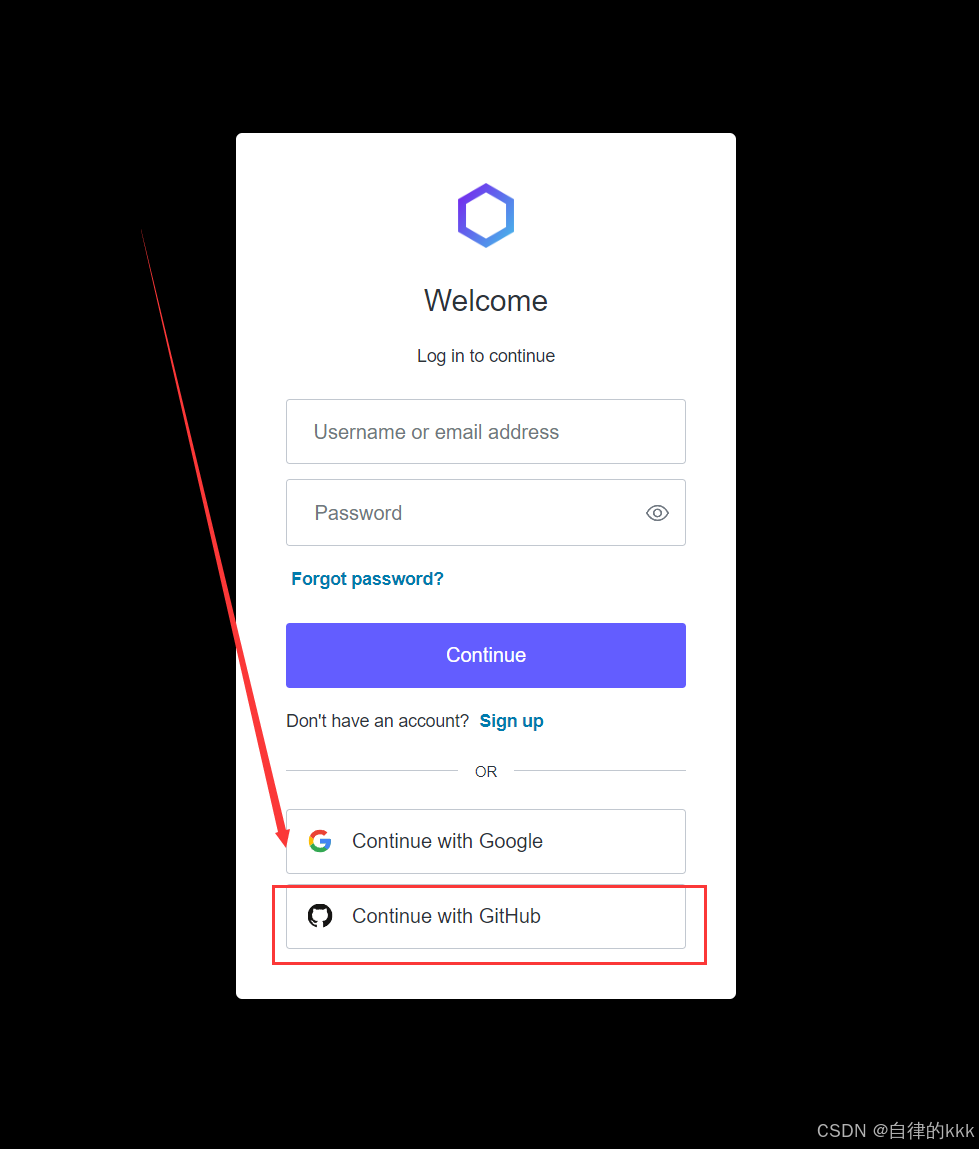
3.选择你的github账号进行登录
4. 获取token
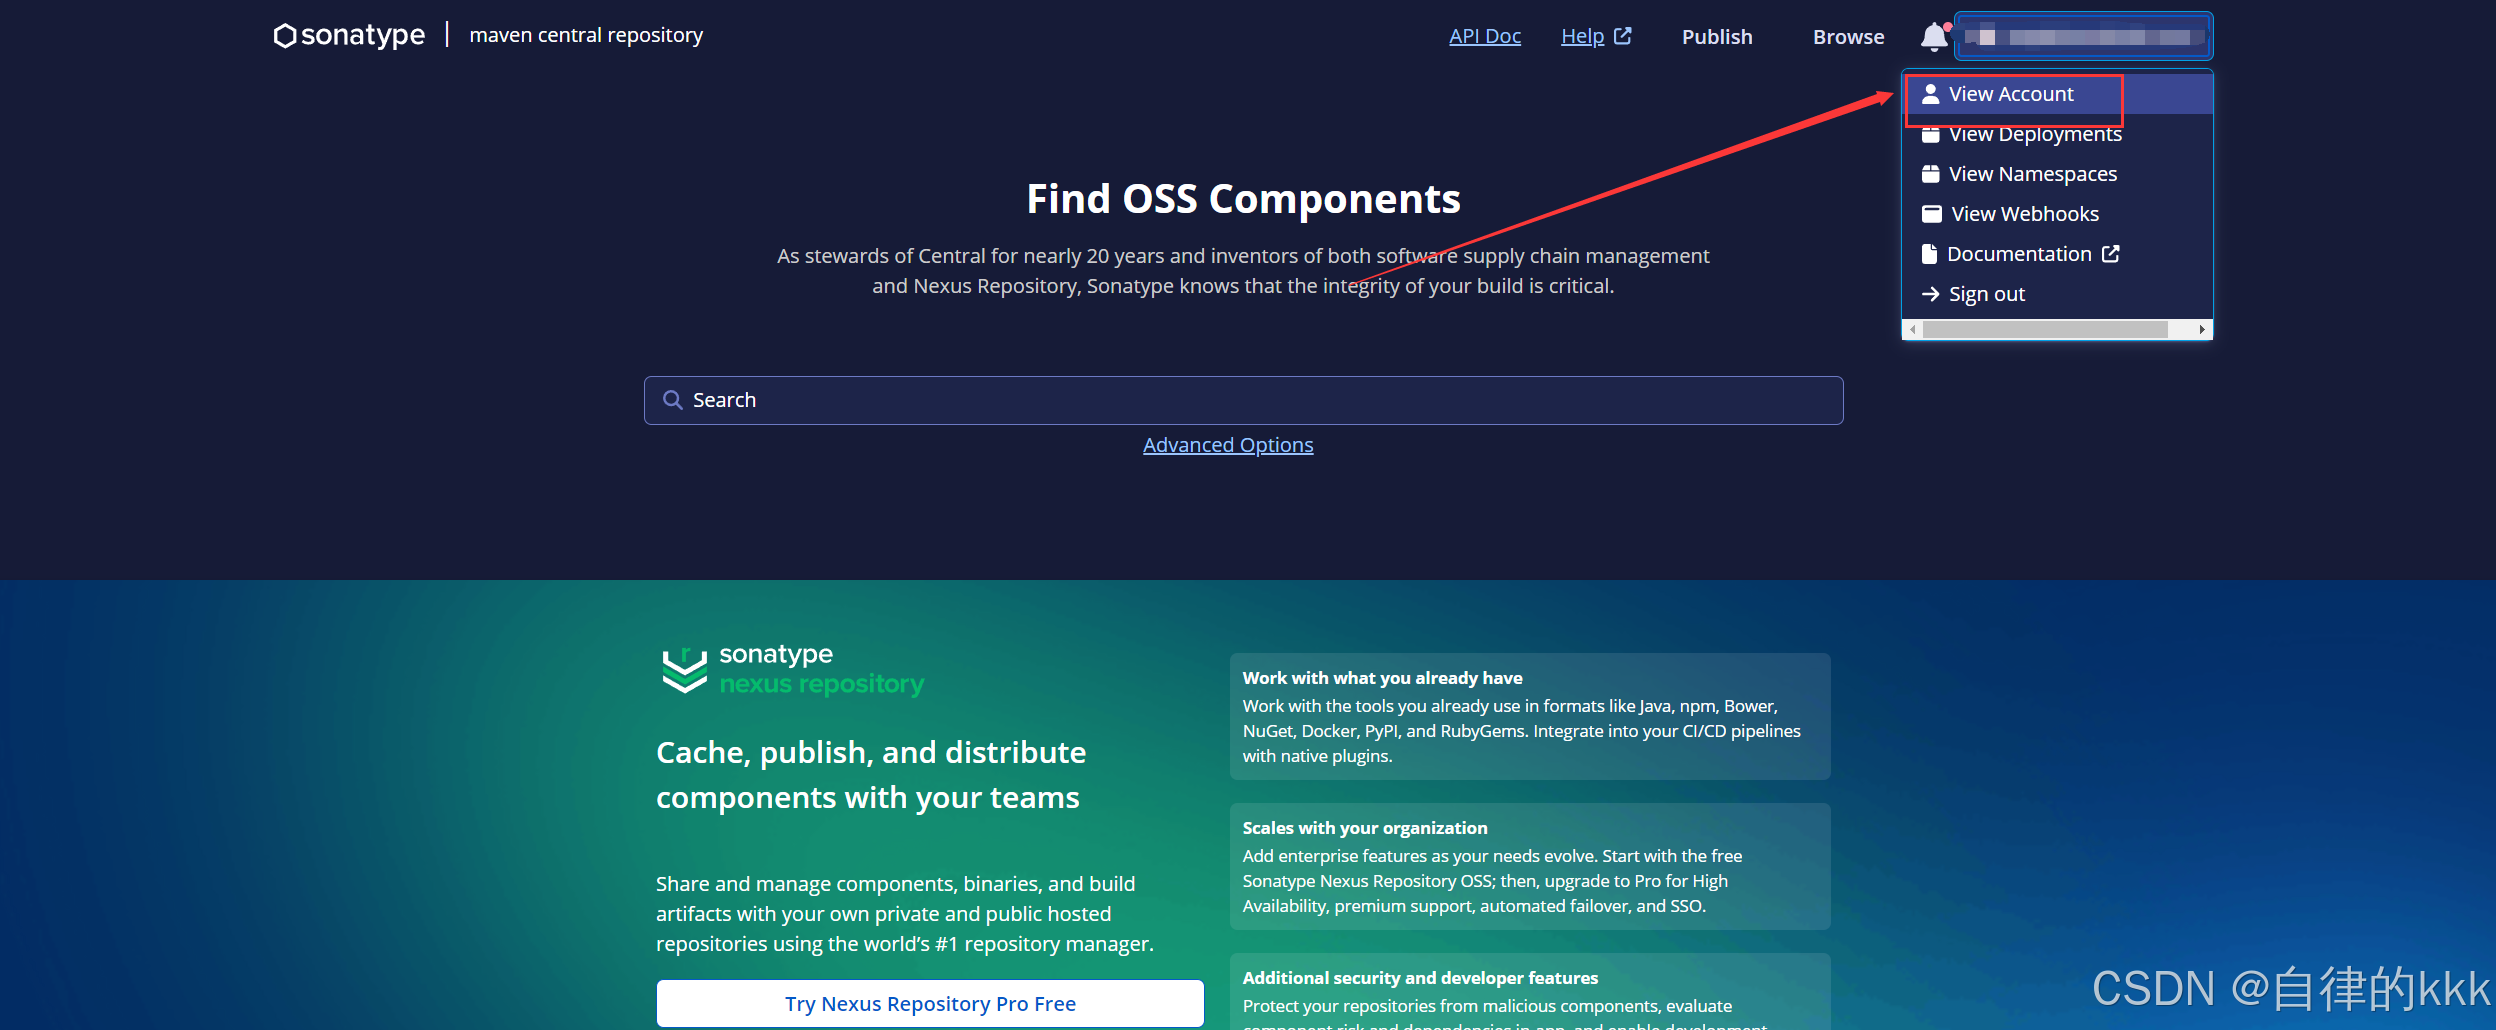
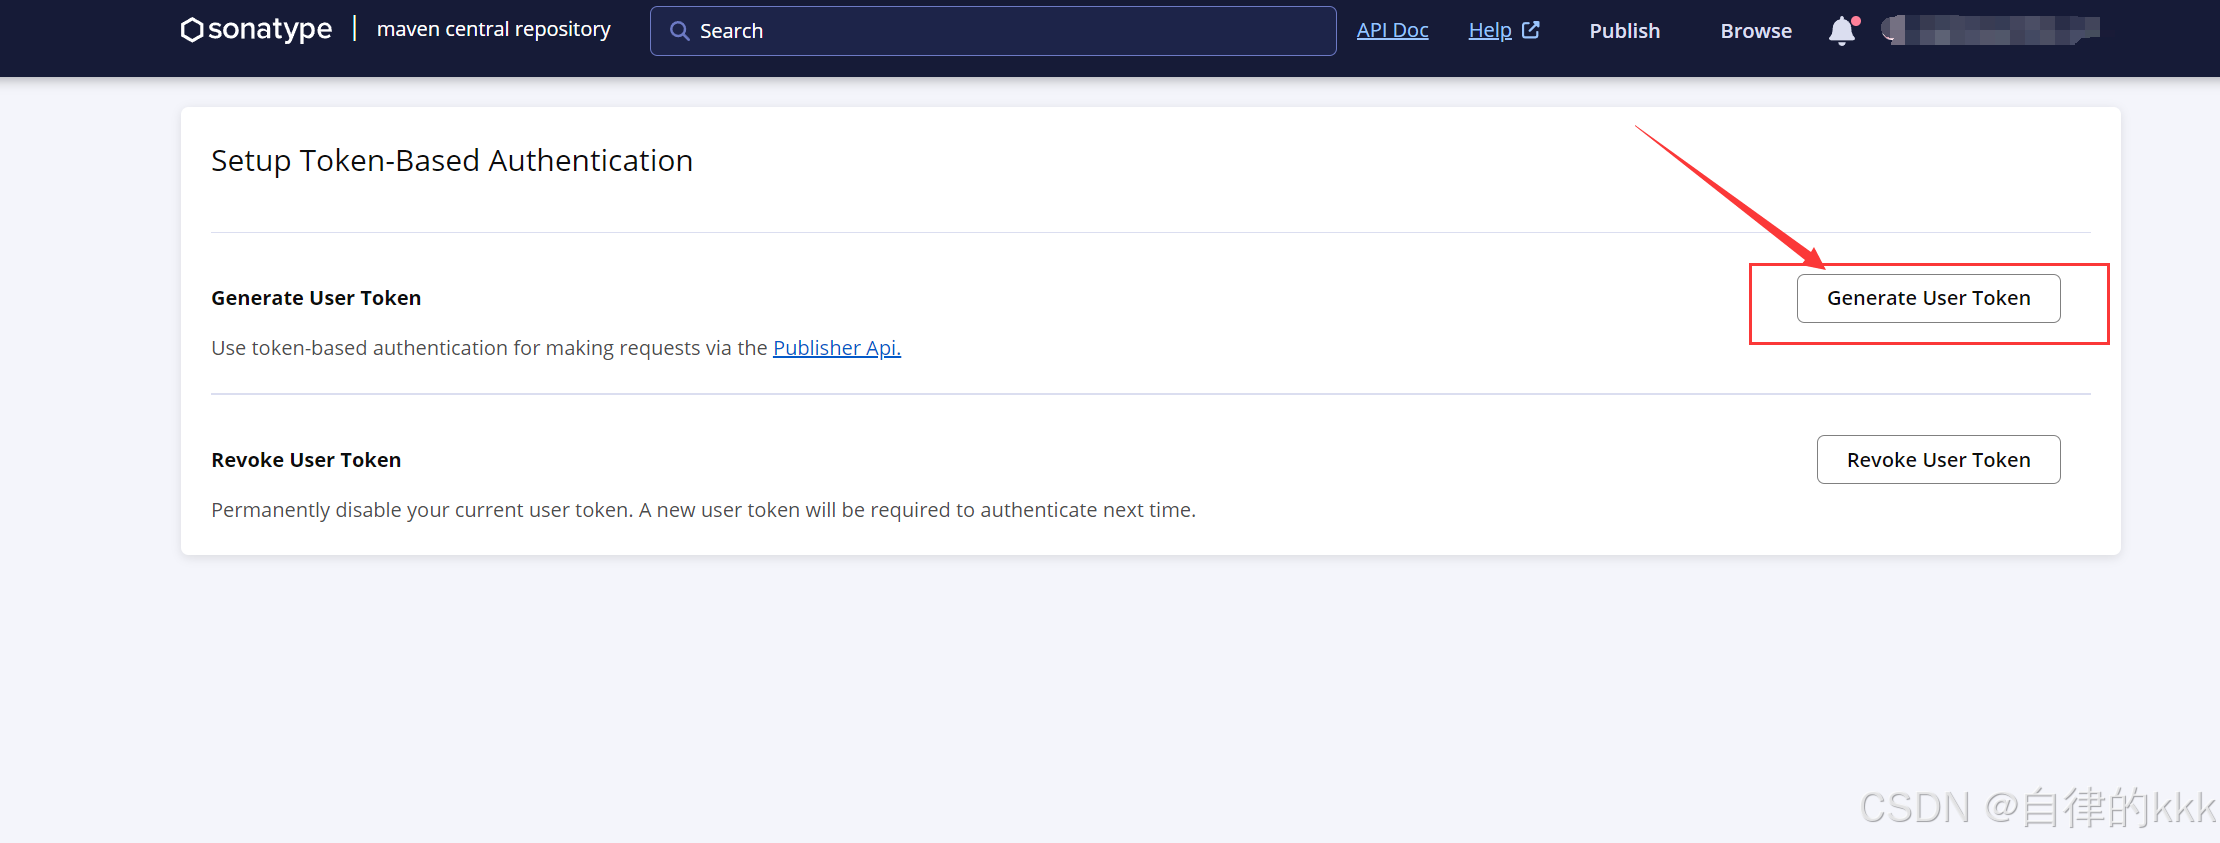
5.复制token
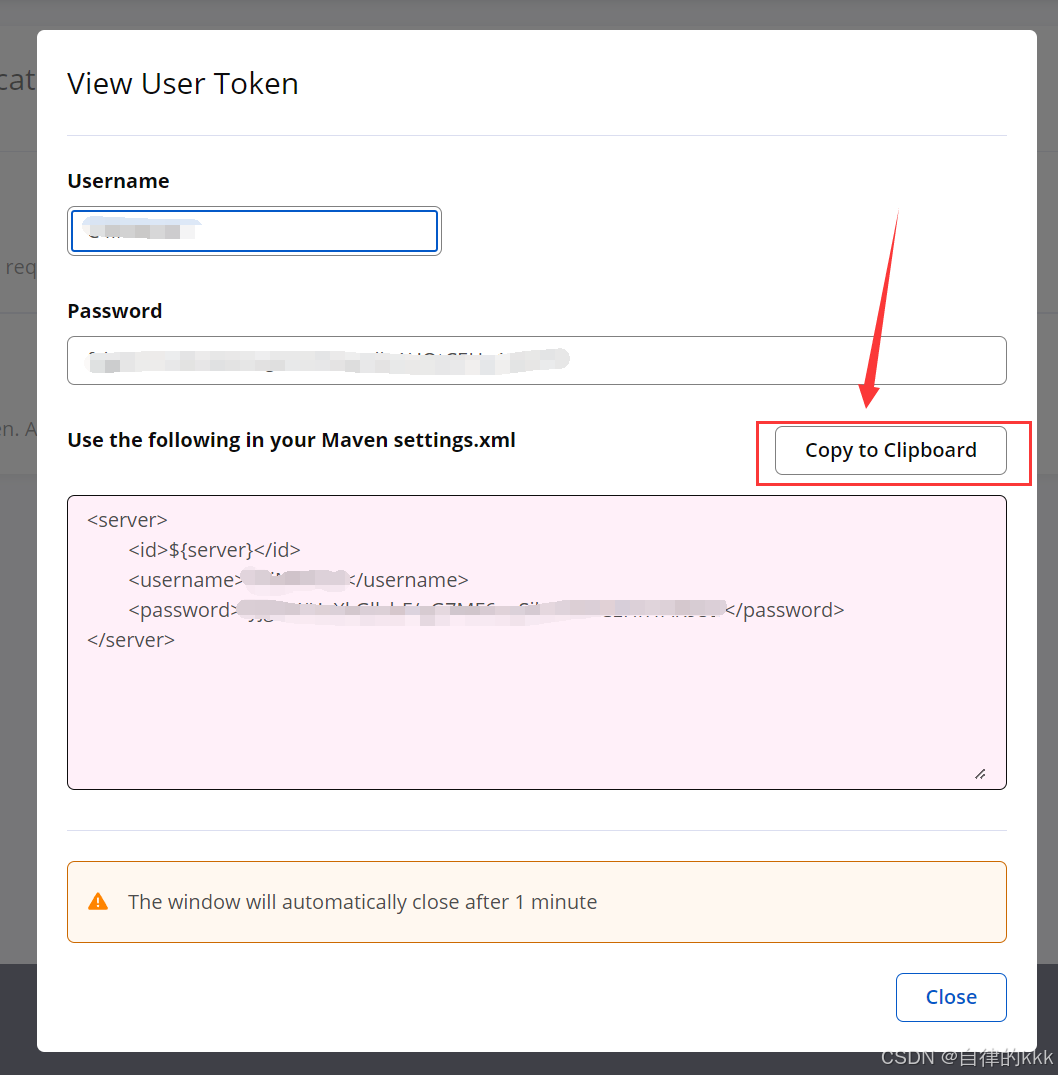
6.打开maven下的setting.xml文件
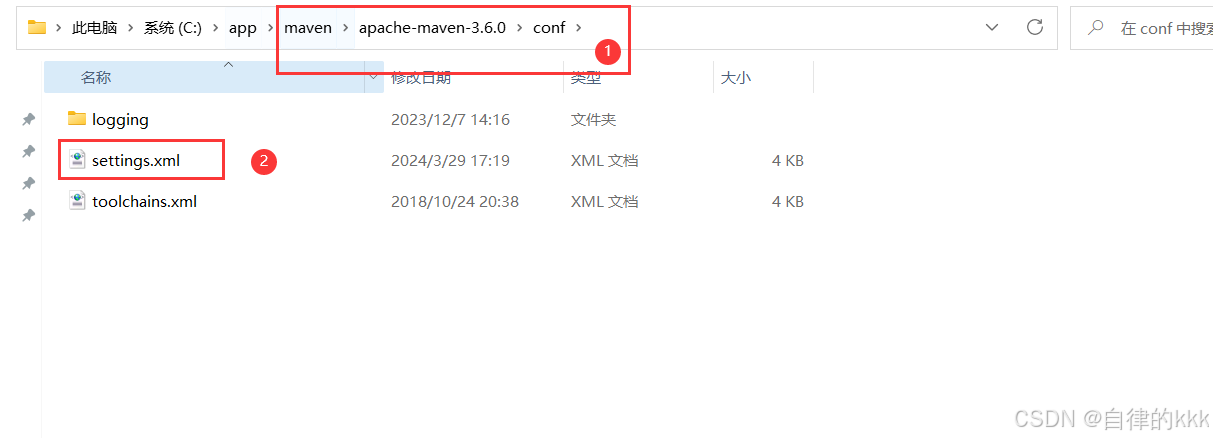
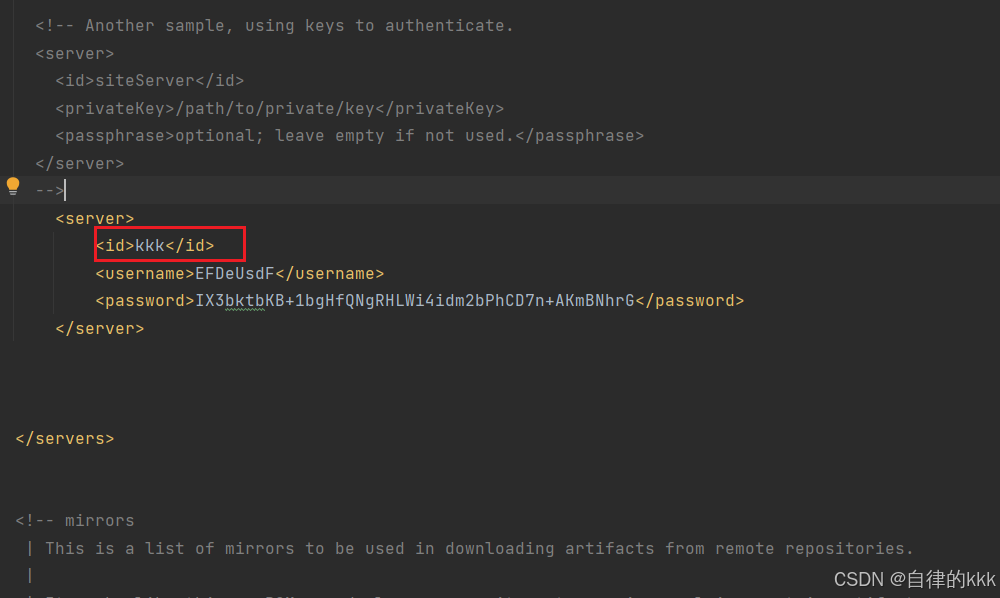
7.将刚刚的token复制到setting.xml文件中,并修改id为你自己的
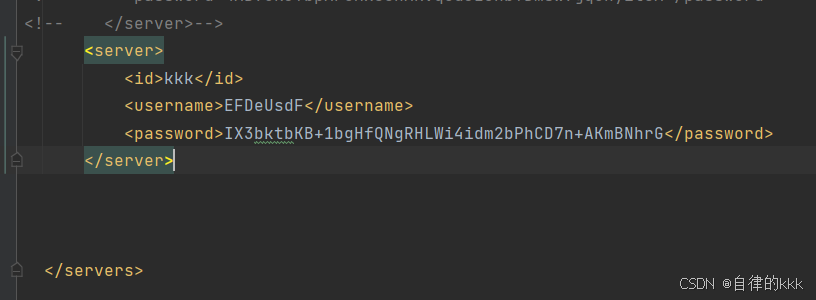
xml
	 <server>
		<!--这里的id随便填一个你自己的id就可以-->
          <id>kkk</id>
          <username>EFDeUsdF</username>
          <password>IX3bktbKB+1bgHfQNgRHLWi4idm2bPhCD7n+AKmBNhrG</password>
      </server>
8. 创建你的maven项目,将下面配置放到pom.xml文件中(主要有三处地方需要修改,里面已标出123,后续会讲)
xml
<?xml version="1.0" encoding="UTF-8"?>
<project xmlns="http://maven.apache.org/POM/4.0.0"
       xmlns:xsi="http://www.w3.org/2001/XMLSchema-instance"
       xsi:schemaLocation="http://maven.apache.org/POM/4.0.0
                           http://maven.apache.org/xsd/maven-4.0.0.xsd">
  <modelVersion>4.0.0</modelVersion>
  <parent>
      <groupId>org.springframework.boot</groupId>
      <artifactId>spring-boot-starter-parent</artifactId>
      <version>2.7.2</version>
      <relativePath/> <!-- lookup parent from repository -->
  </parent>

<!--    1.这里的groupId填写你在maven中央仓库上传地址的命名空间namespace-->
  <groupId>io.github.lonelykkk</groupId>
  <artifactId>remote-client-sdk</artifactId>
  <version>0.0.2</version>
  <name>remote-client-sdk</name>
  <description>第三方接口服务</description>
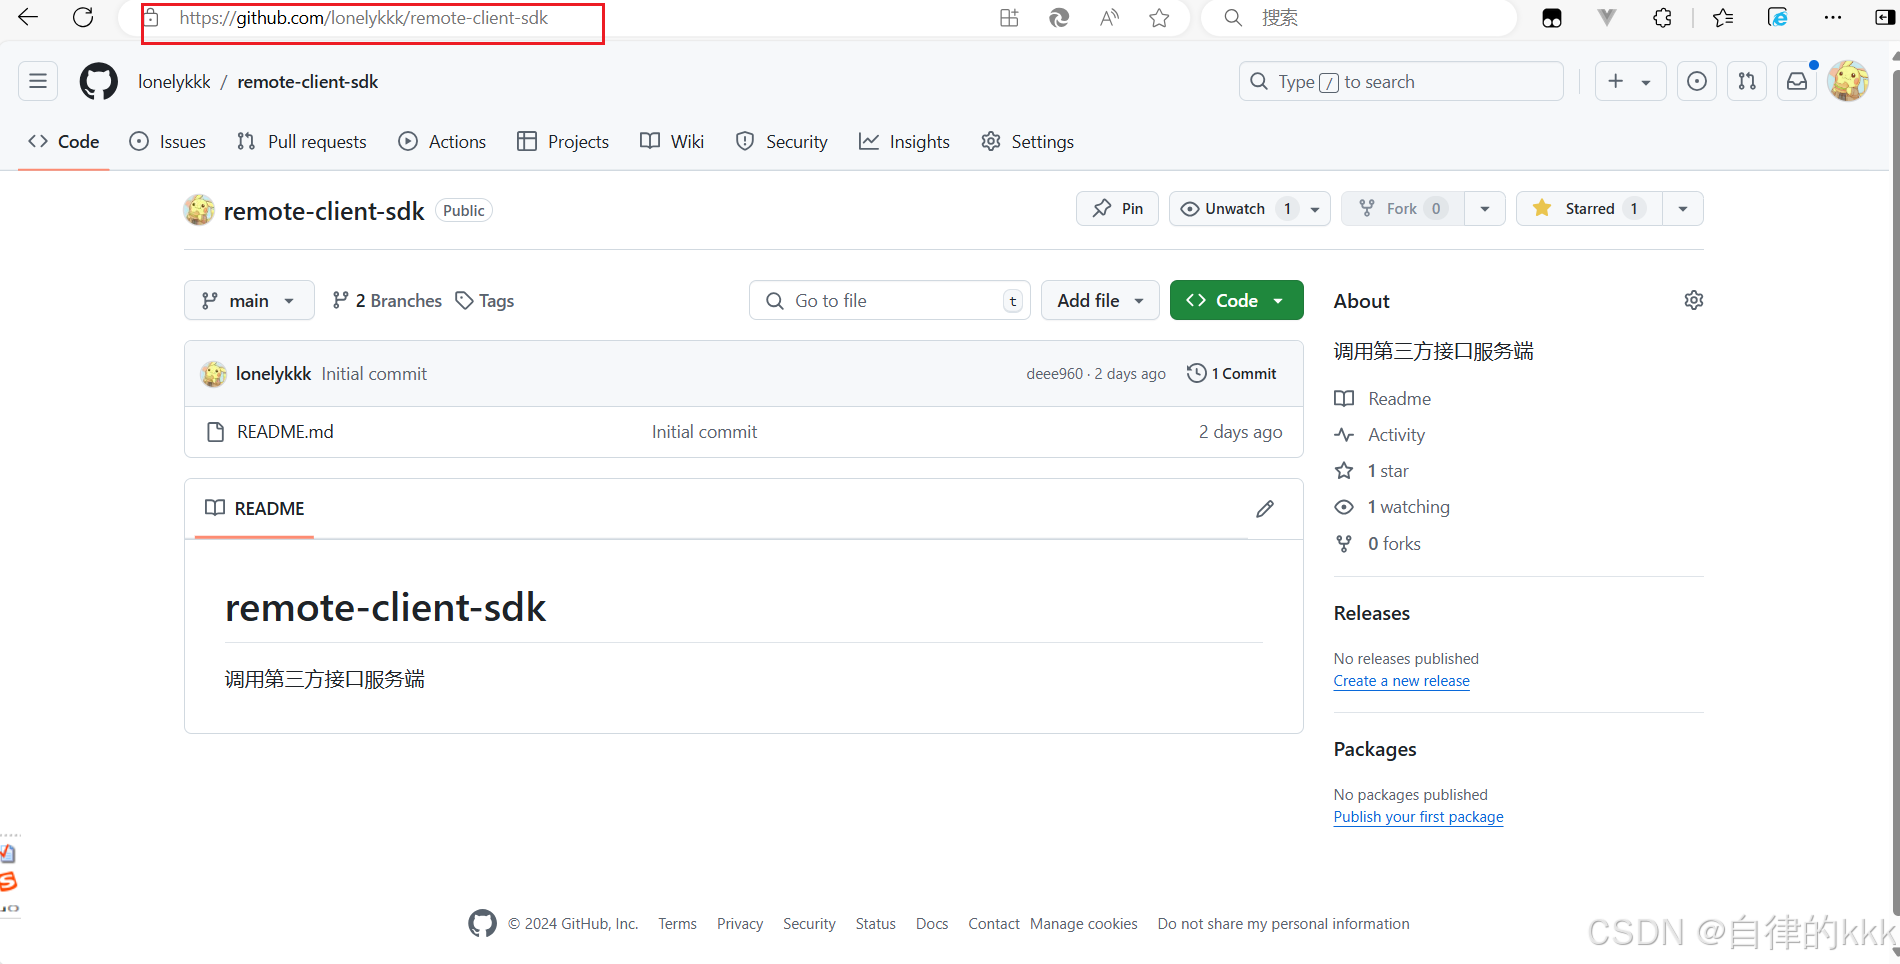
  <url>https://github.com/lonelykkk/remote-client-sdk</url>

  <properties>
      <maven.compiler.source>1.8</maven.compiler.source>
      <maven.compiler.target>1.8</maven.compiler.target>
      <project.build.sourceEncoding>UTF-8</project.build.sourceEncoding>
      <!-- 定义 javadoc 插件版本 -->
      <javadoc.plugin.version>3.4.1</javadoc.plugin.version>
      <!-- 定义 source 插件版本 -->
      <source.plugin.version>3.2.1</source.plugin.version>
  </properties>


  <licenses>
      <license>
          <name>The Apache License, Version 2.0</name>
          <url>http://www.apache.org/licenses/LICENSE-2.0.txt</url>
      </license>
  </licenses>
<!--   2. 此处id和name都填写你刚刚在settings.xml中填写的id就行,qq邮箱填写你自己的,其余不用改动-->
<!--    <id>kkk</id>-->
<!--    <name>kkk</name>-->
  <developers>
      <developer>
          <id>kkk</id>
          <name>kkk</name>
          <email>2765314967@qq.com</email>
          <roles>
              <role>Project Manager</role>
              <role>Architect</role>
          </roles>
      </developer>
  </developers>

  <scm>
      <connection>scm:git:git://github.com/simpligility/ossrh-demo.git</connection>
      <developerConnection>scm:git:ssh://github.com:simpligility/ossrh-demo.git</developerConnection>
      <url>http://github.com/simpligility/ossrh-demo/tree/master</url>
  </scm>

  <!-- 发布地址 -->
  <distributionManagement>
      <snapshotRepository>
          <id>ossrh</id>
          <url>https://s01.oss.sonatype.org/content/repositories/snapshots</url>
      </snapshotRepository>
      <repository>
          <id>ossrh</id>
          <url>https://s01.oss.sonatype.org/service/local/staging/deploy/maven2</url>
      </repository>
  </distributionManagement>


  <build>
      <plugins>
          <plugin>
              <groupId>org.apache.maven.plugins</groupId>
              <artifactId>maven-compiler-plugin</artifactId>
              <version>3.10.1</version>
              <configuration>
                  <source>1.8</source>
                  <target>1.8</target>
              </configuration>
          </plugin>
          <!--   central发布插件    -->
          <plugin>
              <groupId>org.sonatype.central</groupId>
              <artifactId>central-publishing-maven-plugin</artifactId>
              <version>0.4.0</version>
              <extensions>true</extensions>
              <configuration>
                  <publishingServerId>kkk</publishingServerId>
                  <tokenAuth>true</tokenAuth>
              </configuration>
          </plugin>
          <!--   source源码插件 -->
          <plugin>
              <groupId>org.apache.maven.plugins</groupId>
              <artifactId>maven-source-plugin</artifactId>
              <version>2.2.1</version>
              <executions>
                  <execution>
                      <id>attach-sources</id>
                      <goals>
                          <goal>jar-no-fork</goal>
                      </goals>
                  </execution>
              </executions>
          </plugin>
          <!--   javadoc插件 -->
          <plugin>
              <groupId>org.apache.maven.plugins</groupId>
              <artifactId>maven-javadoc-plugin</artifactId>
              <version>3.3.1</version>
              <executions>
                  <execution>
                      <id>attach-javadocs</id>
                      <goals>
                          <goal>jar</goal>
                      </goals>
                  </execution>
              </executions>
              <configuration>
                  <source>1.8</source>
                  <encoding>UTF-8</encoding>
                  <failOnError>false</failOnError>
              </configuration>
          </plugin>
          <plugin>
              <groupId>org.apache.maven.plugins</groupId>
              <artifactId>maven-gpg-plugin</artifactId>
              <version>1.5</version>
              <configuration>
              <!-- 3.此处executable填写你下载的路径
                  keyname填写你根据gpg工具生成的秘钥id-->
                  <executable>F:\gpg\GnuPG\bin\gpg.exe</executable>
                  <keyname>6B5FEF6DC335F0A7848ACEC2EA43070D13A4DFDA</keyname>
              </configuration>
              <executions>
                  <execution>
                      <id>sign-artifacts</id>
                      <phase>verify</phase>
                      <goals>
                          <goal>sign</goal>
                      </goals>
                  </execution>
              </executions>
          </plugin>

      </plugins>
  </build>

</project>
8.1 命名空间
在此处添加你的命名空间,并将其修改至上述pom.xml文件中去,如下图:


8.2 修改你的id
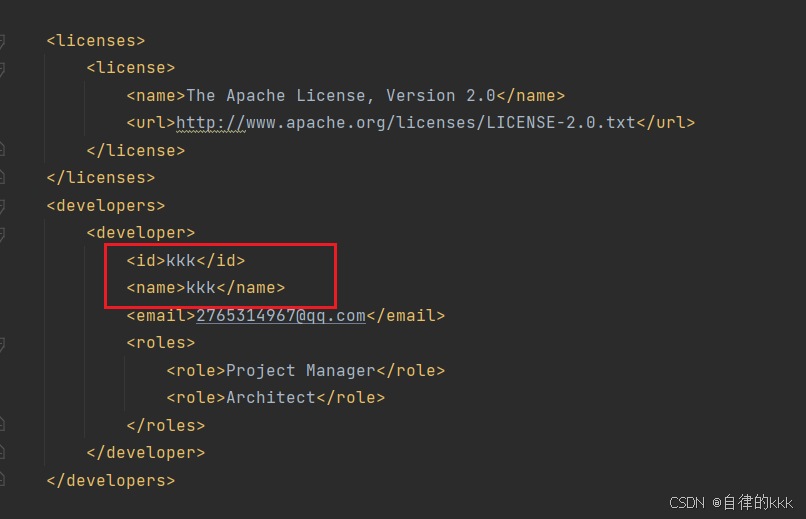
将此处的id和你的name都修改为你刚刚在settings.xml中填写的id就行,如下图
8.3 修改你的仓库地址

此处name填写你的项目名,description填写的项目描述,url填写你的仓库地址就可以了。
如我只需要创建仓库后填写如下图的链接就可以了。
8.4 修改你的gpg文件地址和秘钥id(在此之前需要先下载GPG签名验证工具,后面讲,先记住这里等会需要修改)
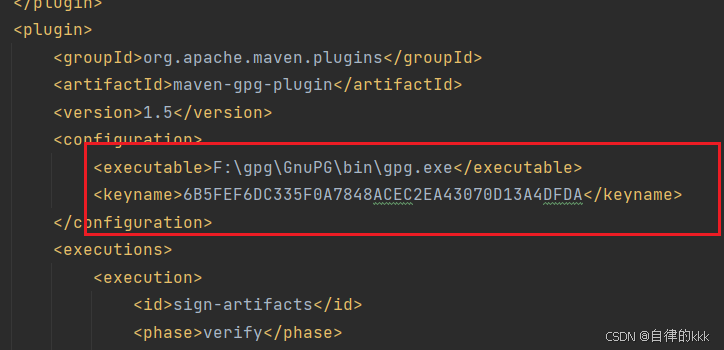
此处executable填写你的gpg文件路径,只需要修改F:\gpg\GnuPG这一段就好了,后面\bin\gpg.exe是一样的。
9. 下载GPG签名认证工具
下载地址 https://gpg4win.org/download.html

- 点击这里无脑下载安装就行,确定你的下载路径
如果出现(没有错误直接跳过就可以了)
安装失败GPG界面服务器错误-Kleopatra
无法初始化 Kleopatra Windows 资源管理器模块。
给出的错误是:无法确定 GnuPG 的主目录。请指定
GNUPGHOME环境变量,
这可能意味着您的安装有问题。:
尝试重新安装或联系您的管理
员以获得支持。
您可以尝试继续使用 Kleopatra,但可能还有其他问题类似这种问题(如下图),
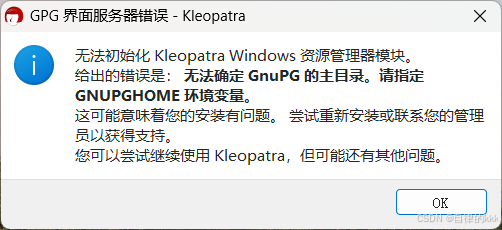
基本说明你的系统有问题,建议换一个用户登录,没有的可以以管理员身份注册一个用户

9.1 打开你的控制面板生成签名
- 确保gpg.exe已添加到系统路径中。可以通过在命令行中运行以下命令确认是否安装成功:
bash
gpg --version如果显示版本信息,说明安装成功。
- 输入以下命令以启动生成密钥的过程:
bash
gpg --full-generate-key- 按照系统提示完成密钥生成过程。以下是几个主要步骤:
- 选择密钥类型:通常选择默认的(1) RSA and RSA。按回车键继续。
- 设置密钥长度:建议选择较高的密钥长度(如4096位),以提高安全性。
- 设置密钥有效期:可以设置密钥的有效期(例如1年)。输入0表示永不过期。
- 输入身份信息:按提示输入用户ID,包括姓名、电子邮件地址和可选的备注信息。
- 确认信息:确认信息无误后,按回车键继续。
- 设置密码:系统会提示输入一个密码,用于保护生成的密钥。
- 密钥生成完成后,GPG会显示生成的密钥ID和相关信息。
- 查看生成的密钥
- 输入以下命令可以查看所有已生成的公钥和私钥:
bash
gpg --list-keys        # 查看公钥
gpg --list-secret-keys # 查看私钥- 导出公钥和私钥
若需要备份或导出密钥,可以使用以下命令:
- 导出公钥:
bash
gpg --export -a "你的邮箱或用户名" > public_key.asc- 导出私钥:
bash
gpg --export-secret-keys -a "你的邮箱或用户名" > private_key.asc完成这些步骤后,你就成功在Windows控制台中生成了GPG签名密钥。
9.2 把你刚刚生成的keyId修改到上述提到的pom.xml文件中

此处填写你的gpg文件地址以及刚刚的秘钥Id.
10. maven打包发布
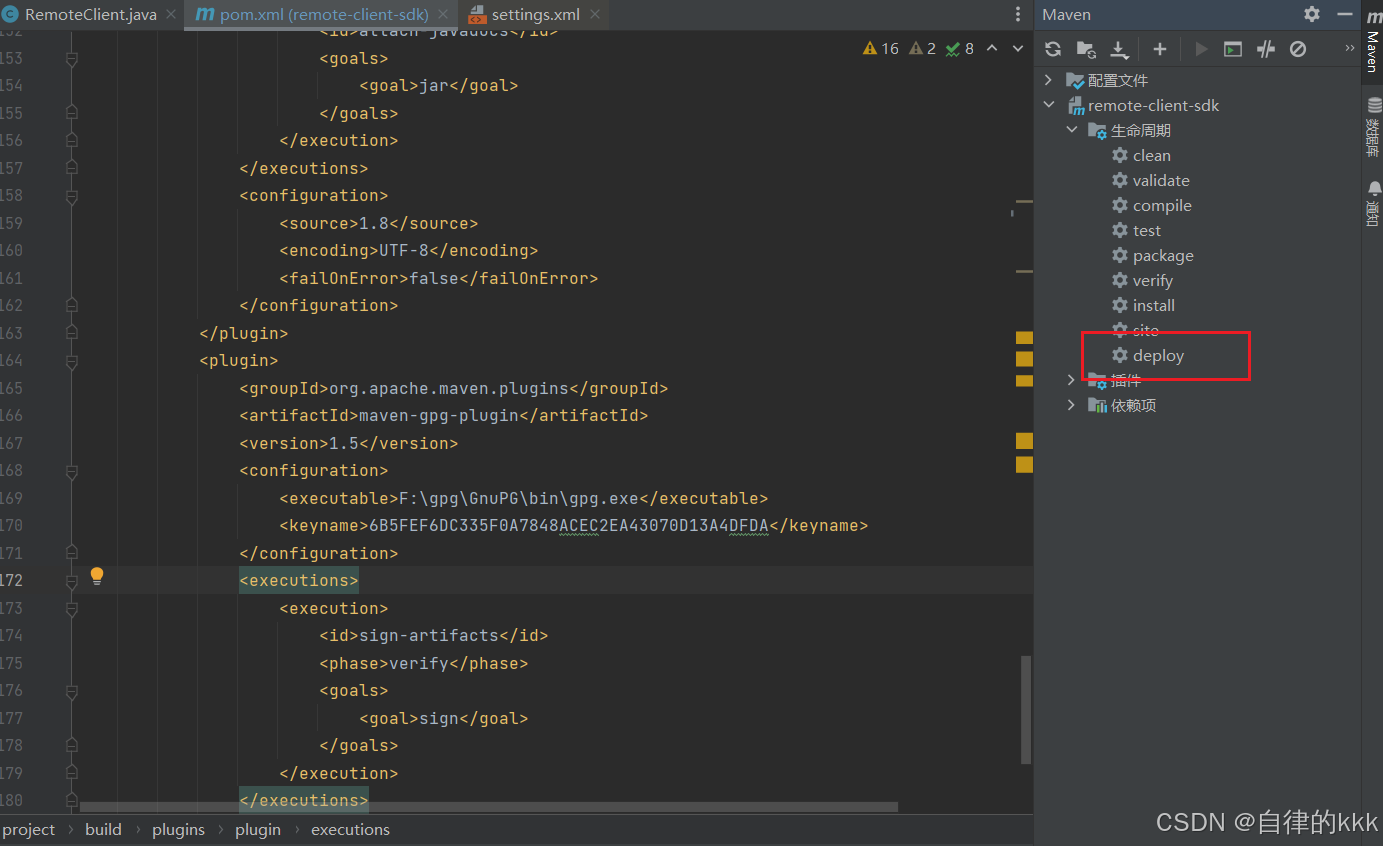
配置好maven后使用idea的maven工具进行deploy工作,这个时候回弹出让你输入gpg密码(只有第一次进行这个操作回有,后面就不需要输入密码了),只要输入你刚刚生成签名时设置的密码就行了。
11. maven发布
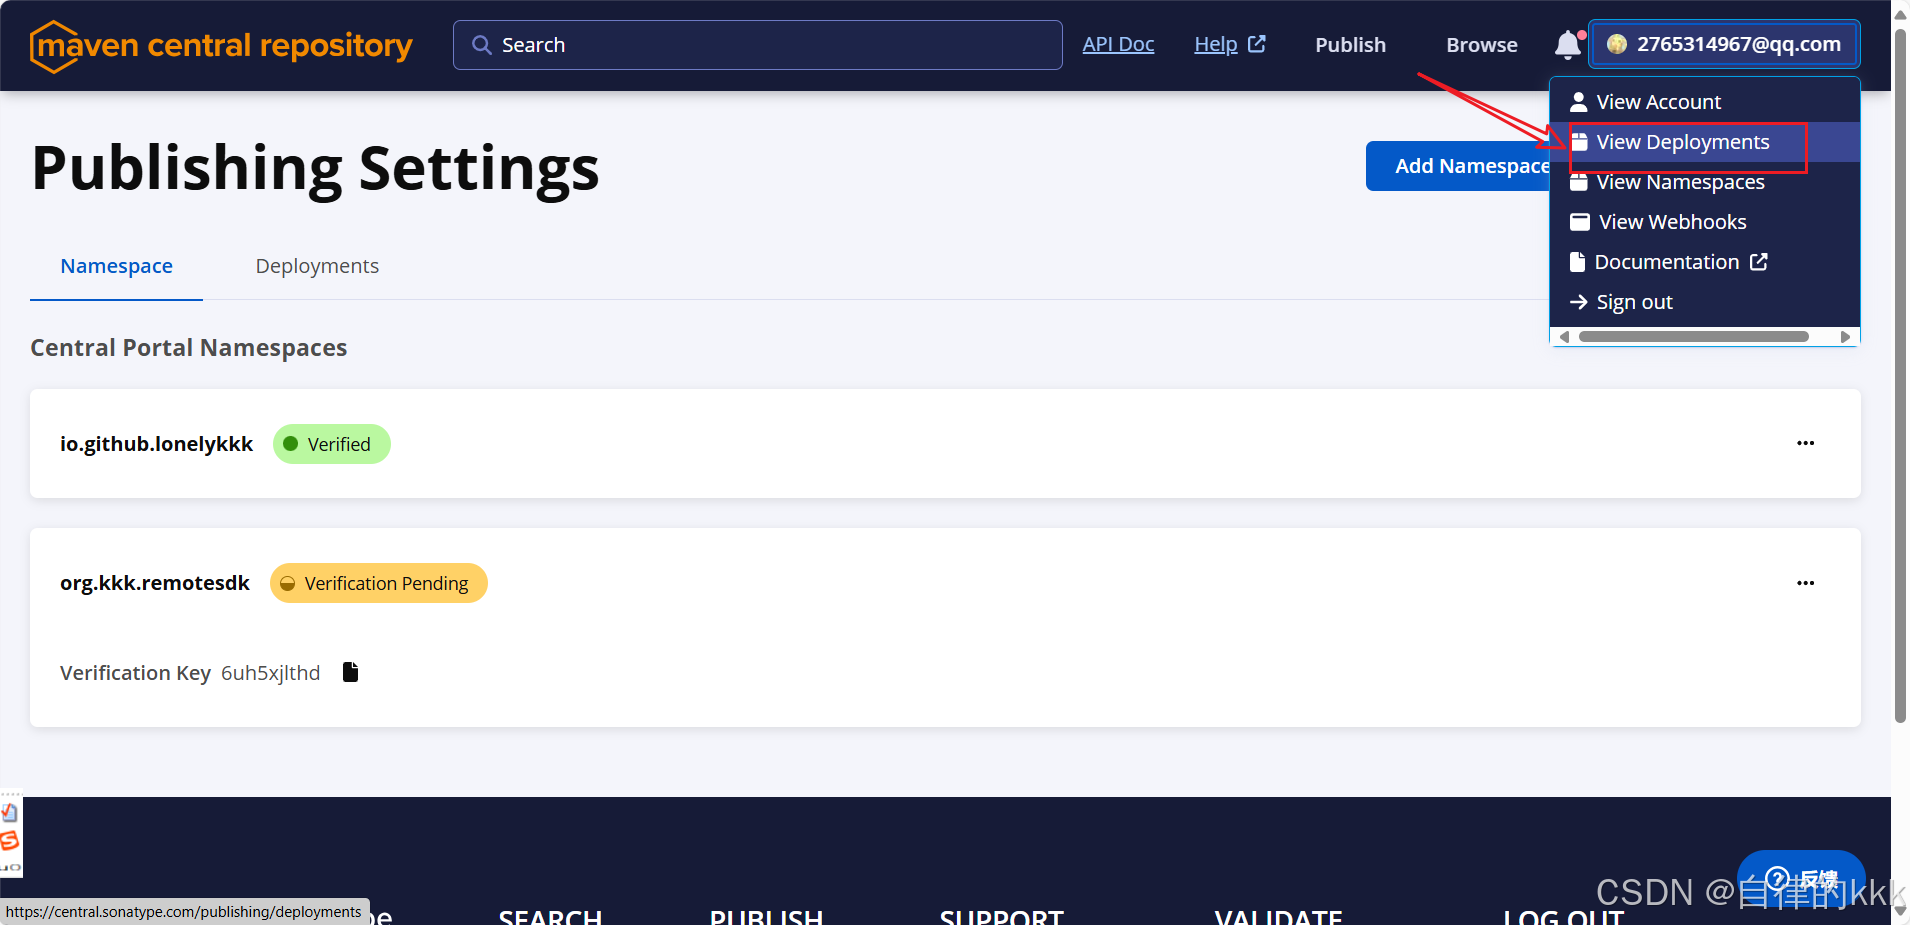
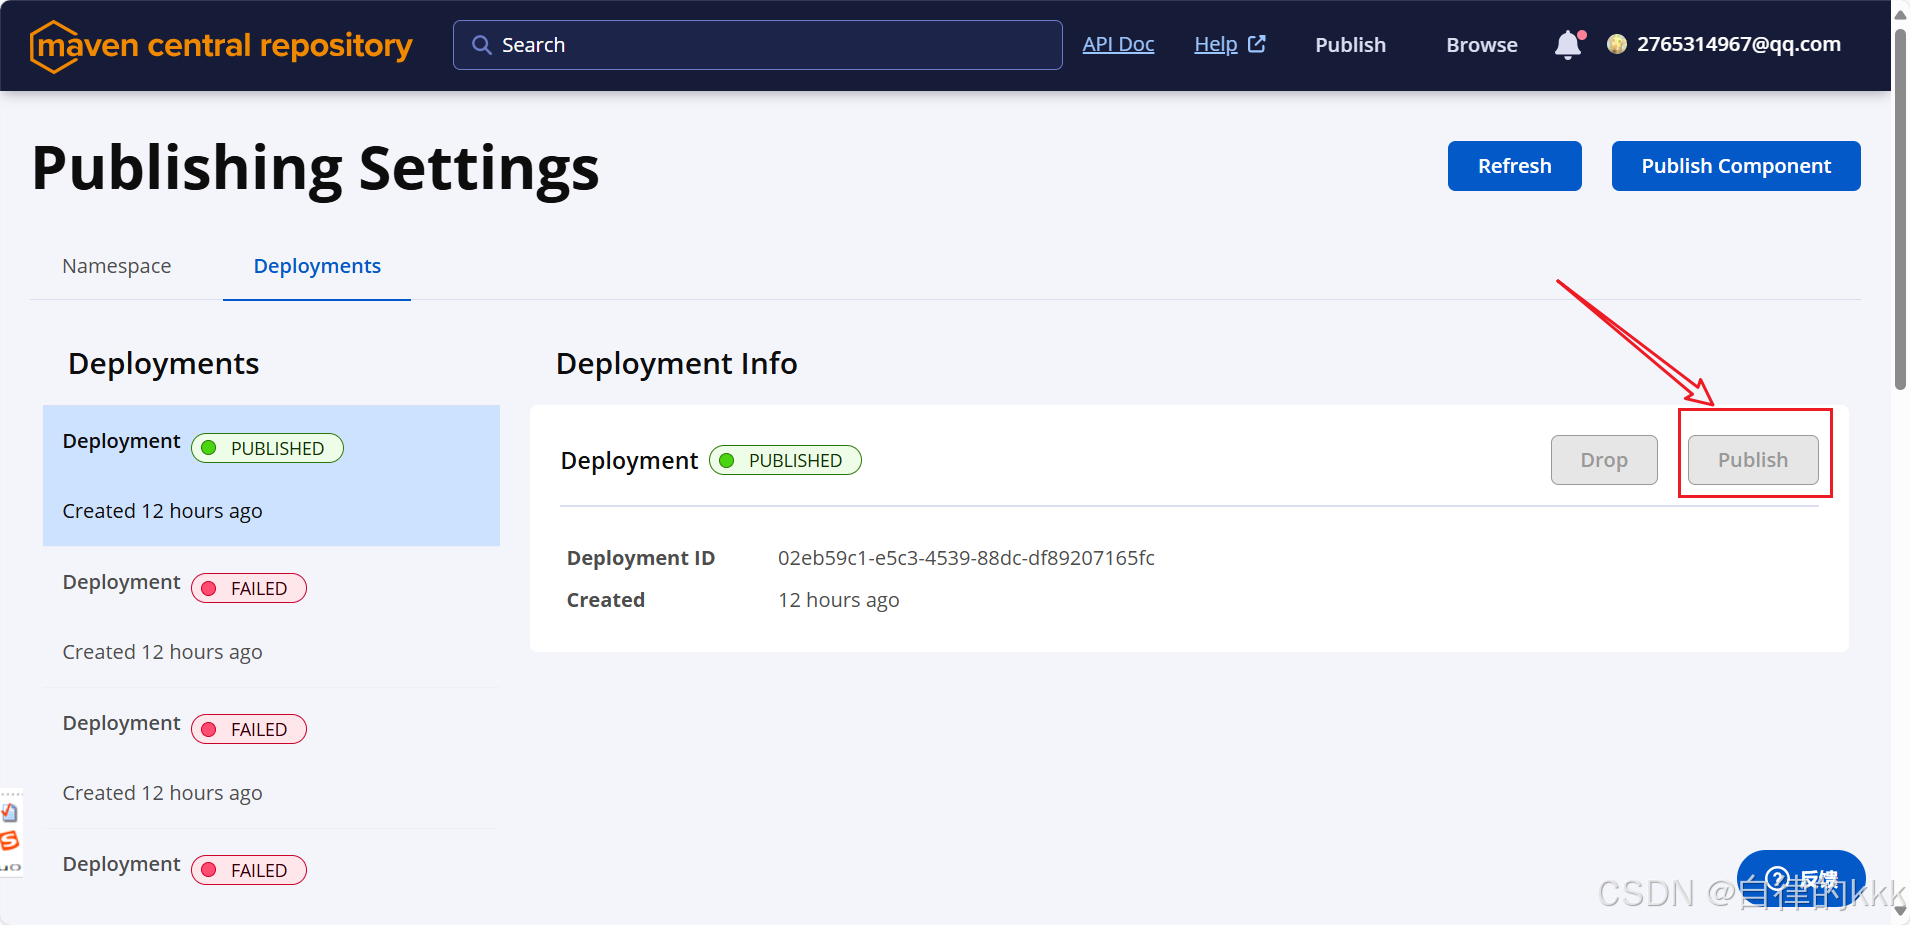
上传成功后需要再maven中央仓库手动进行发布,如下图进行发布,发布成功后别人就可以用你的maven了
12. 导入你的maven坐标

这就是你的maven坐标,导入后刷新就可以使用了
xml
<dependency>
      <groupId>io.github.lonelykkk</groupId>
      <artifactId>remote-client-sdk</artifactId>
      <version>0.0.2</version>
 </dependency>
给大家分享一下我刚制作的maven坐标(第三方接口调用服务接口)
github地址 https://github.com/lonelykkk/remote-client-sdk/tree/master