文章目录
-
- 一、实验环境说明
- 二、前期准备工作
-
- [2.1 安装 Python 3.9+ 和 pip](#2.1 安装 Python 3.9+ 和 pip)
- [2.2 安装 Poetry](#2.2 安装 Poetry)
- [2.3 安装并启动Docker(可选)](#2.3 安装并启动Docker(可选))
- [2.4 安装 MySQL 客户端](#2.4 安装 MySQL 客户端)
- [2.5 注册阿里云百炼账号并开通服务获取 API Key](#2.5 注册阿里云百炼账号并开通服务获取 API Key)
- 三、构建智能问答小助手
-
- [3.1 部署 OceanBase 集群](#3.1 部署 OceanBase 集群)
-
- [3.1.1 方式一:使用 OBCloud Database 免费试用版](#3.1.1 方式一:使用 OBCloud Database 免费试用版)
- [3.1.2 方式二:使用 Docker 部署 OceanBase 数据库](#3.1.2 方式二:使用 Docker 部署 OceanBase 数据库)
- [3.2 克隆代码仓库至本地](#3.2 克隆代码仓库至本地)
- [3.3 安装依赖项](#3.3 安装依赖项)
- [3.4 设置环境变量](#3.4 设置环境变量)
- [3.5 测试数据库连通性](#3.5 测试数据库连通性)
- [3.6 准备文档数据](#3.6 准备文档数据)
- [3.7 启动 Chat UI](#3.7 启动 Chat UI)
- [3.8 报错排查](#3.8 报错排查)
- 四、参考链接
一、实验环境说明
| 实例信息 | 实例参数 | 备注 |
|---|---|---|
| 操作系统 | Ubuntu 24.04.1 LTS | |
| 系统内核 | Linux 6.8.0-1016-aws | |
| 实例大小 | m5.2xlarge | |
| vCPU/内存 (GiB) | 8C/32G |

二、前期准备工作
2.1 安装 Python 3.9+ 和 pip
bash
root@oceanbase:~# python3 --version
Python 3.12.3

root@oceanbase:~# pip3 --version
pip 24.0 from /usr/lib/python3/dist-packages/pip (python 3.12)
2.2 安装 Poetry
root@oceanbase:~# sudo python3 -m pip install poetry --break-system-packages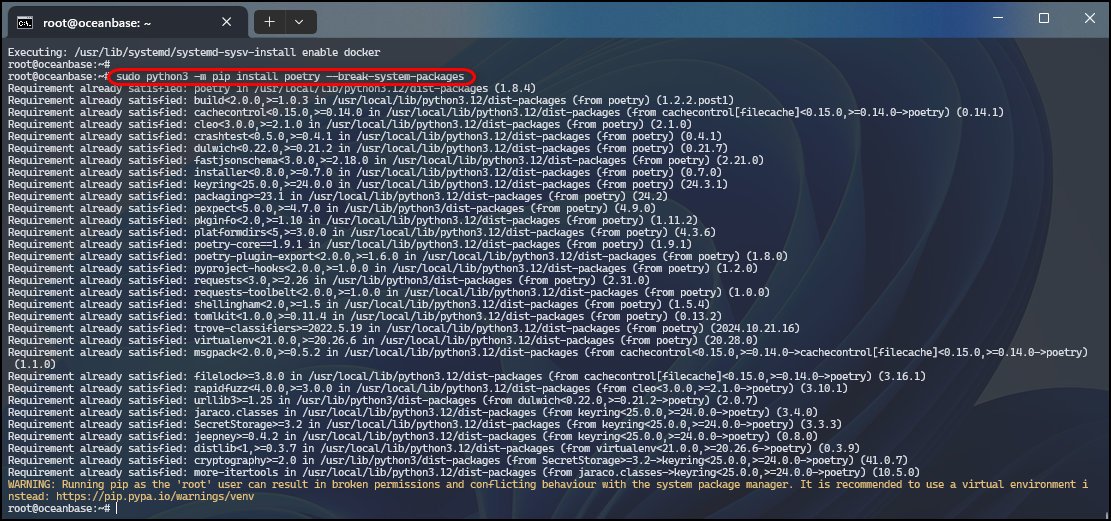
2.3 安装并启动Docker(可选)
说明:若不使用下文
方式二:使用 Docker 部署 OceanBase 数据库,部署oceanbase集群,该步骤可省略。
bash
root@oceanbase:~# apt-get install docker-ce
Reading package lists... Done
Building dependency tree... Done
Reading state information... Done
docker-ce is already the newest version (5:27.3.1-1~ubuntu.24.04~noble).
0 upgraded, 0 newly installed, 0 to remove and 26 not upgraded.

root@oceanbase:~# systemctl start docker && systemctl enable docker
Synchronizing state of docker.service with SysV service script with /usr/lib/systemd/systemd-sysv-install.
Executing: /usr/lib/systemd/systemd-sysv-install enable docker
root@oceanbase:~# systemctl status docker
2.4 安装 MySQL 客户端
bash
root@oceanbase:~# apt-get install -y mysql-client
Reading package lists... Done
Building dependency tree... Done
Reading state information... Done
mysql-client is already the newest version (8.0.40-0ubuntu0.24.04.1).
0 upgraded, 0 newly installed, 0 to remove and 26 not upgraded.
2.5 注册阿里云百炼账号并开通服务获取 API Key
注册链接🔗:https://bailian.console.aliyun.com/
注册完阿里云百炼账号后,点击
开通服务。
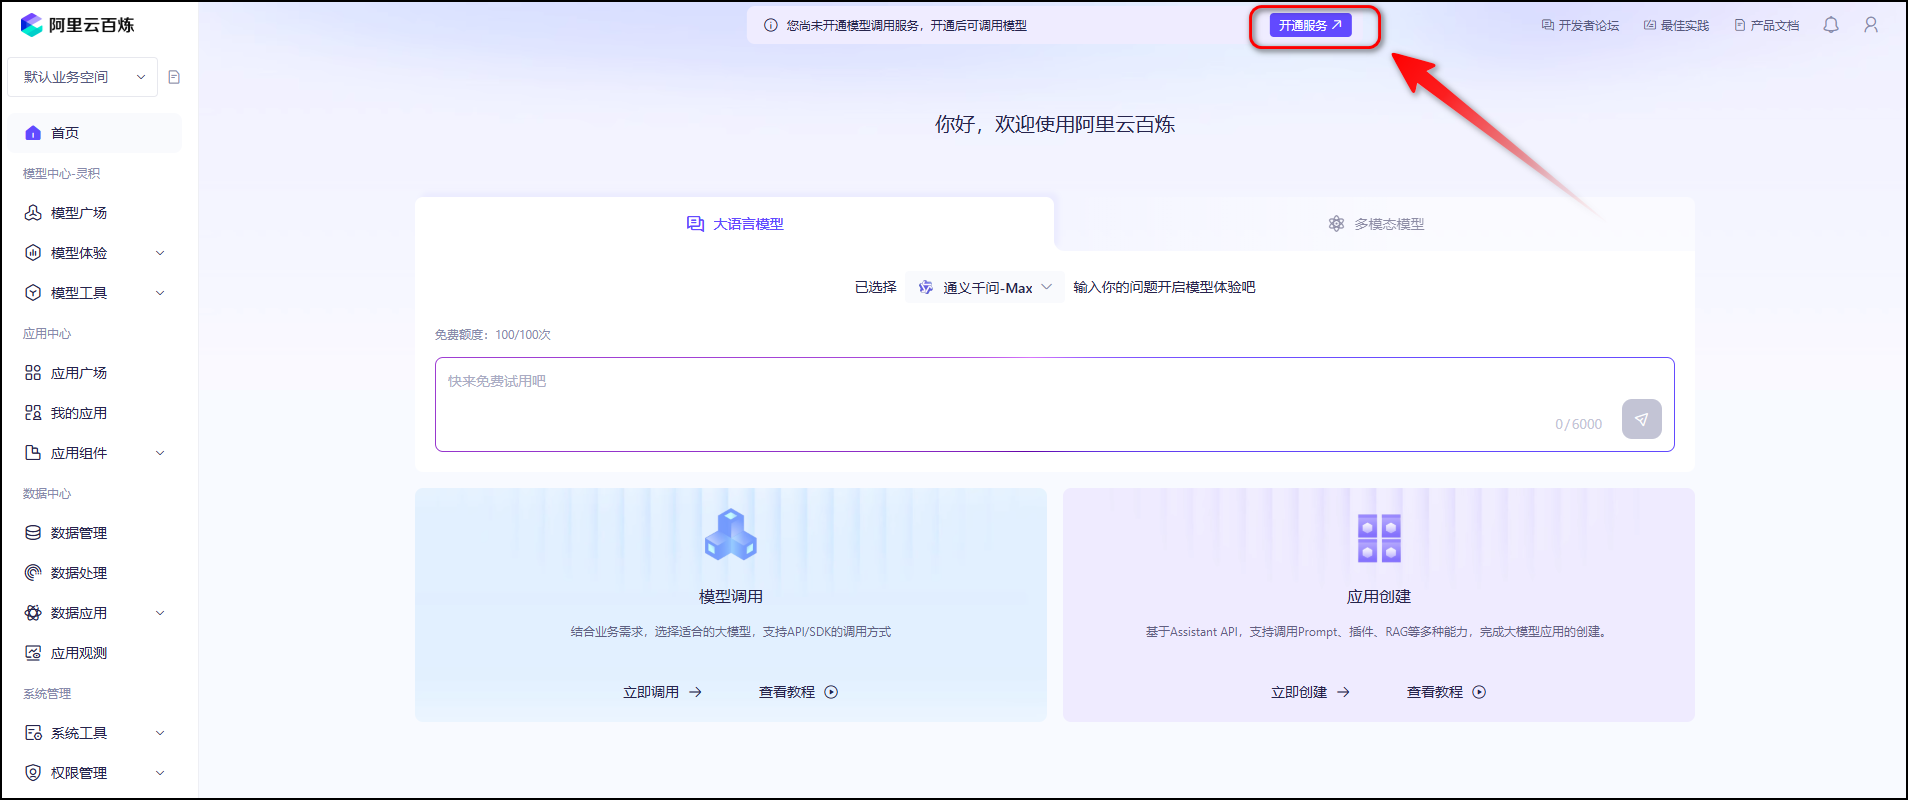
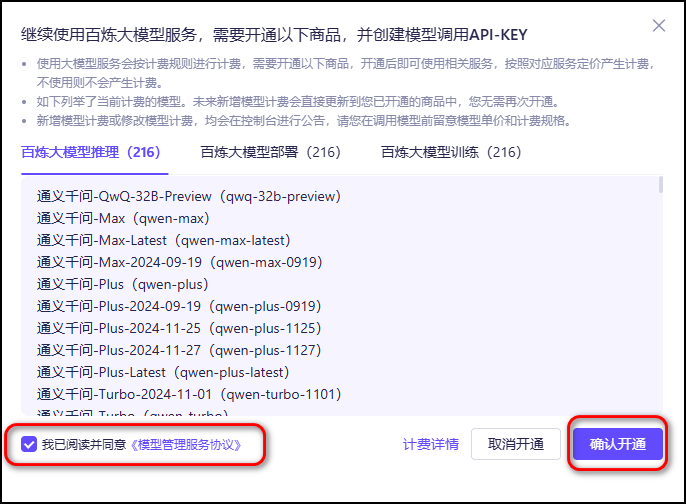
点击
我已阅读并同意《模型管理服务协议》
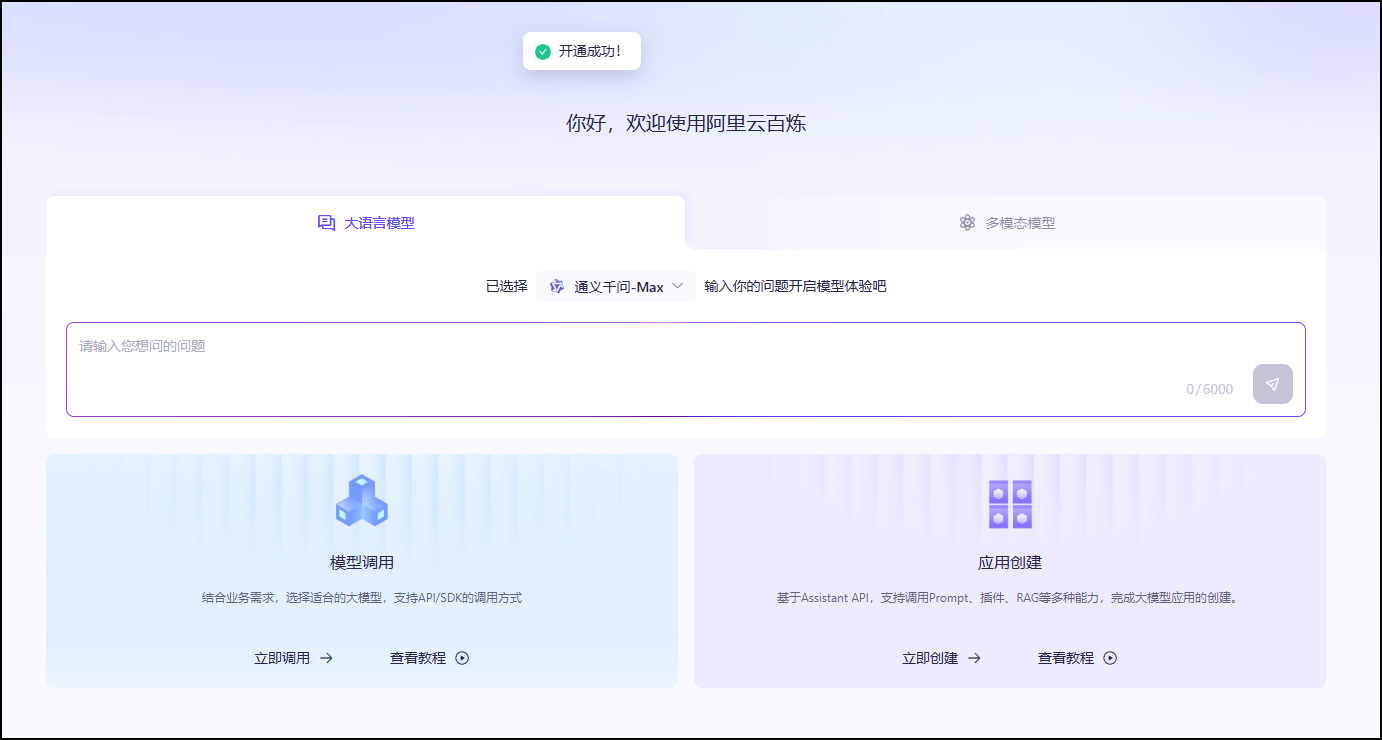
提示开通成功。
接下来,我们获取API-KEY。
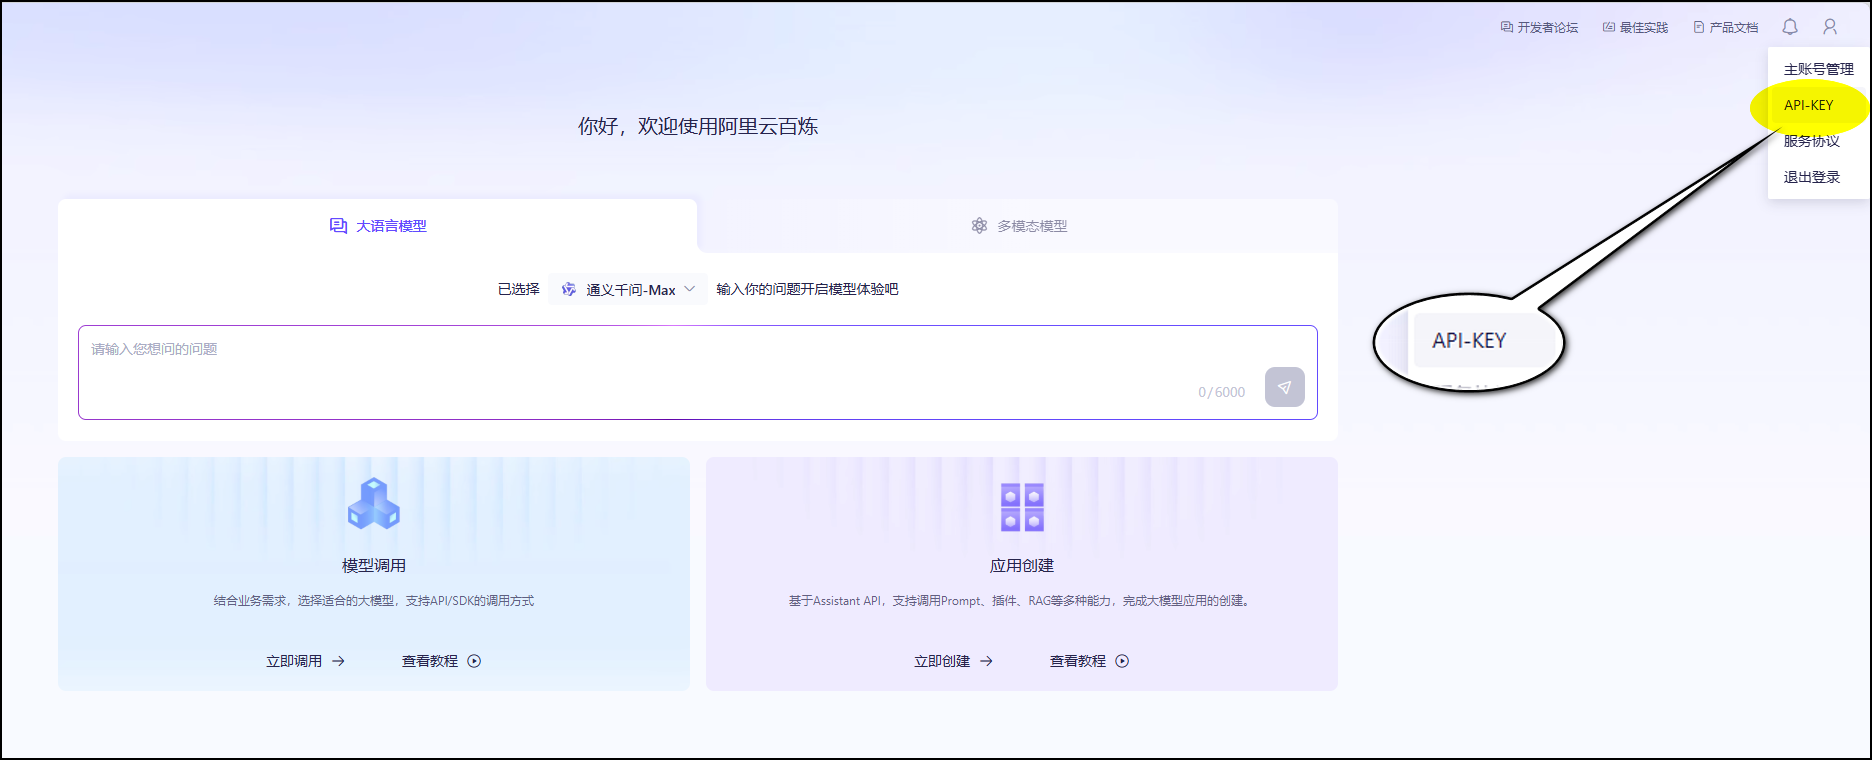
创建API KEY。

我的API-KEY
bash
sk-xxxxxxxxxxxxxxxxxxxxxxxxx记录并保存下来。

以上步骤完成后,接下来进入正式的构建只能文档小助手环节。
三、构建智能问答小助手
3.1 部署 OceanBase 集群
3.1.1 方式一:使用 OBCloud Database 免费试用版
直达链接:https://www.oceanbase.com/free-trial#trial
OB Cloud 提供 365 天免费试用,前往 OceanBase 官网开通事务型共享实例(MySQL模式)。点击
立即试用。
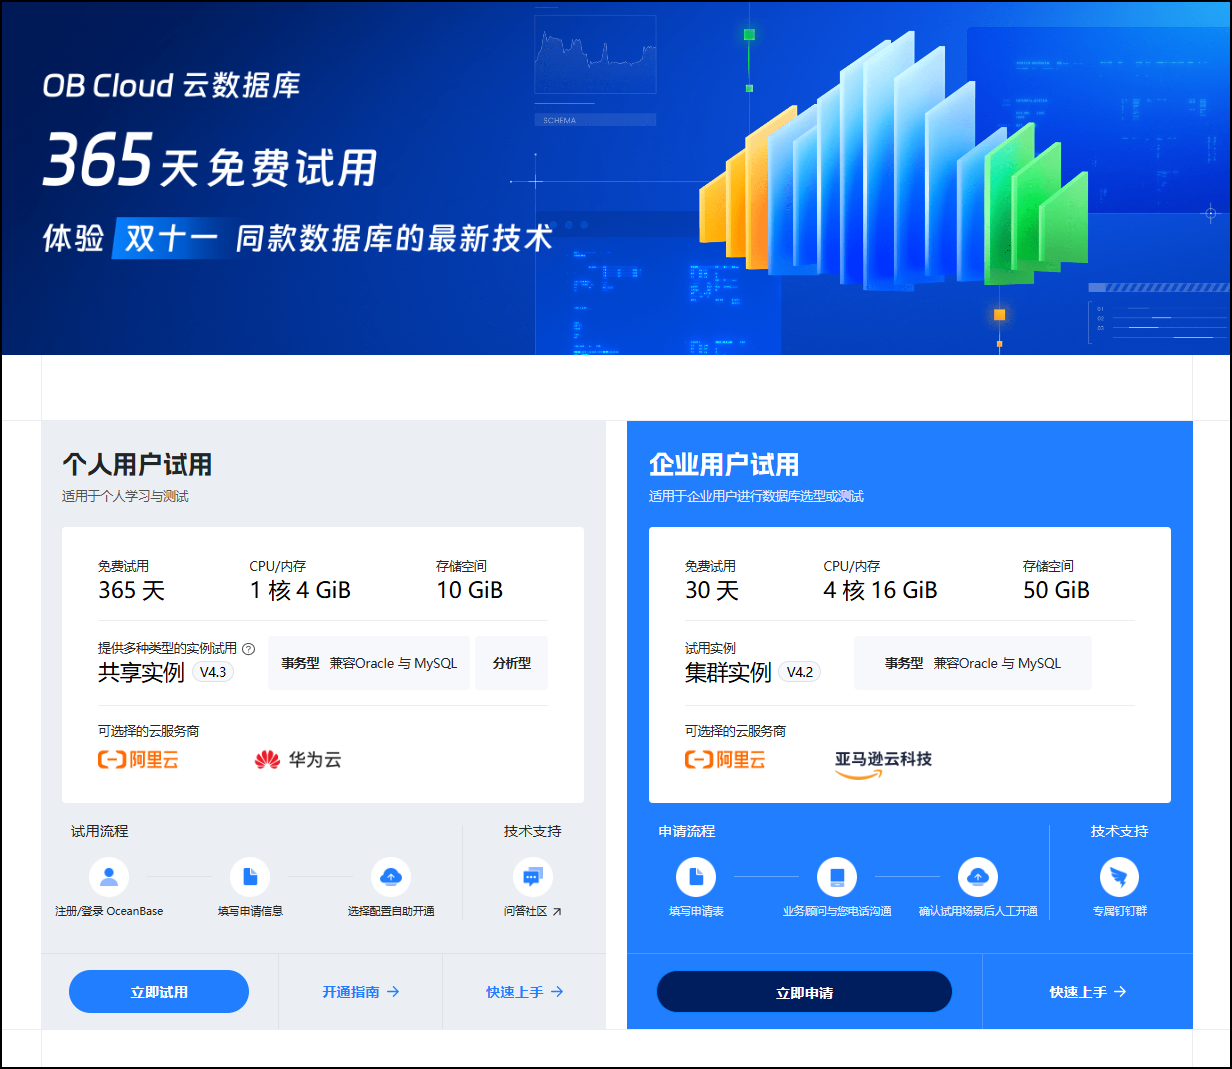
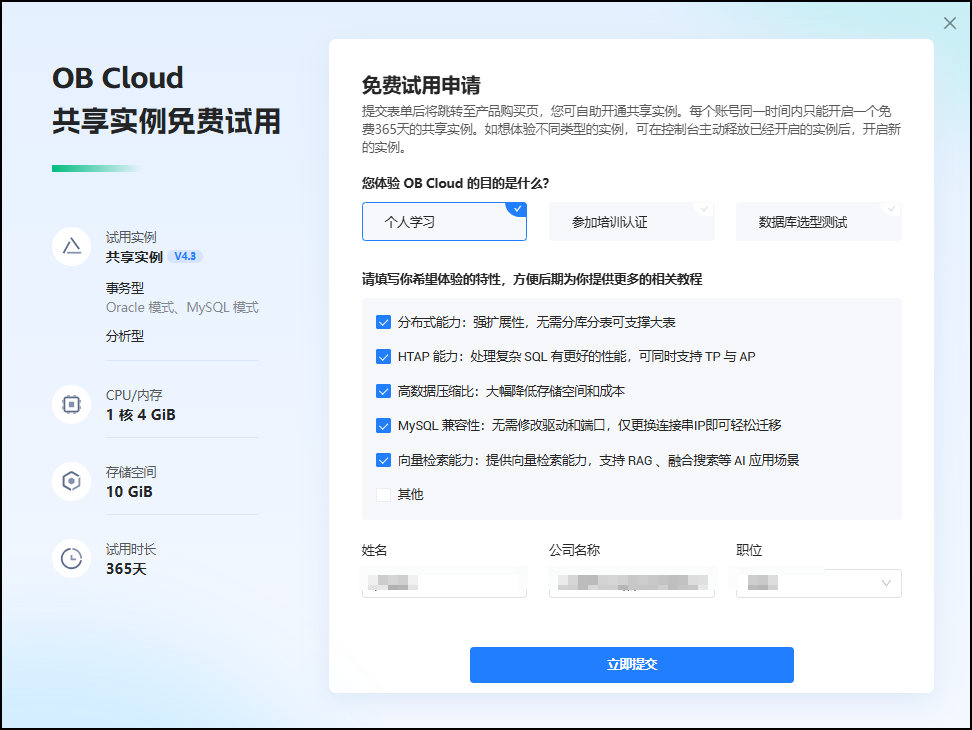
提交申请表单。
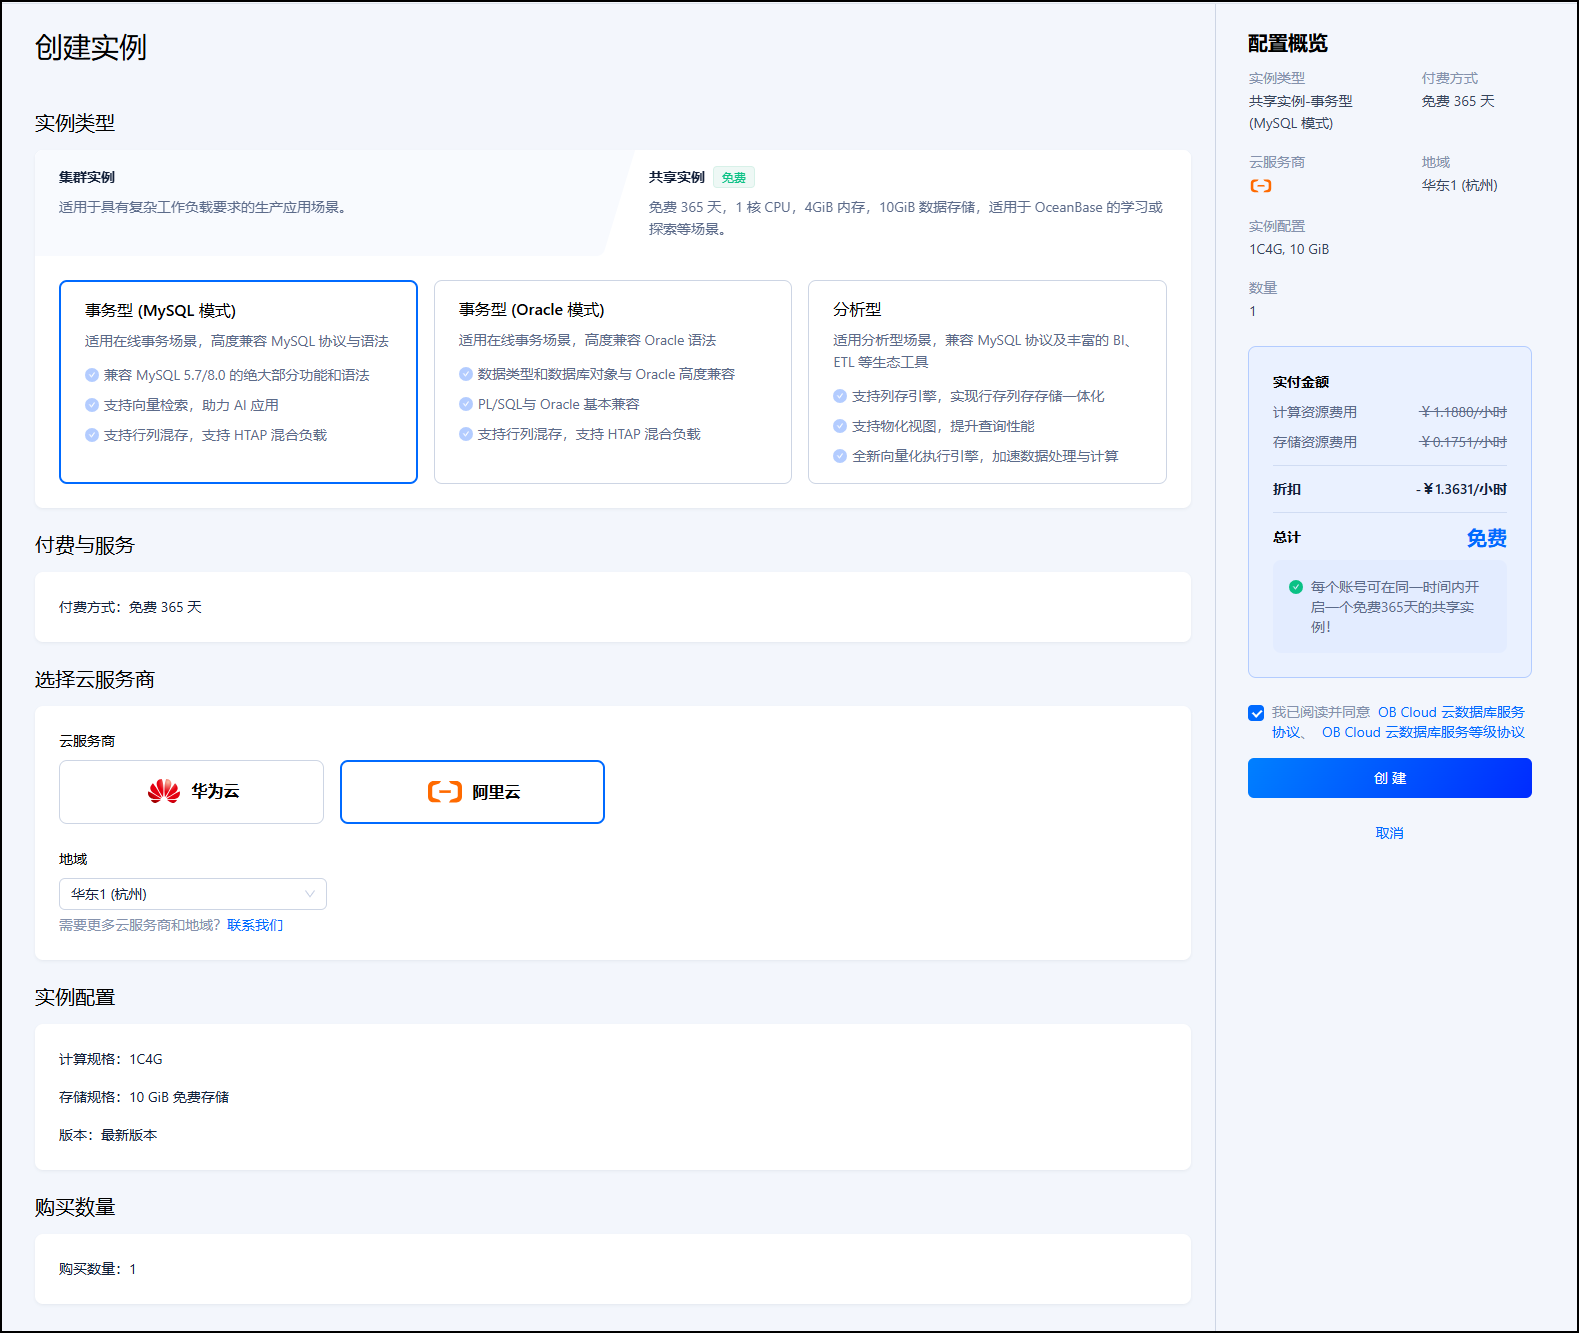
创建实例,选择实例类型、云服务提供商等配置,最后点击创建。
实例创建过程大概需要5~10分钟。

实例创建完成,可以查看到实例的相关信息参数。

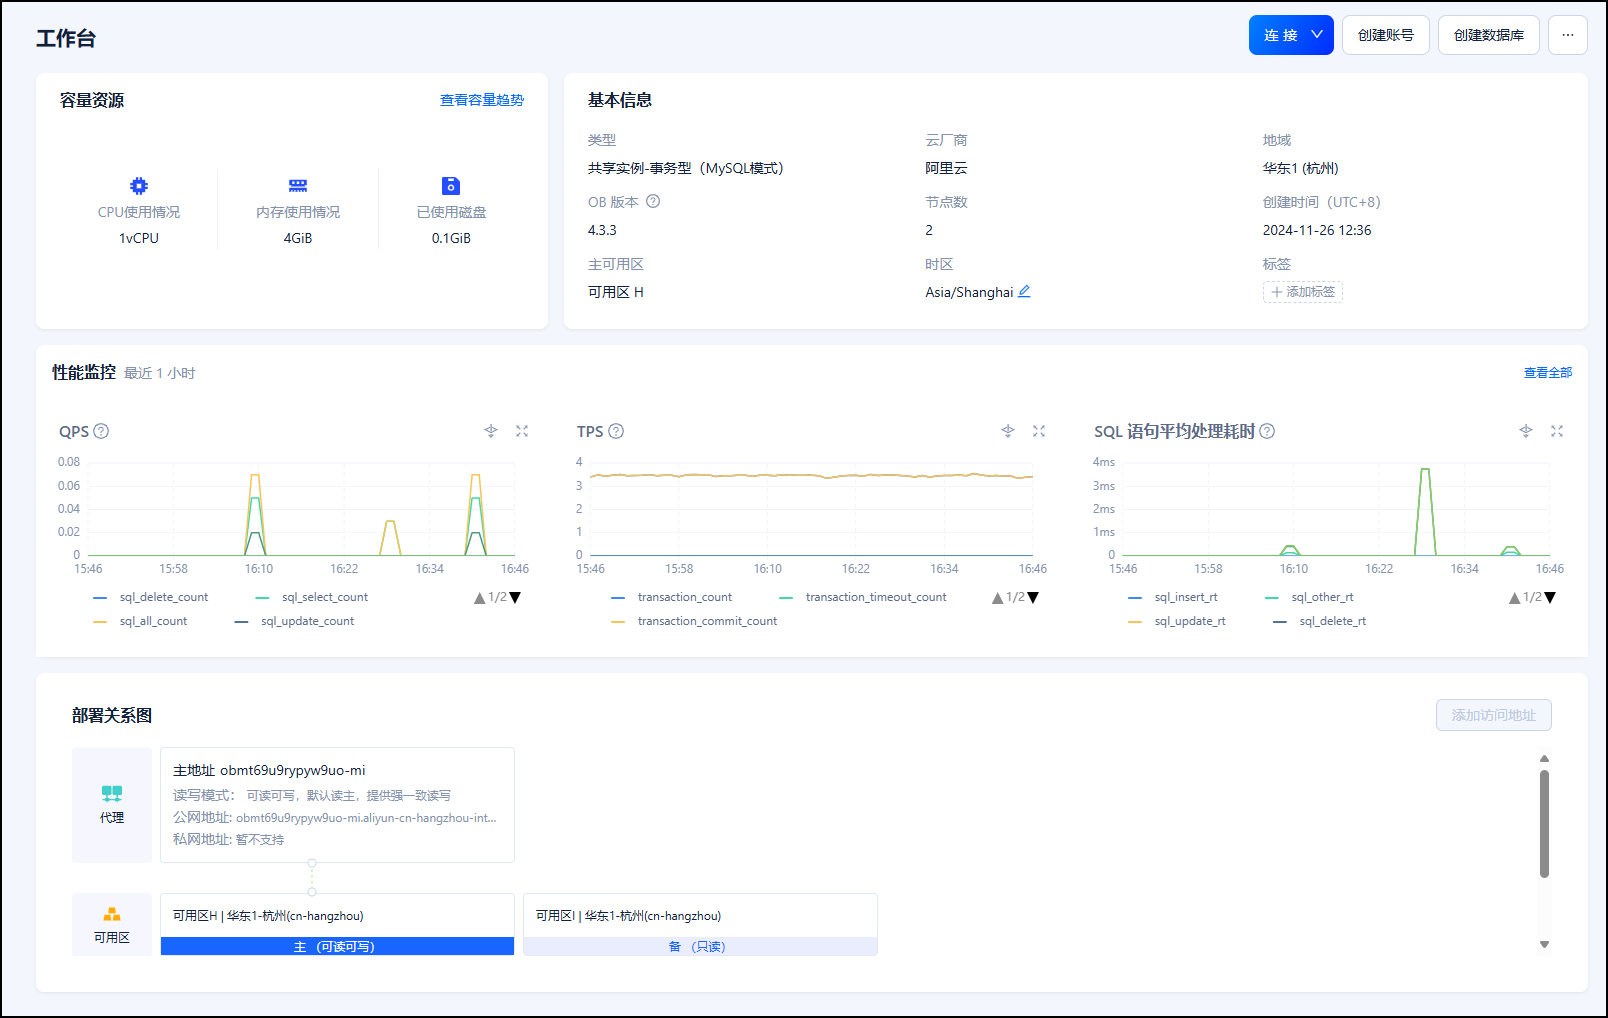
点击进入实例工作台,可以查看到实例详情信息。如容量资源、基本信息、性能监控等参数信息。
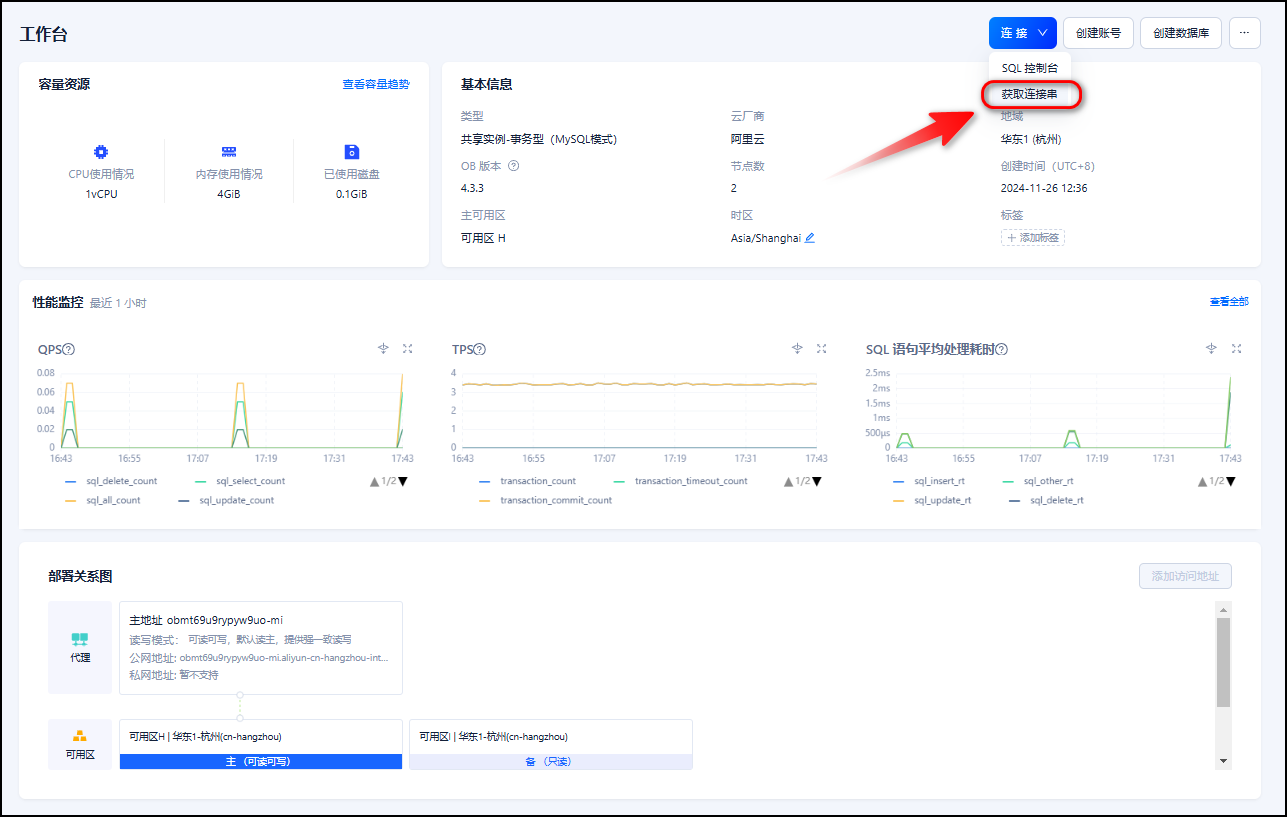
注意:进入实例工作台,设置 ob_vector_memory_limit_percentage 参数以启用向量检索功能,推荐设置值为 30。然后,单击 "连接",获取连接串:在弹出框中选择使用公共网络,选择 添加当前浏览器 IP 地址,填写数据库相关信息,复制连接串。

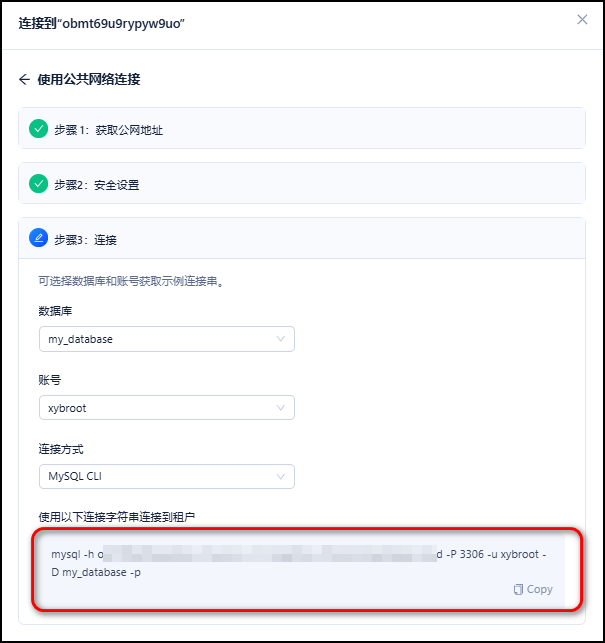
实例的连接信息可以通过下面的连接字符串可以获取到
bashmysql -h xxxxxxxxxxxxxxxxxxx.oceanbase.cloud -P 3306 -u xybroot -D my_database -p
3.1.2 方式二:使用 Docker 部署 OceanBase 数据库
启动 Docker 服务
bash
root@oceanbase:~# systemctl start docker执行如下命令启动 OceanBase docker 容器
bash
docker run --name=ob433 -e MODE=mini -e OB_MEMORY_LIMIT=8G -e OB_DATAFILE_SIZE=10G -e OB_CLUSTER_NAME=ailab2024 -e OB_SERVER_IP=127.0.0.1 -p 127.0.0.1:2881:2881 -d quay.io/oceanbase/oceanbase-ce:4.3.3.1-101000012024102216
执行成功,输出容器 ID
bash
7c318ebdea53ab7906d2eb387cbbb42717563d60731a9fea939bfc2bbb62eafc通过执行以下命令,检查 OceanBase 的引导是否完成
bash
docker logs -f ob433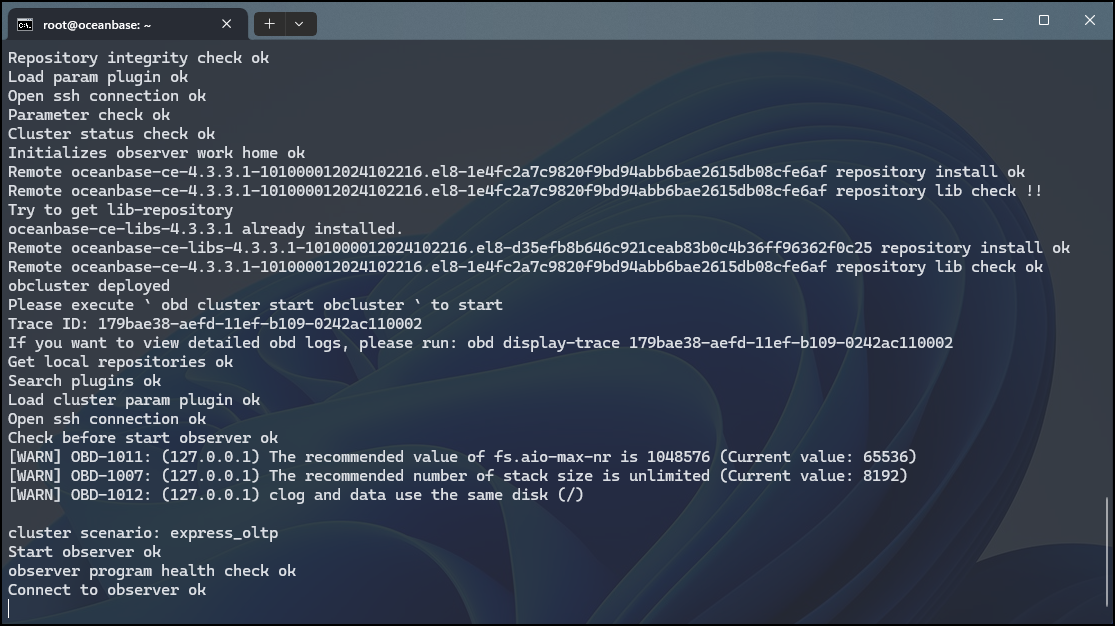
初始化大约需要 2-3 分钟。当您看到以下消息(底部是必不可少的)时,引导已完成:
boot success!按下
Ctrl+C可退出日志视图。
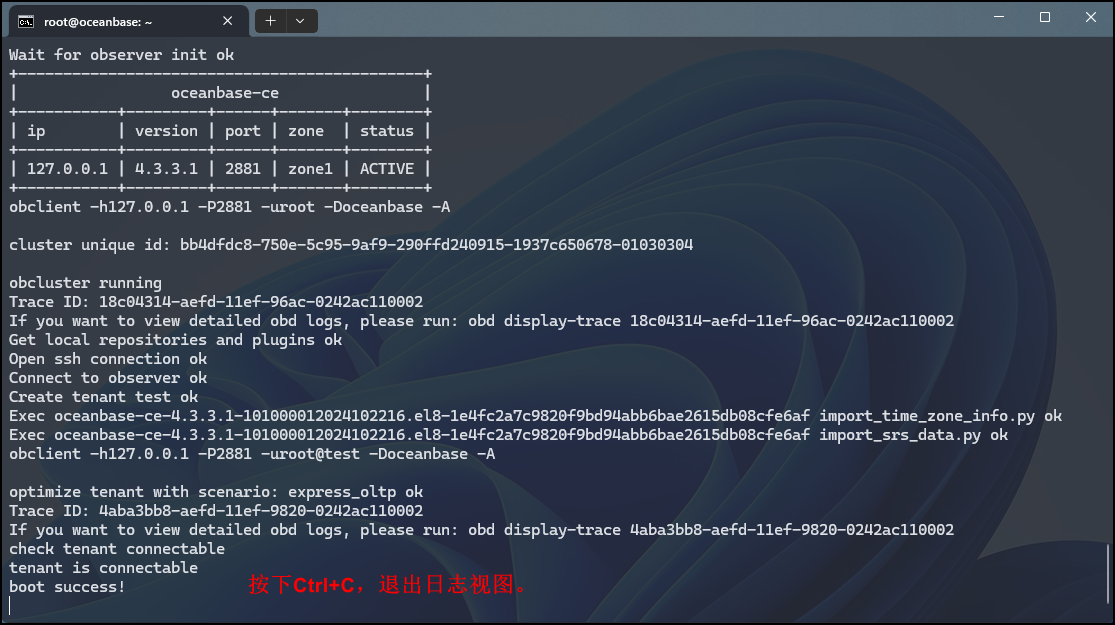
测试部署 (可选)
使用 mysql 客户端连接 OceanBase 集群,查看部署情况。
bash
mysql -h127.0.0.1 -P2881 -uroot@test -A -e "show databases"如果部署成功,将看到以下输出:
bash
root@oceanbase:~# mysql -h127.0.0.1 -P2881 -uroot@test -A -e "show databases"
+--------------------+
| Database           |
+--------------------+
| information_schema |
| mysql              |
| oceanbase          |
| test               |
+--------------------+
3.2 克隆代码仓库至本地
bash
git clone https://github.com/oceanbase-devhub/ai-workshop-2024.git
bash
root@oceanbase:~# git clone https://github.com/oceanbase-devhub/ai-workshop-2024.git
Cloning into 'ai-workshop-2024'...
remote: Enumerating objects: 315, done.
remote: Counting objects: 100% (315/315), done.
remote: Compressing objects: 100% (218/218), done.
remote: Total 315 (delta 198), reused 209 (delta 92), pack-reused 0 (from 0)
Receiving objects: 100% (315/315), 4.62 MiB | 14.48 MiB/s, done.
Resolving deltas: 100% (198/198), done.
root@oceanbase:~#Tipe:确保项目代码是最新的,建议在项目目录中运行git pull
bash
root@oceanbase:~# cd ai-workshop-2024/
root@oceanbase:~/ai-workshop-2024# git pull
Already up to date.
3.3 安装依赖项
bash
poetry install
3.4 设置环境变量
bash
cp .env.example .env
# Update the .env file with the correct values, especially the API_KEY and database information
vim .env
以下方法二选一即可。
若采用方式二:使用 Docker 部署 OceanBase 数据库,则只需要填写API_KEY和OPENAI_EMBEDDING_API_KEY即可,其余参数保持默认。示例如下:
bash
API_KEY=xxxxxxxxxxxxxxxxxxxxxxxxxxxxxxxx
LLM_MODEL="qwen-turbo-2024-11-01"
LLM_BASE_URL="https://dashscope.aliyuncs.com/compatible-mode/v1"

HF_ENDPOINT=https://hf-mirror.com
BGE_MODEL_PATH=BAAI/bge-m3

OLLAMA_URL=
OLLAMA_TOKEN=

# OPENAI_EMBEDDING_API_KEY 一项请填写和 API_KEY 一样的值
OPENAI_EMBEDDING_API_KEY=xxxxxxxxxxxxxxxxxxxxxxxxxxxxxxxx
OPENAI_EMBEDDING_BASE_URL="https://dashscope.aliyuncs.com/compatible-mode/v1/embeddings"
OPENAI_EMBEDDING_MODEL=text-embedding-v3

UI_LANG="zh"

# 如果你使用的是 OB Cloud 的实例,请根据实例的连接信息更新下面的变量
DB_HOST="127.0.0.1"
DB_PORT="2881"
DB_USER="root@test"
DB_NAME="test"
DB_PASSWORD=""若采用方式一:使用 OBCloud Database 免费试用版,则需要填写API_KEY和OPENAI_EMBEDDING_API_KEY,以及使用到的 OB Cloud 的实例连接信息需要更新。示例如下:
bash
API_KEY=xxxxxxxxxxxxxxxxxxxxxxxxxxxxxxxx
LLM_MODEL="qwen-turbo-2024-11-01"
LLM_BASE_URL="https://dashscope.aliyuncs.com/compatible-mode/v1"

HF_ENDPOINT=https://hf-mirror.com
BGE_MODEL_PATH=BAAI/bge-m3

OLLAMA_URL=
OLLAMA_TOKEN=

# OPENAI_EMBEDDING_API_KEY 一项请填写和 API_KEY 一样的值
OPENAI_EMBEDDING_API_KEY=xxxxxxxxxxxxxxxxxxxxxxxxxxxxxxxx
OPENAI_EMBEDDING_BASE_URL="https://dashscope.aliyuncs.com/compatible-mode/v1/embeddings"
OPENAI_EMBEDDING_MODEL=text-embedding-v3

UI_LANG="zh"

# 如果你使用的是 OB Cloud 的实例,请根据实例的连接信息更新下面的变量
DB_HOST="xxxxxxxxxxxxxxxxxxx.oceanbase.cloud"
DB_PORT="3306"
DB_USER="xybroot"
DB_NAME="my_database"
DB_PASSWORD="xxxxx"
3.5 测试数据库连通性
bash
bash utils/connect_db.sh
3.6 准备文档数据
克隆文档仓库
bash
git clone --single-branch --branch V4.3.4 https://github.com/oceanbase/oceanbase-doc.git doc_repos/oceanbase-doc
bash
root@oceanbase:~/ai-workshop-2024# git clone --single-branch --branch V4.3.4 https://github.com/oceanbase/oceanbase-doc.git doc_repos/oceanbase-doc
Cloning into 'doc_repos/oceanbase-doc'...
remote: Enumerating objects: 126520, done.
remote: Counting objects: 100% (2173/2173), done.
remote: Compressing objects: 100% (1409/1409), done.
remote: Total 126520 (delta 1719), reused 764 (delta 764), pack-reused 124347 (from 1)
Receiving objects: 100% (126520/126520), 72.28 MiB | 16.44 MiB/s, done.
Resolving deltas: 100% (50134/50134), done.
文档格式标准化
由于 OceanBase 开源文档中的一些文件使用 AND 来表示 1 级和 2 级标题,因此在此步骤中,我们会将它们转换为 standard 和 representation。
bash
# Convert document headings to standard markdown format
poetry run python convert_headings.py doc_repos/oceanbase-doc/zh-CN
将文档转换为矢量并插入到 OceanBase 中
bash
# 由于执行该命令的过程耗时,可以执行第二条命令。
poetry run python embed_docs.py --doc_base doc_repos/oceanbase-doc/zh-CN

poetry run python embed_docs.py --doc_base doc_repos/oceanbase-doc/zh-CN/640.ob-vector-search/

3.7 启动 Chat UI
执行以下命令以启动聊天 UI:
bash
poetry run streamlit run --server.runOnSave false chat_ui.py
通过上述获取到的URL,访问只能问答助手UI页面。
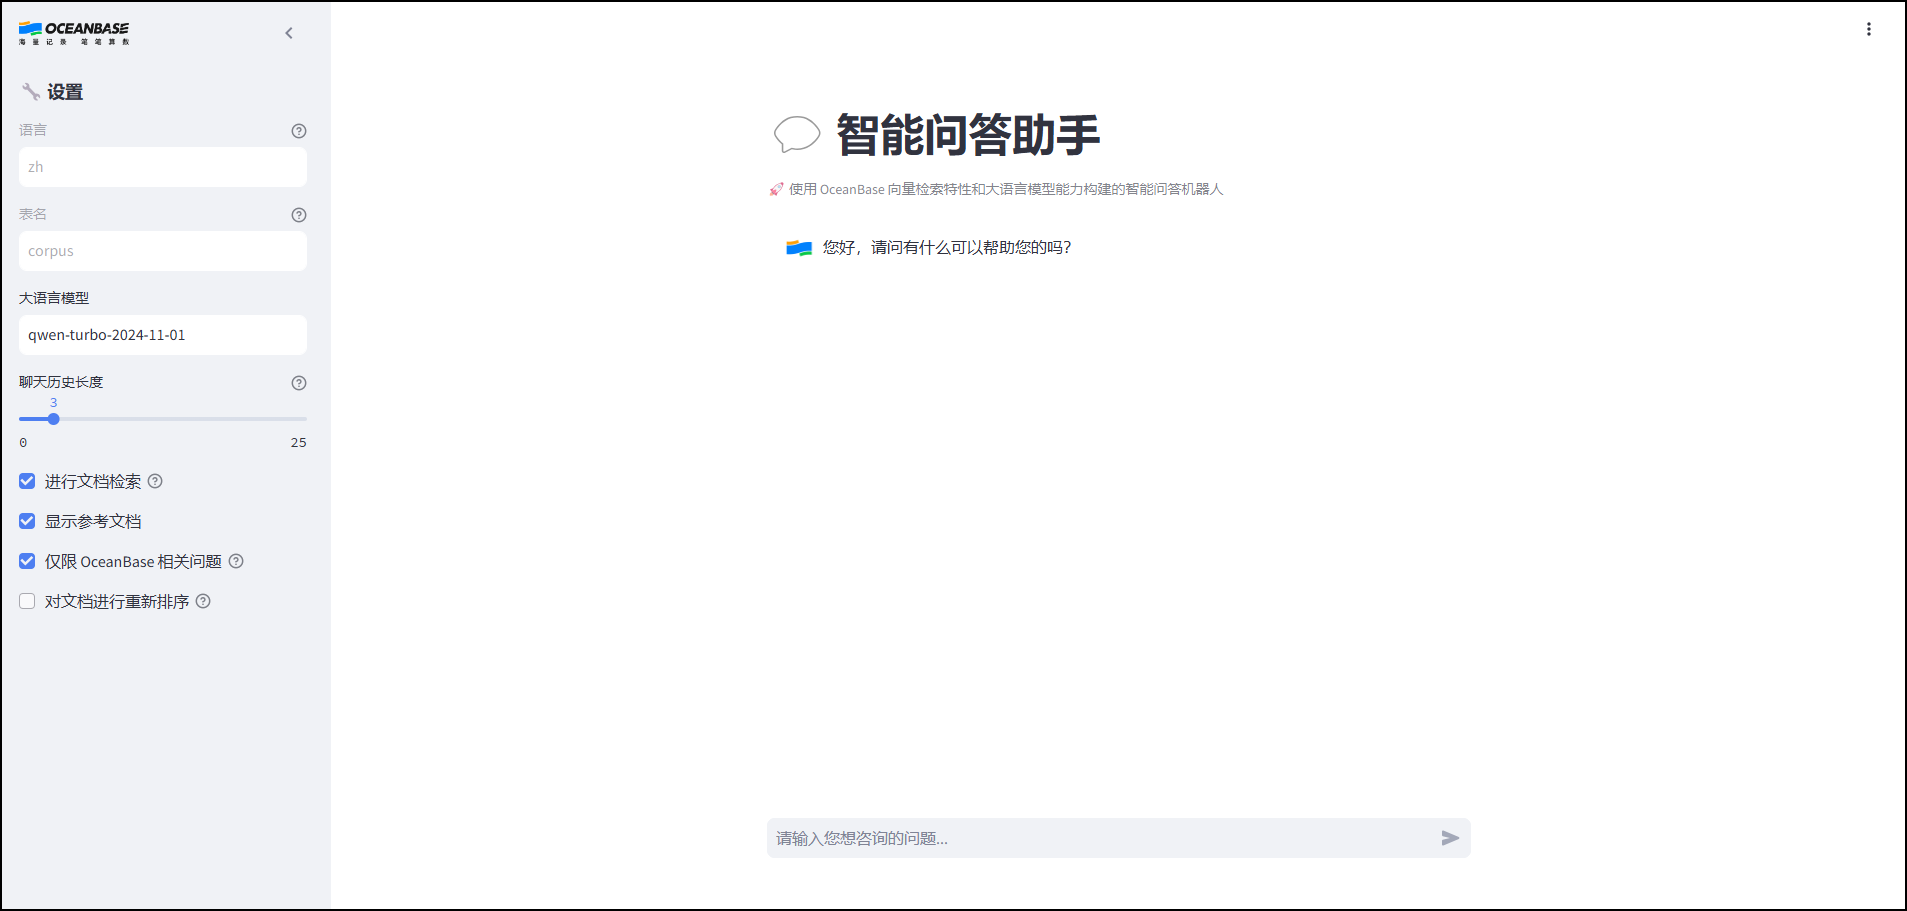
在输入框中,输入我们想要咨询的问题。
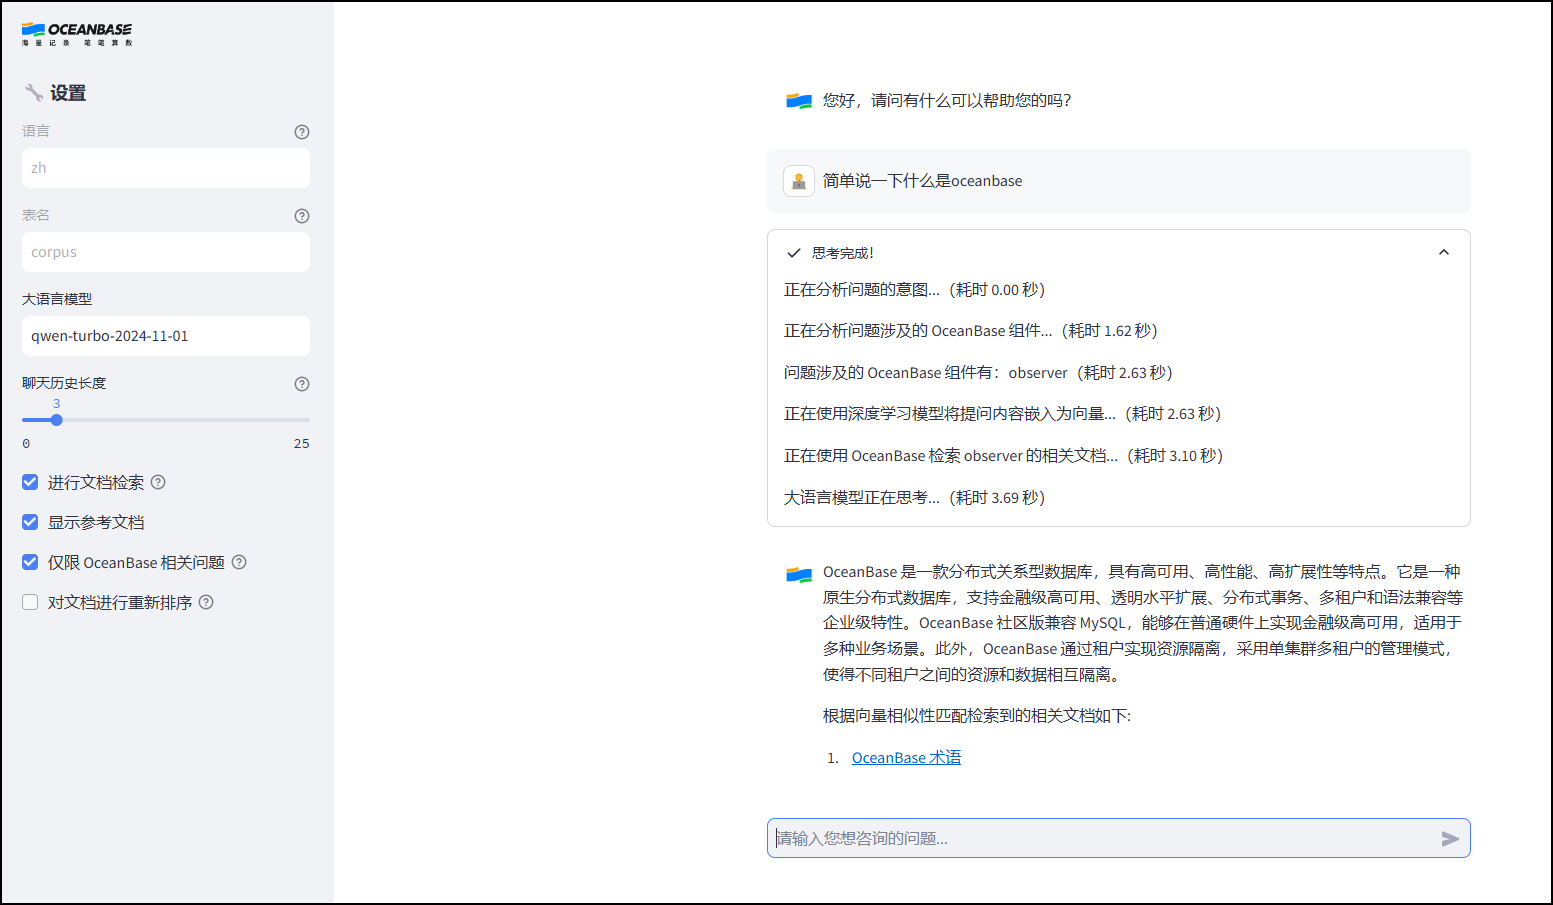
至此,利用 OceanBase 向量检索能力构建文档智能问答小助手完成!
3.8 报错排查
【问题描述】
在执行
poetry run python embed_docs.py --doc_base doc_repos/oceanbase-doc/zh-CN/640.ob-vector-search该命令发生了如下报错信息。
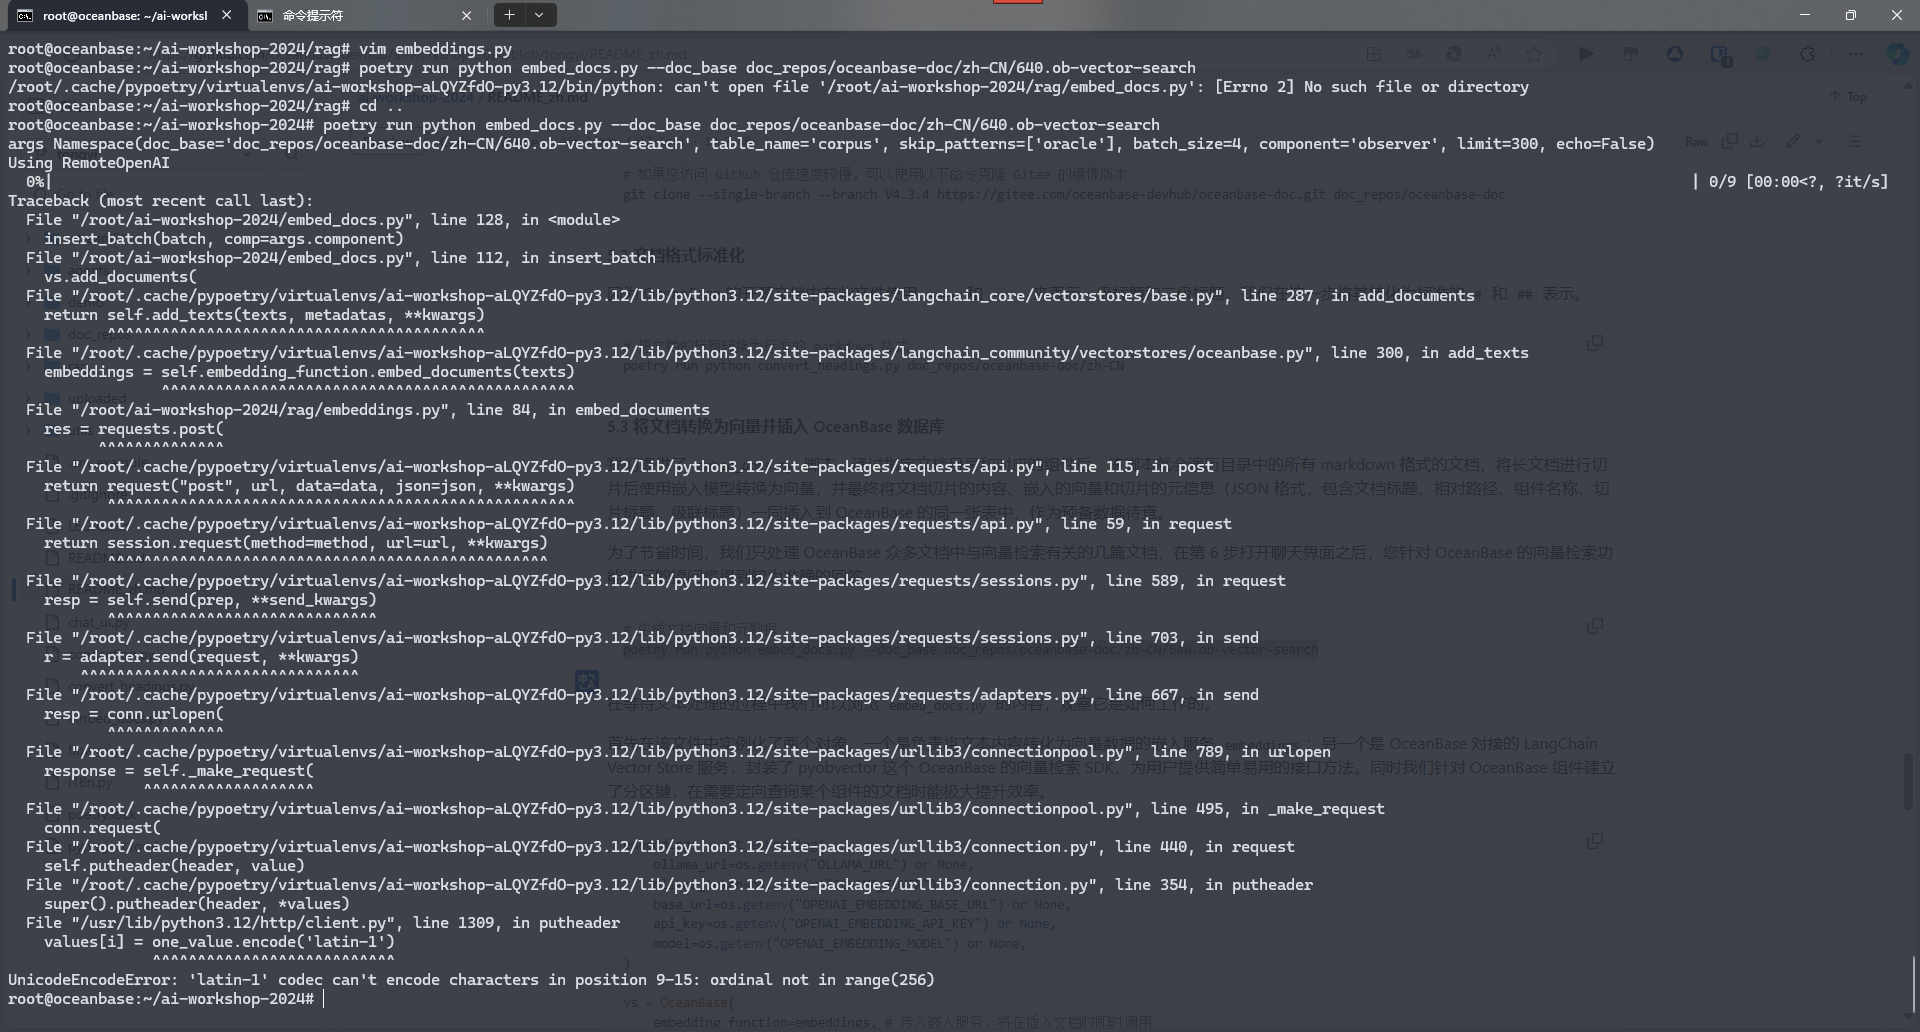
【问题发现】
在.env配置文件中"API_KEY"和"OPENAI_EMBEDDING_API_KEY"的值需要保持一致,否则会导致上述报错信息的发生。
【解决办法】
更新.env配置文件的参数值,保存后继续执行上述命令。
bash
root@oceanbase:~/ai-workshop-2024# poetry run python embed_docs.py --doc_base doc_repos/oceanbase-doc/zh-CN/640.ob-vector-search/
args Namespace(doc_base='doc_repos/oceanbase-doc/zh-CN/640.ob-vector-search/', table_name='corpus', skip_patterns=['oracle'], batch_size=4, component='observer', limit=300, echo=False)
Using RemoteOpenAI
100%|██████████████████████████████████████████████| 9/9 [00:25<00:00, 2.87s/it]
四、参考链接
① ai-workshop-2024/README_zh.md at main · oceanbase-devhub/ai-workshop-2024 · GitHub
② 基于 OceanBase 构建智能问答机器人-V4.3.4-OceanBase 数据库文档-分布式数据库使用文档
③ ai-workshop-2024/README.md at tongyi · oceanbase-devhub/ai-workshop-2024
④ 执行<将文档转换为向量并插入 OceanBase 数据库>的命令产生了报错 - 社区问答- OceanBase社区-分布式数据库