使用 Gin 框架处理文件上传是一个常见的任务,Gin 提供了简单而直观的方法来处理文件上传。下面将介绍如何用 Gin 实现文件上传功能。
1. 安装 Gin
如果你还没有安装 Gin,可以通过 Go 的包管理工具 go get 来安装:
bash
go get -u github.com/gin-gonic/gin2. 创建一个简单的文件上传接口
首先,你需要创建一个新的 Go 文件(例如 main.go),并编写以下代码:
go
package main

import (
	"fmt"
	"net/http"
	"os"

	"github.com/gin-gonic/gin"
)

func main() {
	r := gin.Default()

	// 设置静态文件目录,方便前端访问上传的文件
	r.Static("/uploads", "./uploads")
	// 设置模板文件
	r.LoadHTMLGlob("templates/*")
	// 渲染表单页面
	r.GET("/upload", func(c *gin.Context) {
		c.HTML(http.StatusOK, "upload.html", nil)
	})

	// 处理文件上传
	r.POST("/upload", func(c *gin.Context) {
		// 单个文件上传
		file, err := c.FormFile("file")
		if err != nil {
			c.String(http.StatusBadRequest, fmt.Sprintf("get form file err: %s", err.Error()))
			return
		}

		// 获取上传文件的原始文件名
		filename := file.Filename

		// 指定文件保存路径
		destination := "./uploads/" + filename

		// 创建 uploads 目录(如果不存在)
		err = os.MkdirAll("./uploads", os.ModePerm)
		if err != nil {
			c.String(http.StatusInternalServerError, fmt.Sprintf("mkdir err: %s", err.Error()))
			return
		}

		// 保存上传的文件到指定位置
		if err := c.SaveUploadedFile(file, destination); err != nil {
			c.String(http.StatusInternalServerError, fmt.Sprintf("upload file err: %s", err.Error()))
			return
		}

		// 返回成功信息
		c.String(http.StatusOK, fmt.Sprintf("'%s' uploaded!", filename))
	})

	// 启动服务器
	r.Run(":8080") // 默认在 :8080 端口监听
}
3. 创建上传表单页面
在templates目录下创建一个名为 upload.html 的文件,用于展示文件上传表单:
html
<!DOCTYPE html>
<html>
<head>
    <title>Upload File</title>
</head>
<body>
    <h1>Upload a File</h1>
    <form action="/upload" method="post" enctype="multipart/form-data">
        Select file to upload:
        <input type="file" name="file" id="file">
        <input type="submit" value="Upload File" name="submit">
    </form>
</body>
</html>
4. 运行应用
确保你的工作目录中有上述两个文件后,你可以通过命令行运行你的 Go 应用:
bash
go run main.go然后,在浏览器中访问 http://localhost:8080/upload,你应该能看到一个文件上传表单。选择一个文件并提交表单,文件将会被上传到服务器端的 ./uploads/ 目录中。
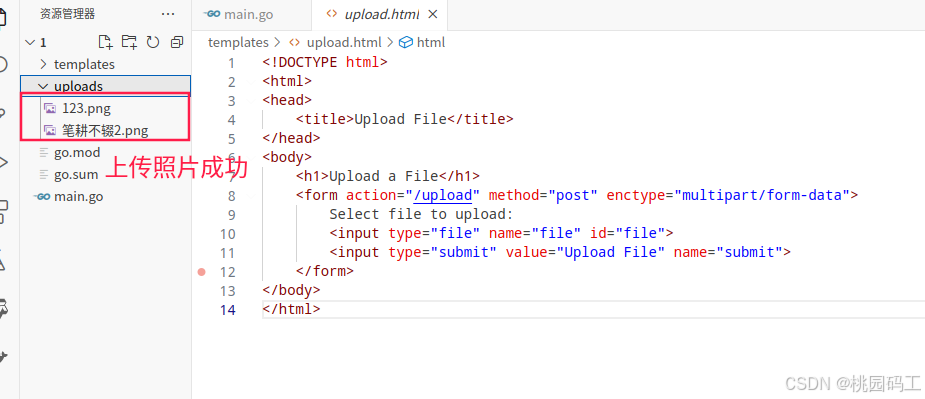
这个例子展示了如何使用 Gin 框架接收单个文件上传。如果你需要处理多个文件上传,可以使用 c.Request.MultipartForm.File 来获取所有上传的文件,并对每个文件调用 SaveUploadedFile 方法。
请注意,实际应用中你可能还需要考虑安全性问题,比如验证文件类型、限制文件大小等。此外,为了提高性能和可靠性,建议配置合适的中间件来处理这些额外的需求。
多文件上传--不同名字的多个文件
为了处理多文件上传,特别是当这些文件使用不同的表单字段名时,你可以利用 Gin 框架的灵活性来接收和保存这些文件。下面是一个完整的示例,它展示了如何创建一个多文件上传接口,并且每个文件都有不同的名字。
1. 安装 Gin
确保你已经安装了 Gin:
bash
go get -u github.com/gin-gonic/gin2. 创建 Go 应用程序
创建一个新的 Go 文件(例如 main.go),并编写以下代码:
go
package main

import (
	"fmt"
	"github.com/gin-gonic/gin"
	"net/http"
	"os"
	"path/filepath"
)

func main() {
	r := gin.Default()

	// 设置静态文件目录,方便前端访问上传的文件
	r.Static("/uploads", "./uploads")
	// 设置模板文件
	r.LoadHTMLGlob("templates/*")
	// 渲染表单页面
	r.GET("/upload", func(c *gin.Context) {
		c.HTML(http.StatusOK, "upload.html", nil)
	})

	// 处理多文件上传
	r.POST("/upload", func(c *gin.Context) {
		// 创建 uploads 目录(如果不存在)
		err := os.MkdirAll("./uploads", os.ModePerm)
		if err != nil {
			c.String(http.StatusInternalServerError, fmt.Sprintf("mkdir err: %s", err.Error()))
			return
		}

		// 获取所有表单数据
		form, _ := c.MultipartForm()
		files := form.File

		var fileNames []string
		for field, fileList := range files {
			fmt.Printf("Field: %s\n", field)
			for _, file := range fileList {
				// 获取上传文件的原始文件名
				fileName := file.Filename
				// 指定文件保存路径
				destination := filepath.Join("./uploads", fileName)

				// 保存上传的文件到指定位置
				if err := c.SaveUploadedFile(file, destination); err != nil {
					c.String(http.StatusInternalServerError, fmt.Sprintf("upload file err: %s", err.Error()))
					return
				}
				fileNames = append(fileNames, fileName)
			}
		}

		// 返回成功信息
		c.JSON(http.StatusOK, gin.H{
			"message": "Files uploaded successfully!",
			"files":   fileNames,
		})
	})

	// 启动服务器
	r.Run(":8080") // 默认在 :8080 端口监听
}
3. 创建上传表单页面
在同一目录下创建一个名为 upload.html 的文件,用于展示文件上传表单:
html
<!DOCTYPE html>
<html>
<head>
    <title>Upload Multiple Files</title>
</head>
<body>
    <h1>Upload Multiple Files with Different Names</h1>
    <form action="/upload" method="post" enctype="multipart/form-data">
        Select image to upload:
        <input type="file" name="image" id="image"><br><br>
        Select document to upload:
        <input type="file" name="document" id="document"><br><br>
        Select archive to upload:
        <input type="file" name="archive" id="archive"><br><br>
        <input type="submit" value="Upload Files" name="submit">
    </form>
</body>
</html>在这个例子中,我们定义了三个不同名字的文件输入框:image、document 和 archive。你可以根据需要添加更多不同名字的文件输入框。
4. 运行应用
确保你的工作目录中有上述两个文件后,你可以通过命令行运行你的 Go 应用:
bash
go run main.go然后,在浏览器中访问 http://localhost:8080/upload,你应该能看到一个包含多个文件选择框的表单。选择文件并提交表单后,文件将会被上传到服务器端的 ./uploads/ 目录中,每个文件都按照其对应的表单字段名称进行处理。
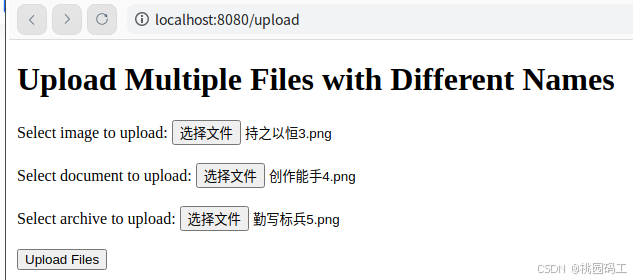
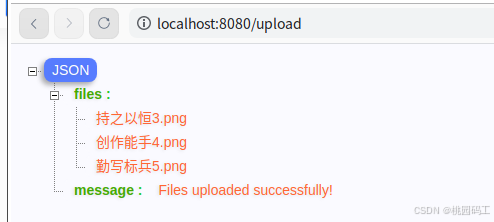
这个示例展示了如何处理具有不同表单字段名的多文件上传。实际应用中,你可能还需要实现额外的功能,如文件类型验证、大小限制等,以增强安全性和用户体验。
文件上传 按照日期存储
为了按照日期存储上传的文件,你可以基于当前日期创建一个目录结构,例如 uploads/yyyy/mm/dd。当文件被上传时,根据上传时间将它们保存到对应的日期目录中。下面是一个完整的 Gin 文件上传示例,它展示了如何实现这一点。
1. 安装 Gin
确保你已经安装了 Gin:
bash
go get -u github.com/gin-gonic/gin2. 创建 Go 应用程序
创建一个新的 Go 文件(例如 main.go),并编写以下代码:
go
package main

import (
	"fmt"
	"github.com/gin-gonic/gin"
	"net/http"
	"os"
	"path/filepath"
	"time"
)

// 获取按日期组织的上传路径
func getUploadPath() string {
	t := time.Now()
	return filepath.Join("uploads", t.Format("2006/01/02"))
}

func main() {
	r := gin.Default()

	// 设置静态文件目录,方便前端访问上传的文件
	r.Static("/uploads", "./uploads")
	// 设置模板文件
	r.LoadHTMLGlob("templates/*")
	// 渲染表单页面
	r.GET("/upload", func(c *gin.Context) {
		c.HTML(http.StatusOK, "upload.html", nil)
	})

	// 处理多文件上传
	r.POST("/upload", func(c *gin.Context) {
		// 获取所有表单数据
		form, err := c.MultipartForm()
		if err != nil {
			c.String(http.StatusBadRequest, fmt.Sprintf("get multipart form err: %s", err.Error()))
			return
		}
		files := form.File

		var fileNames []string
		for field, fileList := range files {
			fmt.Printf("Field: %s\n", field)
			for _, file := range fileList {
				// 根据当前日期获取上传路径
				uploadPath := getUploadPath()

				// 创建日期目录(如果不存在)
				err = os.MkdirAll(uploadPath, os.ModePerm)
				if err != nil {
					c.String(http.StatusInternalServerError, fmt.Sprintf("mkdir err: %s", err.Error()))
					return
				}

				// 获取上传文件的原始文件名
				fileName := file.Filename
				// 指定文件保存路径
				destination := filepath.Join(uploadPath, fileName)

				// 保存上传的文件到指定位置
				if err := c.SaveUploadedFile(file, destination); err != nil {
					c.String(http.StatusInternalServerError, fmt.Sprintf("upload file err: %s", err.Error()))
					return
				}
				fileNames = append(fileNames, fileName)
			}
		}

		// 返回成功信息
		c.JSON(http.StatusOK, gin.H{
			"message": "Files uploaded successfully!",
			"files":   fileNames,
		})
	})

	// 启动服务器
	r.Run(":8080") // 默认在 :8080 端口监听
}
3. 创建上传表单页面
在同一目录下创建一个名为 upload.html 的文件,用于展示文件上传表单:
html
<!DOCTYPE html>
<html>
<head>
    <title>Upload Multiple Files</title>
</head>
<body>
    <h1>Upload Multiple Files with Different Names</h1>
    <form action="/upload" method="post" enctype="multipart/form-data">
        Select image to upload:
        <input type="file" name="image" id="image"><br><br>
        Select document to upload:
        <input type="file" name="document" id="document"><br><br>
        Select archive to upload:
        <input type="file" name="archive" id="archive"><br><br>
        <input type="submit" value="Upload Files" name="submit">
    </form>
</body>
</html>
在这个例子中,我们定义了一个 getUploadPath 函数来生成基于当前日期的上传路径,并使用这个路径来保存文件。每当有文件上传时,都会检查和创建相应的日期目录,以确保文件被正确地保存到对应日期的子目录中。
4. 运行应用
确保你的工作目录中有上述两个文件后,你可以通过命令行运行你的 Go 应用:
bash
go run main.go然后,在浏览器中访问 http://localhost:8080/upload,你应该能看到一个包含多个文件选择框的表单。选择文件并提交表单后,文件将会被上传到服务器端的 ./uploads/yyyy/mm/dd 目录中,每个文件都按照其上传的时间戳进行分类保存。
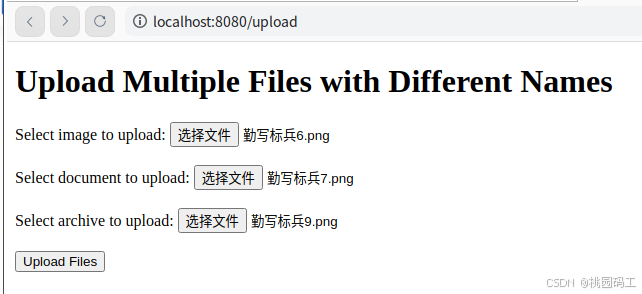
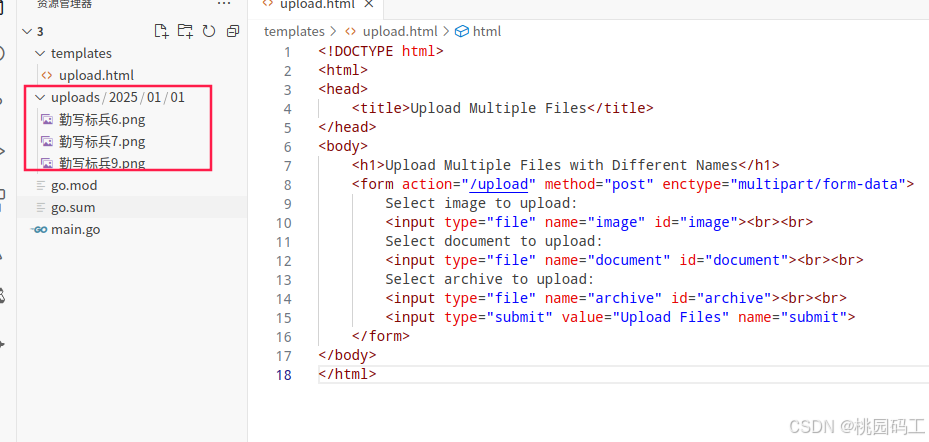
这种做法不仅有助于保持文件系统的整洁有序,还便于后续对文件进行管理和检索。如果你的应用需要处理大量的文件上传,这样的组织方式是非常有用的。