【每日学点鸿蒙知识】24.08.25
【每日学点鸿蒙知识】自定义键盘光标、Cavas绘制、XComponent触发键盘抬起等
1、基于自定义键盘如何设置光标位置?
可以参考如下代码:
class MyKeyboardController {
public onInputChanged?: (value: string) => void
public inputController = new TextInputController()
public carePosition = -1
private inputValue = ''
onKeyClicked(key: string) {
const index = this.inputController.getCaretOffset().index
if (key === 'A' || key === 'B') {
this.setInputValue(this.inputValue.substring(0, index) + key + this.inputValue.substring(index))
this.carePosition = index + 1
} else if (key === '<') {
if (index > 0) {
this.setInputValue(this.inputValue.substring(0, index - 1) + this.inputValue.substring(index))
this.carePosition = index - 1
}
}
}
setInputValue(value: string) {
if (this.carePosition >= 0) {
this.inputController.caretPosition(this.carePosition)
this.carePosition = -1
}
if (this.inputValue === value) {
return;
}
this.inputValue = value
if (this.onInputChanged) {
this.onInputChanged(value)
}
}
}
@Component
struct MyKeyboardA {
controller?: MyKeyboardController
private keys = ['A', 'B', '<']
build() {
Row() {
ForEach(this.keys, (v: string) => {
Text(v)
.layoutWeight(1)
.height(44)
.borderWidth(1)
.borderColor(Color.Gray)
.borderRadius(4)
.onClick(() => {
this.controller?.onKeyClicked(v)
})
})
}
.height(300)
.backgroundColor(Color.Gray)
}
}
@Entry
@Component
export struct RichKeyPage {
keyboardController = new MyKeyboardController()
@State text: string = ''
aboutToAppear(): void {
this.keyboardController.onInputChanged = (value) => {
this.text = value
}
}
build() {
Column({ space: 20 }) {
TextInput({ text: this.text, controller: this.keyboardController.inputController })
.width('100%')
.height(44)
.customKeyboard(this.myKeyboardA())
.onChange((value) => {
this.keyboardController.setInputValue(value)
})
Button('点击直接更改输入框内容')
.width('100%')
.height(44)
.onClick(() => {
this.text = '12345678'
})
}
}
@Builder
myKeyboardA() {
MyKeyboardA({ controller: this.keyboardController })
}
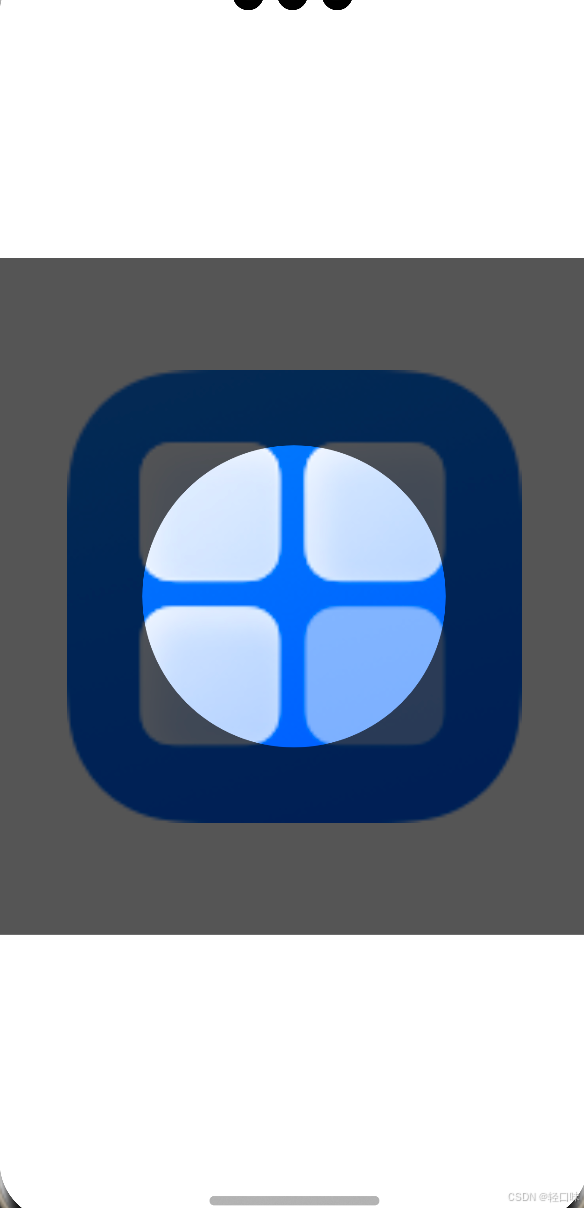
}2、如何实现镂空效果?
利用canvas绘制镂空圆形然后使用Stack组件叠加在需要透明展示的区域上,参考代码如下:
@Entry
@Component
struct Page {
  @State message: string = 'Hello World';
  private settings: RenderingContextSettings = new RenderingContextSettings(true)
  private context: CanvasRenderingContext2D = new CanvasRenderingContext2D(this.settings)
  @State circleCenterX: number = 0
  @State circleCenterY: number = 0
  @State circleRadius: number = 100

  build() {
    Row() {
      Column() {
        Stack() {
          Image($r('app.media.startIcon')).height(300)
          // 使用Canvas绘制遮罩覆盖在图片、相机等上面
          Canvas(this.context)
            .width('100%')
            .height('100%')
            .backgroundColor('#00000000')
            .onReady(() => {
              this.circleCenterX = this.context.width / 2
              this.circleCenterY = this.context.height / 2
              this.context.fillStyle = '#aa000000'
              // 绘制原型路径进行半透明填充
              this.context.beginPath()
              this.context.moveTo(0, 0)
              this.context.lineTo(0, this.context.height)
              this.context.lineTo(this.context.width, this.context.height)
              this.context.lineTo(this.context.width, 0)
              this.context.lineTo(0, 0)
              this.context.arc(this.circleCenterX, this.circleCenterY, this.circleRadius, 0, Math.PI * 2)
              this.context.fill()
              this.context.closePath()
            })
        }.width('1456px')
        .height('1456px')
      }
      .width('100%')
    }
    .height('100%')
  }
}
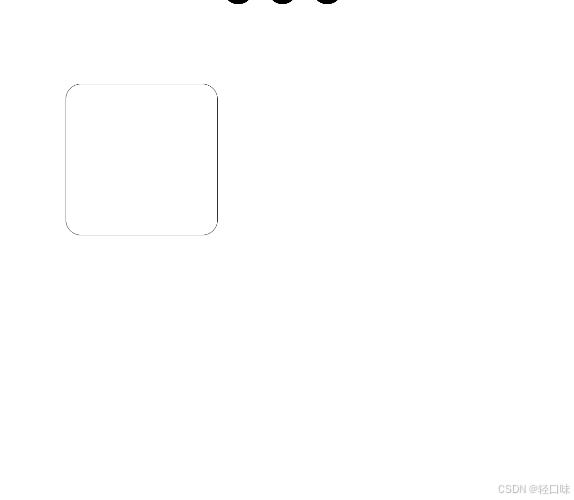
3、如何使用canvas绘制圆角矩形?
利用CanvasRenderingContext2D对象的arc绘制弧形路径,结合lineTo方法绘制直线进行封装,参考代码如下:
@Entry
@Component
struct Page {
  @State message: string = 'Hello World';
  private readonly settings: RenderingContextSettings = new RenderingContextSettings(true);
  private readonly ctx: CanvasRenderingContext2D = new CanvasRenderingContext2D(this.settings);

  /**
   * 绘制圆角矩形
   * @param {* 必填} x x坐标
   * @param {* 必填} y y坐标
   * @param {* 必填} width 宽度
   * @param {* 必填} height 高度
   * @param {* 必填} radius 圆角半径
   * @param {* 非必填 默认值:'#456'} strokeColor 边框颜色
   * @param {* 非必填 无默认值} fillColor 填充颜色
   * @param {* 非必填 默认值:[]实线} lineDash 边框样式
   */
  drawRoundRect(x: number, y: number, width: number, height: number, radius: number, strokeColor?: string, fillColor?: string, lineDash?: []) {
    strokeColor = strokeColor || '#333';
    lineDash = lineDash || [];
    this.ctx.beginPath();
    // 是否是虚线如果有则设置
    this.ctx.setLineDash(lineDash);
    // 绘制第一段圆弧路径
    this.ctx.arc(x + radius, y + radius, radius, Math.PI, Math.PI * 3 / 2);
    // 绘制第一段直线路径
    this.ctx.lineTo(width - radius + x, y);
    // 绘制第二段圆弧路径
    this.ctx.arc(width - radius + x, radius + y, radius, Math.PI * 3 / 2, Math.PI * 2);
    // 绘制第二段直线路径
    this.ctx.lineTo(width + x, height + y - radius);
    // 绘制第三段圆弧路径
    this.ctx.arc(width - radius + x, height - radius + y, radius, 0, Math.PI / 2);
    // 绘制第三段直线路径
    this.ctx.lineTo(radius + x, height + y);
    // 绘制第四段圆弧路径
    this.ctx.arc(radius + x, height - radius + y, radius, Math.PI / 2, Math.PI);
    // 绘制第四段直线路径
    this.ctx.lineTo(x, y + radius);
    // 设置画笔颜色
    this.ctx.strokeStyle = strokeColor;
    // 描边绘制
    this.ctx.stroke();
    if (fillColor) {
      // 如果有填充颜色泽填充
      this.ctx.fillStyle = fillColor;
      this.ctx.fill();
    }
    this.ctx.closePath();
  }

  build() {
    Row() {
      Column() {
        Canvas(this.ctx)
          .width('100%')
          .height('100%')
          .onReady(() => {
            this.drawRoundRect(50, 50, 100, 100, 10)
          })
      }
      .width('100%')
    }
    .height('100%')
  }
}
4、为什么XComponent有时候无法触发键盘的抬起事件?
问题描述:
- 在使用Native XComponent关于键盘事件的接口时,发现alt按键的抬起状态无法获取;
- 当前通过快捷键拉起其他应用或切换至其他应用时,因为窗口失焦,导致xComponent无法接收到按键的抬起事件,导致应用内按键异常。
解答:
- 可以通过hdc shell hidumper -s 3101 -a -s观察到所有被订阅的按键,可以看到alt被订阅了。这种情况下alt的抬起事件会被其他订阅的应用消费掉。
- 在窗口失焦时,应用感知不到键盘事件,这是属于规格,在后面将会开放一个新的接口能力,新接口将会在键盘/鼠标事件触发时,返回的参数里会提供当前键盘/鼠标上处于按压态的键位/按钮,提供了这些后,其他的由应用侧自行处理逻辑。
5、绑定类型的组件和foreach的正确连用方式?
问题描述:
bindSheet和foreach合用的问题,$$this.isShow会弹出两次半模态,如果是this.isShow,则会半模态弹出的次数是数组的长度数,如何在某一个foreach中的item点击的时候只弹出一个弹窗。
解答:
关键代码:给每一个弹窗都绑定一个@State修饰的变量,有很多个弹窗的话,这里用数组就很方便。