十二. Redis 集群操作配置(超详细配图,配截图详细说明)
@
目录
- [十二. Redis 集群操作配置(超详细配图,配截图详细说明)](#十二. Redis 集群操作配置(超详细配图,配截图详细说明))
- [1. 为什么需要集群-高可用性](#1. 为什么需要集群-高可用性)
- [2. 集群概述(及其搭建)](#2. 集群概述(及其搭建))
- [3. Redis 集群的使用](#3. Redis 集群的使用)
- [4. Redis 集群故障恢复](#4. Redis 集群故障恢复)
- [5. Redis 集群的 Jedis 开发(使用Java程序连接 Redis 同时开启集群)](#5. Redis 集群的 Jedis 开发(使用Java程序连接 Redis 同时开启集群))
- [6. Redis 集群的优缺点](#6. Redis 集群的优缺点)
- [7. 补充:](#7. 补充:)
- [8. 最后:](#8. 最后:)
1. 为什么需要集群-高可用性
为什么需要集群-高可用性:
- 生产环境的实际需求和问题:
- 容量不够,redis 如何进行扩容。
- 并发写操作,redis 如何分摊。
- 主从模式,薪火相传模式,主机宕机,会导致 ip 地址发生变化,应用程序中配置需要修改对应的主机地址,端口等信息。
- 传统解决方案 代理主机来解决

上图解图:
- 客户端请求先到代理服务器
- 由代理服务器进行请求转发到对应的业务处理器
- 为了高可用,代理服务,A服务,B服务,C服务都需要搭建主从结构(至少是一主一从 这样就需求搭建至少 8 台服务器)。
- 这种方案的缺点是:成本高,维护困难,如果是一主多从,成本就会更高。
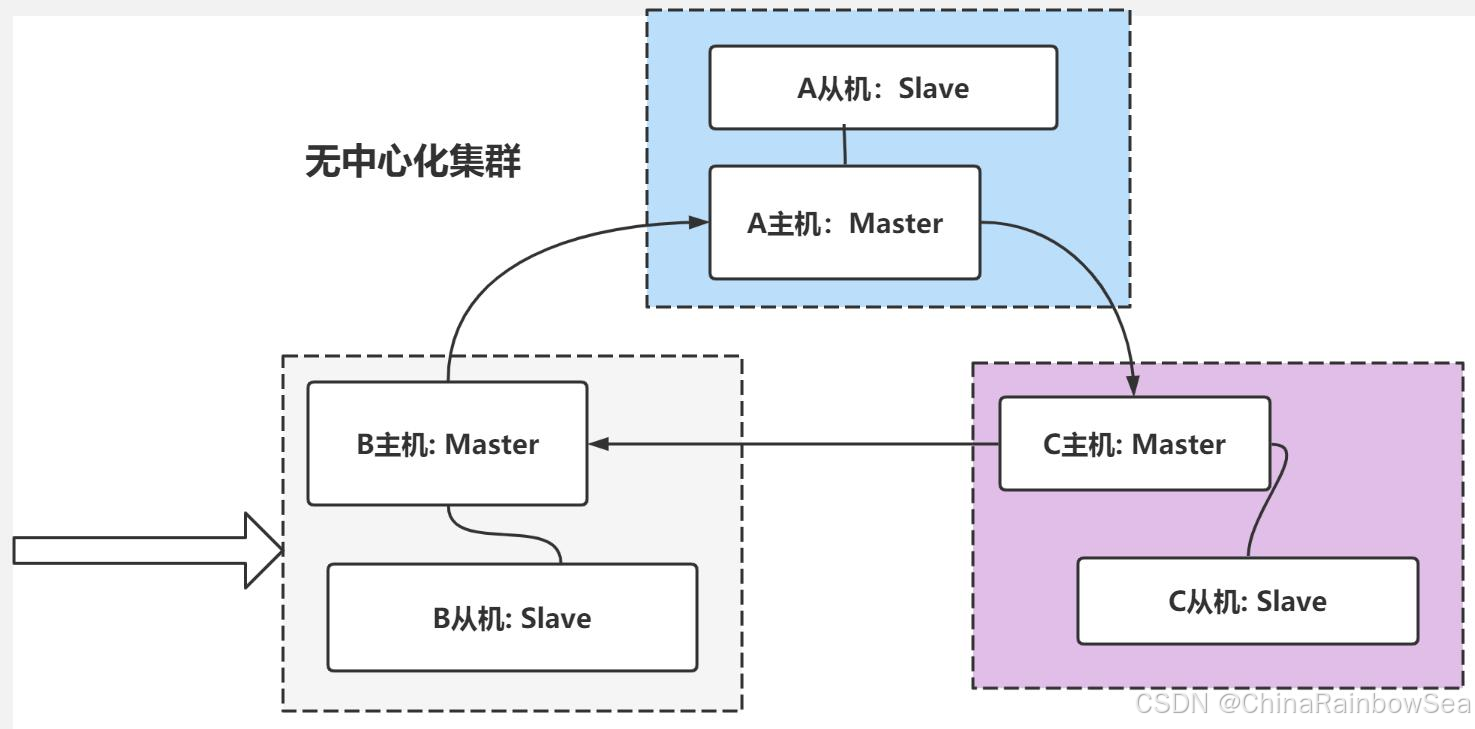
redis3.0 提供解决方案 无中心化集群配置:

- 各个 Redis 服务仍然采用主从结构。
- 各个 Redis 服务是连通的,任何一台服务器,都可以作为请求入口 。
- 各个 Redis 服务器因为是连通的,可以进行请求转发
- 这种方式,就无中心化 集群配置,可以看到,只需要 6 台服务器即可搞定。
- 无中心化集群配置 ,还会根据 key 值,计算 slot ,把数据分散到不同的主机,从而缓解单个主机的存取压力
- Redis 推荐使用无中心化集群配置。
- 在实际生成环境,各个 Redis 服务器,应当部署到不同的机器(防止机器宕机,主从复制失效)。
2. 集群概述(及其搭建)
- Redis 集群实现了对 Redis 的水平扩容,即启动 N 个 Redis 节点,将整个数据库分布存储在这个 N 个节点中,每个节点存储总数居的 1 / N
- Redis 集群通过分区(partition) 来提供一定程度的可用性(availability) ,即使集群中有一部分节点失效或者无法进行通讯,集群也可以继续处理命令请求。
Redis 集群搭建:实操演示:
redis.conf配置修改
properties
cluster-enabled yes 打开集群模式
cluster-config-file nodes-6379.conf 设定节点配置文件名
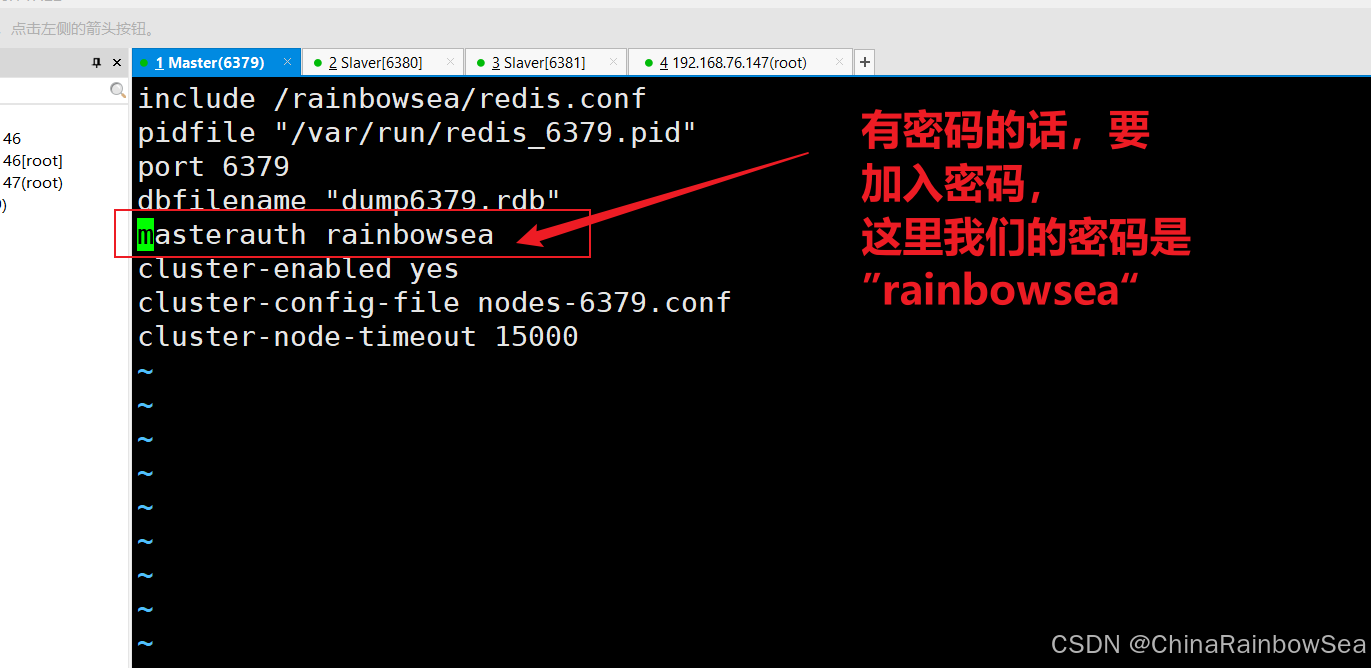
cluster-node-timeout 15000 设定节点失联时间,超过该时间(毫秒),集群自动进行主 从切换vi /rainbowsea/redis6379.conf, 删除不必要的内容 增加 cluster 配置, 文件最后内容,如图
properties
include /rainbowsea/redis.conf
pidfile "/var/run/redis_6379.pid"
port 6379
dbfilename "dump6379.rdb"
masterauth rainbowsea
cluster-enabled yes
cluster-config-file nodes-6379.conf
cluster-node-timeout 15000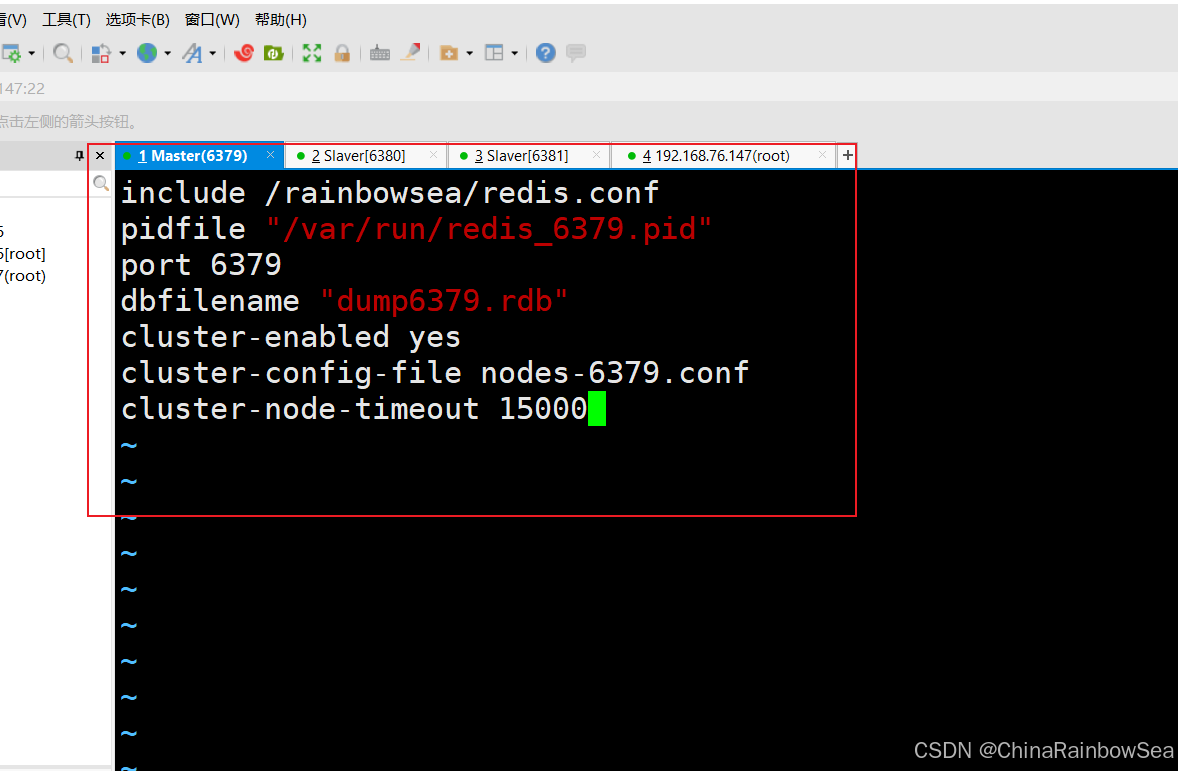
sh
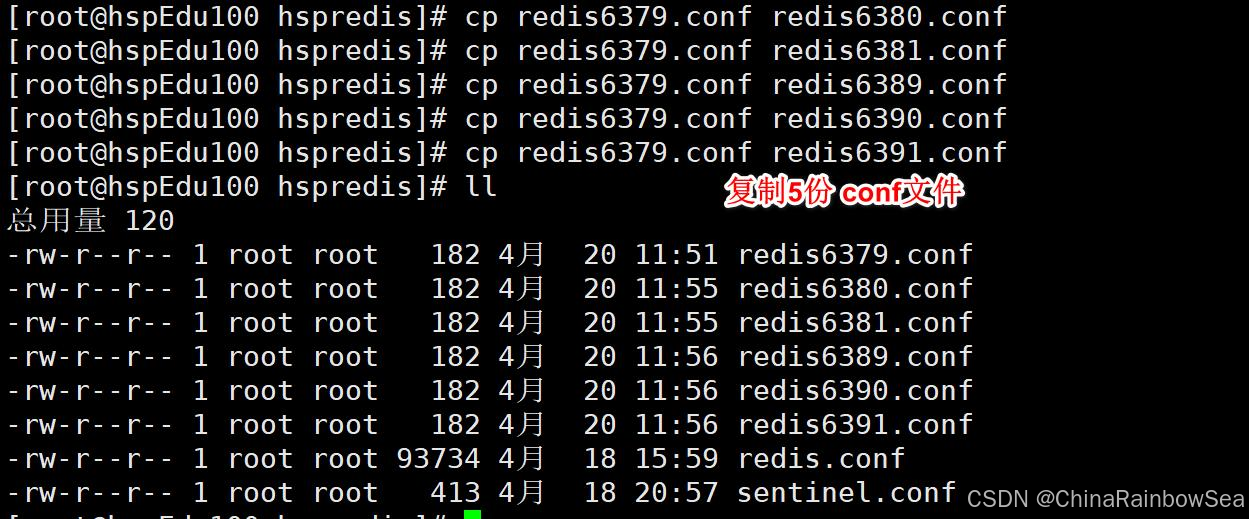
[root@localhost rainbowsea]# cp redis6379.conf redis6380.conf
[root@localhost rainbowsea]# cp redis6379.conf redis6381.conf
[root@localhost rainbowsea]# cp redis6379.conf redis6389.conf
[root@localhost rainbowsea]# cp redis6379.conf redis6390.conf
[root@localhost rainbowsea]# cp redis6379.conf redis6391.conf
[root@localhost rainbowsea]# 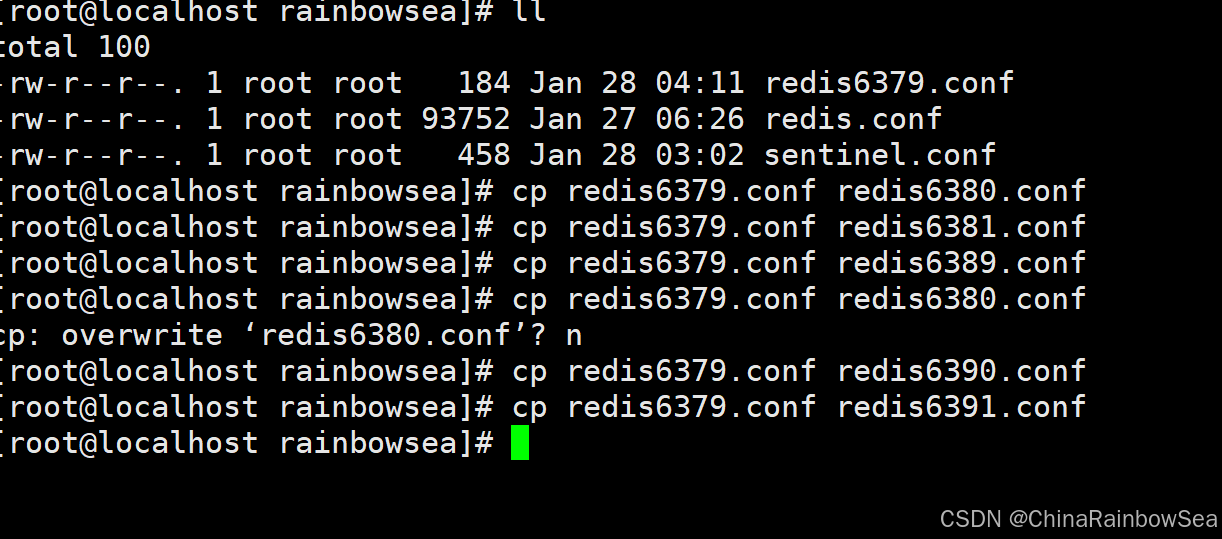
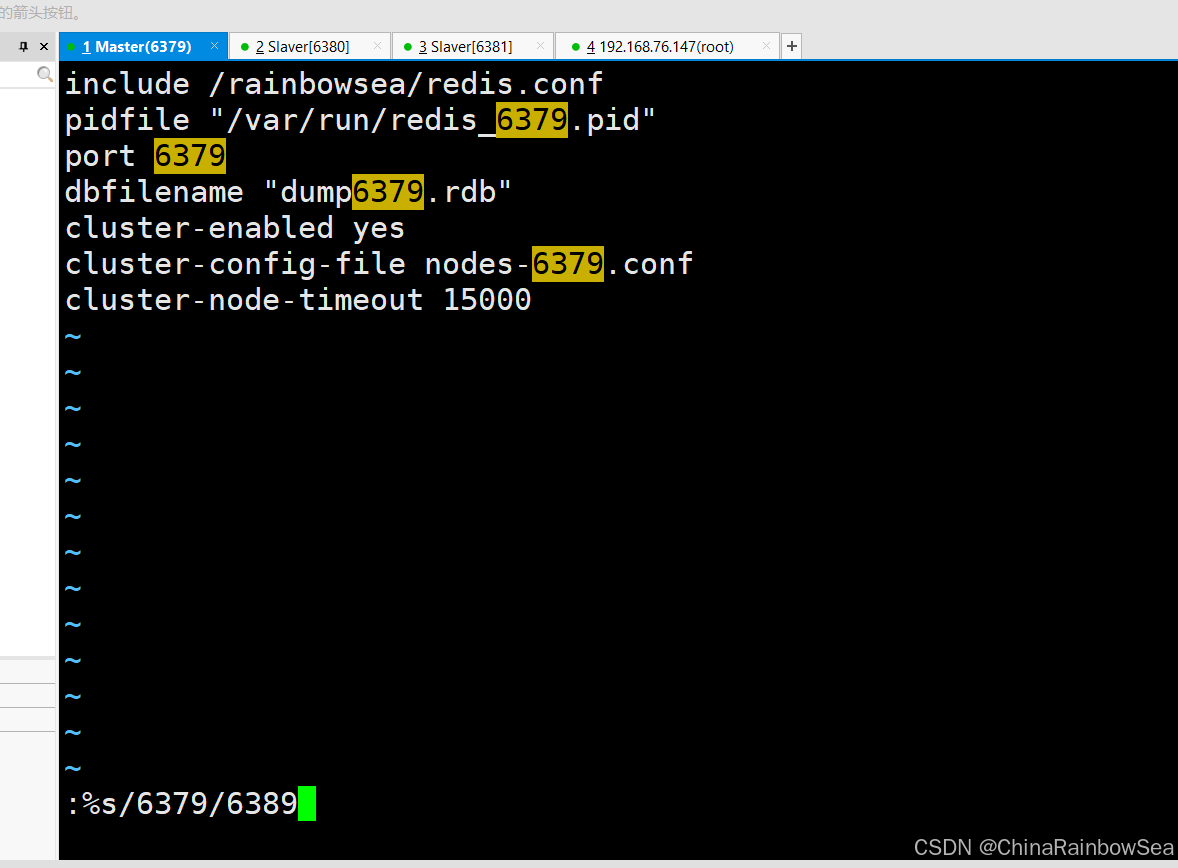
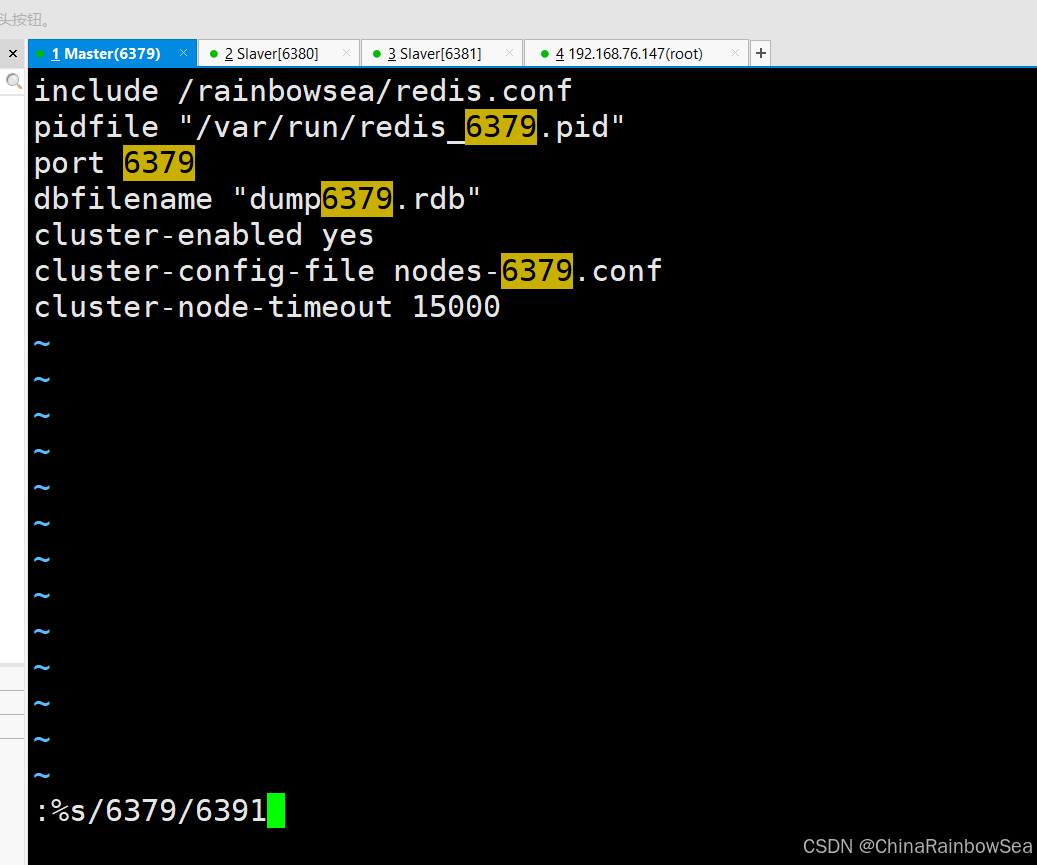
- 使用查找替换修改另外 5 个文件

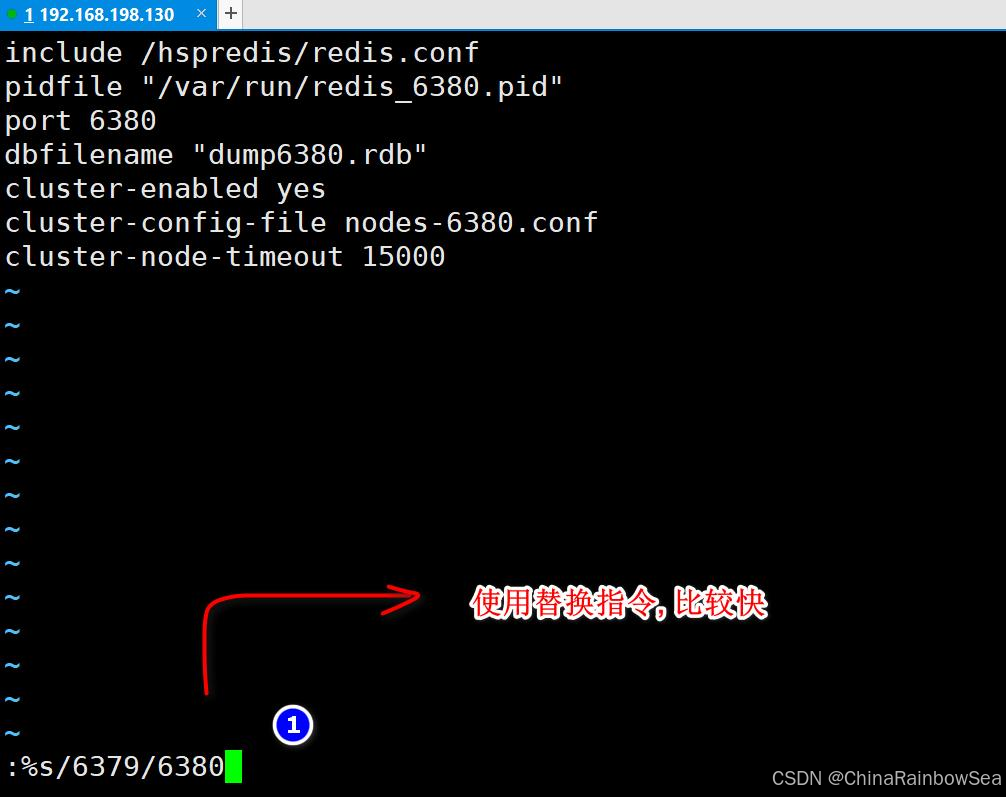
sh
换指令 :%s/6379/6380其它几个文件以此操作即可, 操作的时候,一定要小心, 最后建议再检查一下


所有的都要加上这个 masterauth rainbowsea 加上 Redis 的密码,没有设置密码的则不用配置这个。
所有的都要加上这个 masterauth rainbowsea 加上 Redis 的密码,没有设置密码的则不用配置这个。
所有的都要加上这个 masterauth rainbowsea 加上 Redis 的密码,没有设置密码的则不用配置这个。
properties
include /rainbowsea/redis.conf
pidfile "/var/run/redis_6379.pid"
port 6379
dbfilename "dump6379.rdb"
masterauth rainbowsea
cluster-enabled yes
cluster-config-file nodes-6379.conf
cluster-node-timeout 15000- 启动 6 个 Redis 服务
sh
[root@localhost rainbowsea]# redis-server /rainbowsea/redis6379.conf
[root@localhost rainbowsea]# redis-server /rainbowsea/redis6380.conf
[root@localhost rainbowsea]# redis-server /rainbowsea/redis6381.conf
[root@localhost rainbowsea]# redis-server /rainbowsea/redis6389.conf
[root@localhost rainbowsea]# redis-server /rainbowsea/redis6390.conf
[root@localhost rainbowsea]# redis-server /rainbowsea/redis6391.conf
[root@localhost rainbowsea]# ps -aux | grep redis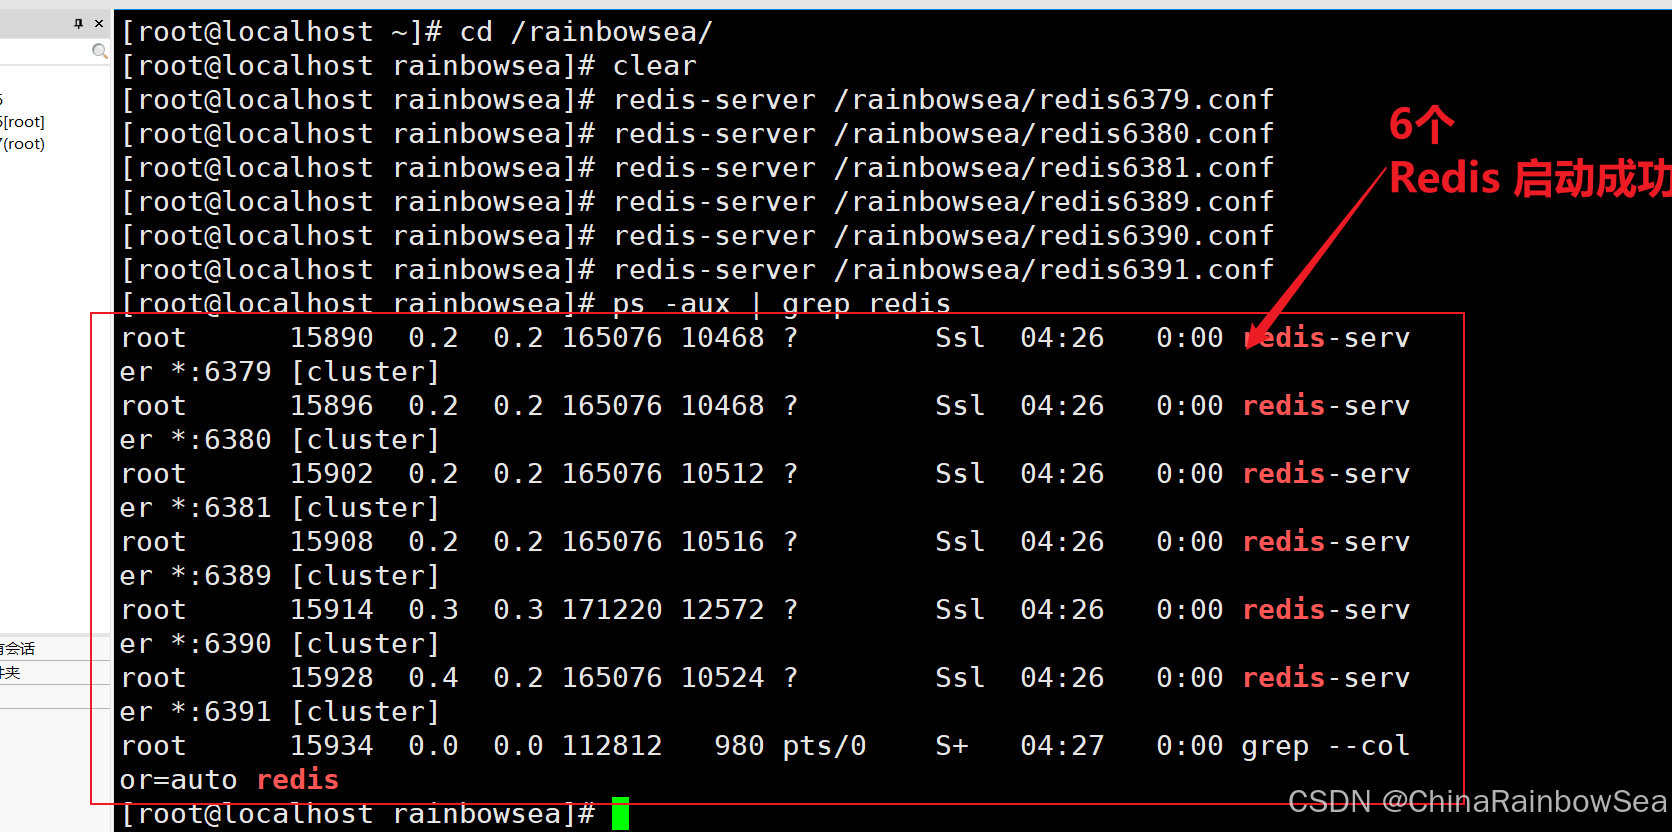
- 将六个节点合成一个集群
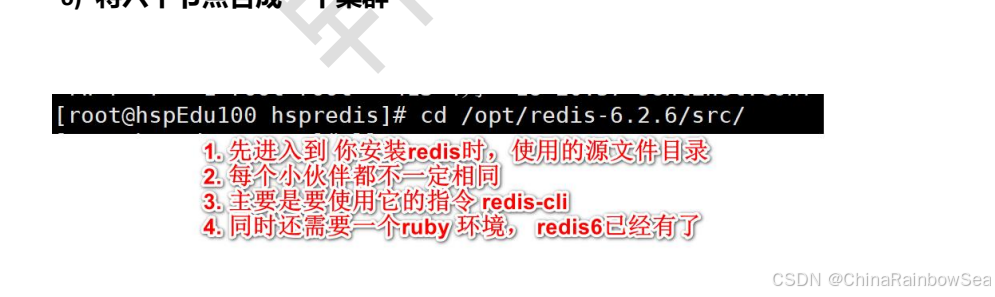
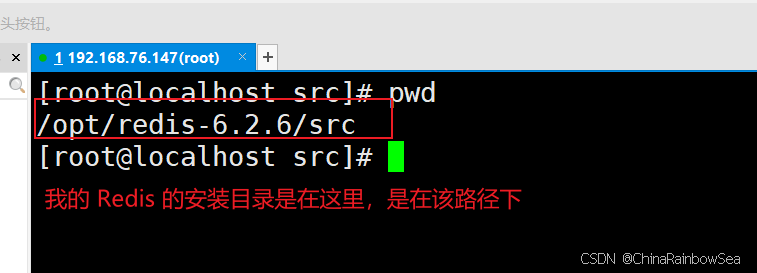
进入到该路径下后,将六个节点合成一个集群的指令:
如下这个是 Redis 没有配置密码的,指令
sh
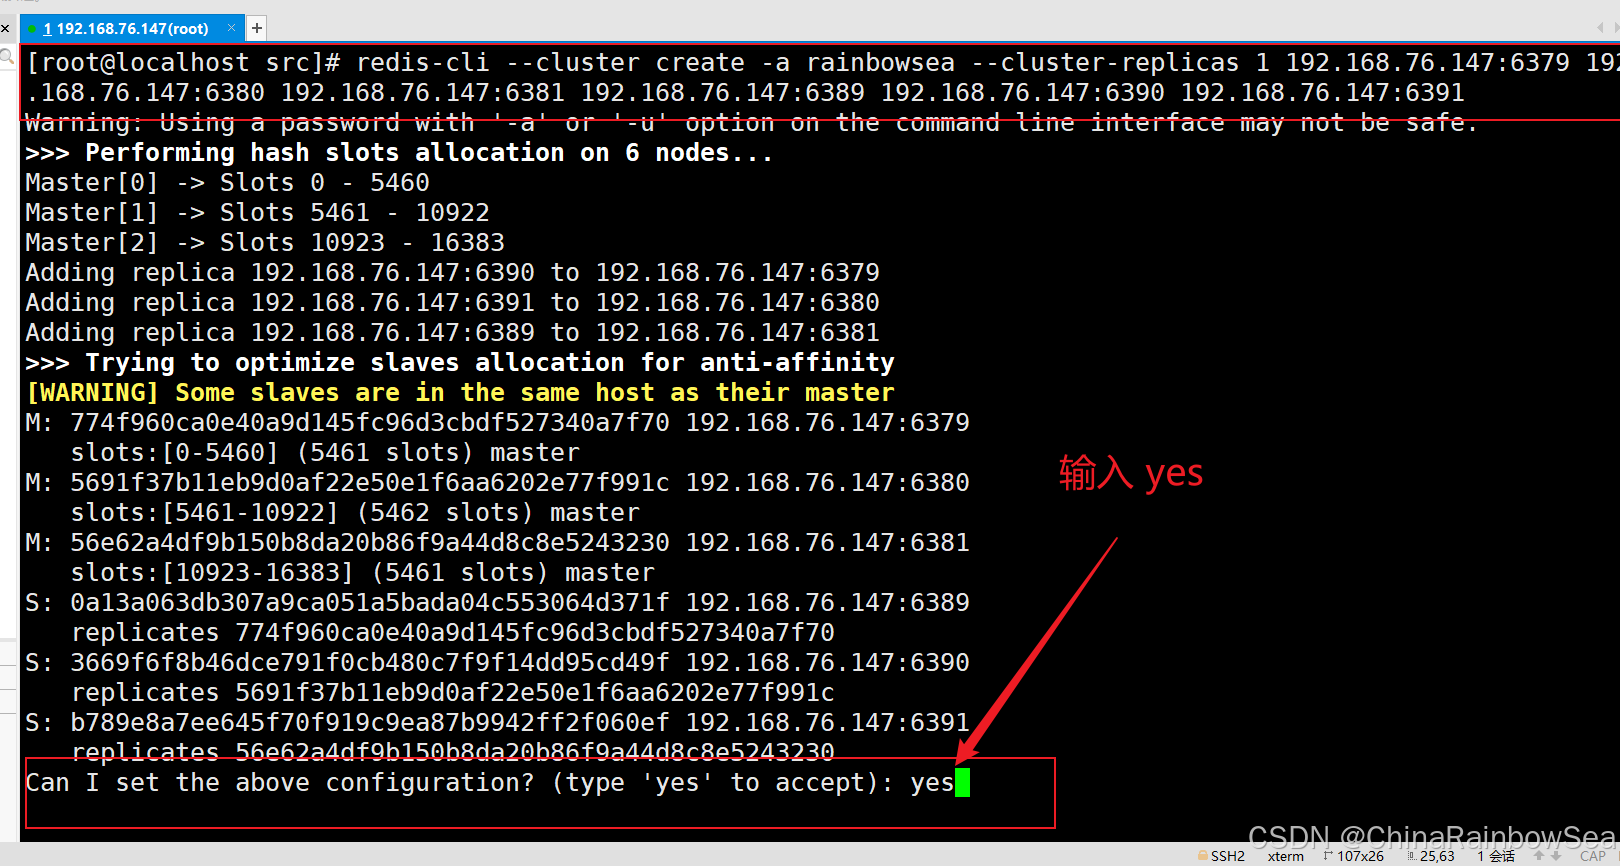
redis-cli --cluster create --cluster-replicas 1 192.168.76.147:6379 192.168.76.147:6380 192.168.76.147:6381 192.168.76.147:6389 192.168.76.147:6390 192.168.76.147:6391如下这个是 Redis 配置了密码的,指令
sh
redis-cli --cluster create -a rainbowsea --cluster-replicas 1 192.168.76.147:6379 192.168.76.147:6380 192.168.76.147:6381 192.168.76.147:6389 192.168.76.147:6390 192.168.76.147:6391注意事项和细节:
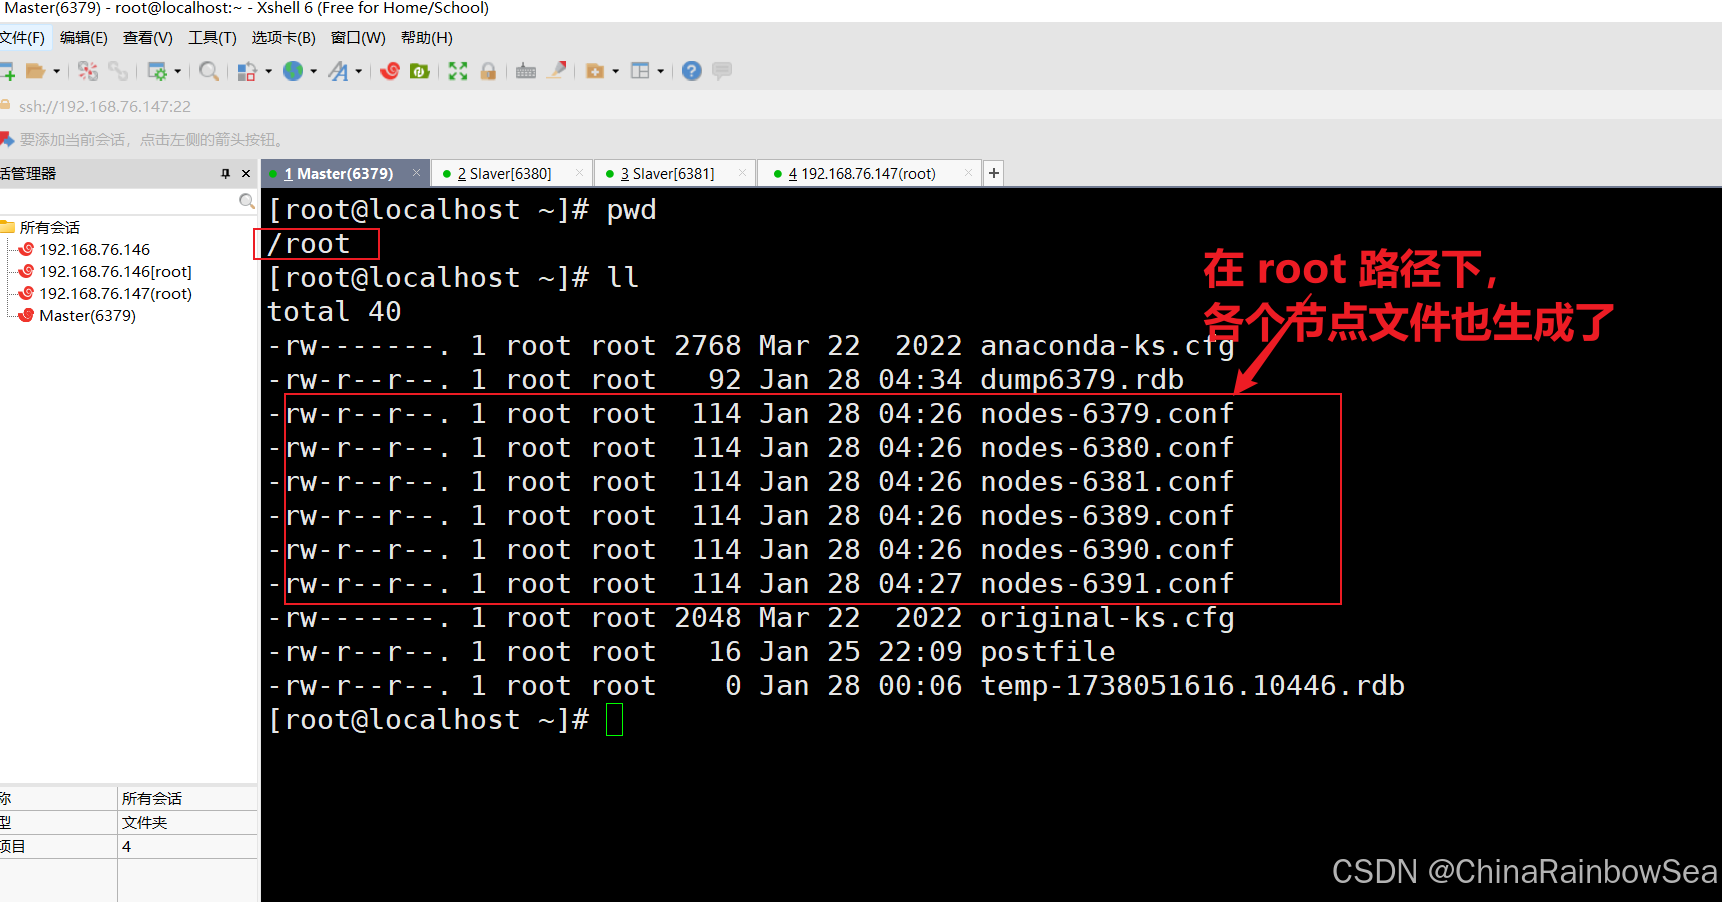
- 组合之前,确保所有(你要使用上的端口的) Redis服务器都是启动的,同时在 root 目录下(我这里是 root 配置的)
nodes-xxxx.conf文件都生成正常。 - 此时不可以用 127.0.0.1 ,需要使用真实的 IP地址(就是你连接 Linux 的地址,Linux 当中使用
ifconfig指令查询到的地址),在真实生产环境 IP都是独立的。 replicas 1采用最简单的方式配置集群,一台主机,一台从机,正好三组。- 搭建加群如果没有成功,把
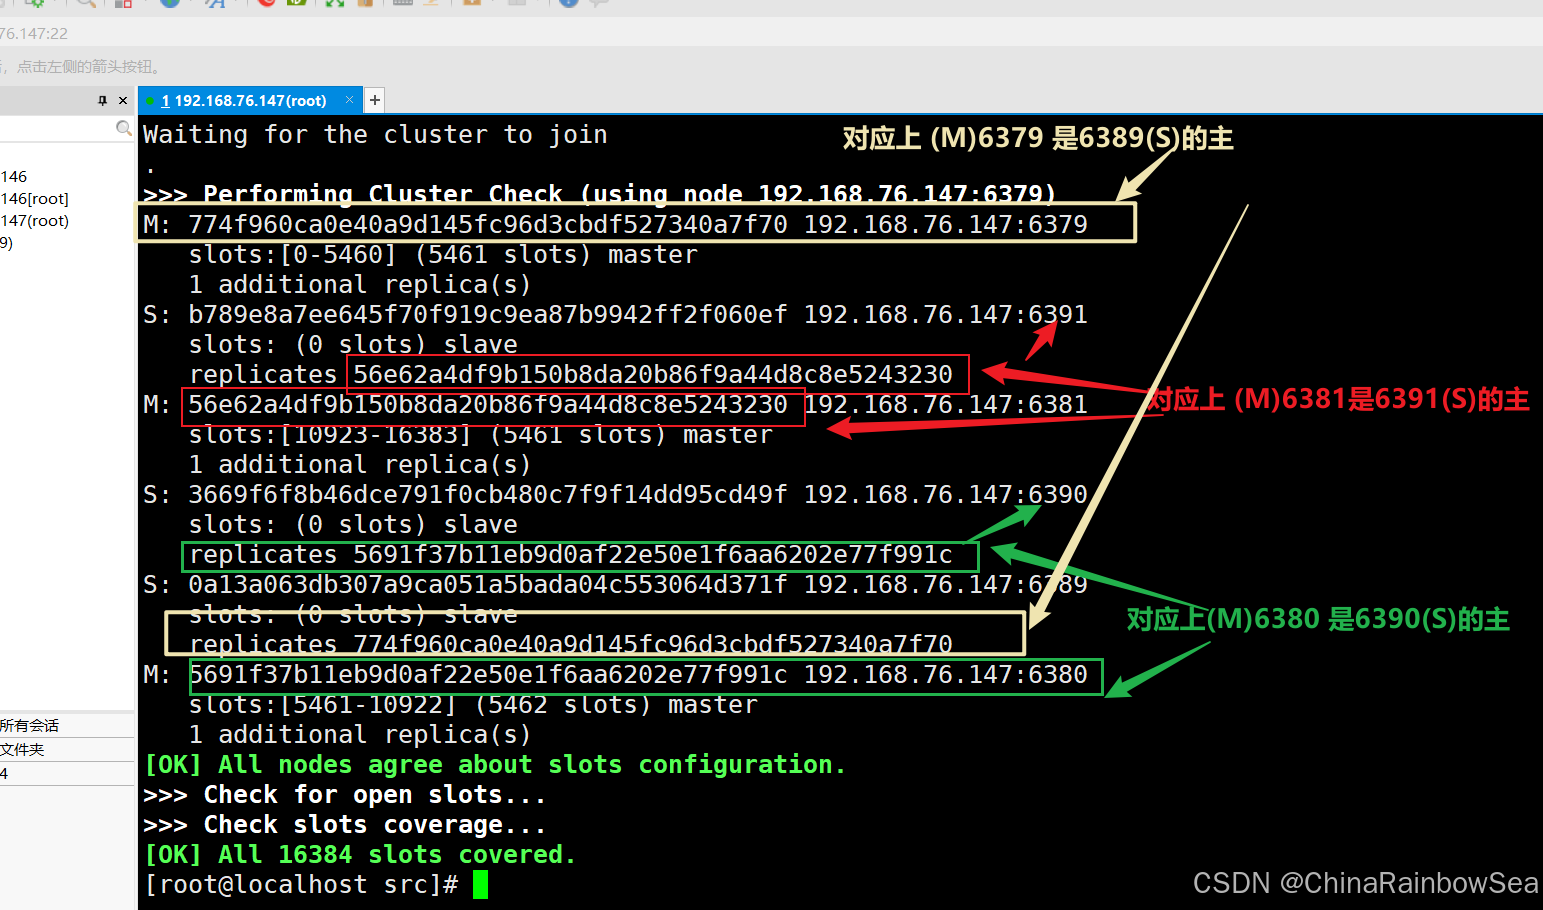
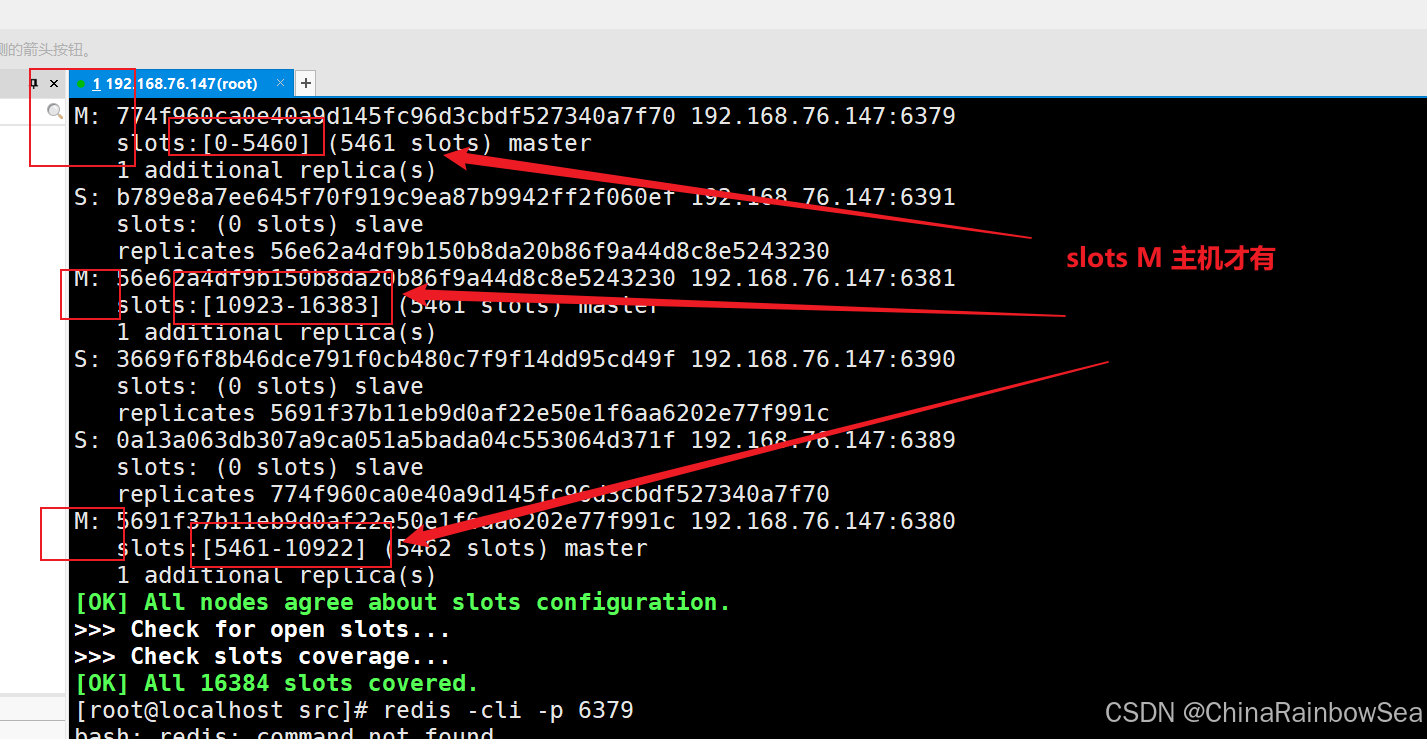
sentinel进程关闭掉,再试一下。 - 分许主从对应关系。
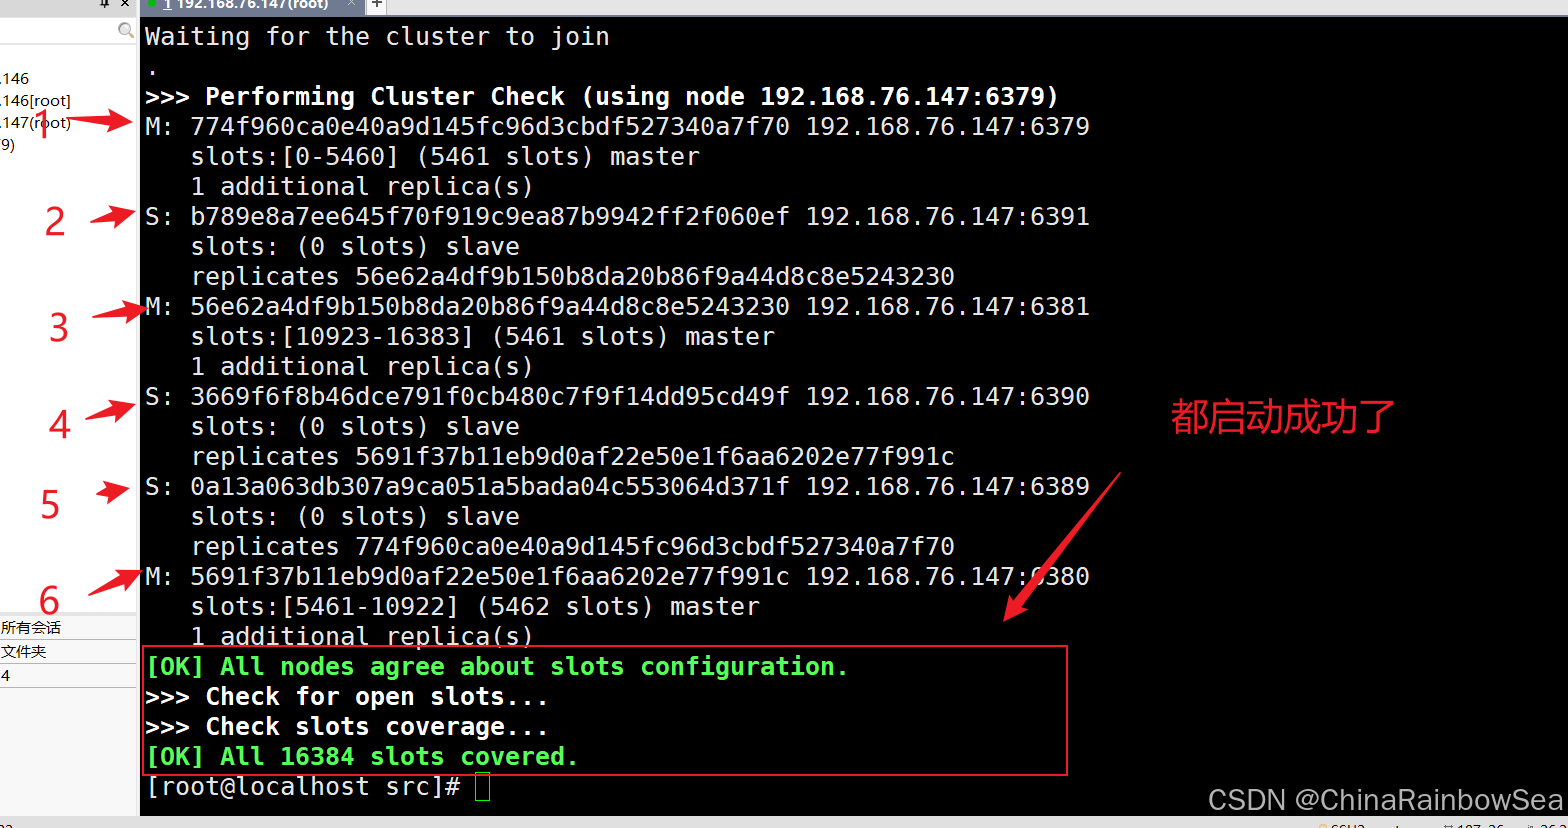
- 分析主从对应关系:如下

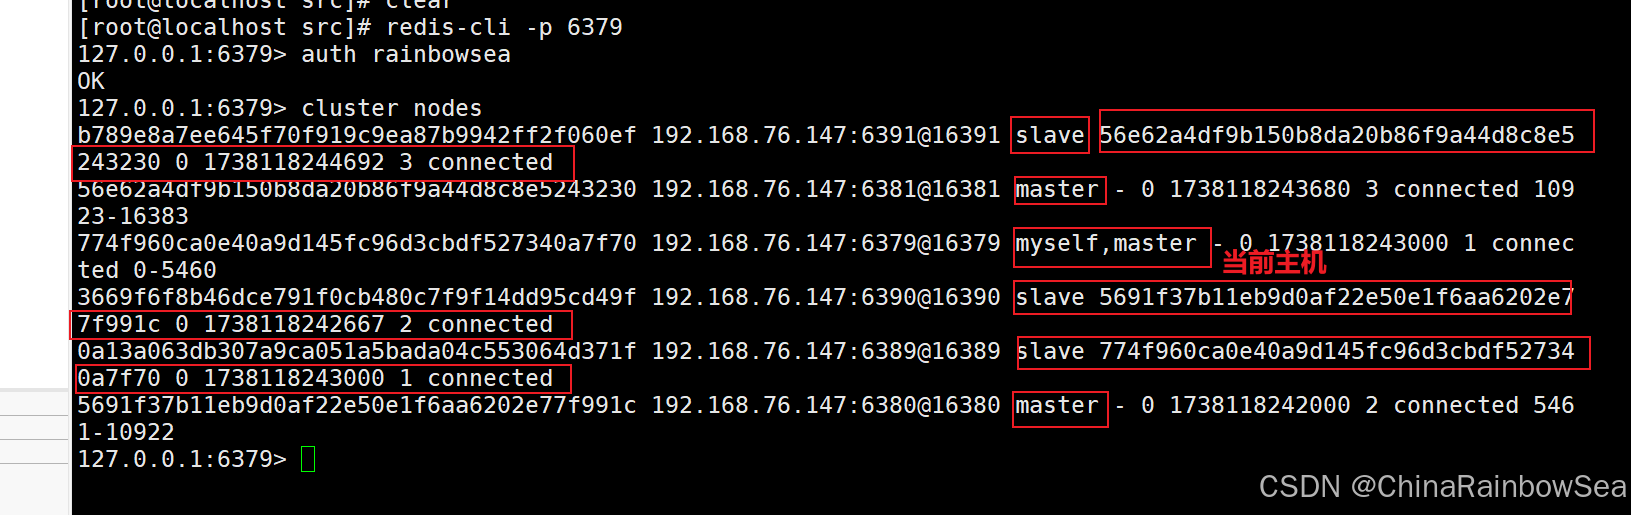
- 集群方式登录:
指令: redis-cli -c -p 6379
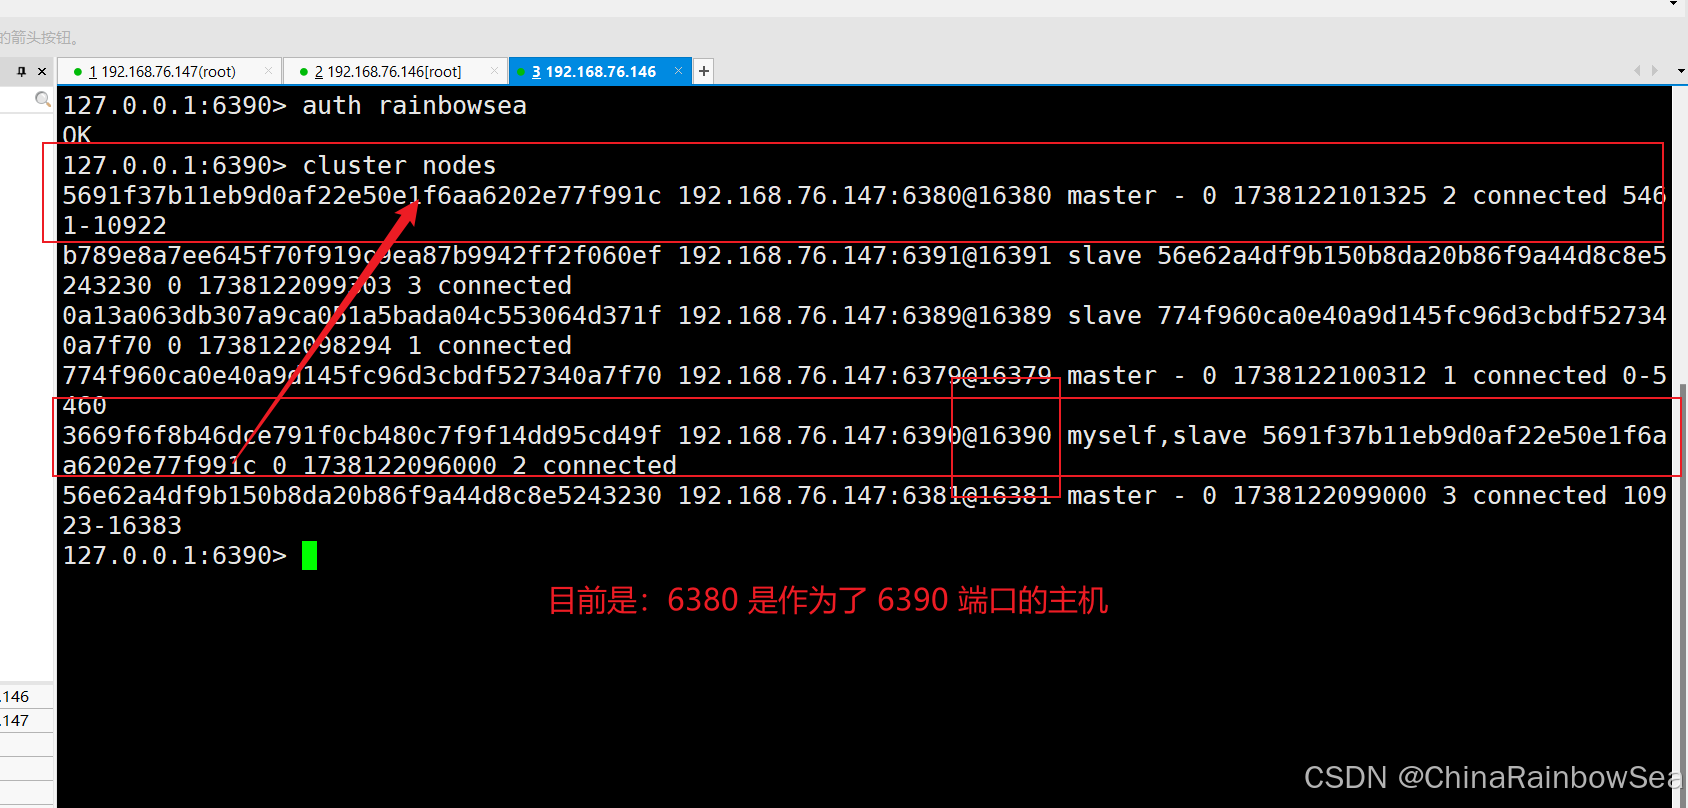
指令: cluster nodes 命令查看集群信息, 主从的对应关系, 主要看这里我标注的颜色
sh
[root@localhost src]# redis-cli -c -p 6379
127.0.0.1:6379> auth rainbowsea
127.0.0.1:6379> cluster nodes
注意事项和细节:
sh
[root@localhost src]# redis-cli -c -p 6379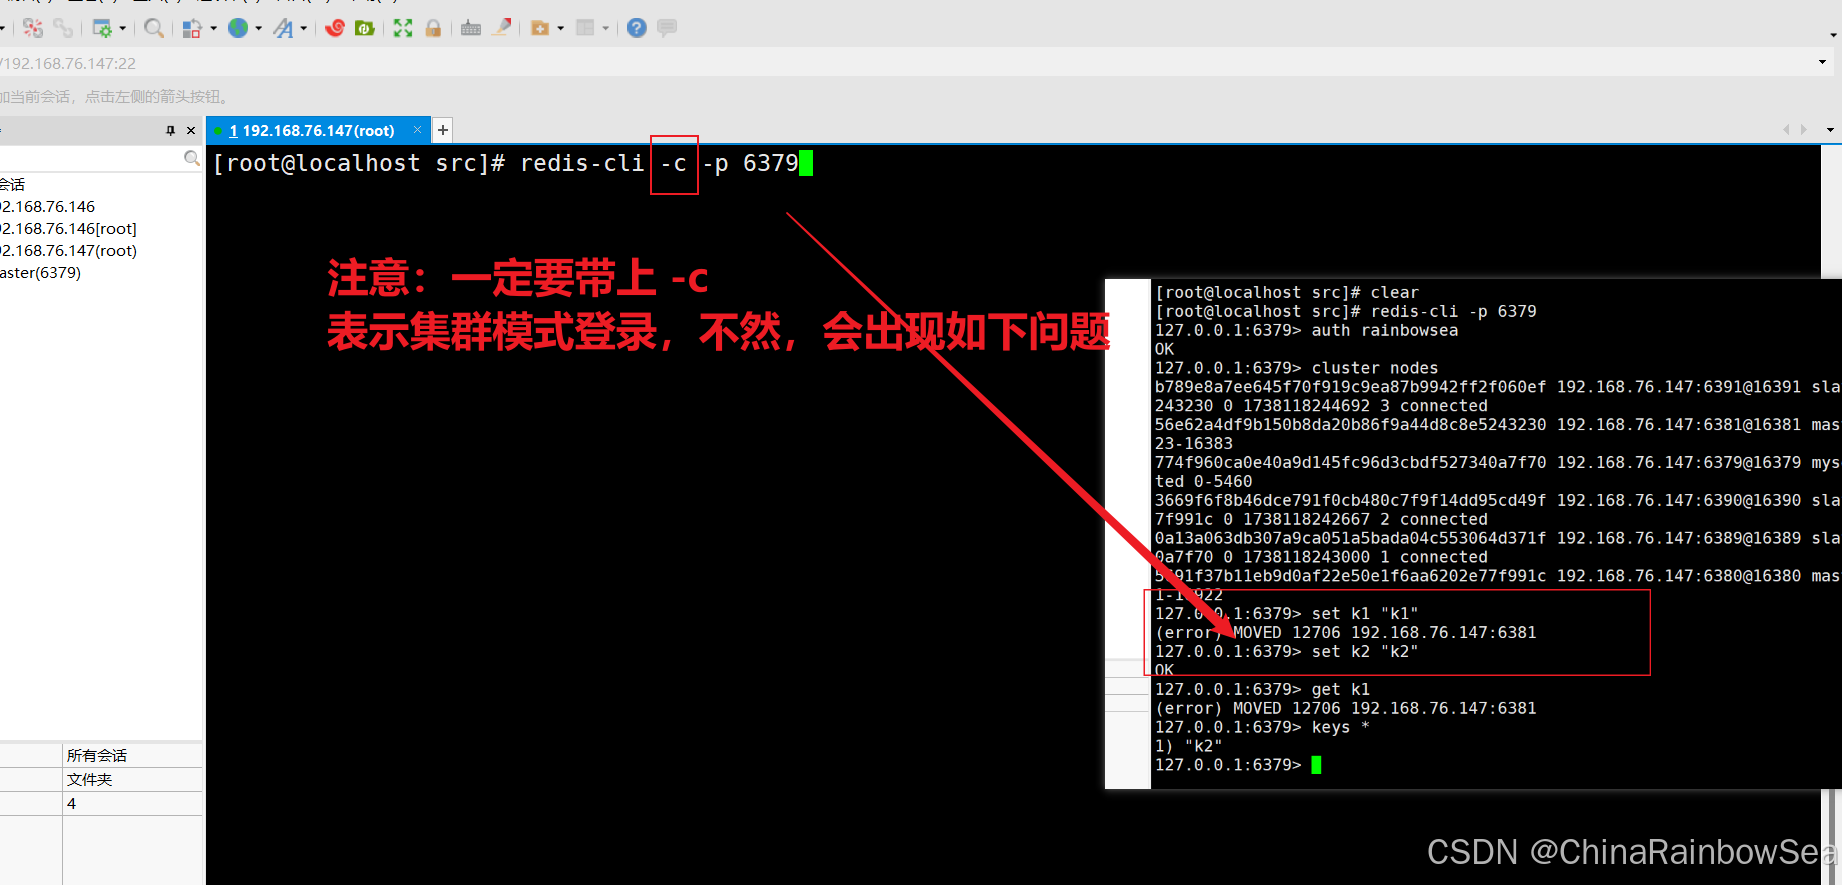
- 一个集群至少要有三个主节点。
- 选项
--cluster-replicas 1表示我们希望为集群中的每个主节点创建一个从节点。 - 分配原则: 尽量保证主服务器和从服务器各自运行在不同的 IP 地址(机器),防止机器故障导致主从机制失效,高可用性得不到保障。
3. Redis 集群的使用
什么是 slots:
Redis 集群启动后, 你会看到如下提示:

- 一个 Redis 集群包含了
16384个插槽(hash slot) ,编号从0-16383,Redis 中的每个键都属于这 16384 个插槽的其中一个。注意:这里虽然只有 16384个插槽,但是并不是只能插入 16384个键,多个不同的键可以插入到同一个插槽的,并不是一个插槽一个键的 。 - 集群使用公式
CRC16(key) % 16384来计算键 key 属于哪个槽,其中 CRC16(key) 语句用于计算键 key 的 CRC16的校验和
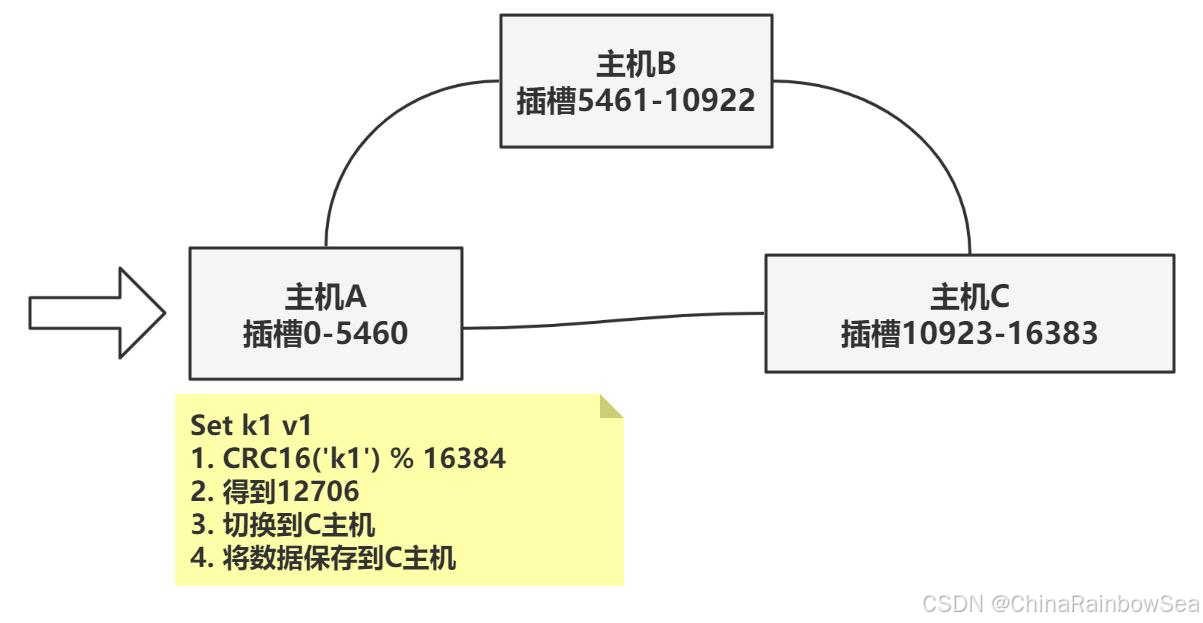
- 集群中的每个节点负责处理一部分插槽。举个例子:如果一个集群可以有主节点,其中
- 节点 A 负责处理
0号 ~ 5460号插槽- 节点 B 负责处理
5461号 ~ 10922号插槽- 节点 C 负责处理
10923号 ~ 16383号插槽
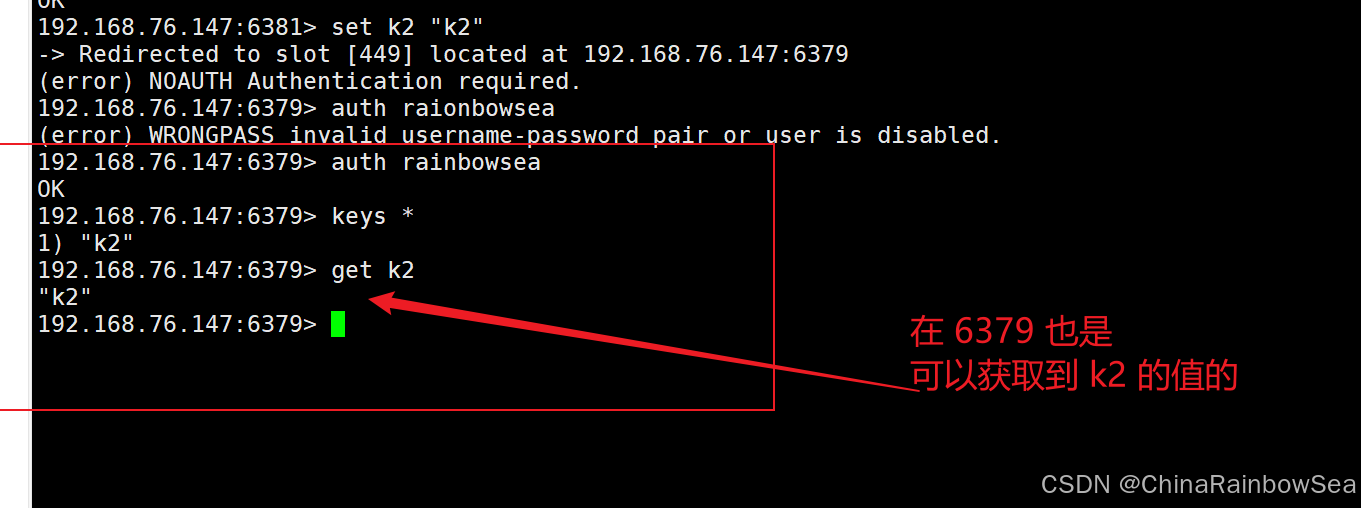
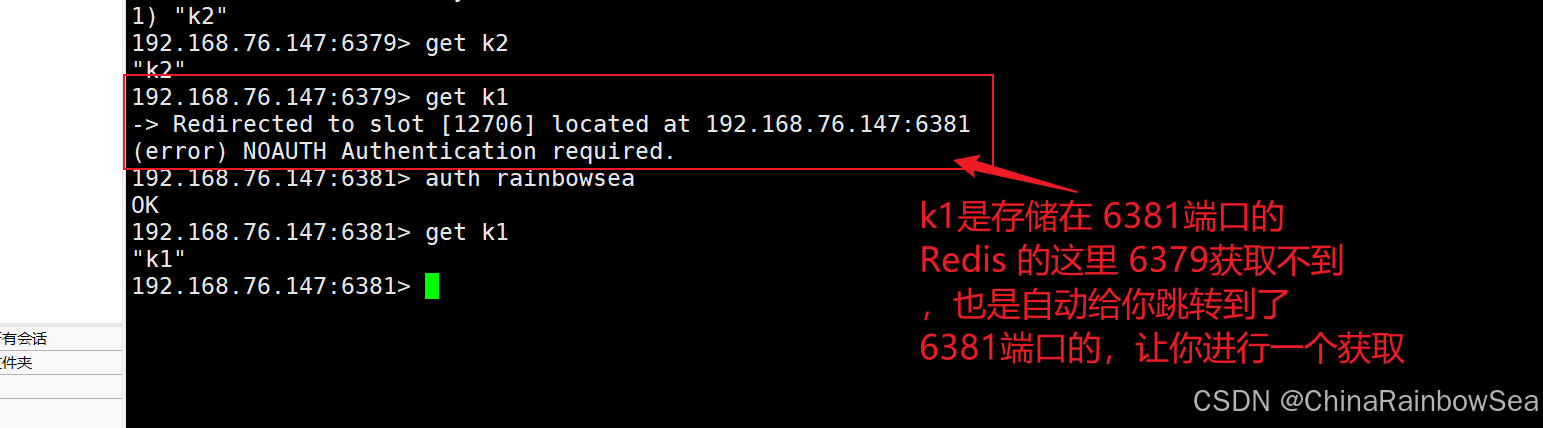
在集群中录入值:
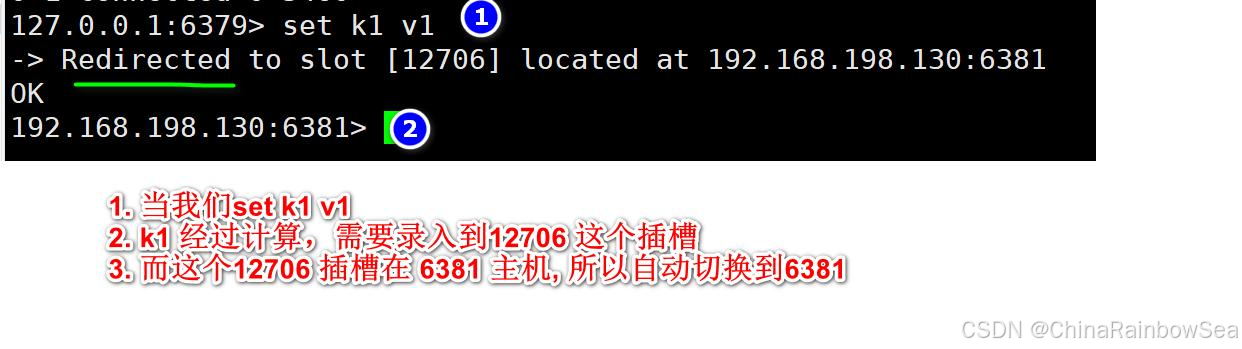
- 在 Redis 每次录入,查询键值,redis 都会计算出该 key 应该送往的插槽,如果不是该客户端对应服务器的插槽,redis 会告知前往的 Redis 实例地址和端口。
- Redis-cli 客户端提供了
-c参数实现自动重定向。 - 如
redis-cli -c -p 6379登入后,再录入,查询键值对可以自动重定向

- 不在一个 slot 下的键值,是不能使用 mget,mset 等多键操作。
sh
192.168.76.147:6381> mset k1 "v1" k2 "v2" k3 "v3"

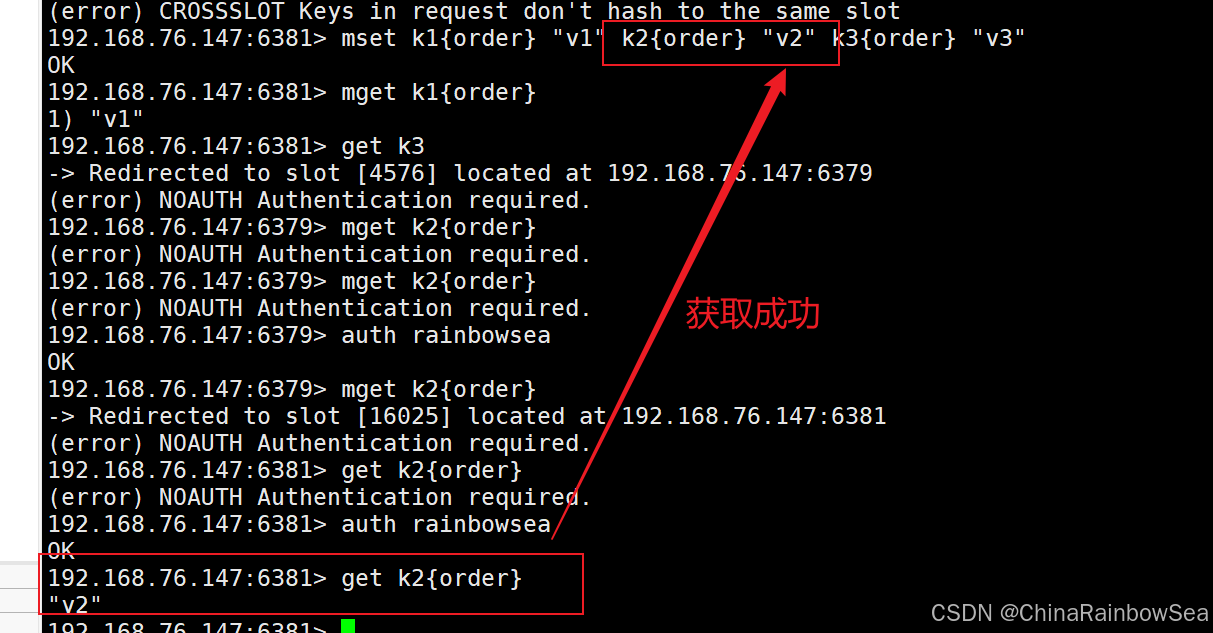
- 可以通过
{}来定义组的概念,从而使 key 中{}内相同内容的键值对放到一个slot中去,就解决了上面 mget 分布到不同 slot 而导致失败的原因。
sh
192.168.76.147:6381> mest k1{order} "v1" k2{order} "v2" k3{order} "v3"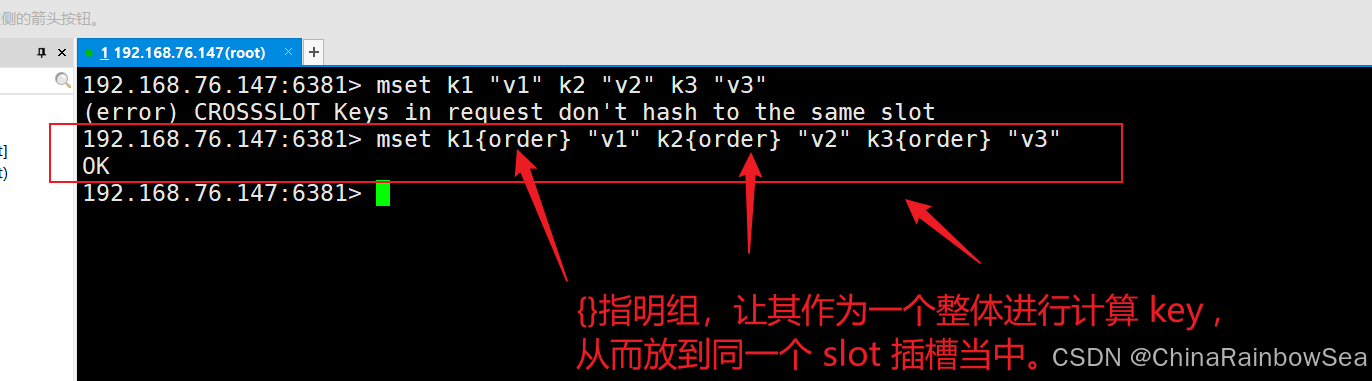
注意:你如果对键加上了{}组,那么你想要获取到该值的时候,也是要加上对应的{}组的,才能获取到的。


查询集群中的值:
- 指令:
CLUSTER KEYSLOT <key>返回 key 对应的 slot 值
sh
192.168.76.147:6381> cluster keyslot k1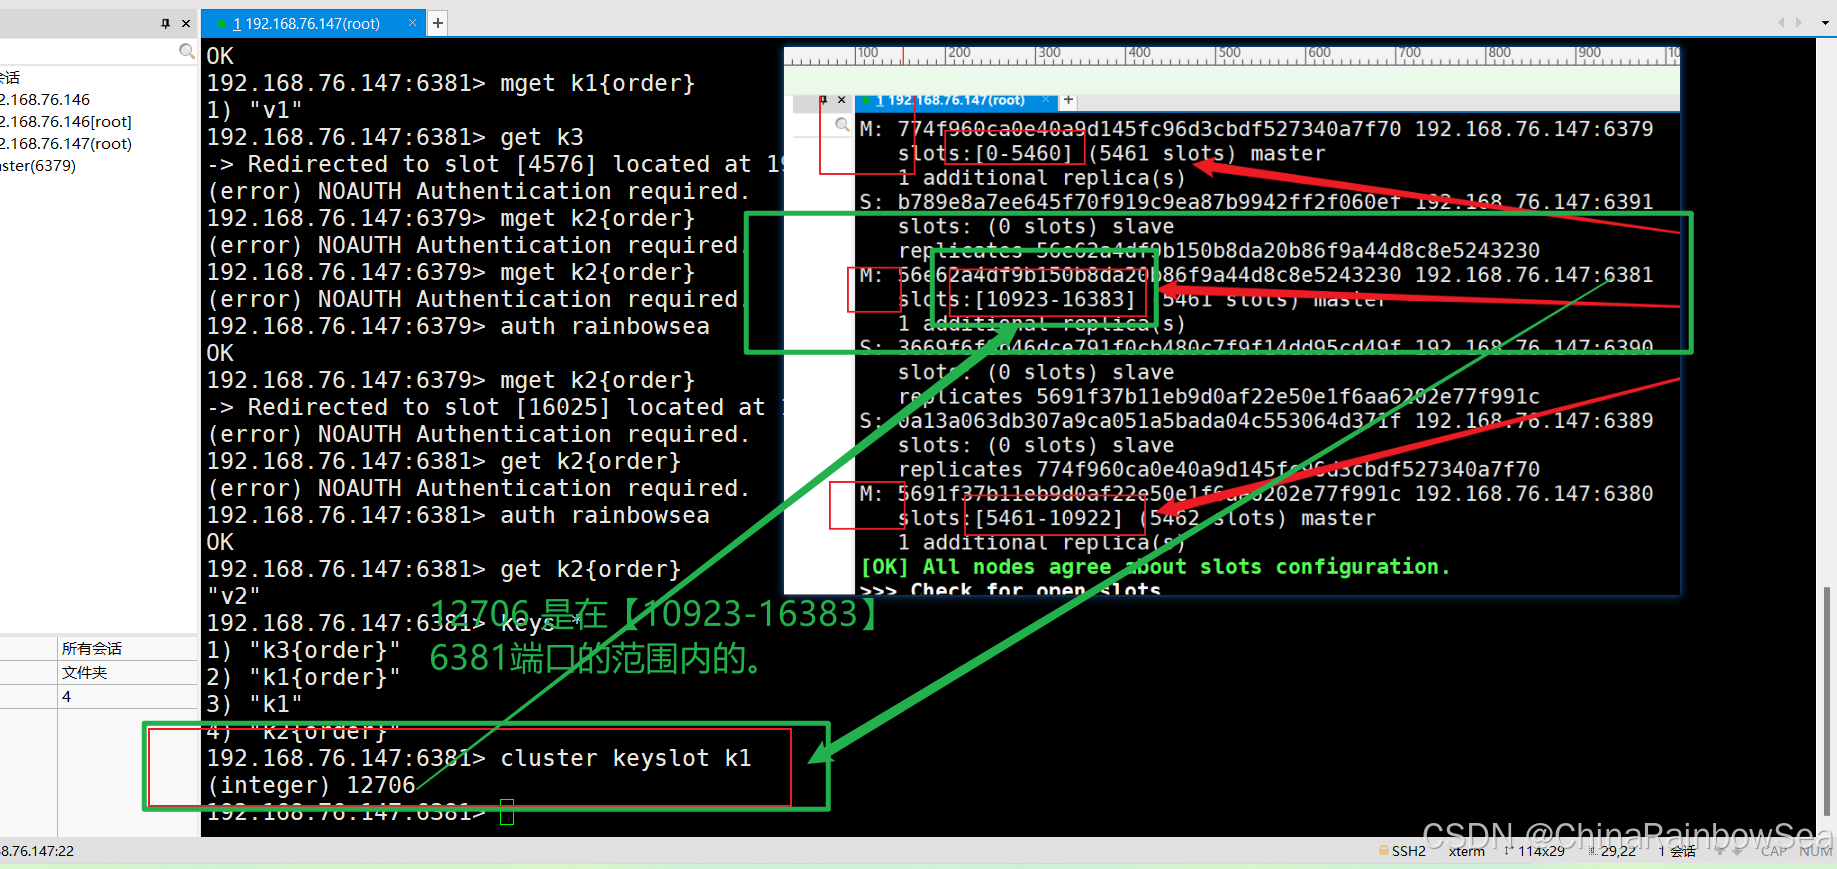
sh
192.168.76.147:6381> cluster keyslot k2{order}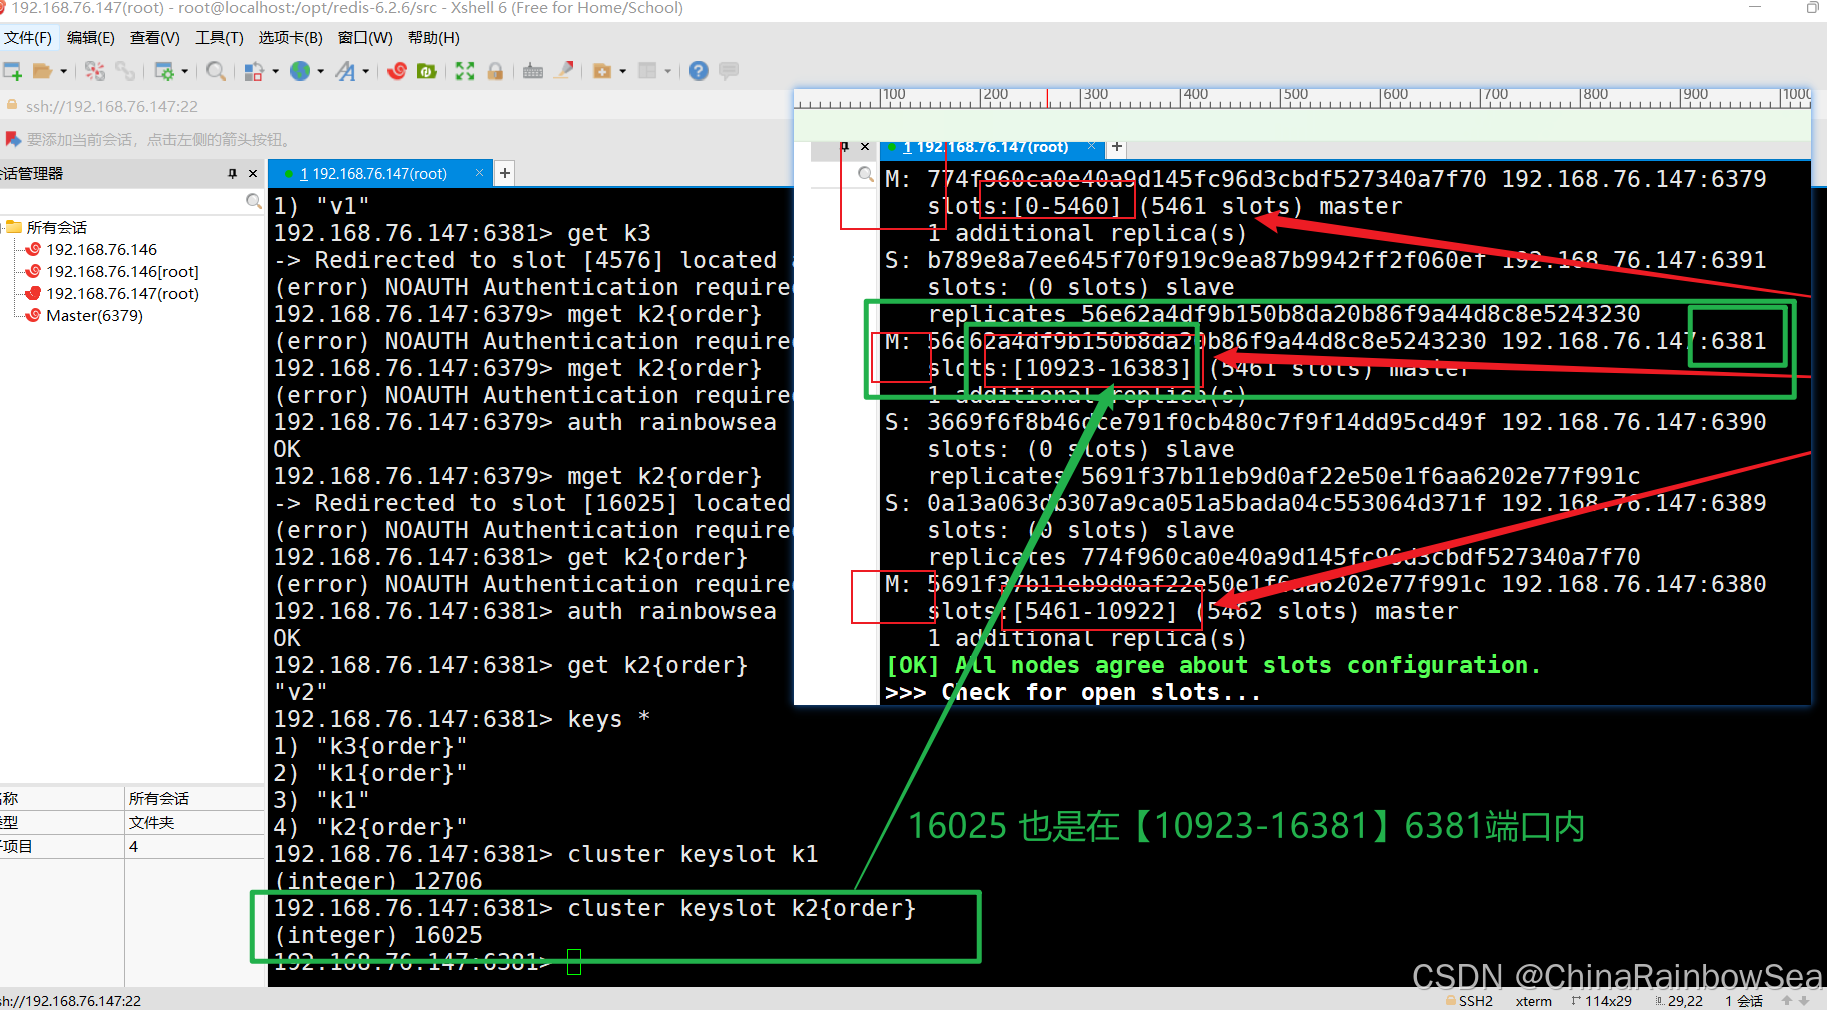
可以看到归属于
{}同一组的,Redis都是分配到了同一个 slot 插槽数值当中。

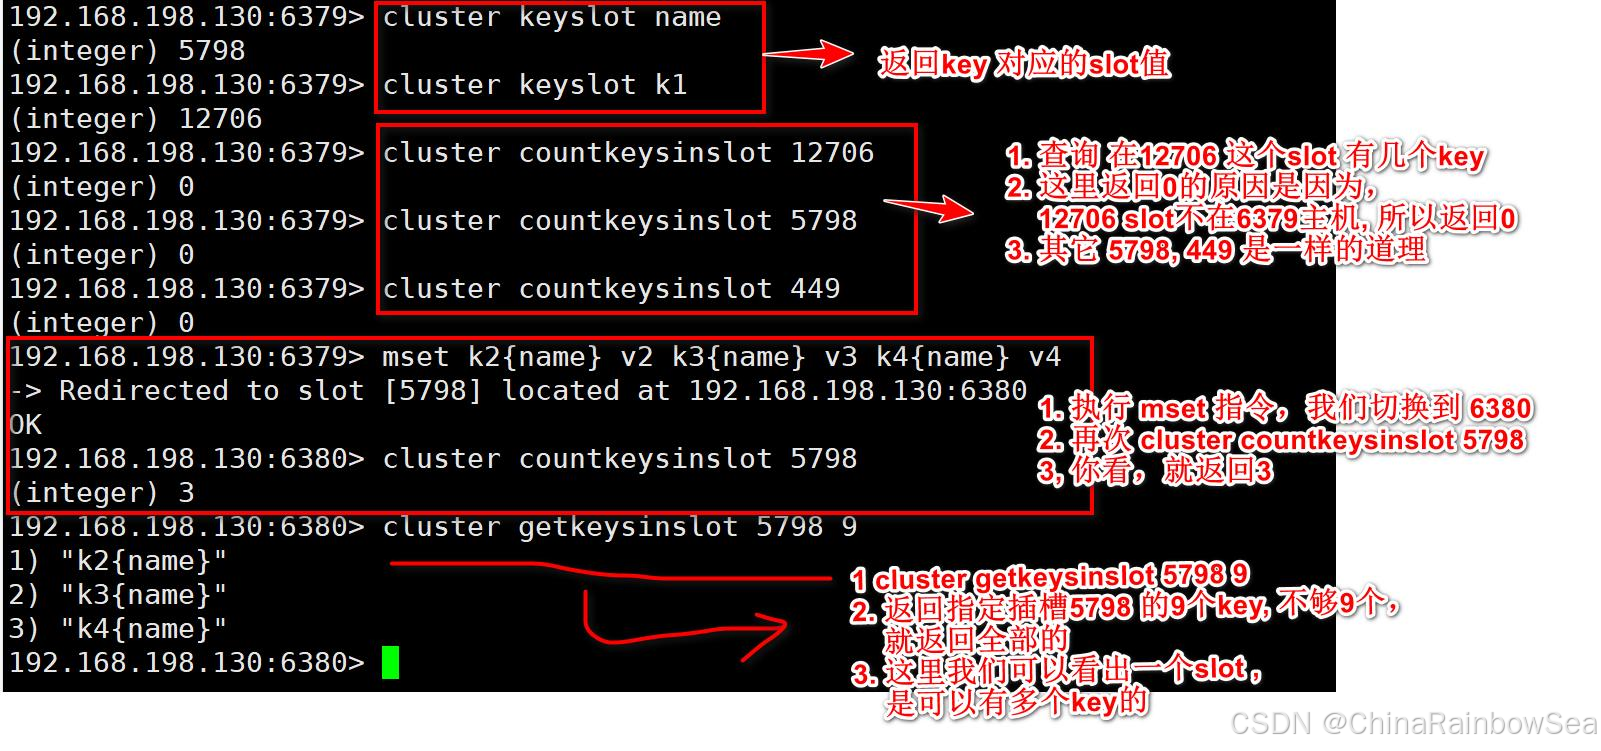
- 指令:
CLUSTER COUNTKEYSINSLOT <slot>返回 slot 有多少个 key
sh
192.168.76.147:6381> cluster countkeysinslot 12706
(integer) 1
192.168.76.147:6381> cluster countkeysinslot 16025
(integer) 3
- 指令:
CLUSTER GETKEYSINSLOT <slot><count>返回 count 个 slot 槽中的键
sh
192.168.76.147:6381> cluster getkeysinslot 16025 1
1) "k1{order}"
192.168.76.147:6381> cluster getkeysinslot 16025 2
1) "k1{order}"
2) "k2{order}"
192.168.76.147:6381> cluster getkeysinslot 16025 3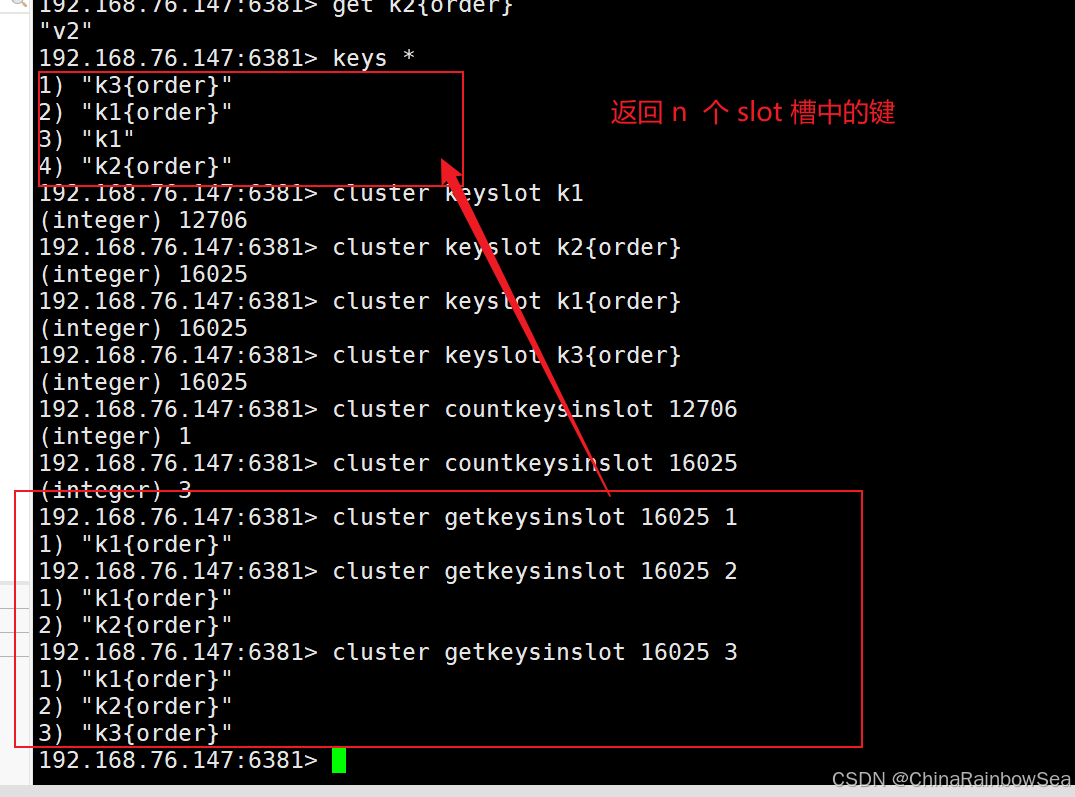
4. Redis 集群故障恢复
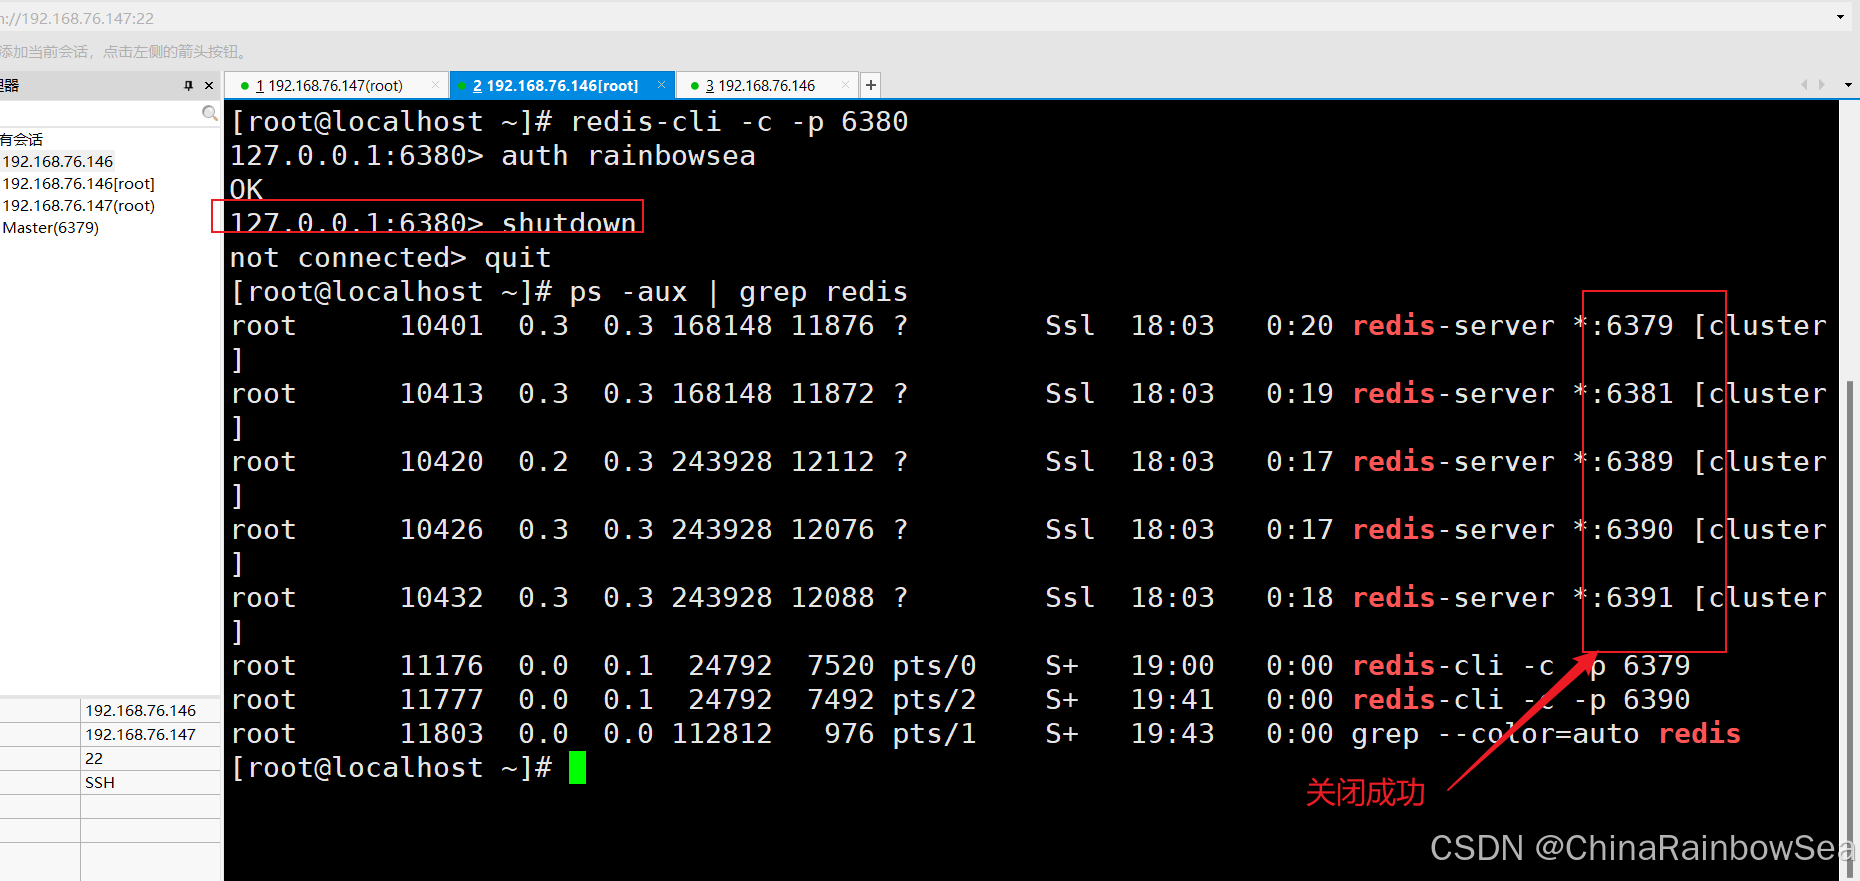
- 如果主节点下线, 从节点会自动升为主节点(注意 15 秒超时, 再观察比较准确)
sh
[root@localhost ~]# redis-cli -c -p 6380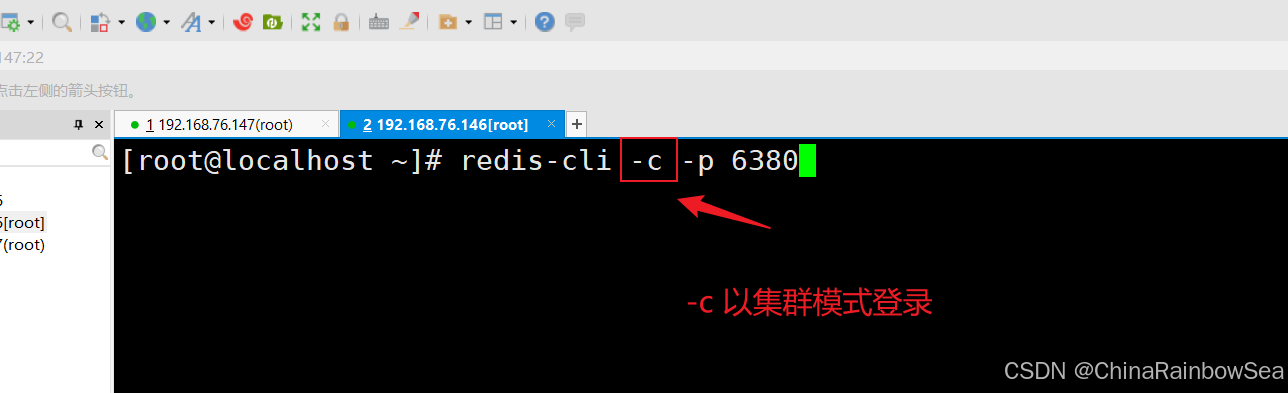

这里我们将 6380 主机关闭了。

- 主节点恢复后,主节点回来变成从机
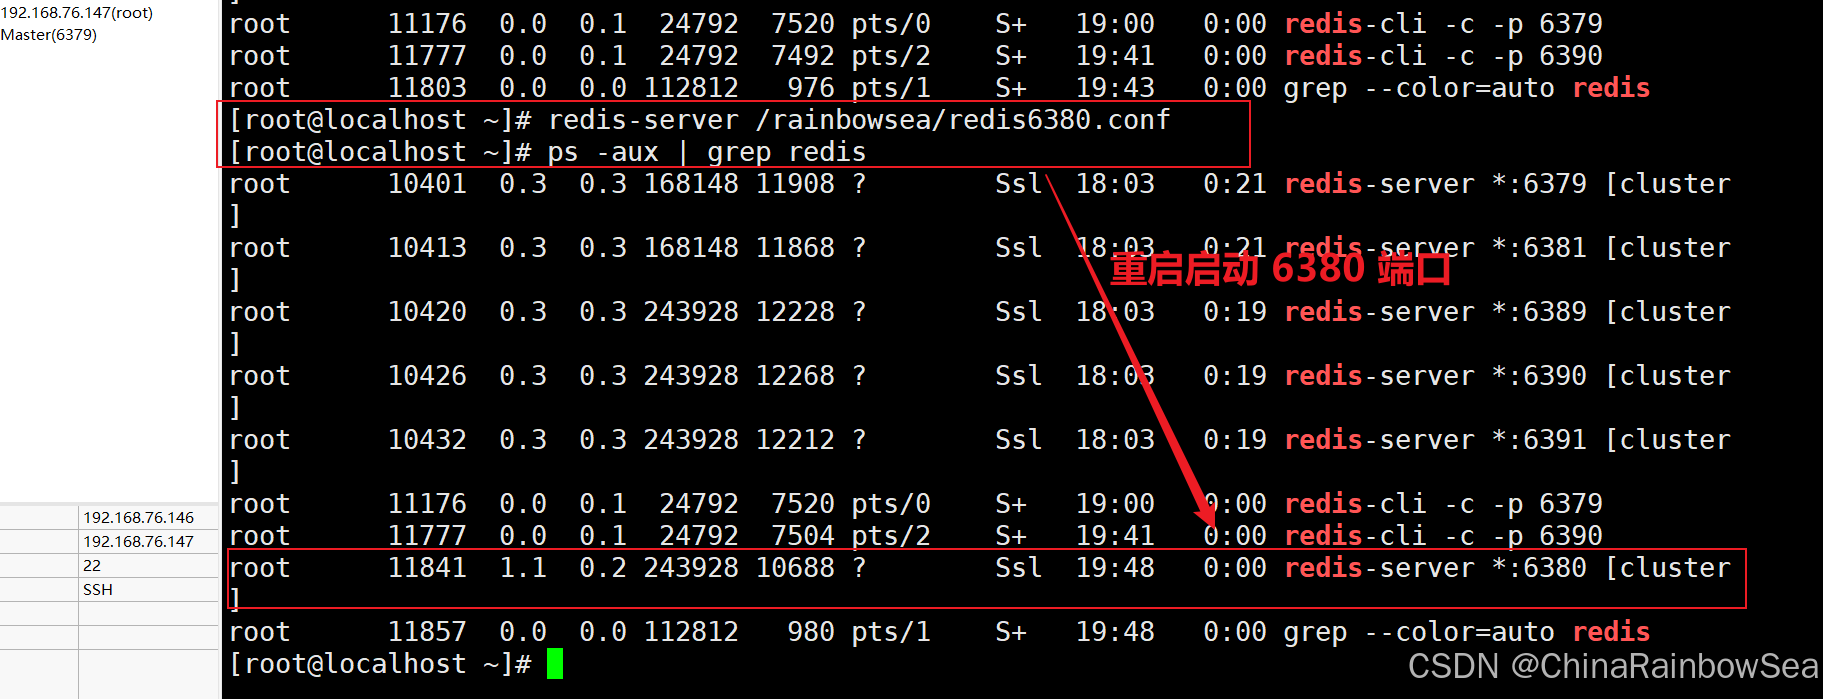
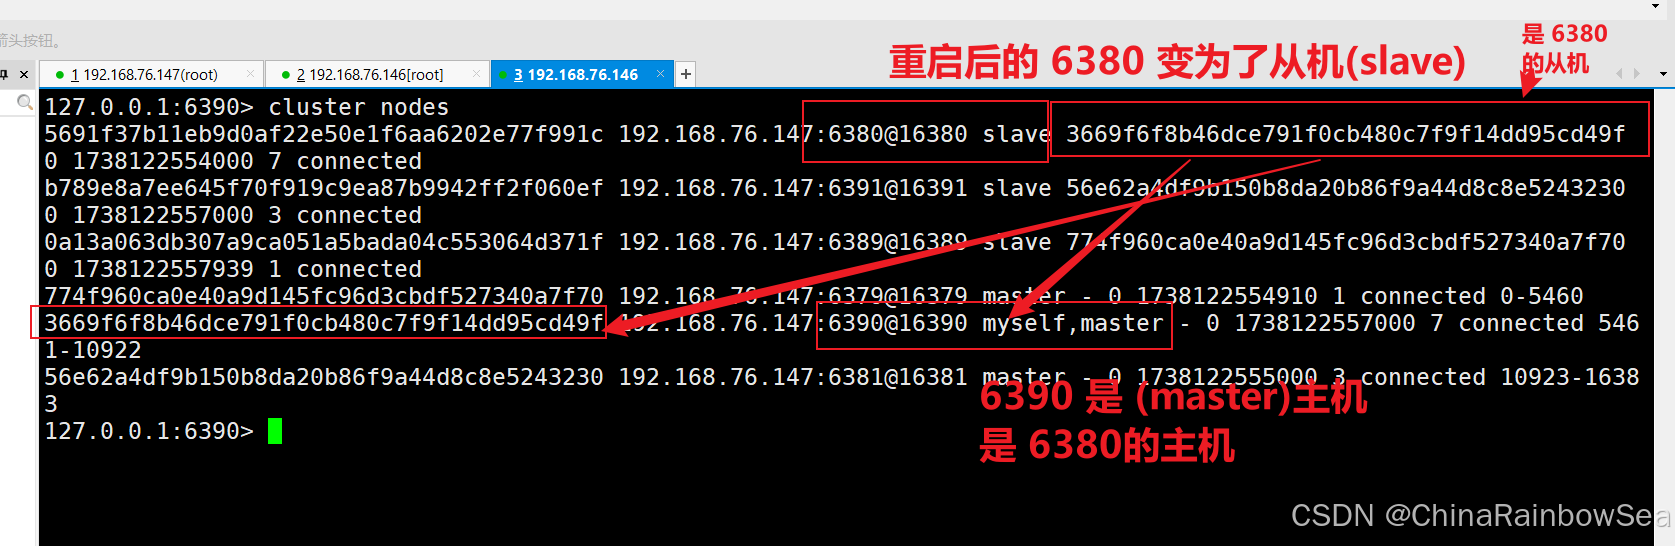
如果所有某一段插槽的主从节点都宕掉了 ,Redis 服务是否还能继续,要根据不同的配置而言。
- 如果某一段插槽的主从 都宕机了,而在 redis.conf 配置文件当中
cluster-require-full-coverage为yes,那么,整个集群都会被宕掉,无法使用。- 如果某一段插槽的主从 都宕机了,而在 redis.conf 配置文件当中
cluster-require-full-coverage为no,那么,仅仅只是该段插槽的数据不能使用了,也无法存储了,其他插槽的数据还可以继续使用。- redis.conf 文件当中的参数
cluster-require-full-coverage

5. Redis 集群的 Jedis 开发(使用Java程序连接 Redis 同时开启集群)
- 即使连接的不是主机,集群会自动切换主机进行存储,主机写,从机读 。
- 无中心化主从集群,无论从哪台主机写的数据,其他主机上都能读到数据。
- 注意:需要将 Redis 相关的端口都打开 否则会报错
配置防火墙将所有相关 Redis 的端口都打开。
sh
[root@localhost src]# firewall-cmd --add-port=6379/tcp --permanent
Warning: ALREADY_ENABLED: 6379:tcp
success
[root@localhost src]# firewall-cmd --add-port=6380/tcp --permanent
success
[root@localhost src]# firewall-cmd --add-port=6381/tcp --permanent
success
[root@localhost src]# firewall-cmd --add-port=6389/tcp --permanent
success
[root@localhost src]# firewall-cmd --add-port=6390/tcp --permanent
success
[root@localhost src]# firewall-cmd --add-port=6391/tcp --permanent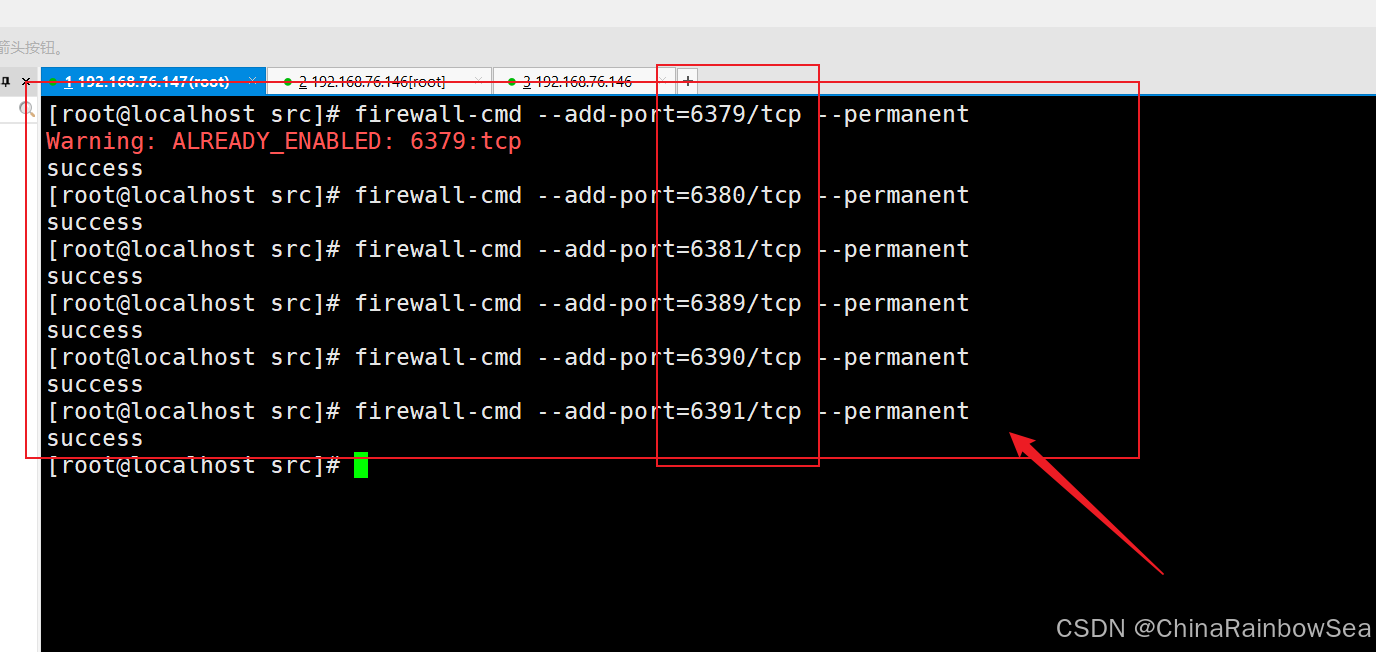
sh
[root@localhost src]# firewall-cmd --reload
sh
[root@localhost src]# firewall-cmd --list-all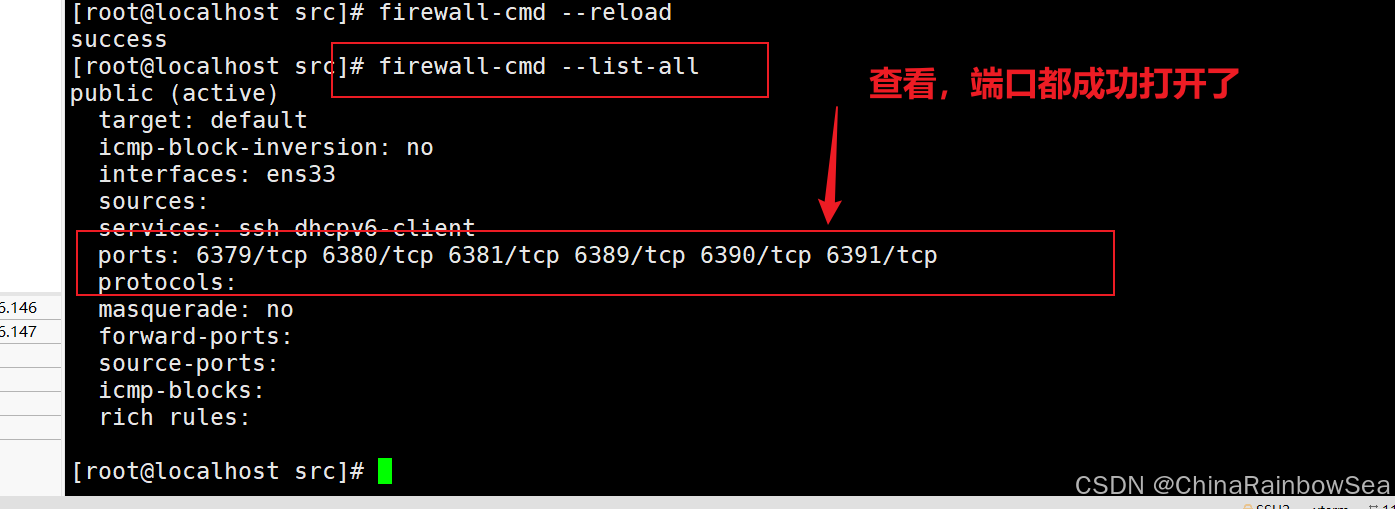
在 pom.xml 当中引入 redis.clients 依赖。如下:
xml
   <!--        引入 jedis 依赖-->
        <dependency>
            <groupId>redis.clients</groupId>
            <artifactId>jedis</artifactId>
            <version>3.2.0</version>
        </dependency>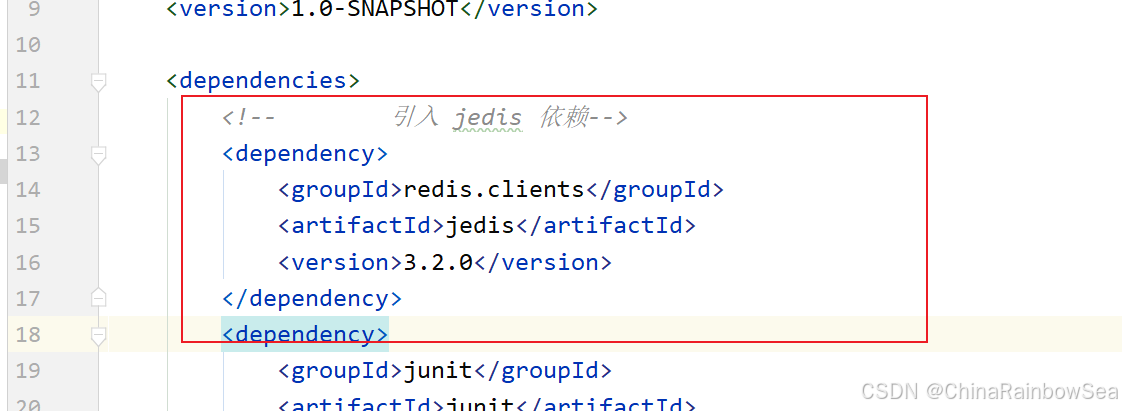
首先测试,是否可以连接到 Redis 服务器。
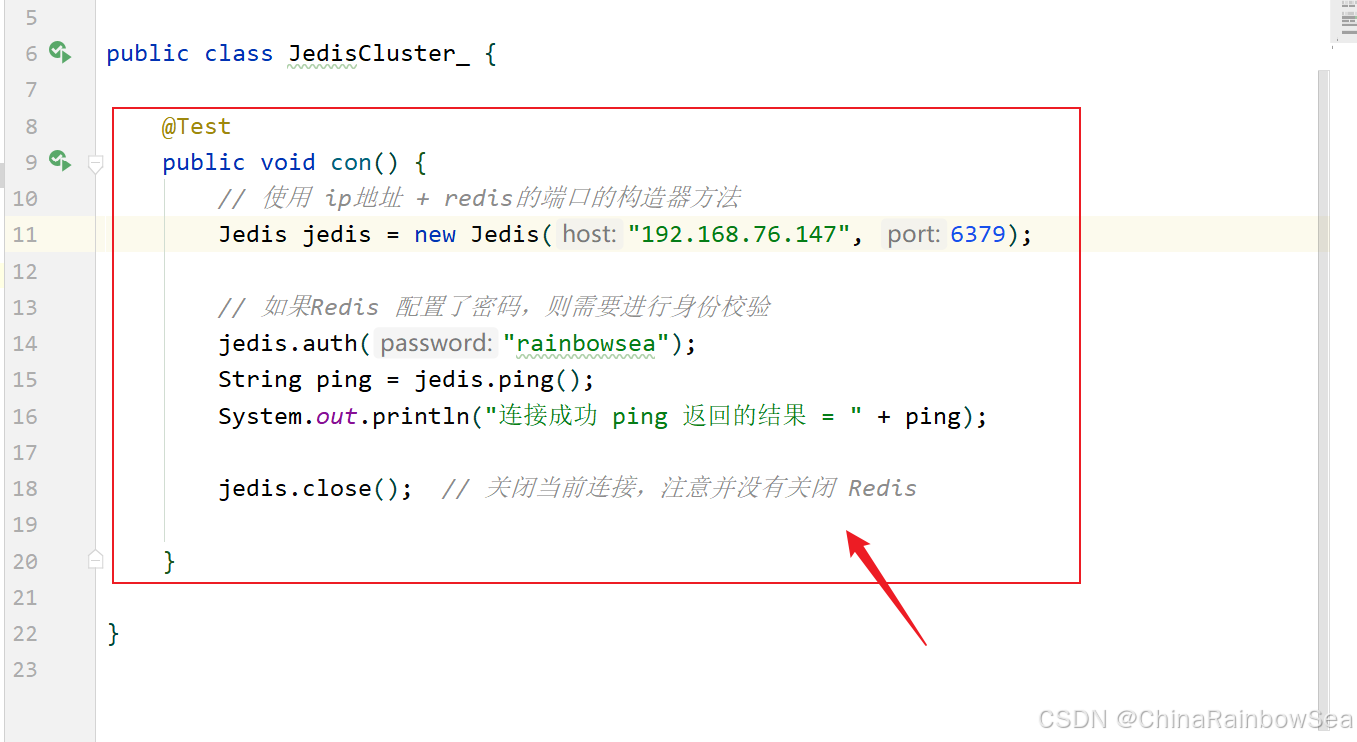
java
package com.rainbowsea.jedis;
import org.junit.Test;
import redis.clients.jedis.Jedis;
public class JedisCluster_ {
@Test
public void con() {
// 使用 ip地址 + redis的端口的构造器方法
Jedis jedis = new Jedis("192.168.76.147", 6379);
// 如果Redis 配置了密码,则需要进行身份校验
jedis.auth("rainbowsea");
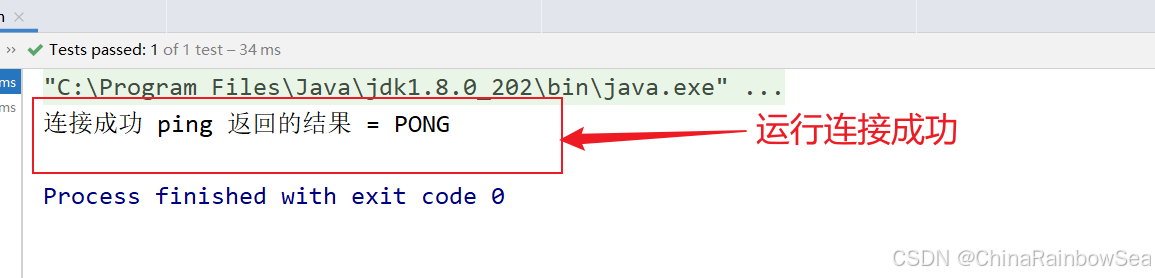
String ping = jedis.ping();
System.out.println("连接成功 ping 返回的结果 = " + ping);
jedis.close(); // 关闭当前连接,注意并没有关闭 Redis
}
}

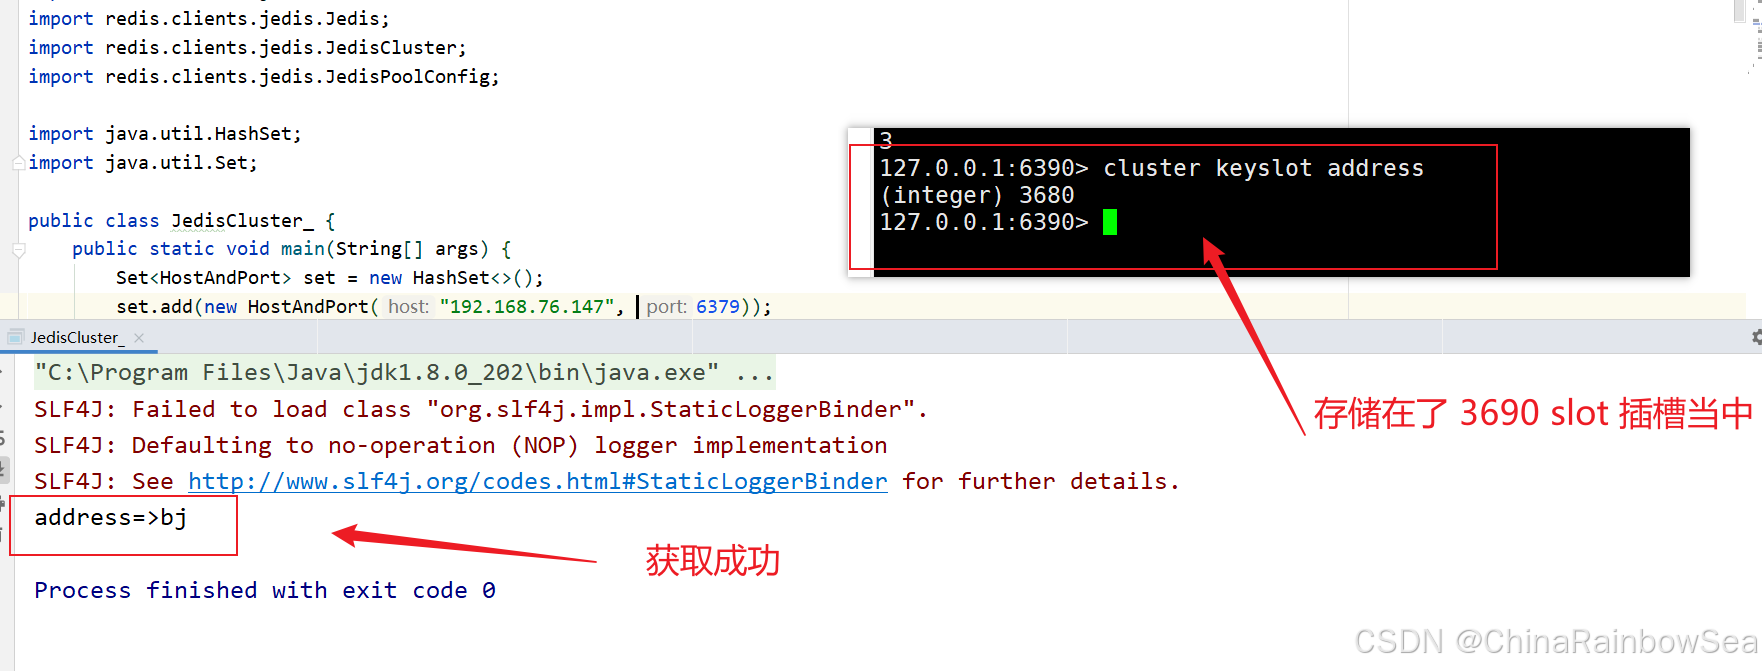
java
import org.junit.Test;
import redis.clients.jedis.HostAndPort;
import redis.clients.jedis.Jedis;
import redis.clients.jedis.JedisCluster;
import redis.clients.jedis.JedisPoolConfig;
import java.util.HashSet;
import java.util.Set;
public class JedisCluster_ {
public static void main(String[] args) {
Set<HostAndPort> set = new HashSet<>();
set.add(new HostAndPort("192.168.76.147", 6379));
JedisPoolConfig jedisPoolConfig = new JedisPoolConfig();
// 对连接池进行配置
jedisPoolConfig.setMaxTotal(200);
jedisPoolConfig.setMaxIdle(32);
jedisPoolConfig.setMaxWaitMillis(60 * 1000); // 单位是毫秒
jedisPoolConfig.setBlockWhenExhausted(true);
jedisPoolConfig.setTestOnBorrow(true);
JedisCluster jedisCluster = new JedisCluster(set,5000,5000,5,"rainbowsea",jedisPoolConfig );
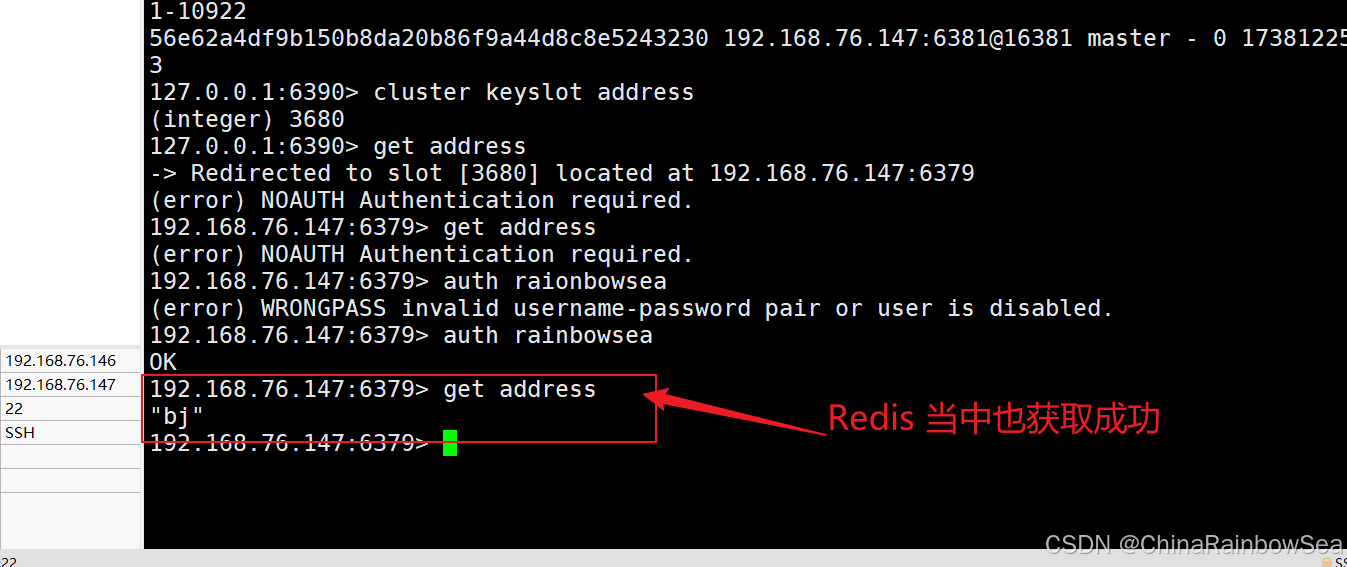
jedisCluster.set("address", "bj");
String address = jedisCluster.get("address");
System.out.println("address=>" + address);
jedisCluster.close();
}
}

6. Redis 集群的优缺点
优点:
- 实现扩容。
- 分摊压力。
- 无中心配置相对简单。
缺点:
- 多键操作是不被支持的。
- 多键的 Redis 事务是不被支持的。 lua 脚本不被支持
- 由于集群方案出现较晚,很多公司已经采用了其他的集群方案,而其它方案想要迁移至 redis cluster ,需要整体迁移而不是逐步过渡,复杂度较大。
7. 补充:
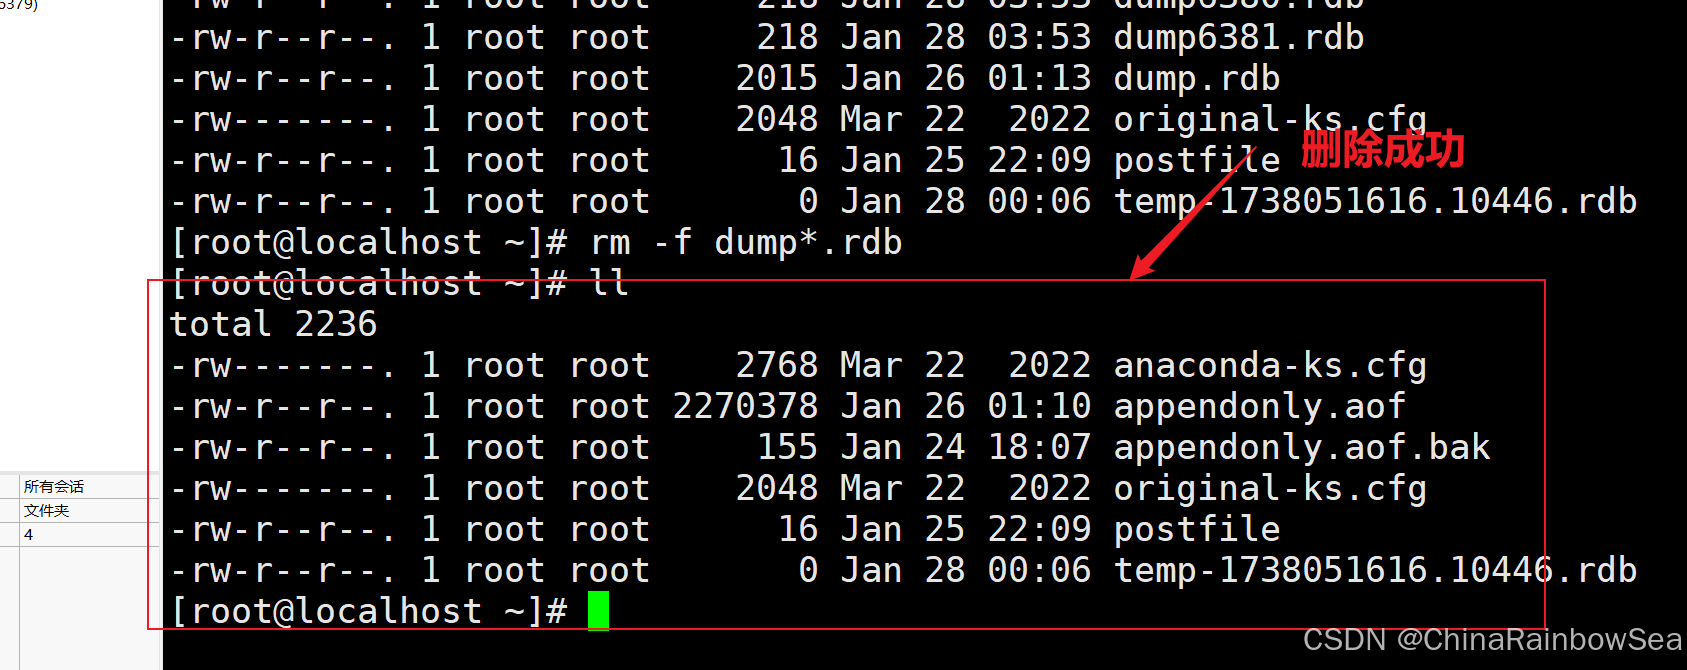
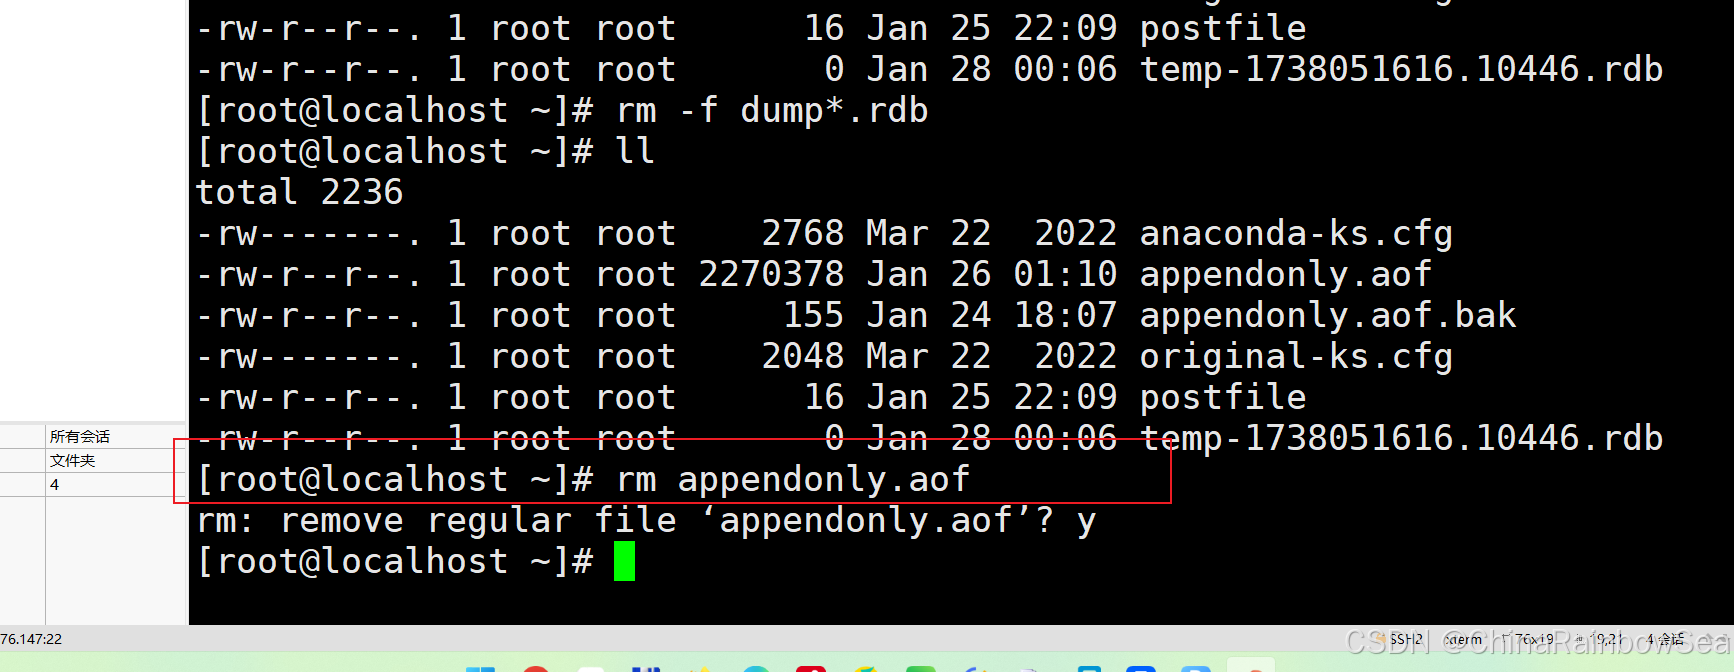
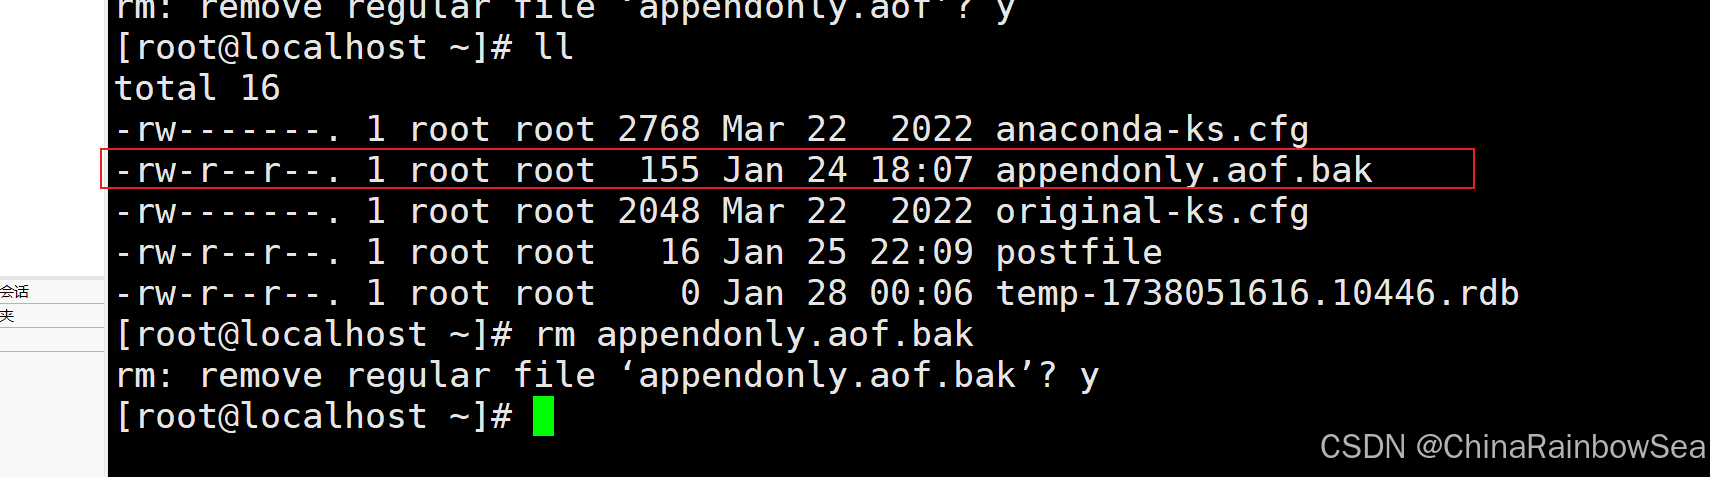
将 root 目录下的,rdb、aof 文件都删除掉
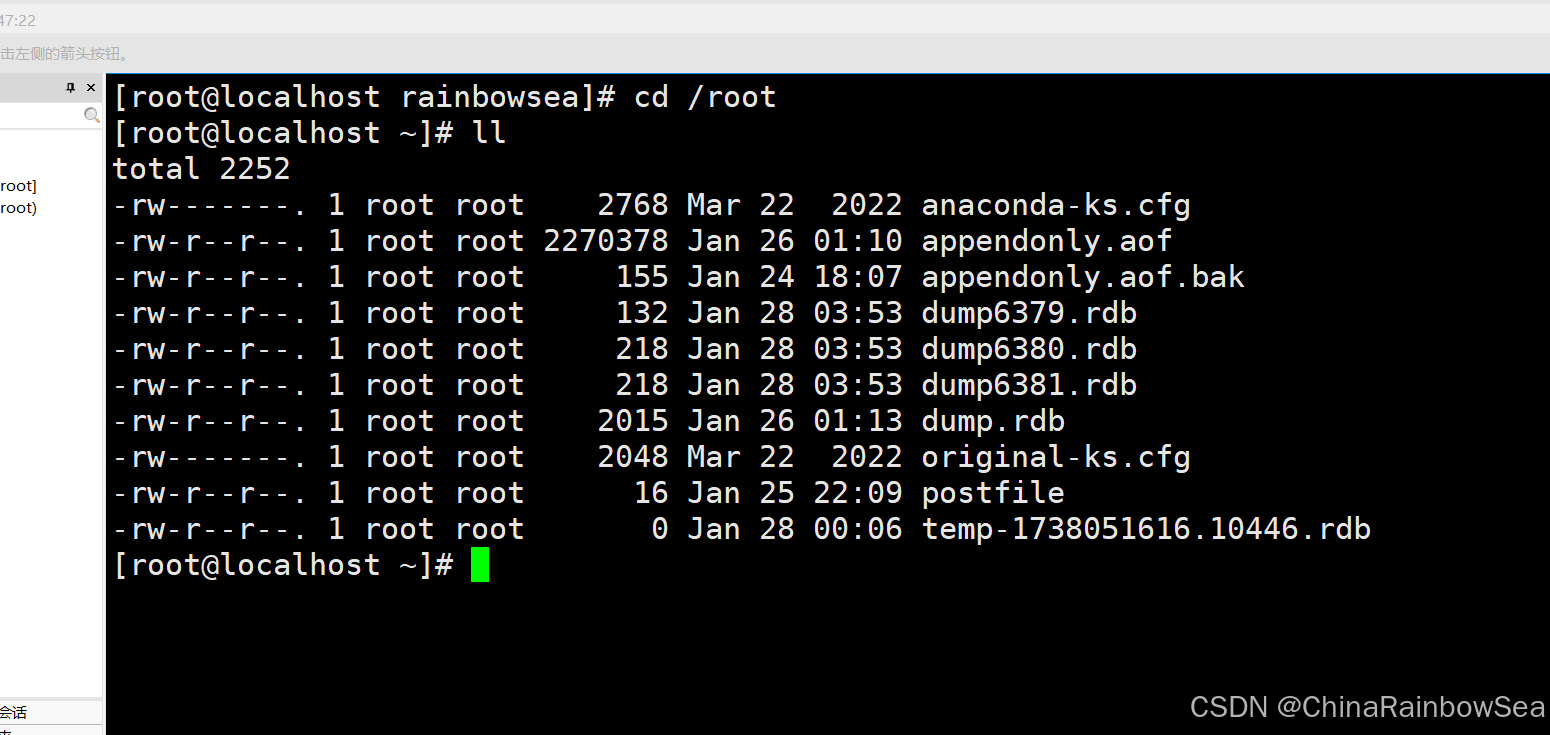
sh
[root@localhost ~]# rm -f dump*.rdb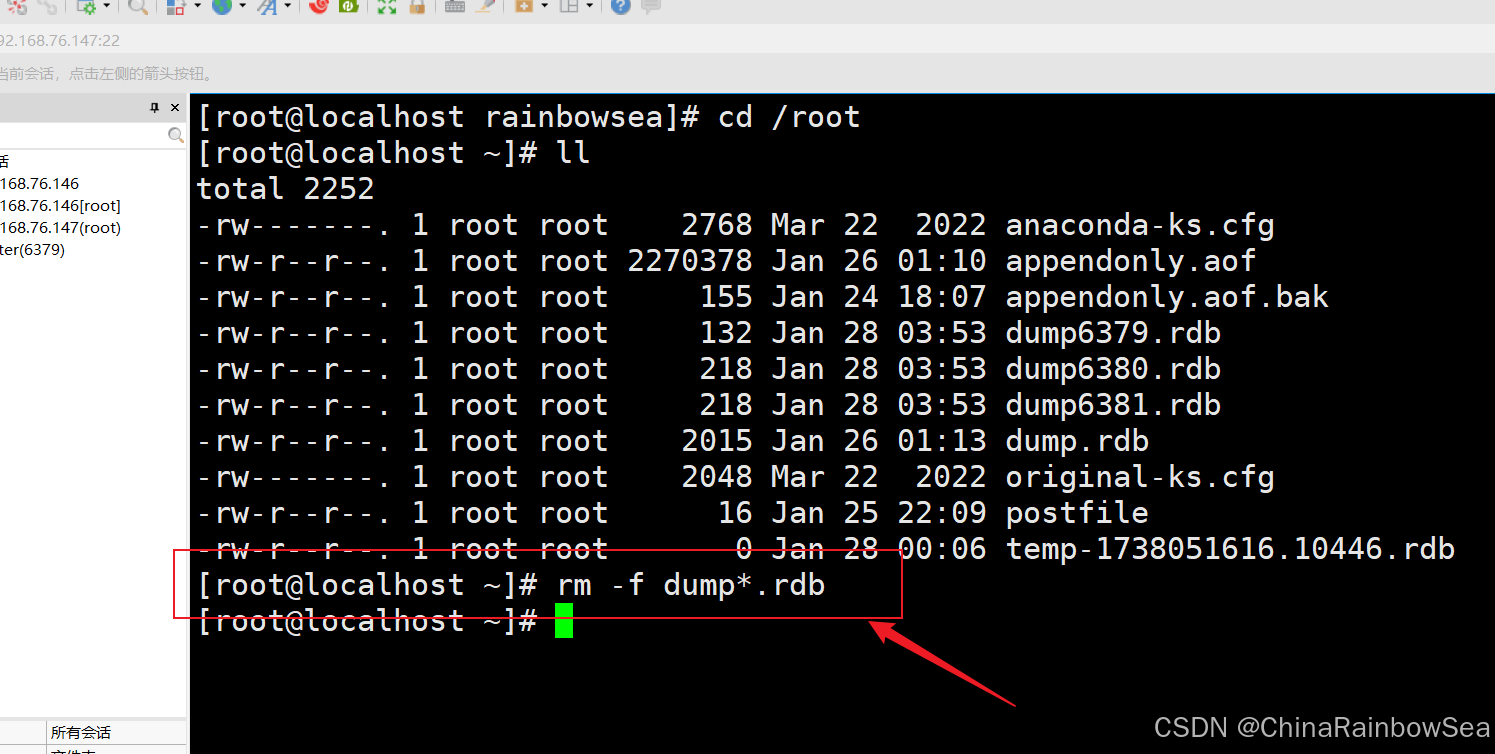
8. 最后:
"在这个最后的篇章中,我要表达我对每一位读者的感激之情。你们的关注和回复是我创作的动力源泉,我从你们身上吸取了无尽的灵感与勇气。我会将你们的鼓励留在心底,继续在其他的领域奋斗。感谢你们,我们总会在某个时刻再次相遇。"