作者:卢建晖 - 微软高级云技术布道师
排版:Alan Wang
上周 GitHub Copilot 发布了全新的 Agent Mode 模式,我们可以通过 GitHub Copilot Agent Mode 完成新应用的创建,或是根据新的需求在原有项目上添加功能。您可以通过 Visual Studio Code Insiders(1.98) 体验该功能。
开通 GitHub Copilot Agent Mode,需要通过 Visual Studio Code Insiders 设置开通 GitHub Copilot Agent Mode 。

之后您可以通过 Edit with GitHub Copilot,选择 Agent Mode 以及对应的模型。现在 GitHub Copilot Agent Mode 支持 GPT-4o、Claude 3.5 Sonnic,以及 Gemini。建议考虑 GPT-4o,因为它支持图片上传。

完成相关设置后,我们进入 Copilot 应用开发阶段。我们希望有一个 Facebook Messenger 风格的 Copilot Chat,所以我们找一张 Facebook Messenger 的截图作为需求。如图:

我们在 GitHub Copilot Mode + GPT-4o 场景下,把该图片作为附件添加进 GitHub Copilot 聊天窗。

输入以下 Prompt
bash
"Generate a Python Flask application based on the content of the image"可以看到,GitHub Copilot Agent Mode 协助我们生成了 Python + Flask 应用,我们可以检查生成文件并接受。
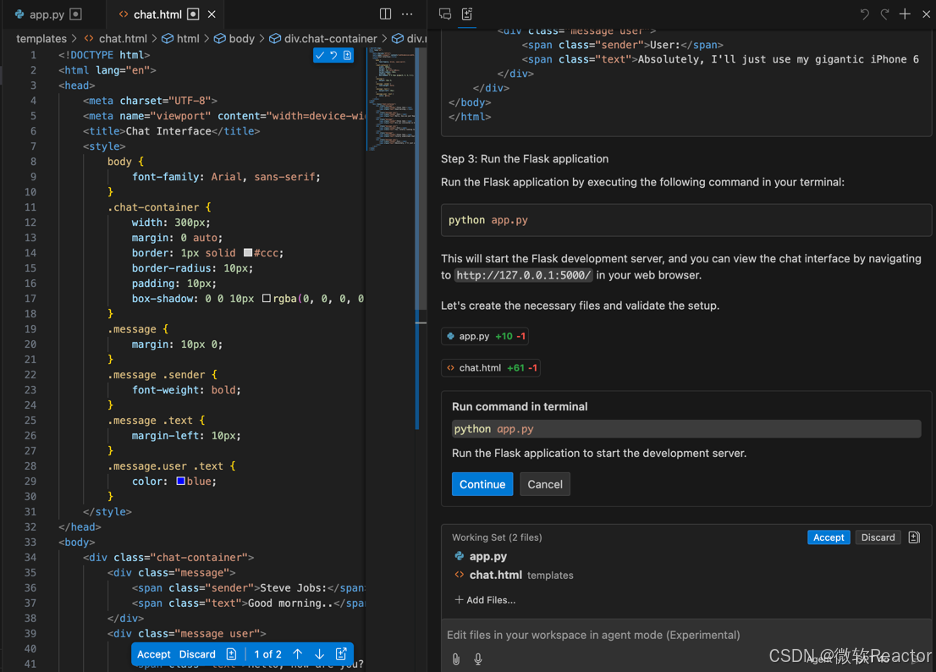
然后按照提示运行,我们会发现缺少元素、样式以及布局错误等。

我们可以通过 Prompt 进行调整,例如:
bash
•	"Adjust page content based on image content, style, and layout"
•	"The chat window height and width are adaptive to the browser size, and the user picture is removed"
通过聊天我们可以成功得到满意的界面。接下来我们希望 AI 能根据现有代码进行调整。这是最基础的前端,当然,我们也可以根据自己的需要进行综合调整。

完成前端设定后,我们希望结合 GitHub Models 中的 o3-mini 来作为后端,但 GitHub Copilot 无法正确使用 Azure AI Inference SDK 调用 GitHub Models,我们可以用 Agent Mode 引用关联文档,提出新的需求并提供参考代码. 我把 GitHub Models 的 Python 参考代码放进项目文件夹内。

通过 Agent Mode 引用,使用以下 Prompt 进行添加:
bash
"According to #file:demo.py Use GitHub Models as the backend to provide an API and call it using JavaScript"这时,Agent Mode 会帮你在相应代码中添加相应的 GitHub Models 调用代码,我们只需接受即可。

注意:如果你希望获取 GITHUB_TOKEN,请通过 Get API Key 获取。
我们尝试运行一下,一个 Copilot Chat 应用就完成了。

GitHub Copilot Agent Mode 让 GitHub Copilot 用户能够更加快捷、便利地完成应用,也让非计算机用户能够更高效地完成原型或者应用构建。"人人能编程"的梦想不远矣。