1、查看esp32的引脚图,寻找对应的串口
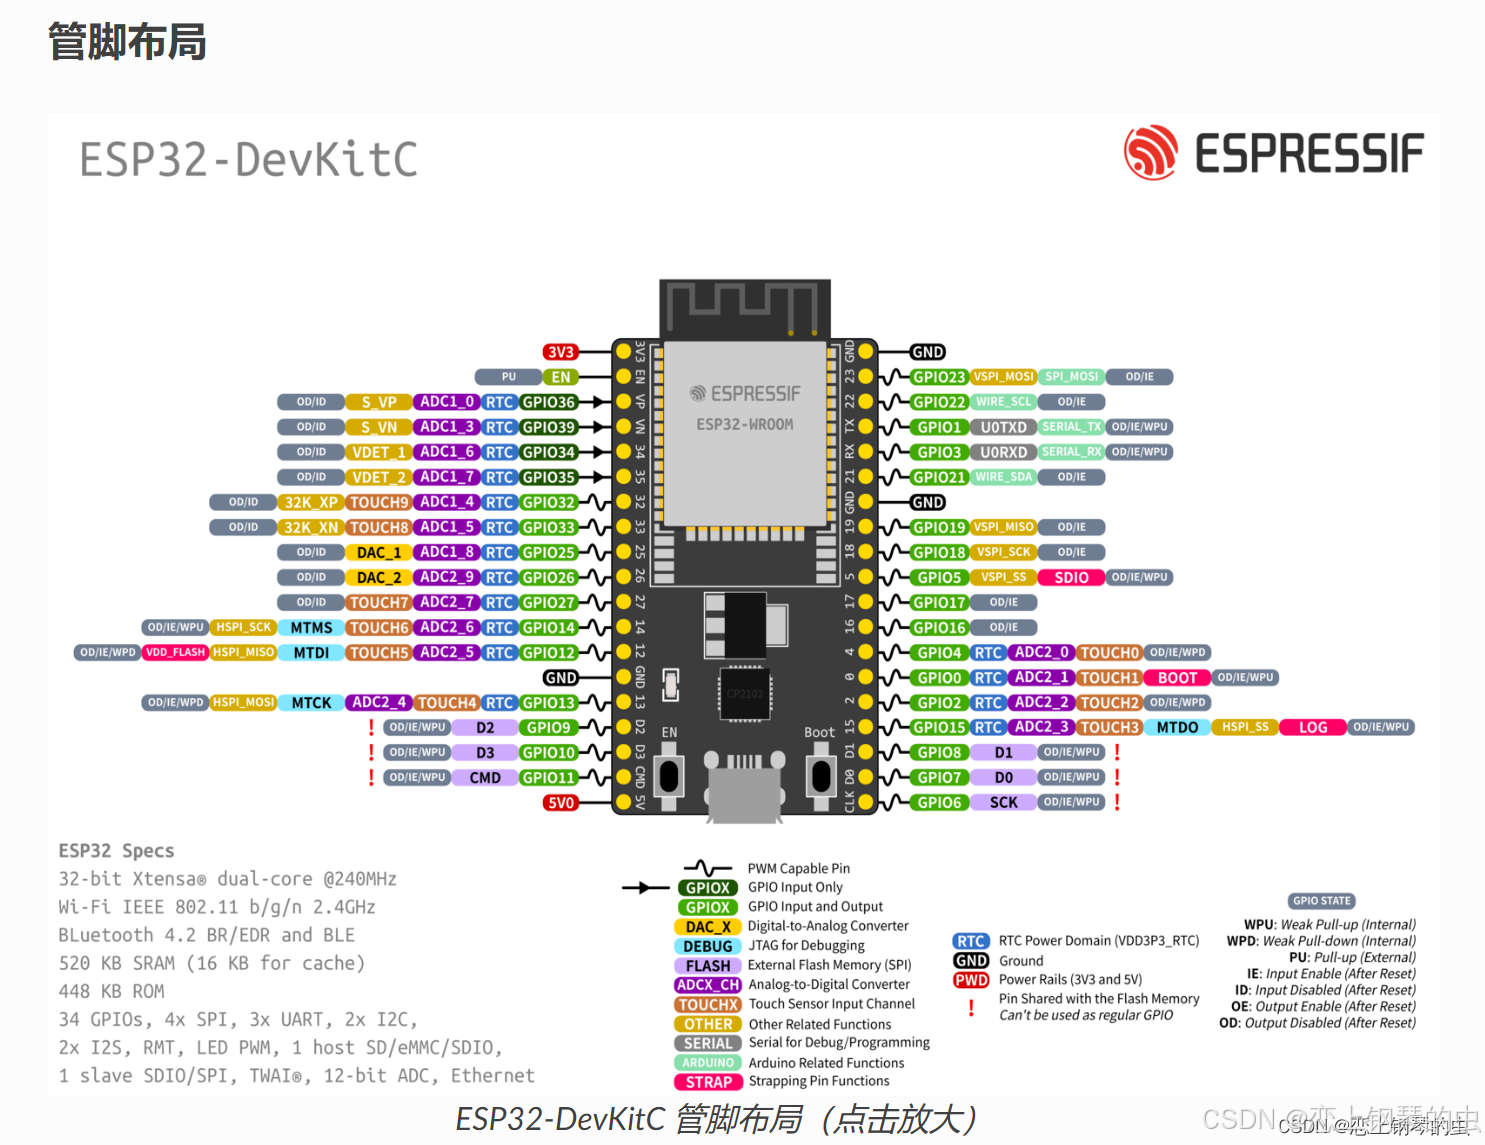
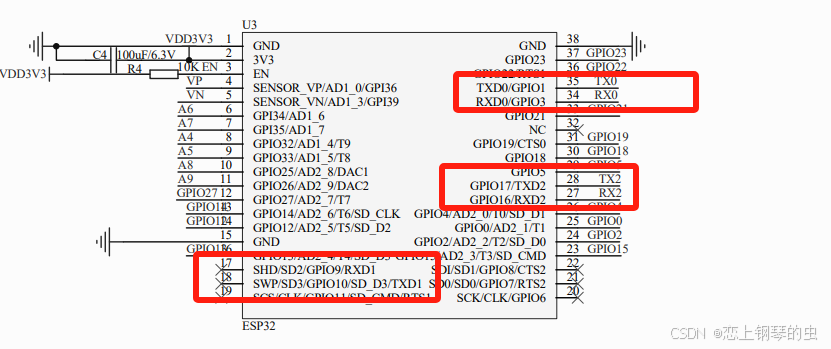
根据原理图,芯片上有3个串口(UART0, UART1和UART2),但是UART1没有引出引脚。其中UART0(GPIO3用于U0RXD,GPIO1用于U0TXD)用作下载、调试串口,引脚不可改变;UART2默认引脚是GPIO16用作U2RXD,GPIO17用作U2TXD
**2、连接线路,**使用Fritzing作图软件


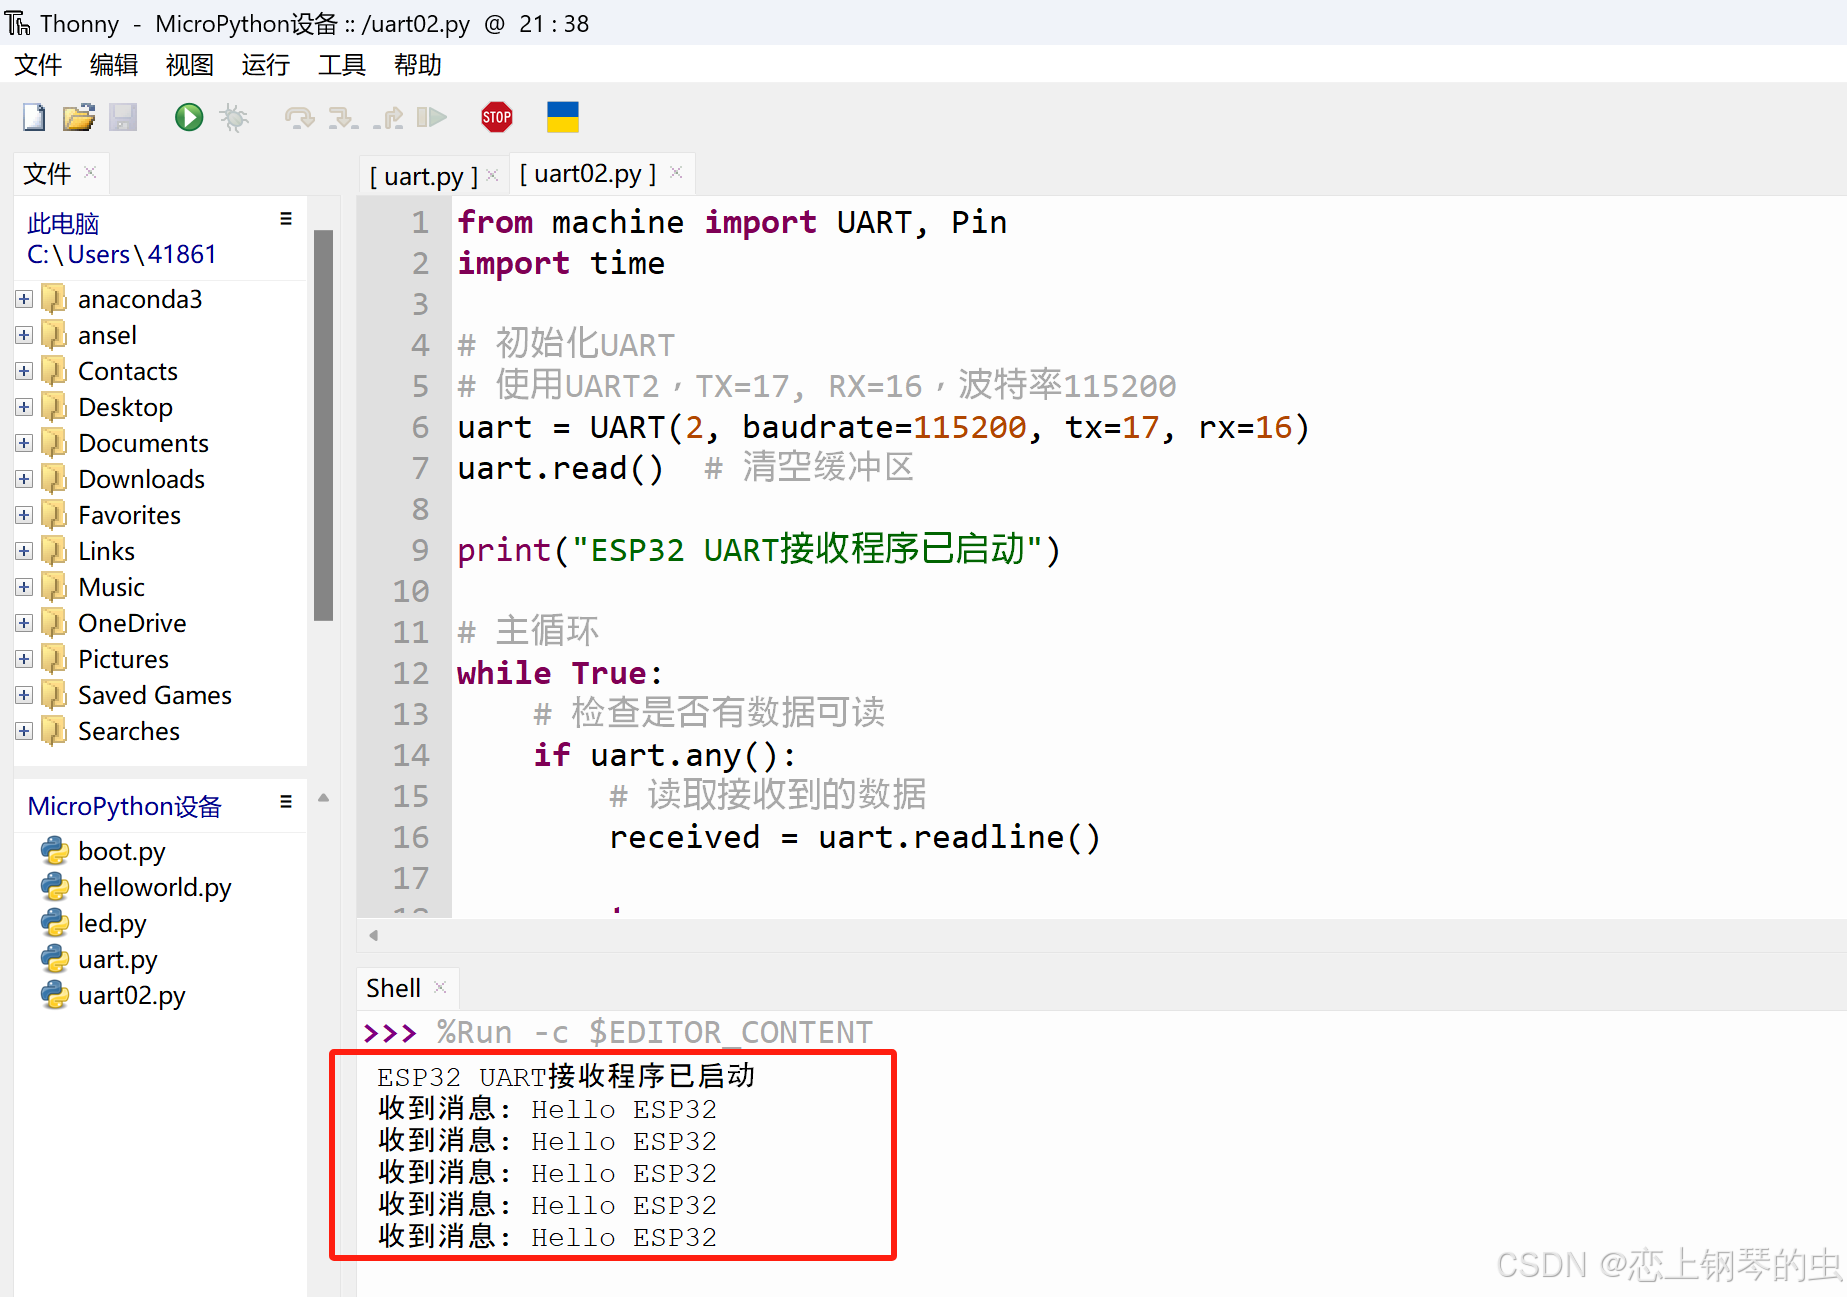
3、esp32作为服务器端等待客户端往eps32发送的消息(使用Thonny软件把下面程序写入到esp32中)
因为串口0作为下载程序使用,所以下面使用串口2作为列子
from machine import UART, Pin
import time

# 初始化UART
# 使用UART2,TX=17, RX=16,波特率115200
uart = UART(2, baudrate=115200, tx=17, rx=16)
uart.read()  # 清空缓冲区

print("ESP32 UART接收程序已启动")

# 主循环
while True:
    # 检查是否有数据可读
    if uart.any():
        # 读取接收到的数据
        received = uart.readline()

        try:
            # 尝试解码为UTF-8字符串
            message = received.decode('utf-8').strip()
            print(f"收到消息: {message}")

            # 发送响应
            response = f"ESP32已收到: {message}\r\n"
            uart.write(response.encode('utf-8'))

        except UnicodeDecodeError:
            # 如果解码失败,发送错误响应
            print("收到无法解码的消息")
            uart.write(b"Error: Invalid message format\r\n")

    # 短暂延时
    time.sleep(0.1)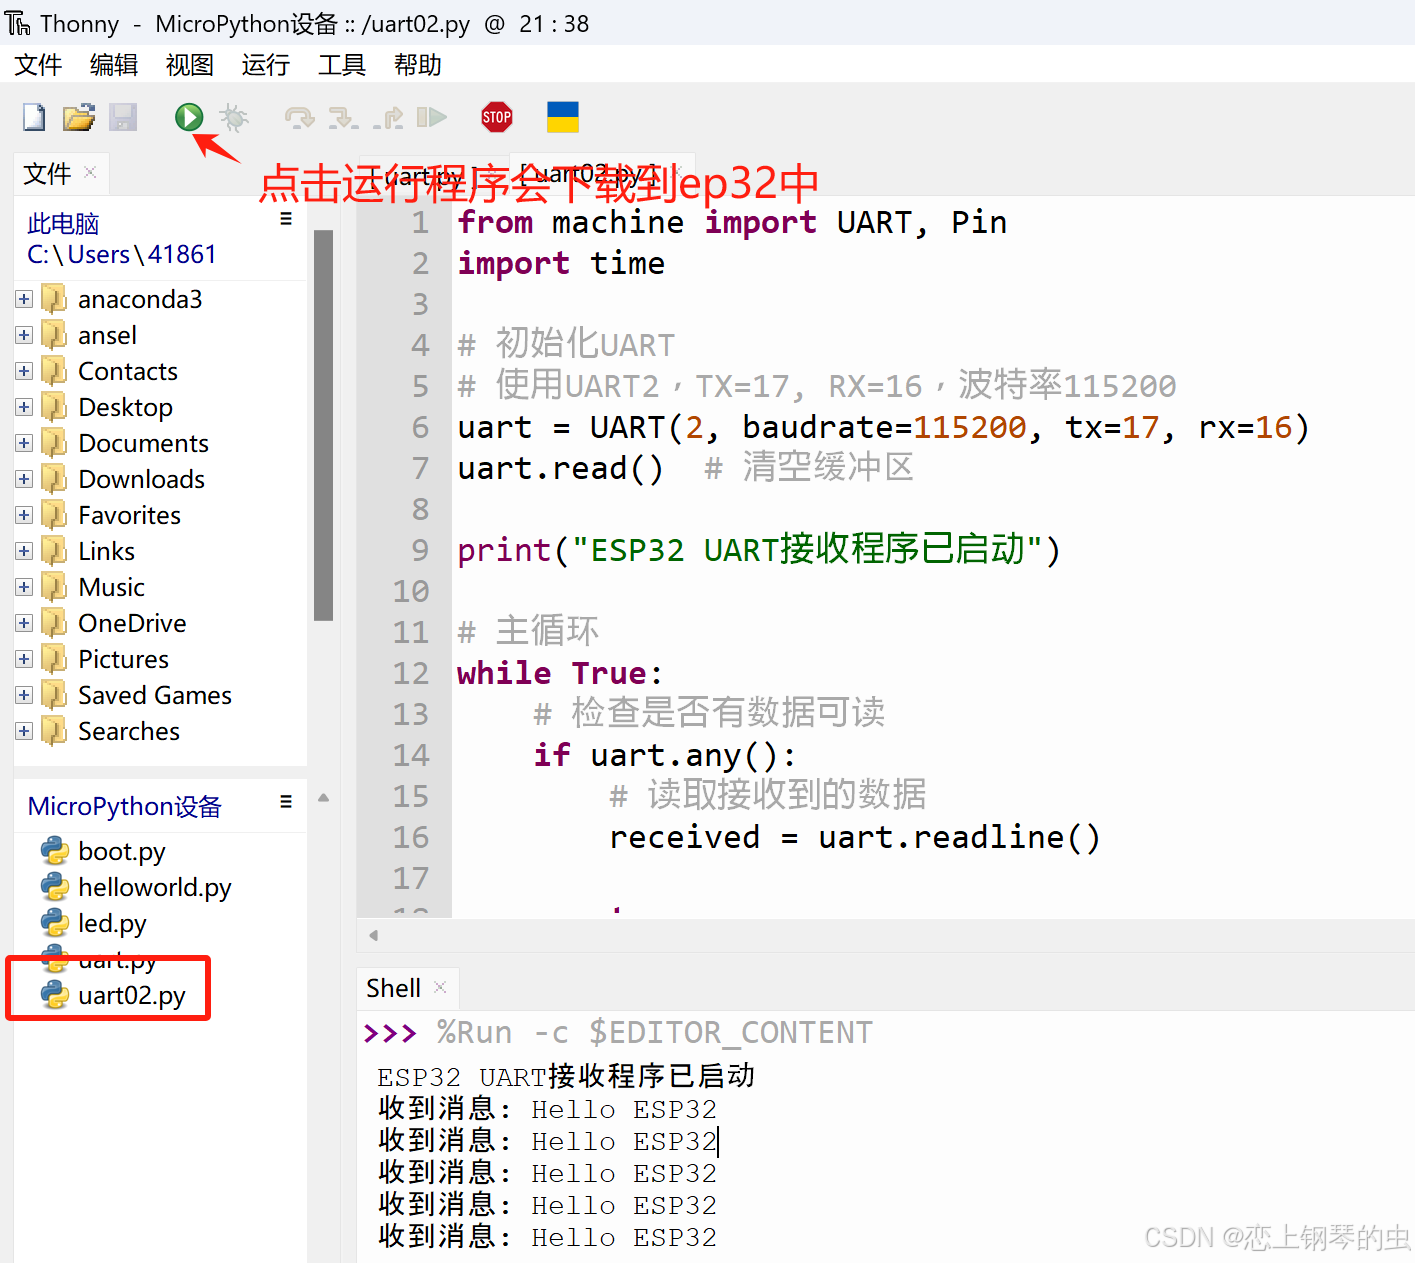
4、客户端往串口2上发送消息,等待esp32的应答。
linux上需要安装pyserial库,运行如下命令
pip3 install pyserial在虚拟机WSL2中运行客户端程序client.py,代码如下:(注意,需要确保WSL2中已经成功链接了串口2,具体链接步骤见附录)
import serial
import time

# 根据系统选择合适的串口名称
port = '/dev/ttyUSB0'  # Linux系统
# port = 'COM4'        # Windows系统

# 初始化串口,使用COM4,波特率115200
ser = serial.Serial(port, baudrate=115200, timeout=1)

# 主循环
while True:
    # 发送消息到ESP32
    message = "Hello ESP32"
    ser.write((message + "\r\n").encode('utf-8'))
    print(f"已发送消息: {message}")

    # 等待ESP32的响应
    while True:
        time.sleep(0.1)  # 更短的等待时间
        if ser.in_waiting > 0:
            # 读取ESP32返回的消息
            response = ser.readline().decode('utf-8').strip()
            print(f"收到ESP32的响应: {response}")
            break  # 收到响应后退出等待循环
5、最终效果:
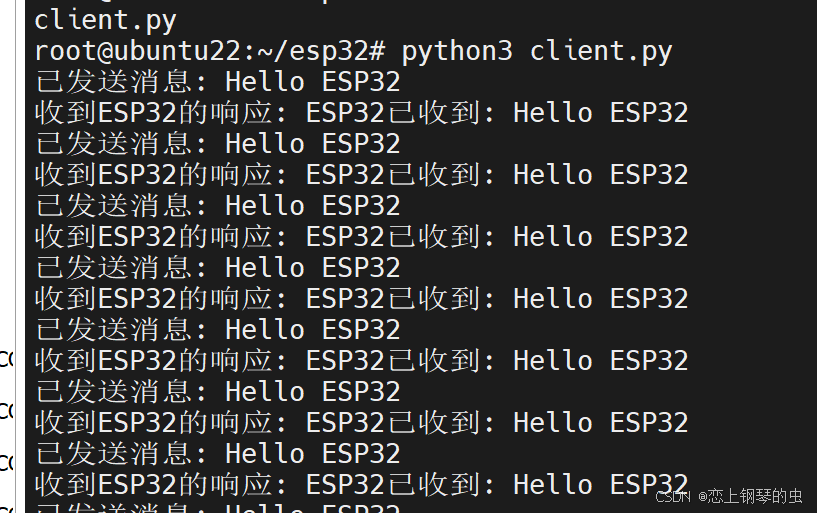
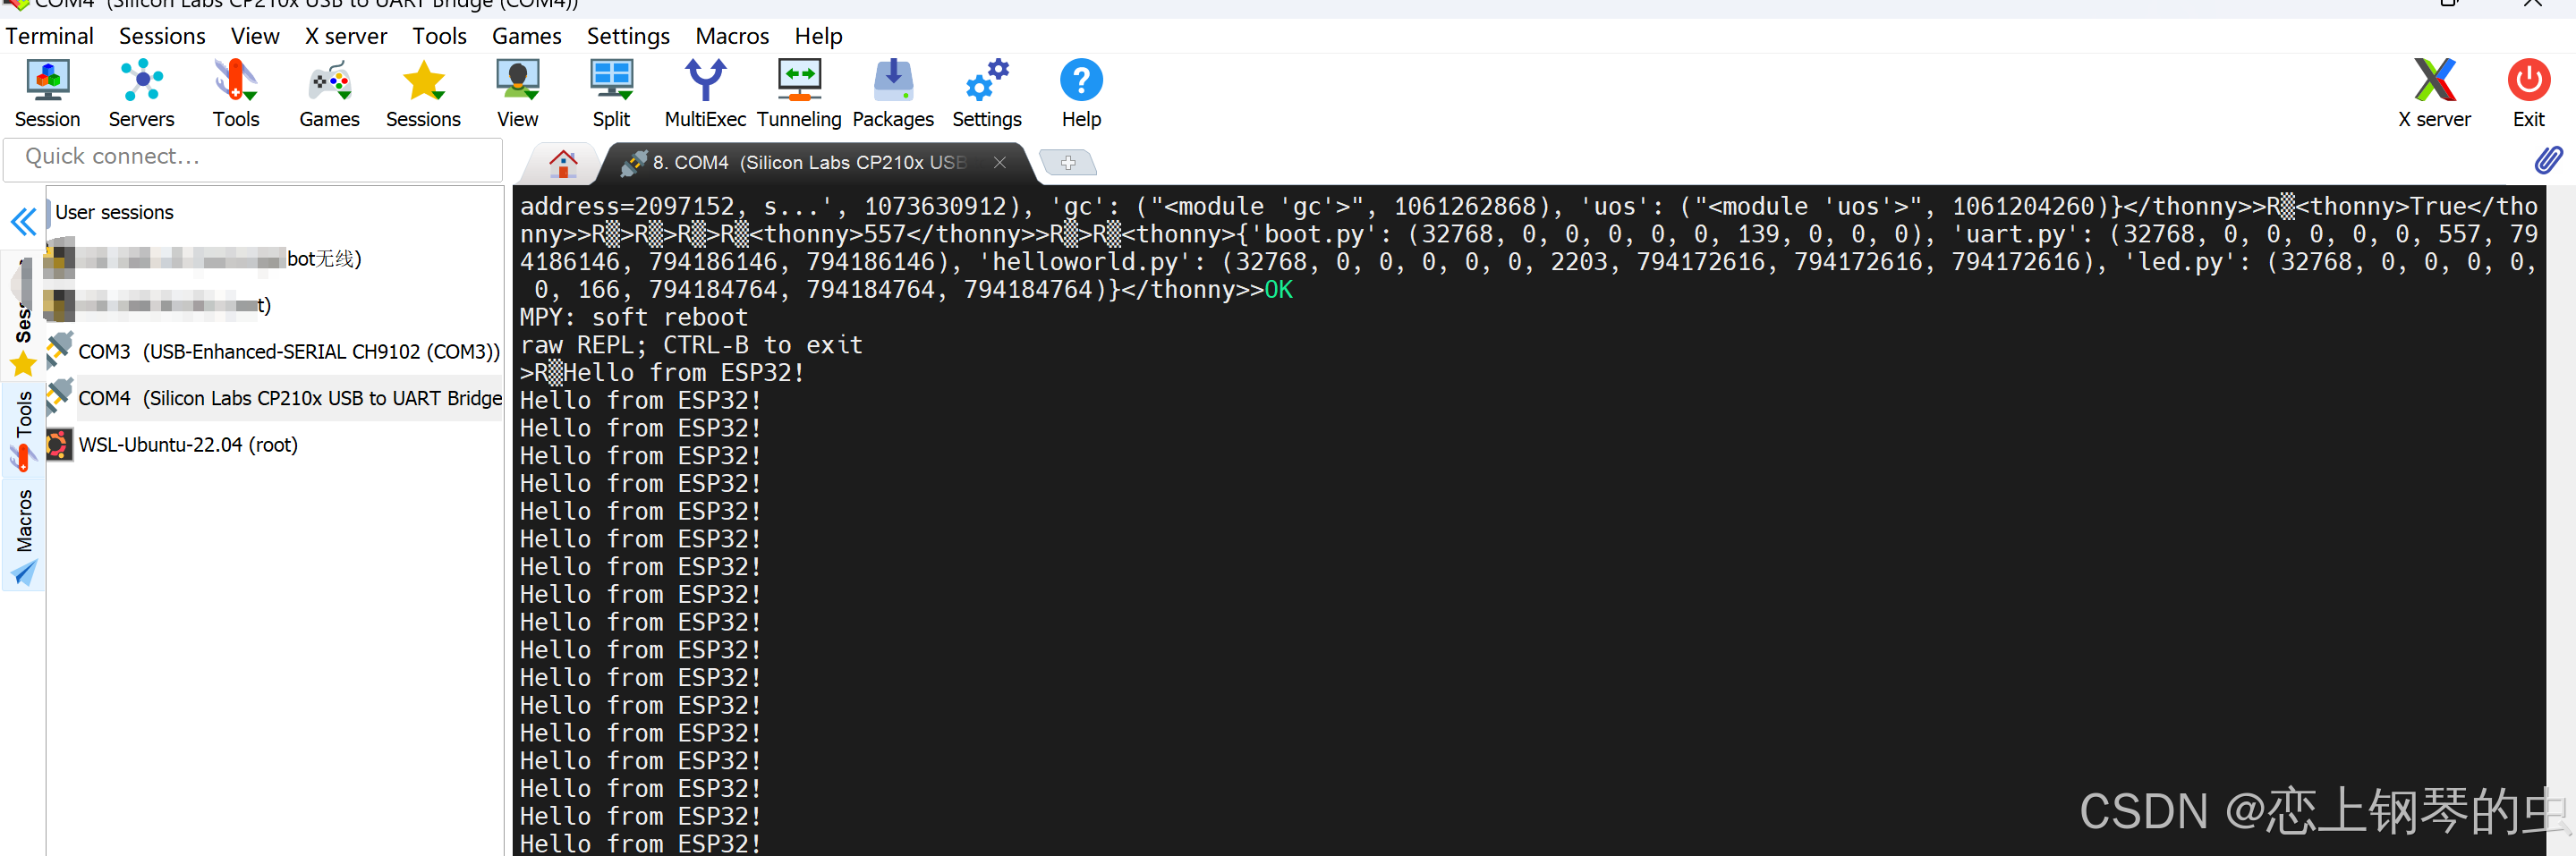
esp32收到客户端发送过来的消息,如下。
客户端发送消息后接收到esp32的应答消息。
附:如何让虚拟机WSL2链接上windows上的串口
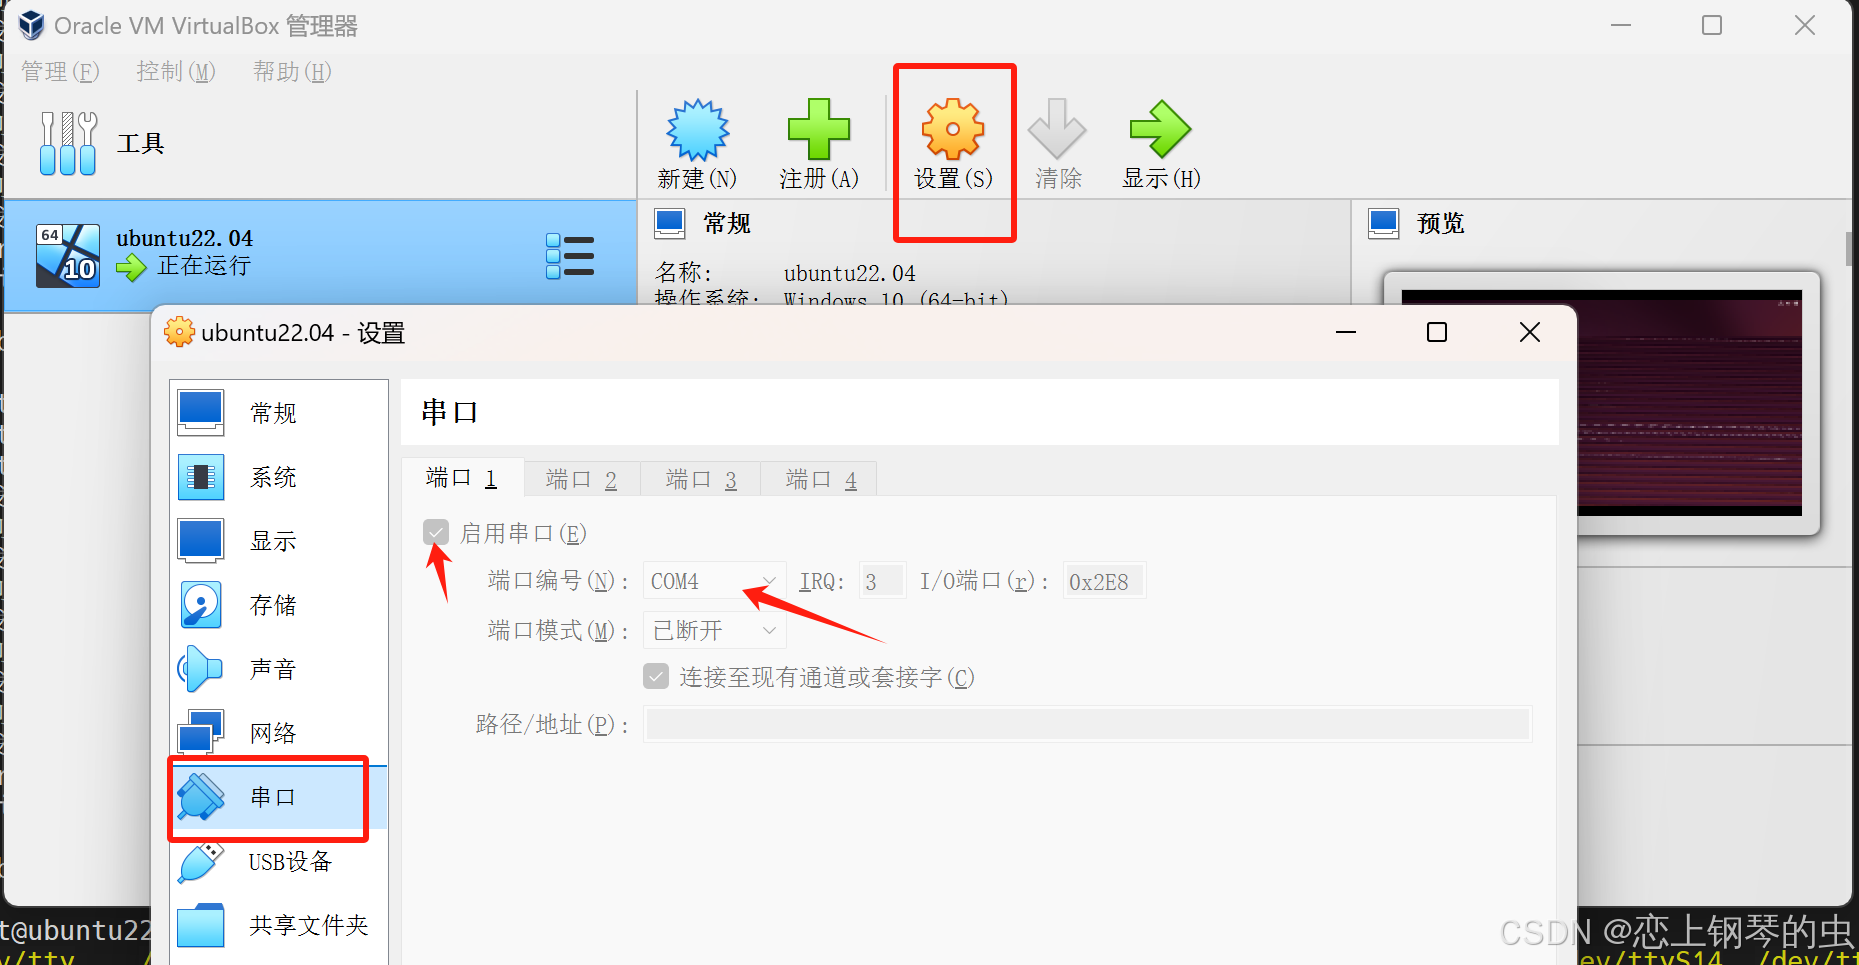
步骤一:启动虚拟机的前,需要想设置启动串口,把widows上对应的串口映射到虚拟机wsl中,如下。(因为我电脑eps32的串口UART2在windows上显示的是COM4,所以我把对应的COM4映射到虚拟机中)
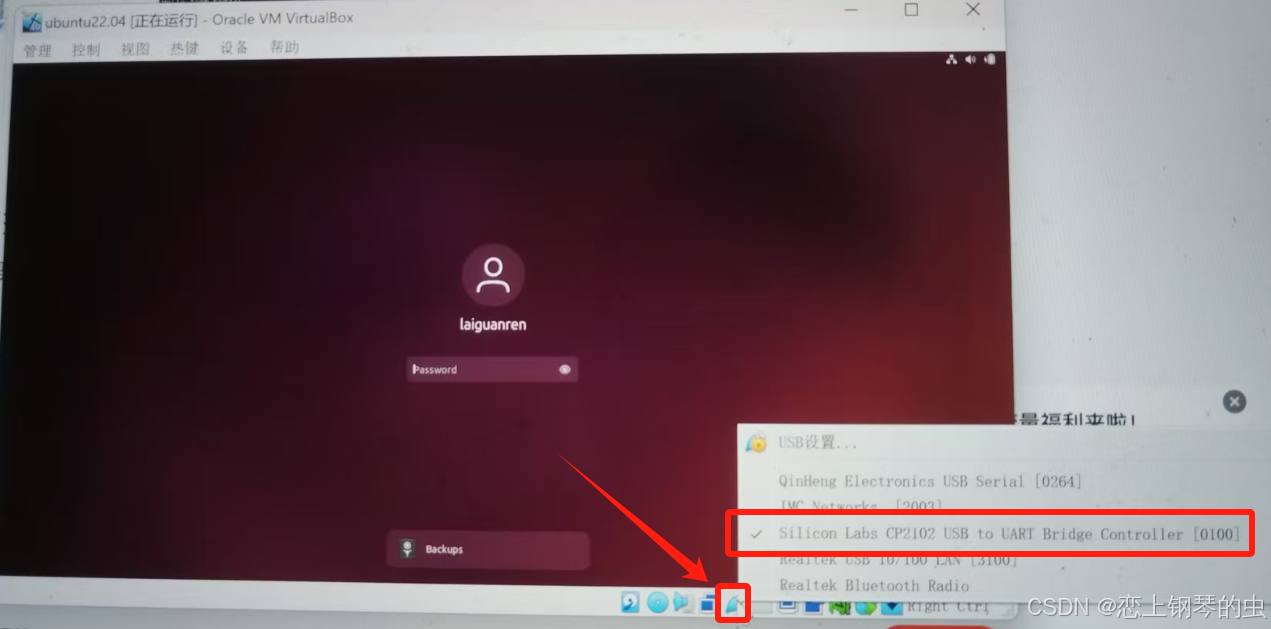
步骤二:wsl虚拟机中找到usb图标,右键勾选刚刚映射进来的串口,如下图
步骤三:查看wsl虚拟机上的串口是否正常识别,一般已ttyUSB*显示
