前言
今天我们来实现古城分布相关功能,这个功能主要用于展示古镇相关信息,比如地理位置,古城分布相关情况,以及古镇的一些情况,比如面积,类型和详情等等,快来一起看看是如何实现的吧。
需求
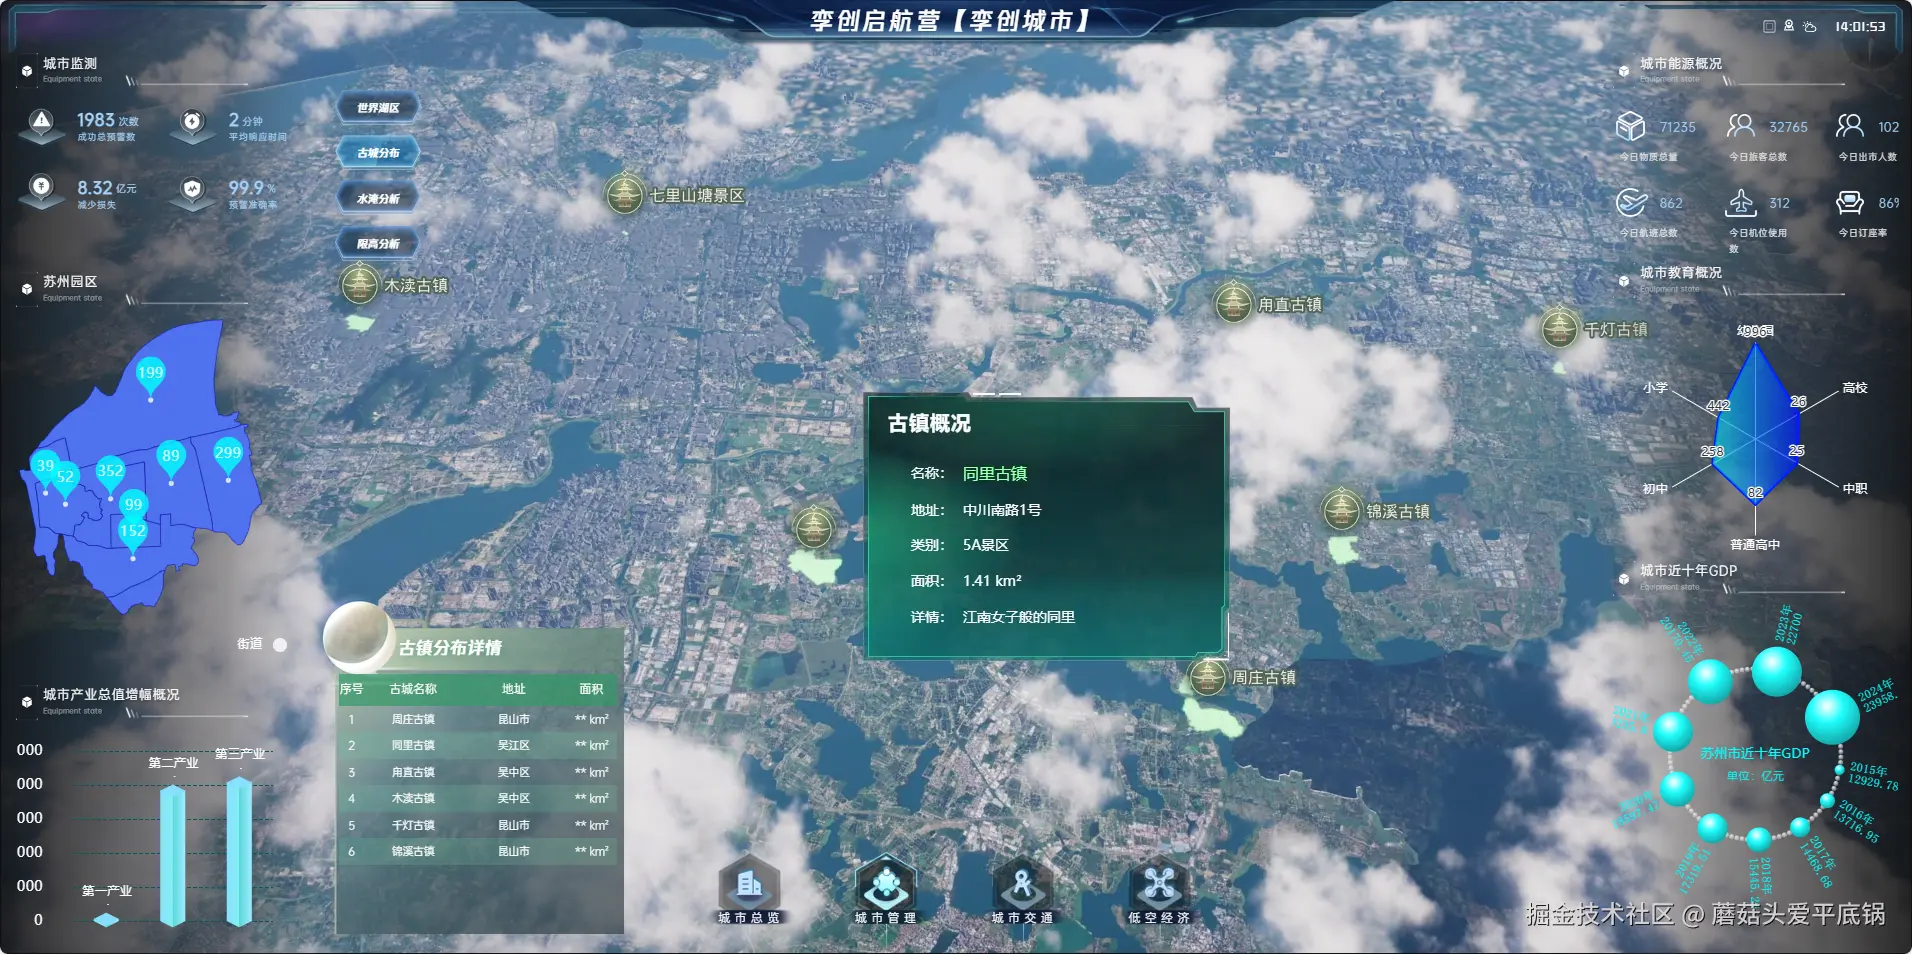
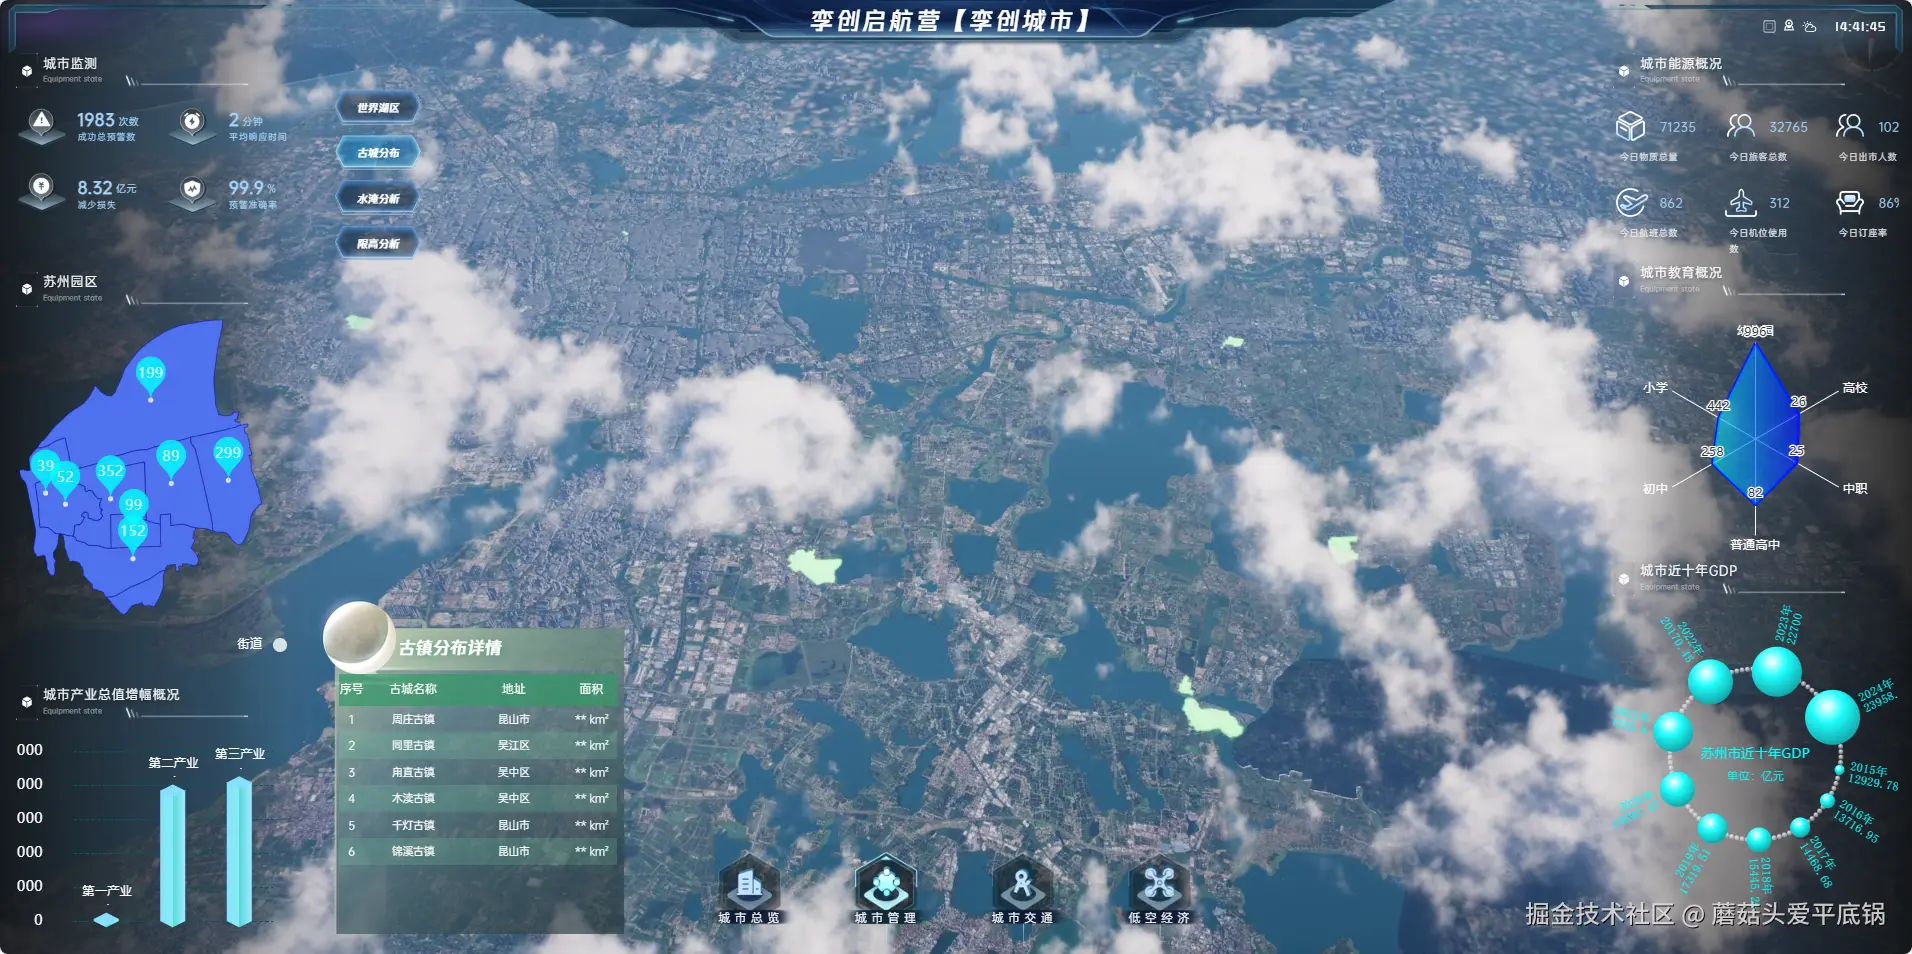
首先我们点击古城分布时,视角抬升至俯视城区,然后会弹出左下角的一个古镇分布详情弹出框,并且古镇区域的位置会高亮为绿色,并且中心位置会有一个图标和名称信息,点击图标会弹出古镇概况的弹出框。
思路
点击按钮时,弹出左下角的弹出框我们不聊,首先还是将我们的视角抬升,如何将我们的视角调整到一个合适的位置在前几期我们已经教过了,这里也不细说。
csharp
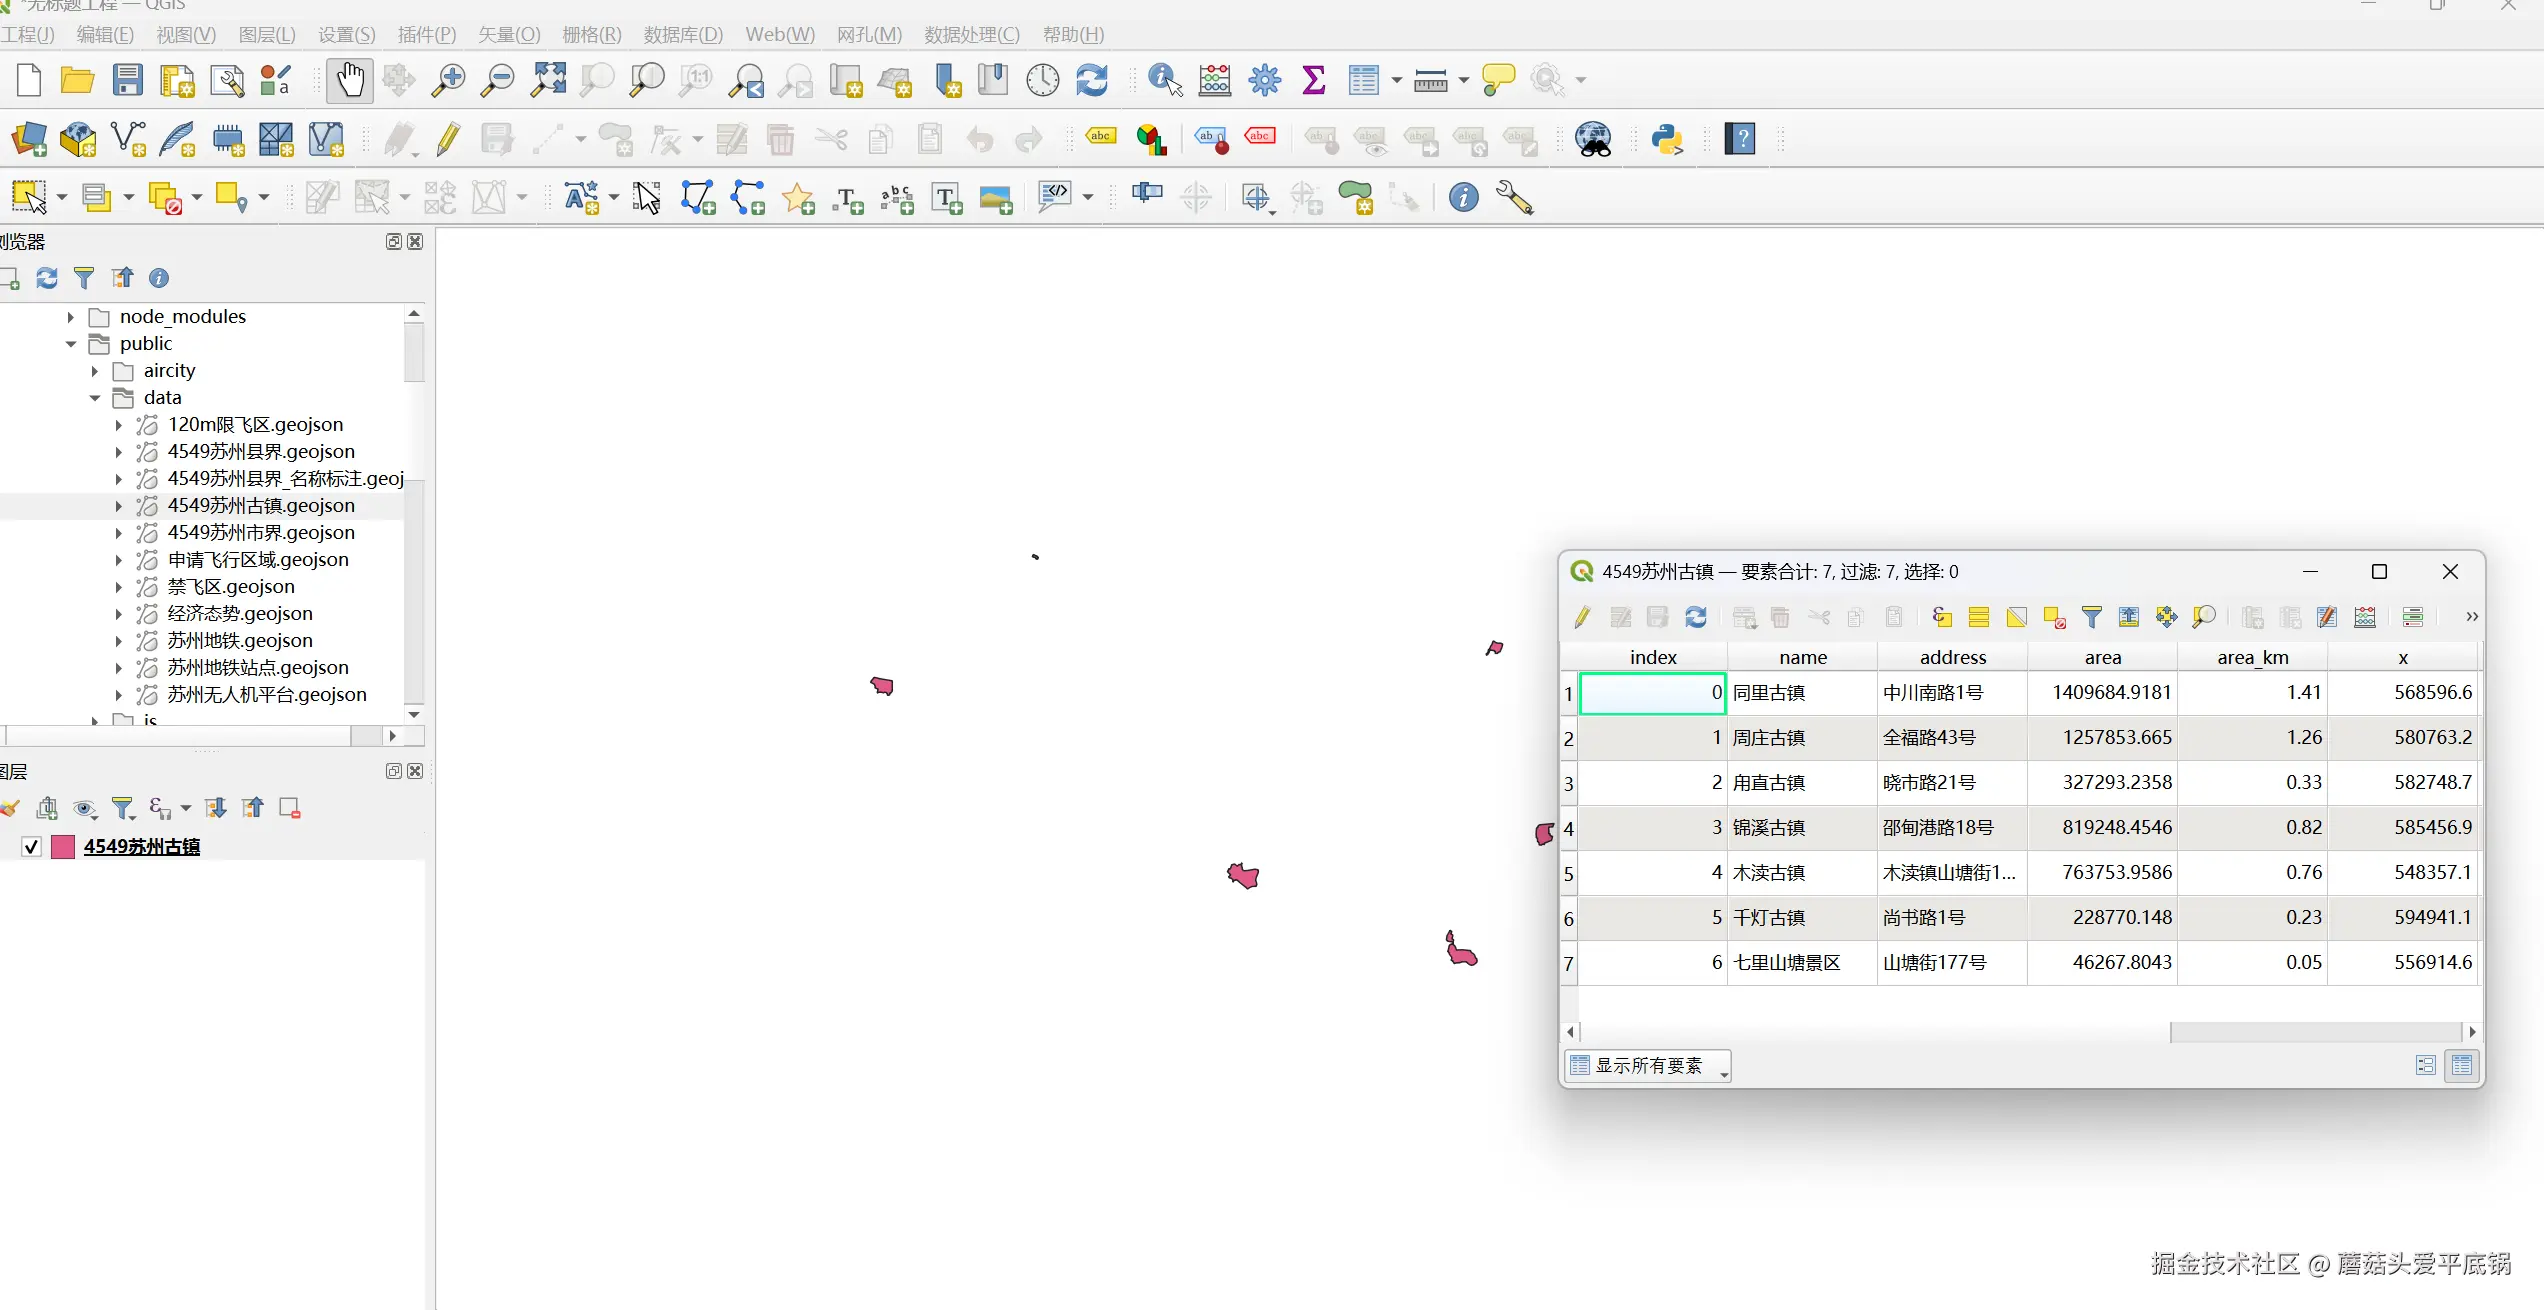
await fdapi.camera.set(575356.531875, 3425641.500625, 27846.3075, -45.316978, -95.526321, 2)然后就是图层的一个绘制以及坐标信息的绘制了。首先还是需要获取到我们的图层的位置信息,同样是放在data文件夹下,通过axios获取。我们可以将我们的geojson数据导入到GIS软件中查看,比如QGis,就可以看到其实就是一些面的信息,其中包括面的名称,点位,地区大小的信息。
然后我们获取到这些数据之后,就可以调用飞渡的api进行一个面的绘制了,这里我们绘制了两个面,一个是低空时绘制的面,一个是高空时绘制的面。
typescript
const addAncienLayer = async () => {
  const { data } = await getAncienLayer()
  const polygonList: any = []
  data.features.forEach((item: any) => {
    const id = item.properties.index
    const name = item.properties.name
    const pointCoord = [item.properties.x, item.properties.y]
    const imaScale = 0.7
    const polygonCoords = item.geometry.coordinates
    polygonids.push('ancient_marker_low_' + id)
    polygonids.push('ancient_marker_height_' + id)
    const polygon_low = {
      id: 'ancient_marker_low_' + id,
      coordinates: polygonCoords,
      coordinateType: 0, //坐标系类型,取值范围:0为Projection类型,1为WGS84类型,2为火星坐标系(GCJ02),3为百度坐标系(BD09),默认值:0
      range: [0, 5000], //可视范围:[近裁距离, 远裁距离],取值范围: [任意负值, 任意正值]
      color: [154 / 255, 245 / 255, 146 / 255, 0.3], //多边形的填充颜色
      intensity: 1, //亮度
      style: 10, //单色 请参照API开发文档选取枚举
      depthTest: false, //是否做深度检测 开启后会被地形高度遮挡
      priority: 1 //显示优先级 值越大显示越靠上
    }
    const polygon_height = {
      id: 'ancient_marker_height_' + id,
      coordinates: polygonCoords,
      coordinateType: 0, //坐标系类型,取值范围:0为Projection类型,1为WGS84类型,2为火星坐标系(GCJ02),3为百度坐标系(BD09),默认值:0
      range: [5000, 1000000], //可视范围:[近裁距离, 远裁距离],取值范围: [任意负值, 任意正值]
      color: [154 / 255, 245 / 255, 146 / 255, 1], //多边形的填充颜色
      intensity: 10, //亮度
      style: 10, //单色 请参照API开发文档选取枚举
      depthTest: false, //是否做深度检测 开启后会被地形高度遮挡
      priority: 1 //显示优先级 值越大显示越靠上
    }
    polygonList.push(polygon_low)
    polygonList.push(polygon_height)
  })
  fdapi.polygon.add(polygonList)
}
然后就是绘制标注信息了,主要是通过marker这个类来实现。在marker这个类里面有一个add方法,他可以添加一个具有弹窗属性的标记,参数是弹窗HTML链接或者视频文件路径。所以我们可以先写好弹出框的html,然后通过url传参的方式给弹出框传递消息。所以我们先定义一个parmas,然后将需要传递的参数填进去,然后找到popupURL,填写好路径即可,注意路径不要搞错了,哈游就是icon图片路径也不要写错了。接下来是完整的代码。
typescript
const addAncienLayer = async () => {
  const { data } = await getAncienLayer()

  const markerList: any = []
  const polygonList: any = []
  data.features.forEach((item: any) => {
    const id = item.properties.index
    const name = item.properties.name
    const pointCoord = [item.properties.x, item.properties.y]

    const parmas = {
      name,
      address: item.properties.address,
      tag: item.properties.tag,
      area: item.properties.area_km + ' km²',
      deepinfo: item.properties.deepinfo
    }
    console.log(`@path:html/ancient.html?parmas=${JSON.stringify(parmas)}`)

    const imaScale = 0.7
    const marker = {
      id: 'ancient_marker_' + id,
      groupId: 'ancient_marker',
      coordinate: pointCoord, //坐标位置
      coordinateType: 0, //默认0是投影坐标系,也可以设置为经纬度空间坐标系值为1
      anchors: [(-112 / 2) * imaScale, 112 * imaScale], //锚点,设置Marker的整体偏移,取值规则和imageSize设置的宽高有关,图片的左上角会对准标注点的坐标位置。示例设置规则:x=-imageSize.width/2,y=imageSize.height
      imagePath: '@path:古城.png', //显示图片路径
      imageSize: [112 * imaScale, 112 * imaScale], //图片的尺寸
      range: [1, 100000], //可视范围
      viewHeightRange: [1, 100000], // 可见高度范围
      fixedSize: true, //图片固定尺寸,取值范围:false 自适应,近大远小,true 固定尺寸,默认值:false

      text: name, //显示的文字
      useTextAnimation: true, //关闭文字展开动画效果 打开会影响效率
      textRange: [1, 100000], //文本可视范围[近裁距离, 远裁距离]
      textOffset: [-20, 2], // 文本偏移
      textBackgroundColor: [0, 0, 0, 0], //文本背景颜色
      fontSize: 12, //字体大小
      fontOutlineSize: 2, //字体轮廓线大小
      fontColor: '#efece9', //字体颜色
      fontOutlineColor: '#516252', //字体轮廓线颜色

      popupURL: `@path:html/ancient.html?parmas=${JSON.stringify(parmas)}&.html`, //弹窗HTML链接
      popupSize: [734 / 1.8, 556 / 1.8], //弹窗大小
      popupOffset: [0, 0], //弹窗偏移

      autoHidePopupWindow: true, //失去焦点后是否自动关闭弹出窗口
      autoHeight: true, // 自动判断下方是否有物体
      displayMode: 2, //智能显示模式  开发过程中请根据业务需求判断使用四种显示模式
      clusterByImage: true, // 聚合时是否根据图片路径分类,即当多个marker的imagePath路径参数相同时按路径对marker分类聚合
      priority: 0, //避让优先级
      occlusionCull: false //是否参与遮挡剔除
    }

    markerList.push(marker)

    const polygonCoords = item.geometry.coordinates
    polygonids.push('ancient_marker_low_' + id)
    polygonids.push('ancient_marker_height_' + id)
    const polygon_low = {
      id: 'ancient_marker_low_' + id,
      coordinates: polygonCoords,
      coordinateType: 0, //坐标系类型,取值范围:0为Projection类型,1为WGS84类型,2为火星坐标系(GCJ02),3为百度坐标系(BD09),默认值:0
      range: [0, 5000], //可视范围:[近裁距离, 远裁距离],取值范围: [任意负值, 任意正值]
      color: [154 / 255, 245 / 255, 146 / 255, 0.3], //多边形的填充颜色
      intensity: 1, //亮度
      style: 10, //单色 请参照API开发文档选取枚举
      depthTest: false, //是否做深度检测 开启后会被地形高度遮挡
      priority: 1 //显示优先级 值越大显示越靠上
    }
    const polygon_height = {
      id: 'ancient_marker_height_' + id,
      coordinates: polygonCoords,
      coordinateType: 0, //坐标系类型,取值范围:0为Projection类型,1为WGS84类型,2为火星坐标系(GCJ02),3为百度坐标系(BD09),默认值:0
      range: [5000, 1000000], //可视范围:[近裁距离, 远裁距离],取值范围: [任意负值, 任意正值]
      color: [154 / 255, 245 / 255, 146 / 255, 1], //多边形的填充颜色
      intensity: 10, //亮度
      style: 10, //单色 请参照API开发文档选取枚举
      depthTest: false, //是否做深度检测 开启后会被地形高度遮挡
      priority: 1 //显示优先级 值越大显示越靠上
    }
    polygonList.push(polygon_low)
    polygonList.push(polygon_height)
  })

  fdapi.marker.add(markerList)
  fdapi.polygon.add(polygonList)
}
涉及的飞渡api
-
添加标注信息- fdapi.marker.add(markerList)
-
添加面-fdapi.polygon.add(polygonList)