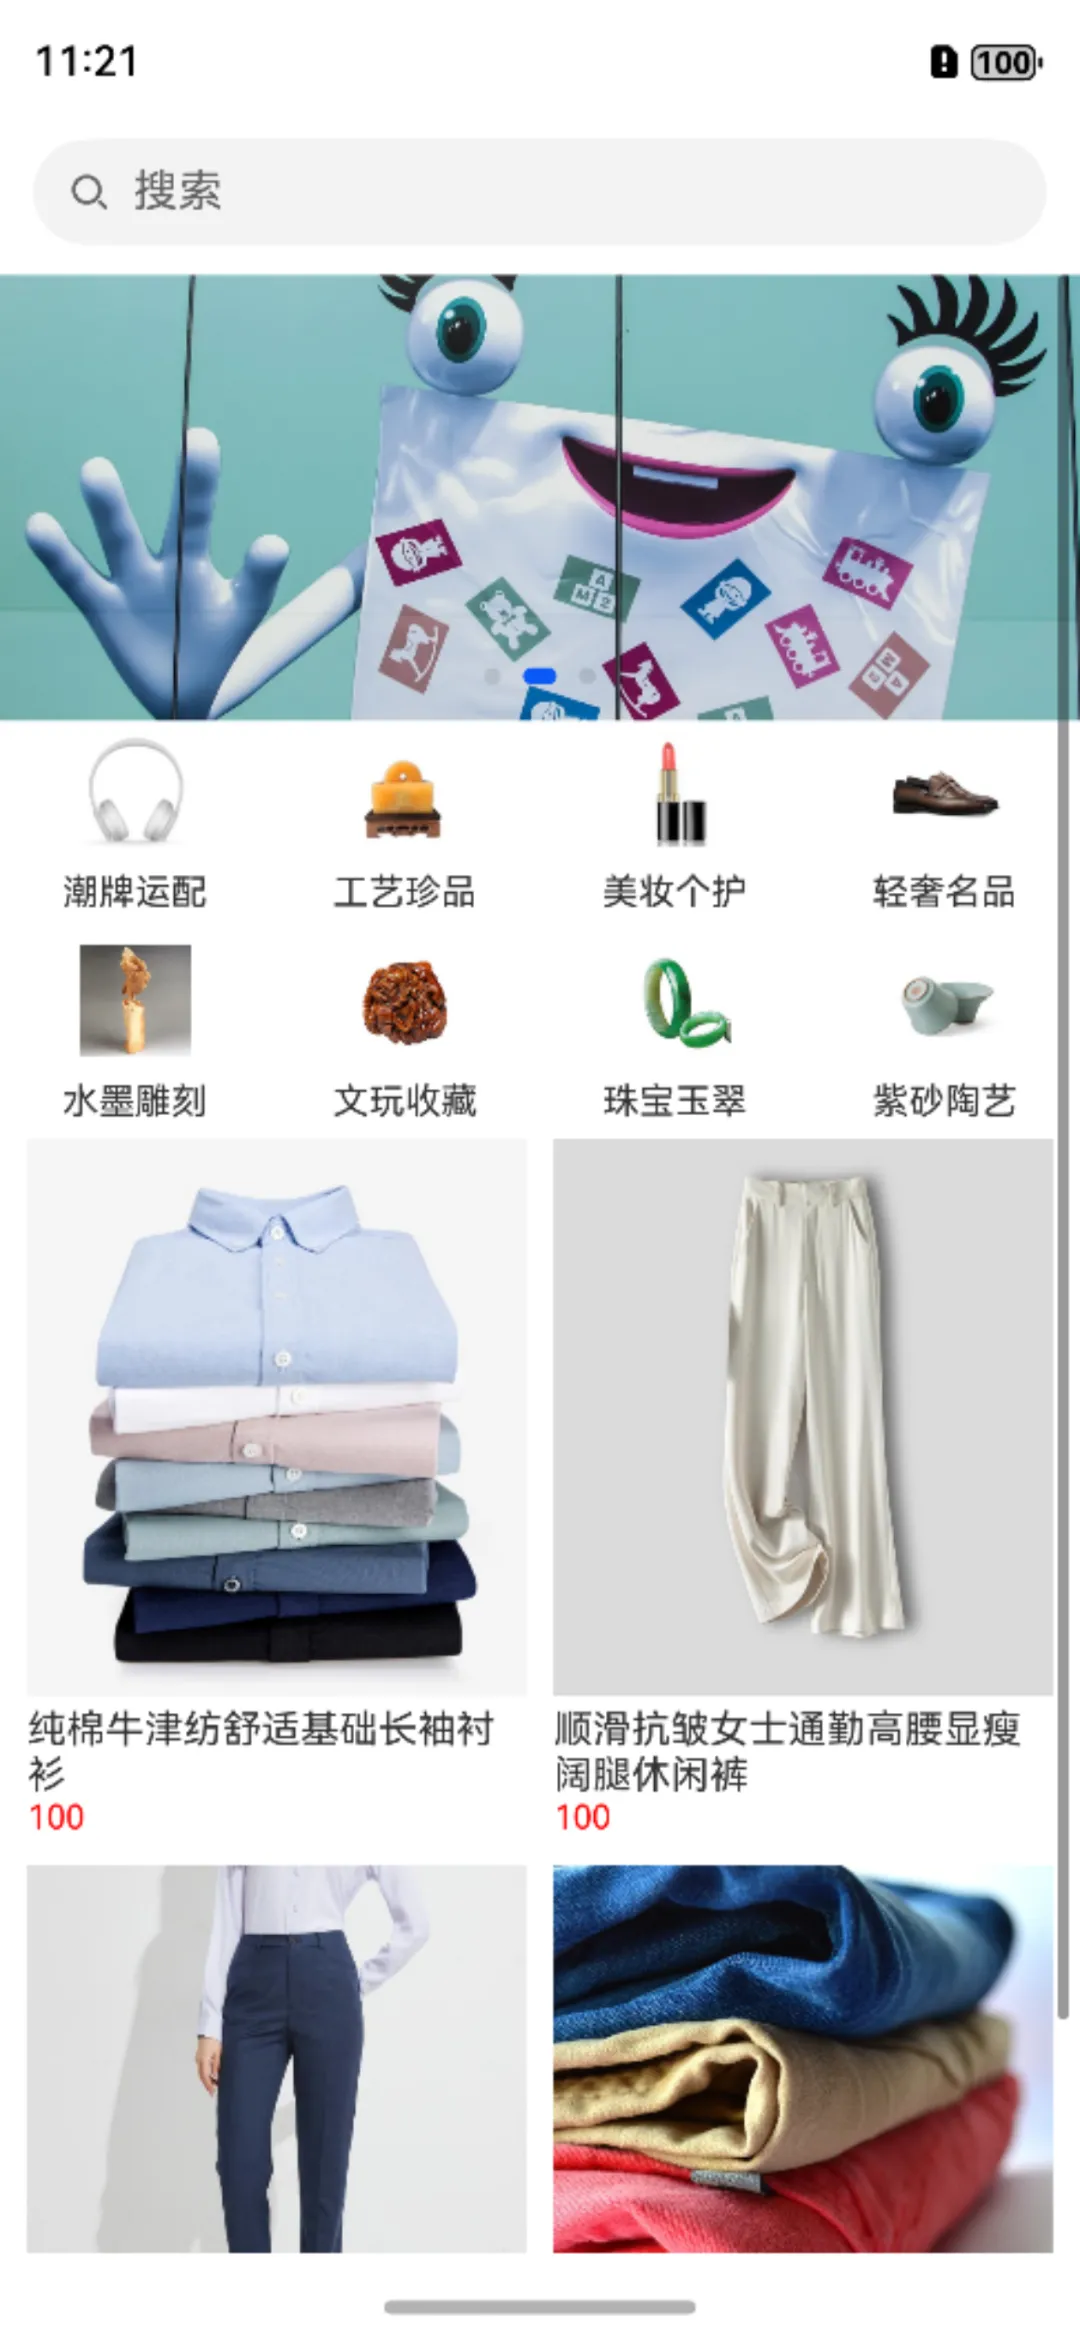
经过了几天的入门教程,我们终于进入到了仓颉开发语言的实战环节,今天分享的内容是实现商城应用的首页页面,效果图如下:

首页的内容包括导航栏、轮播图、商品分类和商品列表,我们下面逐一介绍。
导航栏
仓颉语言中是没有导航栏组件的,我们需要自己去开发。此处的导航栏也比较简单,只有一个搜索框,仓颉中的常见组件我们已经在之前的文章中做了讲解。所以这里就直接Row容器下添加Search组件:
Row {
  Search(placeholder: "搜索",  controller: this.searchController)
  .height(38)
}.width(100.percent).height(60).padding(right: 12, left: 12)
轮播图
仓颉是有轮播图组件的,用法也比较简单:
Swiper{
  Image(@r(app.media.banner1)).width(100.percent).height(100.percent)
  Image(@r(app.media.banner2)).width(100.percent).height(100.percent)
  Image(@r(app.media.banner3)).width(100.percent).height(100.percent)
}.width(100.percent).height(160).duration(1500).autoPlay(true)
商品分类
这里我们会遇到仓颉的第一个复杂容器Grid,作用和ArkTs中的Grid一样:
Grid {
          ForEach(
              goodsTypeList,
              itemGeneratorFunc: {
                  item: TypeItem, index: Int64 => GridItem {
                      Column(){
                          Image(item.getImage()).width(40).height(40).margin(bottom: 4)
                          Text(item.getTitle()).fontSize(13).textAlign(TextAlign.Center).fontWeight(FontWeight.W400).margin(top:5)
                      }
                  }
              }
          )
      }.columnsTemplate('1fr 1fr 1fr 1fr').rowsTemplate('1fr 1fr')
      .width(100.percent).height(150).backgroundColor(0xFFFFFF)
商品列表
商品列表和分类几乎一样,只不过由4列改为2列:
Grid {
         ForEach(
             goodsList,
             itemGeneratorFunc: {
                 item: GoodsItem, index: Int64 => GridItem {
                     Column(){
                         Image(item.getImage()).width(100.percent).height(200).margin(bottom: 4)
                         Text(item.getTitle()).fontSize(14).textAlign(TextAlign.Start).fontWeight(FontWeight.W400)
                         Text(item.getPrice()).fontSize(12).textAlign(TextAlign.Center).fontWeight(FontWeight.W400).fontColor(Color.RED)
                     }
                     .alignItems(HorizontalAlign.Start)
                 }
             }
         )
     }.columnsTemplate('1fr 1fr').columnsGap(10).rowsGap(10)
     .width(100.percent).backgroundColor(0xFFFFFF).padding( right: 10, left: 10)
最后要注意,除导航栏外,其他组件是需要可以滚动的,所以需要把它们放到List组件中,注意List的属性设置,这里使用layoutWeight来自动分配空间:
List() {
    //banner
    ListItem {}
    //分类
    ListItem {}
    //商品
    ListItem {}
}.layoutWeight(1)
源码已经上传到gitee,大家需要的话可以下载:
https://gitee.com/the-blue-plan/cjshop#HarmonyOS语言##仓颉##购物#