引言
模块预览
 在现代旅游类 App 中,提供一个功能丰富且个性化的用户中心是提升用户体验的关键。本文将详细介绍如何基于 React 和 react-vant 实现一个美观、实用的用户中心页面,并重点讲解如何通过 AI 技术为用户提供独特的头像生成服务。我们将从页面布局设计、组件使用、状态管理到 AI 头像生成逻辑,一步步带你了解整个开发过程。
一、动手开发
1. 完整代码
Pages/Account/index.jsx
jsx
import useTitle from '@/hooks/useTitle'
import {
  useState,
} from 'react';
import {
  Image,
  Cell,
  CellGroup,
  ActionSheet,
} from 'react-vant'
import {
  ServiceO,
  FriendsO,
  StarO,
  SettingO
} from '@react-vant/icons'
import styles from './account.module.css'
import {
  generateAvatar
} from '@/llm'

const Account = () => {
  const [userInfo, setUserInfo] = useState({
    nickname: '噜噜',
    level: '5级',
    slogan: '我是噜噜,二代奶龙。',
    avatar: 'https://encrypted-tbn0.gstatic.com/images?q=tbn:ANd9GcRFwyrU4jyb_84PJ0aVyiOkKAeUKjbJFLCl0w&s'
  })
  useTitle('我的')
  const [showActionSheet, setShowActionSheet] = useState(false)
  const handleAction = async (e) => {
    console.log(e);
    if(e.type===1){
      //AI生成头像
      const text = `
        昵称:${userInfo.nickname}
        签名:${userInfo.slogan}
      `;
      const newAvatar = await generateAvatar(text);
    }else if(e.type===2){
      //图片上传

    }
  }
  const actions = [
    {
      name: 'AI上传头像',
      color: '#ee0a24',
      type: 1
    },
    {
      name: '上传头像',
      color: '#123123',
      type: 2
    }
  ]
  return (
    <div className={styles.container}>
      {/* 用户信息模块 */}
      <div className={styles.user}>
        <Image
          round
          width="64px"
          height="64px"
          src={userInfo.avatar}
          style={{cursor: "pointer"}}
          onClick={()=>setShowActionSheet(true)}
        />
        <div className='ml4'>
          <div className={styles.nickname}>昵称:{userInfo.nickname}</div>
          <div className={styles.level}>等级:{userInfo.level}</div>
          <div className={styles.slogan}>签名:{userInfo.slogan}</div>
        </div>
      </div>
      {/* 服务模块 单元格 */}
      <div className='mt3'>
        <CellGroup>
          <Cell title='服务' icon={<ServiceO />} isLink />
        </CellGroup>
        <CellGroup className='mt2'>
          <Cell title="收藏" icon={<StarO />} isLink />
          <Cell title="朋友圈" icon={<FriendsO />} isLink />
        </CellGroup>
        <CellGroup className='mt2'>
          <Cell title="设置" icon={<SettingO />} isLink />
        </CellGroup>
      </div>
      {/* 上传头像模块 */}
      <ActionSheet
        visible={showActionSheet}
        actions={actions}
        cancelText="取消"
        onCancel={()=>setShowActionSheet(false)}
        onSelect={(e)=>handleAction(e)}
      >

      </ActionSheet>
    </div>
  )
}

export default Account
Pages/Account/account.module.css
css
.container {
    background-color: #f5f5f5;
    height: 100%;
}
.user {
    background-color: #fff;
    padding: 20px 16px;
    display: flex;
    align-items: center;
}
.nickname {
    font-size: 32px;
    font-weight: 500;
}
.level{
    font-size: 28px;
    color: #999;
    margin-top: 8px;
}
.slogan{
    font-size: 24px;
    color: #ccc;
    margin-top: 8px;
}
App.css
这里采用了原子化CSS: 原子化CSS(Atomic CSS)是一种提倡将样式拆解为最小单元 ,即所谓的"原子类 ",以便于组合使用的设计理念。这种方法有助于提高样式的复用性,减少重复定义,并且可以更高效地管理样式变化。
css
/* 通用样式 */
.flex {
  display: flex;
}
.flex-col {
  flex-direction: column;
}
.flex-1 {
  flex:1;
}
.h-screen {
  height: 100vh;
}
.h-all {
  height: 100%;
}
.fixed-loading{
  position: fixed;
  top: 50px;
  left: 50%;
  transform: translateX(-50%);
  z-index: 9999;
}
.mt2 {
  margin-top: 8px;
}
.mt3 {
  margin-top: 12px;
}
.ml4 {
  margin-left: 16px;
}
llm/index.js
待完善逻辑...(后面文章会详细介绍哒~)
js
// AI生成头像
export const generateAvatar = async (text) => {
    // 设计prompt
    const prompt = `
        你是一位卡通动画设计师,需要为用户设计头像,主打奶龙风格。
        用户的信息是${text}
        要求有个性,有设计感。
    `
}
2. 页面结构与基础组件
首先,我们来看一下用户中心页面的基本结构和所使用的组件。
2.1 页面布局
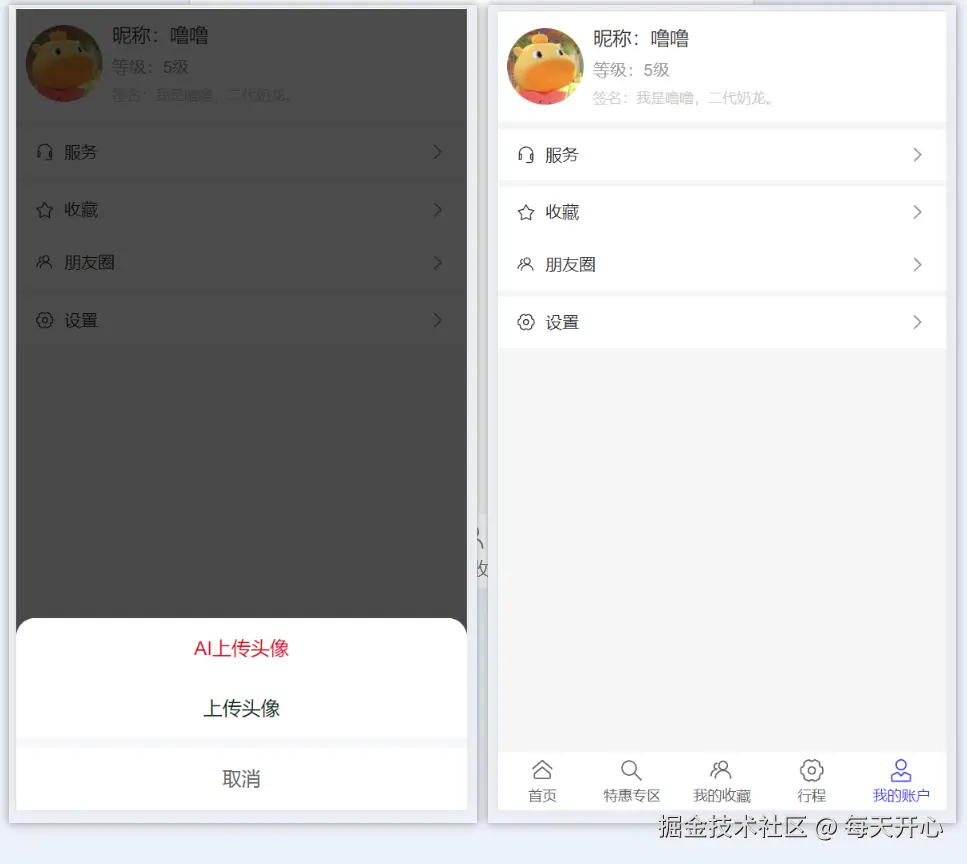
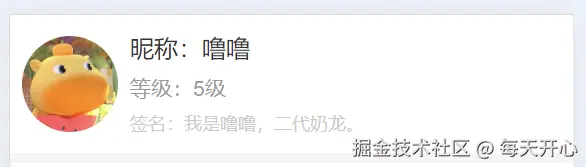
用户中心页面主要分为两部分:用户信息展示区 和功能菜单区。用户信息展示区包括用户的头像、昵称、等级和签名等基本信息;功能菜单区则包含服务、收藏、朋友圈和设置等常用功能入口。
jsx
<div className={styles.container}>
  <div className={styles.user}>
    {/* 用户信息展示 */}
  </div>
  <div className='mt3'>
    {/* 功能菜单 */}
  </div>
</div>
2.1.1 用户信息展示区
2.1.2 功能菜单区
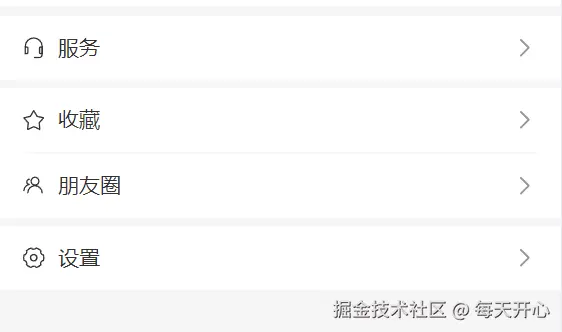
2.2 基础组件
为了实现上述布局,我们使用了 react-vant 提供的一系列 UI 组件,如 Image、Cell、CellGroup 等。
jsx
<div className={styles.container}>
  {/* 用户信息模块 */}
  <div className={styles.user}>
    <Image
      round
      width="64px"
      height="64px"
      src={userInfo.avatar}
      style={{cursor: "pointer"}}
      onClick={()=>setShowActionSheet(true)}
    />
    <div className='ml4'>
      <div className={styles.nickname}>昵称:{userInfo.nickname}</div>
      <div className={styles.level}>等级:{userInfo.level}</div>
      <div className={styles.slogan}>签名:{userInfo.slogan}</div>
    </div>
  </div>
  {/* 服务模块 单元格 */}
  <div className='mt3'>
    <CellGroup>
      <Cell title='服务' icon={<ServiceO />} isLink />
    </CellGroup>
    <CellGroup className='mt2'>
      <Cell title="收藏" icon={<StarO />} isLink />
      <Cell title="朋友圈" icon={<FriendsO />} isLink />
    </CellGroup>
    <CellGroup className='mt2'>
      <Cell title="设置" icon={<SettingO />} isLink />
    </CellGroup>
  </div>
2.3 用户信息展示与交互
用户信息展示区不仅展示了用户的静态信息,还提供了头像更换的交互功能。 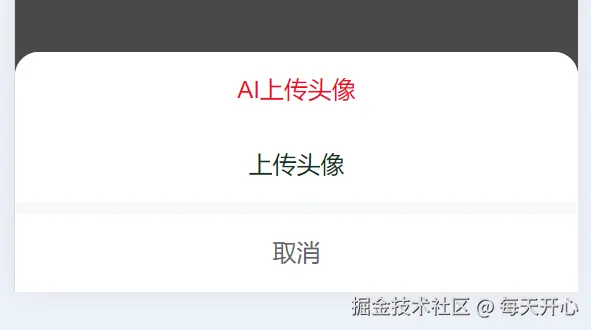
2.3.1 用户信息展示
用户信息区通过useState管理用户信息的状态。
jsx
const [userInfo, setUserInfo] = useState({
  nickname: '噜噜',
  level: '5级',
  slogan: '我是噜噜,二代奶龙。',
  avatar: 'https://encrypted-tbn0.gstatic.com/images?q=tbn:ANd9GcRFwyrU4jyb_84PJ0aVyiOkKAeUKjbJFLCl0w&s'
});
2.3.2 头像更换交互
点击用户头像时,会弹出一个 ActionSheet 提供两种头像更换方式:AI 生成头像 和上传头像。
jsx
//是否弹出的状态,一开始设置为false,不弹出
const [showActionSheet, setShowActionSheet] = useState(false)
const actions = [
{
name: 'AI上传头像',
color: '#ee0a24',
type: 1 // 用来判断上传头像的类型
},
{
name: '上传头像',
color: '#123123',
type: 2
}
]
{/* 用户信息模块 */}
<Image
round
width="64px"
height="64px"
src={userInfo.avatar}
onClick={() => setShowActionSheet(true)} // 点击出现
/>
{/* 头像上传模块 */}
<ActionSheet
visible={showActionSheet}
actions={actions}
cancelText="取消"
onCancel={() => setShowActionSheet(false)} // 点击取消
onSelect={(e) => handleAction(e)}
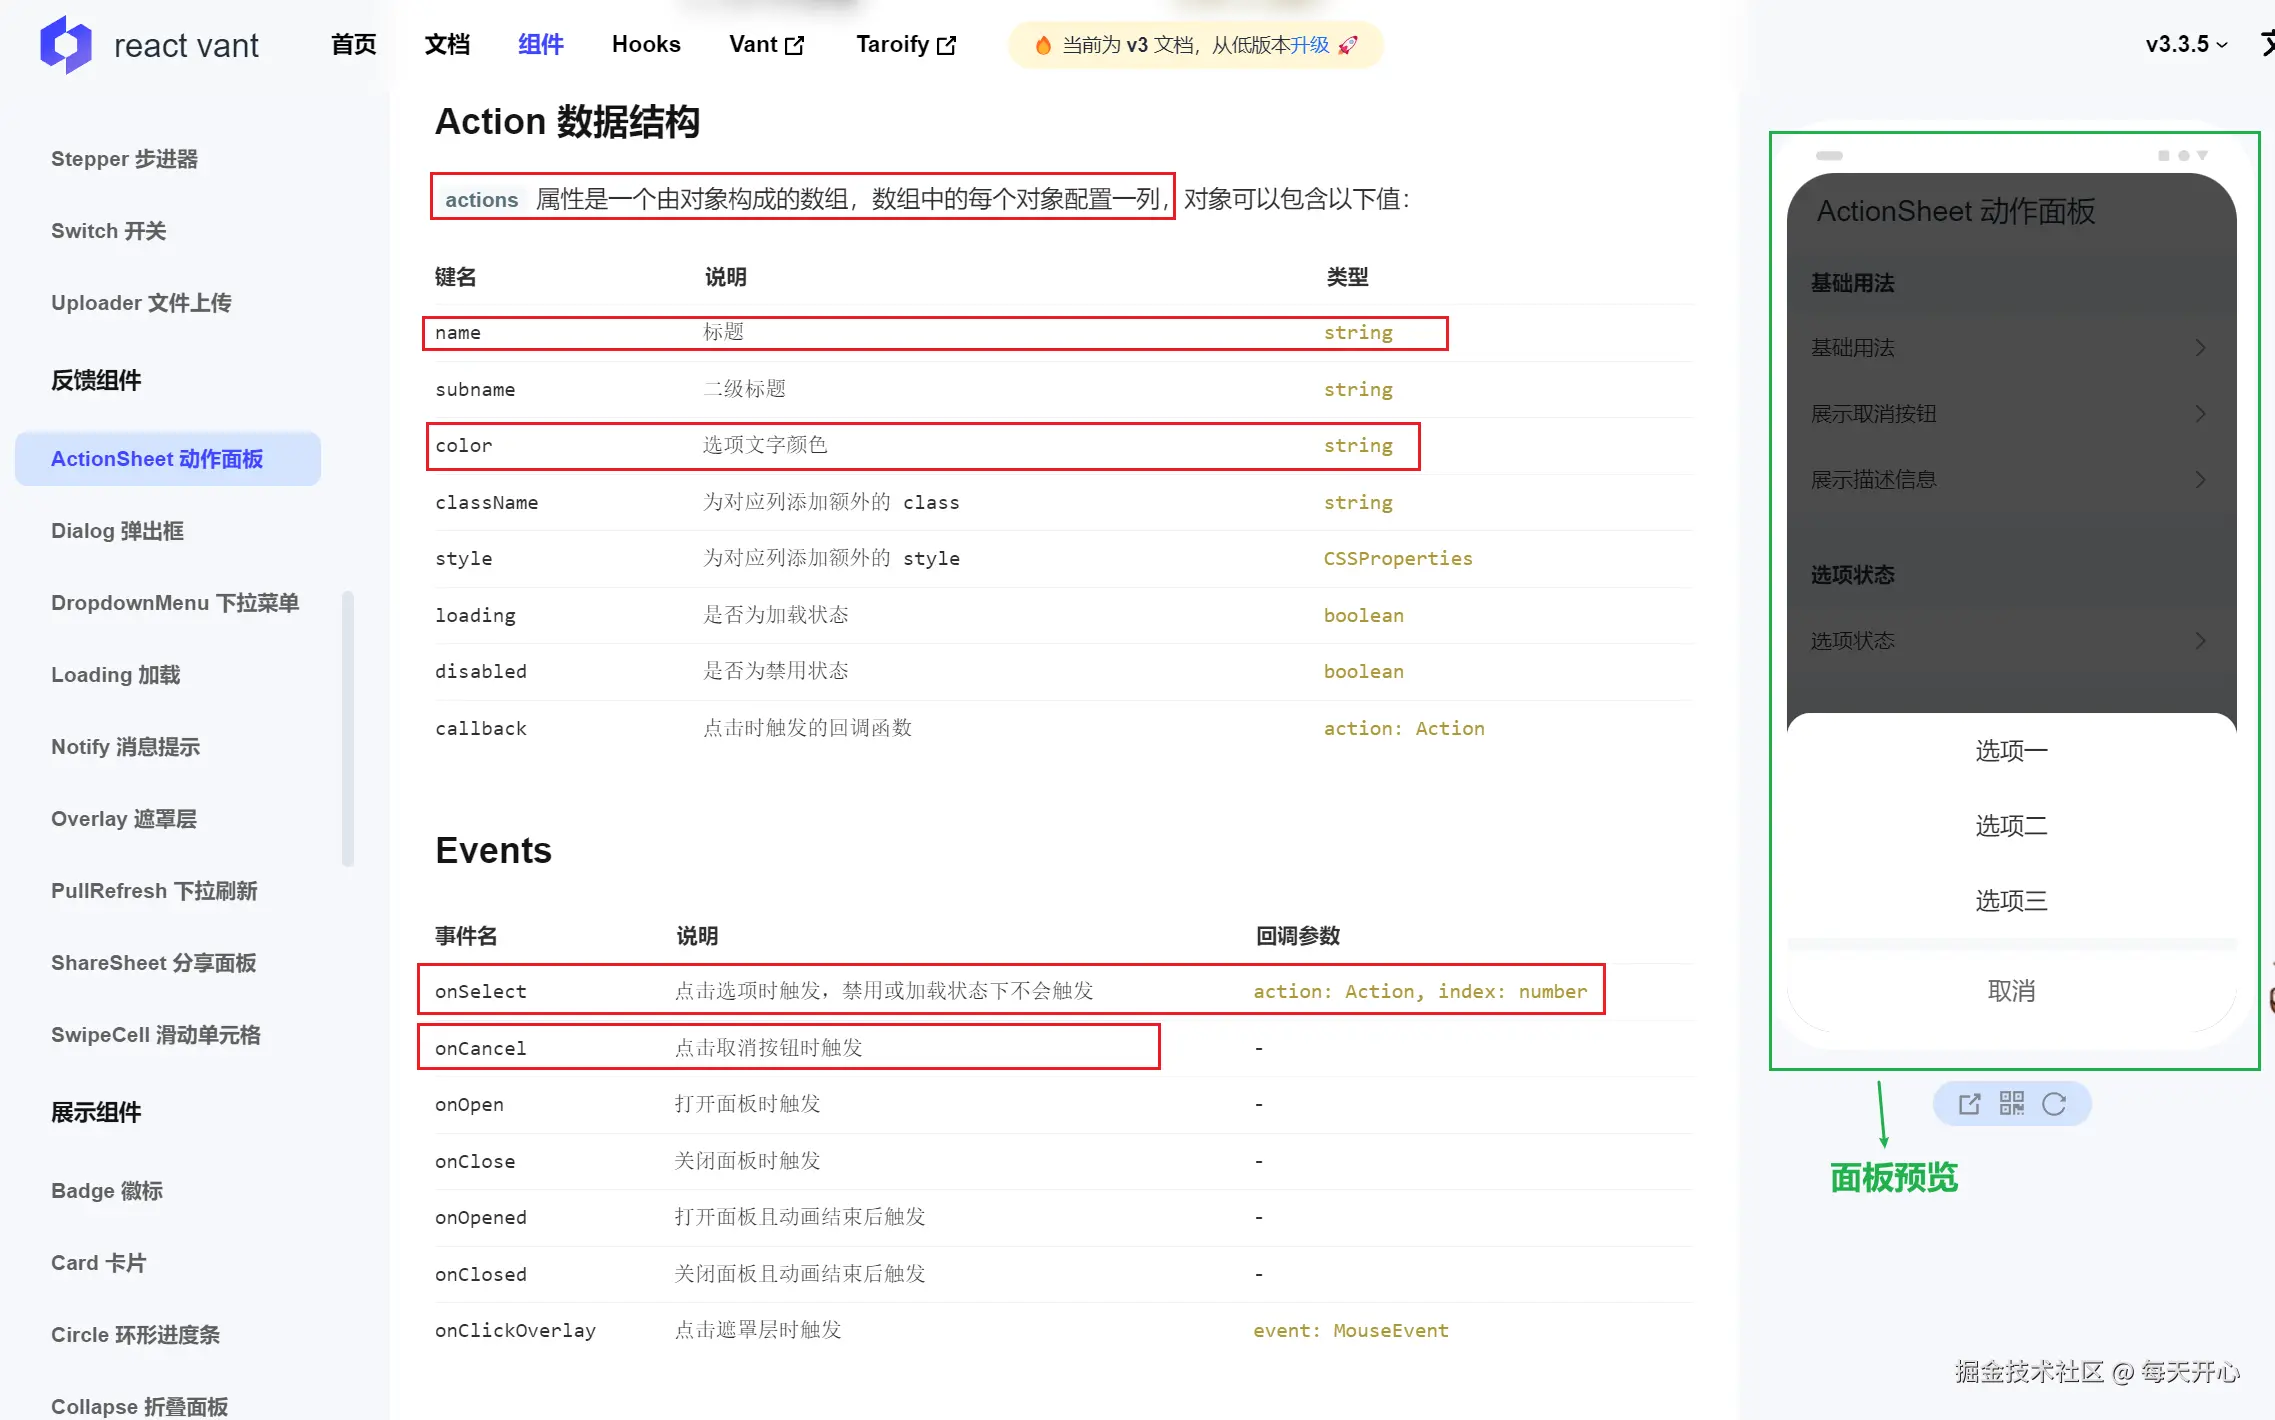
/>小Tips :
如何使用react-vant组件库中的组件呢?查找文档。
从
react-vant官网里找到ActionSheet动作面板 ,选择带有取消的模版。
2.4 AI 头像生成逻辑
当用户选择"AI 生成头像"时,系统会根据用户的昵称和签名信息 ,调用 generateAvatar 函数生成新的头像。
2.4.1 AI 头像生成函数
js
export const generateAvatar = async (text) => {
  // 设计prompt
  const prompt = `
      你是一位卡通动画设计师,需要为用户设计头像,主打奶龙风格。
      用户的信息是${text}
      要求有个性,有设计感。
  `;
  // 这里可以调用实际的AI接口进行头像生成
};
2.4.2 处理头像生成结果
在 handleAction 函数中,处理 AI 头像生成的结果,并更新用户信息。
js
const handleAction = async (e) => {
    if(e.type===1){
      //AI生成头像
      const text = `
        昵称:${userInfo.nickname}
        签名:${userInfo.slogan}
      `;
      const newAvatar = await generateAvatar(text);
    }else if(e.type===2){
      //图片上传
    }
  }
结尾
通过本文的介绍,我们成功实现了一个功能丰富的用户中心页面,并利用 AI 技术为用户提供个性化的头像生成服务。希望本文能为你在开发类似项目时提供一些参考和启发。接下来,我们将在后续文章中继续深入探讨更多高级功能和技术细节。