文章目录
基础指令
1. echo指令
echo 是 Linux 中常用的命令,用于在终端输出文本或变量内容。
基本用法
功能:直接打印指定的文本或变量值
举例
bash
[lll@hcss-ecs-647d Linux_test]$ echo 'hello world!'
hello world!
[lll@hcss-ecs-647d Linux_test]$ name='lisi'
[lll@hcss-ecs-647d Linux_test]$ echo 'Name: $name'
Name: $name
补充
- Linux下一切皆文件。从上面的例子可以推出,打印到显示器,那么显示器就是文件;而写入到显示器文件,就是从键盘中读取数据,且键盘也是一个文件,那么就是从键盘文件中读取数据
- 若不想打印到显示器中,而是打印到所需要的其他文件中,那么就要进行输出重定向,需要用到 ">" 符号,来进行重定向,如下:
bash
[lll@hcss-ecs-647d Linux_test]$ echo "hello world" > file.txt
[lll@hcss-ecs-647d Linux_test]$ ls
file.txt
[lll@hcss-ecs-647d Linux_test]$ cat file.txt
hello world
若目标文件不存在,则系统先会创建目标文件,再进行写入;若目标文件存在,则会把目标文件清空再写入
- 若不想对目标文件清空再写入,就可用 ">>" 符号,来进行追加重定向,如下:
bash
[lll@hcss-ecs-647d Linux_test]$ echo "hello lll" >> file.txt
[lll@hcss-ecs-647d Linux_test]$ cat file.txt
hello world
hello lll
若目标文件不明确,系统默认目标文件为显示器
2. cat指令
cat 是 Linux 中常用的文本操作命令,全称为 concatenate(连接),主要用于查看文件内容、合并文件或创建新文件。
主要功能
- 查看文件内容:直接输出文件的全部内容到终端
- 合并多个文件:将多个文件的内容连接后输出
语法:cat 选项 文件
举例
(查看单个文件)
bash
[lll@hcss-ecs-647d Linux_test]$ cat test.txt
hi world
(查看多个合并文件并输出)
bash
[lll@hcss-ecs-647d Linux_test]$ cat file.txt test.txt
hello world
hello lll
hi world
常用选项
-b:对非空行输出行编号
-n:对输出的所有行编号
-s:不输出多行空行
举例
bash
#对非空行输出行编号
[lll@hcss-ecs-647d Linux_test]$ cat -b file.txt
     1	hello world


     2	hello lll

     3	123
bash
#对输出的所有行编号
[lll@hcss-ecs-647d Linux_test]$ cat -n file.txt
     1	hello world
     2
     3
     4	hello lll
     5
     6	123
bash
#不输出多行空行,多行空行缩成一行
[lll@hcss-ecs-647d Linux_test]$ cat file.txt
hello world


hello lll

123
[lll@hcss-ecs-647d Linux_test]$ cat -s file.txt
hello world

hello lll

123
(tac指令逆向输出)
bash
[lll@hcss-ecs-647d Linux_test]$ tac file.txt
123

hello lll


hello world
补充
- 已经知道Linux下一切皆文件,那么既然有输出重定向,就会有输入重定向,如下:
bash
[lll@hcss-ecs-647d Linux_test]$ cat
1234
1234
hello
hello
^C
当直接输入cat指令时,光标会自动卡在下一行的起始位置,当从键盘输入数据时,系统就会直接将得到的数据打印到显示器上,也就是说该指令是,从键盘文件中读入数据,再从显示器文件中输出数据。(ctrl+c为终止程序)
- 若我们不想从键盘中输入数据,就可加上 "<" 符号,进行输入重定向,如下:
bash
[lll@hcss-ecs-647d Linux_test]$ ls
file.txt  test.txt
[lll@hcss-ecs-647d Linux_test]$ cat < test.txt
hi world
从test文件中读入数据,再从显示器文件中输出数据
3. more指令
more 是 Linux 中一个基础的分页显示命令,用于逐屏查看文件内容(尤其适合大文件),避免内容快速滚动超出屏幕。
基本功能
功能:类似cat指令,但cat指令适用于查看小文件
语法:more 目标文件
bash
[lll@hcss-ecs-647d Linux_test]$ more file.txt常用选项
-n:指定输出行数
q:退出more
举例
bash
#指定输出行数
[lll@hcss-ecs-647d Linux_test]$ more -10 mycode.c
hello world
hello world
hello world
hello world
hello world
hello world
hello world
hello world
hello world
hello world
--More--(0%)
其他操作键
- 空格 / f :向下翻一屏
- 回车 / e :向下滚动一行
- b :向上翻一屏(仅部分实现支持)
- / + 关键词 :搜索内容(从当前页开始)
- n :跳转到下一个匹配项
- :f :显示当前文件名和行号
4. less指令
less 是 Linux 中一个强大的分页文件查看工具,支持双向滚动、动态加载和高级搜索,尤其适合处理大文件或日志。相比 more,less 功能更全面,操作更灵活,是终端下查看文本的首选工具。
基本功能
语法:less 选项 目标文件
bash
[lll@hcss-ecs-647d Linux_test]$ less mycode.c常用选项
-N:显示行号
-i:搜索时忽略大小写
-S:禁止长行换行(适合查看代码)
-F :文件内容少于一屏时自动退出
-M:显示文件名、行号和百分比进度
-r:正确显示 ANSI 颜色(如日志中的高亮)
bash
#less -N mycode.c   (显示行号)
	  1 hello world
      2 hello world
      3 hello world
      4 hello world
      5 hello world
      6 hello world
      7 hello world
      8 hello world
      9 hello world
其他选项在这里就不逐个测试了
其他操作键
- 逐行滚动:方向键(↑/↓)或 j/k
- 翻页:空格键(下)、b(上)、PageUp/PageDown
- 跳转:g(首行)、G(末行)、:行号(指定行)
- 正向搜索:/关键词,按n 跳转下一个匹配项,N 上一个
- 反向搜索:?关键词,同样支持 n/N 导航
- 忽略大小写:启动时加 -i 选项(如 less -ifile.log)
5. head指令
head 是 Linux 中一个简单高效的文件查看工具,用于快速输出文件的开头部分内容(默认显示前 10 行)。它特别适合快速预览文件结构、检查日志头部信息或提取文件片段,尤其在处理大文件时无需加载整个文件,响应迅速。
基本功能
功能:查看前10行内容
语法:head 目标文件
bash
[lll@hcss-ecs-647d Linux_test]$ head mycode.c
0.hello world
1.hello world
2.hello world
3.hello world
4.hello world
5.hello world
6.hello world
7.hello world
8.hello world
9.hello world
常用选项
-n<行数> :显示前n行的内容
-c <字节数x>:显示前x个字节
bash
# 显示前n行内容
[lll@hcss-ecs-647d Linux_test]$ head -20 mycode.c
0.hello world
1.hello world
2.hello world
3.hello world
4.hello world
5.hello world
6.hello world
7.hello world
8.hello world
9.hello world
10.hello world
11.hello world
12.hello world
13.hello world
14.hello world
15.hello world
16.hello world
17.hello world
18.hello world
19.hello world
bash
#显示前50个字节
[lll@hcss-ecs-647d Linux_test]$ head -c 50 mycode.c
0.hello world
1.hello world
2.hello world
6. tail指令
tail 是 Linux 中一个高效的文件查看工具,专门用于输出文件的末尾部分内容(默认显示最后 10 行)。它支持实时监控文件变化(如日志更新),是系统管理和日志分析的核心命令之一。
基本功能
功能:查看最后10行内容
语法:tail 目标文件
bash
[lll@hcss-ecs-647d Linux_test]$ tail mycode.c
1991.hello world
1992.hello world
1993.hello world
1994.hello world
1995.hello world
1996.hello world
1997.hello world
1998.hello world
1999.hello world
2000.hello world
tail的常用选项与head指令基本一致,这里也不逐一演示了
补充:"|" 管道
功能:批量化、流水线化地对文本进行加工
问题:若一个文件中有2000行内容,如何使用head指令和tail指令来获取1000行到1020行的内容?
若想获取中间行的内容,可以通过"管道"来获取,如下:
bash
[lll@hcss-ecs-647d Linux_test]$ head -1020 mycode.c | tail -21
1000.hello world
1001.hello world
1002.hello world
1003.hello world
1004.hello world
1005.hello world
1006.hello world
1007.hello world
1008.hello world
1009.hello world
1010.hello world
1011.hello world
1012.hello world
1013.hello world
1014.hello world
1015.hello world
1016.hello world
1017.hello world
1018.hello world
1019.hello world
1020.hello world
可以理解为,通俗来讲管道就是一个有着两端口子管子,两端口分别为出入口,当获取到前1020行内容时,将获取到的内容放入管道入口,通过管道对获取到的内容进行加工、处理,最后从管道出口出来的就是被处理、加工过的文本,只剩下最后21行的内容
7. date指令
在 Linux 中,date 是一个常用的命令行工具,用于显示或设置系统的日期和时间。它支持多种格式化选项,可以灵活地输出时间信息,或通过参数调整系统时间(需 root 权限)。
基本功能
功能:显示当前的时间
语法:date
bash
[lll@hcss-ecs-647d Linux_test]$ date
Sat Jul 19 15:28:03 CST 2025
默认输出格式:星期 月 日 时:分:秒 时区 年
格式化输出
通过 + 指定格式符号,来自定义输出内容
%Y:年份
%m:月份
%d:日期
%H:小时
%M:分钟
%S:秒
%s:Unix 时间戳(秒)
%F:等价于 %Y-%m-%d
%T:等价于 %H:%M:%S
%A:星期全称
%a:星期缩写
%Z:时区
举例
(格式化输出:年-月-日 时:分:秒)
bash
[lll@hcss-ecs-647d Linux_test]$ date +%Y-%m-%d\ %H:%M:%S
2025-07-19 15:36:47
[lll@hcss-ecs-647d Linux_test]$ date +%F\ %T
2025-07-19 15:37:32
选项
-s :设置系统时间
bash
sudo date -s "2024-06-12 15:30:00"设置系统时间,只有超级用户才能设置,所以需要通过 sudo 指令来进行提权
补充:时间戳
时间戳(Timestamp) 是计算机科学中用于表示特定时间点的标准化数值。它是一个数字,表示从某个预定义的"时间原点(Epoch)"到当前时间的总秒数(或毫秒、微秒等)。
时间原点为 1970年1月1日 12:00,也就是从时间原点到现在累计的秒数
bash
[lll@hcss-ecs-647d Linux_test]$ date +%s
1752912227
(对时间戳进行格式化)
bash
[lll@hcss-ecs-647d Linux_test]$ date +%F\ %T -d @1752912227
2025-07-19 16:03:47
8. cal命令
在 Linux 中,cal 是一个用于显示日历的命令行工具,可以快速查看当前月份、指定年份或月份的日历。它简单易用,支持多种格式输出,适合快速查询日期信息。
基本功能
功能:查看日历
语法:cal 年份
bash
# 显示当前日历
[lll@hcss-ecs-647d Linux_test]$ cal
      July 2025
Su Mo Tu We Th Fr Sa
       1  2  3  4  5
 6  7  8  9 10 11 12
13 14 15 16 17 18 19
20 21 22 23 24 25 26
27 28 29 30 31
bash
# 显示年份的完整日历
[lll@hcss-ecs-647d Linux_test]$ cal 2025
常用选项
-3:显示系统前⼀个月,当前月,下⼀个月的月历
-j:显示在当年中的第几天(⼀年日期按天算,从1月1号算起,默认显示当前月在一年中的天数)
-y:显示当前年份的日历
bash
[lll@hcss-ecs-647d Linux_test]$ cal -3
      June 2025             July 2025            August 2025
Su Mo Tu We Th Fr Sa  Su Mo Tu We Th Fr Sa  Su Mo Tu We Th Fr Sa
 1  2  3  4  5  6  7         1  2  3  4  5                  1  2
 8  9 10 11 12 13 14   6  7  8  9 10 11 12   3  4  5  6  7  8  9
15 16 17 18 19 20 21  13 14 15 16 17 18 19  10 11 12 13 14 15 16
22 23 24 25 26 27 28  20 21 22 23 24 25 26  17 18 19 20 21 22 23
29 30                 27 28 29 30 31        24 25 26 27 28 29 30
                                            31
bash
[lll@hcss-ecs-647d Linux_test]$ cal -j
         July 2025
Sun Mon Tue Wed Thu Fri Sat
        182 183 184 185 186
187 188 189 190 191 192 193
194 195 196 197 198 199 200
201 202 203 204 205 206 207
208 209 210 211 212
9. find指令
在 Linux 中,find 是一个强大的文件搜索工具,能够基于名称、类型、大小、时间等多种条件递归查找文件或目录,并支持对搜索结果执行操作(如删除、权限修改等)。
基本功能
功能:用于在文件树中查找文件,并作出相应的处理(可能访问磁盘)
语法:find 搜索路径 选项 操作
搜索路径:指定搜索的起始目录(默认为当前目录 .)。
选项:定义搜索条件(如名称、类型、时间等)。
操作:对匹配的文件执行的操作(如 -print、-delete、-exec)。
常用搜索条件
- 按名称查找
bash
[lll@hcss-ecs-647d ~]$ find test/ -name test.txt
test/dir1/test.txt
test/dir2/cp_test/mydir/test.txt
查找该路径 test/ 下的所有 test.txt 文件
- 按类型查找
find /path -type 文件类型
常用文件类型:
f:普通文件
d:目录
l:符号链接
b / c:块设备/字符设备
bash
# 查找该路径下的所有普通文件类型的文件
[lll@hcss-ecs-647d Linux_test]$ find /home/lll/Linux_test/ -type f
/home/lll/Linux_test/file.txt
/home/lll/Linux_test/test.txt
/home/lll/Linux_test/mycode.c- 按大小查找
bash
find /path -size [+/-]N[单位]单位:
c:字节
k:KB
M:MB
G:GB
bash
# 查找test/ 路径中大于3KB的文件
[lll@hcss-ecs-647d ~]$ find test/ -size +3k
test/
test/.dir2
test/dir1
test/dir1/a

# 查找 Linux_test/ 中小于100字节的文件
[lll@hcss-ecs-647d ~]$ find Linux_test/ -size -100c
Linux_test/file.txt
Linux_test/test.txt
10. which指令
基本功能
功能:搜索系统指定的命令
语法:which 目标命令
bash
[lll@hcss-ecs-647d ~]$ which ls
alias ls='ls --color=auto'
	/usr/bin/ls
[lll@hcss-ecs-647d ~]$ which cd
/usr/bin/cd
which vs find
which只用来查系统自带的可执行程序,而find是在系统目录直接查找,可查找任意文件
补充:alias
"alias" 是别名/别称的意思,上面例子中alias ls = 'ls --colour=auto',说明ls 是 ls --colour的别名。用户可以给自己的也可以为程序设置特殊的别名,例如:alias hello = ls -l
11. whereis指令
在Linux中,whereis 是一个用于快速定位二进制文件、源代码和帮助手册(manual pages)位置的命令。它通过搜索预定义的目录列表(如 /bin、/sbin、/usr/share/man 等)来查找文件,速度较快但范围有限。
基本用法
语法:whereis 选项 文件名
bash
[lll@hcss-ecs-647d Linux_test]$ whereis ls
ls: /usr/bin/ls /usr/share/man/man1/ls.1.gz /usr/share/man/man1p/ls.1p.gz
常用选项
-b:仅搜索二进制文件(如 /usr/bin/ls)
-m:仅搜索帮助手册(manual pages)
-s:仅搜索源代码文件
-u:显示未找到的文件(即某些路径不存在)
-l:列出搜索的目录路径
bash
[lll@hcss-ecs-647d Linux_test]$ whereis -b ls
ls: /usr/bin/ls
其他选项就不逐一演示了
12. grep指令
在 Linux 中,grep 是一个强大的文本搜索工具,用于在文件或输入流中查找匹配指定模式(正则表达式或普通字符串)的行,并将结果输出到终端。通俗来讲就是"筛选"
基本功能
功能:在文件中搜索字符串,将找到的行打印出来
语法:grep 选项 搜索字符串 文件
bash
[lll@hcss-ecs-647d Linux_test]$ cat test.txt
hi world
aaa
1234
[lll@hcss-ecs-647d Linux_test]$ grep 'aaa' test.txt
aaa
常用选项
-i:忽略大小写的不同,所以大小写视为相同
-n:顺便输出行号
-v:反向选择,显示出没有'搜寻字符串'内容的那一行
bash
[lll@hcss-ecs-647d Linux_test]$ cat test.txt
hi world
aaa
1234
AAA
[lll@hcss-ecs-647d Linux_test]$ grep -in 'aaa' test.txt
2:aaa
4:AAA
bash
# 反向筛选
[lll@hcss-ecs-647d Linux_test]$ cat test.txt
hi world
aaa
1234
AAA
[lll@hcss-ecs-647d Linux_test]$ grep -inv 'aaa' test.txt
1:hi world
3:1234
其他选项
-c:统计匹配的行数(而非内容)
-l:仅显示包含匹配项的文件名
-r或 -R:递归搜索目录中的文件
-w:匹配整个单词(避免部分匹配)
-A NUM:显示匹配行及其后 NUM 行(After)
-B NUM:显示匹配行及其前 NUM 行(Before)
-C NUM:显示匹配行及其前后各 NUM 行(Context)
-E:启用扩展正则表达式(等同于 egrep)
-F :禁用正则表达式,按普通字符串匹配(等同于 fgrep)
13. zip/unzip指令
在 Linux 中,zip 和 unzip 是常用的压缩和解压工具,用于处理 .zip 格式的归档文件。它们支持跨平台使用(Windows/macOS/Linux),适合压缩多个文件或目录,并保留基本权限信息。
zip指令
语法:zip 选项 压缩包名.zip 需压缩的文件或目录列表
unzip指令
语法:unzip 选项 压缩包名.zip -d 目标目录
基本用法
bash
#压缩
[lll@hcss-ecs-647d Linux_test]$ tree test
test
├── dir1
│   └── dir2
│       └── dir3
│           └── log.txt
├── f1.txt
├── f2.txt
├── f3.txt
├── f4.txt
└── f5.txt

3 directories, 6 files
[lll@hcss-ecs-647d Linux_test]$ zip test.zip test
  adding: test/ (stored 0%)
[lll@hcss-ecs-647d Linux_test]$ ls
other  test  test.zip
bash
#解压
[lll@hcss-ecs-647d Linux_test]$ ls
other  test  test.zip
[lll@hcss-ecs-647d Linux_test]$ mv test.zip other
[lll@hcss-ecs-647d Linux_test]$ ls
other  test
[lll@hcss-ecs-647d Linux_test]$ cd other/
[lll@hcss-ecs-647d other]$ ls
test.zip
[lll@hcss-ecs-647d other]$ unzip test.zip
Archive:  test.zip
   creating: test/
[lll@hcss-ecs-647d other]$ ls
test  test.zip
[lll@hcss-ecs-647d other]$ tree test
test

0 directories, 0 files
我们发现当压缩完test文件之后,将压缩包转移到other路径下解压,但是解压之后的文件不符合我们的预期,与压缩前的test完全不一致,即压缩/解压大致的思路是没有错的,对于普通的文件这样打包压缩是没有问题的,可是示例中压缩的是目录,这样的操作只能对顶级目录(test目录)进行打包压缩,所以需要加上 -r 选项,才能对目录进行递归式的打包压缩
-r:递归处理,将指定目录下的所有文件和子目录一并处理
语法:zip -r(目录) xxx.zip src
bash
#压缩
[lll@hcss-ecs-647d Linux_test]$ zip -r test.zip test
  adding: test/ (stored 0%)
  adding: test/f2.txt (stored 0%)
  adding: test/f5.txt (stored 0%)
  adding: test/f4.txt (stored 0%)
  adding: test/dir1/ (stored 0%)
  adding: test/dir1/dir2/ (stored 0%)
  adding: test/dir1/dir2/dir3/ (stored 0%)
  adding: test/dir1/dir2/dir3/log.txt (stored 0%)
  adding: test/f3.txt (stored 0%)
  adding: test/f1.txt (stored 0%)
[lll@hcss-ecs-647d Linux_test]$ ls
other  test  test.zip
由于test目录里面的文件都是空的,所以显示的就是0%
bash
#解压
[lll@hcss-ecs-647d Linux_test]$ mv test.zip other
[lll@hcss-ecs-647d Linux_test]$ cd other
[lll@hcss-ecs-647d other]$ ls
test.zip
[lll@hcss-ecs-647d other]$ unzip test.zip
Archive:  test.zip
   creating: test/
 extracting: test/f2.txt
 extracting: test/f5.txt
 extracting: test/f4.txt
   creating: test/dir1/
   creating: test/dir1/dir2/
   creating: test/dir1/dir2/dir3/
 extracting: test/dir1/dir2/dir3/log.txt
 extracting: test/f3.txt
 extracting: test/f1.txt
[lll@hcss-ecs-647d other]$ ls
test  test.zip
[lll@hcss-ecs-647d other]$ tree test
test
├── dir1
│   └── dir2
│       └── dir3
│           └── log.txt
├── f1.txt
├── f2.txt
├── f3.txt
├── f4.txt
└── f5.txt

3 directories, 6 files
语法:unzip xxx.zip
默认解压到当前路径,若想要解压到指定路径,在解压时携带 -d 选项即可
bash
[lll@hcss-ecs-647d Linux_test]$ ls
other  test  test.zip
[lll@hcss-ecs-647d Linux_test]$ unzip test.zip -d ../test/dir1
Archive:  test.zip
   creating: ../test/dir1/test/
 extracting: ../test/dir1/test/f2.txt
 extracting: ../test/dir1/test/f5.txt
 extracting: ../test/dir1/test/f4.txt
   creating: ../test/dir1/test/dir1/
   creating: ../test/dir1/test/dir1/dir2/
   creating: ../test/dir1/test/dir1/dir2/dir3/
 extracting: ../test/dir1/test/dir1/dir2/dir3/log.txt
 extracting: ../test/dir1/test/f3.txt
 extracting: ../test/dir1/test/f1.txt
语法:unzip xxx.zip -d 路径
实现Windows和Linux文件互传
Linux -> Windows
bash
[lll@hcss-ecs-647d Linux_test]$ ls
file.txt  mycode.c  other  test  test.txt  test.zip
[lll@hcss-ecs-647d Linux_test]$ sz test.zip
输入 sz 命令后会弹出一个界面,如下:
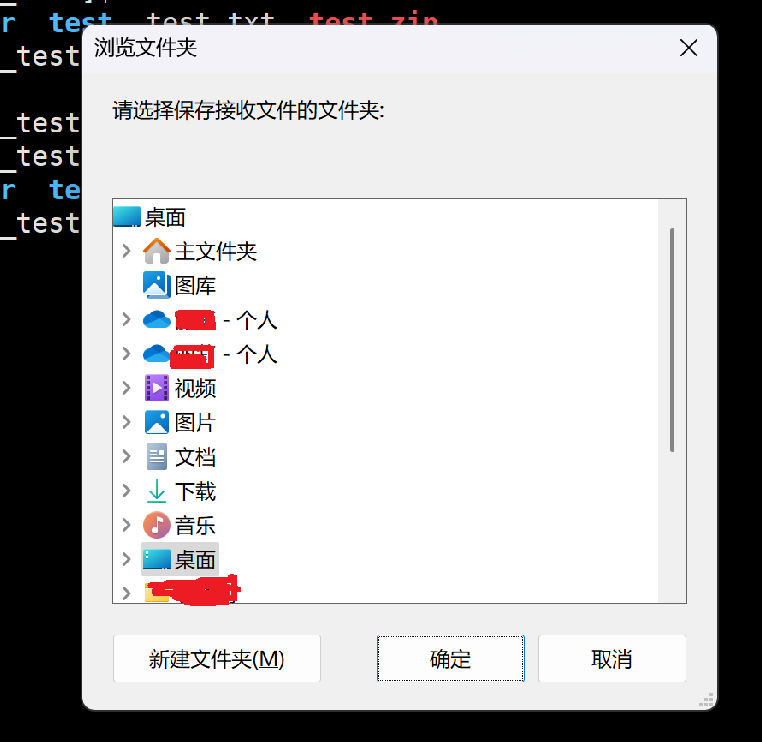
选择一个将压缩包存放在Windows下的位置即可
Windows -> Linux
法一:
bash
[lll@hcss-ecs-647d Linux_test]$ rz 输入该命令,即弹出选择传输的压缩文件,如下:
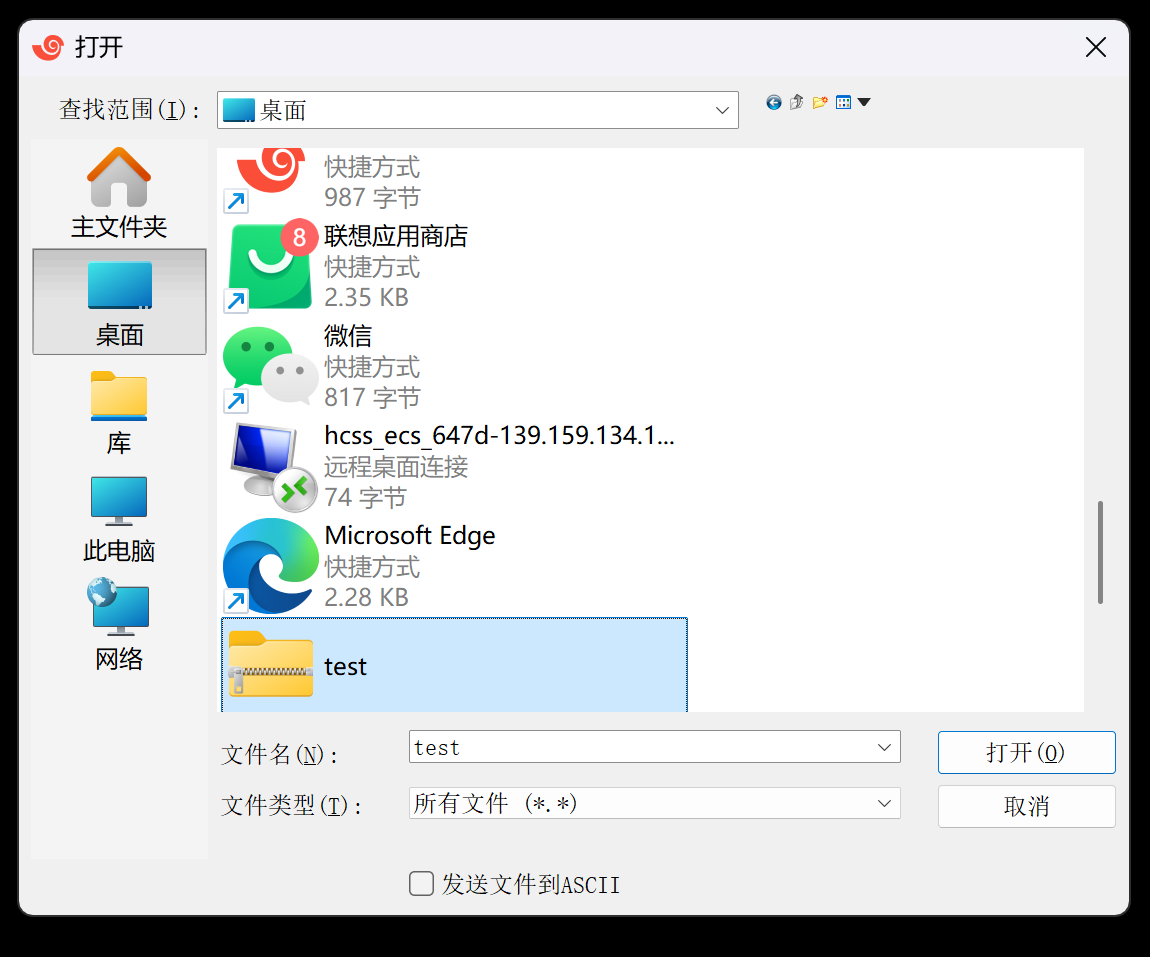
选择文件,并打开即可
法二:直接用鼠标将文件直接拖拽到Xshell界面即可传输
14. tar指令
tar 是 Linux 中用于归档文件的常用命令,全称 Tape Archive。它可以将多个文件或目录打包成一个归档文件(通常称为 tarball),并可选择是否压缩。
基本功能
打包:将文件/目录合并为一个归档文件(不压缩)
解包:从归档文件中提取原始内容
压缩/解压:结合压缩工具,减少体积
常用选项
-c:创建新归档文件(打包)
-x:解包归档文件
-f:指定归档文件名(必须紧跟文件名)
-v:显示操作过程(verbose)
-z:使用 gzip 压缩/解压(.tar.gz 或 .tgz)
-j:使用 bzip2 压缩/解压(.tar.bz2)
-J:使用 xz 压缩/解压(.tar.xz)
-t:列出归档内容(不解包)
-r:向归档中追加文件
-C:解包到指定目录
打包压缩:tar -czf xxx.tgz src
解压:tar xxx.tgz
bash
[lll@hcss-ecs-647d Linux_test]$ tar -czf test.tgz test
[lll@hcss-ecs-647d Linux_test]$ ls
other  test  test.tgz
[lll@hcss-ecs-647d Linux_test]$ mv test.tgz other
[lll@hcss-ecs-647d Linux_test]$ ls
other  test
[lll@hcss-ecs-647d Linux_test]$ cd other/
[lll@hcss-ecs-647d other]$ ls
test.tgz
[lll@hcss-ecs-647d other]$ tar -xzf test.tgz
[lll@hcss-ecs-647d other]$ ls
test  test.tgz
若想显示压缩/解压的过程,携带 -v 选项即可;若想指定解压路径,携带 -C 选项即可
bash
[lll@hcss-ecs-647d Linux_test]$ ls
other  test  test.tgz
[lll@hcss-ecs-647d Linux_test]$ tar -xzvf test.tgz -C ../test/dir2
test/
test/f2.txt   #展示解压过程
test/f5.txt
test/f4.txt
test/dir1/
test/dir1/dir2/
test/dir1/dir2/dir3/
test/dir1/dir2/dir3/log.txt
test/f3.txt
test/f1.txt
[lll@hcss-ecs-647d Linux_test]$ tree ../test/dir2/test
../test/dir2/test
├── dir1
│   └── dir2
│       └── dir3
│           └── log.txt
├── f1.txt
├── f2.txt
├── f3.txt
├── f4.txt
└── f5.txt

3 directories, 6 files
对于tar指令而言,Windows 与 Linux 互传也是用于操作。
Linux 与 Linux 之间互传
语法:scp 身份@另一个主机的ip地址:目标路径
15. bc 指令
bc命令可以很方便的进行浮点运算
bash
[lll@hcss-ecs-647d Linux_test]$ bc
bc 1.06.95
Copyright 1991-1994, 1997, 1998, 2000, 2004, 2006 Free Software Foundation, Inc.
This is free software with ABSOLUTELY NO WARRANTY.
For details type `warranty'.
1+1
2
8/2
4
16. uname ‒r 指令
语法:uname 选项
功能:uname用来获取电脑和操作系统的相关信息
补充说明:uname可显示linux主机所用的操作系统的版本、硬件的名称等基本信息。
常用选项:
-a或‒all:详细输出所有信息,依次为内核名称,主机名,内核版本号,内核版本,硬件名,处理器类型,硬件平台类型,操作系统名称
bash
[lll@hcss-ecs-647d Linux_test]$ uname
Linux
[lll@hcss-ecs-647d Linux_test]$ uname -r
3.10.0-1160.119.1.el7.x86_64
[lll@hcss-ecs-647d Linux_test]$ uname -a
Linux hcss-ecs-647d 3.10.0-1160.119.1.el7.x86_64 #1 SMP Tue Jun 4 14:43:51 UTC 2024 x86_64 x86_64 x86_64 GNU/Linux
17. shutdown指令
shutdown 是 Linux 中用于安全关闭或重启系统的核心命令,支持定时操作、用户通知和权限控制,是系统维护的必备工具。(俗称挂机指令)
语法:shutdown 选项 时间 消息
常用选项
-h / --halt:关机(默认切断电源,可用 -P 显式指定)
-r / --reboot:重启系统
-k:仅发送警告,不实际操作(测试用)
-c:取消计划中的关机/重启
-f(部分系统):重启时跳过磁盘检查(fsck)
时间格式:
now:立即执行
+m:m 分钟后(如 +5 表示 5 分钟后)
HH:MM:指定具体时间(如 22:00)
bash
#立即关机
sudo shutdown -h now
bash
#定时重启并警告
sudo shutdown -r +10 "系统将在 10 分钟后重启进行更新,请保存工作!"
bash
#取消计划关机
sudo shutdown -c
bash
#仅发送警告但不实际操作
sudo shutdown -k +5 "测试:系统将在 5 分钟后关机(实际不会执行)"
18. 几个重要的热键
Tab按键:具有『命令补全』和『档案补⻬』的功能
Ctrl+c按键:让当前的程序『停掉』
上下建可以翻阅历史命令
Ctrl+r:输入关键字可搜索历史命令
history:查看历史命令
拓展指令
安装和登录命令:login、shutdown、halt、reboot、install、mount、umount、chsh、
exit、last
文件处理命令:file、mkdir、grep、dd、find、mv、ls、diff、cat、ln
系统管理相关命令:df、top、free、quota、at、lp、adduser、groupadd、kill、crontab
网络操作命令:ifconfig、ip、ping、netstat、telnet、ftp、route、rlogin、rcp、finger、
mail、nslookup 系统安全相关命令:passwd、su、umask、chgrp、chmod、chown、chattr、sudo
ps、 who 其它命令:tar、unzip、gunzip、unarj、mtools、man、unendcode、uudecode