最近追剧,主角天天被热搜,吃瓜吃的不亦乐乎,想搞个实时吃瓜的插件。
1. 怎么入门?
直接问chatGPT我想搞一个展示微博热搜榜单词条的vscode插件怎么搞?
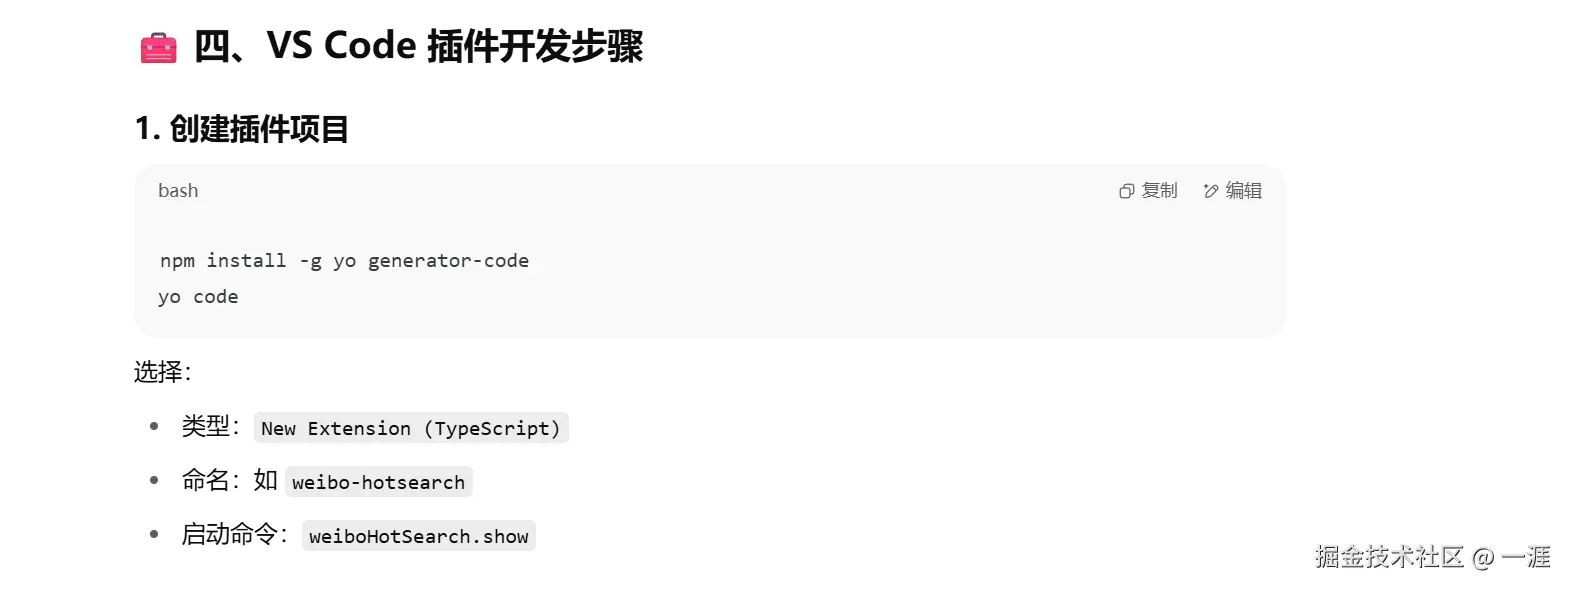
安装完后直接运行yo code会可能会遇到两个问题:
- npm版本报错
js
× An error occured while running code:app#prompting Error code items.findLastIndex is not a function这个问题里面findLastIndex() 是 ES2022(ES13)引入的新方法,需要nodeJS升级V18+,切换nvm
js
nvm use 19.8.0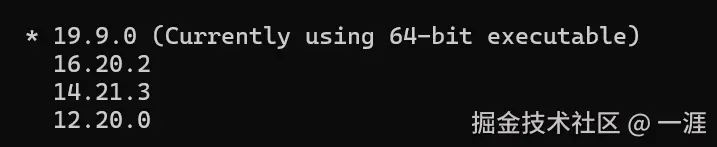
- 运行环境报错

这个是 Windows PowerShell 的脚本执行策略限制 导致的。Windows 默认 不允许执行 .ps1 脚本文件 (即 PowerShell 脚本),而 yo 命令正是通过 yo.ps1 启动的。
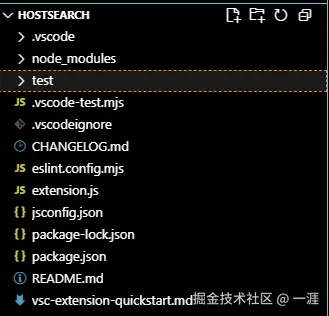
通过win键+R然后输入cmd打开命令行窗口,用非PowerShell的命令窗口运行。 根据自己需要回答问题,生成目录结果如下:
2. 写内容
chatGPT会直接给出extension.js和package.json的代码内容
extension.js
js
const vscode = require('vscode');
const fetch = require('node-fetch');

/**
 * @param {vscode.ExtensionContext} context
 */
function activate(context) {
  let disposable = vscode.commands.registerCommand('weiboHotSearch.show', async function () {
    const panel = vscode.window.createWebviewPanel(
      'weiboHotSearch',
      '微博热搜榜',
      vscode.ViewColumn.One,
      {}
    );

    const hotList = await fetchWeiboHot('https://weibo.com/ajax/statuses/hot_band');
    const entList = await fetchWeiboHot('https://weibo.com/ajax/statuses/entertainment');

    panel.webview.html = getWebviewContent(hotList, entList);
  });

  context.subscriptions.push(disposable);
}

async function fetchWeiboHot(url) {
  try {
    const res = await fetch(url, {
      headers: {
        'User-Agent': 'Mozilla/5.0',
        'Referer': 'https://weibo.com/'
      }
    });
    const json = await res.json();
    return (json.data.band_list || []).slice(0, 5);
  } catch (e) {
    vscode.window.showErrorMessage('请求微博热搜失败: ' + e.message);
    return [];
  }
}

function getWebviewContent(hotList, entList) {
  function listToHTML(list) {
    return list.map((item, i) => {
      const url = item.word_scheme || `https://s.weibo.com/weibo?q=${encodeURIComponent(item.word)}`;
      return `<li><a href="${url}" target="_blank">${i + 1}. ${item.word}</a> (${item.category || ''})</li>`;
    }).join('');
  }

  return `
    <!DOCTYPE html>
    <html>
    <head>
      <meta charset="utf-8">
      <style>
        body { font-family: sans-serif; padding: 1em; }
        h2 { color: #e91e63; }
        ul { list-style: none; padding: 0; }
        li { margin-bottom: 6px; }
        a { text-decoration: none; color: #2196f3; }
      </style>
    </head>
    <body>
      <h2>🔥 微博热搜榜</h2>
      <ul>${listToHTML(hotList)}</ul>
      <h2>🎬 文娱榜</h2>
      <ul>${listToHTML(entList)}</ul>
    </body>
    </html>`;
}

function deactivate() {}

module.exports = {
  activate,
  deactivate
};
其实chatGPT给出的文娱榜的接口不对,我自己去控制台拿的
package.json
js
// 在上面代码的基础上改了这个
  "contributes": {
    "commands": [
      {
        "command": "weiboHotSearch.show",
        "title": "📈 显示微博热搜榜"
      }
    ]
## },
如果想查看效果
F5然后在新打开的窗口里面Ctrl+Shift+P,点击显示微博热搜榜,展示结果如下:
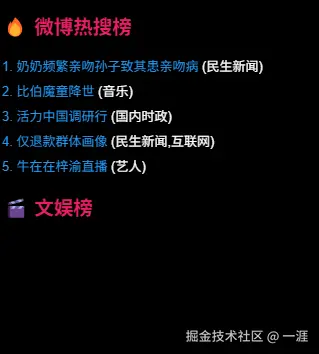
从图片可以看到,文娱榜数据未加载出来,报错如下:
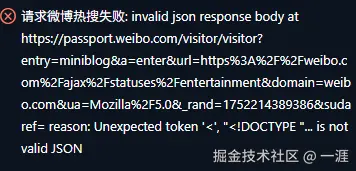
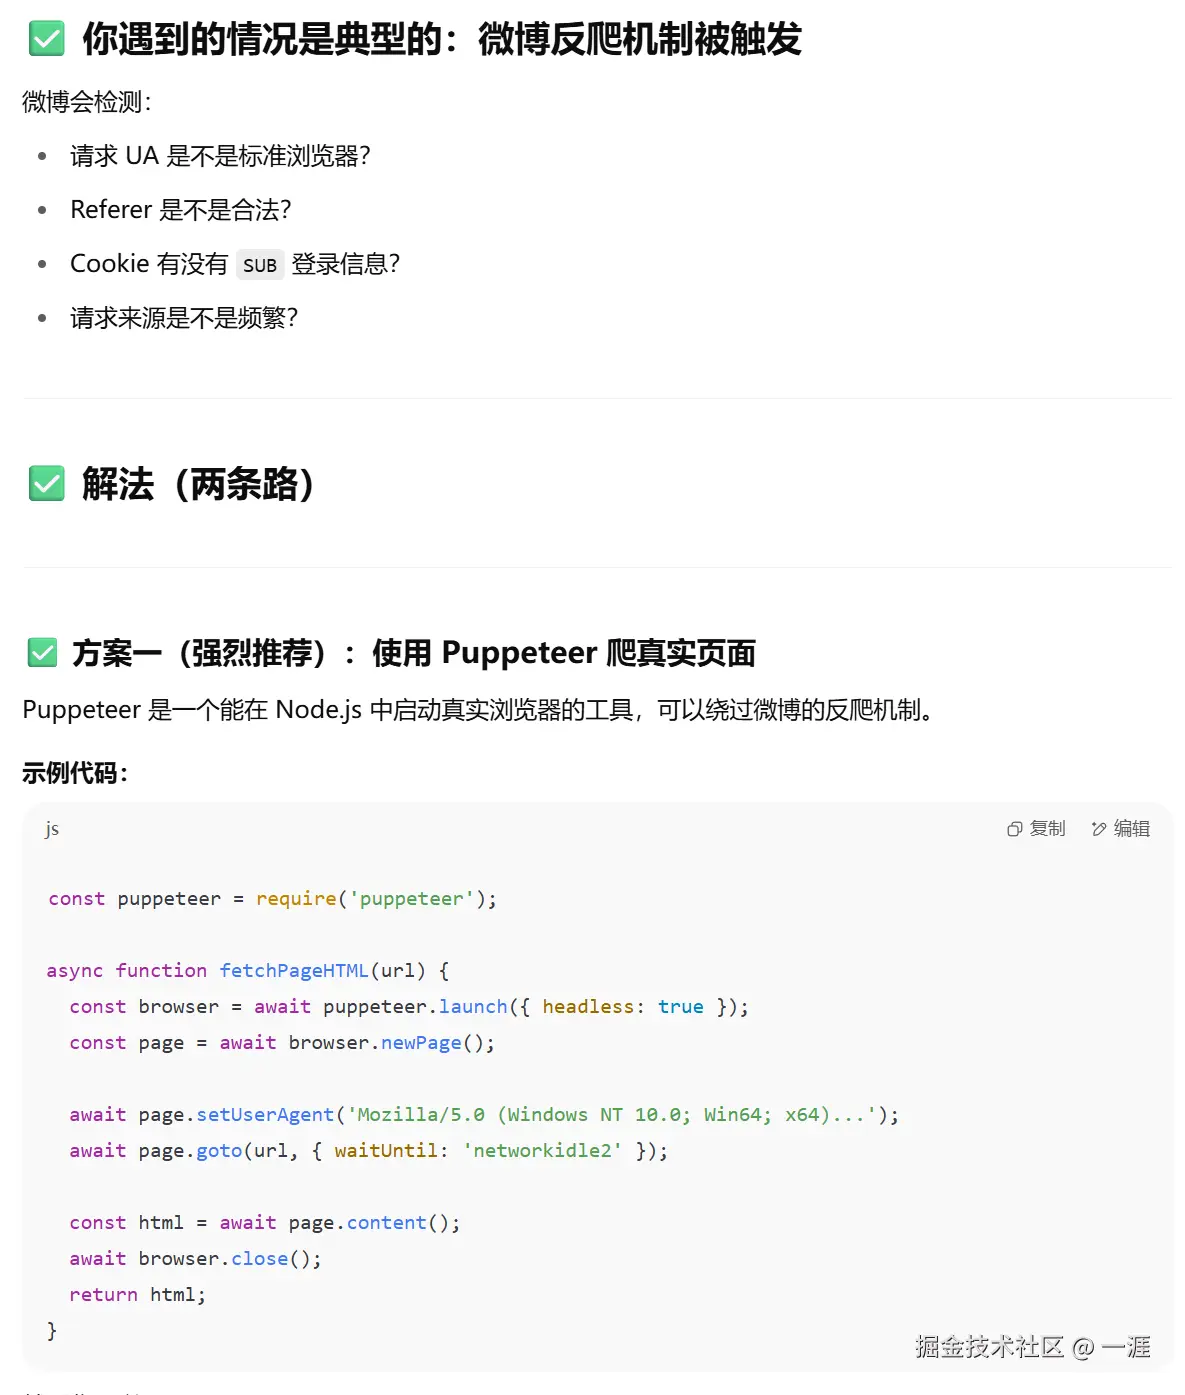
这是因为微博反爬机制被触发
3. 方案升级
把上面的错误反馈给chatGPT, 然后他会告诉你可以使用puppeteer+cheerio
结合上面的cheerio,extension.js最终代码形式如下:
js
const vscode = require('vscode');
const puppeteer = require('puppeteer');
const cheerio = require('cheerio');

/**
 * @param {vscode.ExtensionContext} context
 */
function activate(context) {
  let disposable = vscode.commands.registerCommand('weiboHotSearch.show', async function () {
    const panel = vscode.window.createWebviewPanel(
      'weiboHotSearch',
      '微博热搜榜',
      vscode.ViewColumn.One,
      {
        enableScripts: true, // 允许点击跳转
      }
    );

    // 设置初始页面(加载中)
    panel.webview.html = `
      <html><body>
        <h2>正在加载微博热搜...</h2>
      </body></html>
    `;

    try {
      const hotList = await fetchWeiboHot('https://s.weibo.com/top/summary?cate=realtime');
      const entList = await fetchWeiboHot('https://s.weibo.com/top/summary?cate=entrank');

      panel.webview.html = getWebviewContent(hotList, entList);
    } catch (e) {
      panel.webview.html = `<html><body><h2>加载失败:</h2><pre>${e.message}</pre></body></html>`;
    }
  });

  context.subscriptions.push(disposable);
}

async function fetchWeiboHot(url) {
  let browser;
  try {
    browser = await puppeteer.launch({
      headless: true, // 不显示浏览器窗口
      args: ['--no-sandbox', '--disable-setuid-sandbox'],
    });

    const page = await browser.newPage();
    await page.setUserAgent(
      'Mozilla/5.0 (Windows NT 10.0; Win64; x64) AppleWebKit/537.36 Chrome/102.0.0.0 Safari/537.36'
    );

    await page.goto(url, { waitUntil: 'networkidle2', timeout: 60000 });

    const html = await page.content();
    const $ = cheerio.load(html);
    const list = [];

    $('table tbody tr').each((i, el) => {
      const rank = $(el).find('td.td-01').text().trim();
      const a = $(el).find('td.td-02 a');
      const title = a.text().trim();
      const href = a.attr('href');
      const hot = $(el).find('td.td-03').text().trim();
      const link = href ? (href.startsWith('http') ? href : 'https://s.weibo.com' + href) : '';

      if (title) {
        list.push({ rank: rank || (i + 1).toString(), title, hot, link });
      }
    });

    return list;
  } catch (err) {
    console.error('获取微博热搜失败(puppeteer):', err.message);
    return [];
  } finally {
    if (browser) await browser.close();
  }
}
function getWebviewContent(hotList, entList) {
  function renderSection(title, list) {
    if (!list.length) return `<p>暂无数据</p>`;
    const rows = list
      .map(
        (item, index) => `
        <tr>
          <td class="rank">${item.rank || index + 1}</td>
          <td class="title">
            <a href="${item.link}" target="_blank">${item.title}</a>
            ${item.hot ? `<span class="hot">${item.hot}</span>` : ''}
          </td>
        </tr>`
      )
      .join('\n');

    return `
      <h2>${title}</h2>
      <table>
        <tbody>${rows}</tbody>
      </table>
    `;
  }

  return `
  <!DOCTYPE html>
  <html lang="zh">
  <head>
    <meta charset="UTF-8" />
    <meta name="viewport" content="width=device-width, initial-scale=1.0" />
    <style>
      body {
        font-family: -apple-system, BlinkMacSystemFont, 'Segoe UI', Roboto, Oxygen, Ubuntu;
        padding: 20px;
        color: #333;
      }
      h2 {
        font-size: 1.2rem;
        border-left: 4px solid #fa7d3c;
        padding-left: 10px;
        margin-top: 2rem;
      }
      table {
        width: 100%;
        border-collapse: collapse;
        margin-top: 0.5rem;
      }
      td {
        padding: 8px 10px;
        border-bottom: 1px solid #eee;
      }
      td.rank {
        width: 2rem;
        color: #fa7d3c;
        font-weight: bold;
      }
      td.title a {
        text-decoration: none;
        color: #0366d6;
      }
      td.title .hot {
        color: #999;
        font-size: 0.85rem;
        margin-left: 10px;
      }
    </style>
    <title>微博热搜榜</title>
  </head>
  <body>
    <h1>微博热搜速览</h1>
    ${renderSection('🔥 热搜榜', hotList)}
    ${renderSection('🎬 文娱榜', entList)}
  </body>
  </html>
  `;
}

function deactivate() {}

module.exports = {
  activate,
  deactivate,
};
效果如下:
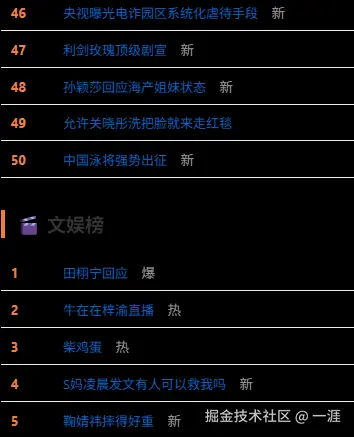
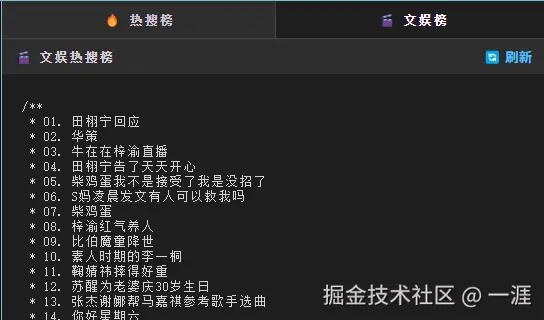
4. UI优化
-
✅ 使用 Tab 标签 在"🔥 热搜榜"与"🎬 文娱榜"之间切换查看
-
✅ 每个 Tab 内部有各自的 独立刷新按钮
-
✅ 视觉保持"摸鱼伪装"风格:像代码注释,暗色低调
js
function getWebviewContent(hotList, entList) {
  function renderContent(id, list) {
    const lines = list.map((item, index) => {
      const safeTitle = item.title.replace(/"/g, '\\"');
      return ` * ${(item.rank || index + 1).toString().padStart(2, '0')}. ${safeTitle}`;
    });
    return [`/**`, ...lines, ` */`].join('\n');
  }

  const hotText = renderContent('hot', hotList);
  const entText = renderContent('ent', entList);

  return `
  <!DOCTYPE html>
  <html lang="zh">
  <head>
    <meta charset="UTF-8" />
    <style>
      body {
        background-color: #1e1e1e;
        color: #d4d4d4;
        font-family: Consolas, Monaco, 'Courier New', monospace;
        font-size: 13px;
        padding: 0;
        margin: 0;
      }

      .tabs {
        display: flex;
        background-color: #2d2d2d;
        border-bottom: 1px solid #444;
      }

      .tab {
        flex: 1;
        text-align: center;
        padding: 10px;
        cursor: pointer;
        font-weight: bold;
        color: #ccc;
        border-right: 1px solid #444;
      }

      .tab.active {
        background-color: #1e1e1e;
        color: #fff;
      }

      .refresh-bar {
        display: flex;
        justify-content: space-between;
        align-items: center;
        background-color: #2d2d2d;
        padding: 6px 12px;
        border-top: 1px solid #333;
        border-bottom: 1px solid #333;
      }

      .refresh-bar .title {
        font-weight: bold;
      }

      .refresh-bar button {
        background: none;
        border: none;
        color: #4FC1FF;
        cursor: pointer;
        font-weight: bold;
      }

      .refresh-bar button:hover {
        text-decoration: underline;
      }

      .content {
        padding: 12px 20px;
        white-space: pre-wrap;
        display: none;
      }

      .content.active {
        display: block;
      }
    </style>
  </head>
  <body>
    <div class="tabs">
      <div class="tab active" id="tab-hot">🔥 热搜榜</div>
      <div class="tab" id="tab-ent">🎬 文娱榜</div>
    </div>

    <div class="refresh-bar" id="refresh-hot">
      <span class="title">🔥 微博热搜榜</span>
      <button onclick="refresh('hot')">🔄 刷新</button>
    </div>
    <pre class="content active" id="content-hot">${hotText}</pre>

    <div class="refresh-bar" id="refresh-ent" style="display: none;">
      <span class="title">🎬 文娱热搜榜</span>
      <button onclick="refresh('ent')">🔄 刷新</button>
    </div>
    <pre class="content" id="content-ent">${entText}</pre>

    <script>
      const vscode = acquireVsCodeApi();

      const tabHot = document.getElementById('tab-hot');
      const tabEnt = document.getElementById('tab-ent');
      const contentHot = document.getElementById('content-hot');
      const contentEnt = document.getElementById('content-ent');
      const refreshHot = document.getElementById('refresh-hot');
      const refreshEnt = document.getElementById('refresh-ent');

      tabHot.onclick = () => {
        tabHot.classList.add('active');
        tabEnt.classList.remove('active');
        contentHot.classList.add('active');
        contentEnt.classList.remove('active');
        refreshHot.style.display = 'flex';
        refreshEnt.style.display = 'none';
      };

      tabEnt.onclick = () => {
        tabEnt.classList.add('active');
        tabHot.classList.remove('active');
        contentEnt.classList.add('active');
        contentHot.classList.remove('active');
        refreshEnt.style.display = 'flex';
        refreshHot.style.display = 'none';
      };

      function refresh(type) {
        vscode.postMessage({ command: 'refresh', type });
      }

      window.addEventListener('message', event => {
        const msg = event.data;
        if (msg.command === 'update') {
          const pre = document.getElementById('content-' + msg.type);
          pre.textContent = msg.content;
        }
      });
    </script>
  </body>
  </html>
  `;
}
刷新监听
js
panel.webview.onDidReceiveMessage(async msg => {
  if (msg.command === 'refresh') {
    const url = msg.type === 'hot'
      ? 'https://s.weibo.com/top/summary?cate=realtime'
      : 'https://s.weibo.com/top/summary?cate=entertainment';

    const list = await fetchWeiboHot(url);
    const lines = list.map((item, index) => {
      const safeTitle = item.title.replace(/"/g, '\\"');
      return ` * ${(item.rank || index + 1).toString().padStart(2, '0')}. ${safeTitle}`;
    });
    const content = [`/**`, ...lines, ` */`].join('\n');

    panel.webview.postMessage({ command: 'update', type: msg.type, content });
  }
});
效果图如下:
5. 本地部署
如果只是本地运行,F5后在新窗口Ctrl+Shift+P找显示微博热搜榜就行了
js
// 我的node版本19+,否则报错
npm install -g vsce

// 在项目根目录运行
vsce package
会生成 hotsearch-0.0.1.vsix
然后运行安装命令
js
code --install-extension ./-hostsearch-0.0.1.vsix然后在已安装插件库里面就可以看到了。

但是我平时已经习惯用Cursor了,这个代码在Cursor里面跑不起来。想先发布到VsCode的插件库,再同步到Cursor使用。
6. 发布插件
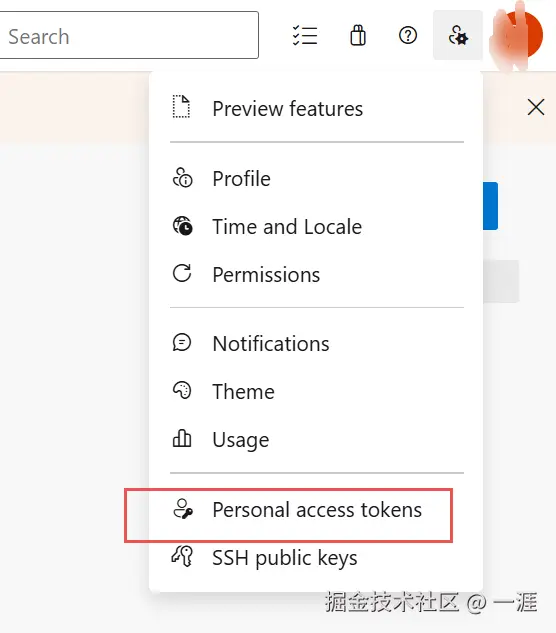
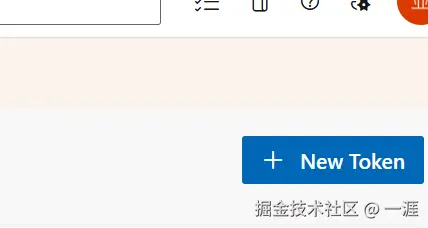
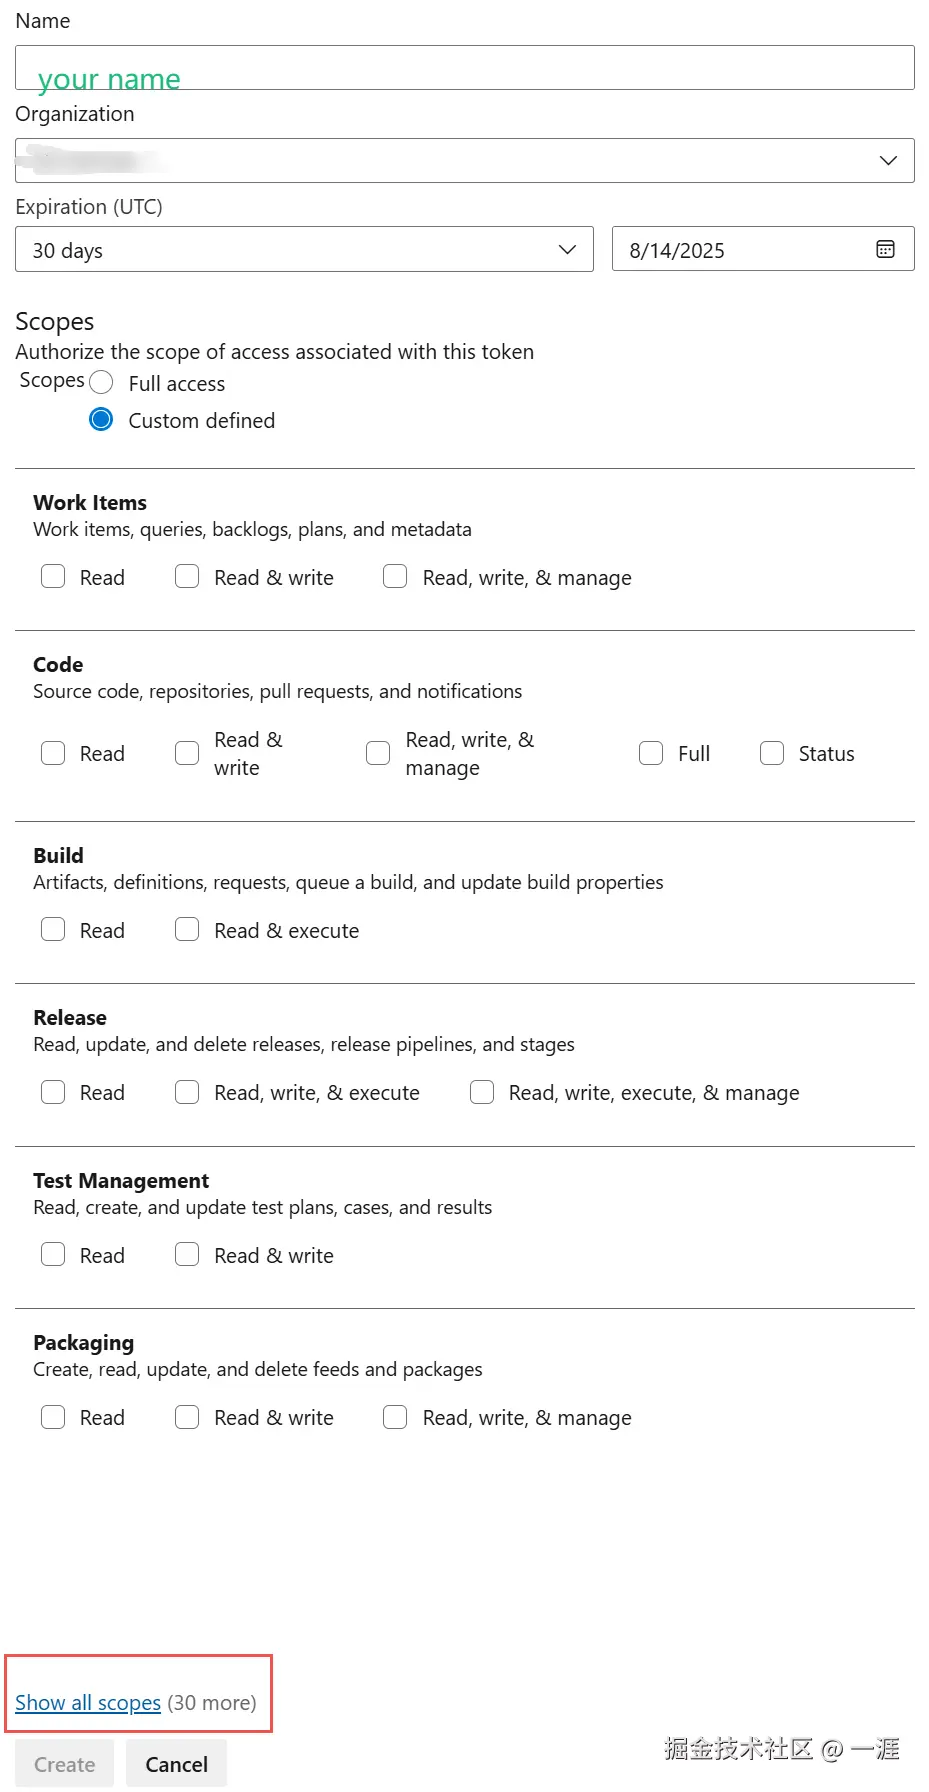
找到MarketPlace

- 创建publisher
访问页面:marketplace.visualstudio.com/publishers/... 注意这个your-name就是上面创建的your name
- 发布
- 第一种: 命令发布
js
vsce login xxx
vsce publish- 第二种: 后台发布
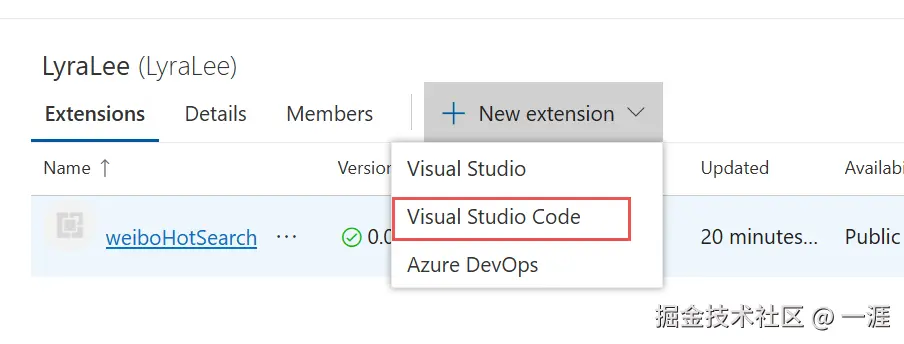 将上面生成的vsix文件上传,然后等待version字段变绿就行了

就可以在Vscode的插件库里面搜索到了
6. 升级
1. 修改版本号-package.json
js
"version": "0.0.2"📌 提示:每次发布版本都必须改 version,不然无法发布。 你可以根据改动的大小选择版本号的更新方式:
0.0.1 → 0.0.2 小修复
0.1.0 添加功能
1.0.0 稳定版本
2. (可选)更新 README.md / changelog
- 在
README.md写明更新内容。 - 如果用了
CHANGELOG.md,也建议记录更新历史。
3. 重新打包插件
使用 vsce 打包:
go
bash
复制编辑
vsce package
这会生成新的 .vsix 文件,例如:my-extension-0.0.2.vsix
4. 发布新版本到 VS Code 插件市场
如果你用 vsce 发布插件到 marketplace:
bash
复制编辑
vsce publish
如果你没有设置
Personal Access Token,它会提示你配置。
或者指定版本号(比如不想手动改 package.json):
bash
复制编辑
vsce publish 0.0.2
⛳ 补充:升级发布所需前提
-
✅ 你要有 Microsoft 的 Visual Studio Marketplace 帐号。
-
✅ 插件要已注册(拥有唯一 ID,比如:
publisher.my-extension)。 -
✅ 安装了
vsce:bash 复制编辑 npm install -g vsce